# 使用 Vue.js 通过 MQTT.js 连接到部署
本文主要介绍如何在 Vue 3 框架搭建的 Web 应用程序中使用 `MQTT.js` ,实现客户端与 MQTT 服务器的连接、订阅、收发消息、取消订阅等功能。
本篇文档使用 Vue 3 进行代码演示,如果您使用 Vue 2,请参考 [Vue 2 MQTT 连接示例](https://github.com/emqx/MQTT-Client-Examples/tree/master/mqtt-client-Vue.js)。
## 前置准备
在将您的 Web 应用程序连接到 EMQX Cloud 之前,请确保已完成以下准备:
- 部署 MQTT 服务器
- 创建 Vue 3 应用
### 部署 MQTT 服务器
### 创建 Vue 3 应用
本文参考 Vue 官方文档中的[创建一个 Vue 应用](https://cn.vuejs.org/guide/quick-start.html#creating-a-vue-application)章节进行示例代码的开发和测试。使用的 node 版本为 16.16.0。
## 安装依赖
[MQTT.js](https://github.com/mqttjs/MQTT.js) 是一个完全开源的 MQTT 协议的客户端库,使用 JavaScript 编写,可用于 Node.js 和浏览器环境。有关 `MQTT.js` 的更多内容和使用方法,您可以前往查阅 [MQTT.js GitHub 页面](https://github.com/mqttjs/MQTT.js#table-of-contents)。
MQTT.js 支持通过 NPM 或 Yarn 安装,通过 CDN 或相对路径引入。本示例将通过 NPM 命令安装 MQTT.js,直接引入文件的方法更适用于通过 CDN 使用 Vue 的项目。
- 使用 NPM 或 Yarn:
安装 MQTT.js 依赖
```shell
# 使用 NPM
npm install mqtt
# 或使用 Yarn
yarn add mqtt
```
成功安装后,还需引入 MQTT.js,您可以查阅 [Vite Support](https://github.com/mqttjs/MQTT.js/issues/1269) 了解更详细的配置。
```js
import * as mqtt from "mqtt/dist/mqtt.min";
```
- 通过 CDN 引入:
```html
```
- 下载到本地,然后使用相对路径引入:
```html
```
## 通过 WebSocket 端口连接
通过以下代码设置客户端 ID、用户名及密码,客户端 ID 应具有唯一性。
```js
const clientId = "emqx_vue3_" + Math.random().toString(16).substring(2, 8);
const username = "emqx_test";
const password = "emqx_test";
```
通过以下代码建立客户端与 MQTT Broker 的连接。
```js
const client = mqtt.connect("ws://broker.emqx.io:8083/mqtt", {
clientId,
username,
password,
// ...other options
});
```
## 通过 WebSocket TLS/SSL 端口连接
启用 TLS/SSL 加密时,连接[参数选项](https://github.com/mqttjs/MQTT.js#mqttclientstreambuilder-options)与通过 WebSocket 端口建立连接一致,您只需注意将协议改为 `wss`,且匹配正确的端口号即可。
通过以下代码建立客户端与 MQTT Broker 的连接。
```js
const client = mqtt.connect("wss://broker.emqx.io:8084/mqtt", {
clientId,
username,
password,
// ...other options
});
```
## 订阅和发布
### 订阅主题
设置将要订阅的主题及对应 [QoS 等级](https://www.emqx.com/zh/blog/introduction-to-mqtt-qos)。
```js
// 设置将要订阅的主题和 QoS
const subscription = ref({
topic: "topic/mqttx",
qos: 0 as mqtt.QoS,
});
const doSubscribe = () => {
const { topic, qos } = subscription.value;
client.subscribe(
topic,
{ qos },
(error: Error, granted: mqtt.ISubscriptionGrant[]) => {
if (error) {
console.log("subscribe error:", error);
return;
}
console.log("subscribe successfully:", granted);
}
);
};
```
### 取消订阅
通过以下代码取消订阅,此时应指定取消订阅的主题及对应的 QoS 等级。
```js
const doUnSubscribe = () => {
const { topic, qos } = subscription.value;
client.unsubscribe(topic, { qos }, (error) => {
if (error) {
console.log("unsubscribe error:", error);
return;
}
console.log(`unsubscribed topic: ${topic}`);
});
};
```
### 发布消息
发布消息时需要告知 MQTT Broker 目标主题及消息内容。
```js
// 设置发布的主题、消息及 QoS
const publish = ref({
topic: "topic/browser",
payload: '{ "msg": "Hello, I am browser." }',
qos: 0 as mqtt.QoS,
});
const doPublish = () => {
const { topic, qos, payload } = publish.value;
client.publish(topic, payload, { qos }, (error) => {
if (error) {
console.log("publish error:", error);
return;
}
console.log(`published message: ${payload}`);
});
};
```
### 接收消息
通过以下代码指定客户端对消息事件进行监听,并在收到消息后执行回调函数,将接收到的消息及其主题打印到控制台。
```js
client.on("message", (topic: string, message) => {
console.log(`received message: ${message} from topic: ${topic}`);
});
```
### 断开连接
如客户端希望主动断开连接,可以通过如下代码实现:
```js
const destroyConnection = () => {
if (client.connected) {
try {
client.end(false, () => {
console.log("disconnected successfully");
});
} catch (error) {
console.log("disconnect error:", error);
}
}
};
```
以上部分仅列出了一些关键代码,项目完整代码请见:[MQTT Client - Vue3](https://github.com/emqx/MQTT-Client-Examples/tree/master/mqtt-client-Vue3.js),您可以进行下载并体验。
## 测试验证
我们使用 Vue 3 编写了一个简单的 [MQTT 客户端](https://github.com/emqx/MQTT-Client-Examples/tree/master/mqtt-client-Vue3.js),该客户端具备:创建连接、订阅主题、收发消息、取消订阅、断开连接等功能。
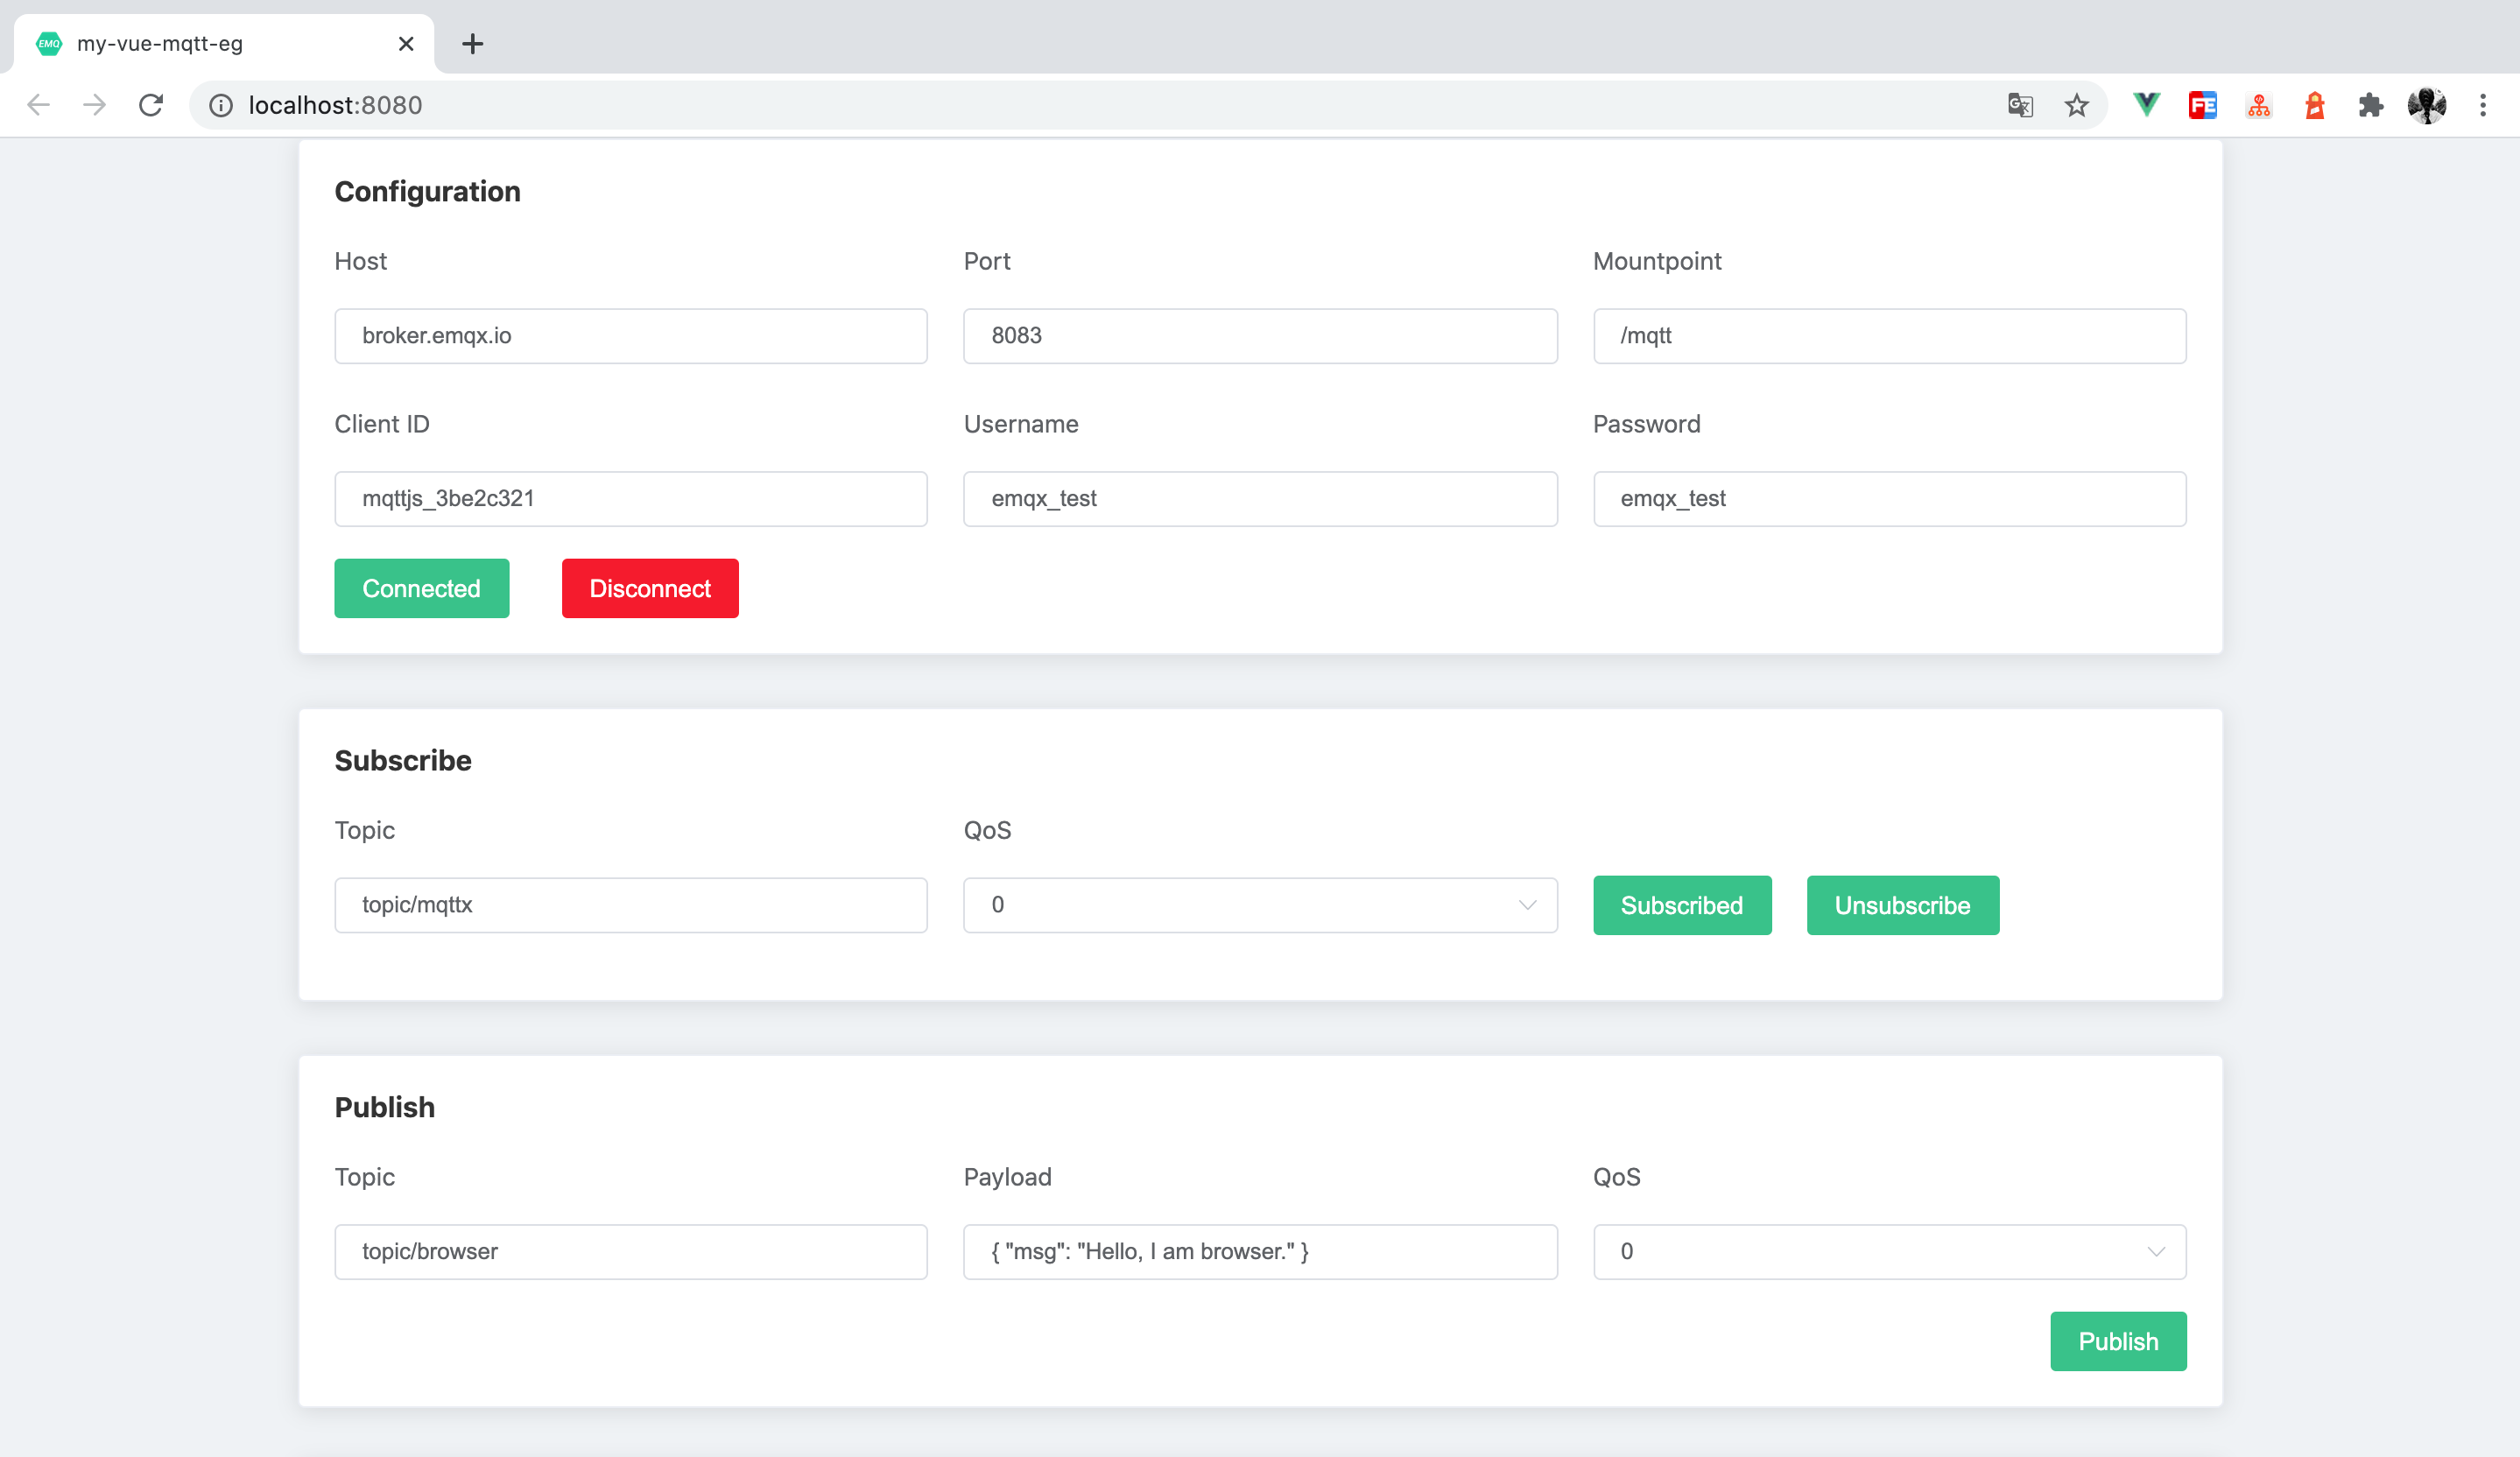
使用 [MQTT 5.0 客户端工具 - MQTTX](https://mqttx.app/zh) 作为另一个客户端进行消息收发测试。
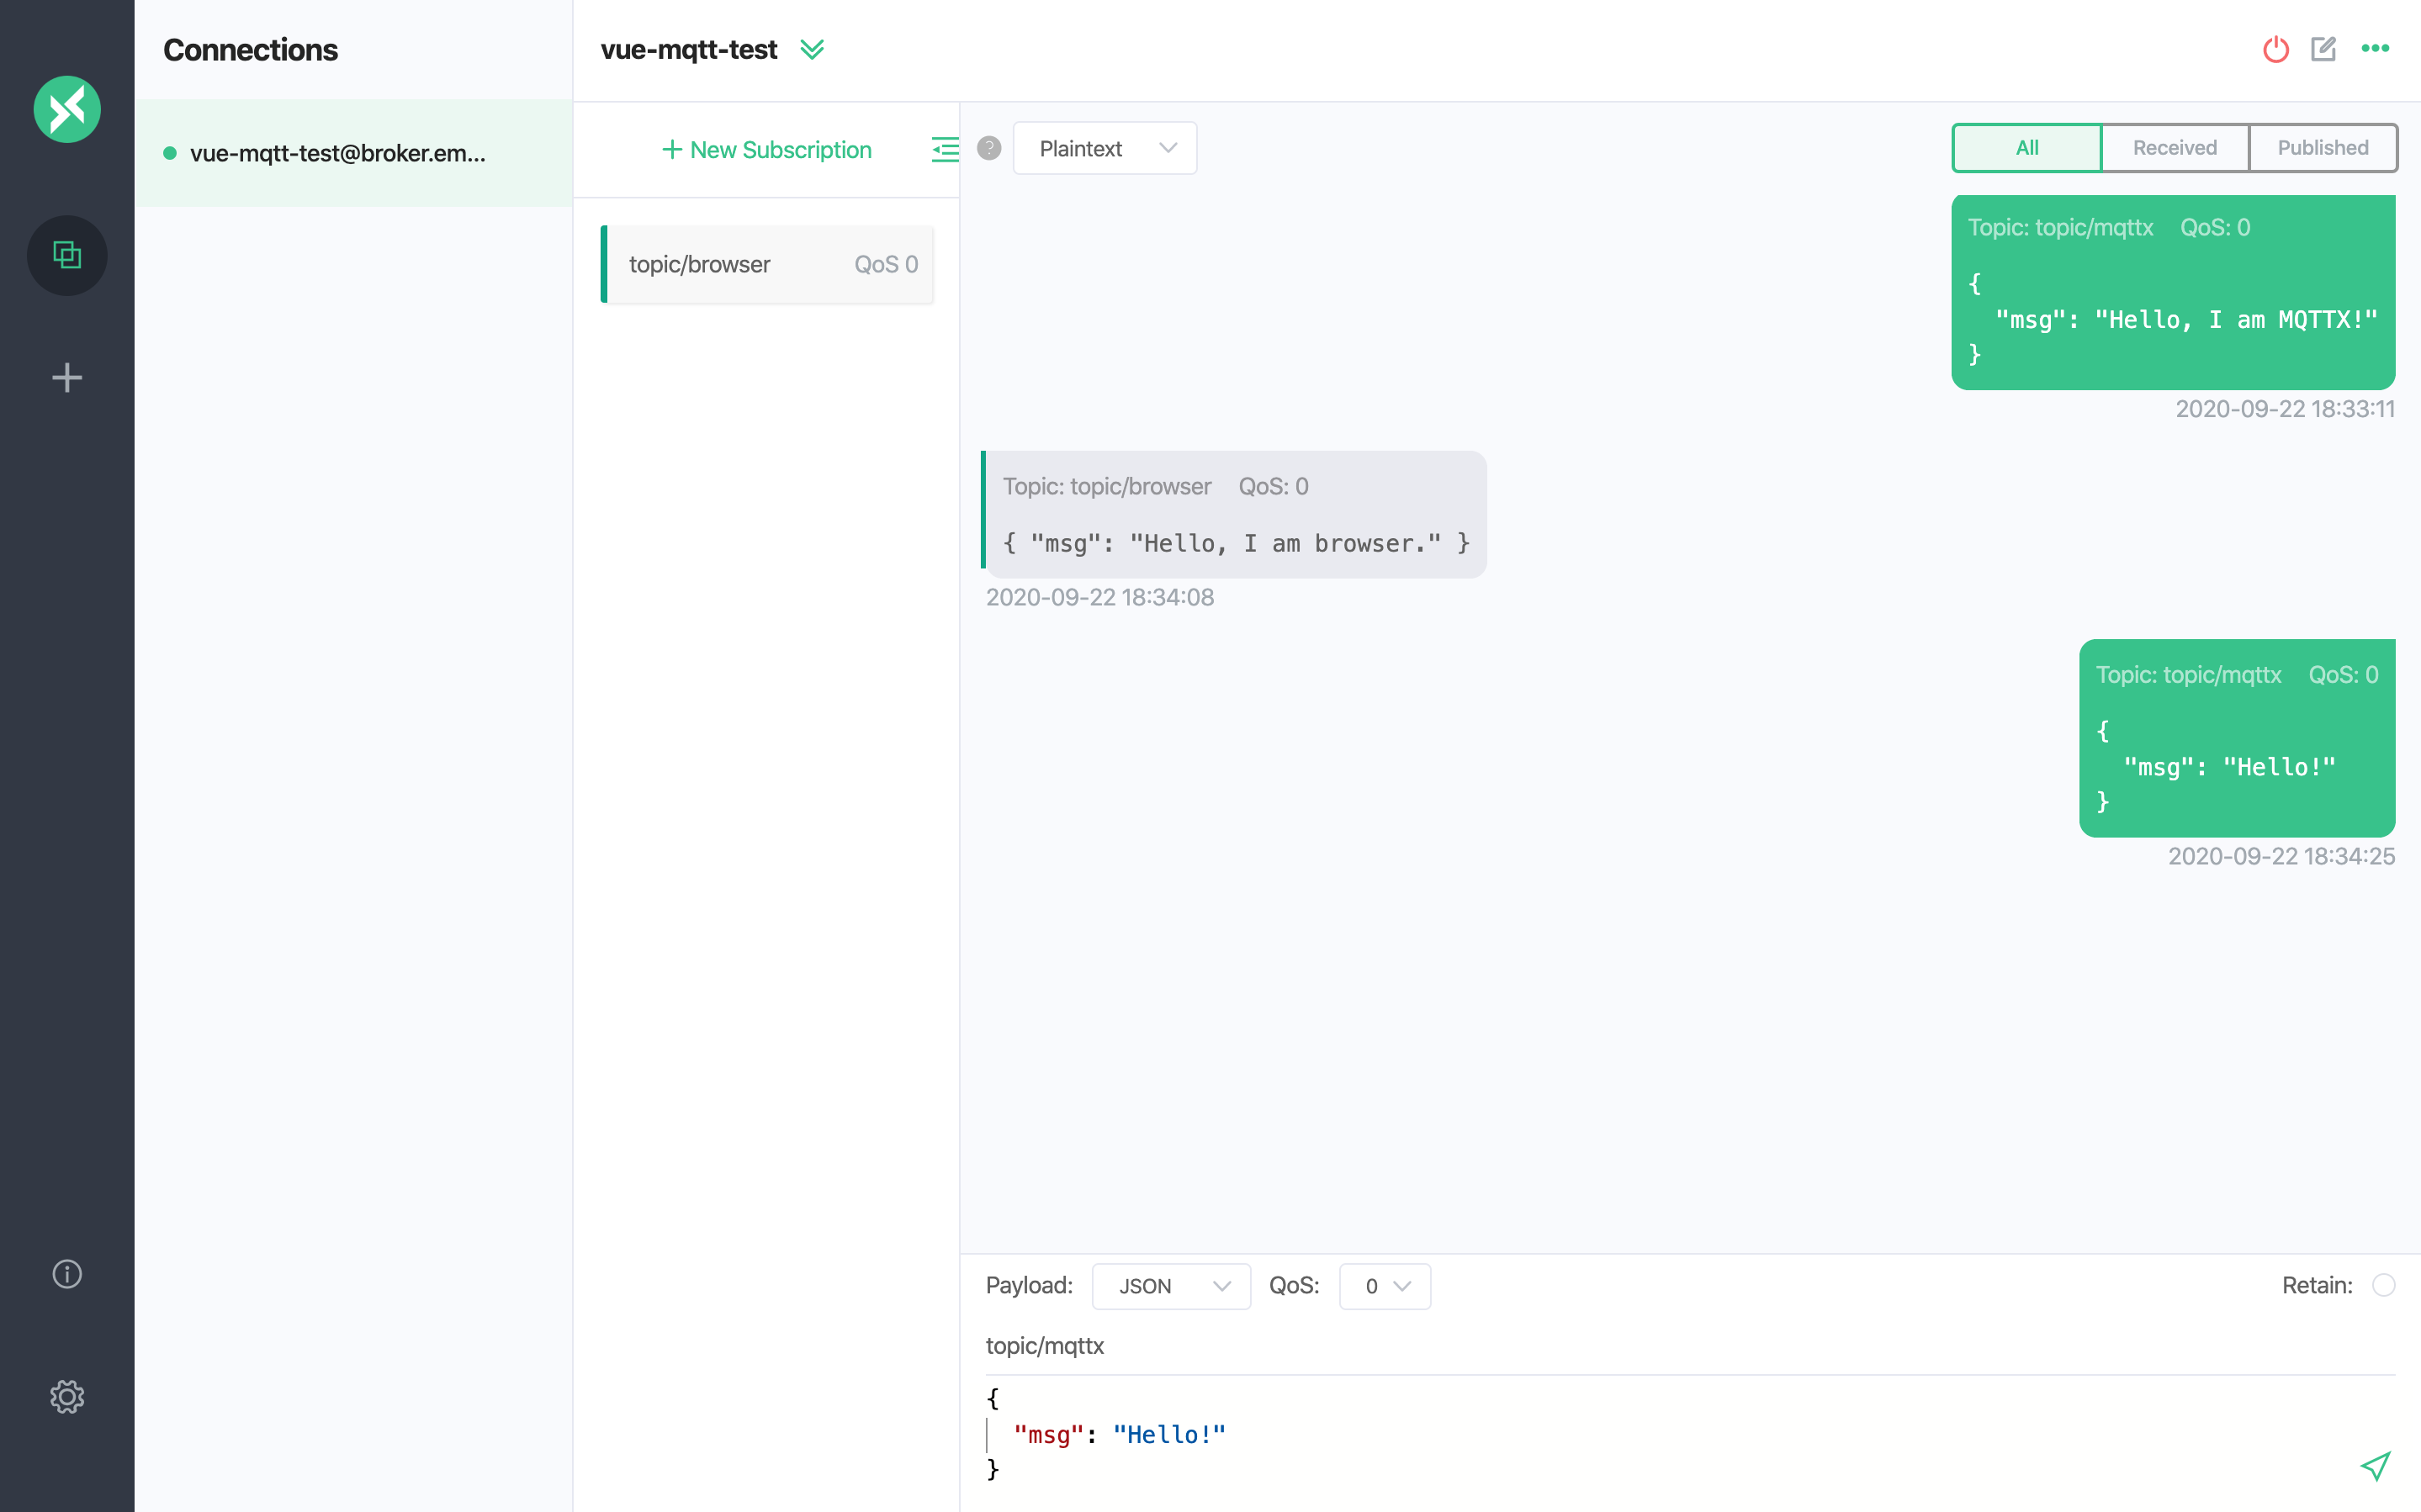
在 MQTTX 发送第二条消息之前,在浏览器端进行取消订阅操作,浏览器端将不会收到 MQTTX 发送的后续消息。
## 常见问题
1. 是否支持自签名 TLS/SSL 证书?是否支持双向 TLS/SSL 认证?
由于浏览器的限制,均暂不支持。参考 MQTT.js issue: [如何在浏览器环境中使用双向认证?](https://github.com/mqttjs/MQTT.js/issues/1515)和 [Node.js 中双向认证可用,但在浏览器中不支持](https://github.com/mqttjs/mqtt.js/issues/741)。
## 更多内容
综上所述,我们实现了在 Vue 3 项目中创建 MQTT 连接,模拟了客户端与 MQTT 服务器进行订阅、收发消息、取消订阅以及断开连接的场景。可以在 [MQTT Client - Vue3 页面](https://github.com/emqx/MQTT-Client-Examples/tree/master/mqtt-client-Vue3.js)下载完整的示例源码,同时也欢迎前往 [MQTT Client 示例页面](https://github.com/emqx/MQTT-Client-Examples)探索更多其他语言的 Demo 示例。