Access EMQX Cluster Through LoadBalancer
Task Target
Access the EMQX cluster through the Service of LoadBalancer type.
Configure EMQX Cluster
The following is the relevant configuration of EMQX Custom Resource. You can choose the corresponding APIVersion according to the version of EMQX you want to deploy. For the specific compatibility relationship, please refer to EMQX Operator Compatibility:
Connect To EMQX Cluster By MQTT X CLI
Obtain the External IP of the EMQX cluster
Use MQTT X CLI to connect to EMQX cluster
bash$ mqttx conn -h ${external_ip} -p 1883 [4/17/2023] [5:17:31 PM] › … Connecting... [4/17/2023] [5:17:31 PM] › ✔ Connected
Add New Listener Through EMQX Dashboard
TIP
The screenshots of the Dashboard below are from EMQX 5, EMQX 4 Dashboard also supports the corresponding function, please operate by yourself.
Add new Listener
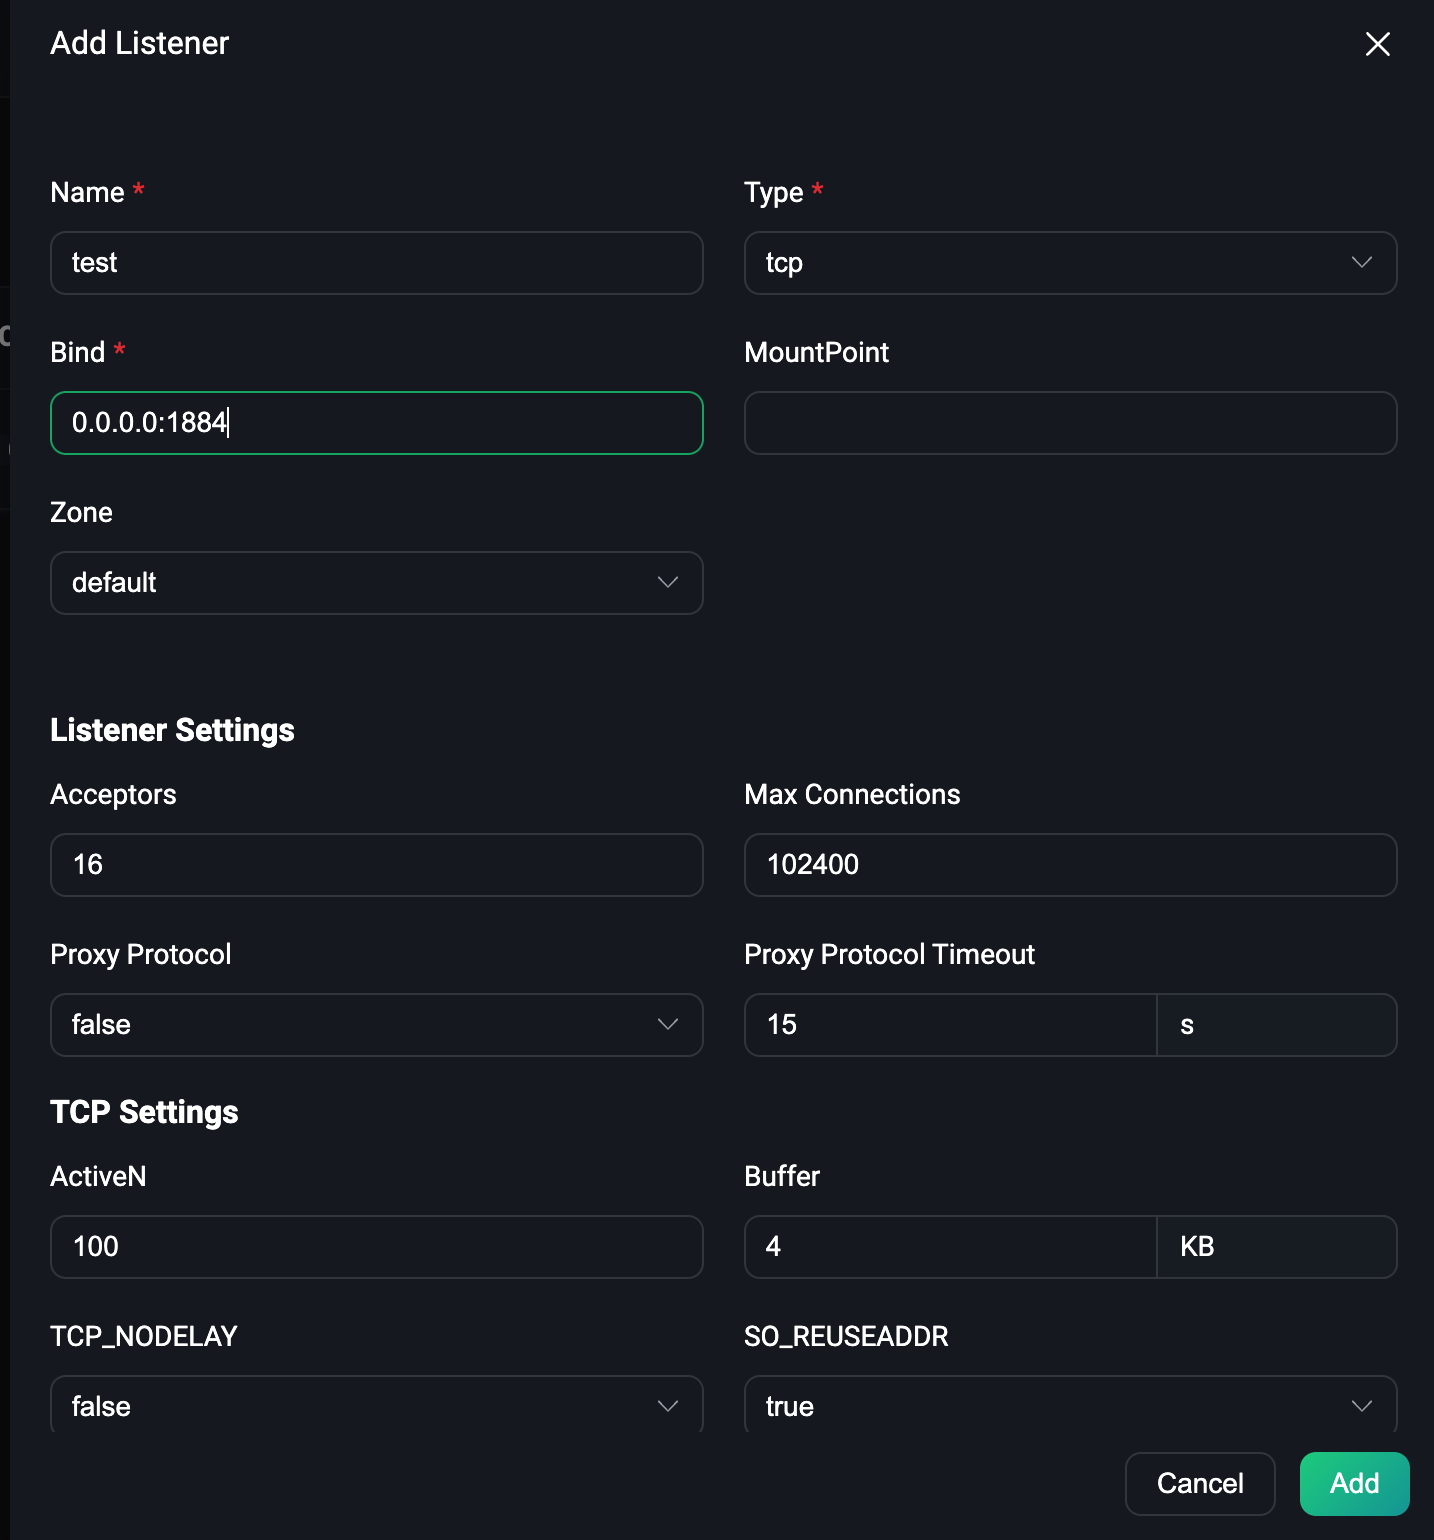
Open the browser to login the EMQX Dashboard and click Configuration → Listeners to enter the listener page, we first click the Add Listener button to add a name called test, port 1884 The listener, as shown in the following figure:
Then click the Add button to create the listener, as shown in the following figure:

As can be seen from the figure, the test listener we created has taken effect.
Check whether the newly added listener is injected into the Service
bashkubectl get svc NAME TYPE CLUSTER-IP EXTERNAL-IP PORT(S) AGE emqx-dashboard NodePort 10.105.110.235 <none> 18083:32012/TCP 13m emqx-listeners NodePort 10.106.1.58 <none> 1883:32010/TCP,1884:30763/TCP 12mFrom the output results, we can see that the newly added listener 1884 has been injected into the
emqx-listenersService.