Ingest MQTT Data into GCP Pub/Sub
EMQX supports seamless integration with Google Cloud Pub/Sub for real-time extraction, processing, and analysis of MQTT data. Additionally, it enables data push and subscription to various Google Cloud services such as Cloud Functions, App Engine, Cloud Run, Kubernetes Engine, and Compute Engine.
EMQX GCP Pub/Sub integration allows you to send MQTT messages and events to GCP Pub/Sub, which can help you flexibly choose services on Google Cloud and build IoT applications more easily.
TIP
EMQX Enterprise Edition features. EMQX Enterprise Edition provides comprehensive coverage of key business scenarios, rich data integration, product-level reliability, and 24/7 global technical support. Experience the benefits of this enterprise-ready MQTT messaging platform today.
Prerequisites
- Knowledge about EMQX data integration rules
- Knowledge about data bridge
Feature List
Quick Start Tutorial
This section introduces how to configure the GCP Pub/Sub data bridge, including how to set up the GCP service, create data bridges and rules for forwarding data to GCP and test the data bridges and rules.
Create Service Account Key in GCP
You need to create a service account and a service account key to use the GCP PubSub service.
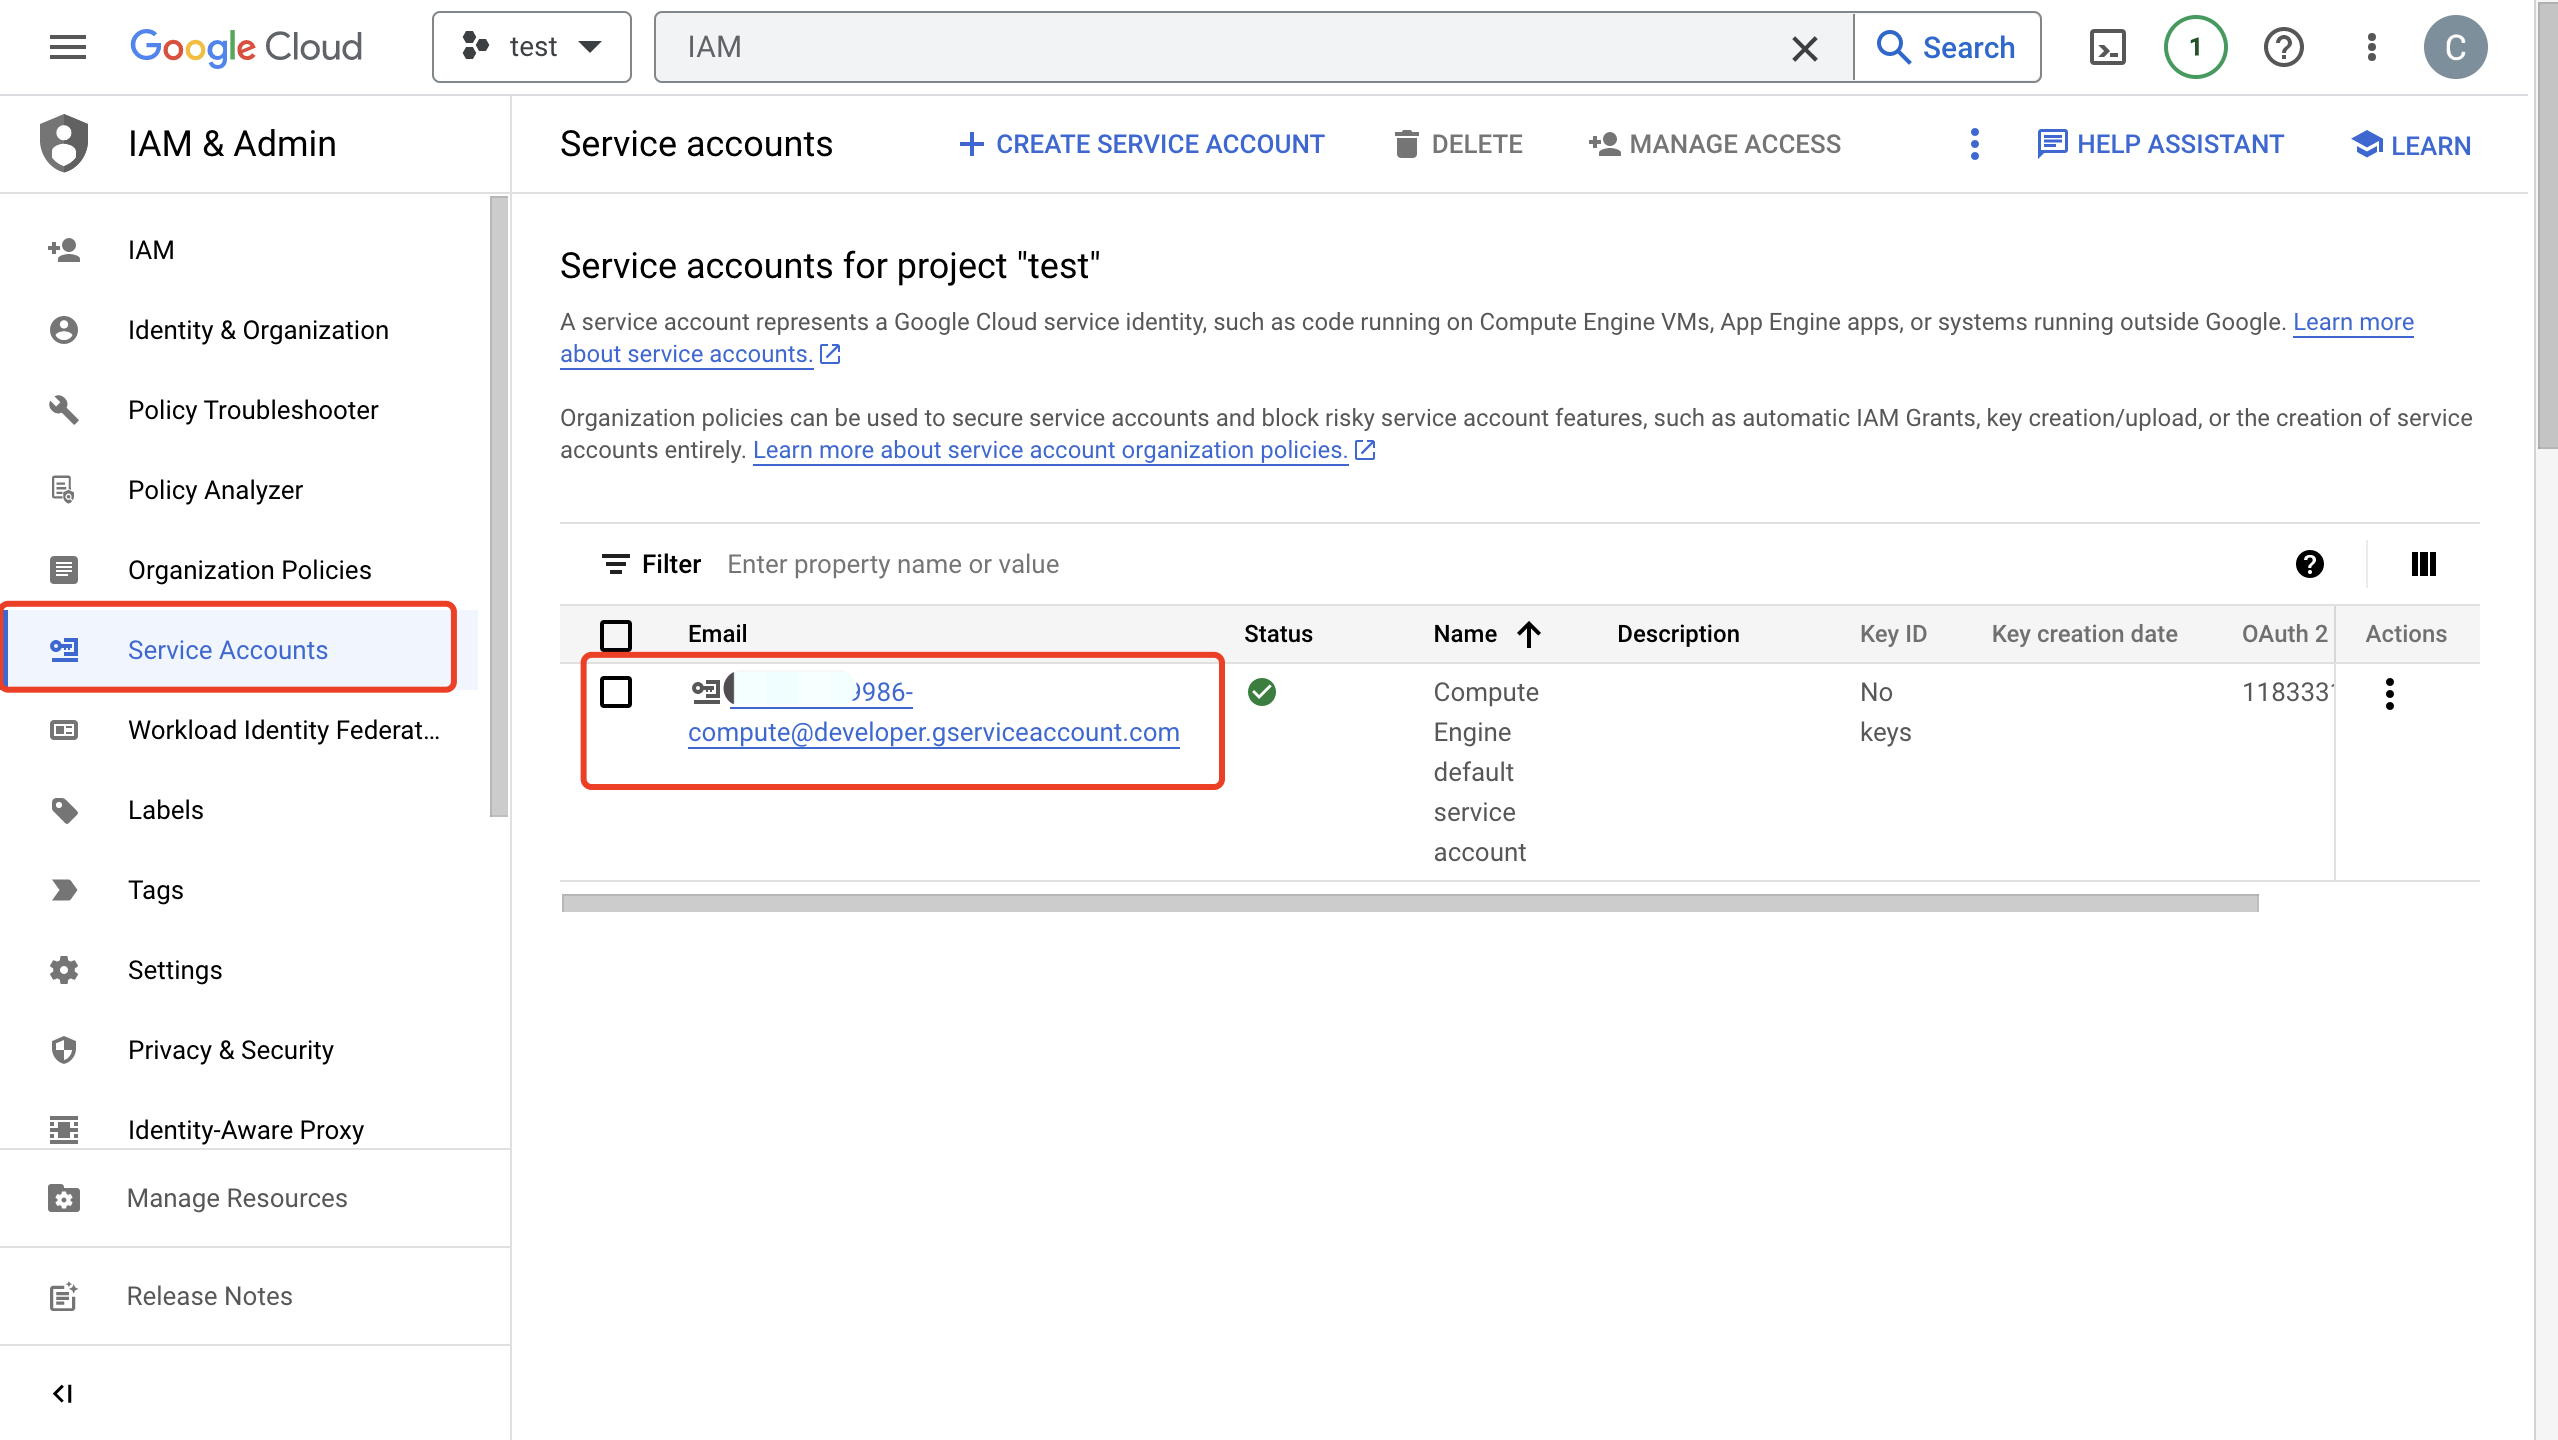
Create a Service Account in your GCP account. Ensure that the Service Account has permission to at least publish messages to the topic of interest.
Click the email address for the service account you created. Click the Key tab. In the Add key drop-down list, select Create new key to create a Service Account key for that account and download it in JSON format.
TIP
Store the Service Account key securely for later use.
Create and Manage Topics in GCP
Before configuring the GCP Pub/Sub Bridge on EMQX, you need to create a topic and be familiar with the basic management operation in GCP.
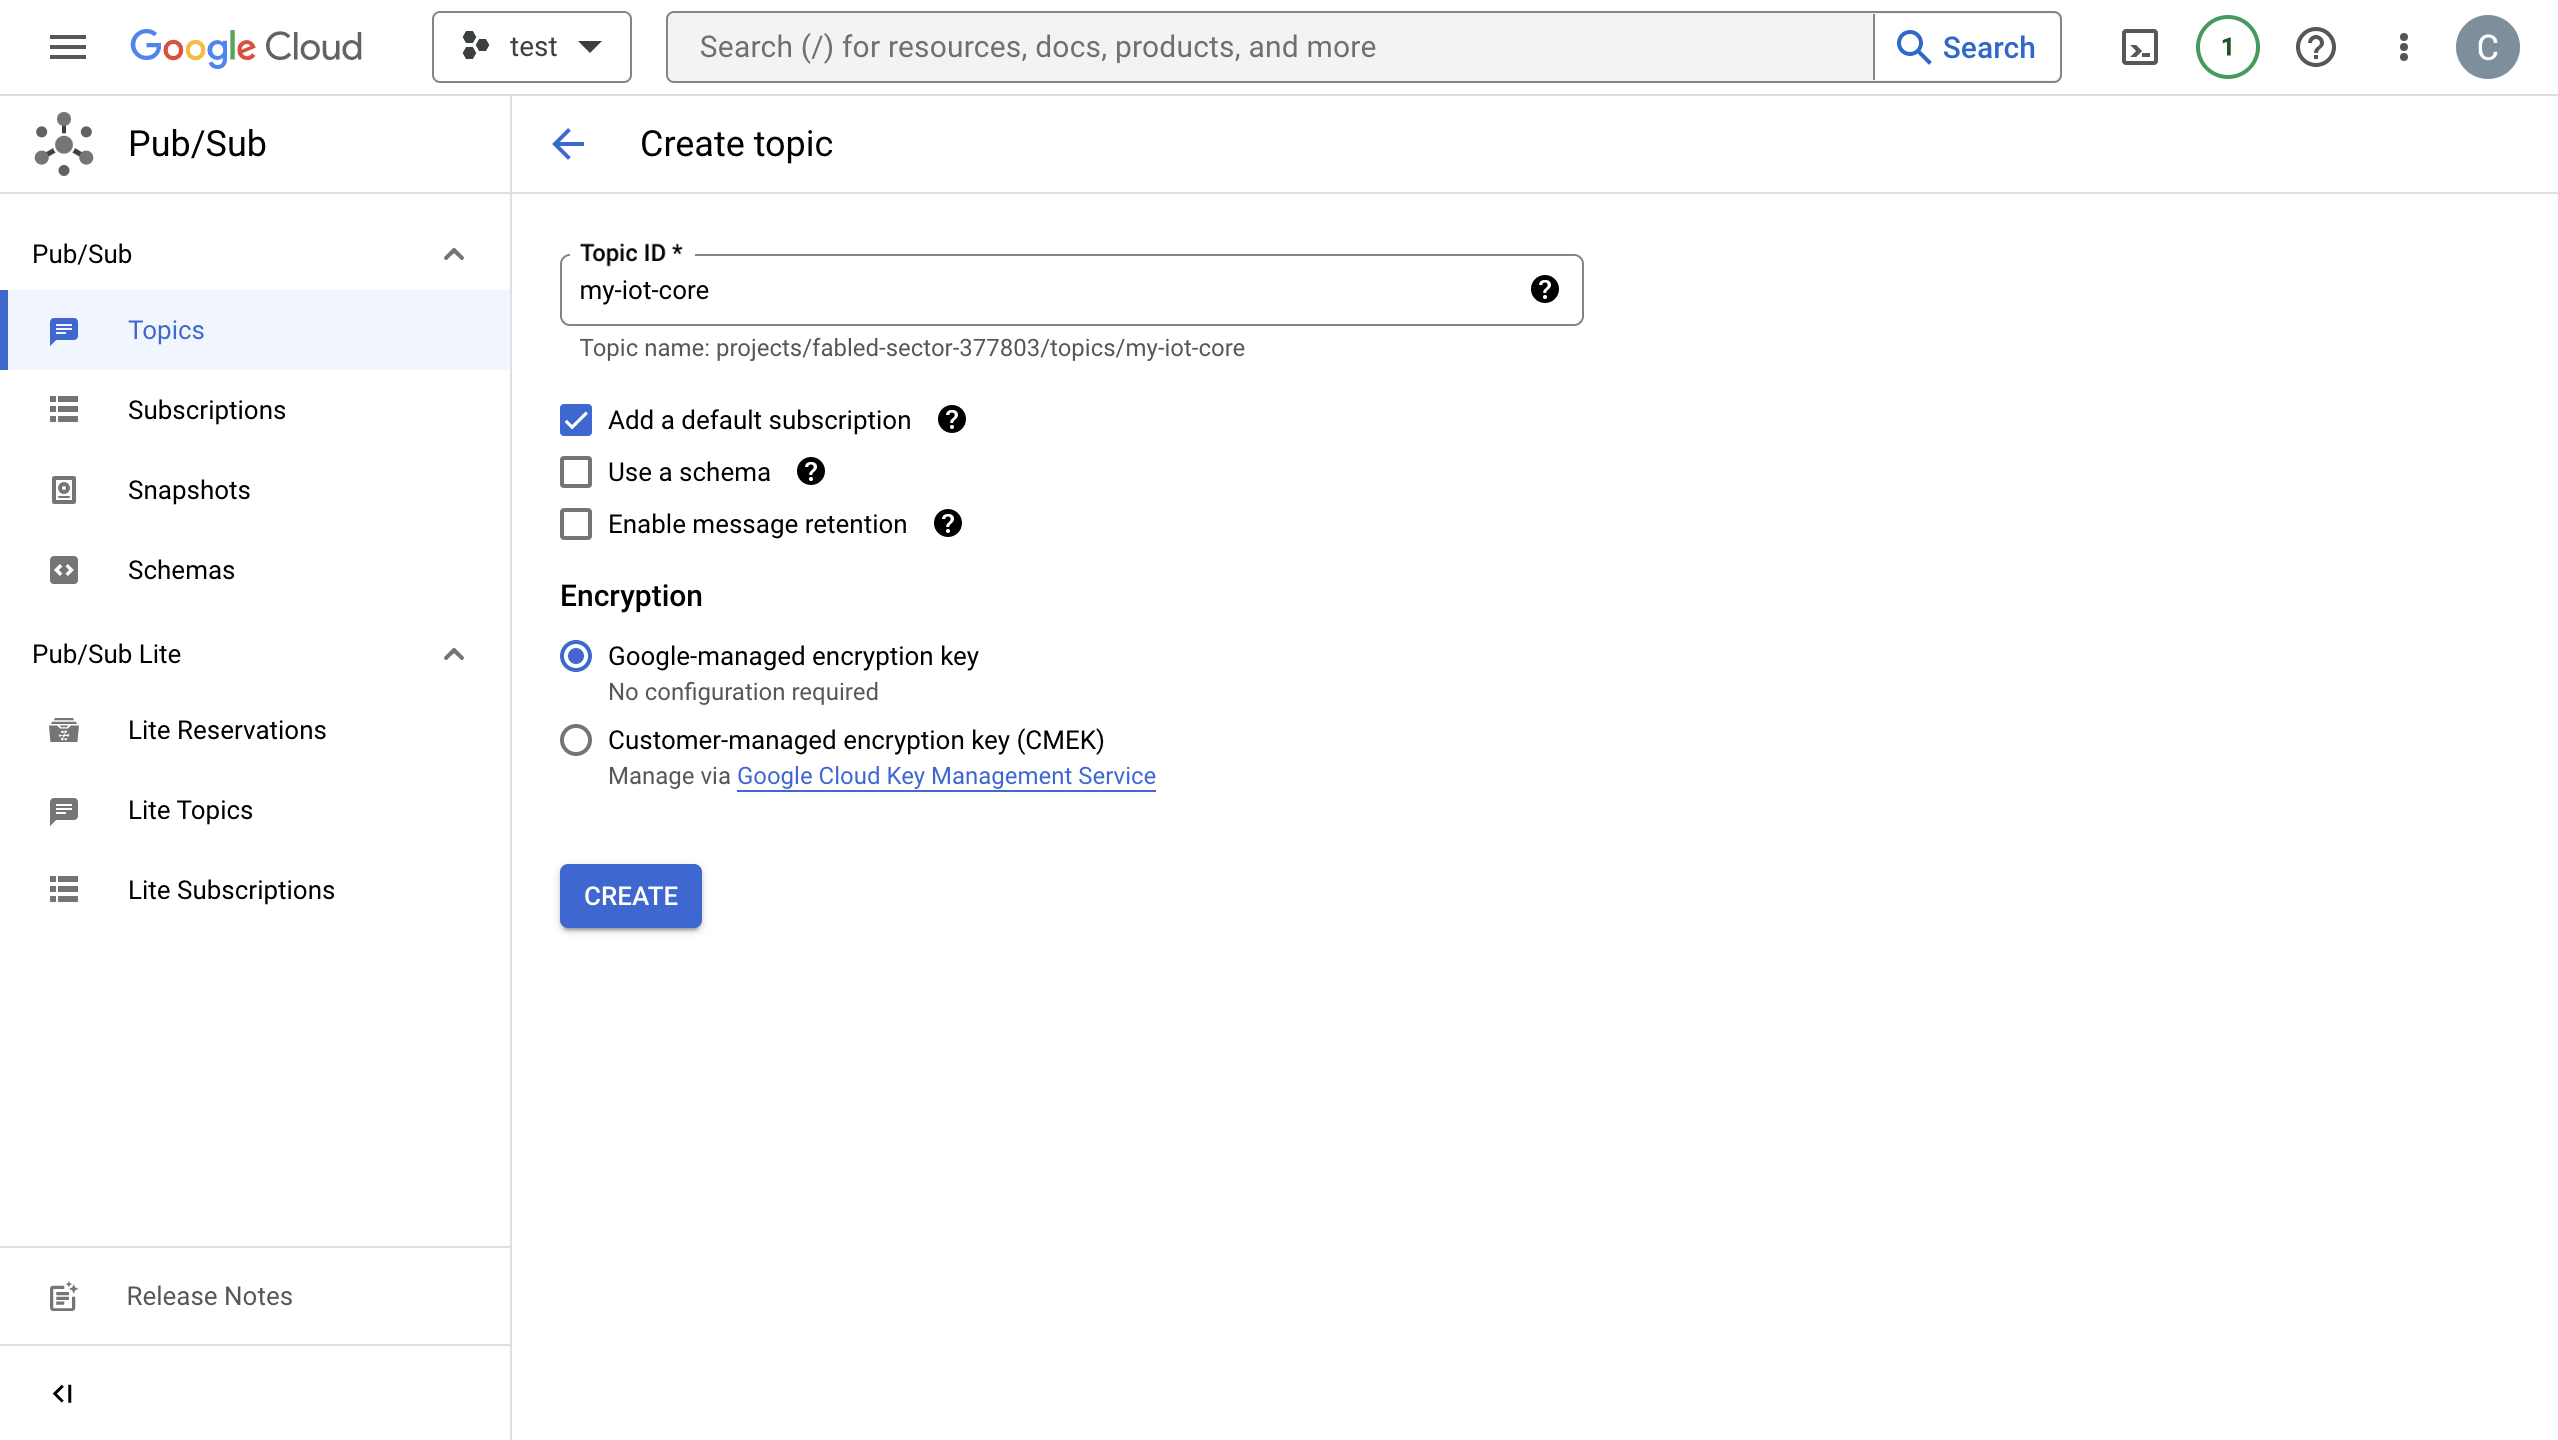
In the Google Cloud console, go to the Pub/Sub ->Topics page. For detailed instructions, see Create and manage topics.
TIP
The Service Account must have permission to publish that topic.
In the Topic ID field, enter an ID for your topic. Click Create topic.
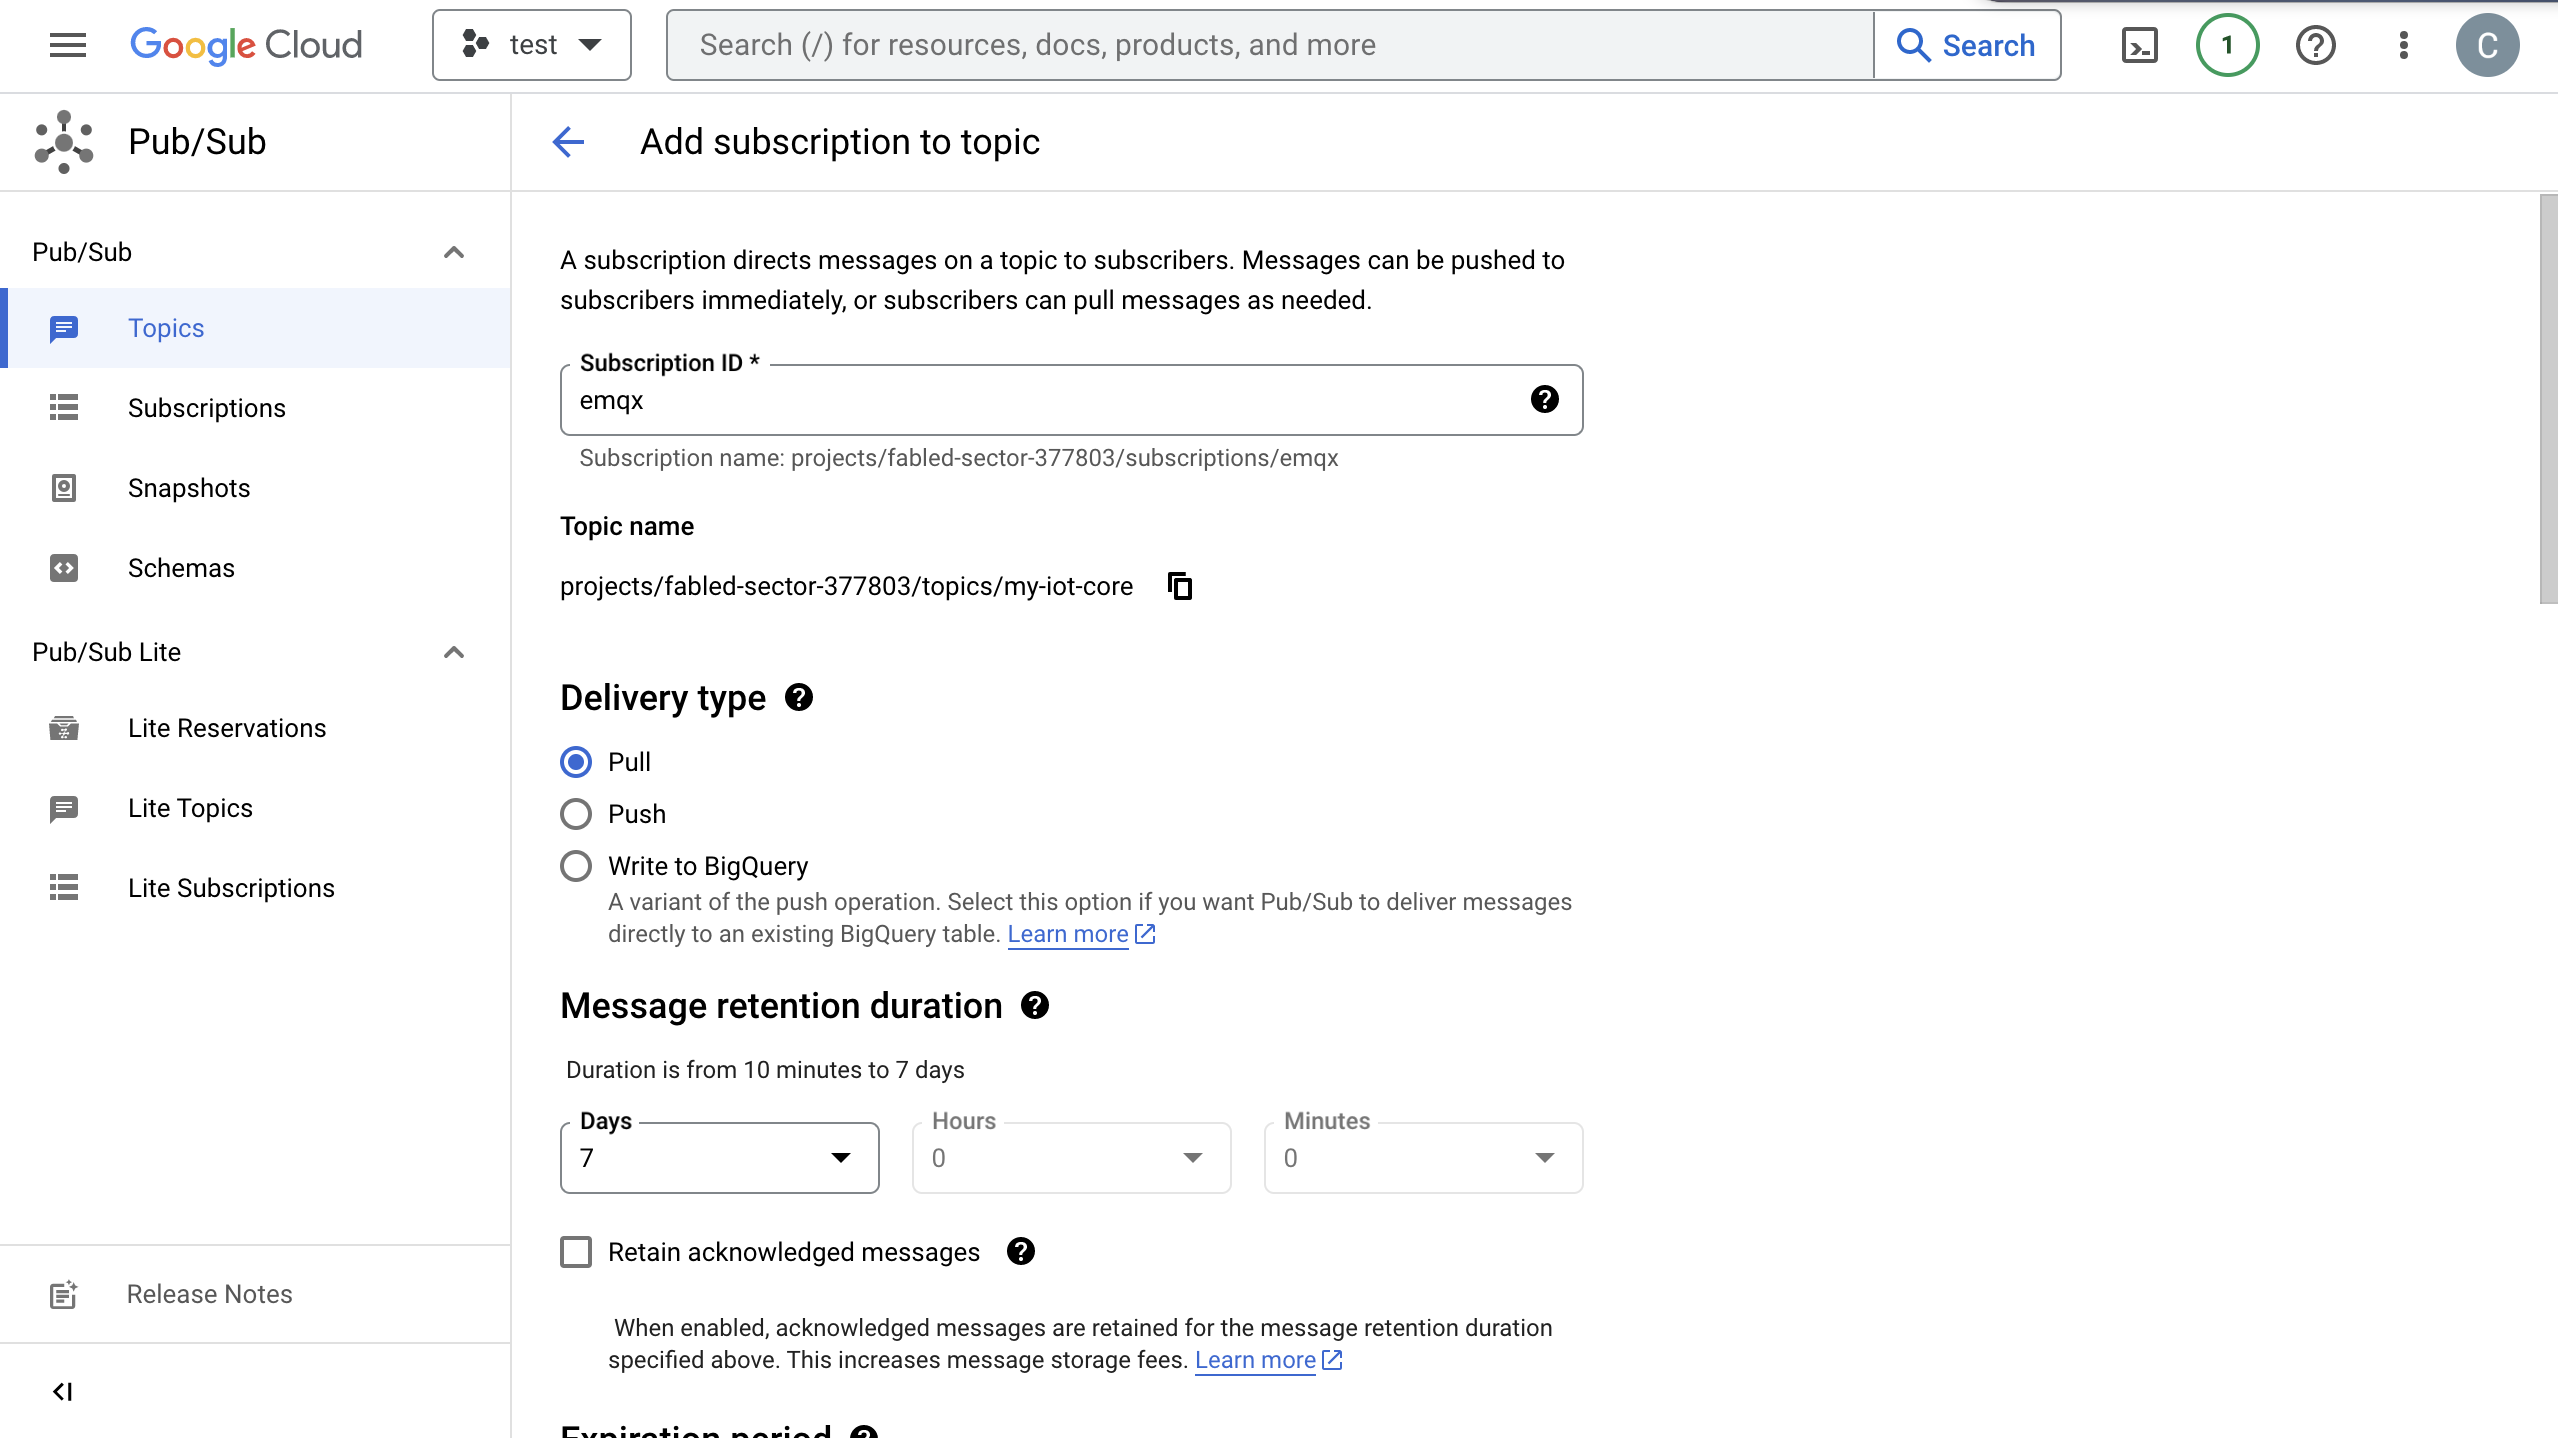
Go to the Subscriptions page. Click the Topic ID in the list. Create a subscription to the topic.
- Select Pull in Delivery type.
- Select
7Days for Message retention duration.
For detailed instructions, see GCP Pub/Sub Subscription.
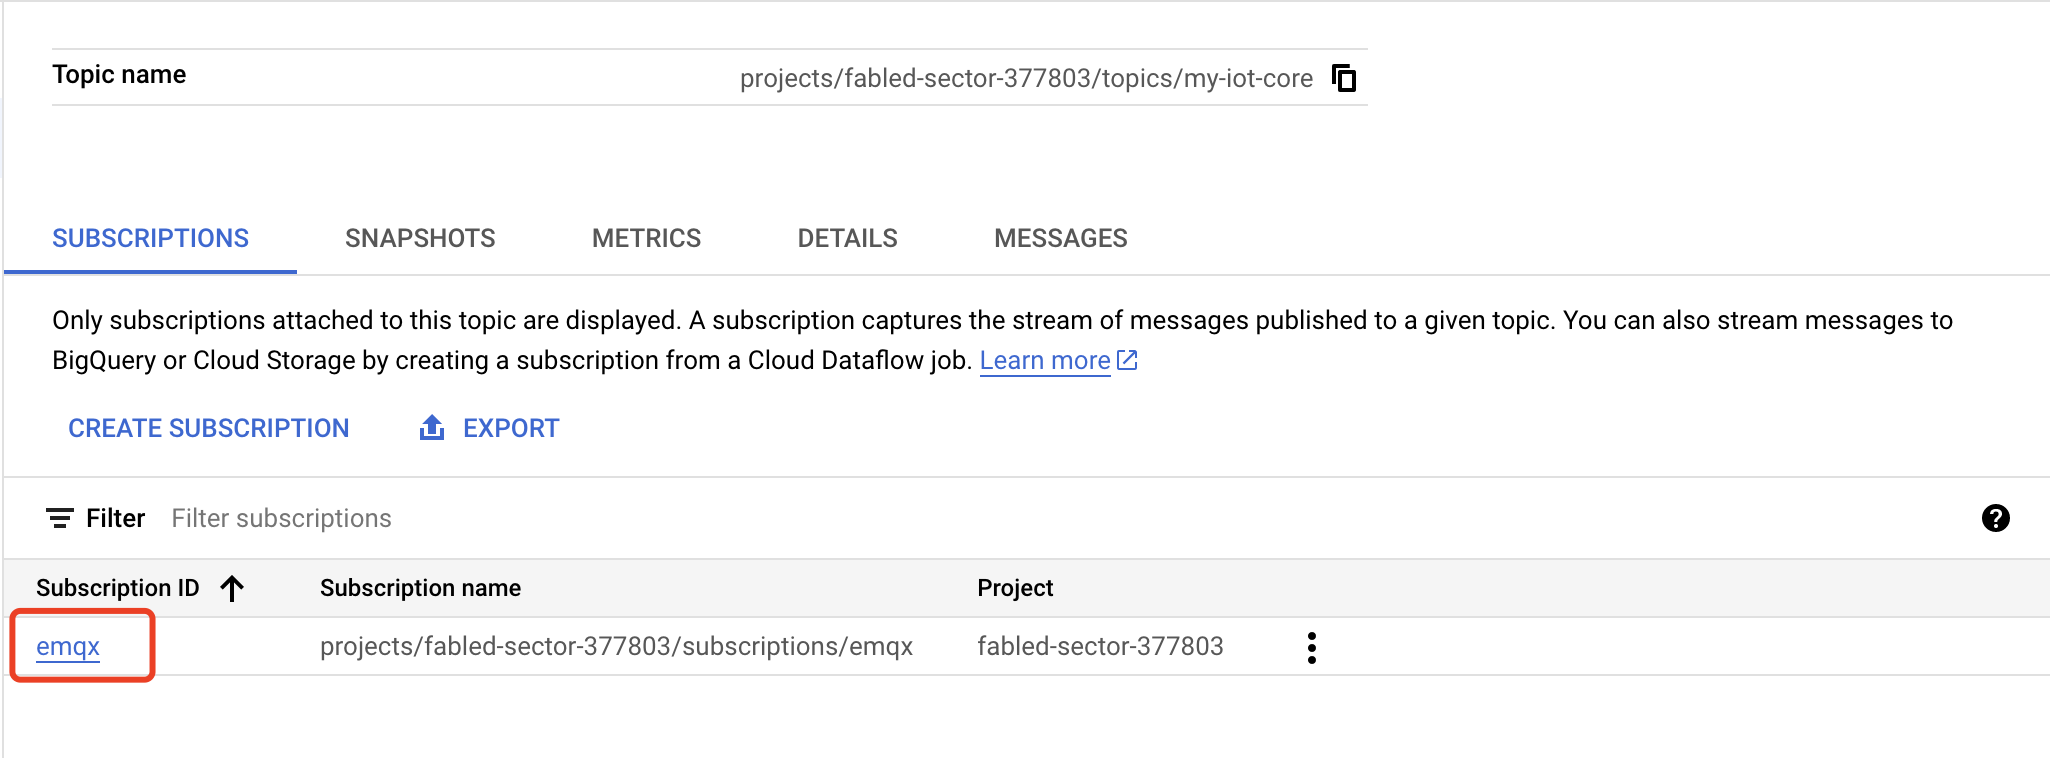
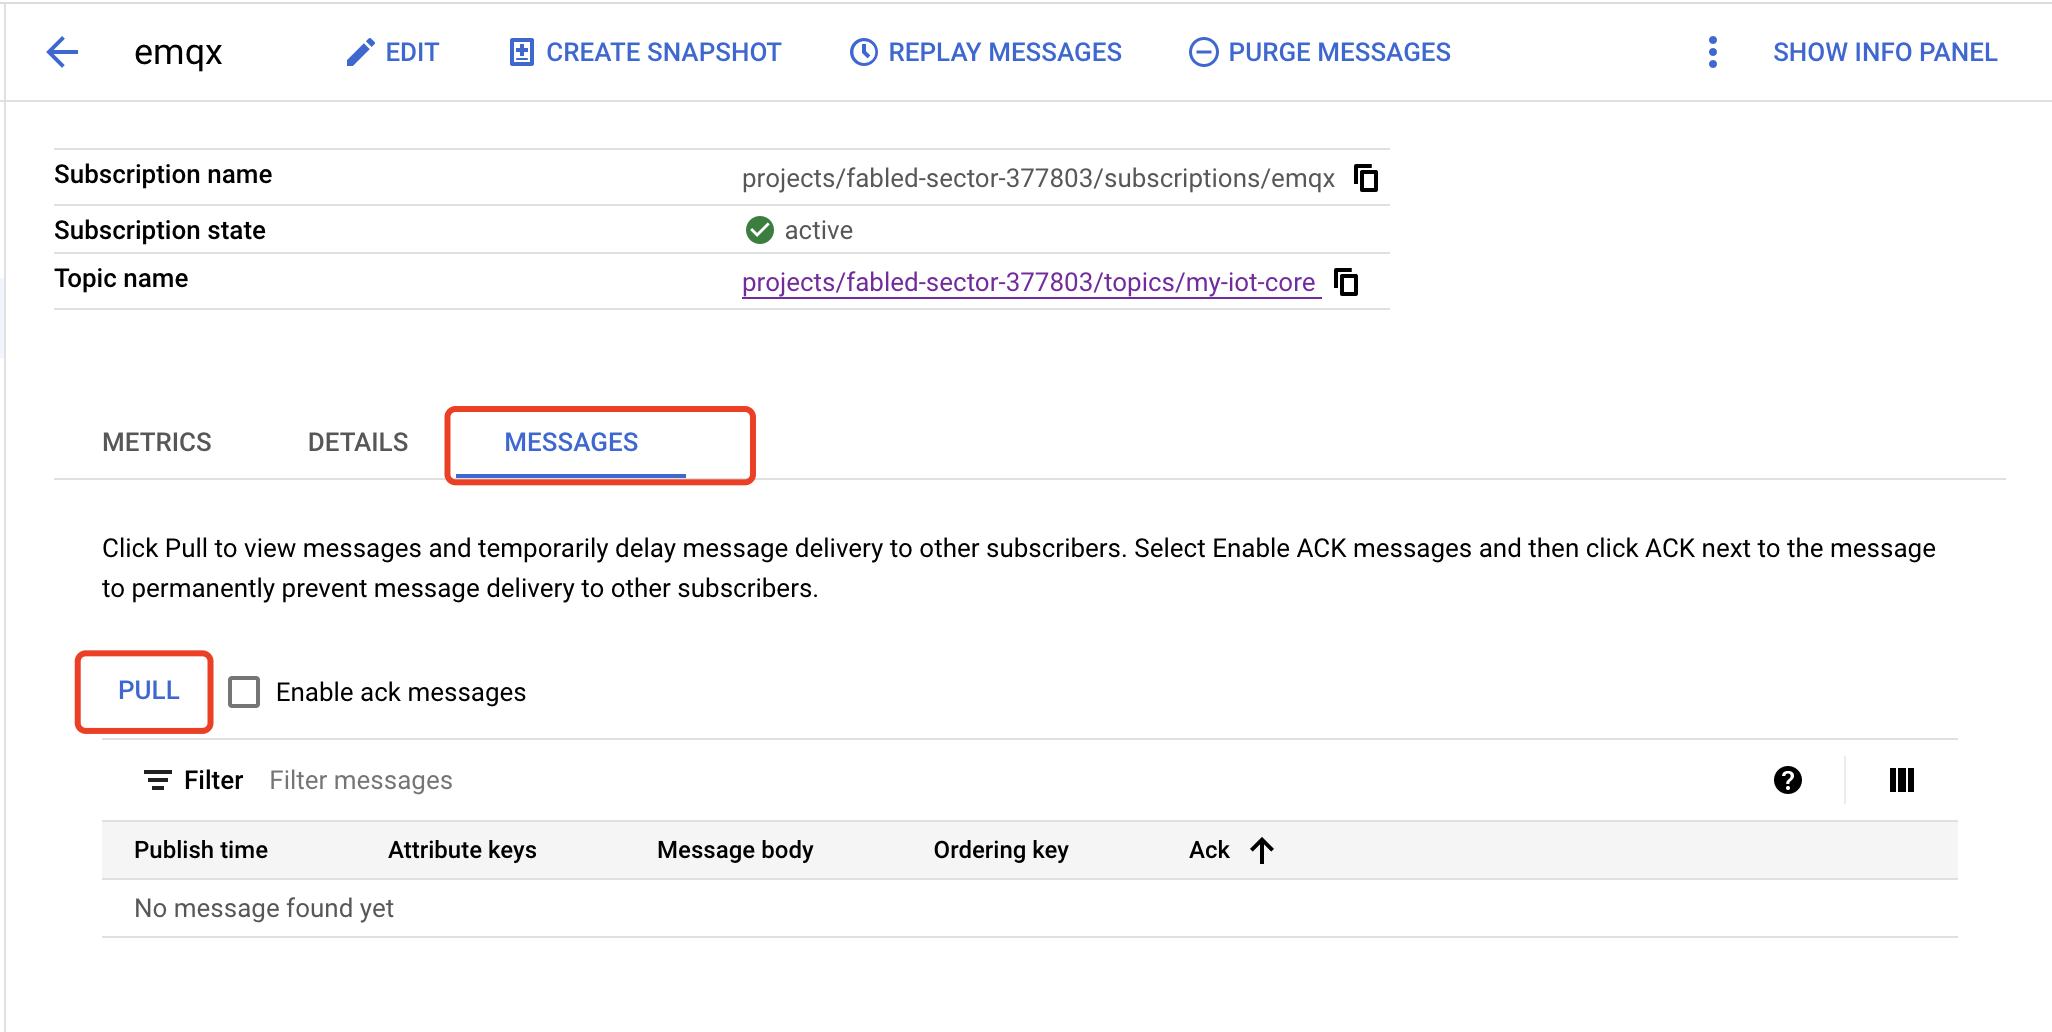
Click Subscription ID -> Messages -> Pull can view the message sent to the topic.
Create a GCP Pub/Sub Bridge
Go to EMQX Dashboard, click Integration -> Data Bridge.
Click Create on the top right corner of the page.
In the Create Data Bridge page, click to select Google PubSub, and then click Next.
In the Name field, enter a name for the data bridge. The name should be a combination of upper/lower case letters and numbers.
In the Bridge Role field, select
ProducerorConsumerfrom the drop-down list according to your business needs and complete the corresponding configurations.- GCP PubSub Topic: Enter the topic ID
my-iot-coreyou created in Create and Manage Topic in GCP. - GCP Service Account Credentials: Upload the Service Account credentials in JSON format you exported in Create Service Account Key in GCP.
- Payload Template: Leave it blank or define a template.
- If left blank, it will encode all visible inputs from the MQTT message using JSON format, such as clientid, topic, payload, etc.
- If using the defined template, placeholders of the form
${variable_name}will be filled with the corresponding value from the MQTT context. For example,${topic}will be replaced withmy/topicif such is the MQTT message topic.
- Attributes Template and Ordering Key Template (optional): Similarly, you can define templates for formatting the attributes and/or ordering key of the outgoing message.
- For Attributes, both keys and values may use placeholders of the form
${variable_name}. Such values will be extracted from the MQTT context. If a key template resolves to an empty string, that key is omitted from the outgoing message to GCP PubSub. - For Ordering Key, placeholders of the form
${variable_name}may be used. If the resolved value is an empty string, theorderingKeyfield will not be set for the GCP PubSub outgoing message.
- For Attributes, both keys and values may use placeholders of the form
- Advanced settings (optional): Choose whether to use sync or async query mode as needed.
- GCP PubSub Topic: Enter the topic ID
Before clicking Create, you can click Test Connectivity to test that the bridge can connect to the GCP PubSub server.
Click Create to finish the creation of the data bridge.
A confirmation dialog will appear and ask if you like to create a rule using this data bridge, you can click Create Rule to continue creating rules to specify the data to be saved into GCP PubSub. You can also create rules by following the steps in Create Rules for GCP PubSub Data Bridge.
Create a Rule for GCP PubSub Producer Data Bridge
You can continue to create rules to specify the data to be saved into GCP PubSub.
Go to EMQX Dashboard, click Integration -> Rules.
Click Create on the top right corner of the page.
Input
my_ruleas the rule ID.Set the rules in the SQL Editor. Here we want to save the MQTT messages under topic
/devices/+/eventsto GCP PubSub, we can use the SQL syntax below.Note: If you want to specify your own SQL syntax, make sure that the
SELECTpart includes all fields required by the payload template in the data bridge.sqlSELECT * FROM "/devices/+/events"Click the Add Action button, select Forwarding with Data Bridge from the dropdown list, and then select the data bridge you just created under Data Bridge. Then click the Add button.
Click Create at the page bottom to finish the creation.
Now a rule to forward data to GCP PubSub via a GCP PubSub bridge is created. You can click Integration -> Flows to view the topology. It can be seen that the messages under topic /devices/+/events are sent and saved to GCP PubSub after parsing by rule my_rule.
Test the Data Bridge and Rule
Use MQTTX to send messages on the topic
/devices/+/events.bashmqttx pub -i emqx_c -t /devices/+/events -m '{ "msg": "hello GCP PubSub" }'Check the running status of the data bridge, there should be one new incoming and one new outgoing message.
Go to GCP Pub/Sub -> Subscriptions, click MESSAGES tab. You should see the message.