# GCP IoT Core 设备
EMQX 是 Google Cloud IoT Core (opens new window) MQTT 服务的替代方案之一,而该服务即将被停用。为了方便将您当前的 MQTT 设备从 Google Cloud IoT Core (下文中为 GCP IoT Core)迁移到 EMQX,EMQX 提供了一个兼容层,具有以下功能:
- 从 GCP IoT Core 导入设备配置和认证数据。
- 提供与 GCP IoT Core 兼容格式的设备配置和 MQTT 认证。
EMQX 兼容层通过 GCP IoT Core 设备模块实现,您只需对设备代码进行最少的更改。您可以在 EMQX Dashboard 中添加此模块,并导入设备配置和认证数据。
本页面指导您如何将 GCP IoT Core 中的设备迁移到 EMQX,包括如何将设备认证信息从 GCP IoT Core 中导出并导入 EMQX,以及将设备连接的端点切换成 EMQX。设备迁移可以使用命令行和 REST API 来进行,也可以方便地通过 EMQX Dashboard 进行。两种方式在本页均有演示。
# 从 GCP IoT Core 迁移到 EMQX
设备迁移包括以下两个任务:
- 从 Google Cloud IoT Core 导出设备数据
- 将设备数据导入到 EMQX
# 从 GCP IoT Core 导出设备数据
您可以使用一个利用了 Google Cloud IoT Core REST API (opens new window) 的脚本导出数据。
在相同的
emqx-gcp-iot-migrate文件夹下运行以下命令。该文件夹在连接设备到 MQTT 端点中用于安装环境。python gcp-export.py --project iot-export --region europe-west1 --registry my-registry > gcp-data.jsonCopied!1现在,
gcp-data.json文件中包含了准备导入到 EMQX 中的数据。使用 Docker 启动 EMQX。这是在本地启动 EMQX 的最简单方式。
8883 是 MQTT 端口(使用 TLS),18083 是 HTTP API 端口。
docker run -d --name emqx -p 8883:8883 -p 18083:18083 emqx/emqx:4.4.18Copied!1在 EMQX 中启用 GCP IoT Core Device 模块。
curl -s -u 'admin:public' -X POST 'http://127.0.0.1:18083/api/v4/modules/' -H "Content-Type: application/json" --data-raw '{"type": "gcp_device", "config": {}}'Copied!1提示
您也可以通过在 EMQX Dashboard 中添加 GCP IoT Core Device 模块来启用该模块。了解更多信息,请参阅通过 Dashboard 添加模块。
# 将设备数据导入 EMQX
使用 REST API 将数据导入 EMQX。 admin:public 是 EMQX 默认的用户名和密码。
curl -s -v -u 'admin:public' -X POST 'http://127.0.0.1:18083/api/v4/gcp_devices' --data @gcp-data.json ... {"data":{"imported":14,"errors":0},"code":0}Copied!
2
3
您可以看到有14 个设备被导入。
# 通过 API 管理设备
当设备从 GCP IoT Core 导入到了 EMQX 后,EMQX 提供了一些额外的 API 调用,使用“设备”术语来管理 EMQX 数据。
# 管理单个设备配置
获取设备 c2-ec-x509 的配置:
>curl -s -u 'admin:public' -X GET 'http://127.0.0.1:18083/api/v4/gcp_devices/c2-ec-x509' | jq { "data": { "registry": "my-registry", "project": "iot-export", "location": "europe-west1", "keys": [ { "key_type": "ES256_X509_PEM", "key": "...", "expires_at": 0 } ], "deviceid": "c2-ec-x509", "created_at": 1685477382, "config": "AAECAwQFBgcICQoLDA0ODxAREhMUFRYXGBkaGxwdHh8gISIjJCUmJygpKissLS4vMDEyMzQ1Njc4OTo7PD0+P0BBQkNERUZHSElKS0xNTk9QUVJTVFVWV1hZWltcXV5fYGFiY2RlZmdoaWprbG1ub3BxcnN0dXZ3eHl6e3x9fn+AgYKDhIWGh4iJiouMjY6PkJGSk5SVlpeYmZqbnJ2en6ChoqOkpaanqKmqq6ytrq+wsbKztLW2t7i5uru8vb6/wMHCw8TFxsfIycrLzM3Oz9DR0tPU1dbX2Nna29zd3t/g4eLj5OXm5+jp6uvs7e7v8PHy8/T19vf4+fr7/P3+/w==" }, "code": 0 }Copied!
2
3
4
5
6
7
8
9
10
11
12
13
14
15
16
17
18
19
更新设备 c2-ec-x509 的配置(将配置保存到一个名为 c2-ec-x509.json 的文件中方便修改,然后更改 config 字段):
>cat c2-ec-x509.json { "registry": "my-registry", "project": "iot-export", "location": "europe-west1", "keys": [ { "key_type": "ES256_X509_PEM", "key": "...", "expires_at": 0 } ], "config": "bmV3Y29uZmlnCg==" } >curl -s -u 'admin:public' -X PUT 'http://127.0.0.1:18083/api/v4/gcp_devices/c2-ec-x509' -H "Content-Type: application/json" -d @c2-ec-x509.json {"data":{},"code":0}Copied!
2
3
4
5
6
7
8
9
10
11
12
13
14
15
16
17
删除设备 c2-ec-x509 的配置:
>curl -s -u 'admin:public' -X DELETE 'http://127.0.0.1:18083/api/v4/gcp_devices/c2-ec-x509' {"data":{},"code":0} >curl -s -u 'admin:public' -X GET 'http://127.0.0.1:18083/api/v4/gcp_devices/c2-ec-x509' | jq { "message": "device not found" }Copied!
2
3
4
5
6
# 列出设备
列出所有设备:
>curl -s -u 'admin:public' -X GET 'http://127.0.0.1:18083/api/v4/gcp_devices' | jq { "meta": { "page": 1, "limit": 10000, "hasnext": false, "count": 13 }, "data": [ { "registry": "my-registry", "project": "iot-export", "location": "europe-west1", "keys": [ { "key_type": "RSA_X509_PEM", "key": "...", "expires_at": 0 } ], "deviceid": "2820826361193805", "created_at": 1685477382, "config": "" }, ...Copied!
2
3
4
5
6
7
8
9
10
11
12
13
14
15
16
17
18
19
20
21
22
23
24
25
查询支持分页功能。使用_limit和_page参数:
>curl -s -u 'admin:public' -X GET 'http://127.0.0.1:18083/api/v4/gcp_devices?_page=2&_limit=2' | jqCopied!
# 通过 Dashboard 迁移和管理设备
Dashboard 上的 GCP IoT Core 设备模块为设备迁移和管理提供了一种可视化的方式。
# 添加 GCP IoT Core 设备模块
转到 EMQX Dashboard。从左侧导航目录点击模块。
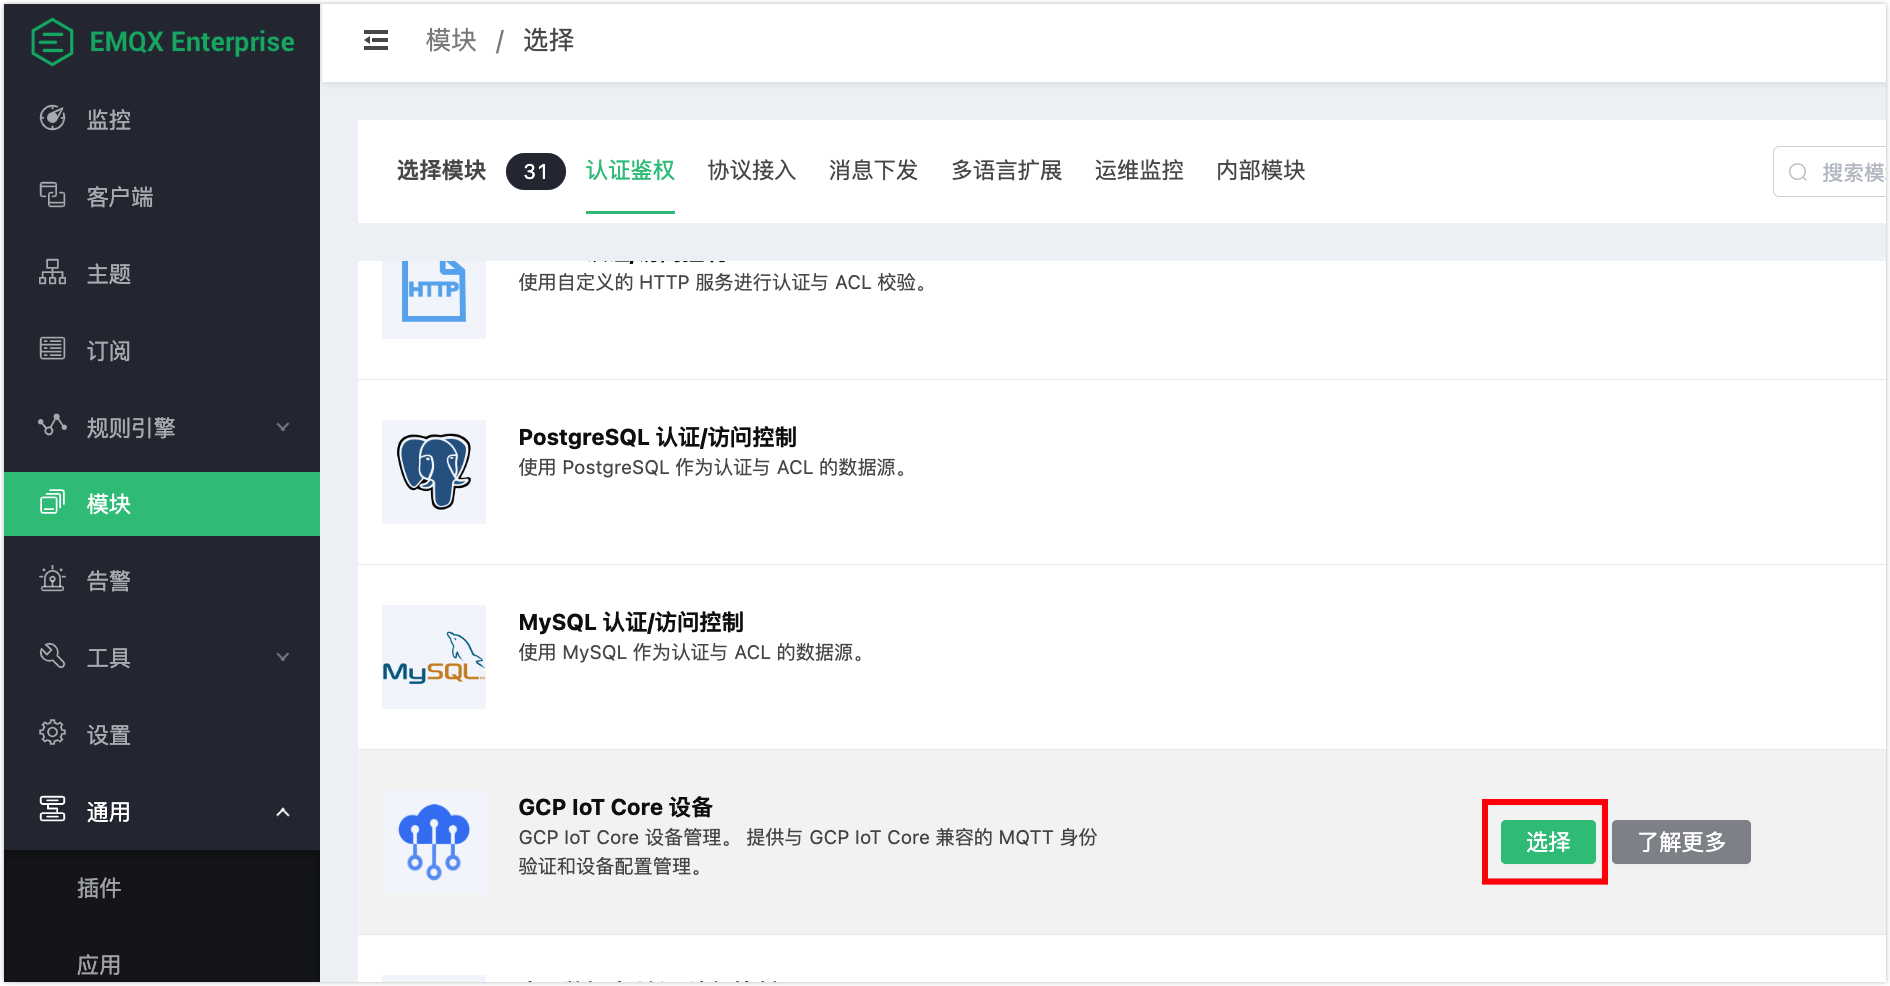
在模块页面,点击添加模块。在选择模块区域,点击认证鉴权。
找到 GCP IoT Core 设备并点击选择。
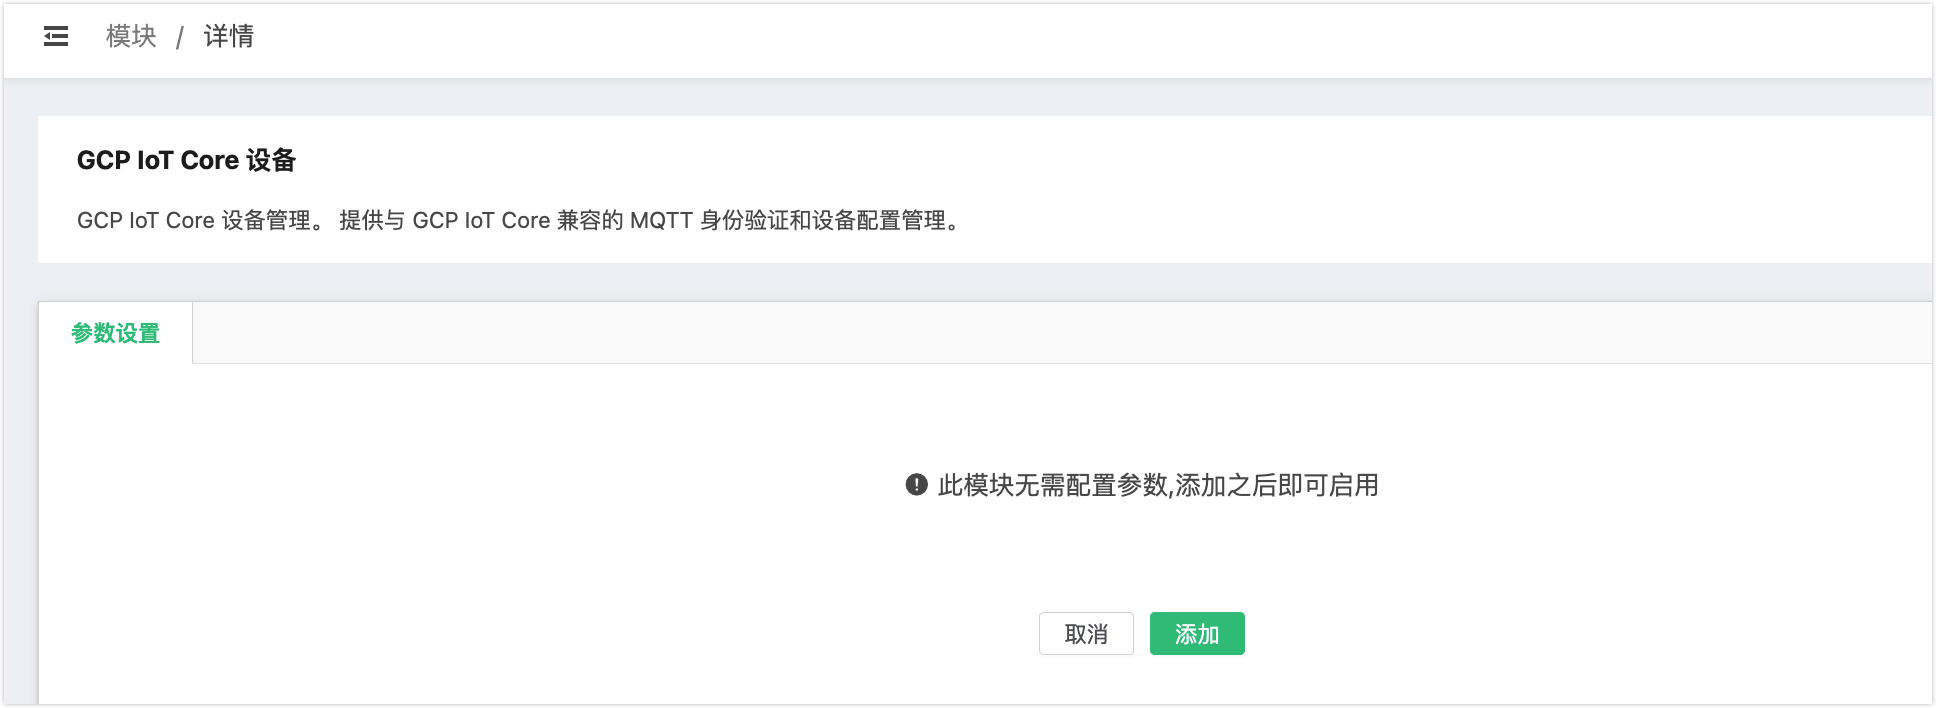
点击页面上的添加以启用模块。
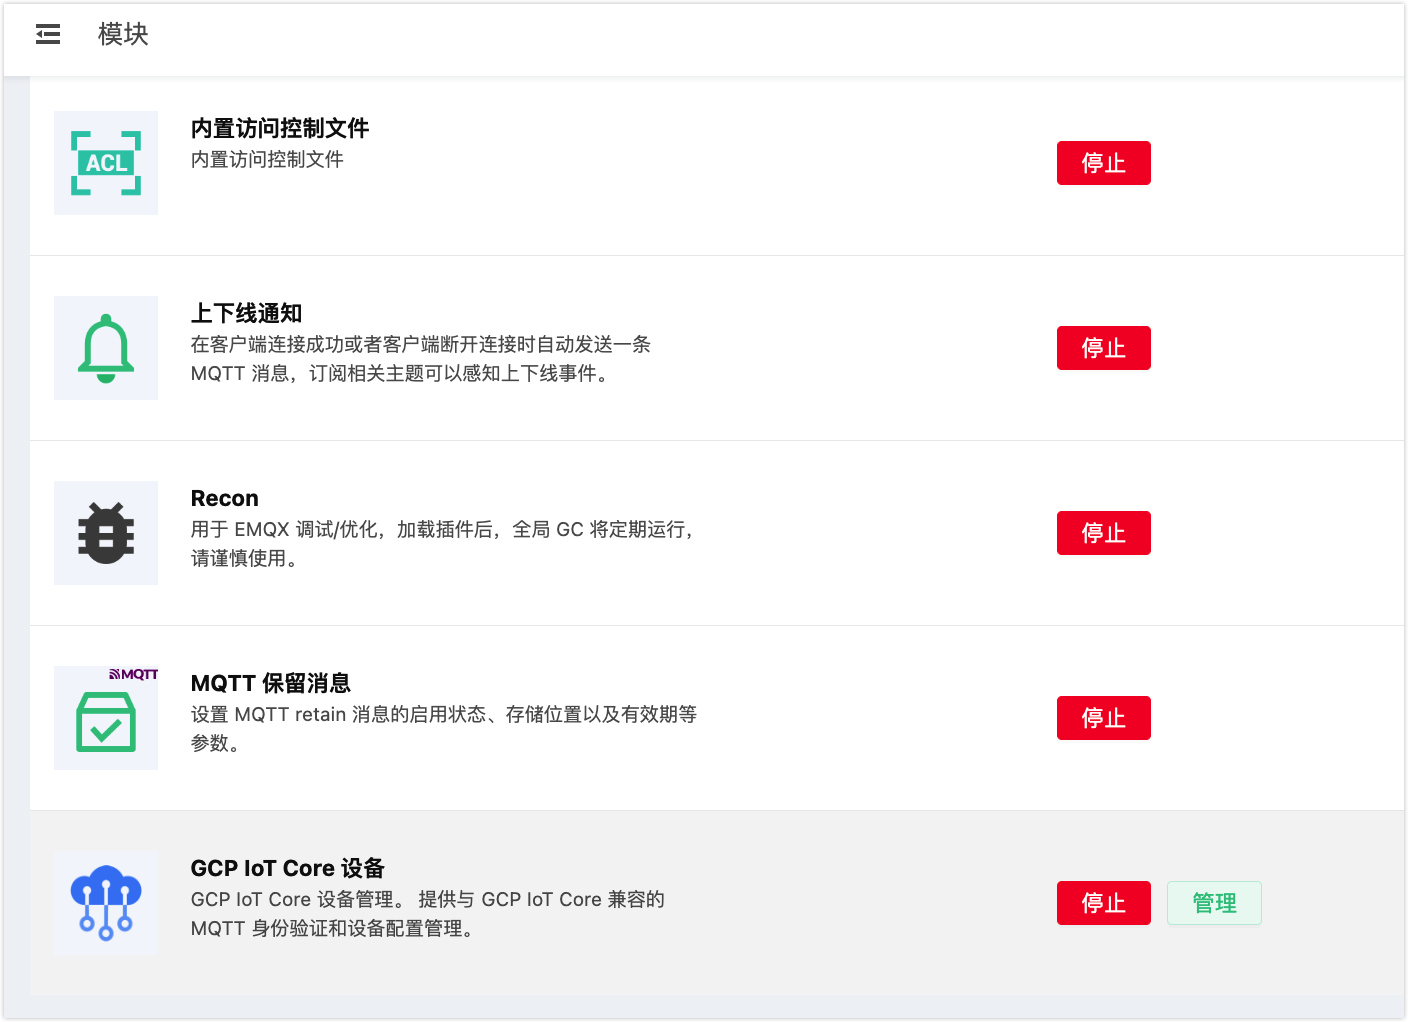
现在您可以看到 GCP IoT Core 设备已被添加到模块页面。
# 导入设备数据
在模块页面上,点击 GCP IoT Core 设备的管理按钮。
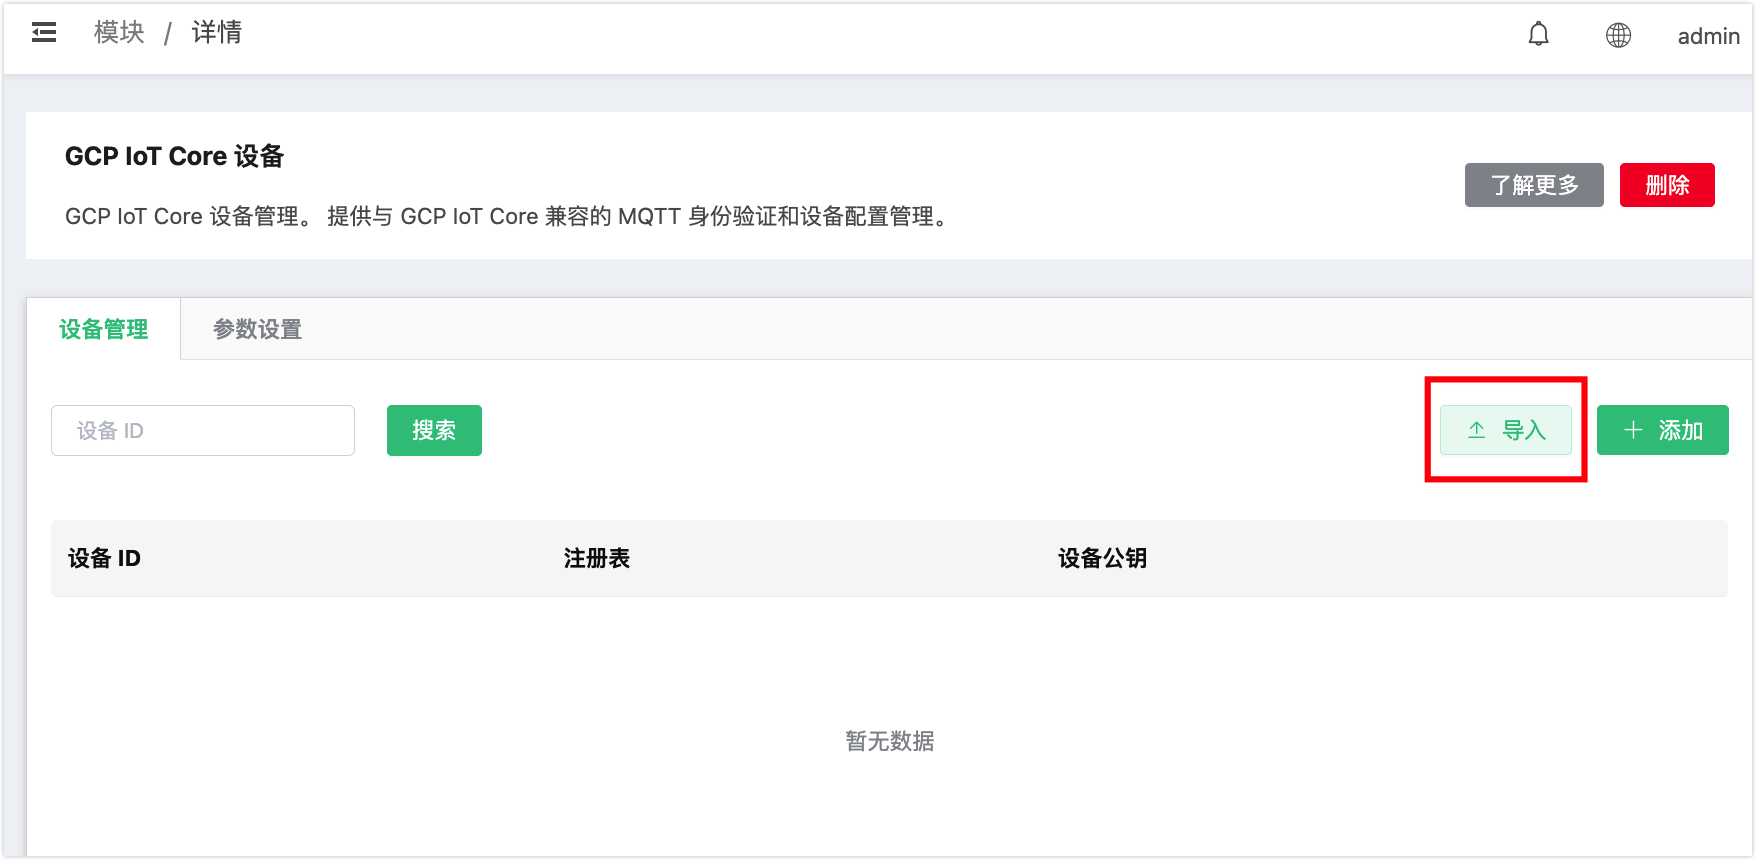
在详情页面的设备管理页签,点击导入以批量导入设备数据或者点击添加以手动添加设备数据。
如果点击导入,将弹出对话框让您导入从 GCP IoT Core 中导出的 json 文件。选中文件并点击打开。
如果点击添加,将弹出对话框让您输入
设备 ID并添加公钥。点击添加,从下拉列表中选择公钥格式。上传公钥文件或输入文件内容,设置到期时间,最后点击确定。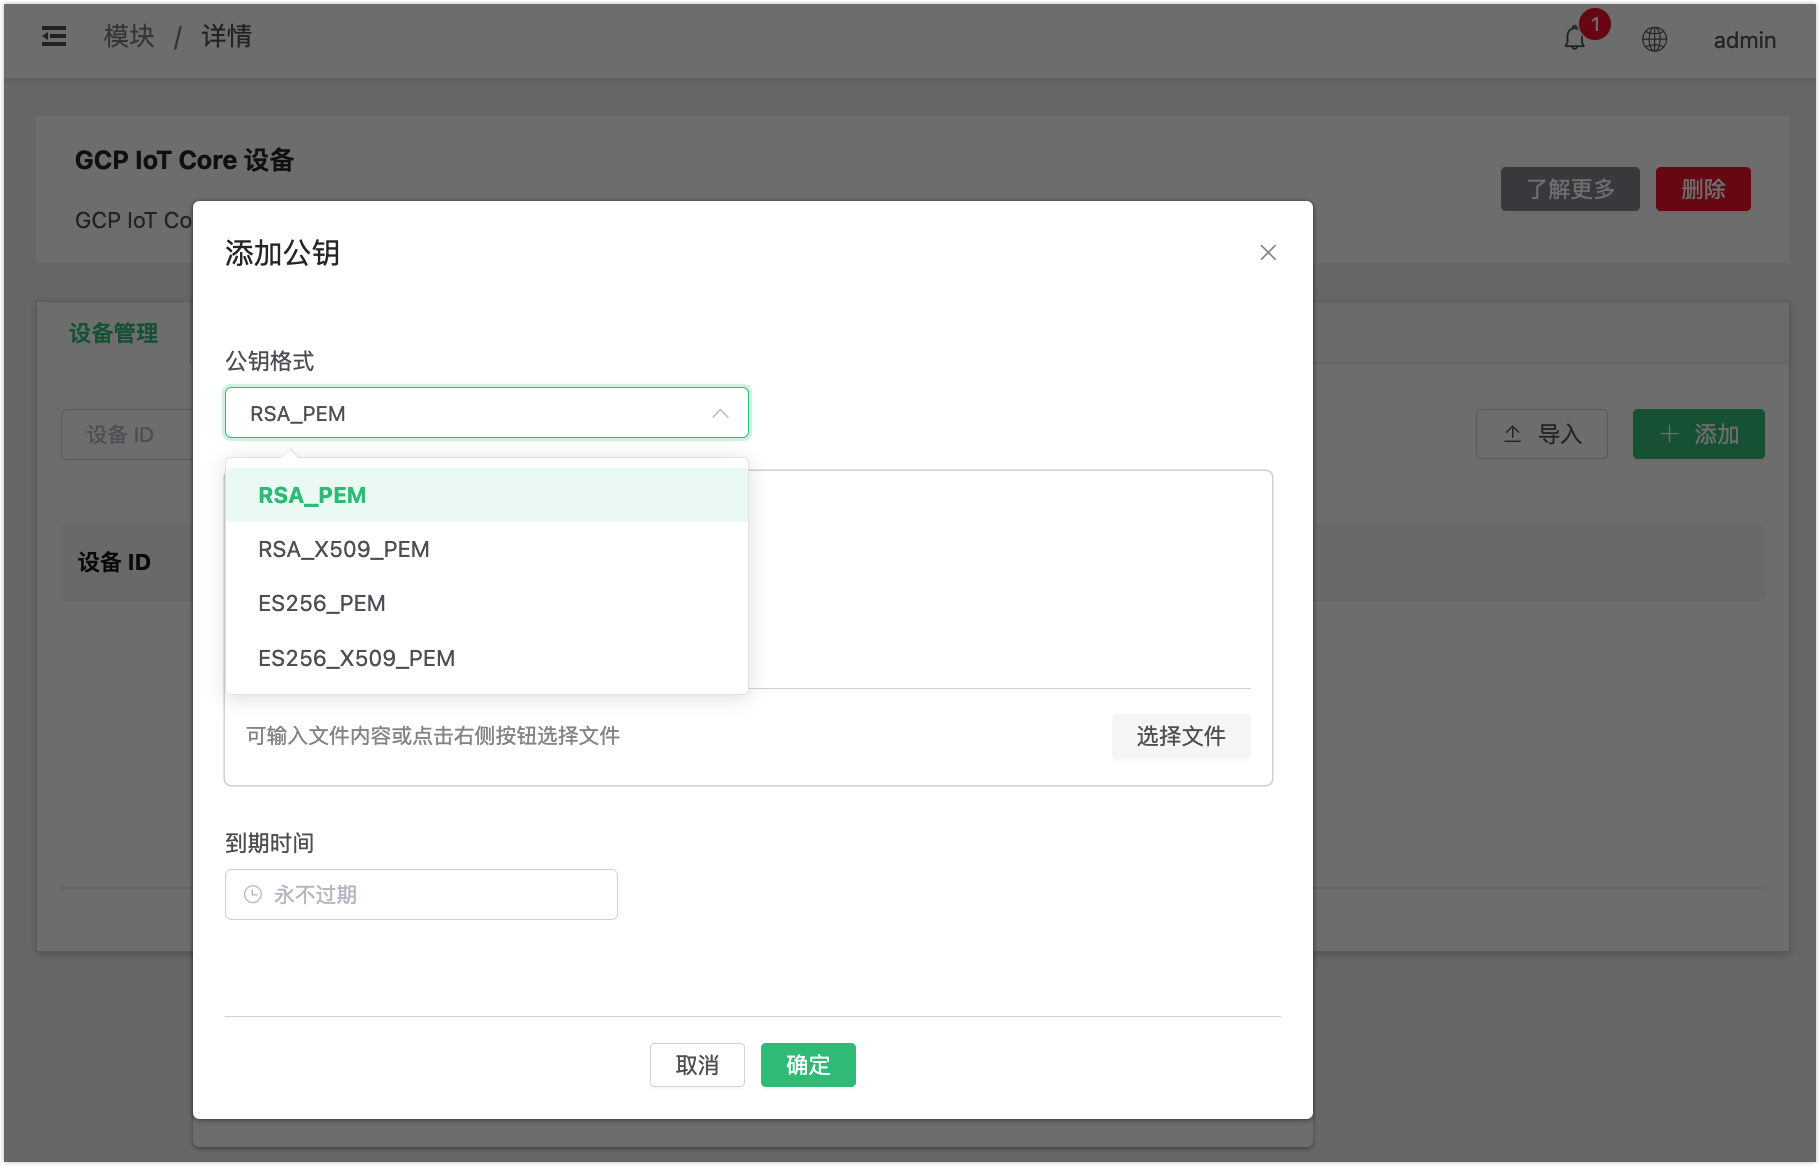
您可以看到设备已被导入。
# 模拟 GCP IoT Core 中设备
以下演示旨在模拟实际设备(例如客户端)与 GCP IoT Core 的 MQTT 端点进行交互的真实情况,以便您可以在 EMQX 中测试 GCP IoT Core 设备模块。
# 初始设置
您需要以下组件进行初始设置:
- 一个已激活 GCP IoT Core 服务的项目:
>gcloud projects list PROJECT_ID NAME PROJECT_NUMBER iot-export IoT Export 283634501352 >gcloud services list NAME TITLE ... cloudiot.googleapis.com Cloud IoT API ...Copied!
2
3
4
5
6
7
8
- 名为
my-registry的 IoT 注册表:
>gcloud iot registries list --region europe-west1 --project iot-export ID LOCATION MQTT_ENABLED my-registry europe-west1 MQTT_ENABLEDCopied!
2
3
注册表中的一些设备,并分配了公钥,例如:
提示
设备描述中包括
config和credentials字段以及其他设备特定信息。
>gcloud iot devices describe c2-ec-x509 --region europe-west1 --registry my-registry --project iot-export config: binaryData: AAECAwQFBgcICQoLDA0ODxAREhMUFRYXGBkaGxwdHh8gISIjJCUmJygpKissLS4vMDEyMzQ1Njc4OTo7PD0-P0BBQkNERUZHSElKS0xNTk9QUVJTVFVWV1hZWltcXV5fYGFiY2RlZmdoaWprbG1ub3BxcnN0dXZ3eHl6e3x9fn-AgYKDhIWGh4iJiouMjY6PkJGSk5SVlpeYmZqbnJ2en6ChoqOkpaanqKmqq6ytrq-wsbKztLW2t7i5uru8vb6_wMHCw8TFxsfIycrLzM3Oz9DR0tPU1dbX2Nna29zd3t_g4eLj5OXm5-jp6uvs7e7v8PHy8_T19vf4-fr7_P3-_w== cloudUpdateTime: '2023-04-12T14:01:34.862851Z' deviceAckTime: '2023-04-19T09:15:53.458746Z' version: '2' credentials: - expirationTime: '1970-01-01T00:00:00Z' publicKey: format: ES256_X509_PEM key: | -----BEGIN CERTIFICATE----- MIIBEjCBuAIJAPKVZoroXatKMAoGCCqGSM49BAMCMBExDzANBgNVBAMMBnVudXNl ZDAeFw0yMzA0MTIxMzQ2NTJaFw0yMzA1MTIxMzQ2NTJaMBExDzANBgNVBAMMBnVu dXNlZDBZMBMGByqGSM49AgEGCCqGSM49AwEHA0IABAugsuay/y2SpGEVDKfiVw9q VHGdZHvLXDqxj9XndUi6LEpA209ZfaC1eJ+mZiW3zBC94AdqVu+QLzS7rPT72jkw CgYIKoZIzj0EAwIDSQAwRgIhAMBp+1S5w0UJDuylI1TJS8vXjWOhgluUdZfFtxES E85SAiEAvKIAhjRhuIxanhqyv3HwOAL/zRAcv6iHsPMKYBt1dOs= -----END CERTIFICATE----- gatewayConfig: {} id: c2-ec-x509 lastConfigAckTime: '2023-04-19T09:15:53.450757285Z' lastConfigSendTime: '2023-04-19T09:15:53.450839281Z' lastErrorStatus: code: 9 message: 'mqtt: The connection broke or was closed by the client.' lastErrorTime: '2023-04-19T08:50:38.285599550Z' lastEventTime: '1970-01-01T00:00:00Z' lastHeartbeatTime: '1970-01-01T00:00:00Z' name: projects/iot-export/locations/europe-west1/registries/my-registry/devices/2928540609735937 numId: '2928540609735937'Copied!
2
3
4
5
6
7
8
9
10
11
12
13
14
15
16
17
18
19
20
21
22
23
24
25
26
27
28
29
30
31
# 连接设备到 MQTT 端点
准备一个用于连接到端点、使用私钥进行身份验证和获取配置的测试脚本。将脚本命名为
client-demo.py。提示
该代码对官方 Python 代码示例 (opens new window)稍作修改。
import argparse import datetime import logging import ssl import jwt import paho.mqtt.client as mqtt def create_jwt(project, private_key, algorithm): token = { "iat": datetime.datetime.now(tz=datetime.timezone.utc), "exp": datetime.datetime.now(tz=datetime.timezone.utc) + datetime.timedelta(minutes=20), "aud": project, } return jwt.encode(token, private_key, algorithm) def on_message(_unused_client, _unused_userdata, message): print( "Received message", message.payload, "on topic", message.topic, "with qos", message.qos, ) def on_connect(unused_client, unused_userdata, unused_flags, rc): print("on_connect", mqtt.connack_string(rc)) def main(): parser = argparse.ArgumentParser( description=("Example Google Cloud IoT Core MQTT client") ) parser.add_argument( "--algorithm", choices=("RS256", "ES256"), required=True, help="Which encryption algorithm to use to generate the JWT", ) parser.add_argument( "--ca-certs", required=True, help="CA root (e.g. from https://pki.google.com/roots.pem)", ) parser.add_argument("--region", required=True, help="GCP region") parser.add_argument("--device", required=True, help="Cloud IoT Core device id") parser.add_argument( "--hostname", required=True, help="MQTT host", ) parser.add_argument( "--port", default=8883, type=int, help="MQTT port", ) parser.add_argument( "--private-key-file", type=argparse.FileType("r"), required=False, help="Path to private key file", ) parser.add_argument( "--project", required=True, help="GCP cloud project name", ) parser.add_argument("--registry", required=True, help="Cloud IoT Core registry id") args = parser.parse_args() client_id = ( f"projects/{args.project}/locations/{args.region}/" + f"registries/{args.registry}/devices/{args.device}" ) print(f"Device client_id is '{client_id}'") client = mqtt.Client(client_id=client_id) password_jwt = create_jwt( args.project, args.private_key_file.read(), args.algorithm ) print(f"Password is {password_jwt}") if args.private_key_file: client.username_pw_set( username="unused", password=password_jwt, ) context = ssl.create_default_context(cafile=args.ca_certs) context.check_hostname = False context.verify_mode = ssl.CERT_REQUIRED client.tls_set_context(context=context) client.on_message = on_message client.on_connect = on_connect client.connect(args.hostname, args.port) config_topic = f"/devices/{args.device}/config" print(f"Subscribing to config topic {config_topic}") client.subscribe(config_topic, qos=1) try: client.loop_forever() except KeyboardInterrupt: client.disconnect() print("Disconnected") if __name__ == "__main__": main()Copied!1
2
3
4
5
6
7
8
9
10
11
12
13
14
15
16
17
18
19
20
21
22
23
24
25
26
27
28
29
30
31
32
33
34
35
36
37
38
39
40
41
42
43
44
45
46
47
48
49
50
51
52
53
54
55
56
57
58
59
60
61
62
63
64
65
66
67
68
69
70
71
72
73
74
75
76
77
78
79
80
81
82
83
84
85
86
87
88
89
90
91
92
93
94
95
96
97
98
99
100
101
102
103
104
105
106
107
108
109
110
111
112
113
114
115
116
117
118
119
120
121
122
123
124
125使用一下命令安装环境:
git clone https://github.com/emqx/emqx-gcp-iot-migrate.git cd emqx-gcp-iot-migrate python3 -m venv .venv source .venv/bin/activate pip install -r requirements.txtCopied!1
2
3
4
5获取 Google 根证书:
curl "https://pki.google.com/roots.pem" --location --output google-roots.pemCopied!1运行脚本:
python client-demo.py --project "iot-export" --region "europe-west1" --registry "my-registry" --algorithm ES256 --device "c2-ec-x509" --hostname mqtt.googleapis.com --private-key-file ./sample-keys/c2_ec_private.pem --ca-certs ./google-roots.pemCopied!1输出为:
Device client_id is 'projects/iot-export/locations/europe-west1/registries/my-registry/devices/c2-ec-x509' Password is eyJhbGciOiJFUzI1NiIsInR5cCI6IkpXVCJ9.eyJpYXQiOjE2ODIzMzQyNzksImV4cCI6MTY4MjMzNTQ3OSwiYXVkIjoiaW90LWV4cG9ydCJ9.djolGOTtK7OxYN1xh1HmEdNCUPFNNpTg8AA9dAO3wnqUByyZYu6OwmSBDRsb89EfWkxLR5Pszc_fsv5gGv_Fpw Subscribing to config topic /devices/c2-ec-x509/config on_connect Connection Accepted. Received message b'\x00\x01\x02\x03\x04\x05\x06\x07\x08\t\n\x0b\x0c\r\x0e\x0f\x10\x11\x12\x13\x14\x15\x16\x17\x18\x19\x1a\x1b\x1c\x1d\x1e\x1f !"#$%&\'()*+,-./0123456789:;<=>?@ABCDEFGHIJKLMNOPQRSTUVWXYZ[\\]^_`abcdefghijklmnopqrstuvwxyz{|}~\x7f\x80\x81\x82\x83\x84\x85\x86\x87\x88\x89\x8a\x8b\x8c\x8d\x8e\x8f\x90\x91\x92\x93\x94\x95\x96\x97\x98\x99\x9a\x9b\x9c\x9d\x9e\x9f\xa0\xa1\xa2\xa3\xa4\xa5\xa6\xa7\xa8\xa9\xaa\xab\xac\xad\xae\xaf\xb0\xb1\xb2\xb3\xb4\xb5\xb6\xb7\xb8\xb9\xba\xbb\xbc\xbd\xbe\xbf\xc0\xc1\xc2\xc3\xc4\xc5\xc6\xc7\xc8\xc9\xca\xcb\xcc\xcd\xce\xcf\xd0\xd1\xd2\xd3\xd4\xd5\xd6\xd7\xd8\xd9\xda\xdb\xdc\xdd\xde\xdf\xe0\xe1\xe2\xe3\xe4\xe5\xe6\xe7\xe8\xe9\xea\xeb\xec\xed\xee\xef\xf0\xf1\xf2\xf3\xf4\xf5\xf6\xf7\xf8\xf9\xfa\xfb\xfc\xfd\xfe\xff' on topic /devices/c2-ec-x509/config with qos 1Copied!1
2
3
4
5
上述演示显示了:
- 客户端使用特别设计的
client_id连接到终端。 - 客户端生成 JWT 令牌并将其用作密码(GCP IoT Core 特定的身份验证方式)。
- 客户端订阅了配置主题,也遵循了 GCP IoT Core 的约定。
- 客户端从配置主题接收配置。消息是一个二进制块,但可以是 JSON 字符串或其他格式。
迁移完成后,您可以期望相同的操作在 EMQX 中也能正常工作,而无需修改客户端代码。
# 对迁移结果进行测试
要测试迁移,请使用之前的相同客户端代码,但将端点更改为 EMQX。您还需要将 CA 证书更改为 EMQX 使用的证书。
docker cp emqx:/opt/emqx/etc/certs/cacert.pem ./сacert.pem python client-demo.py --project "iot-export" --region "europe-west1" --registry "my-registry" --algorithm ES256 --device "c2-ec-x509" --hostname localhost --private-key-file ./sample-keys/c2_ec_private.pem --ca-certs cacert.pemCopied!
2
输出结果如下:
Device client_id is 'projects/iot-export/locations/europe-west1/registries/my-registry/devices/c2-ec-x509' Password is eyJhbGciOiJFUzI1NiIsInR5cCI6IkpXVCJ9.eyJpYXQiOjE2ODIzNDE2NzgsImV4cCI6MTY4MjM0Mjg3OCwiYXVkIjoiaW90LWV4cG9ydCJ9.04_zR71fmi0YikSxZbb_wxpVTnikt2XIkxkuI6JM6VS0VJ1B8QrggHuUron8MAOSJDJu9SVa2fuuFFjJEKJ-Bw Subscribing to config topic /devices/c2-ec-x509/config on_connect Connection Accepted. Received message b'\x00\x01\x02\x03\x04\x05\x06\x07\x08\t\n\x0b\x0c\r\x0e\x0f\x10\x11\x12\x13\x14\x15\x16\x17\x18\x19\x1a\x1b\x1c\x1d\x1e\x1f !"#$%&\'()*+,-./0123456789:;<=>?@ABCDEFGHIJKLMNOPQRSTUVWXYZ[\\]^_`abcdefghijklmnopqrstuvwxyz{|}~\x7f\x80\x81\x82\x83\x84\x85\x86\x87\x88\x89\x8a\x8b\x8c\x8d\x8e\x8f\x90\x91\x92\x93\x94\x95\x96\x97\x98\x99\x9a\x9b\x9c\x9d\x9e\x9f\xa0\xa1\xa2\xa3\xa4\xa5\xa6\xa7\xa8\xa9\xaa\xab\xac\xad\xae\xaf\xb0\xb1\xb2\xb3\xb4\xb5\xb6\xb7\xb8\xb9\xba\xbb\xbc\xbd\xbe\xbf\xc0\xc1\xc2\xc3\xc4\xc5\xc6\xc7\xc8\xc9\xca\xcb\xcc\xcd\xce\xcf\xd0\xd1\xd2\xd3\xd4\xd5\xd6\xd7\xd8\xd9\xda\xdb\xdc\xdd\xde\xdf\xe0\xe1\xe2\xe3\xe4\xe5\xe6\xe7\xe8\xe9\xea\xeb\xec\xed\xee\xef\xf0\xf1\xf2\xf3\xf4\xf5\xf6\xf7\xf8\xf9\xfa\xfb\xfc\xfd\xfe\xff' on topic /devices/c2-ec-x509/config with qos 1Copied!
2
3
4
5
结果和之前相同,表示设备能够在 EMQX 中正常工作并接收消息。
# 限制
需要注意的是,EMQX Broker 不是 GCP IoT Core 的直接替代品。提供的 API 旨在帮助迁移。最显著的限制包括:
- EMQX 不支持 "网关" 的概念。然而,这只会导致位于网关后面的设备无法拥有独立于网关的认证信息。
- EMQX 不使用项目、位置和注册表。它们仅用于构建或验证与 GCP IoT Core 兼容的客户端 ID。这意味着导入到 EMQX 的设备应具有全局唯一的 ID,以避免冲突。