Connect to FX5U
PLC Setting
Open the GX Works3 PLC programming software and create a new project.
SeriesSelectFX5CPU,TypeSelectFX5U, ClickOK.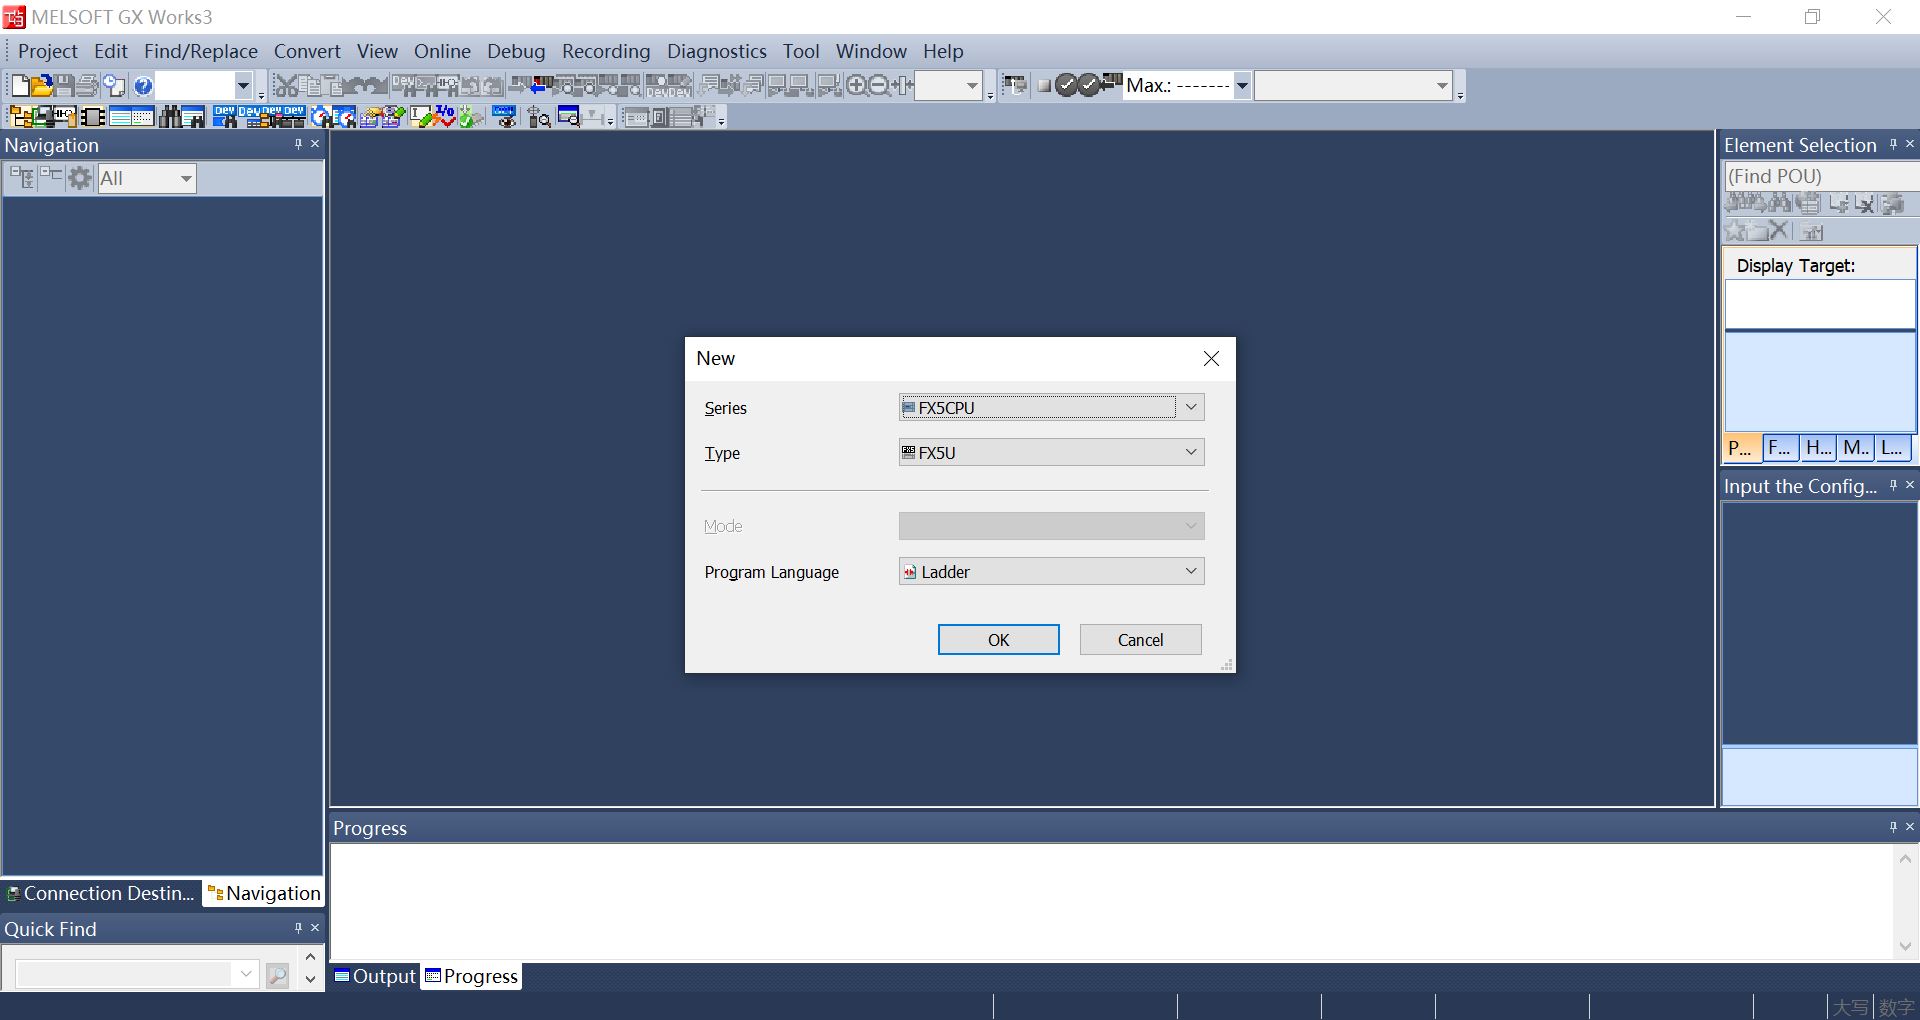
Click
Connection Destination->Connection, SetAdapterandIP Address of Adapter, ClickOK.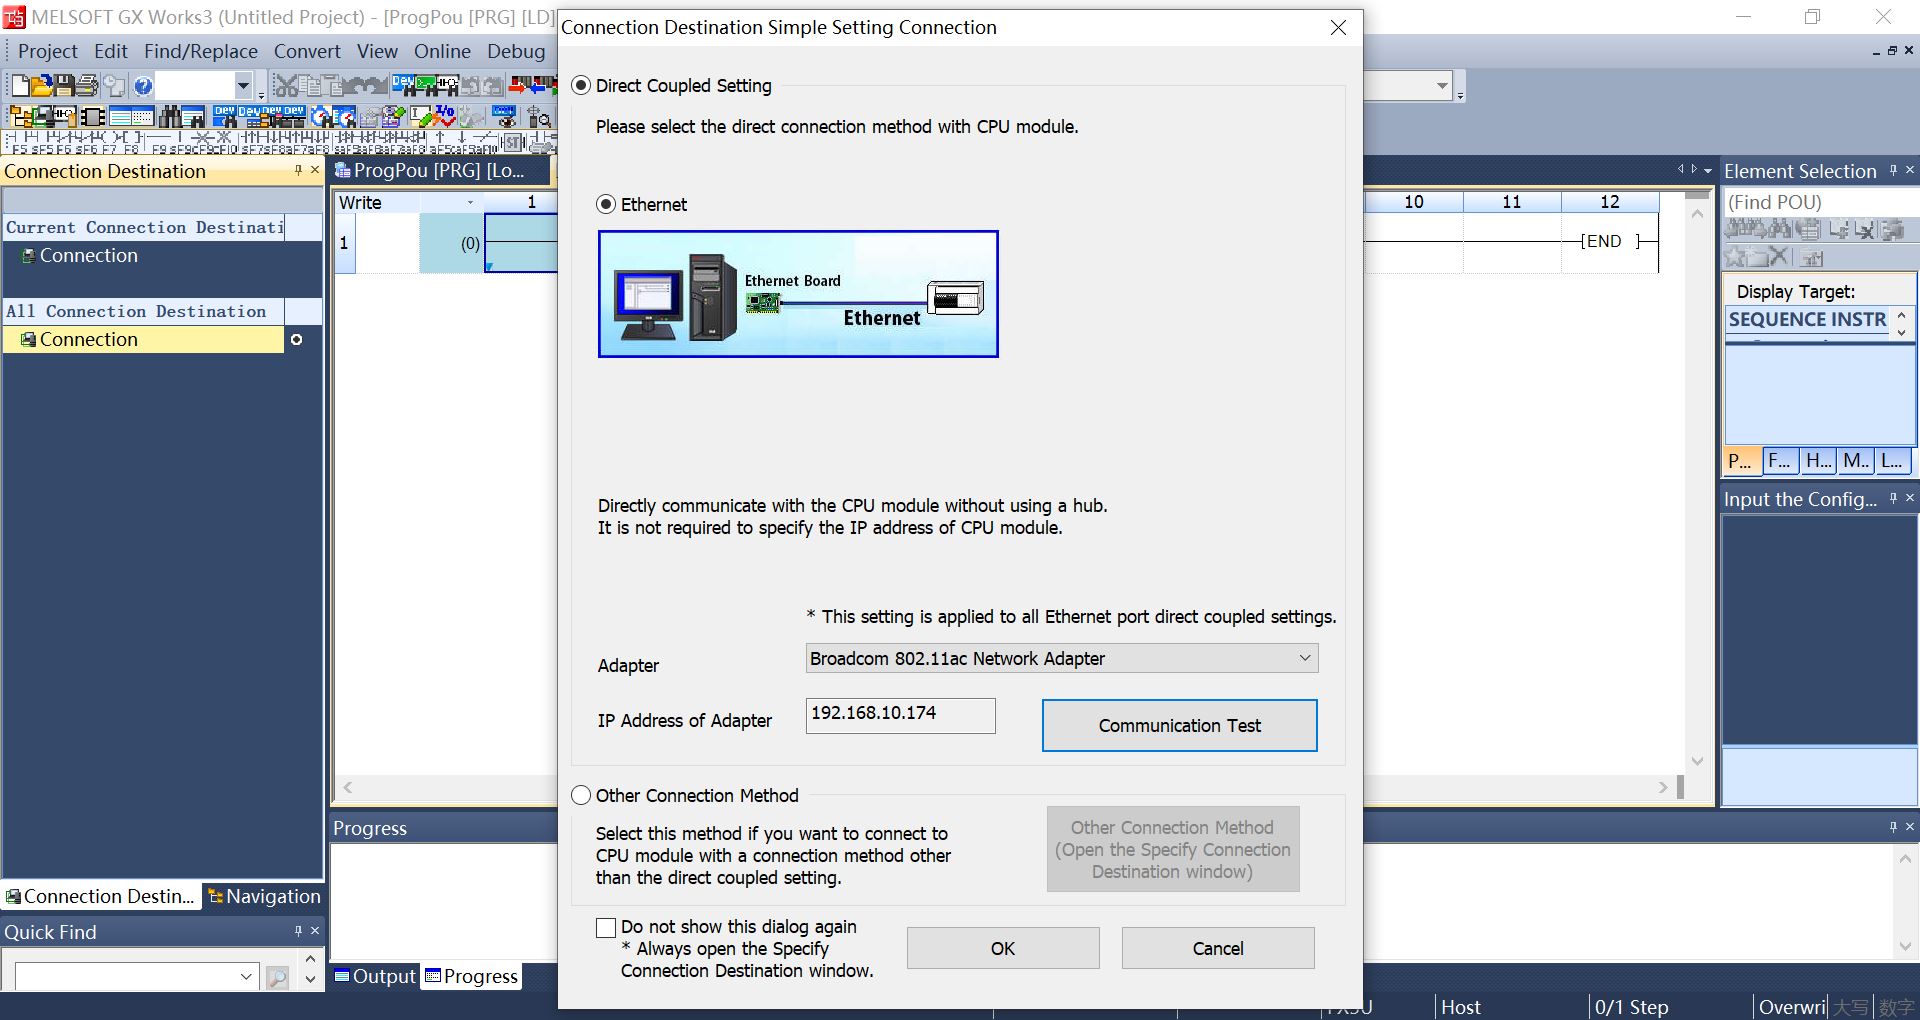
Click on the menu
Online->Read frome PLC->Select All->Execute.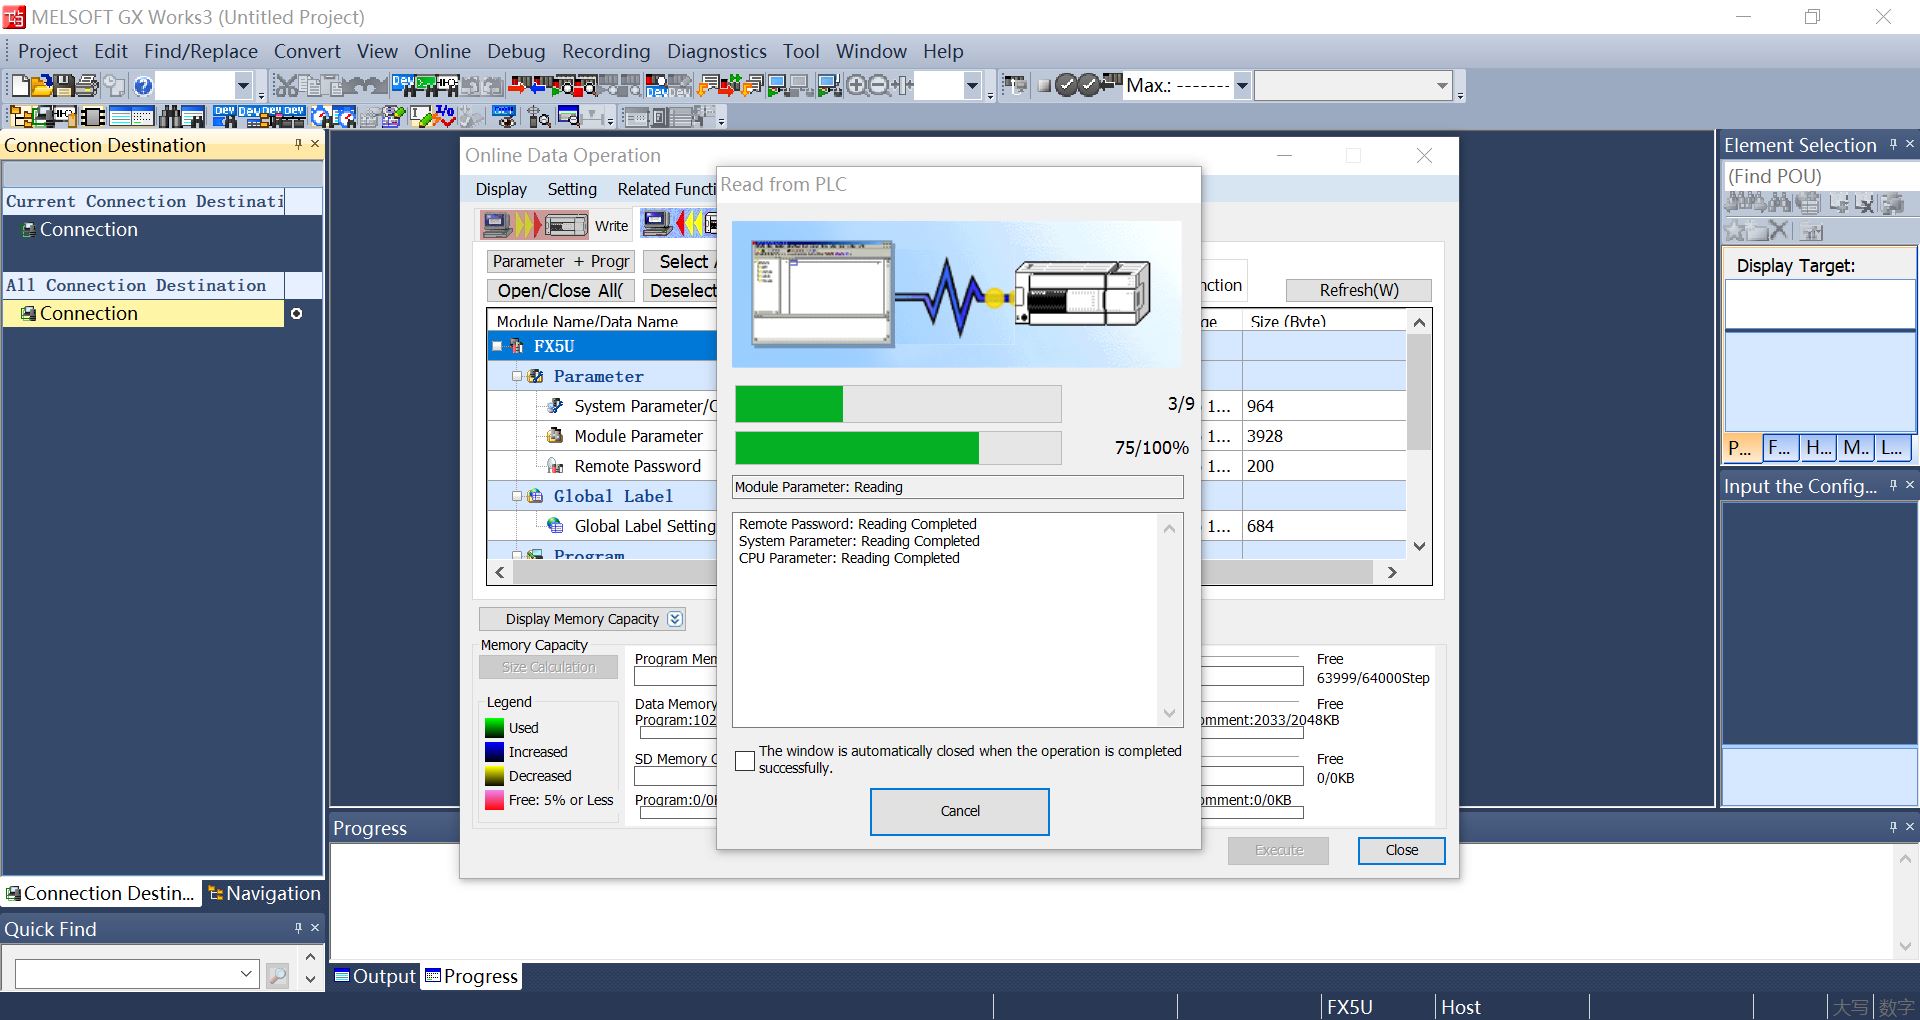
Click
Navigation->Parameter->FX5UCPU->Module Parameter->Ethernet Port, Check and confirmIP Address, ClickExternal Device Configuration.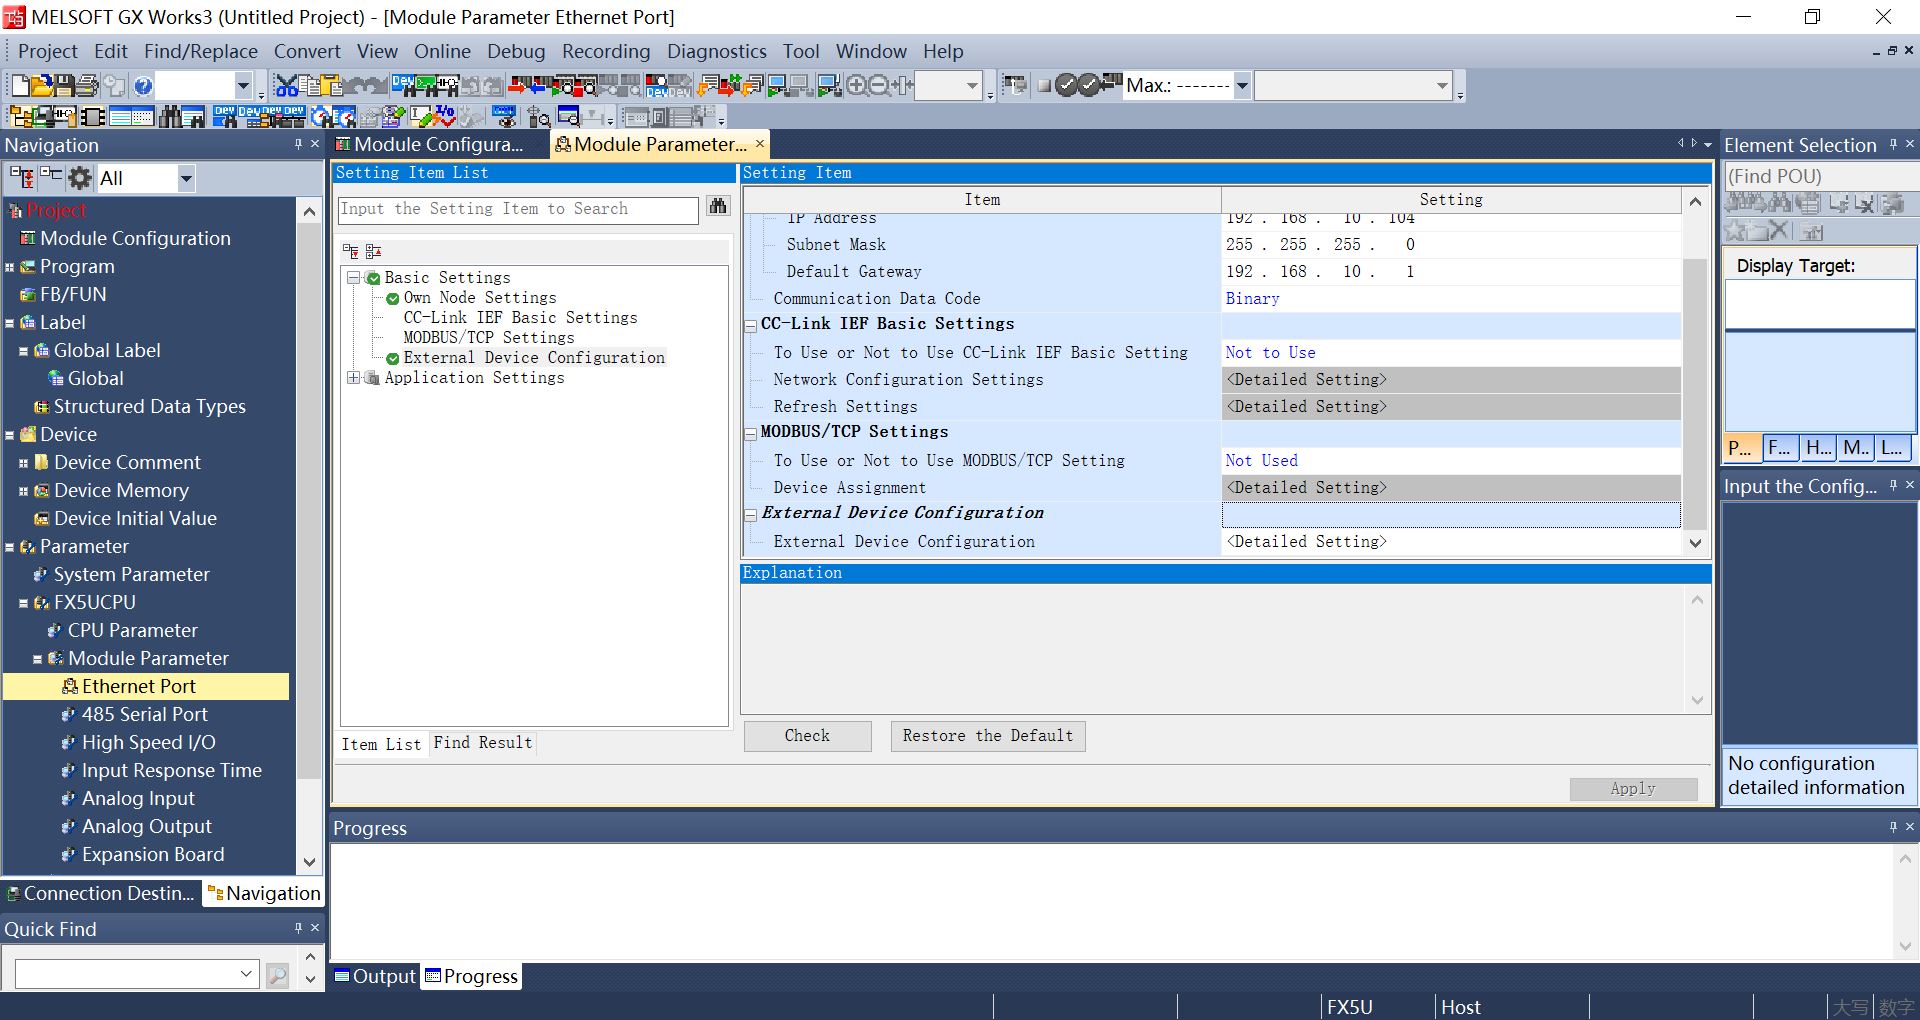
Drag
Ethernet Device(General)->SLMP Connection Moduleto list,ProtocolselectTCPand setPort No., ClickClose with Reflecting the Setting.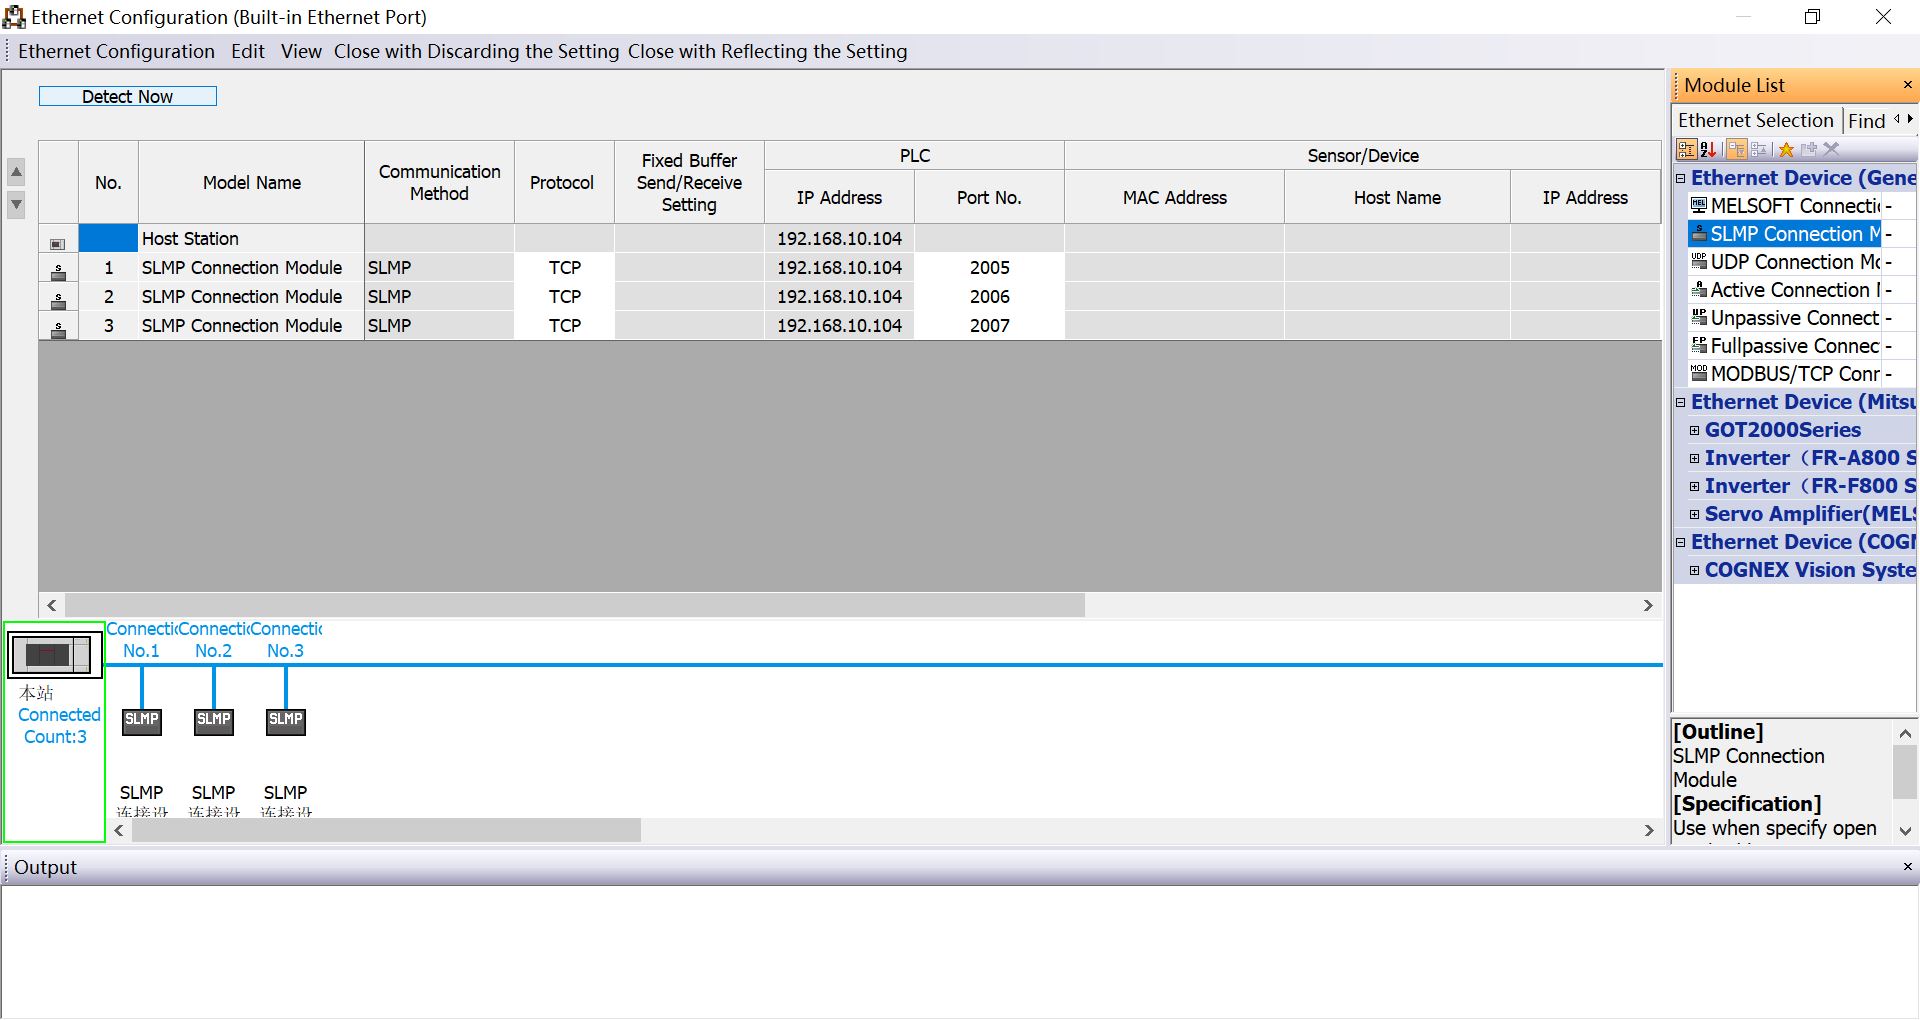
Click on the menu
Online->Write to PLC->Execute.
Neuron Setting
Add a Mitsubishi 3E device to Neuron Southbound Device Management.
Change the
PLC IP Addressto the target device IP address in the device configuration.Modify
PLC Portas the target device port in the device configuration and submit the setup form.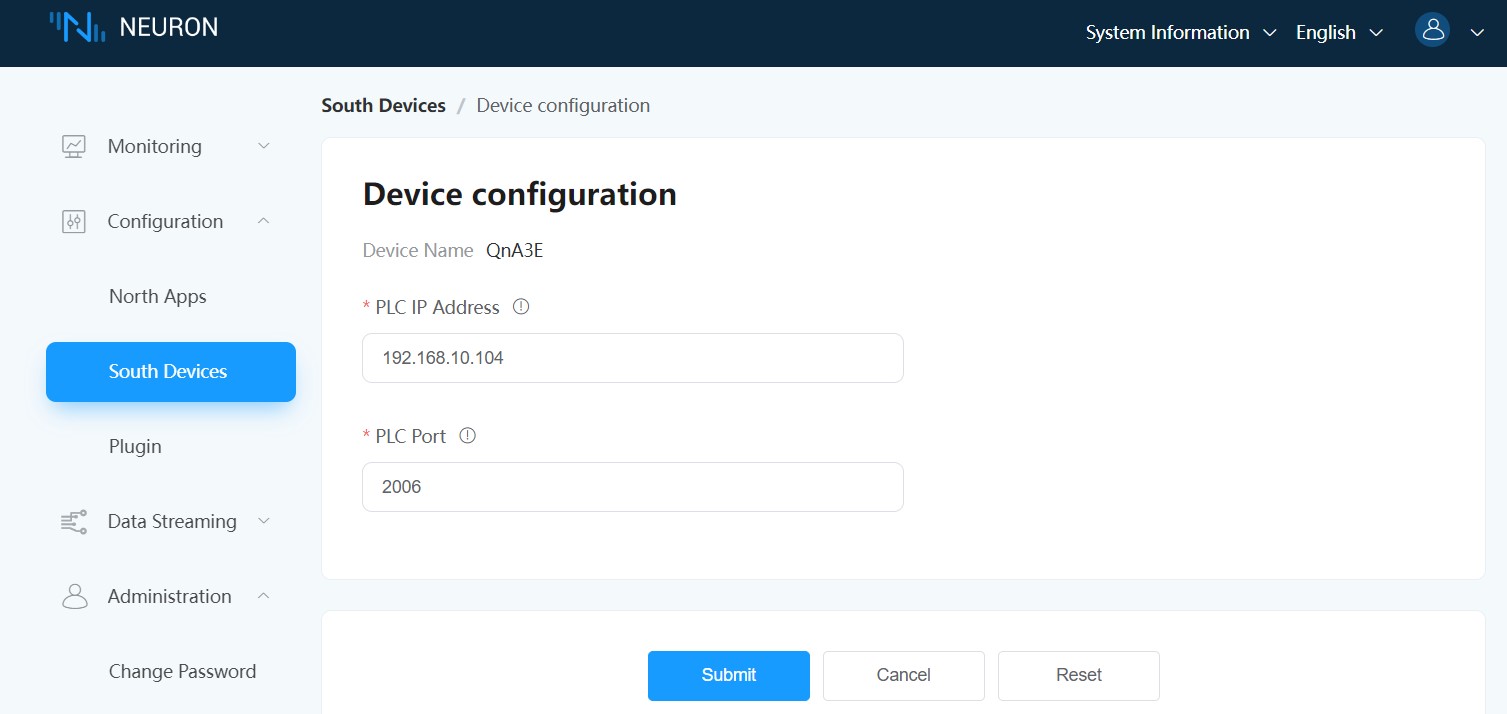
Add
Group,Add testtag.
Test Data List
| Name | Address | Attribute | Data Type |
|---|---|---|---|
| DATA1 | D0 | Read Write | INT16 |
| DATA2 | D1 | Read Write | UINT16 |
| DATA3 | D2 | Read Write | INT32 |
| DATA4 | D4 | Read Write | UINT32 |
| DATA5 | D6 | Read Write | FLOAT |
| DATA6 | D8 | Read Write | DOUBLE |
| DATA7 | X0 | Read | BIT |
| DATA8 | Y0 | Read Write | BIT |
| DATA9 | D20.0 | Read | BIT |
| DATA10 | D100.16 | Read Write | STRING |