Neuron and eKuiper Integration
The integration of Neuron and eKuiper brings numerous benefits to the world of IoT data analytics and edge computing. By integrating eKuiper, Neuron has following capabilities
Expanded Data Analytics Capability Neuron can offer advanced real-time data analytics functionalities, such as anomaly detection, predictive maintenance, and optimization algorithms, providing more comprehensive and intelligent solutions to industrial IoT deployments.
Edge Computing Capability Neuron can process data at the edge, closer to the industrial devices, reducing latency and enabling faster response times.
Seamless Data Processing and Transformation Neuron support for data extraction, transformation, and loading (ETL) enables Neuron to efficiently preprocess and cleanse data before it is used for analytics, ensuring data quality and consistency for cloud AI/ML analytics functionalities
Data-driven Decision-Making at the Edge Neuron can analyze and process AI-driven insights locally, without relying solely on cloud-based decision-making systems.
Neuron2.4 and eKuiper1.9 Integration Configuration
Before version 2.4 of Neuron and version 1.9 of eKuiper, Neuron and eKuiper communicated and integrated with each other using the NNG-IPC (Nanomsg Inter-Process Communication) method, which had several limitations.
Starting from version 2.4.0, the eKuiper plugin for Neuron switched from the IPC transport layer to the TCP transport layer. Similarly, starting from version 1.9.0, eKuiper also adopted the TCP transport layer. The use of the TCP transport layer removes the restriction of deploying Neuron and eKuiper on the same host and allows for multiple connections between Neuron and eKuiper.
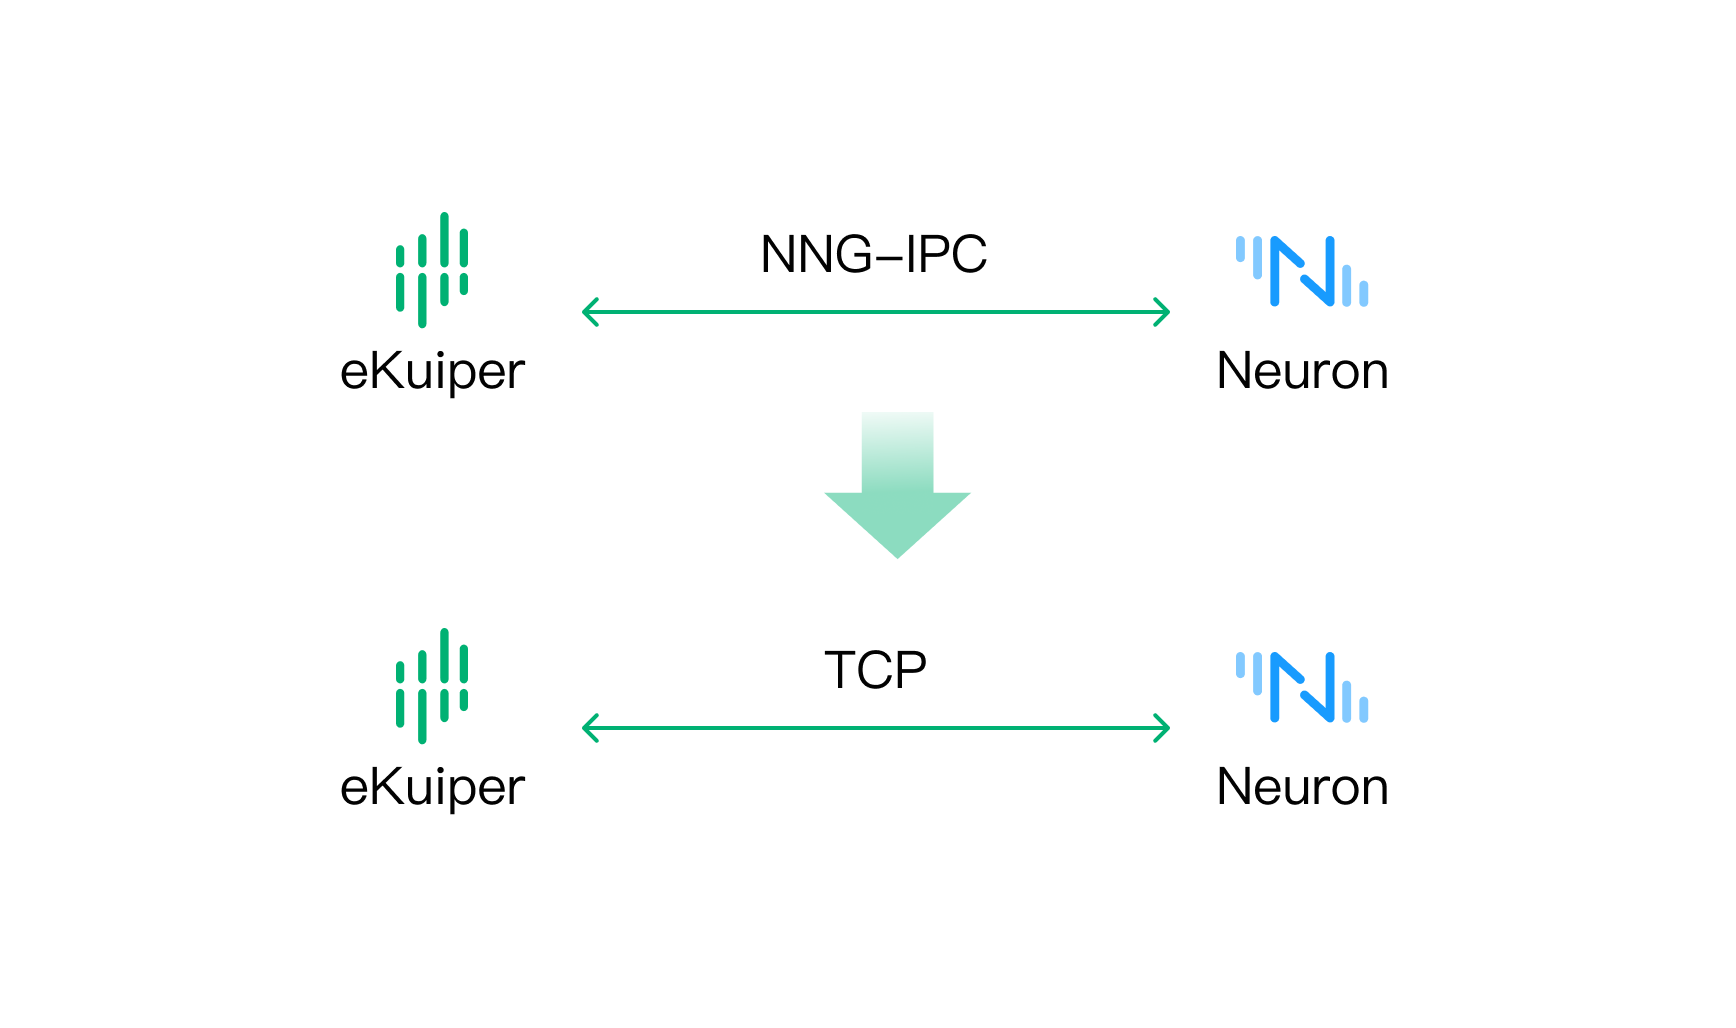
TCP provides a reliable and cross-host communication method, enabling stable data transmission over the network.
This article provides a detailed introduction to deploying Neuron 2.4.x and eKuiper 1.9.x with TCP connection using Docker Compose. Here is the specific configuration process:
Quick Deployment
Both Neuron and eKuiper support binary installation packages and Docker container deployment solutions. This article takes the Docker solution as an example and uses the Docker Compose approach to achieve one-click deployment of the two components on the edge.
Copy the
docker-compose.ymlfile to the deployment machine. Its content includes Neuron, eKuiper, and eKuiper's management interface eKuiper Manager.yamlversion: '3.4' services: manager: image: emqx/ekuiper-manager:1.9 container_name: ekuiper-manager ports: - "9082:9082" ekuiper: image: lfedge/ekuiper:1.9 ports: - "9081:9081" container_name: ekuiper hostname: ekuiper environment: KUIPER__BASIC__CONSOLELOG: "true" KUIPER__BASIC__IGNORECASE: "false" volumes: - /tmp/data:/kuiper/data - /tmp/log:/kuiper/log neuron: image: emqx/neuron:2.4.0 ports: - "7000:7000" # The default port to communicate with eKuiper. Change it if you want to use another port. - "7081:7081" container_name: neuron hostname: neuron environment: DISABLE_AUTH: 1 volumes: - /tmp/neuron/data:/opt/neuron/persistenceHere is the configuration explanation:
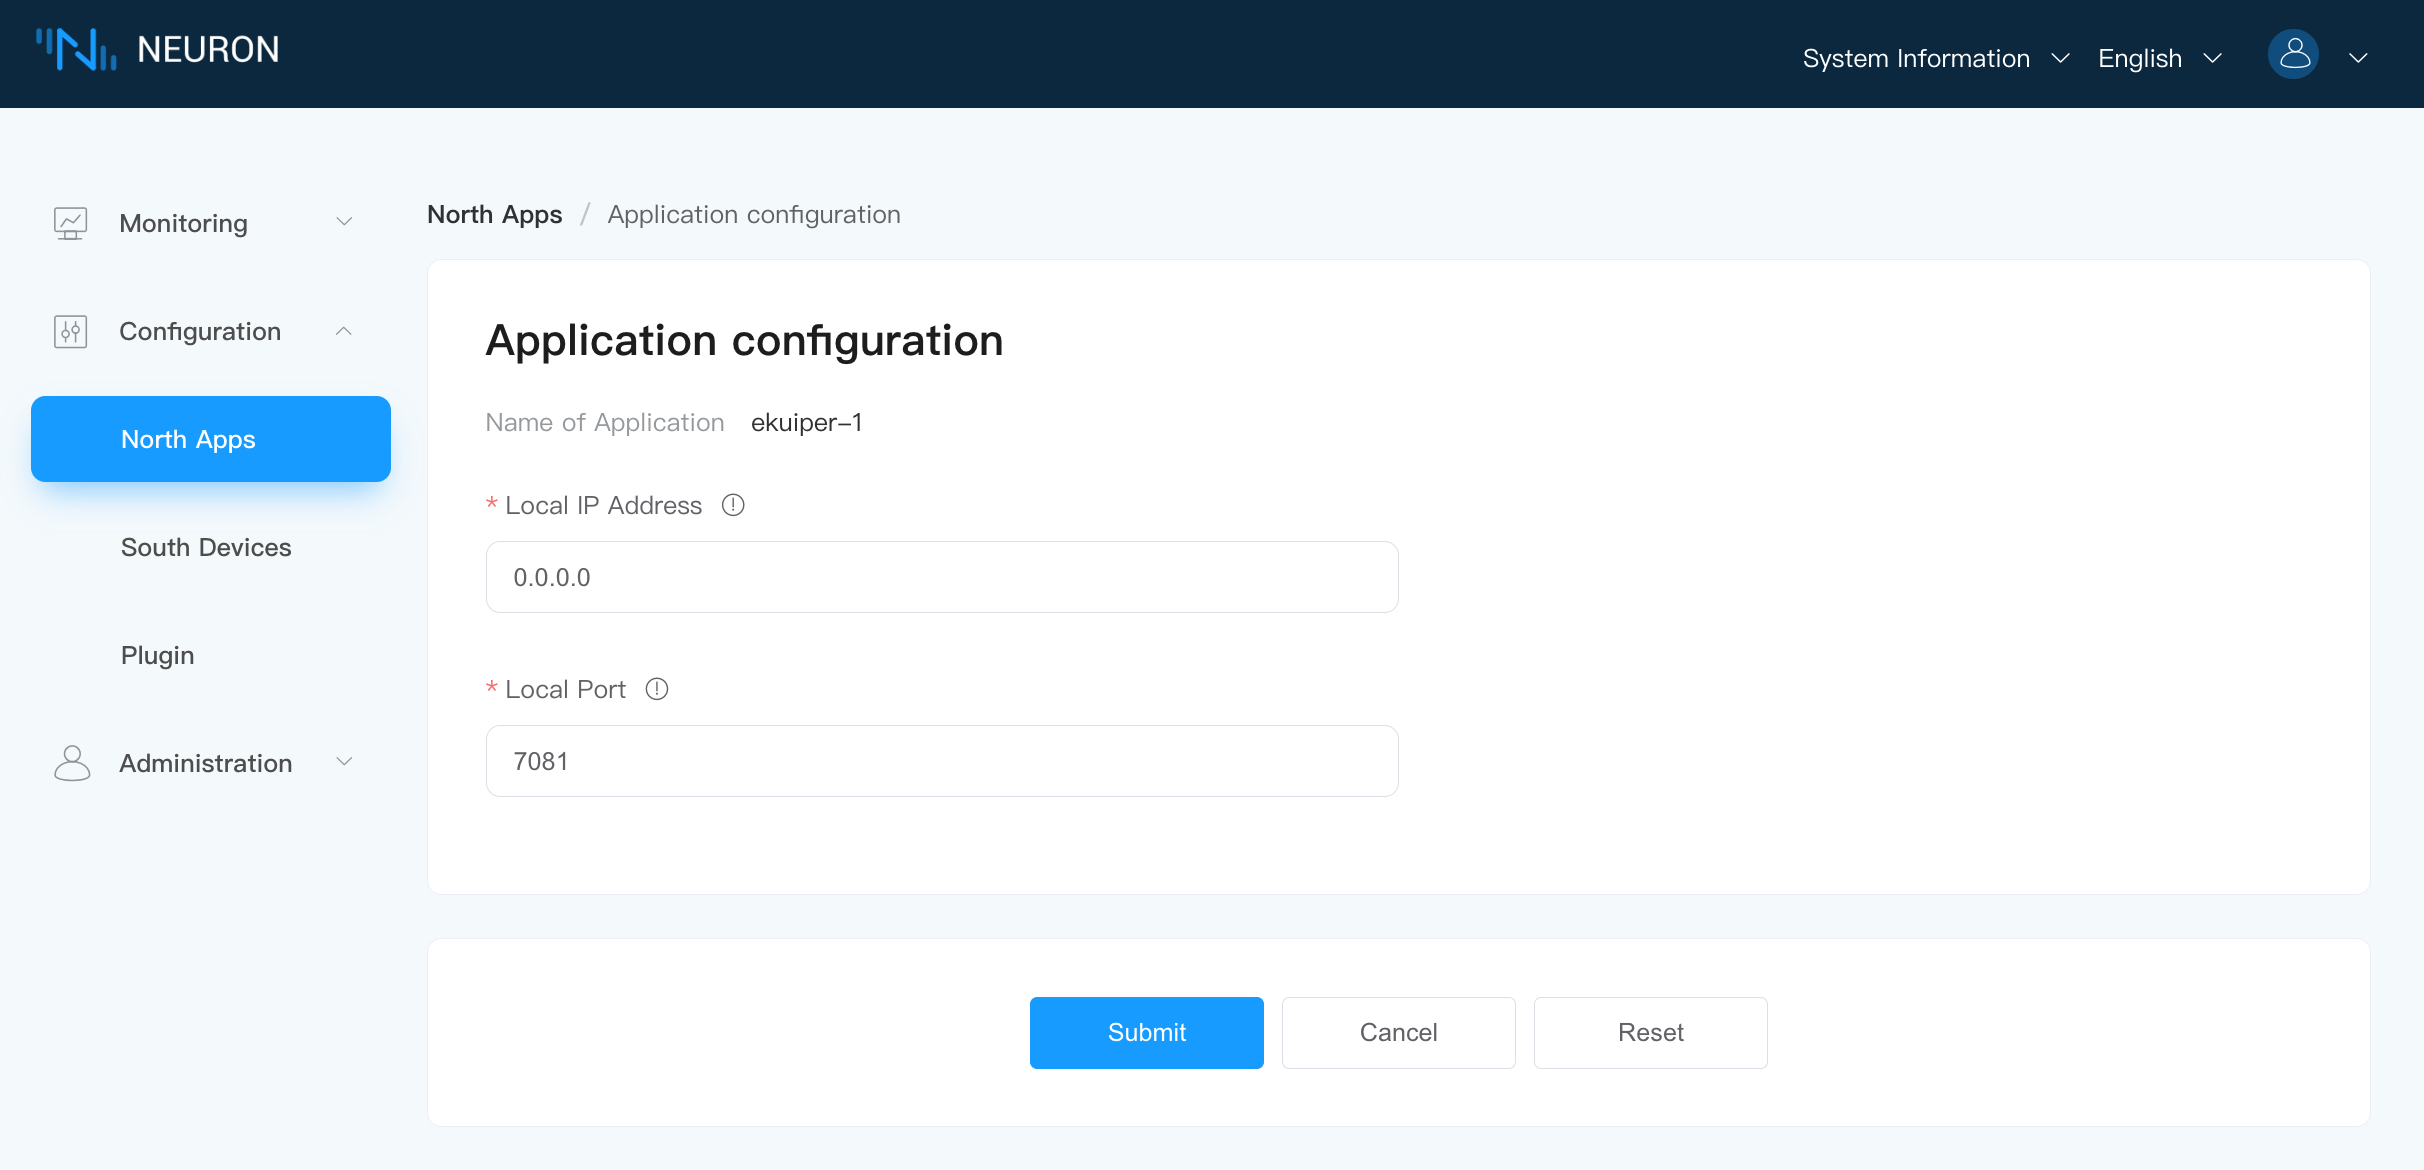
In this configuration file, Neuron and eKuiper use port 7081 for communication. Neuron listens on port 7081 and waits for eKuiper's connection.
Since the Neuron container and eKuiper container have configured hostnames, the software can access each other using the hostnames. If hostnames are not configured, you can use the IP address of the host machine for communication.
The version of the Neuron, eKuiper, and eKuiper-manager images can be adjusted according to the actual usage. As long as Neuron >= 2.4.0 and eKuiper >= 1.9.0, it should work. It is recommended to keep the eKuiper-manager version consistent with the eKuiper version.
For eKuiper environment variable configurations, you can refer to specific documentation for eKuiper.
In the directory of
docker-compose.yml, run following:shell# docker compose up -dAfter all the containers have started, please use the
docker pscommand to confirm that all the containers have started successfully.
Neuron Configuration
After starting Neuron, we need to configure the southbound devices and northbound eKuiper application channel for Neuron, and then start the simulator for simulating data collection.
For the configuration of southbound devices and the simulator, please refer to the Neuron Quick Start Guide to complete the southbound configuration part.
Neuron Northbound eKuiper Node Configuration
In the configuration menu, select Northbound Application Management to access the Northbound Application Management interface. At this point, no applications have been added, so we need to manually add an application. In this example, we will create an eKuiper application.
Step 1: Add a Northbound Application:
- Click on the
Add Configurationbutton. - Enter an application name, for example, "ekuiper-1".
- In the dropdown menu, you will see the available northbound applications for this software version. In this case, select the plugin for eKuiper.
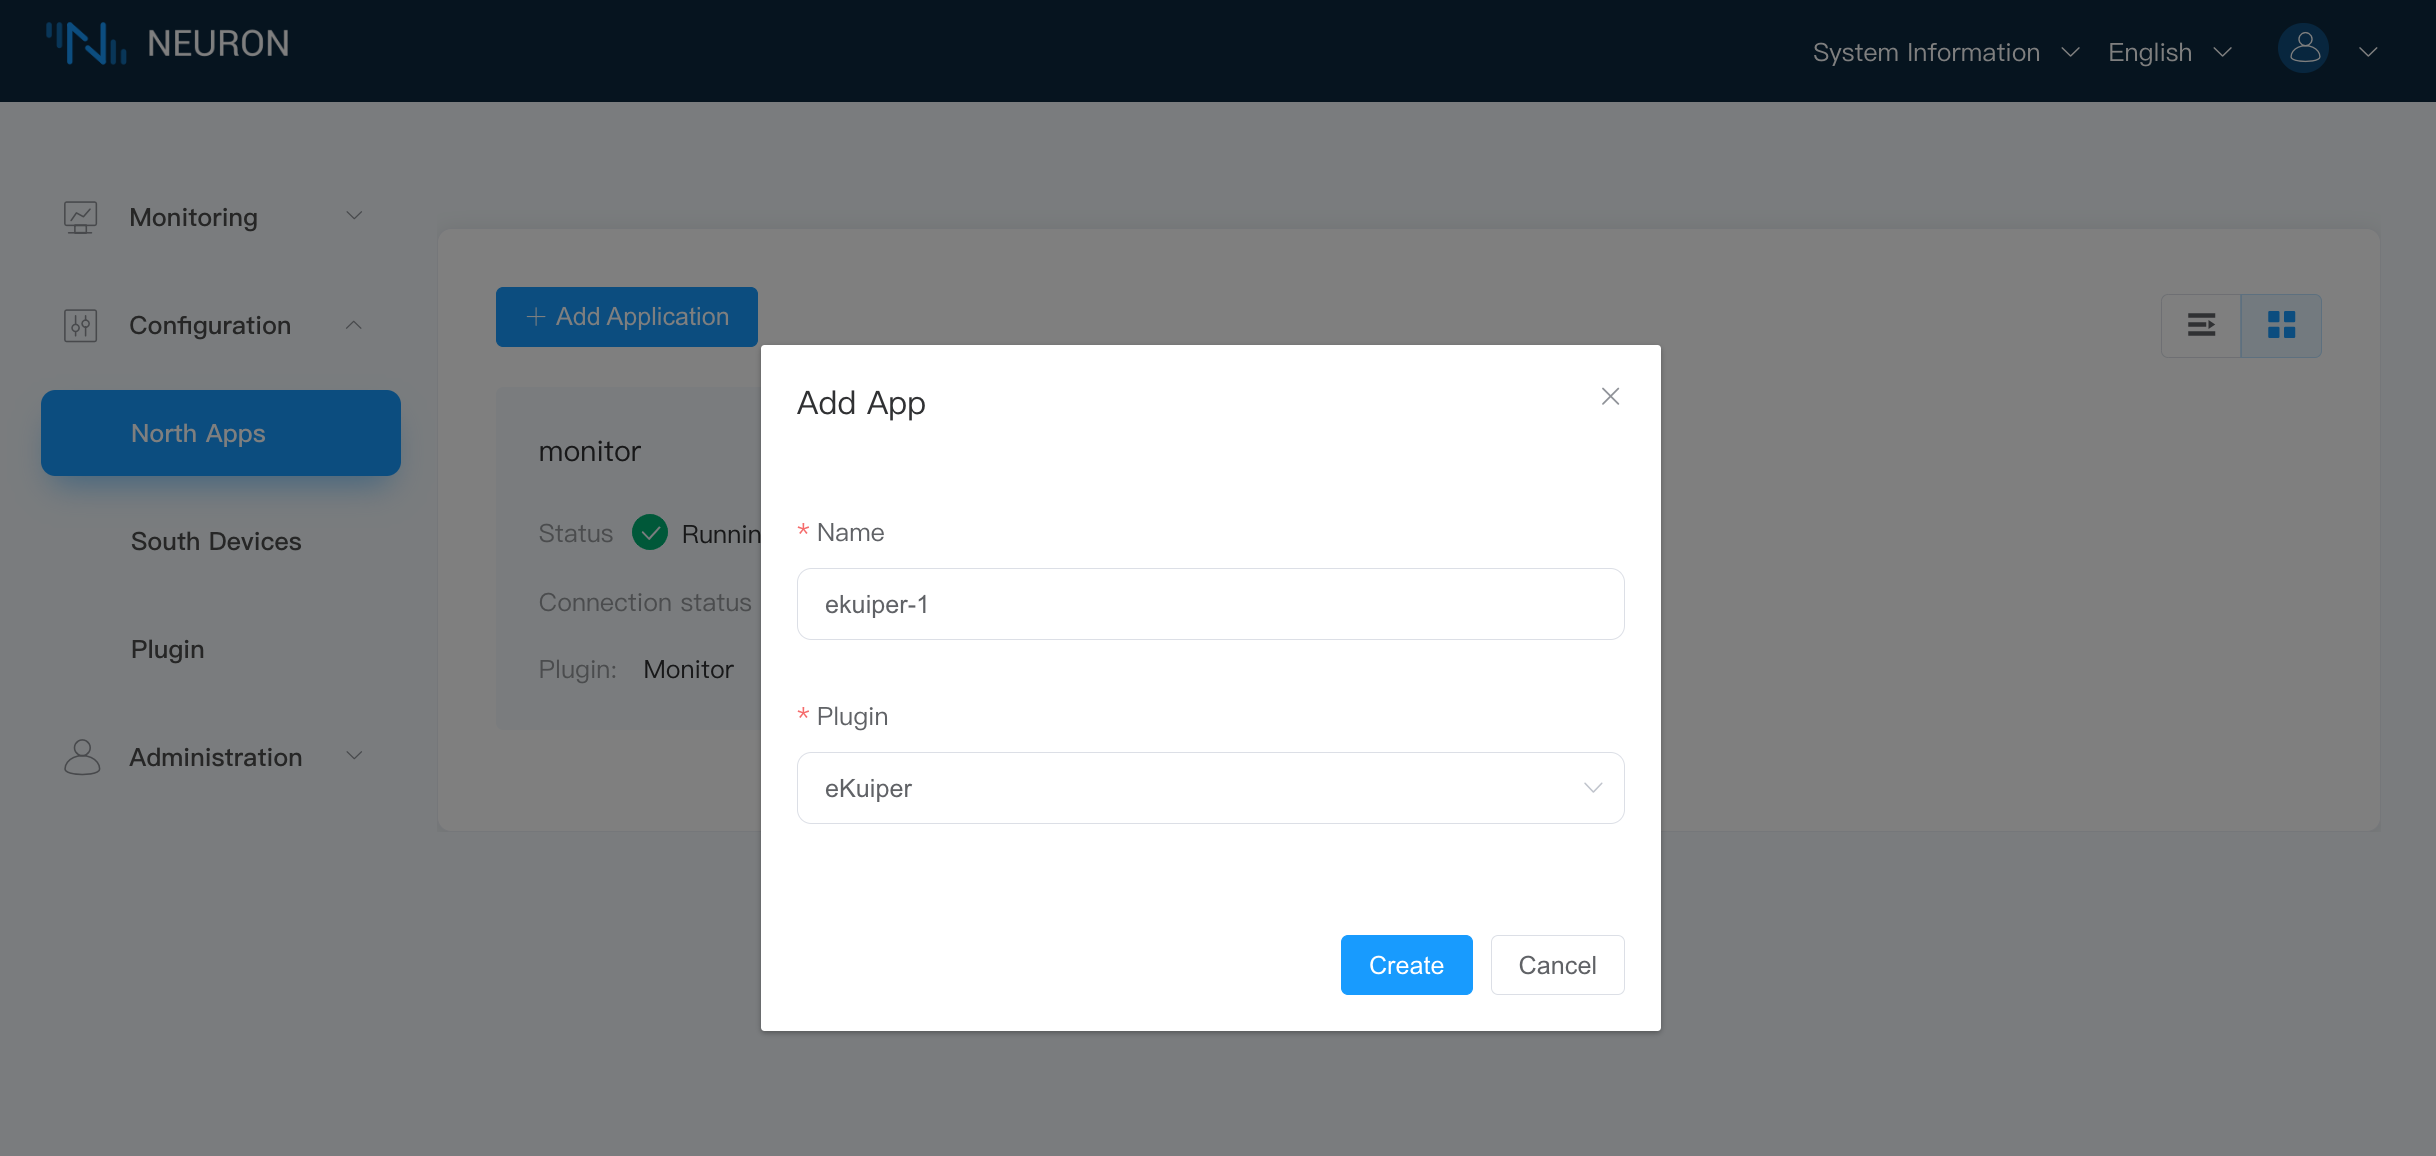
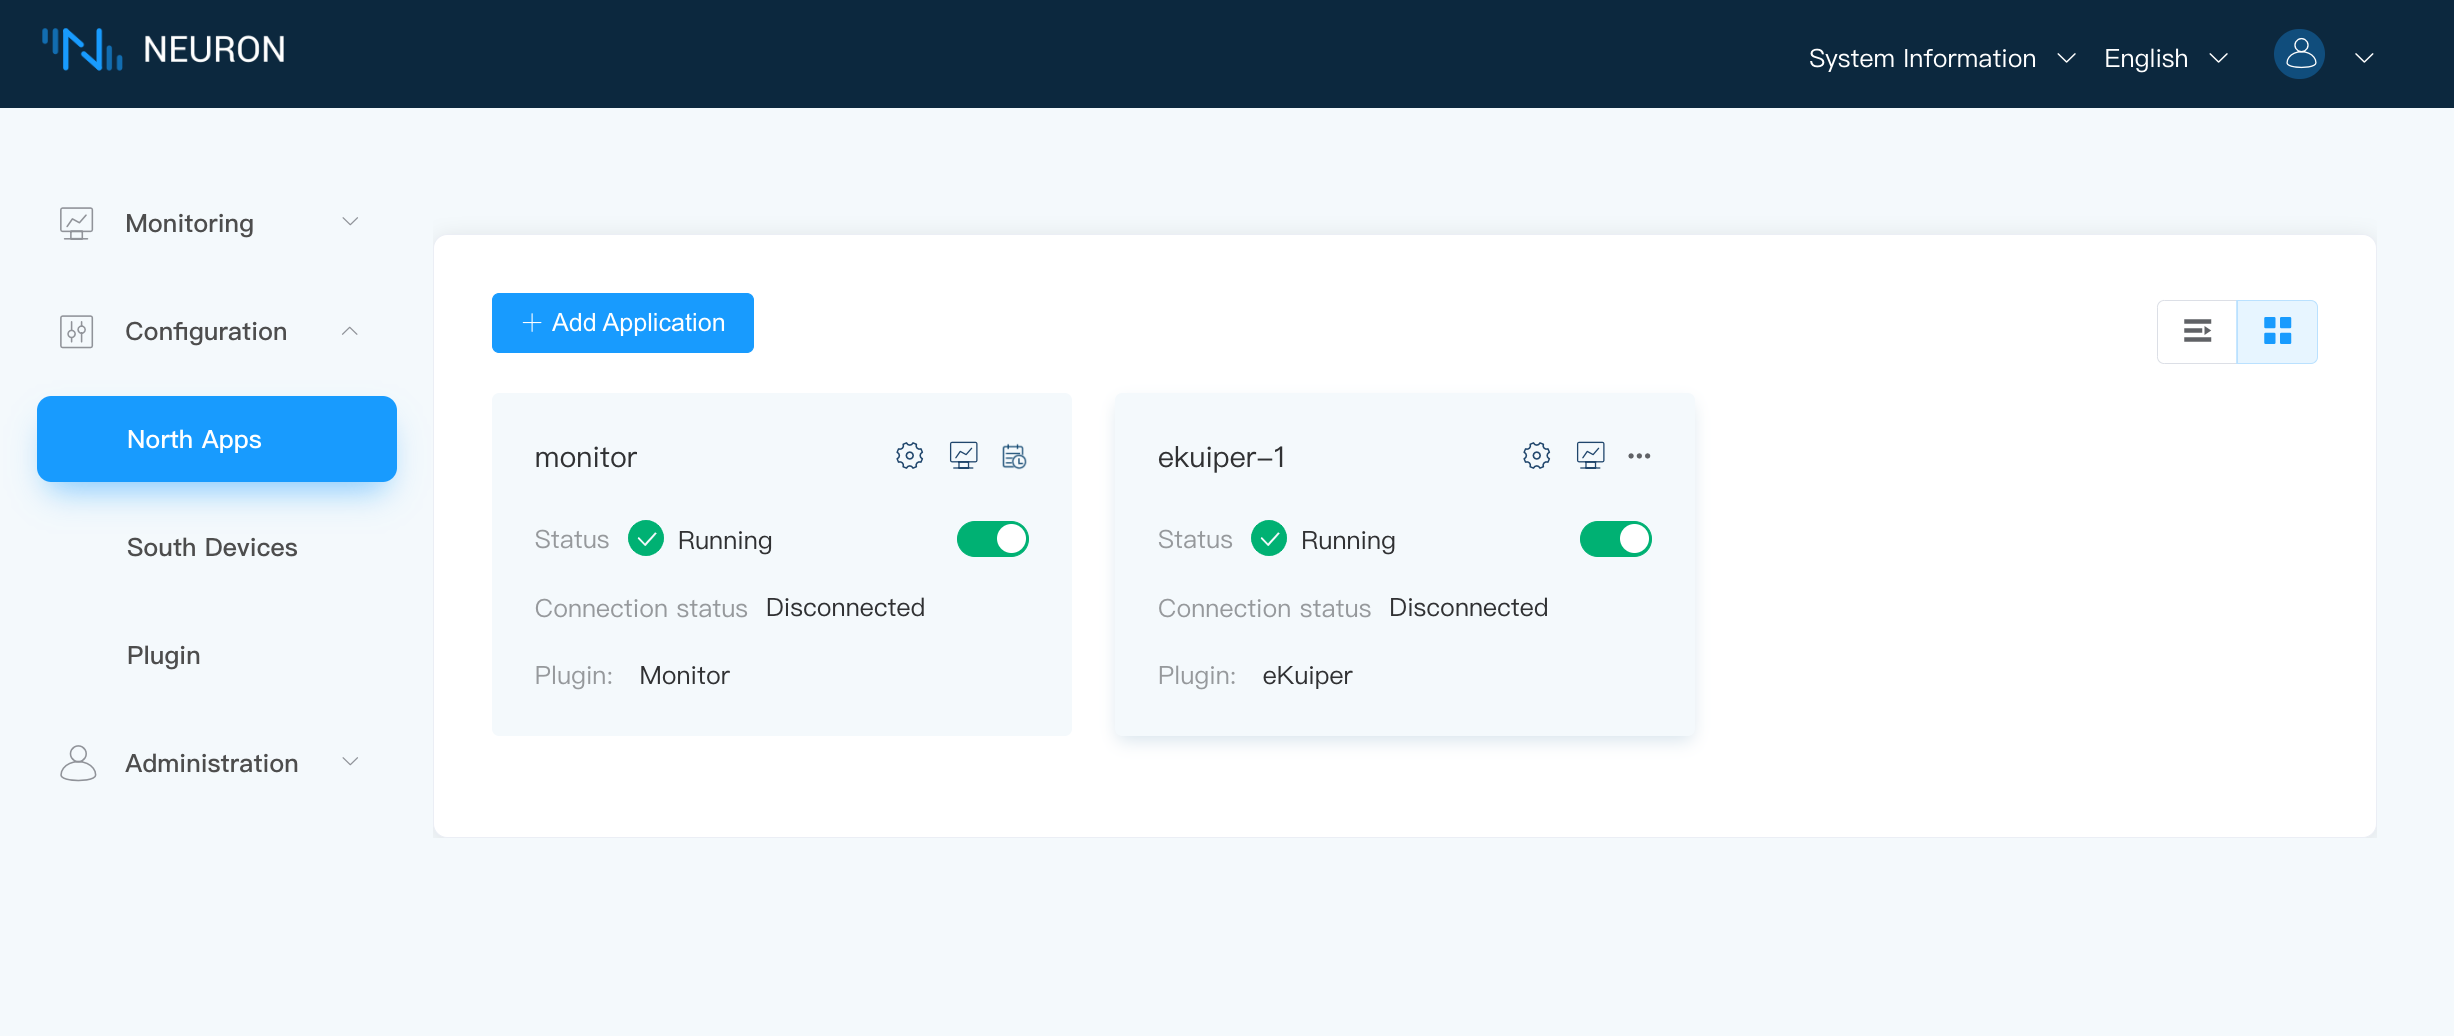
- After successfully creating the application, a card for the newly created application will appear in the Northbound Application Management interface. The application's working state will be in the "Initializing" state, and the connection status will be in the "Disconnected" state.
Step 2: Configure the eKuiper Application:
Click on the application card "ekuiper-1" created in Step 1 to access the application configuration. Click "Confirm" to use the default configuration.
Step 3: Subscribe to a Group:
Click on any blank area of the application card "ekuiper-1" in Step 1 to enter the subscription group interface.
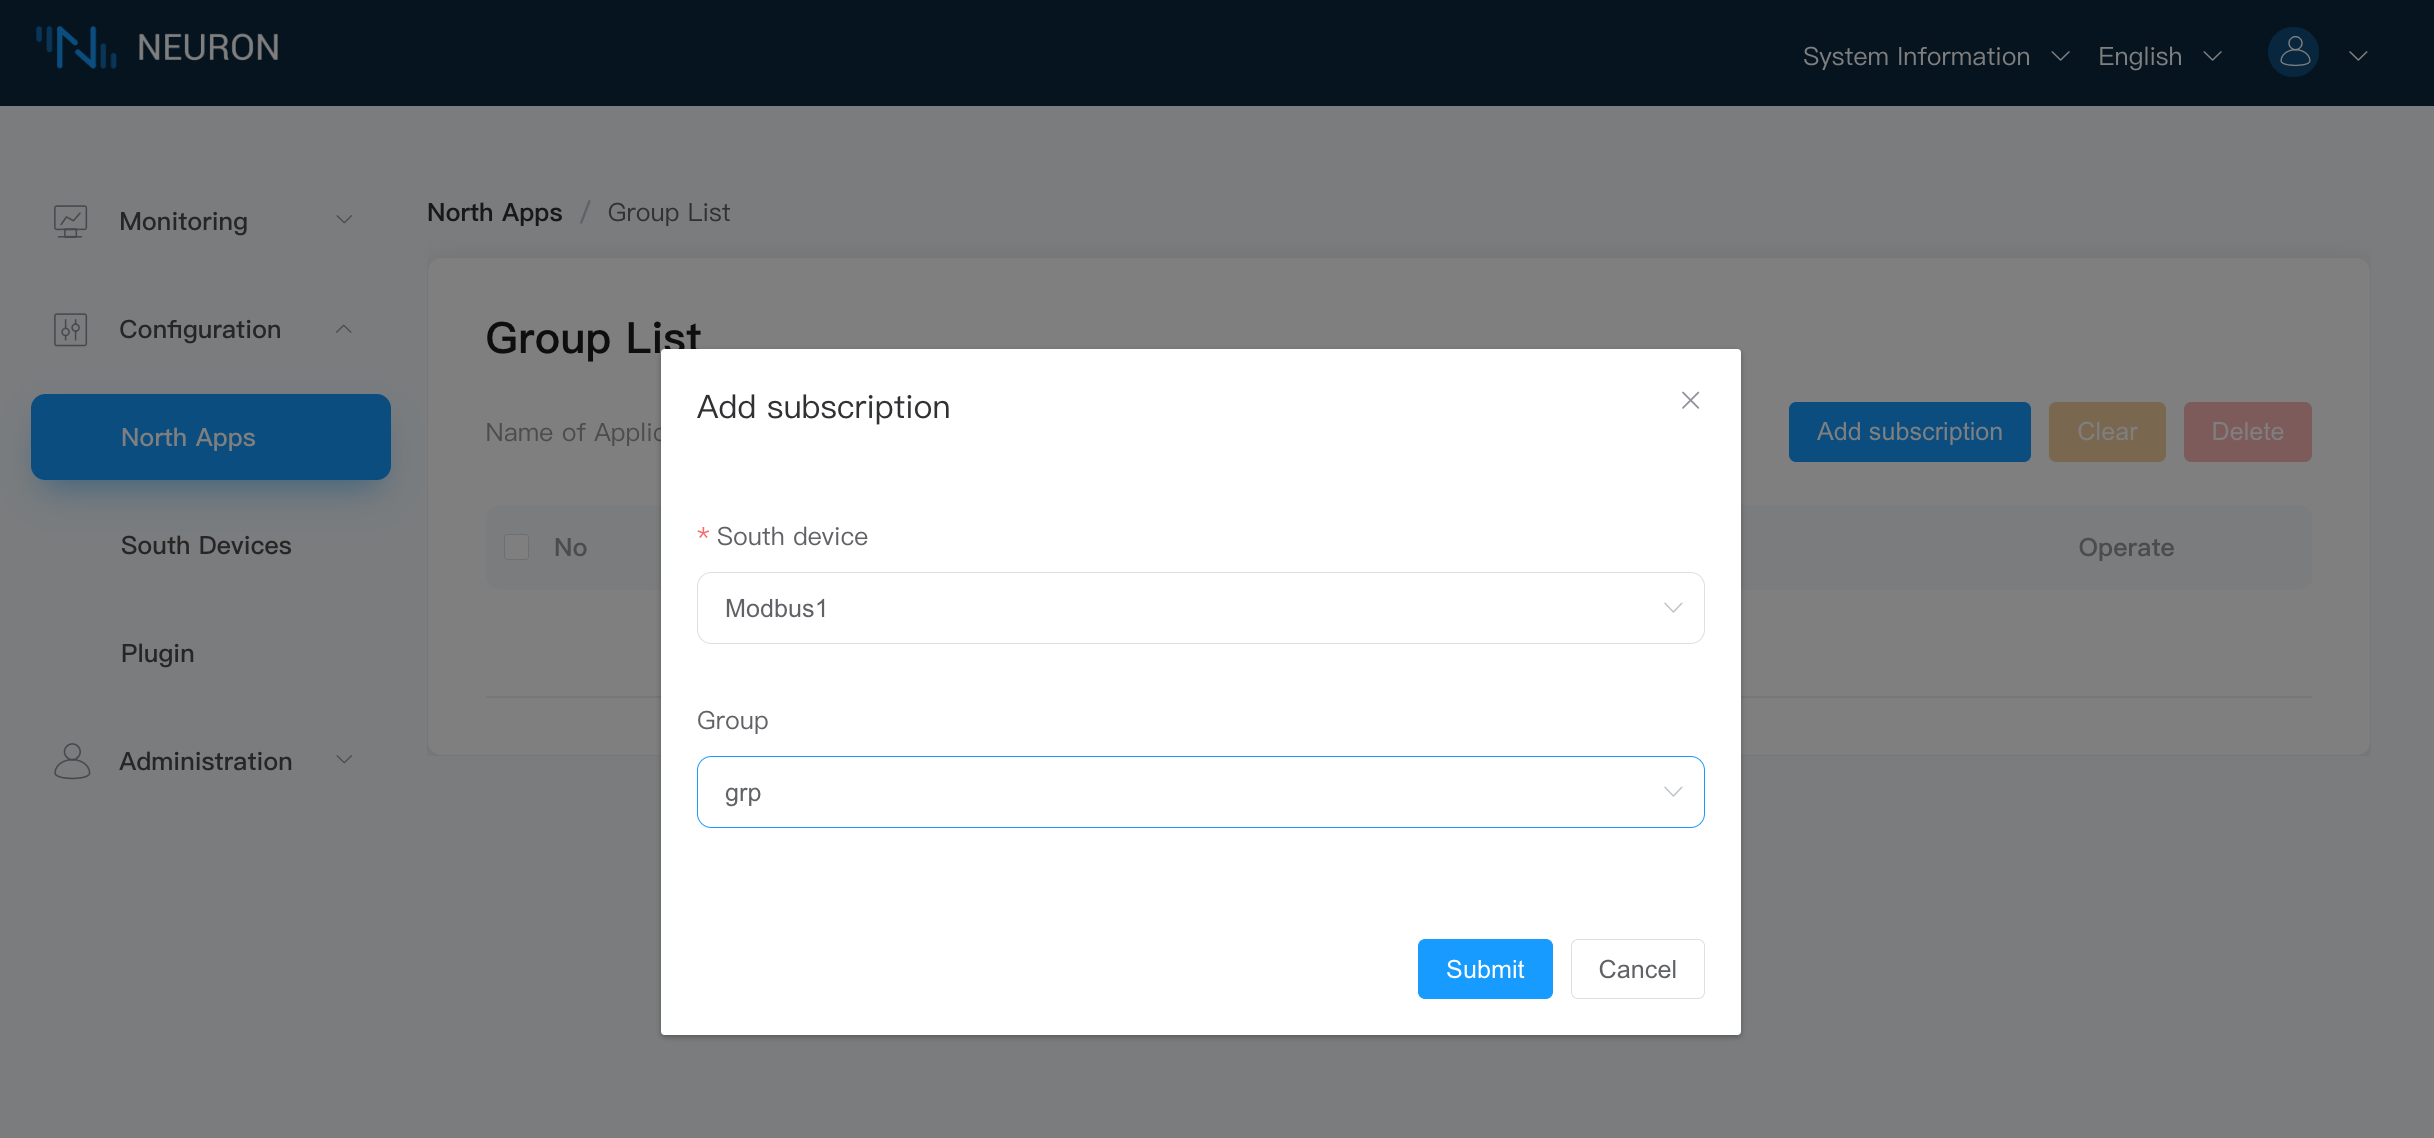
- Click the
Add Subscriptionbutton in the top right corner. - In the dropdown menu, select the southbound device. In this case, we choose the previously created southbound device "Modbus1".
- Select the desired Group to subscribe to from the dropdown menu. In this case, we choose the group of the previously created southbound device "Modbus1".
- Click "Submit" to complete the subscription.
- Click
Northbound Application Managementand toggle the working state switch on the application card to enter the "Running" state.
At this point, Neuron is configured for data collection and sending the collected data to the northbound eKuiper channel.
Note: Since there is currently no eKuiper connected to the current Neuron, the connection status of the Neuron northbound application to the eKuiper node will remain Disconnected.
eKuiper Configuration
eKuiper manager is a web management interface that allows you to manage multiple eKuiper instances. Therefore, we need to configure the eKuiper instances managed by the manager. For detailed instructions, please refer to the documentation on how to use the eKuiper management console.
In the following tutorial, we will use eKuiper manager to configure and manage eKuiper, including the creation of flows and rules.
Add eKuiper Node in eKuiper Manager
To log in to eKuiper Manager, access http://[yourhost]:9082 using your web browser. The default username and password are: admin/public.
To add an eKuiper service:
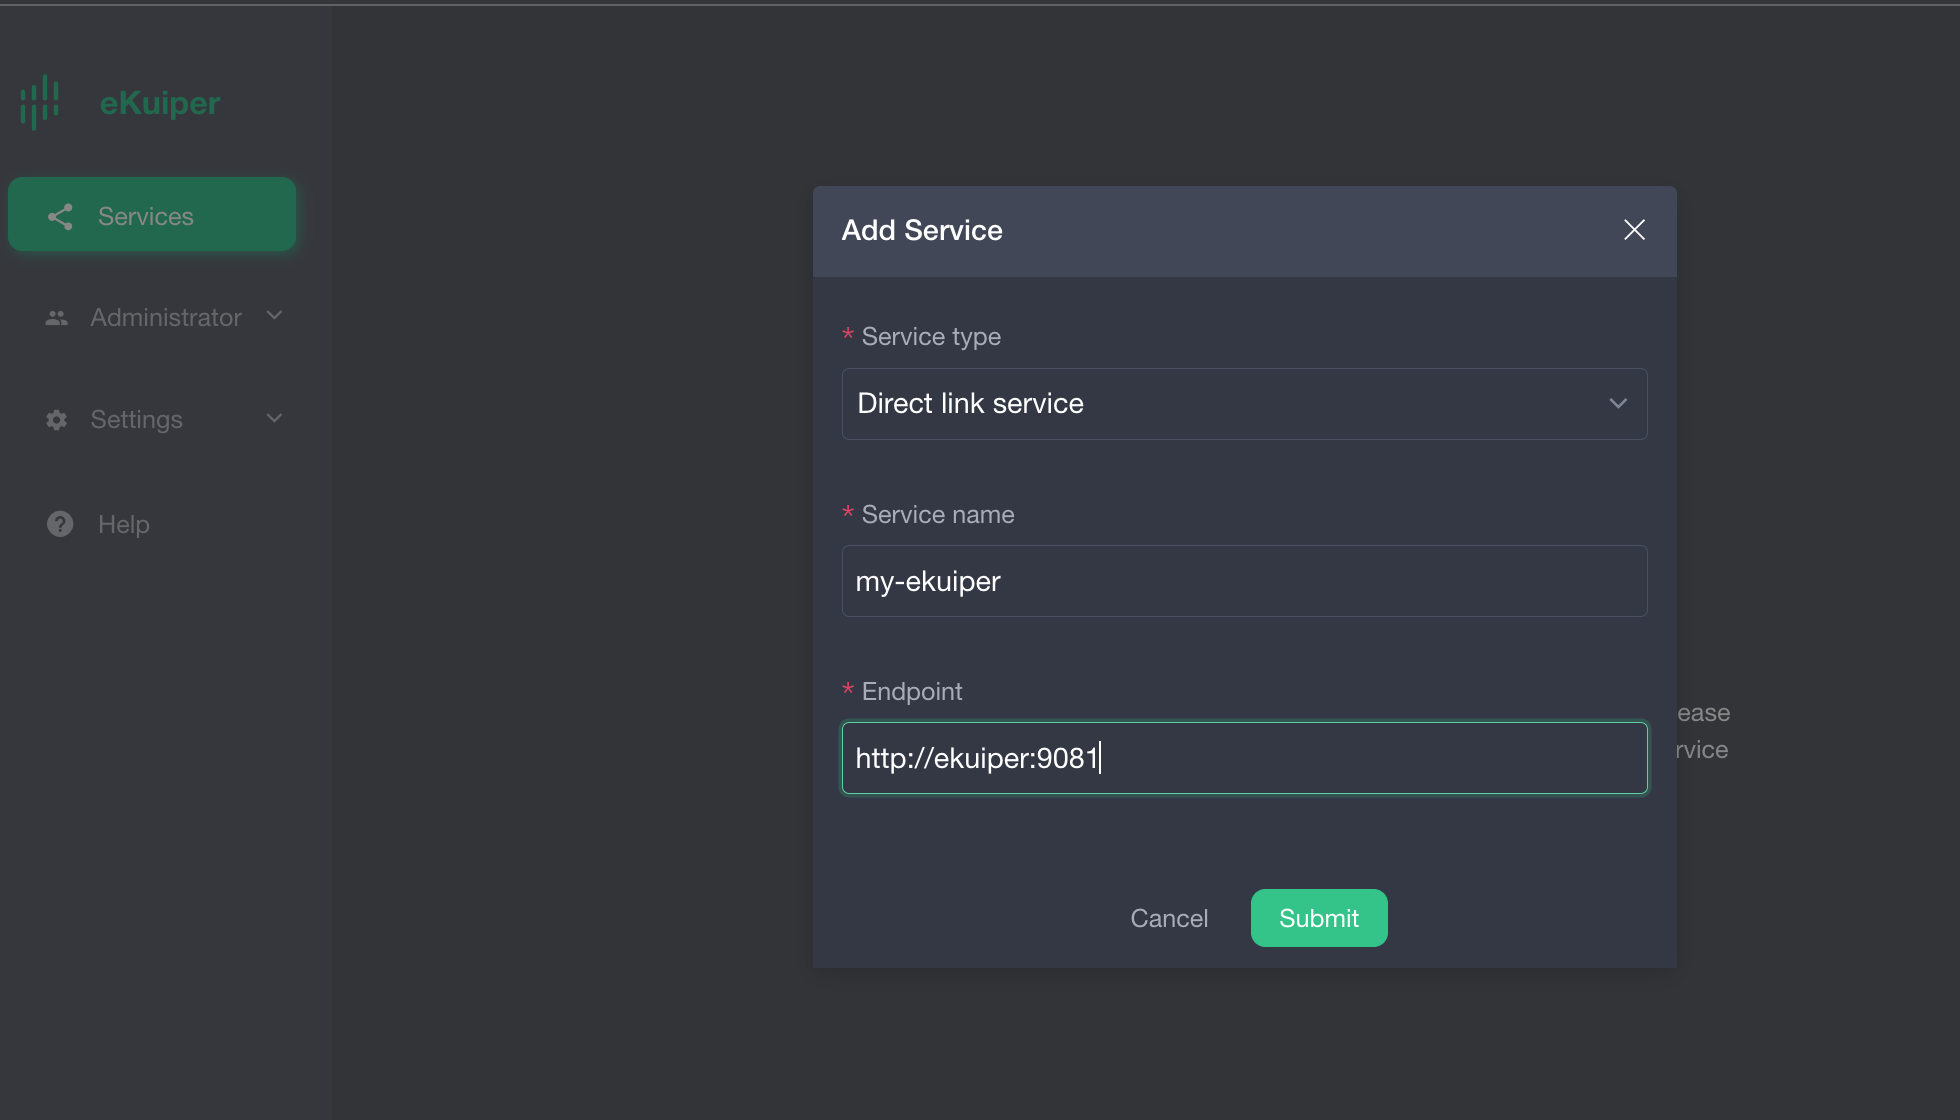
Select the service type as "Direct Connection Service".
Choose a custom service name.
In the Endpoint URL field, enter the hostname of the eKuiper container followed by the port number 9081.
Create Neuron data stream
Log in to your eKuiper node and navigate to the "Stream Management" page to create a new stream. Here are the specific configurations:
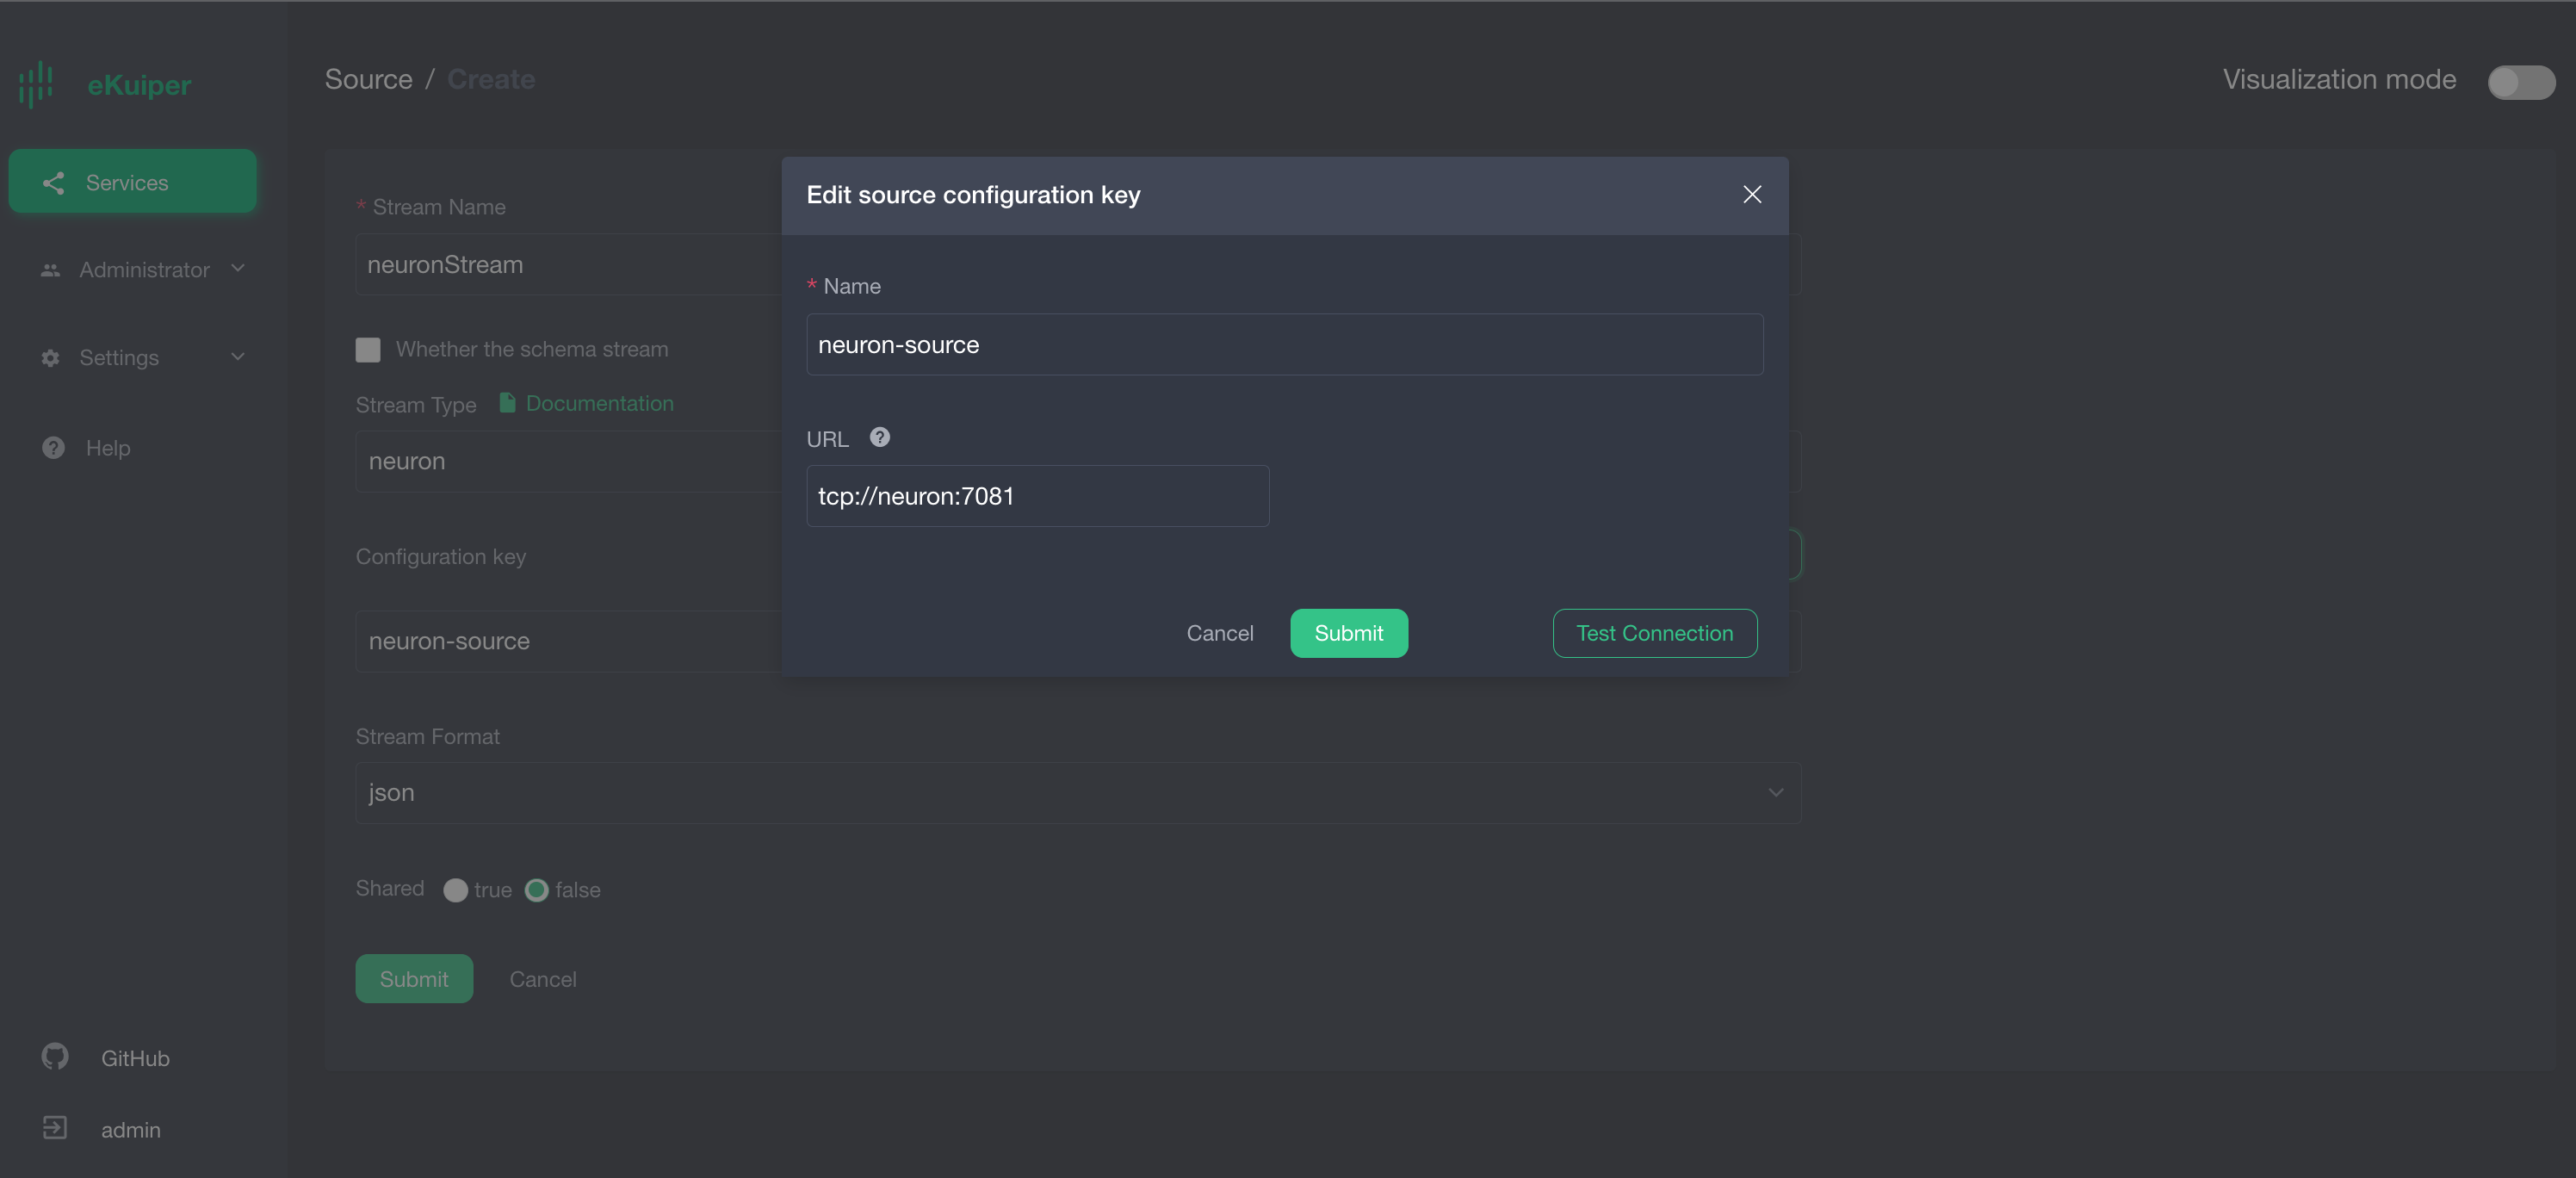
You can customize any stream name. In the example, let's name it
neuronStream.Set the stream type as
neuron, indicating that this stream will connect to Neuron.Configure the group by selecting "Add Configuration Group." Name it
neuron-sourceand set the path astcp://neuron:7081, whereneuronmatches the hostname of the Neuron container.Click on "Submit" to save the configuration.
Create eKuiper Rules
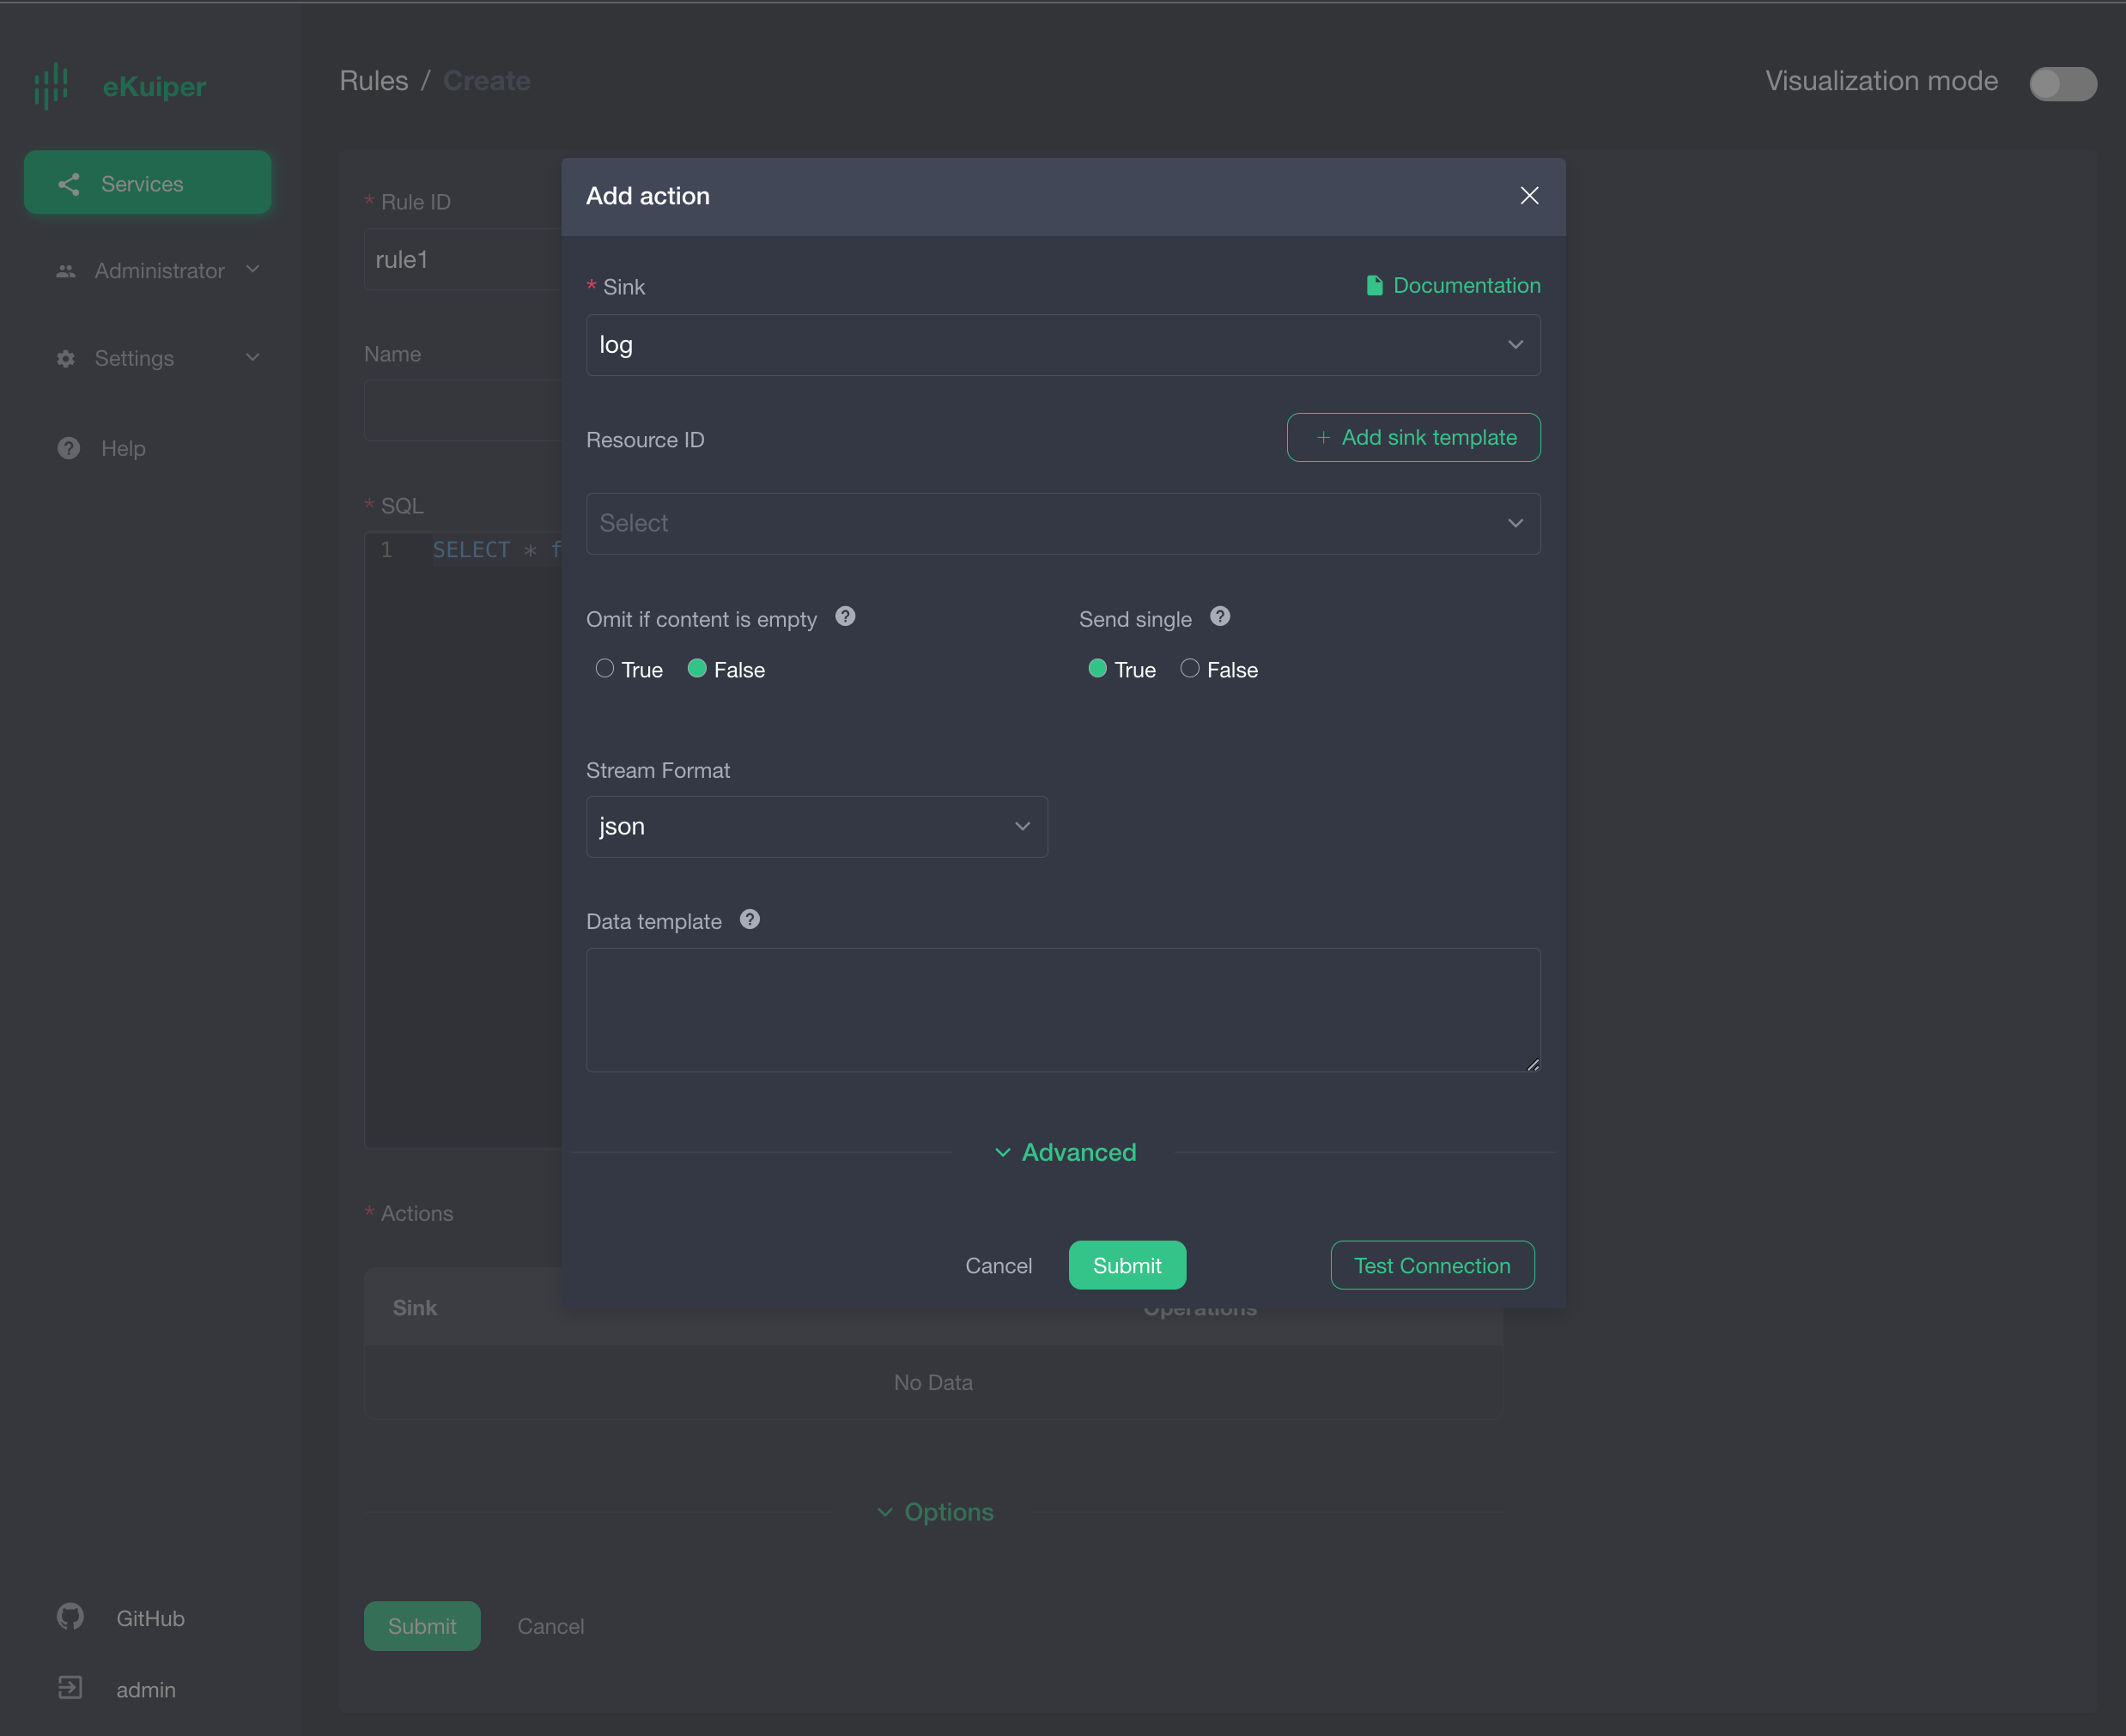
After establishing the Neuron flow, we can create multiple rules in eKuiper to perform various calculations and processing on the collected data. This article only show a simple rule that print Neuron data to eKuiper's log. For more advanced data processing capabilities of eKuiper, please refer to the additional resources section.
Here is an example of creating a new eKuiper rule:
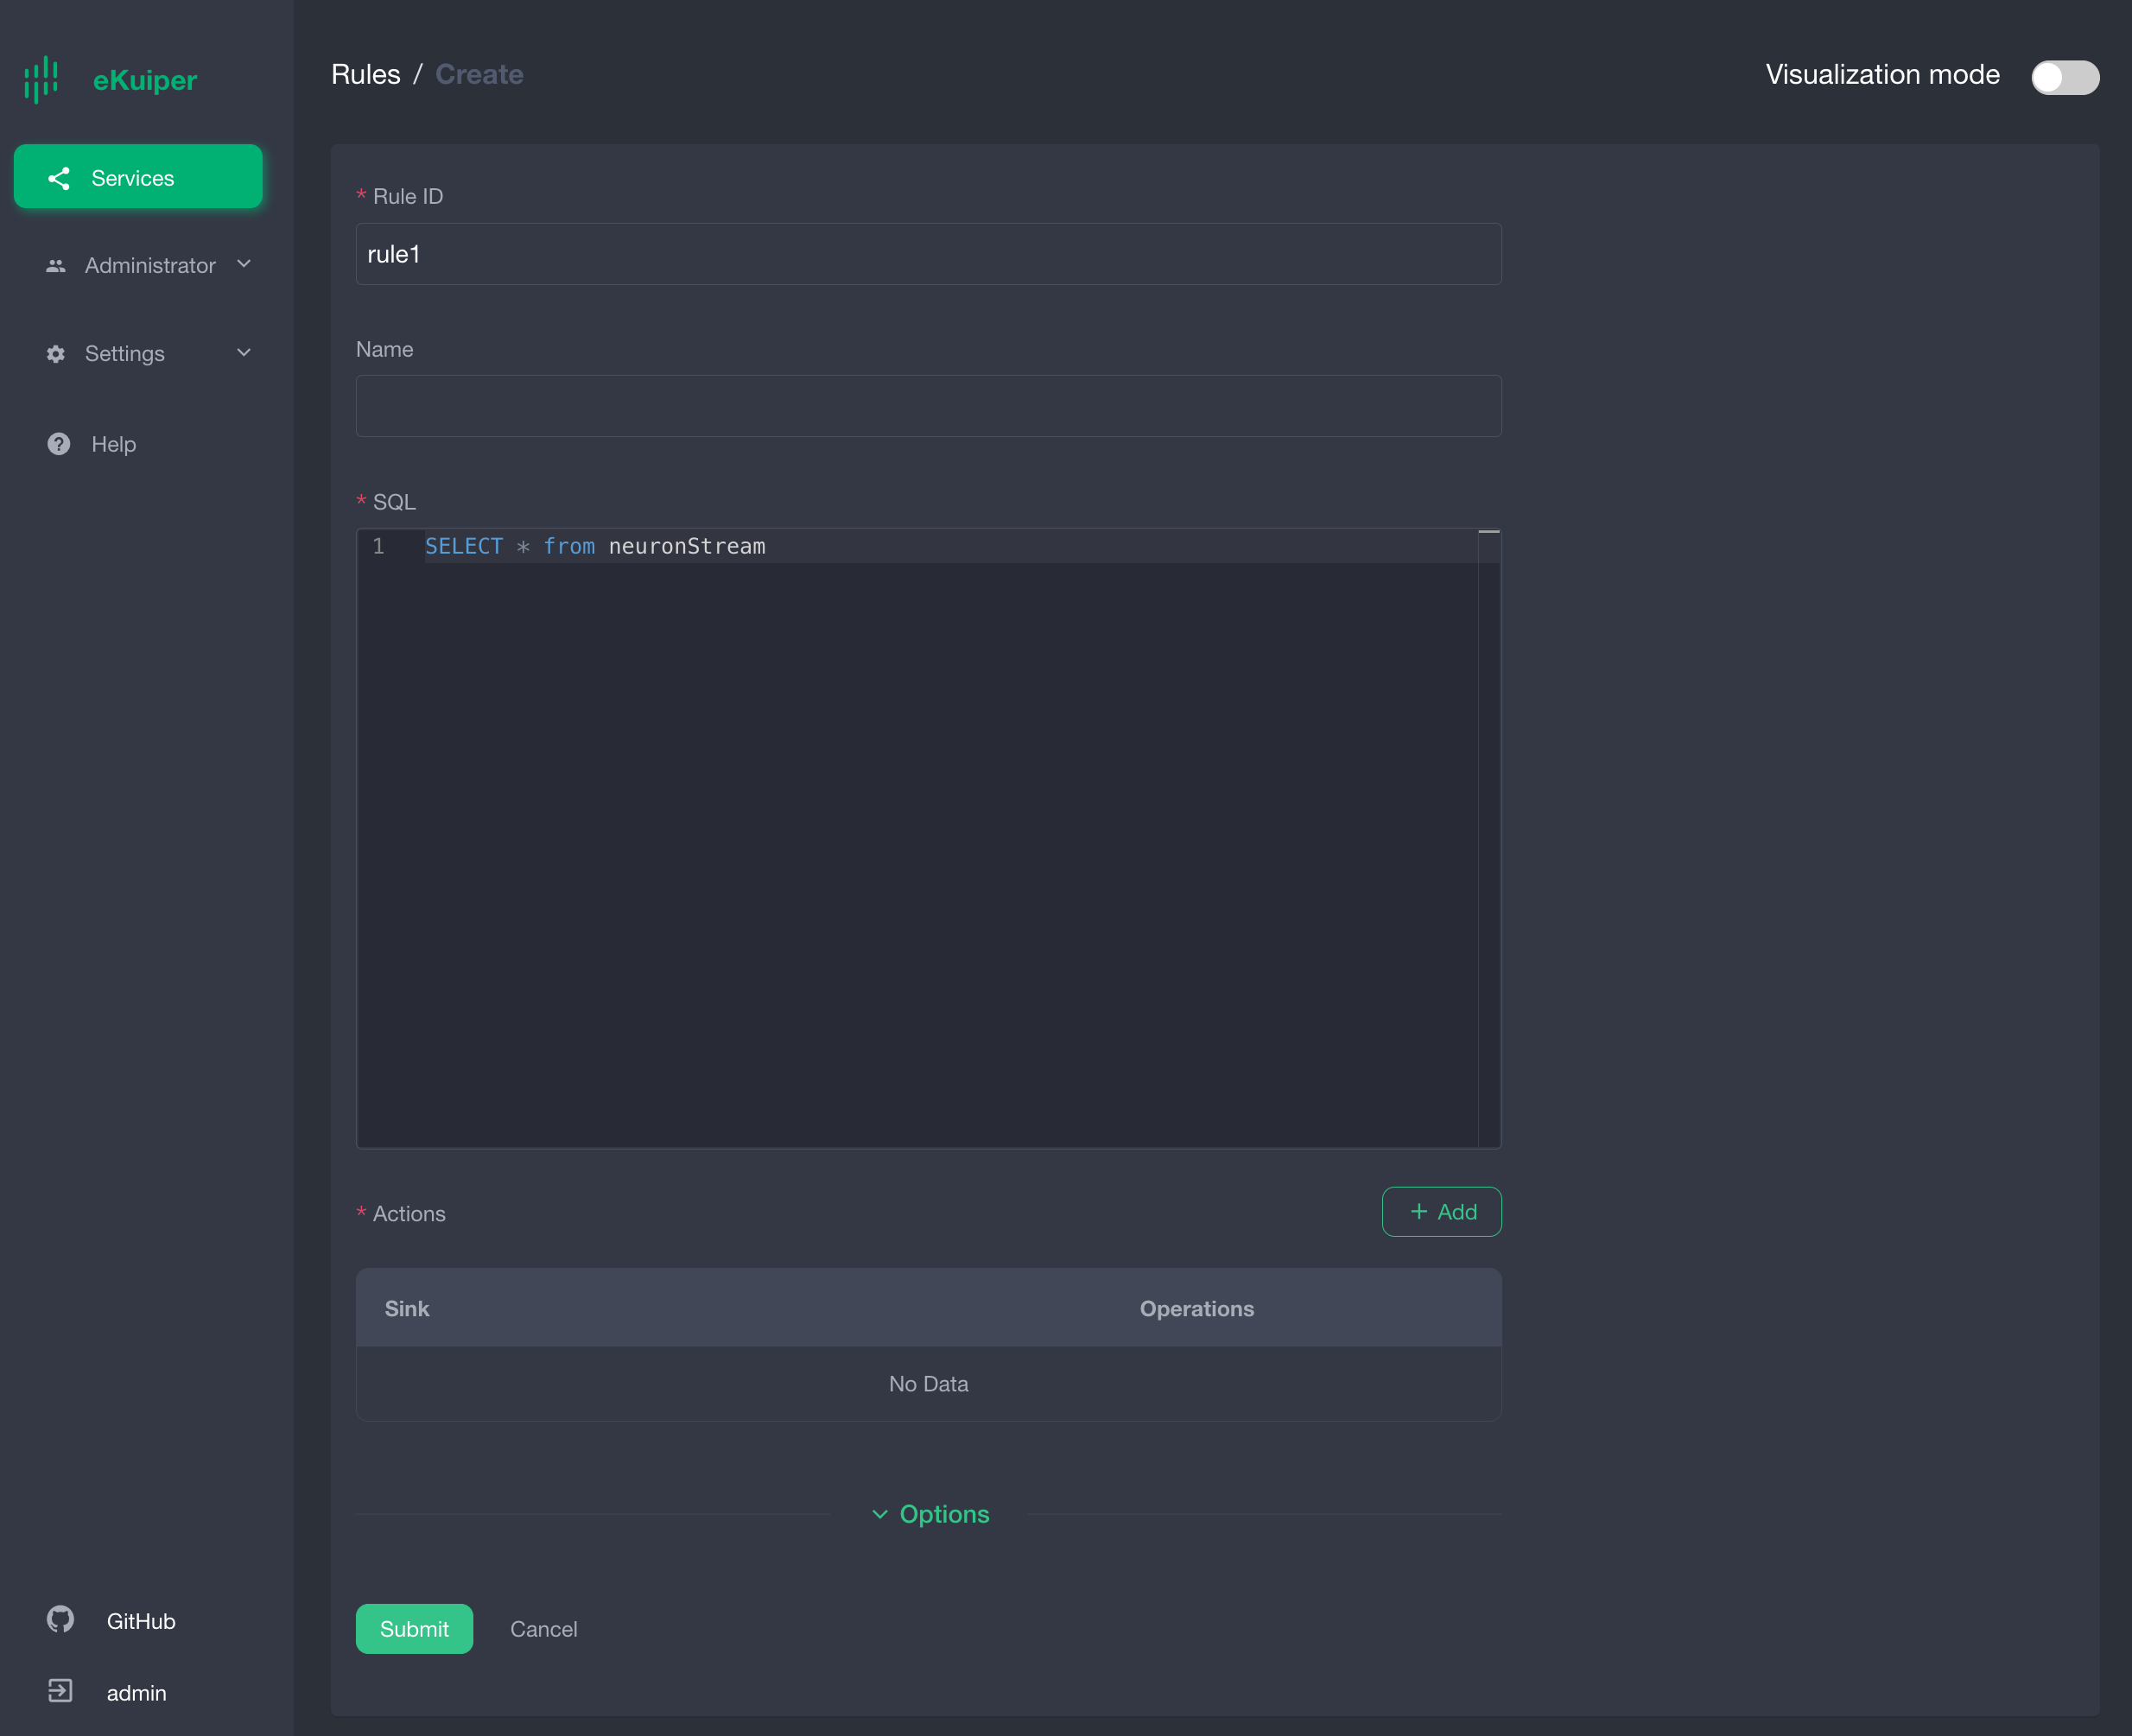
Add a rule action and submit the rule.
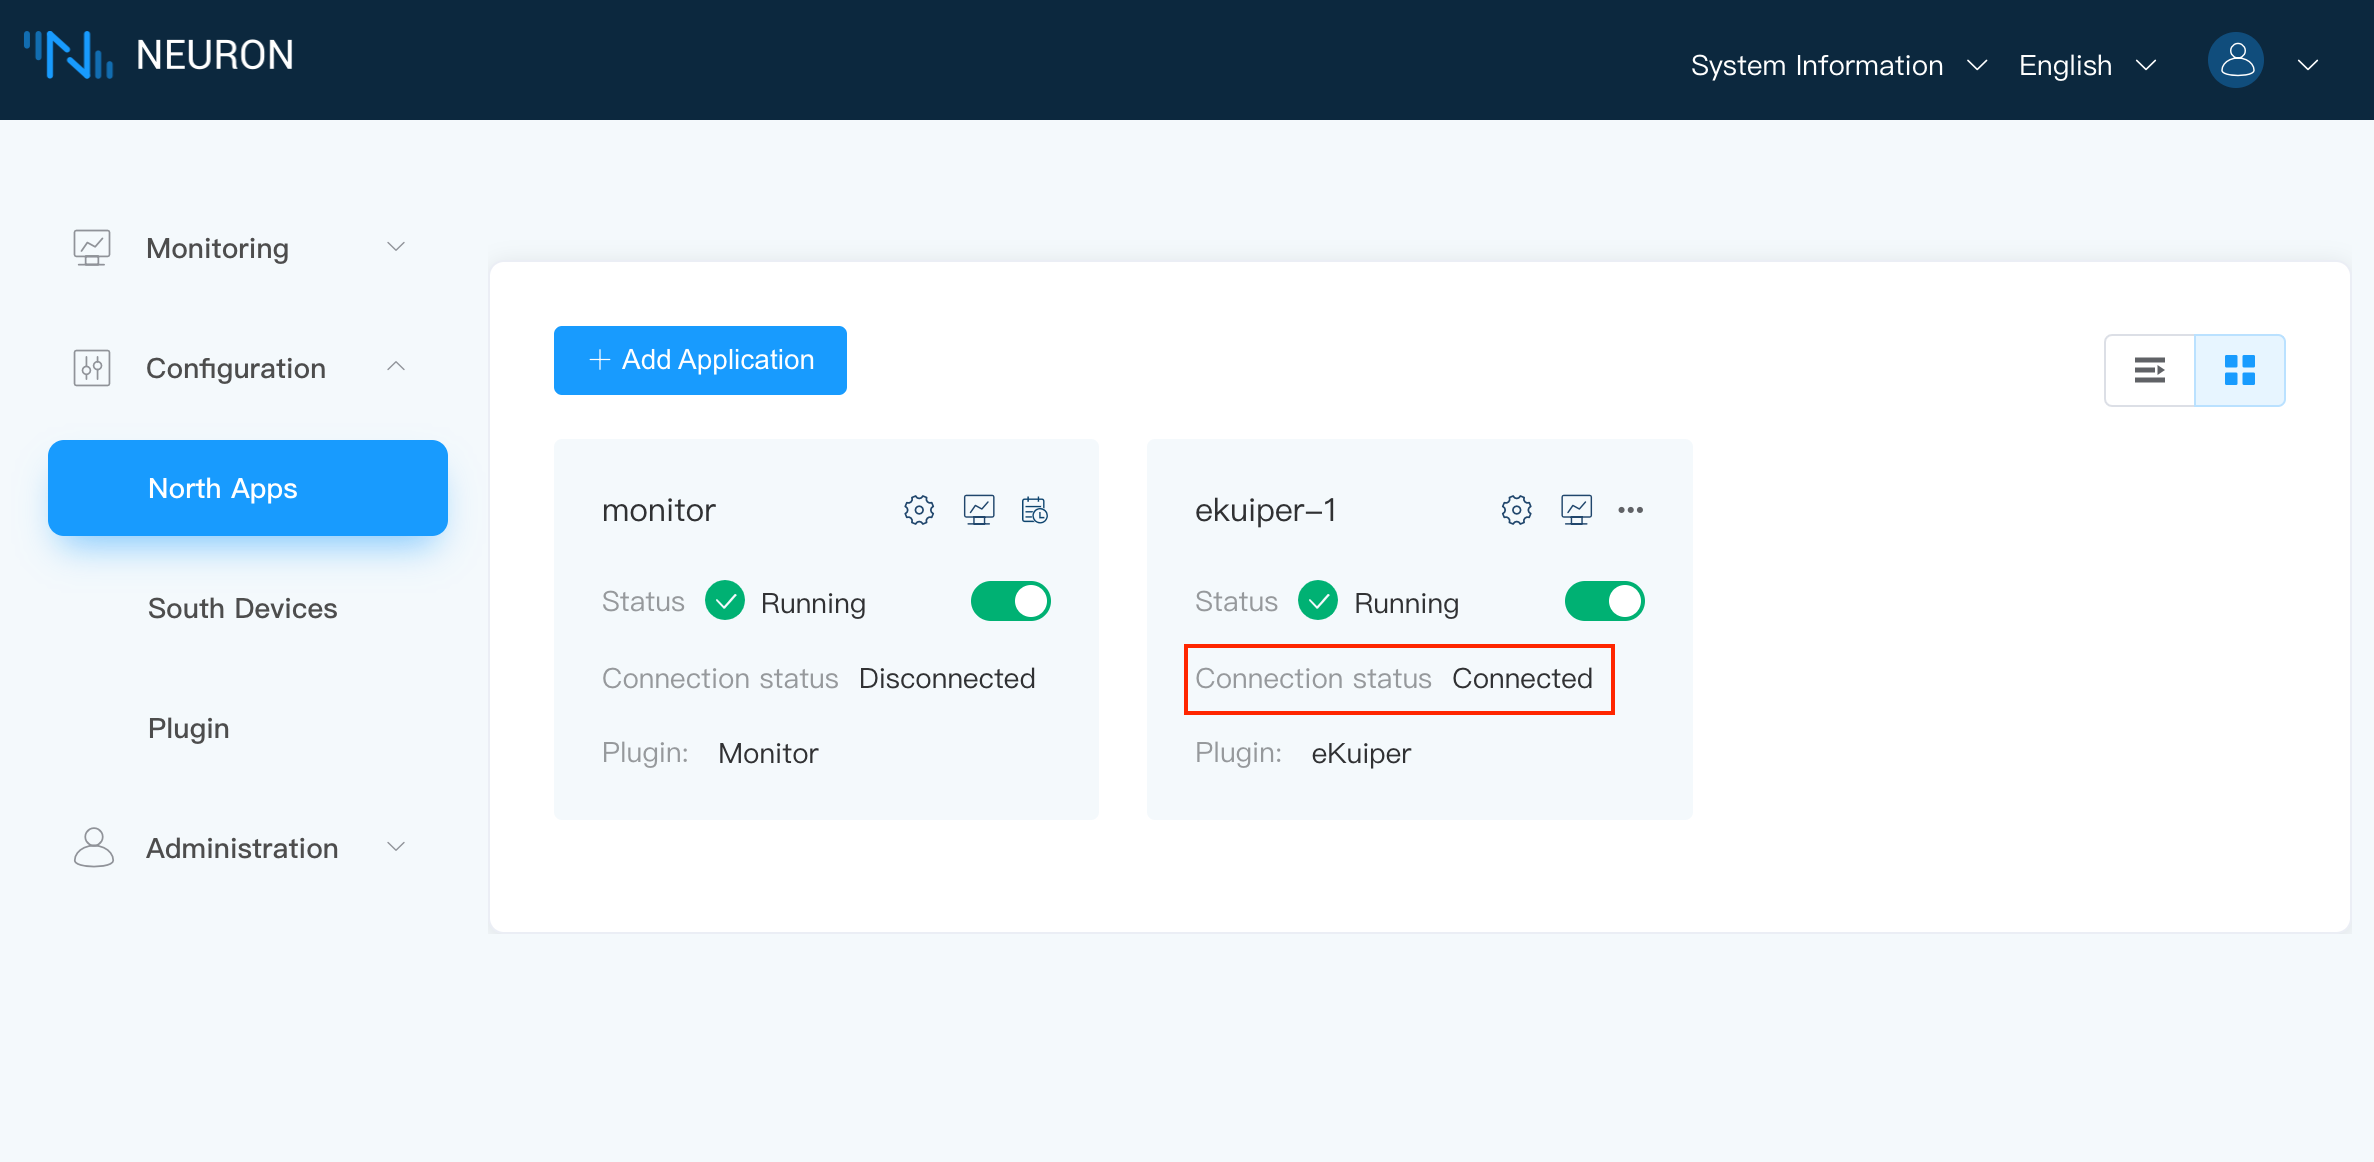
Verify Neuron and eKuiper Communication Status
Neuron connection is normal
eKuiper Rule running status is normal
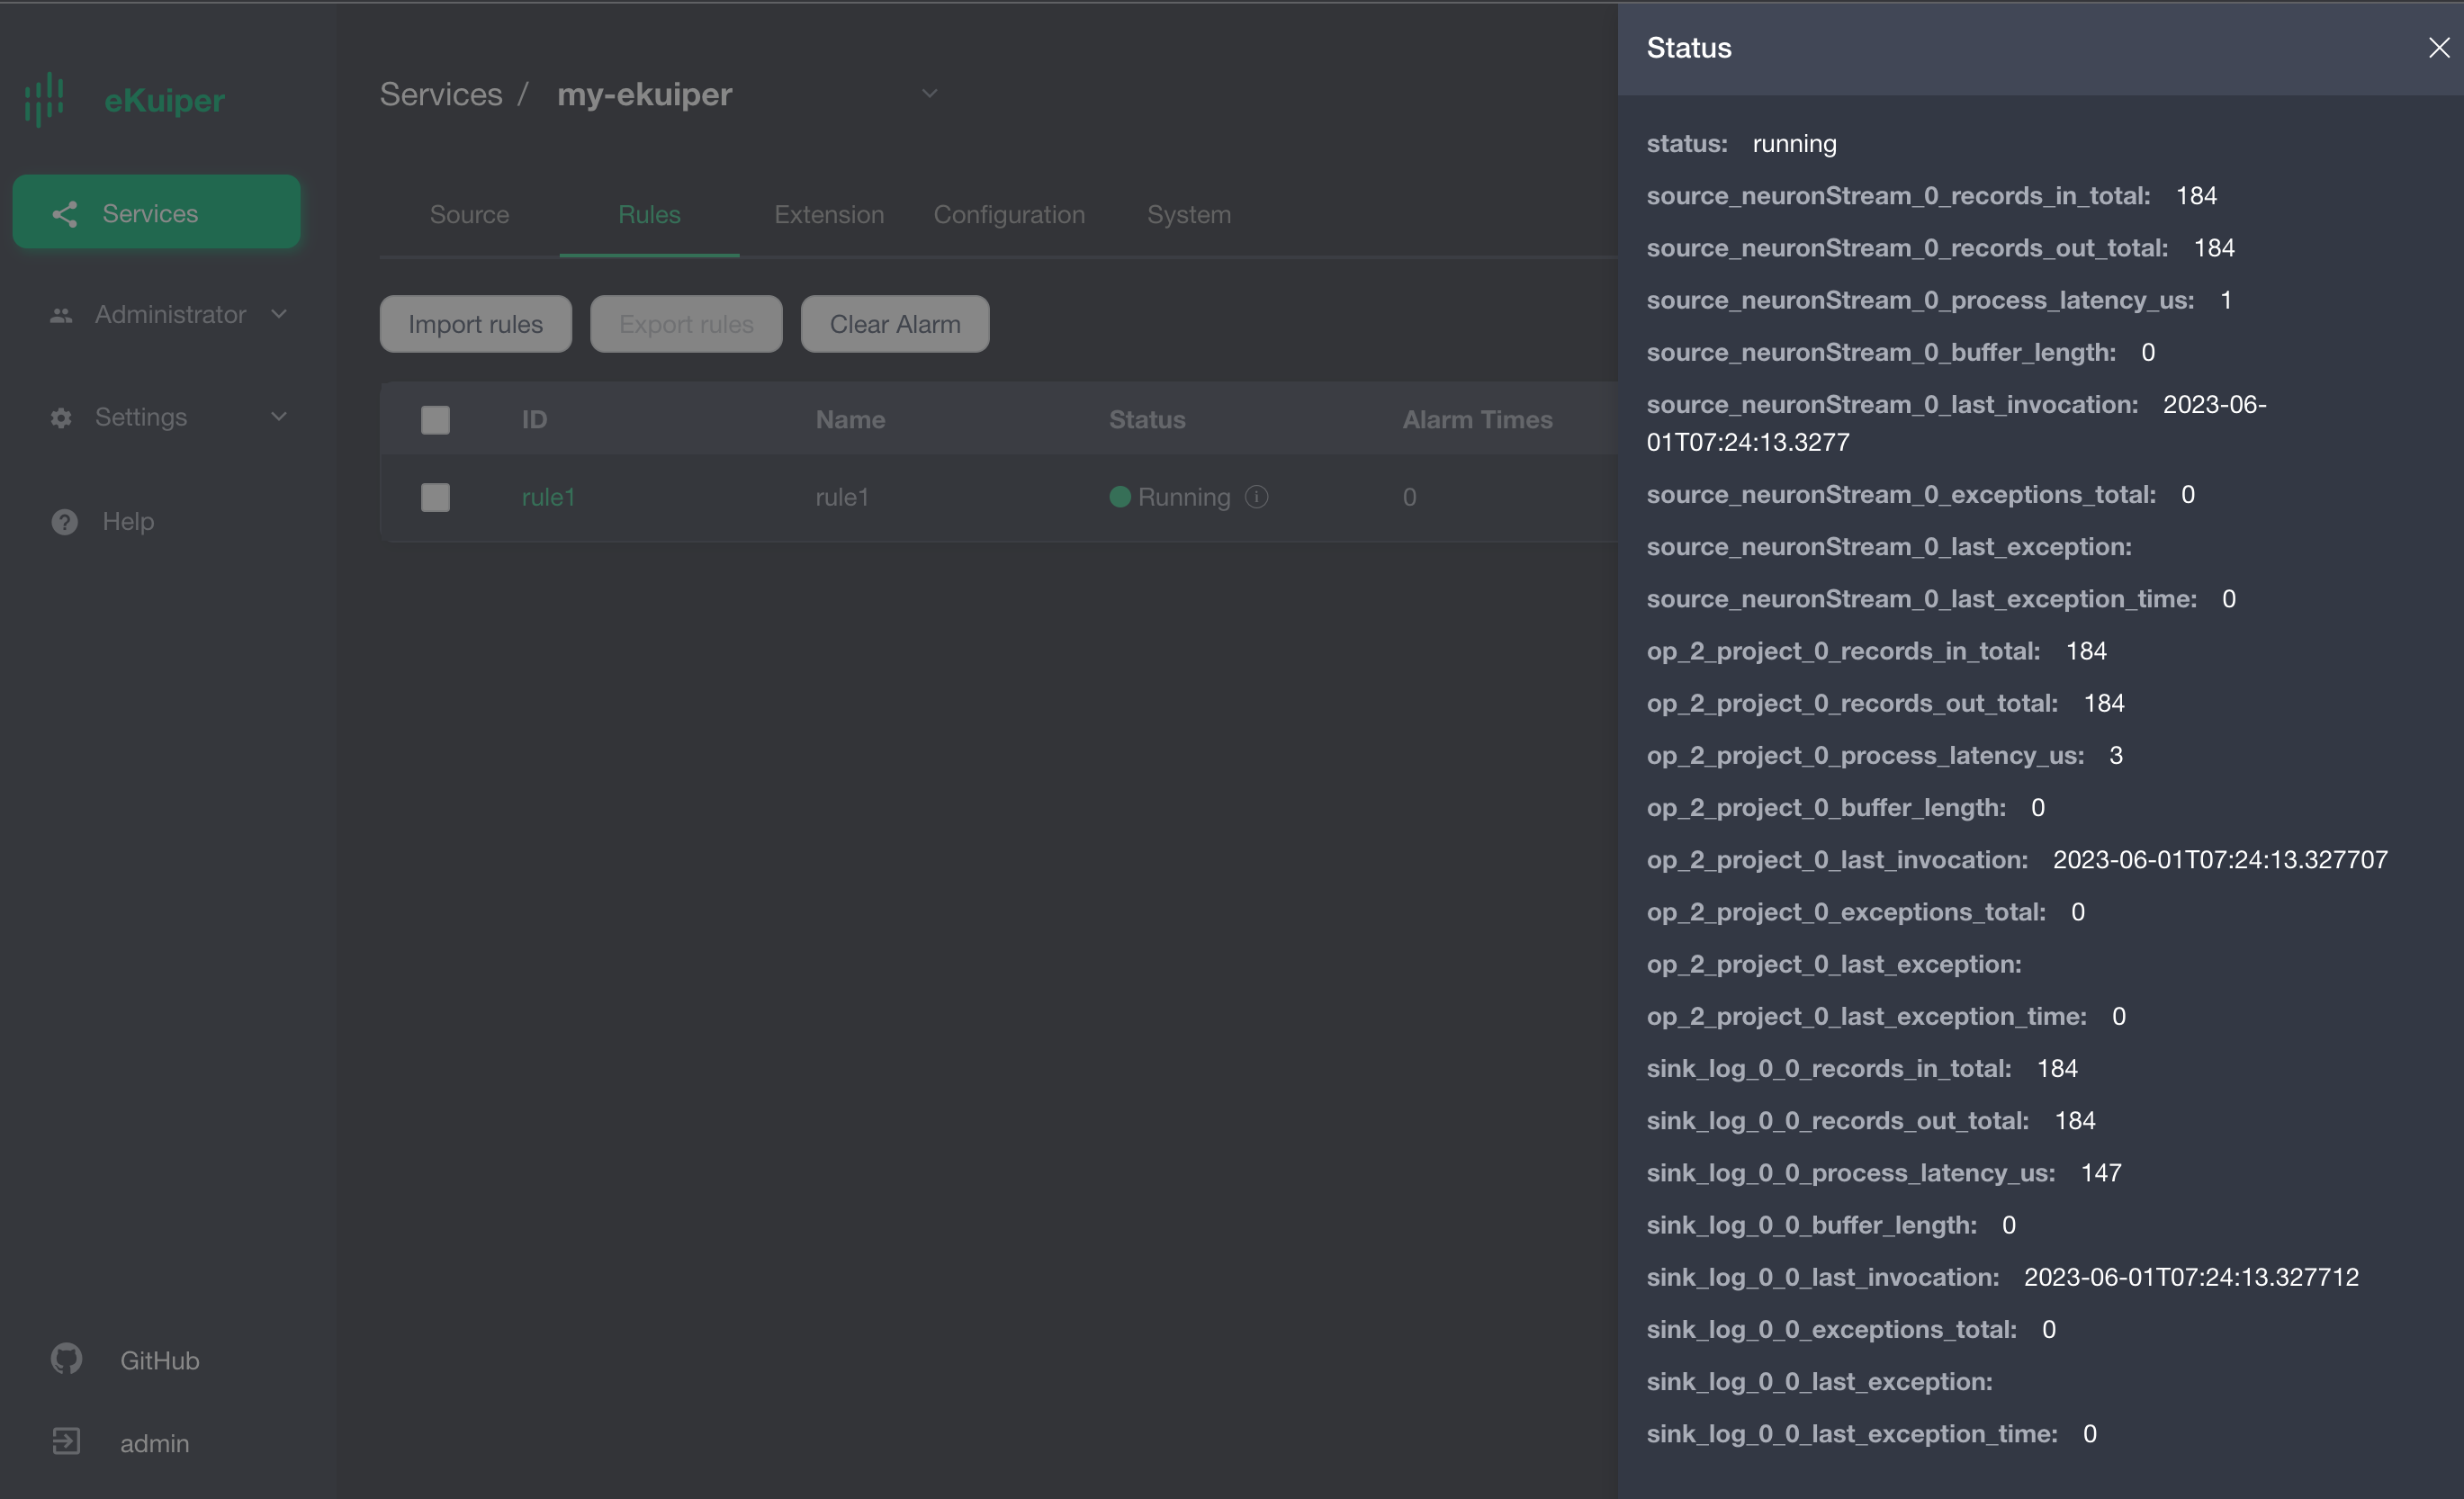
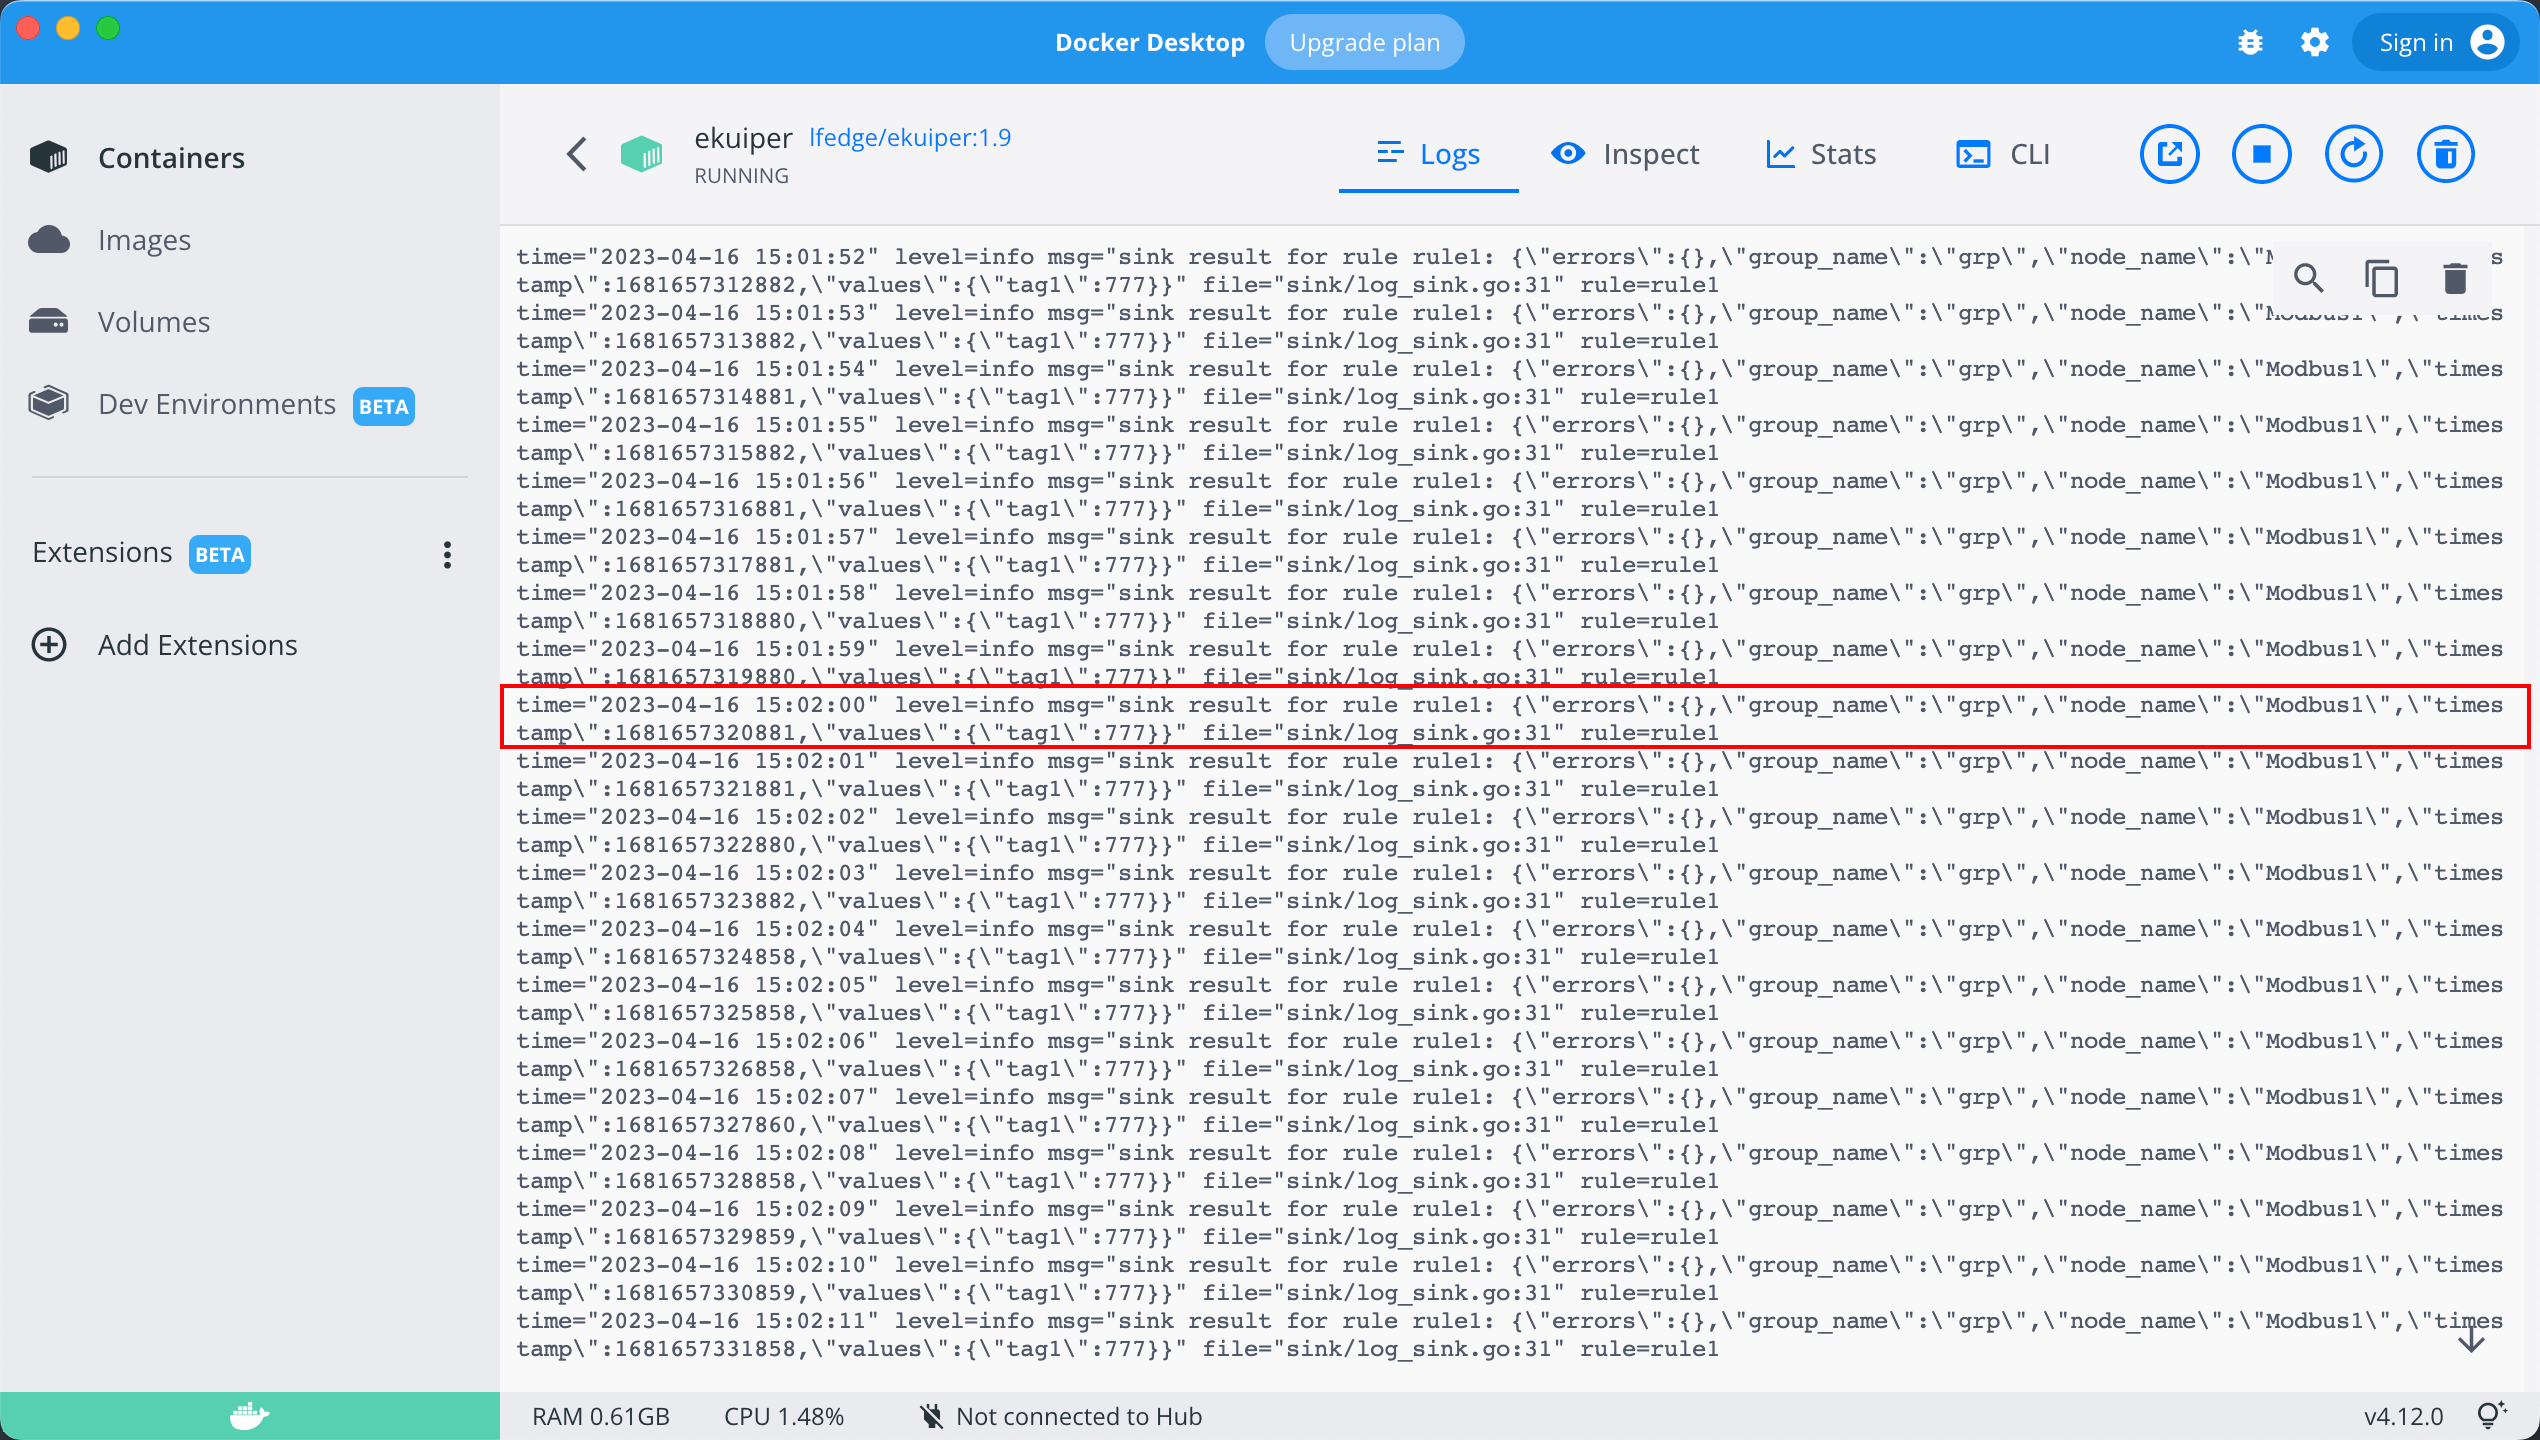
eKuiper LOG message is normal
