MQTT Stream Quick Start
This quick start walks through a typical vehicle-edge deployment to demonstrate how to enable MQTT Stream in EMQX Edge, persist MQTT data locally, and verify historical queries.
After completing this guide, you will be able to confirm that:
- MQTT Stream is correctly enabled.
- MQTT messages for a specific topic are successfully persisted to disk.
- Historical data can be queried by time range.
Scenario: Vehicle Edge Data Persistence and Replay
A vehicle-side edge deployment is a representative use case for MQTT Stream.
In a typical in-vehicle setup, an onboard gateway connects to multiple CAN / CAN-FD buses and continuously collects high-frequency sensor and diagnostic data from subsystems such as the battery, powertrain, and vehicle control units. This data is published as MQTT messages to a local EMQX Edge instance.
In this scenario, MQTT Stream is used to build a reliable local data pipeline on the vehicle:
- Side-capture MQTT messages for specific topics (for example,
canudp) - Buffer high-frequency data locally in batches
- Persist data to local disk in batch form
- Replay historical data by time window for troubleshooting and analysis
This quick start uses a minimal configuration to validate the complete workflow end to end.
Prerequisites
Before you begin, make sure that:
- EMQX Edge 1.5.0 or later is installed and running. This guide uses Docker for the examples, but any supported installation method works.
- MQTTX CLI is installed. See MQTTX CLI for installation instructions.
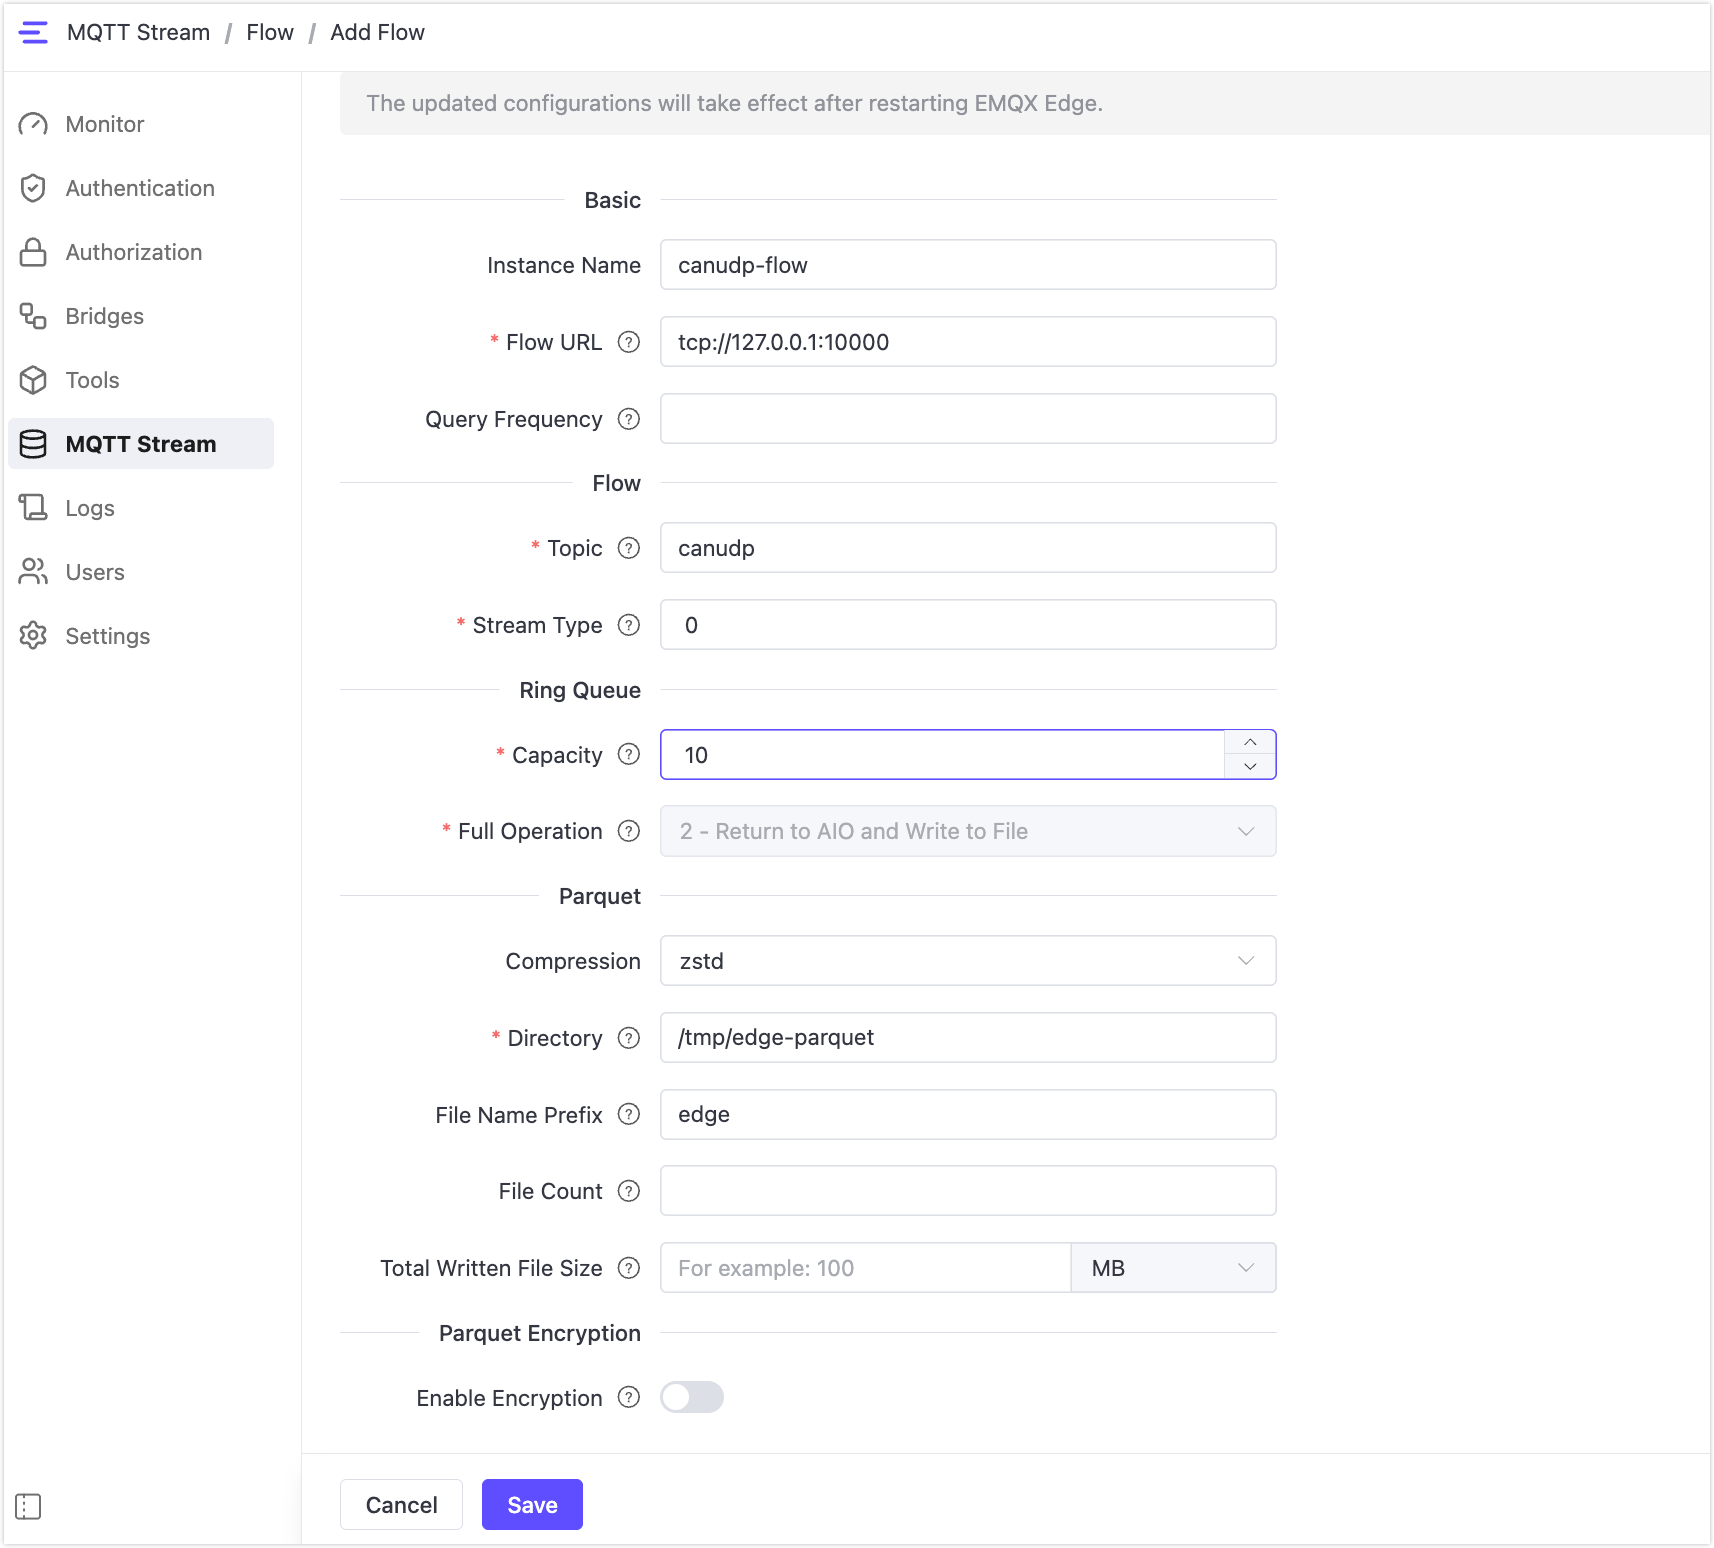
Add a Flow in the Dashboard
In the Dashboard, navigate to MQTT Stream and click the Flow tab. Click Add to open the Add Flow form.
Fill in the following fields:
Basic
- Instance Name: enter a name for this flow instance, such as
canudp-flow. - Flow URL:
tcp://127.0.0.1:10000(keep the default)
Flow
- Topic:
canudp - Stream Type:
0
Ring Queue
- Capacity:
10 - Full Operation:
2 - Return to AIO and Write to File
Parquet
- Directory:
/tmp/edge-parquet(or any absolute path on the host)
Leave all other fields at their defaults. Click Save.
Note
Restart EMQX Edge after saving for the configuration to take effect. For example, if you are running EMQX Edge in Docker:
docker restart emqx-edgeAfter restarting, Exchange, Ring Queue, and the persistence components are initialized automatically.
Publish Test Data
Use MQTTX CLI to publish 20 test messages to the canudp topic:
mqttx bench pub -t "canudp" -h 127.0.0.1 -p 1883 -m "message" -L 20 -c 1The message count must exceed the Ring Queue Capacity value to trigger a batch flush to disk. Using a single persistent connection (-c 1) avoids connection churn that can interfere with the Ring Queue pipeline.
Verify Persisted Data
Once the Ring Queue threshold is reached, buffered messages are written to local Parquet files in batch. Check the configured directory for generated files:
docker exec emqx-edge ls /tmp/edge-parquetThe presence of Parquet files confirms that MQTT Stream is working correctly.
Query Historical Data
Once data has been persisted, you can query it from the Dashboard.
Navigate to MQTT Stream and click the Query tab. Enter canudp in the Topic field, set a Time Range covering the period when you published test data, and leave Schema empty. Click Exact Search.
TIP
If no results appear, widen the time range. The system clock on your EMQX Edge host may differ from your local time.
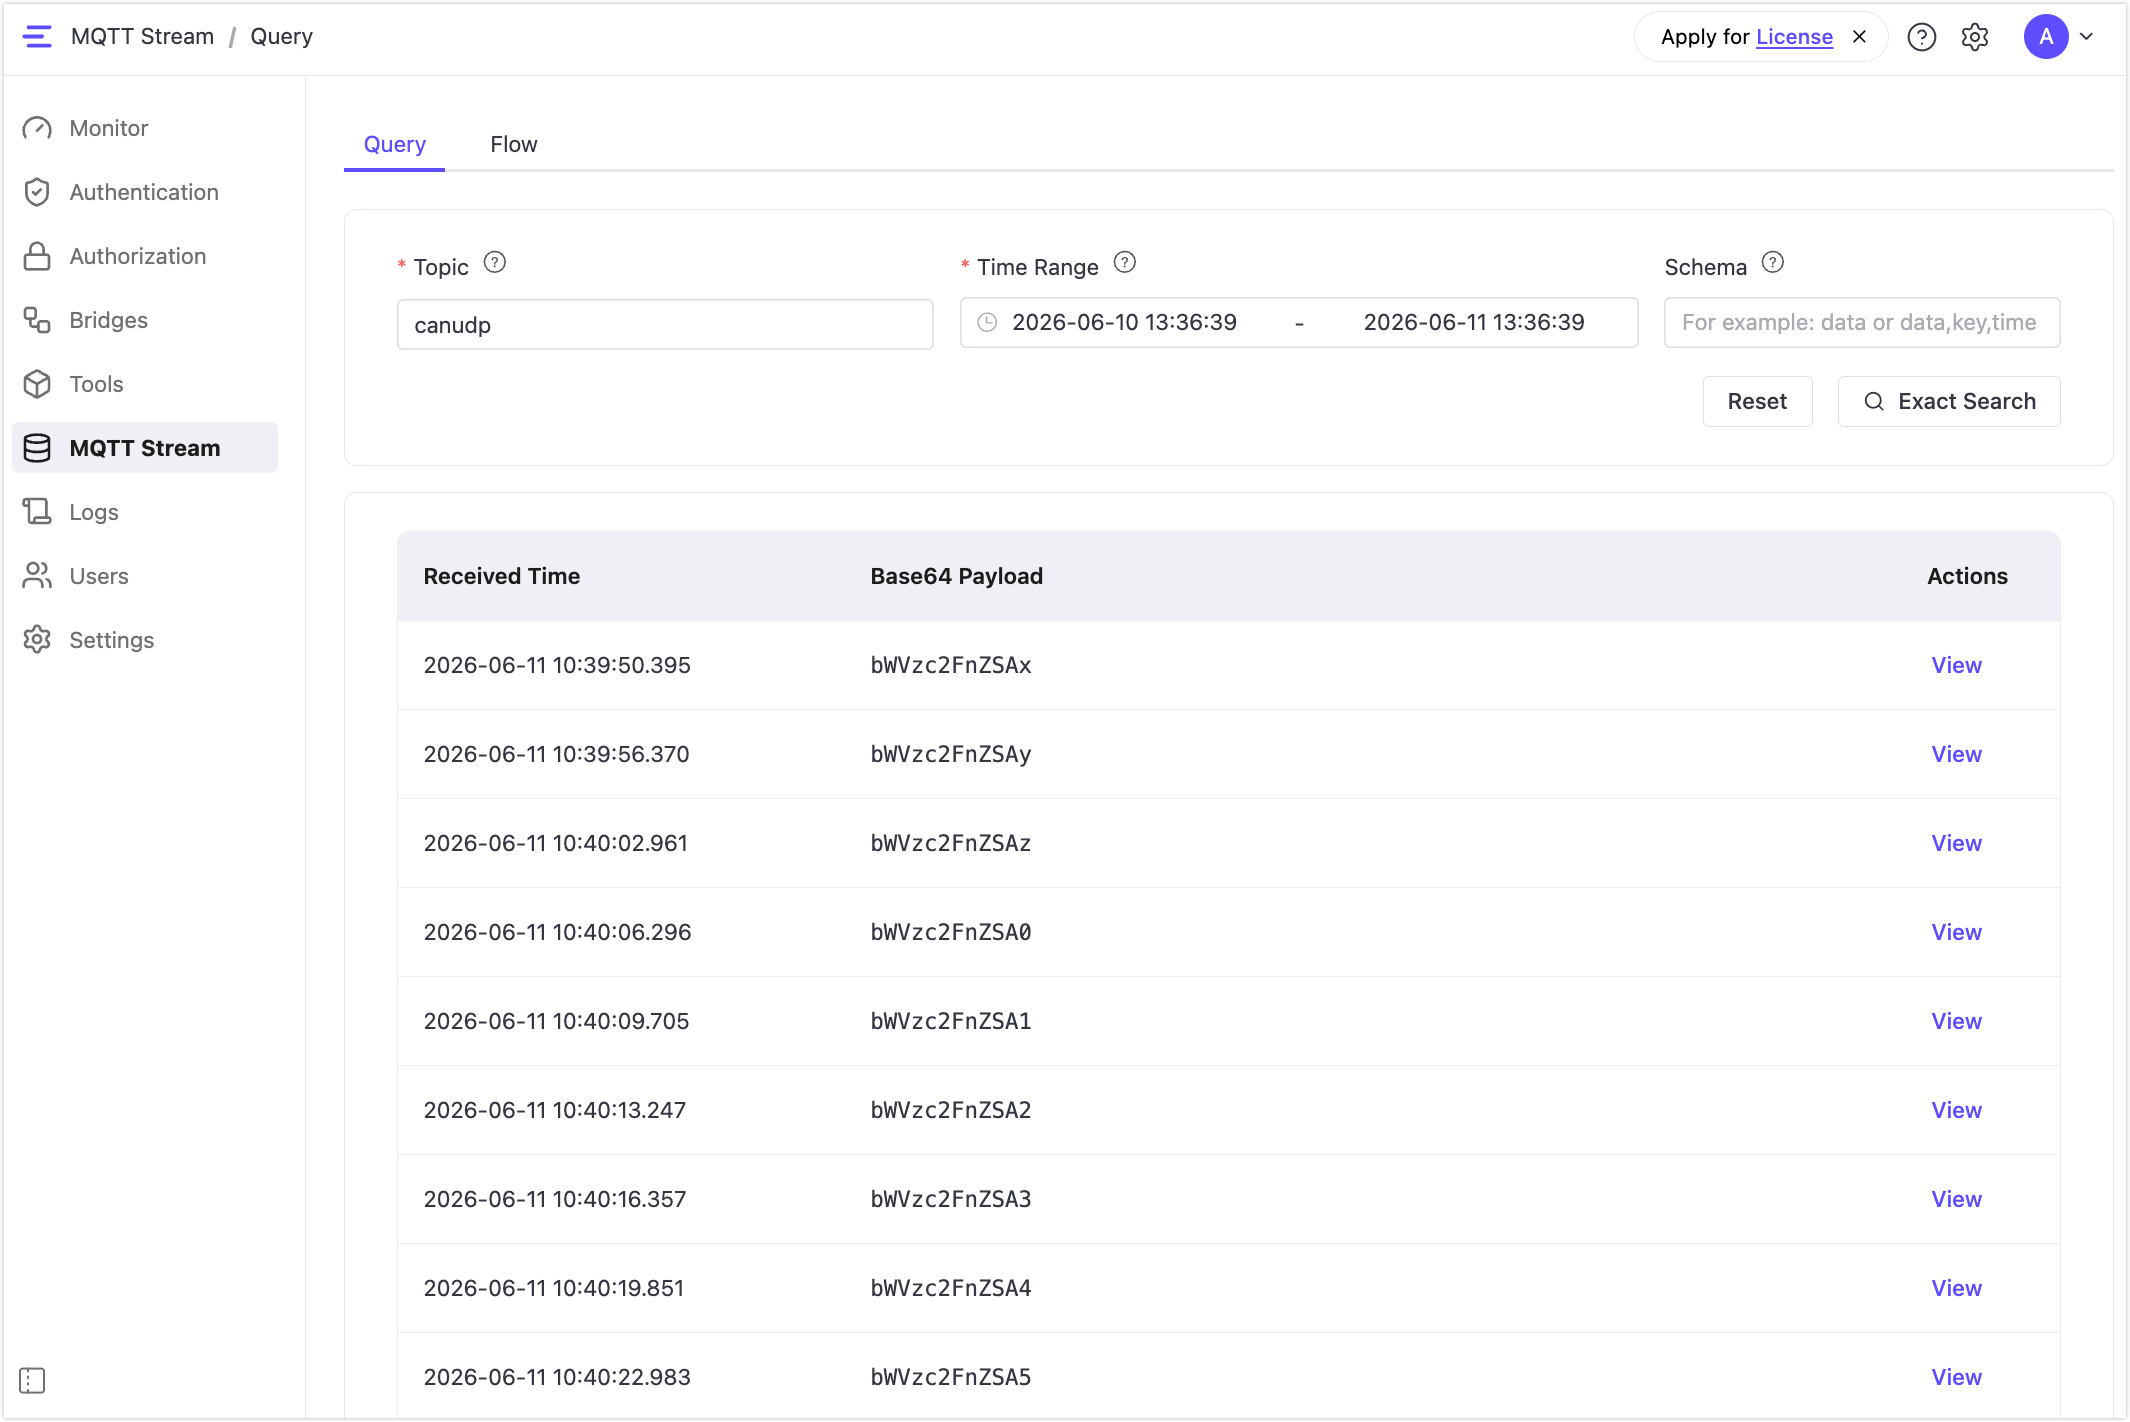
If results are returned, the full MQTT Stream pipeline is functioning correctly: from message capture and Ring Queue batching through Parquet persistence and Dashboard query. Payloads are displayed as Base64-encoded strings. Click View on any row and switch to Decoded Text to see the original message content.
To query persisted data programmatically, see MQTT Stream Query.