Manage EMQX Clusters
Each managed cluster in the ECP corresponds to an EMQX cluster. If you need to manage multiple clusters, you should create a cluster entry for each EMQX cluster.
If the EMQX cluster to manage contains multiple nodes and you need to collect logs from each node, you can achieve this by installing the agent on each node. For details, see Cluster Logs Collection for Multiple Nodes.
If you do not need log collection, you can choose to install the agent on the virtual machine of one of the nodes in the EMQX cluster, which will manage information from all cluster nodes for you.
After registering the EMQX cluster to the ECP through the agent, you can centrally manage and operate EMQX clusters on ECP.
TIP
There are some functional differences across EMQX cluster versions. For details, see Functional Differences across Cluster Versions.
Update Connect Limit
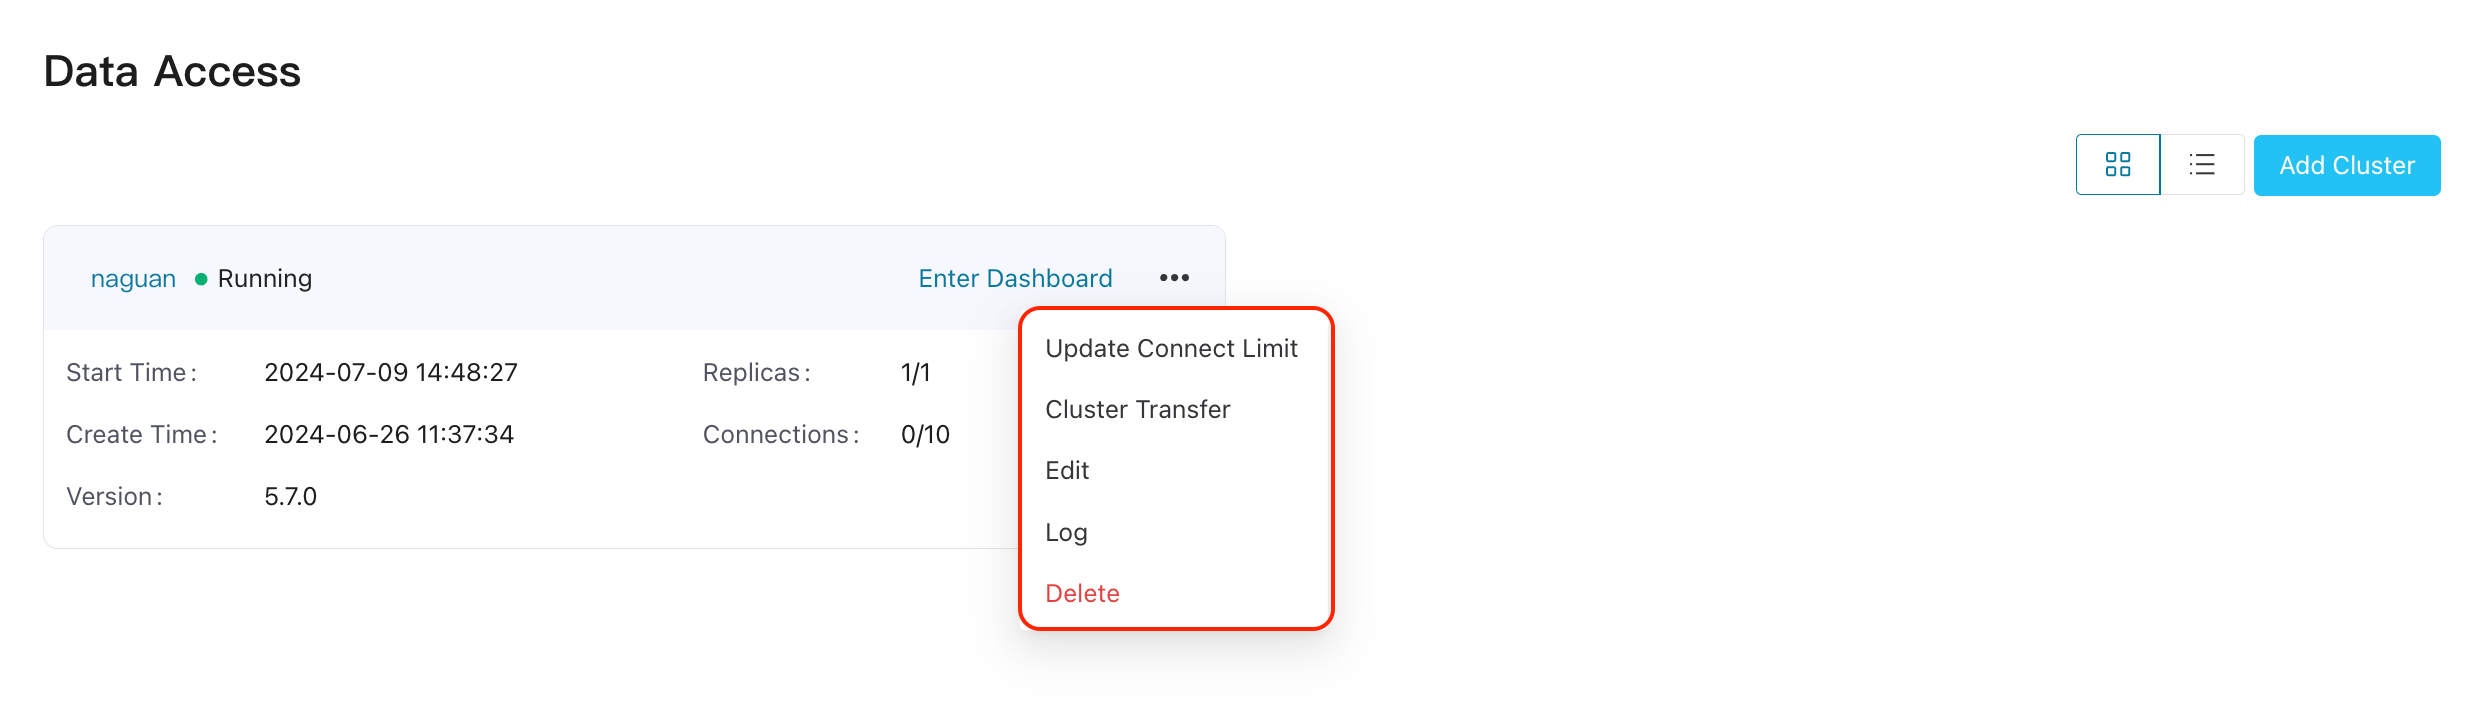
You can dynamically modify the number of maximum connections in the cluster according to business needs:
Log in as system admin, organization admin, or project admin.
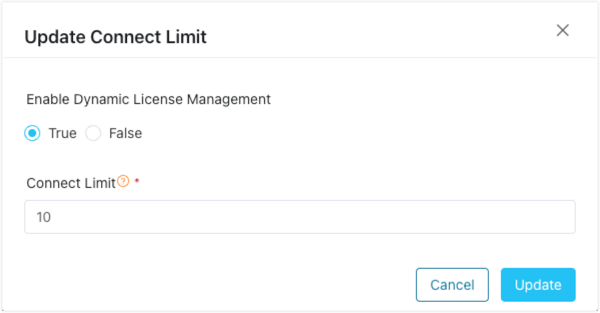
On the specific cluster, click the more icon and select Update Connect Limit. If the dynamic license management is diabled, click the
Trueradio button to enable it, and set the desired maximum connections for the cluster. The change will take effect in a moment.To disable the dynamic license management, click the
Falseradio button. The change will take effect in a moment.
TIP
- This feature applies to EMQX v4.4.6 and above, or EMQX v5.7.0 and above. Please obtain ECP license for corresponding cluster version in advance.
- The number of connections is limited by the total number of connections allowed by the license.
- The license quota on ECP will be restored once unregistration or cluster deletion completes or disabling dynamic license management, and the connections assigned to EMQX cluster will be reclaimed then. Please reset the EMQX license via Update License or Reset License from EMQX dashboard.
Cluster Transfer
For easier management, ECP provides a feature for transferring EMQX clusters across projects.
- Log in as system admin, organization admin, or project admin.
- On the target cluster, click the more icon and select Cluster Transfer. In the popped-up dialog box, select the target project.
- Click Confirm to finish the settings. The changes will take effect immediately. The cluster will be relocated from the current project and appear under the new one.
View Cluster Logs
ECP offers a unified log feature. To use this feature for managed clusters, enable and specify logs location when registering cluster node. If the cluster is installed via docker, please mount the log directory on the host machine into the container, and use the directory path on the host machine in the parameter.
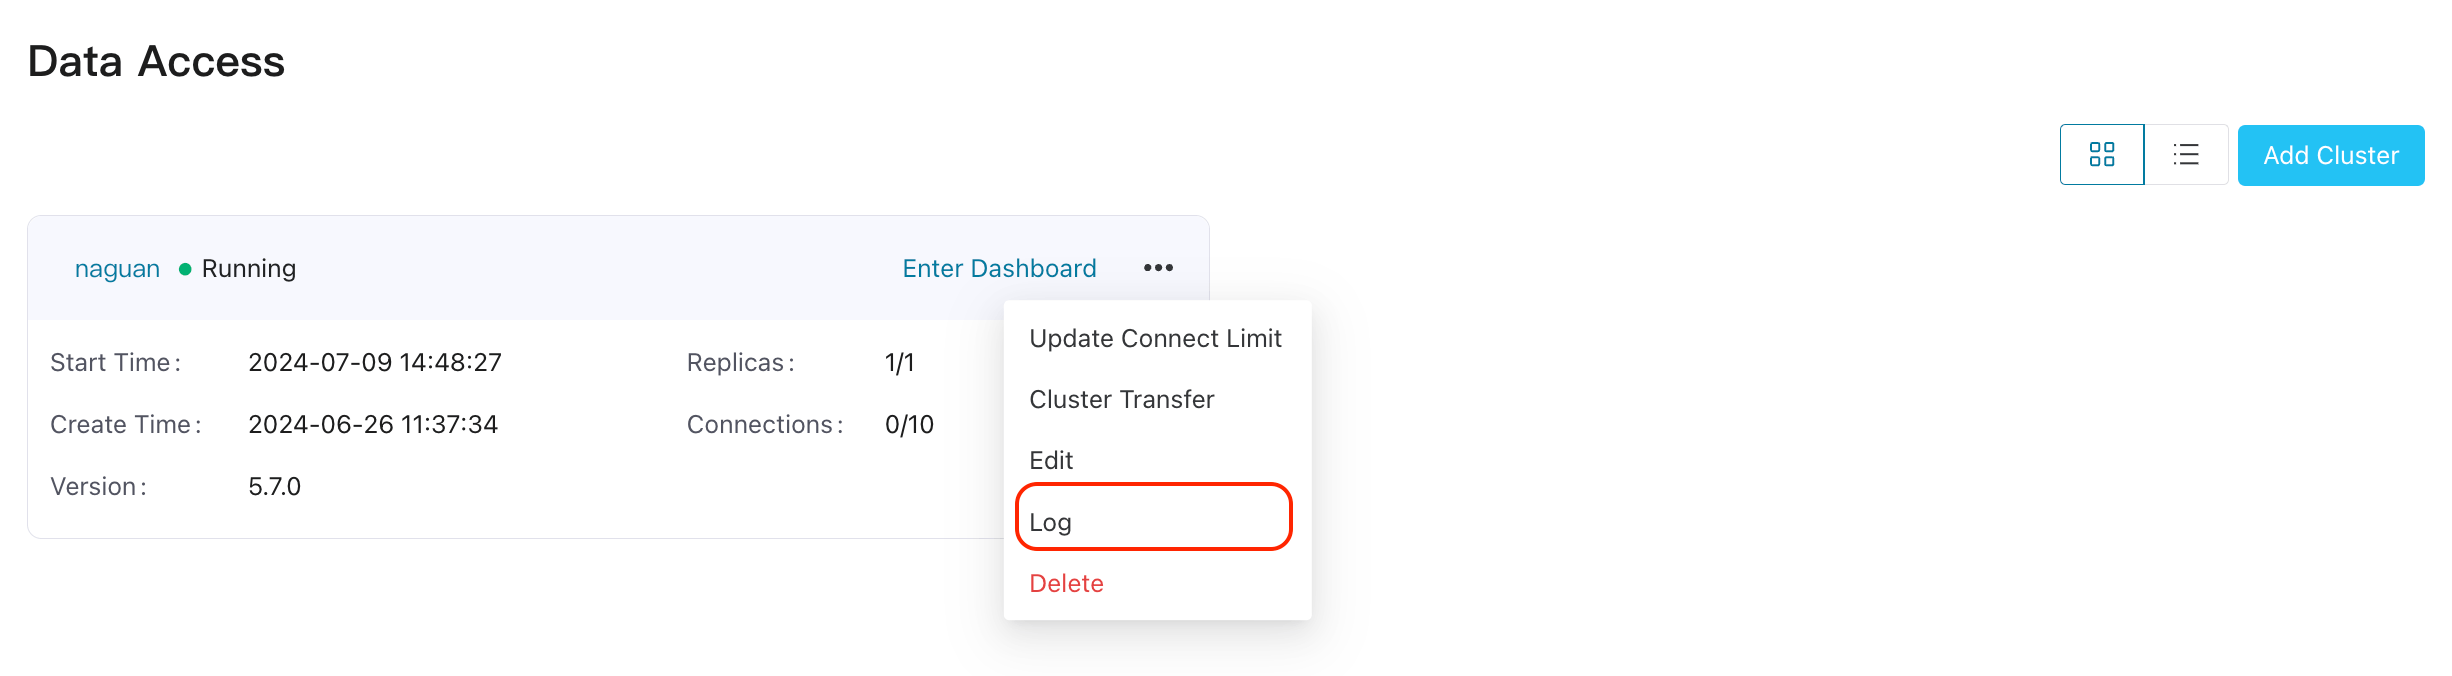
Then on the target cluster, click the more icon and select Log. You will be directed to the Log page, where you can view the log level, generated time, and log messages. For more information on logs, see Logs.
Cluster Logs Collection for Multiple Nodes
To collect logs for a cluster containing multiple nodes, the cluster management agents need to be installed and registered on each of the servers where the nodes are located. On registration, use the localhost or the ip/host address of the current node for dashboardUrl and apiUrl, in order to ensure that each agent can correctly access the corresponding cluster node. After registration is complete, click the more icon and select View Nodes to check whether each node is in a normal managed state. Then select Log to view the cluster logs from each of the node.
Delete Clusters
If a cluster no longer needs to be managed by ECP, you can delete it.
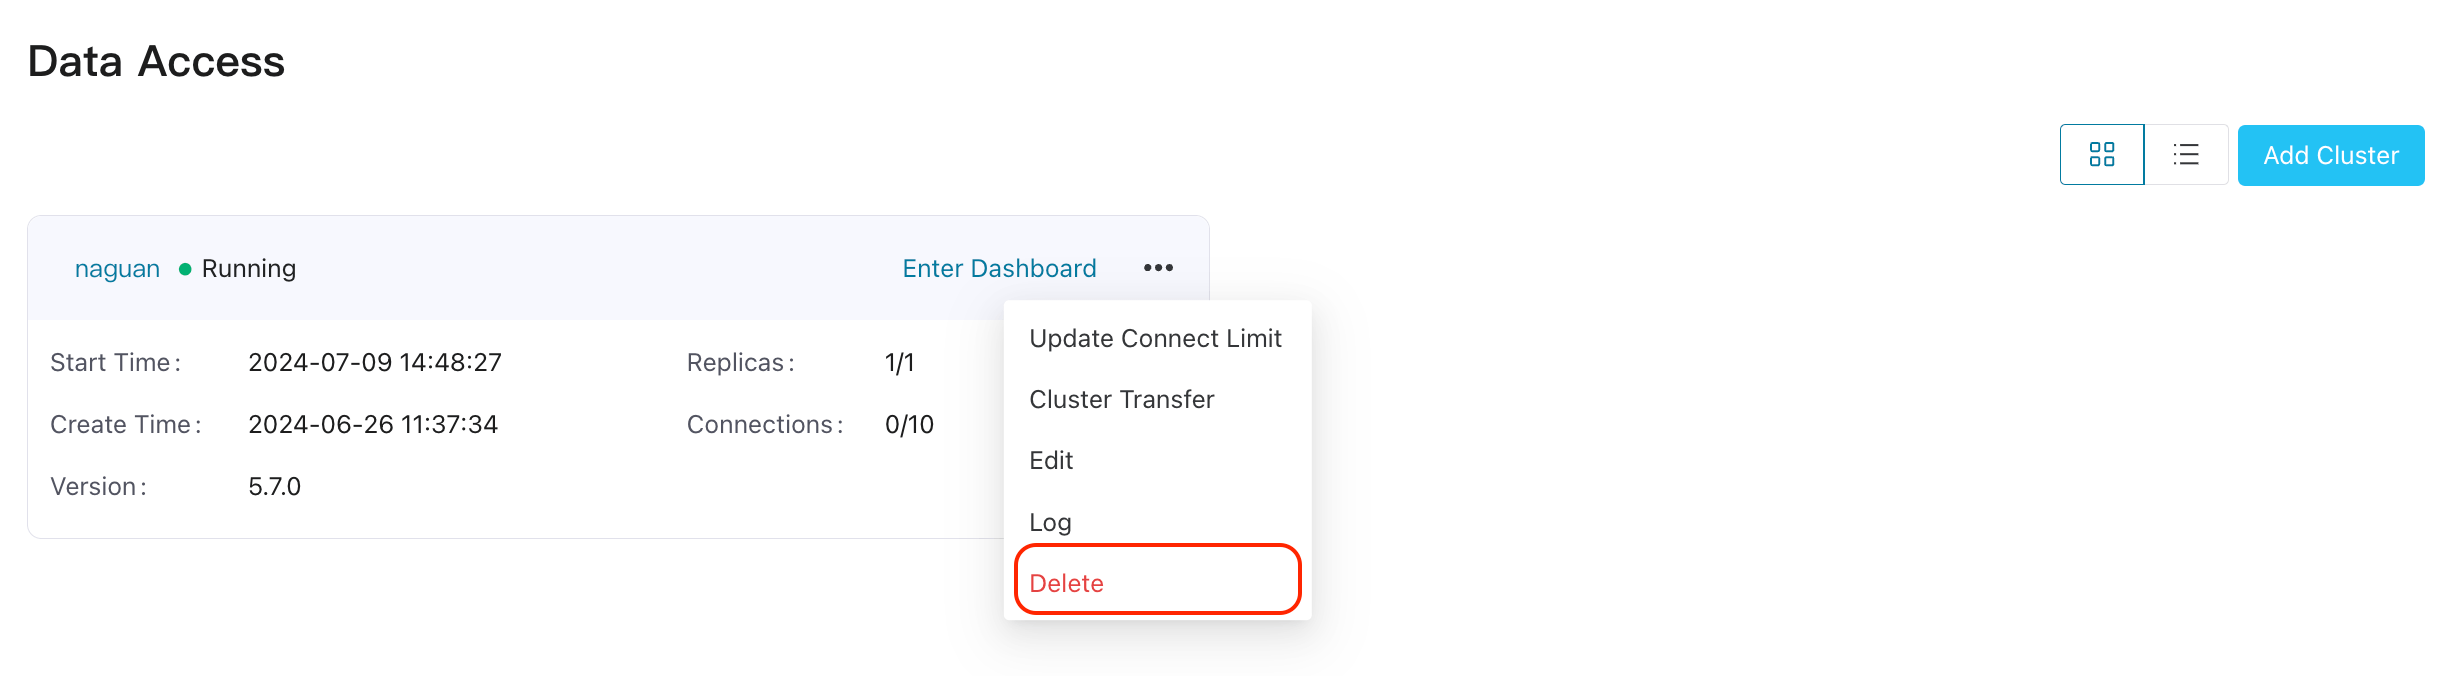
- Log in as system admin, organization admin, or project admin.
- On the target cluster, click the more icon and select Delete and confirm the action. ECP will try to remove the cluster. Please note that only the management relationship between ECP and EMQX cluster will be terminated, but the EMQX cluster itself will not be destroyed.
TIP
- When deleting clusters of version 5.7.0 and above, the connections quota needs to be restored. If the cluster status keeps "Error", the deletion might fail due to inability to release connections quota. If troubleshooting connection issues doesn't restore the cluster, you can click the more icon and select Re-register to attempt re-registration of the cluster and bring the cluster back to normal status before proceeding with deletion.
Monitor Cluster
ECP provides the status overview for managed clusters on the Workspace - Maintenance - Monitoring page. For details, see Monitor EMQX Clusters
TIP
- Monitoring on clusters feature applies to EMQX v5.
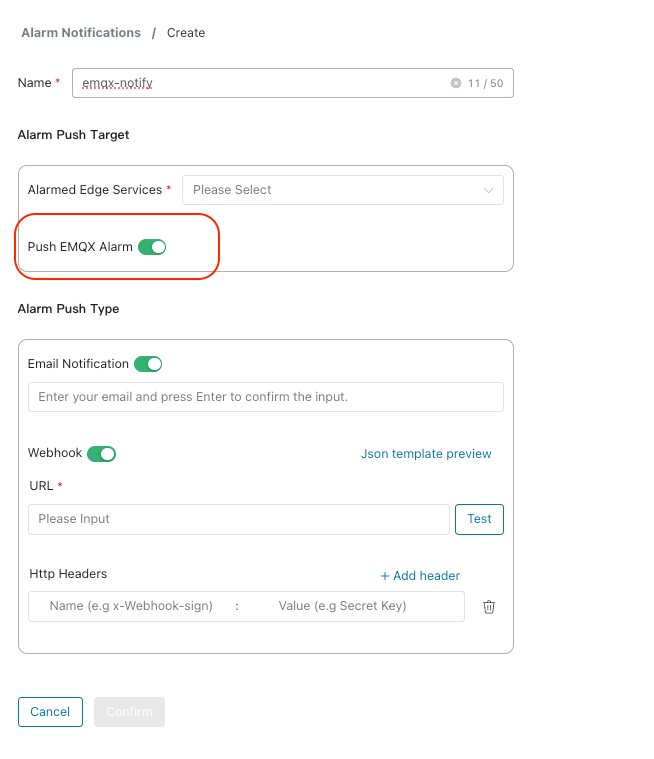
View Cluster Alarms
ECP provides the alarm management for cluster rules and connectors on the Workspace - Maintenance - Alarm page.
To notify cluster alarms by email or Webhook, enable "Push EMQX Alarm" when creating notification.
For other details of alarm, see Alarms)
TIP
- Cluster alarms feature applies to EMQX v5.