Configure License
After completing the installation and deployment, the ECP installation package comes with a trial license, which can be used directly.
ECP Floating License Introduction
ECP utilizes a floating license mechanism that enables multiple EMQX clusters to share a centralized license and connection pool, and multiple NeuronEX instances to share a tag pool. This approach allows for efficient resource allocation across various stages (such as development, testing, and production) by eliminating the need for separate licenses and connection counts for each EMQX cluster.
Apply for License
The trial license that comes with the EMQX ECP installation package has limits on the number of data tags and edge services. If you need a larger 15-day trial license, please click link Download and try it out, we will send the trial license you applied for directly to your email. The 15-day trial license specification is as follows:
- Data Tags : 5000
- Edge Service : 10
- EMQX Cluster : 1
- EMQX Connection : 100
If you want to use EMQX ECP software for long-term trial or commercial use, you can communicate and purchase through the official website Contact Us.
- Navigate to the Contact Us page on the EMQ website.
- Fill out the form with your relevant contact details, including your name, company name, email address, country or region, and your phone number.
- In the text field, specify your interest in the ECP license. Be clear about your use case and requirements to ensure that you're provided with the most suitable resources.
- After you've filled in all the necessary details, click Submit.
Configure License
After the installation, Log in to ECP with the superuser account created during the installation process.
ECP provides two main tabs: Administration and Workspace.
- The Administration tab allows you to perform administrative tasks and system-level settings. Within this tab, you can create organizations and projects, configure resources, set up email servers, manage notifications, specify language preferences, and manage licenses.
- The Workspace tab is designed for operational tasks and managing specific functionalities of the ECP platform. Within this tab, you can manage EMQX clusters, oversee edge services, configure monitoring and alert rules, and access logs for troubleshooting and analysis purposes.
To configure the license, click License Management on the left navigation menu, and enter License Config page.
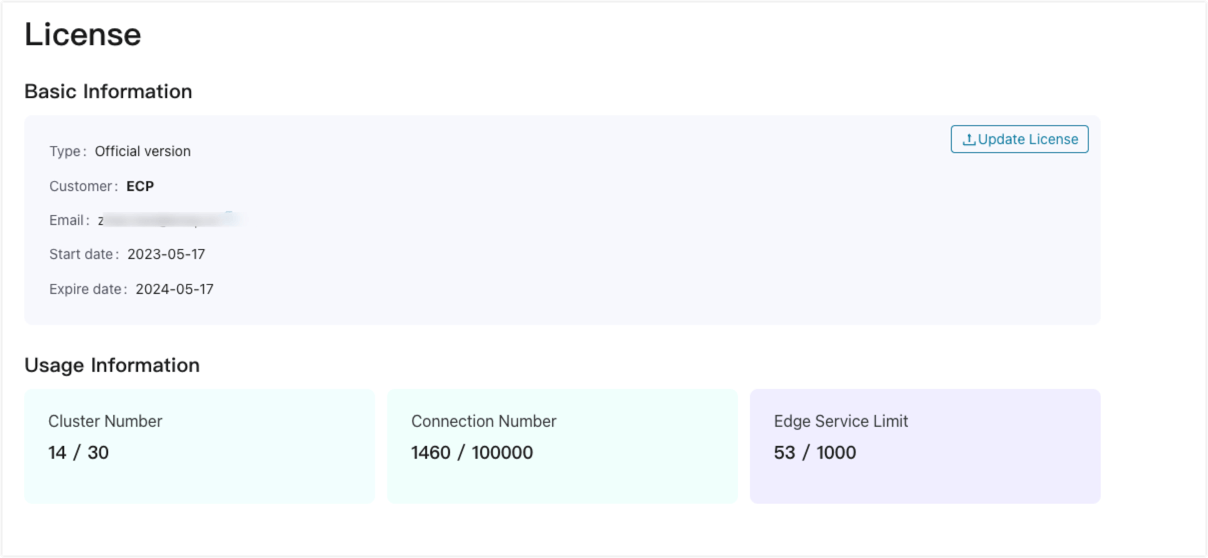
Below is the description of each field
- Type: Indicates whether it is a trial version or a commercial version.
- Customer: Customer name.
- Customer Email: Customer email address.
- Start Date: The date when the license becomes effective.
- Expiration Date: The date when the license expires.
- Tag Point: The maximum number of tags allowed by the license, along with the number of already allocated tags.
- Cluster Count: The maximum number of clusters allowed by the license, along with the number of clusters already created.
- Connection Count: The maximum number of connections allowed by the license, along with the number of connections already established.
- Edge Service Count: The maximum number of edge services allowed by the license, along with the number of edge services already created and managed.
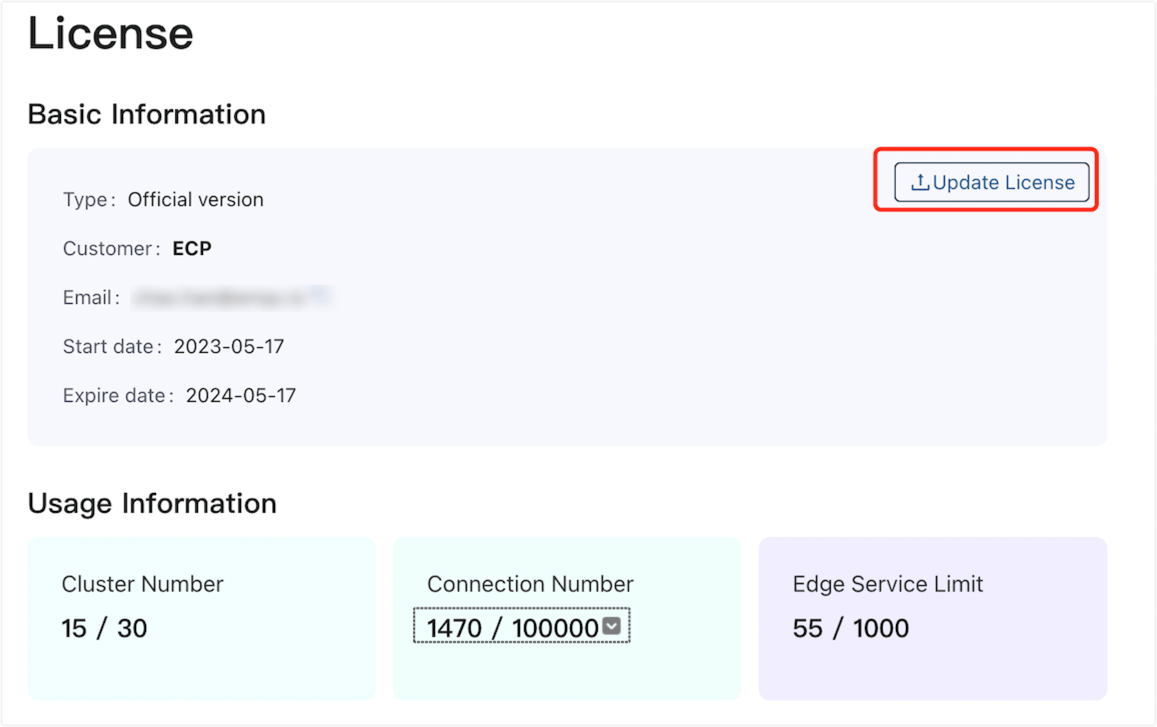
Update License
To update the license, simply select and upload a new license file. The system will automatically update the following based on the new license:
- Subscription duration (for both ECP and EMQX)
- Tag point
- Connection number
- EMQX Cluster number
- Edge services limit
This ensures that the license information accurately reflects the updated limits and durations, enabling proper management and utilization of EMQX clusters, edge services, and ECP functionalities within the revised license scope.
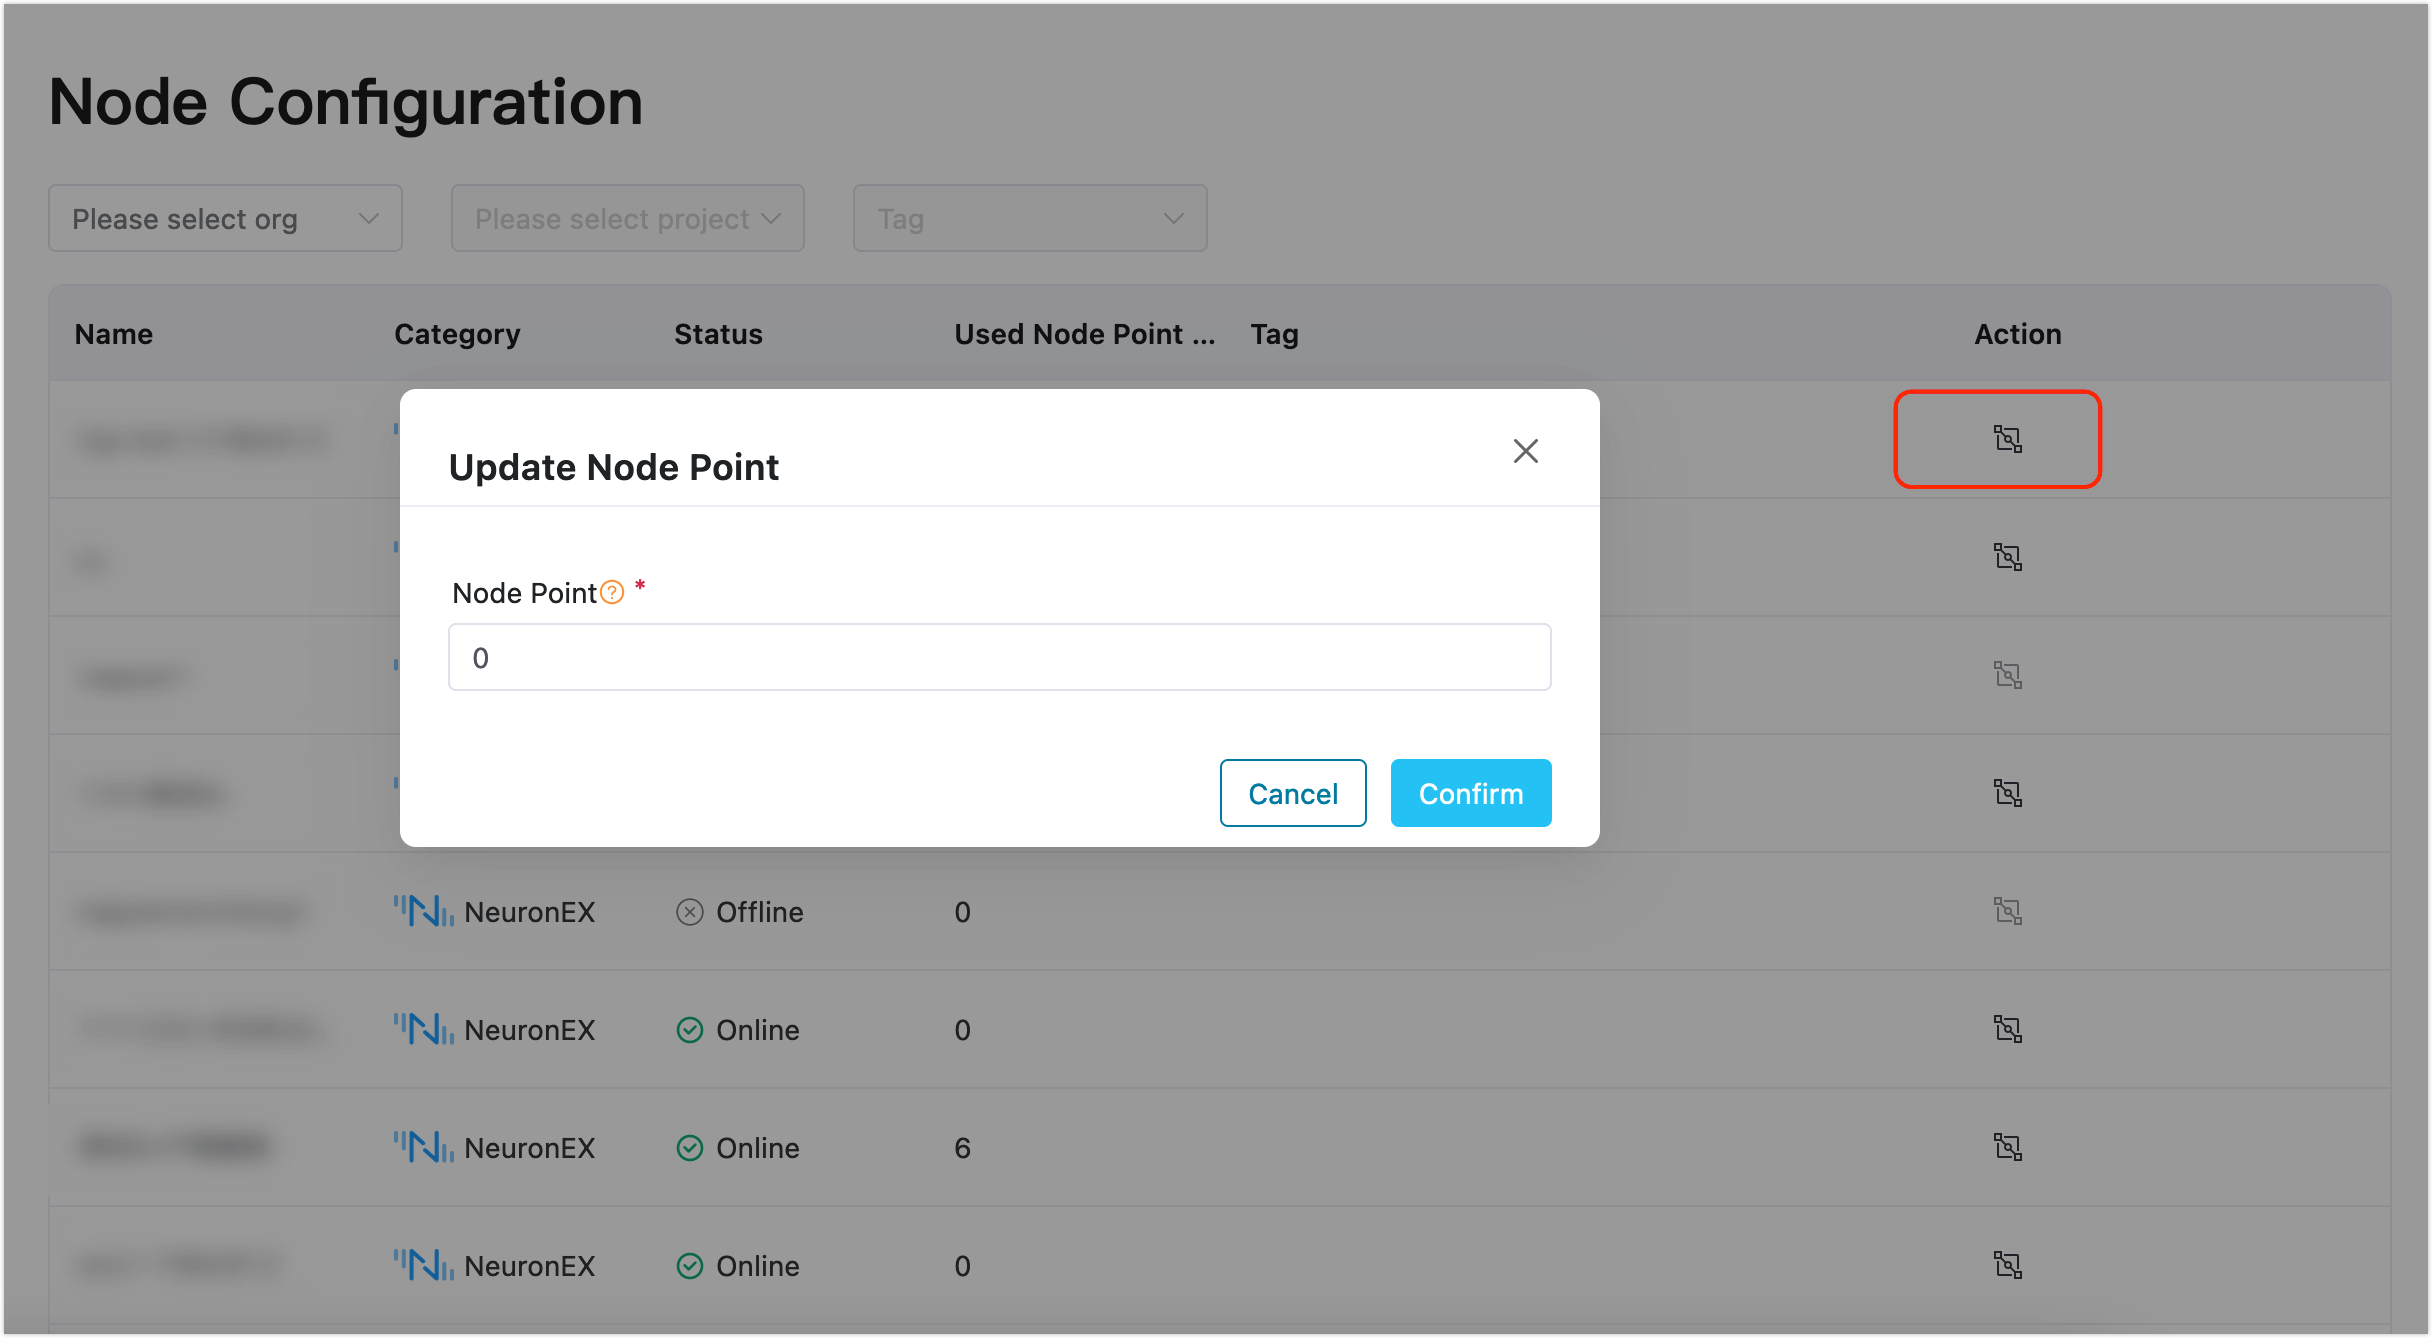
Configure License Tag Point
To view and update device tag point for edge services, click License Management on the left navigation menu, and enter Node Config page. This page provides you with an option to check device tag point by organization, project or tags. To configure device tag point for an edge service, simply click the Update Node Point button and set the point on the prompt dialog.