Tags
ECP provides a tagging feature to classify, organize, and filter edge services. It allows you to group edge services for efficient management, facilitating operations such as managing edge services and batch deployment of edge configurations.
Create Tags
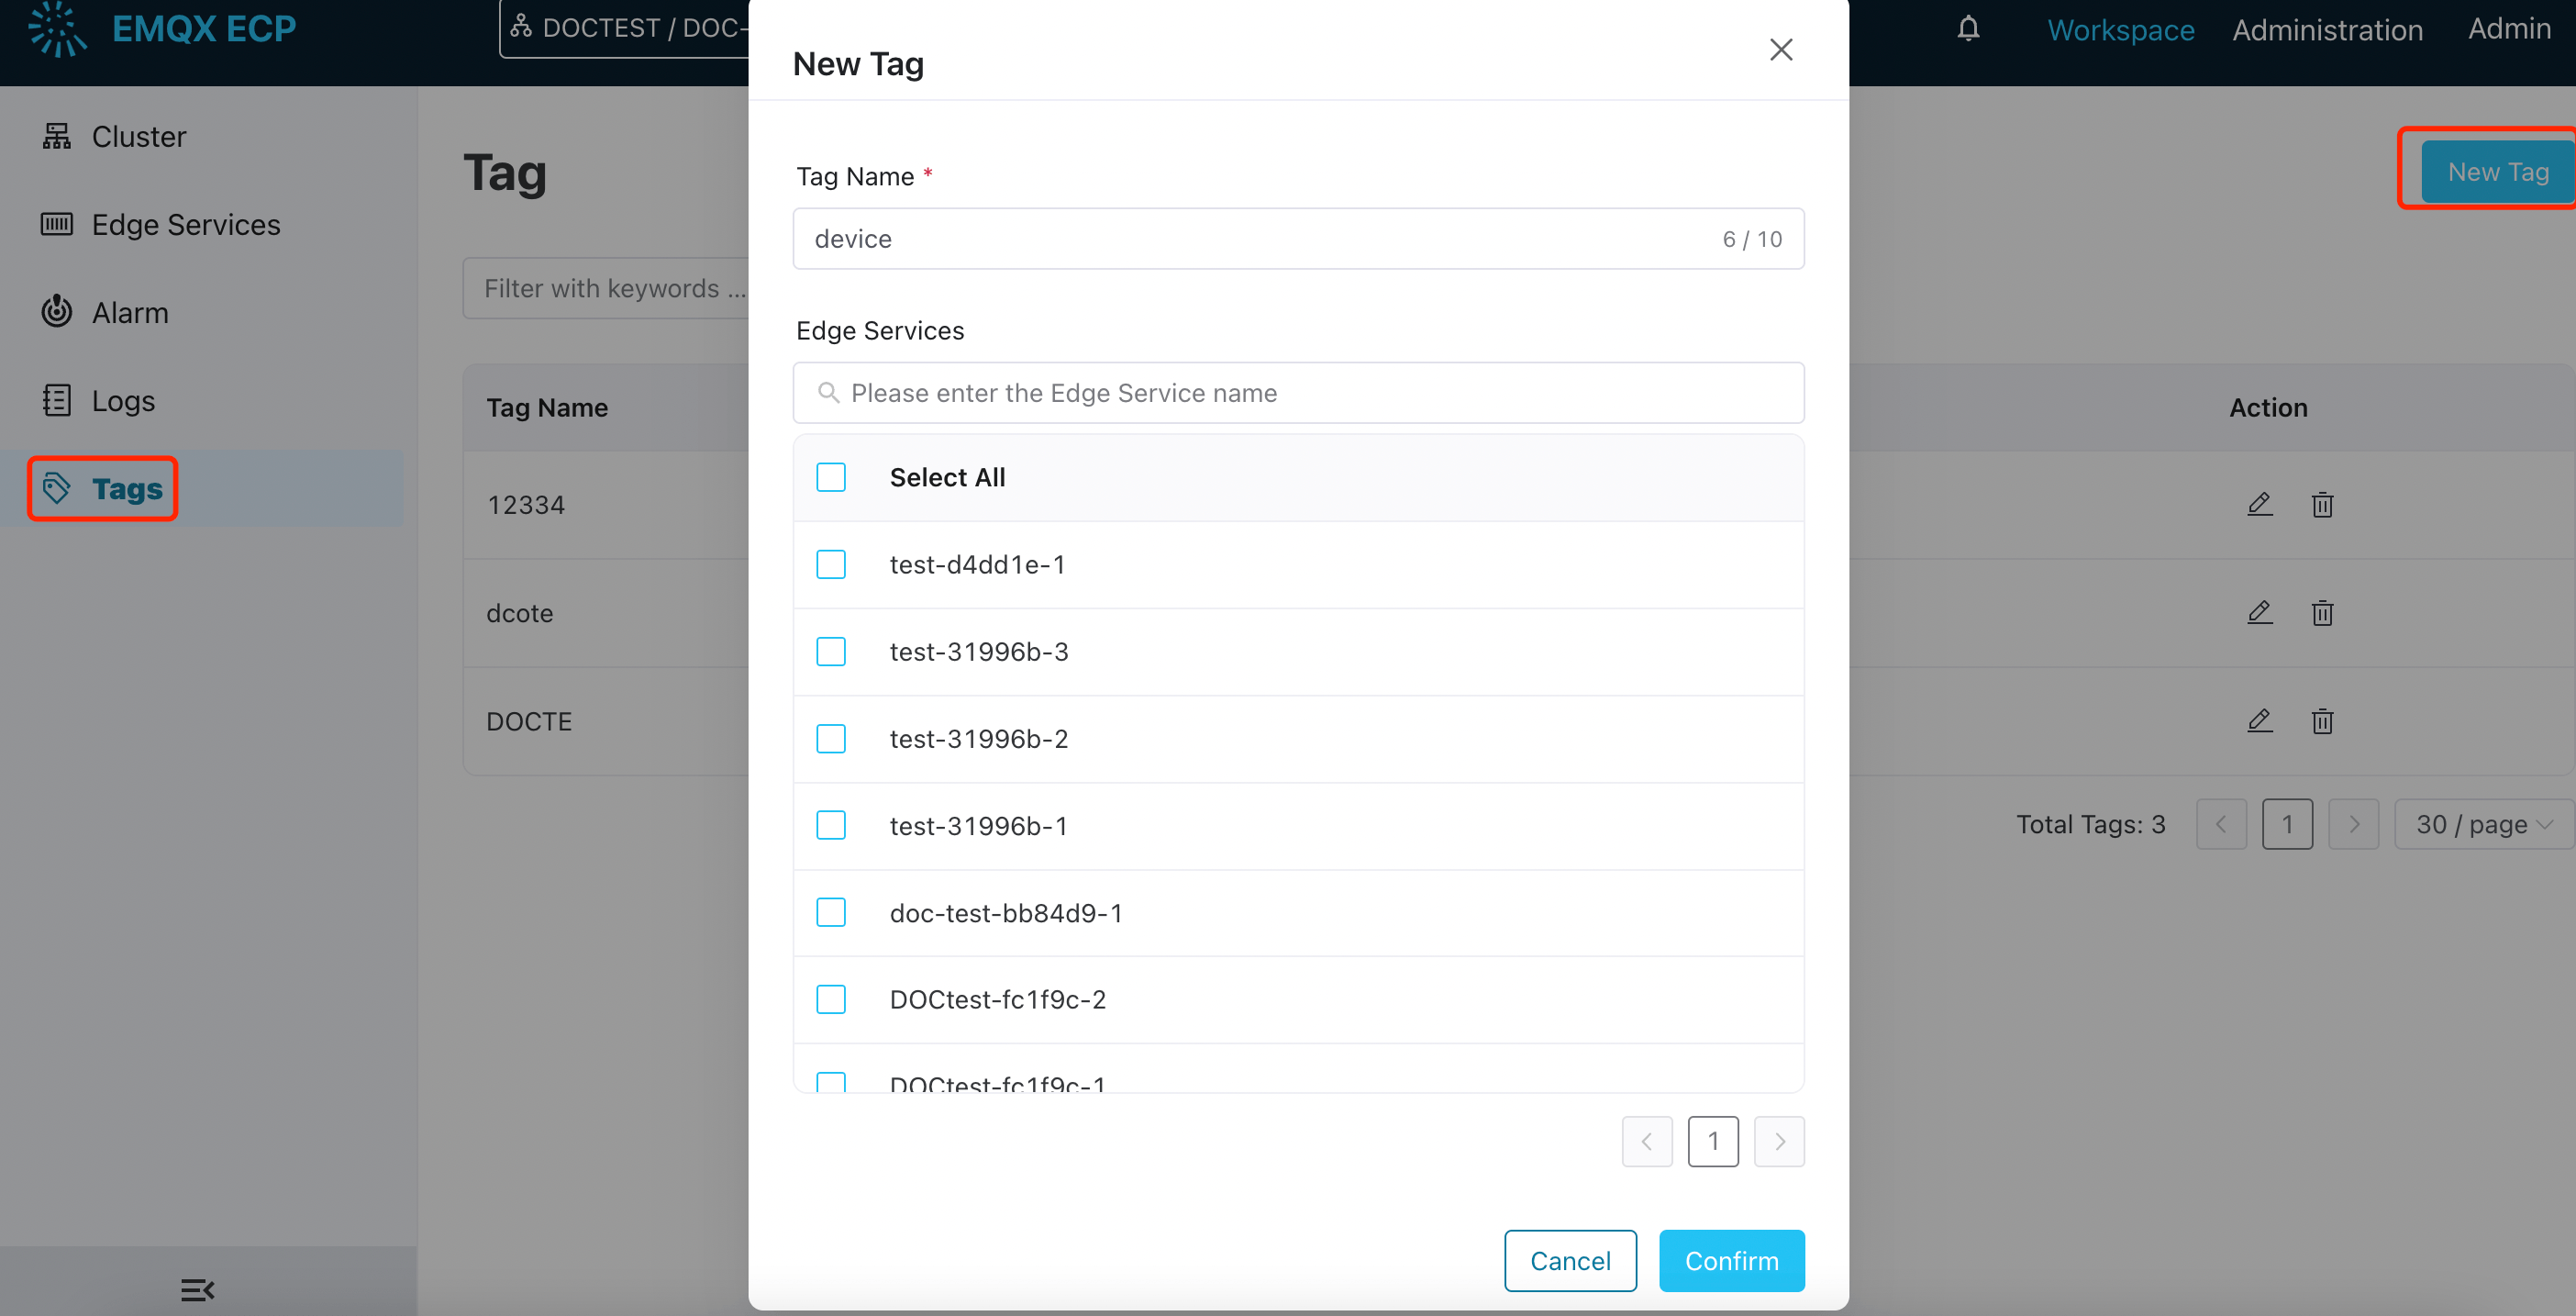
Log in as system admin, organization admin, or project admin. Click Workspace in the ribbon area and switch to the Workspace page. Navigate to the Tags page, where you can see the tag name, the number of associated services, and operations, and you can perform a fuzzy search based on the tag name.
Click the New Tag button and a dialog box will pop up.
Fill in the tag name, it should be 1-10 characters, and also support "-"
Click to check the edge services you want to associate with the tag in the table.
Click Confirm to finish the setting.
Manage Tags
For the created tags, you can click the edit icon to edit the tag name or associated edge services.
Or you can click the delete icon to delete a tag. Note: The associated edge services must be removed before you can delete the tag.
Use Tags for Batch Management
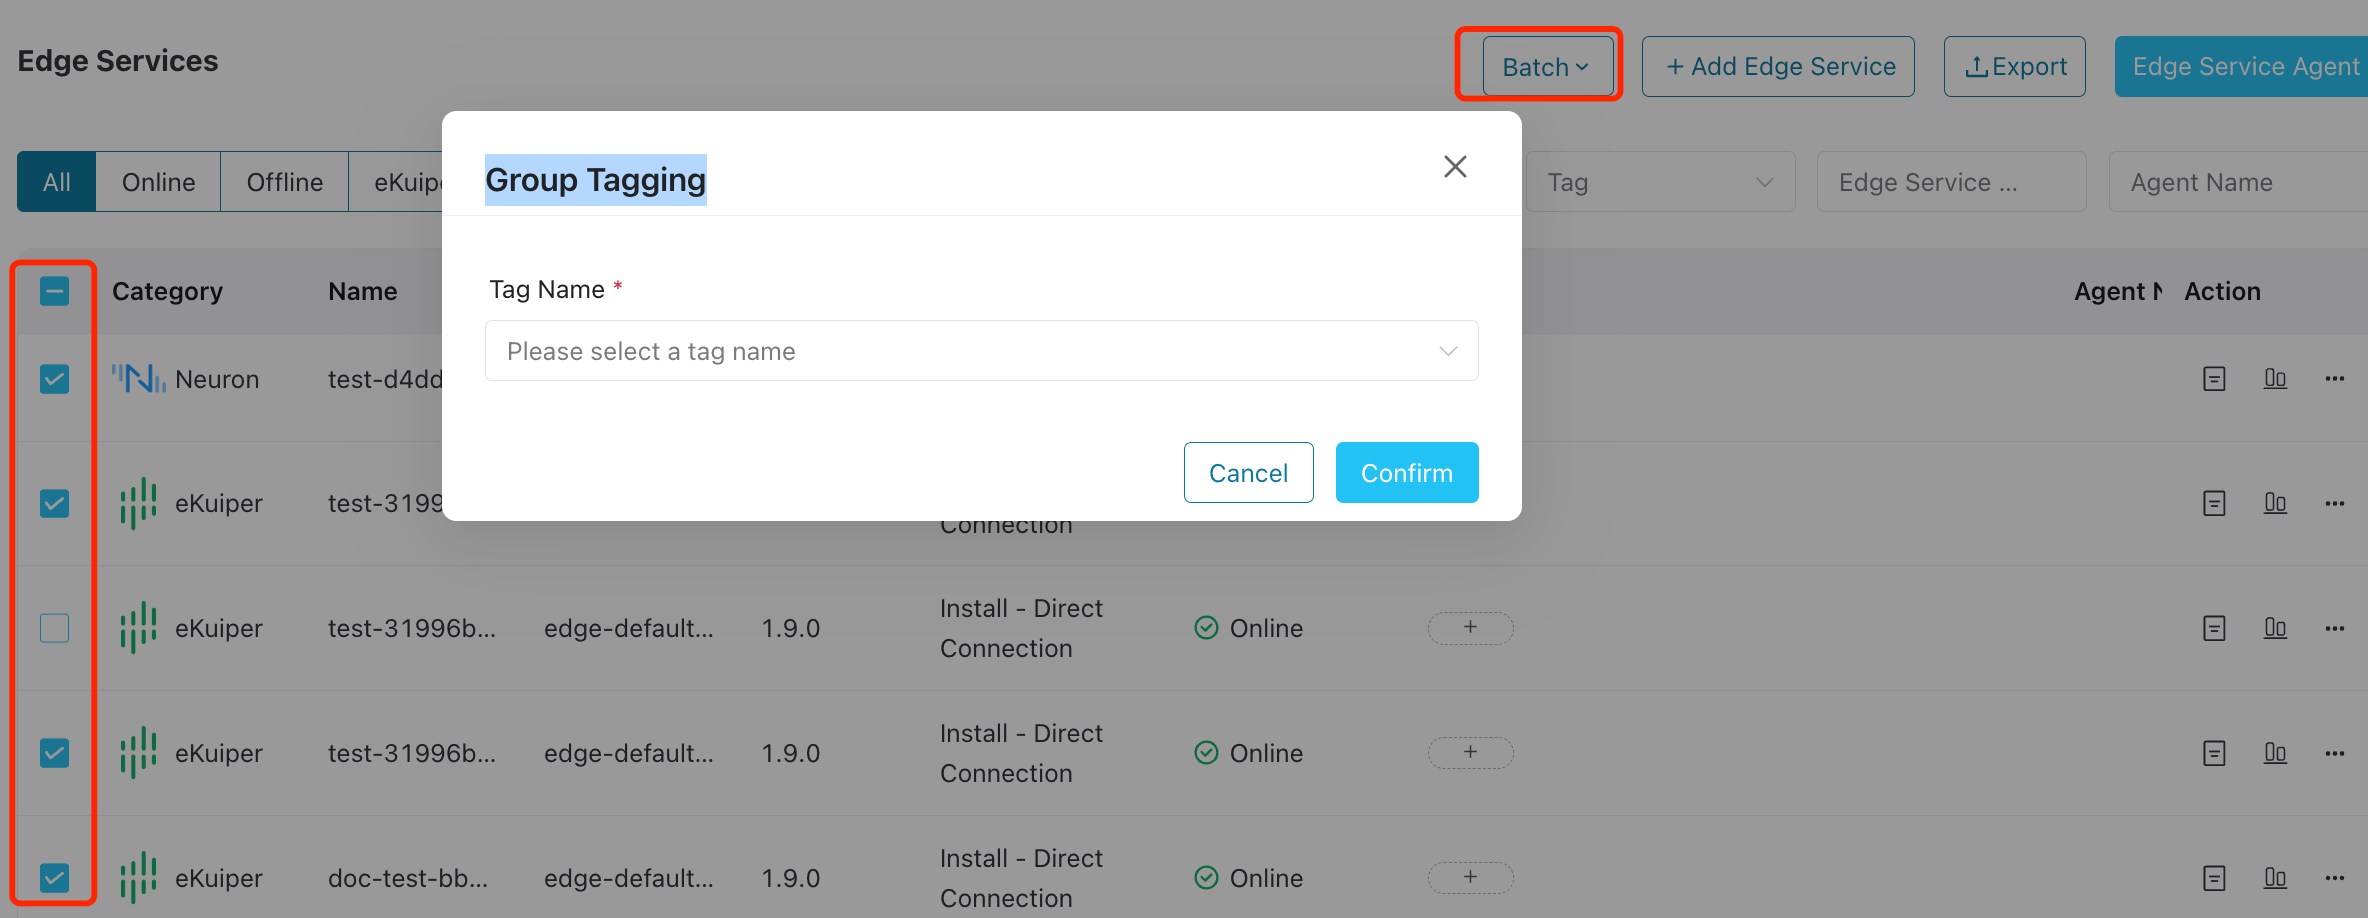
You can also use the Tagging feature for batch management in the Workspace - Edge Service page.
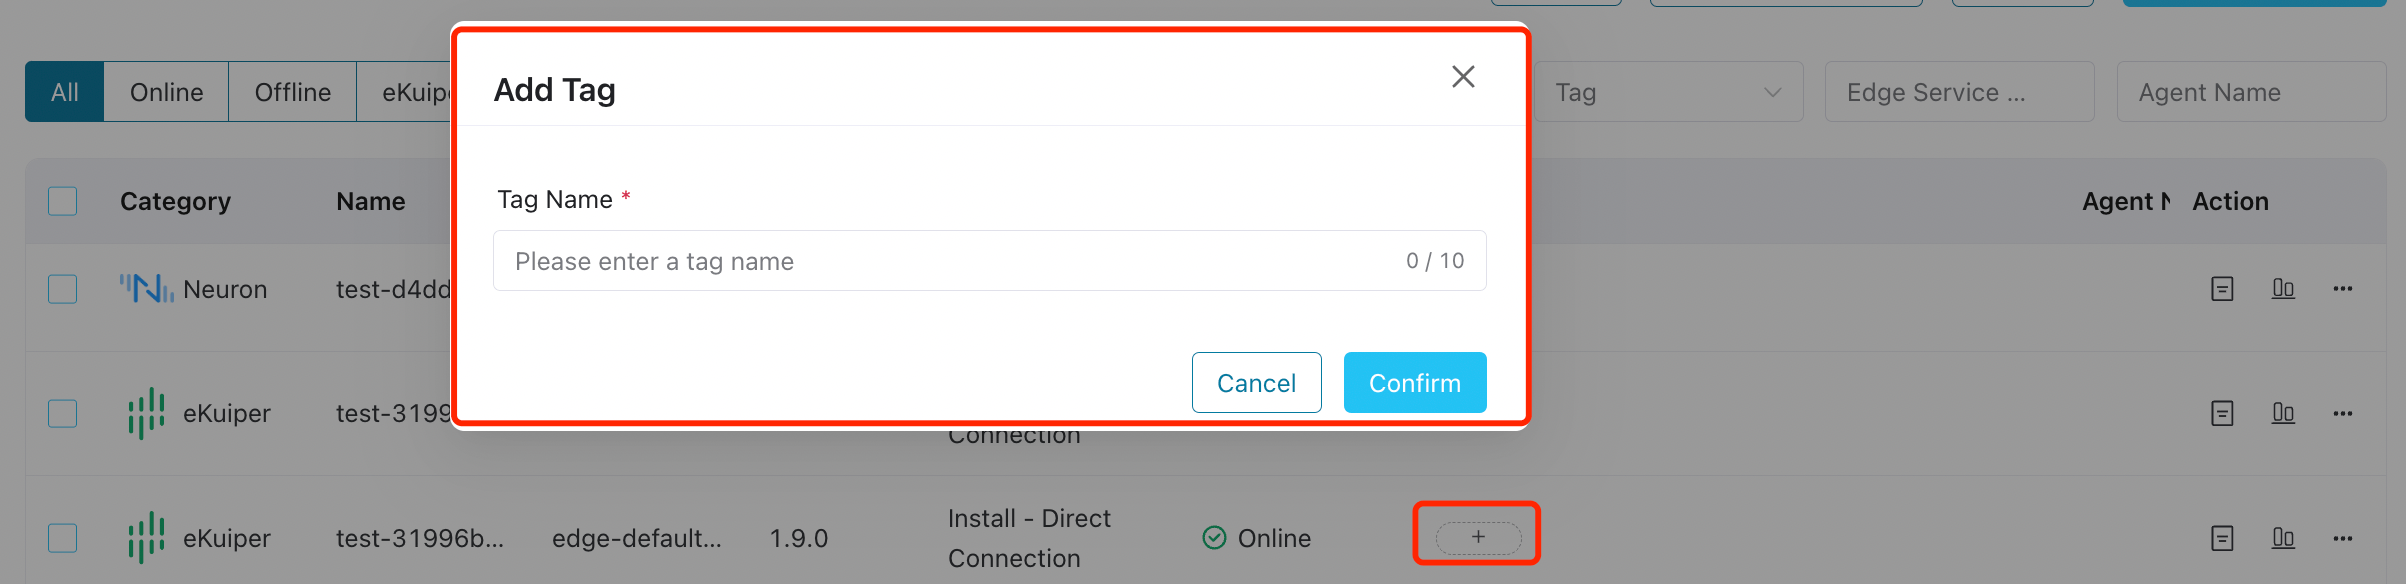
To add tags for multiple edge services:
- Check the boxes corresponding to the edge services you wish to tag.
- Navigate to Batch in the Edge Services panel, and select Tagging.
- In the popup dialog box, input a name for the tag. It should be 1-5 characters, and also support "-". Press the Enter key to confirm the input. Or you can select an existing tag.
- Click 'Confirm' to finish the setting.
TIP
A maximum of 10 tags can be assigned to a single service, for details, see Known Limitations.
Services that have been tagged will automatically display the assigned tag names under the Tag column, where you can also add click the + button to add more tags to the service.