Create Dedicated Deployment
EMQX Cloud's Dedicated Plan offers independent MQTT service instances/clusters with higher connection and TPS limits, as well as greater scalability. This guide will use the Dedicated Plan (Professional) as an example to walk you through the steps of creating and utilizing EMQX Cloud.
Create Deployment
Log in to EMQX Cloud console.
You can create a new deployment for a specific project from either the console homepage or the deployment list page. Click + New.
Click Create Now on the Dedicated tab.
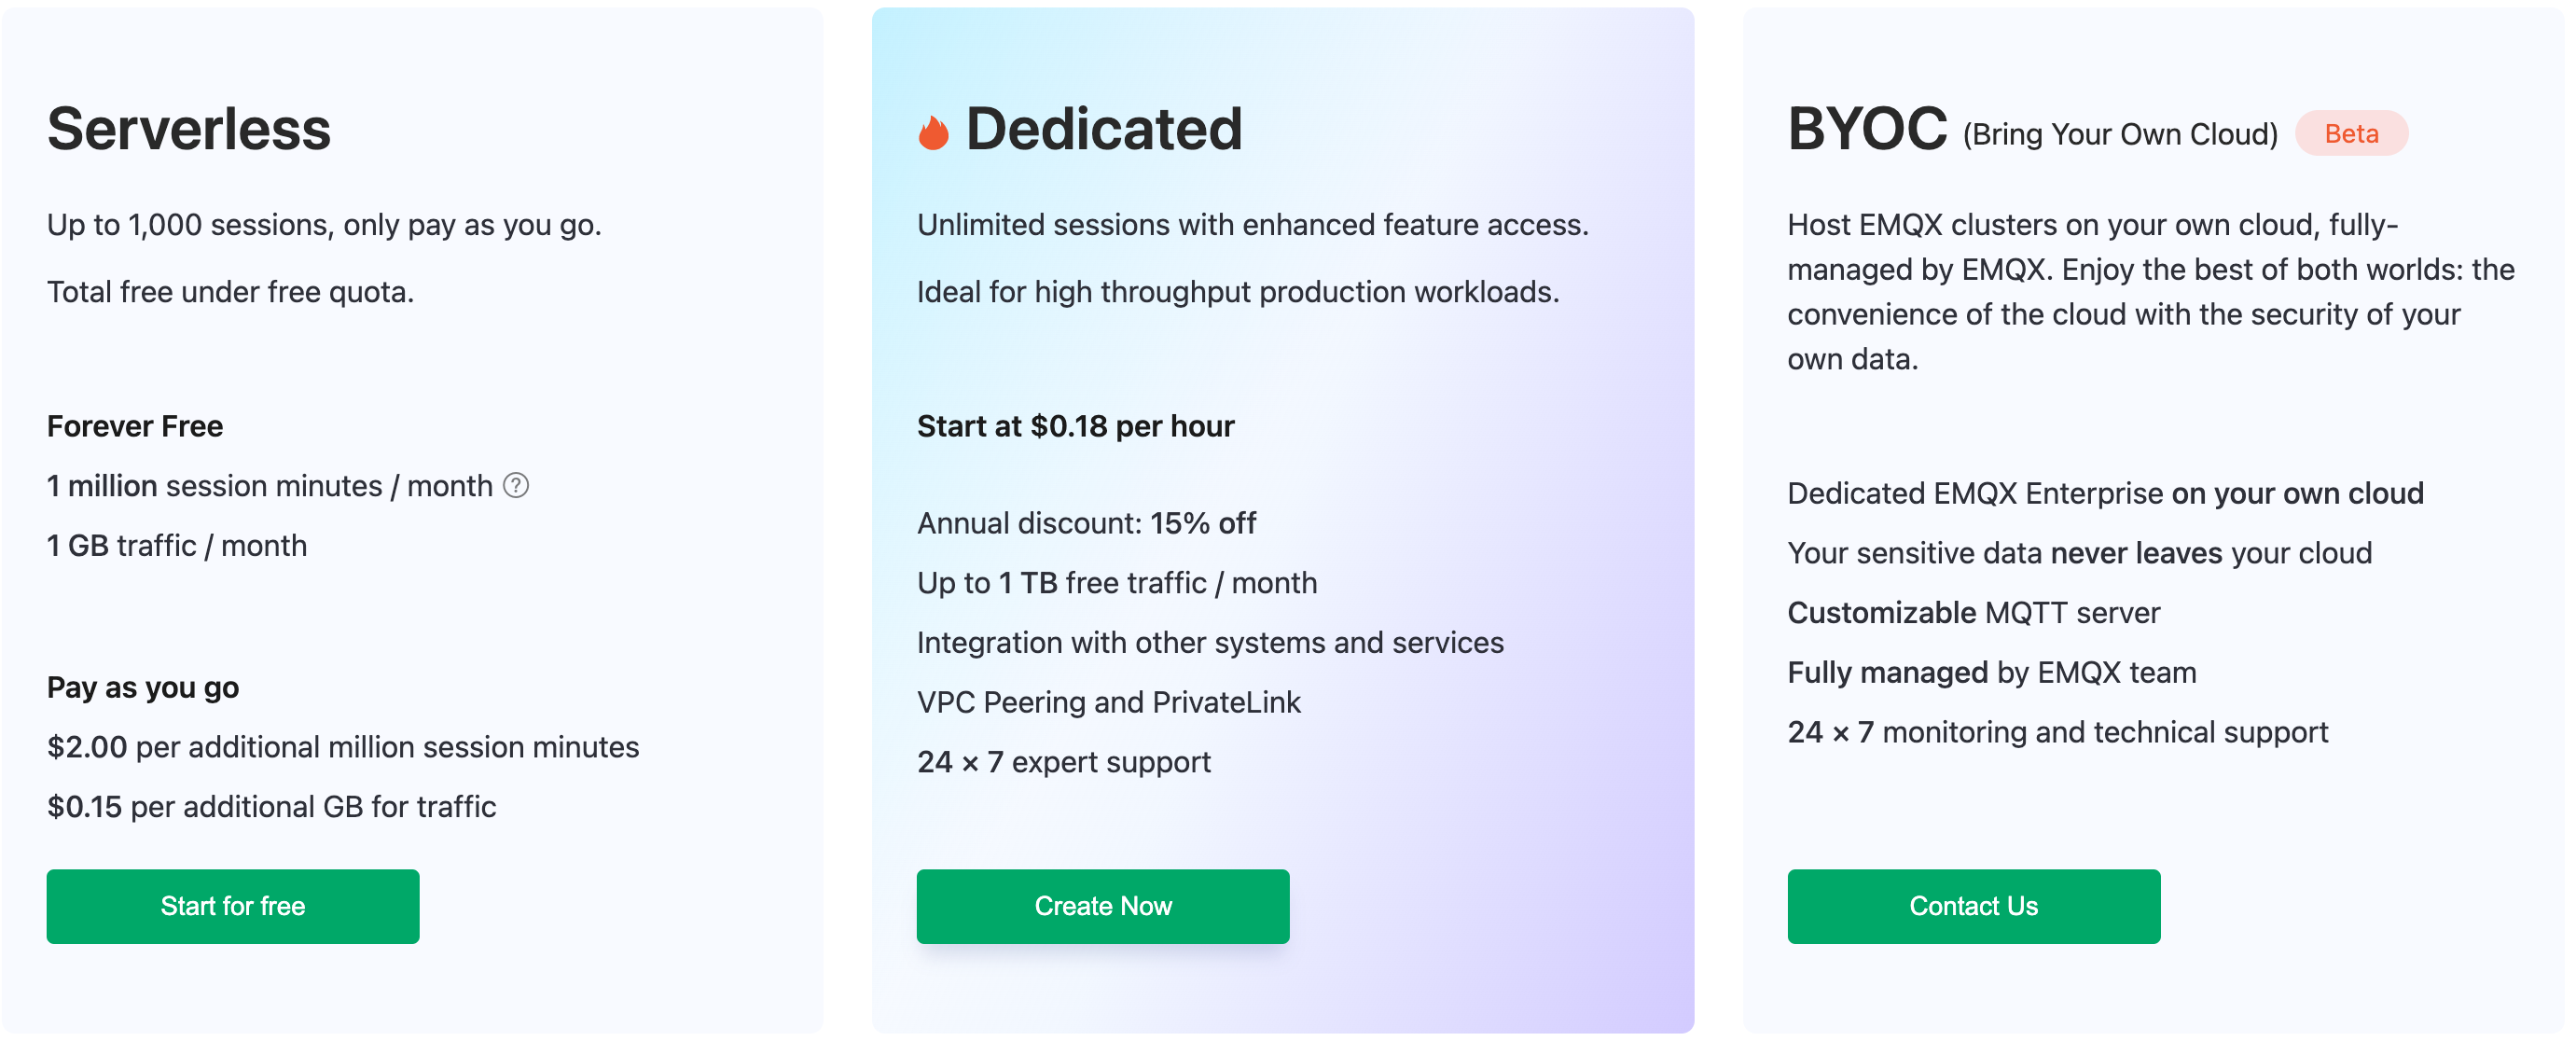
Choose the appropriate tier and configurations based on your needs.
Plan: Choose the product plan.
Choose Cloud Platform: You can choose from AWS, Azure, or Google Cloud.
Choose Region: Choose the region to deploy EMQX Cloud. To deploy your EMQX Cloud in a different region, you can submit a request via a ticket or [email][cloud-support@emqx.io].
Choose Tier: Each tier has different limits on the maximum number of connections and transactions per second (TPS), which can be upgraded or downgraded in later stages.
Billing Method: Choose between Hourly billing or Annual prepaid (with a 15% of discount).
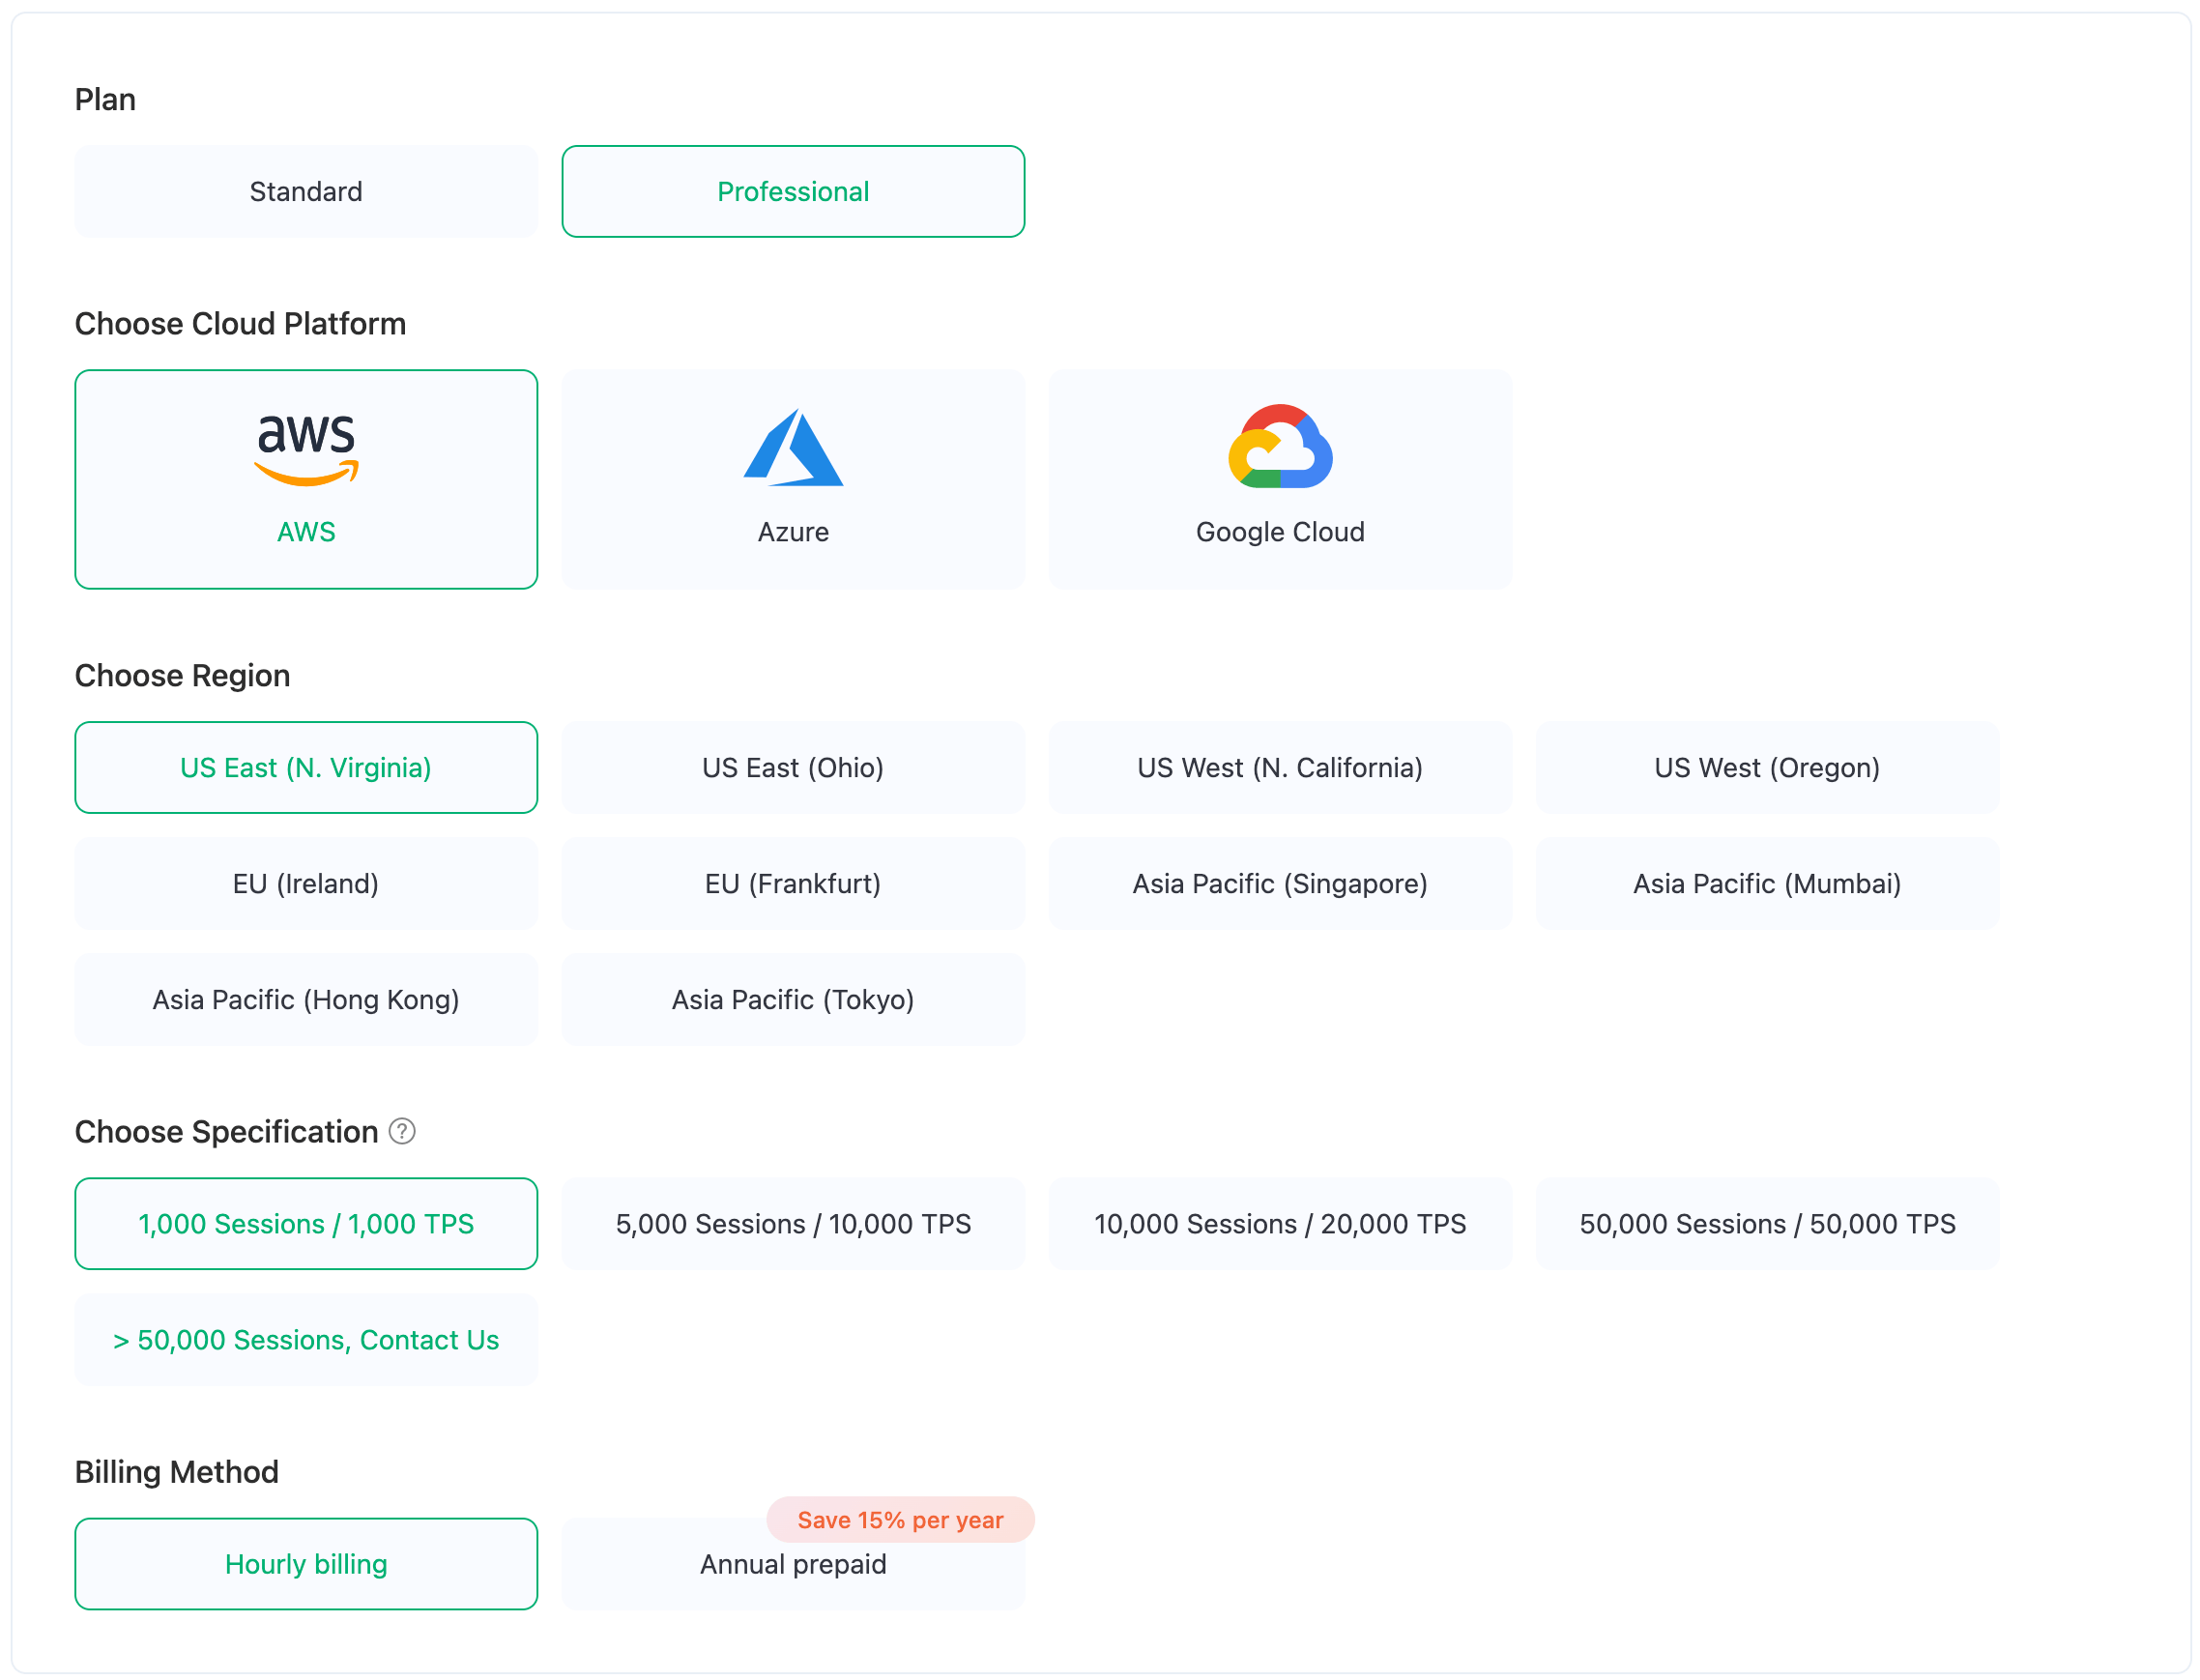
Double-check your setting in the New Deployment tab, and click Deploy.
As part of the deployment process, you'll be asked to agree to the EMQX Cloud Services Agreement, please review the agreement carefully and accept it if you agree with its terms.
After agreeing to the agreement, the deployment process will begin and take about 5 minutes to complete. You can monitor the progress on the Projects page, and once the status changes to Running, your deployment has been successfully created and is ready for use.
View Deployment
After the deployment is created, it will appear on the Cloud console home page. Click the Dedicated deployment card to enter the deployment overview page. On the overview page, you can check the real-time status and connection information for your deployment.
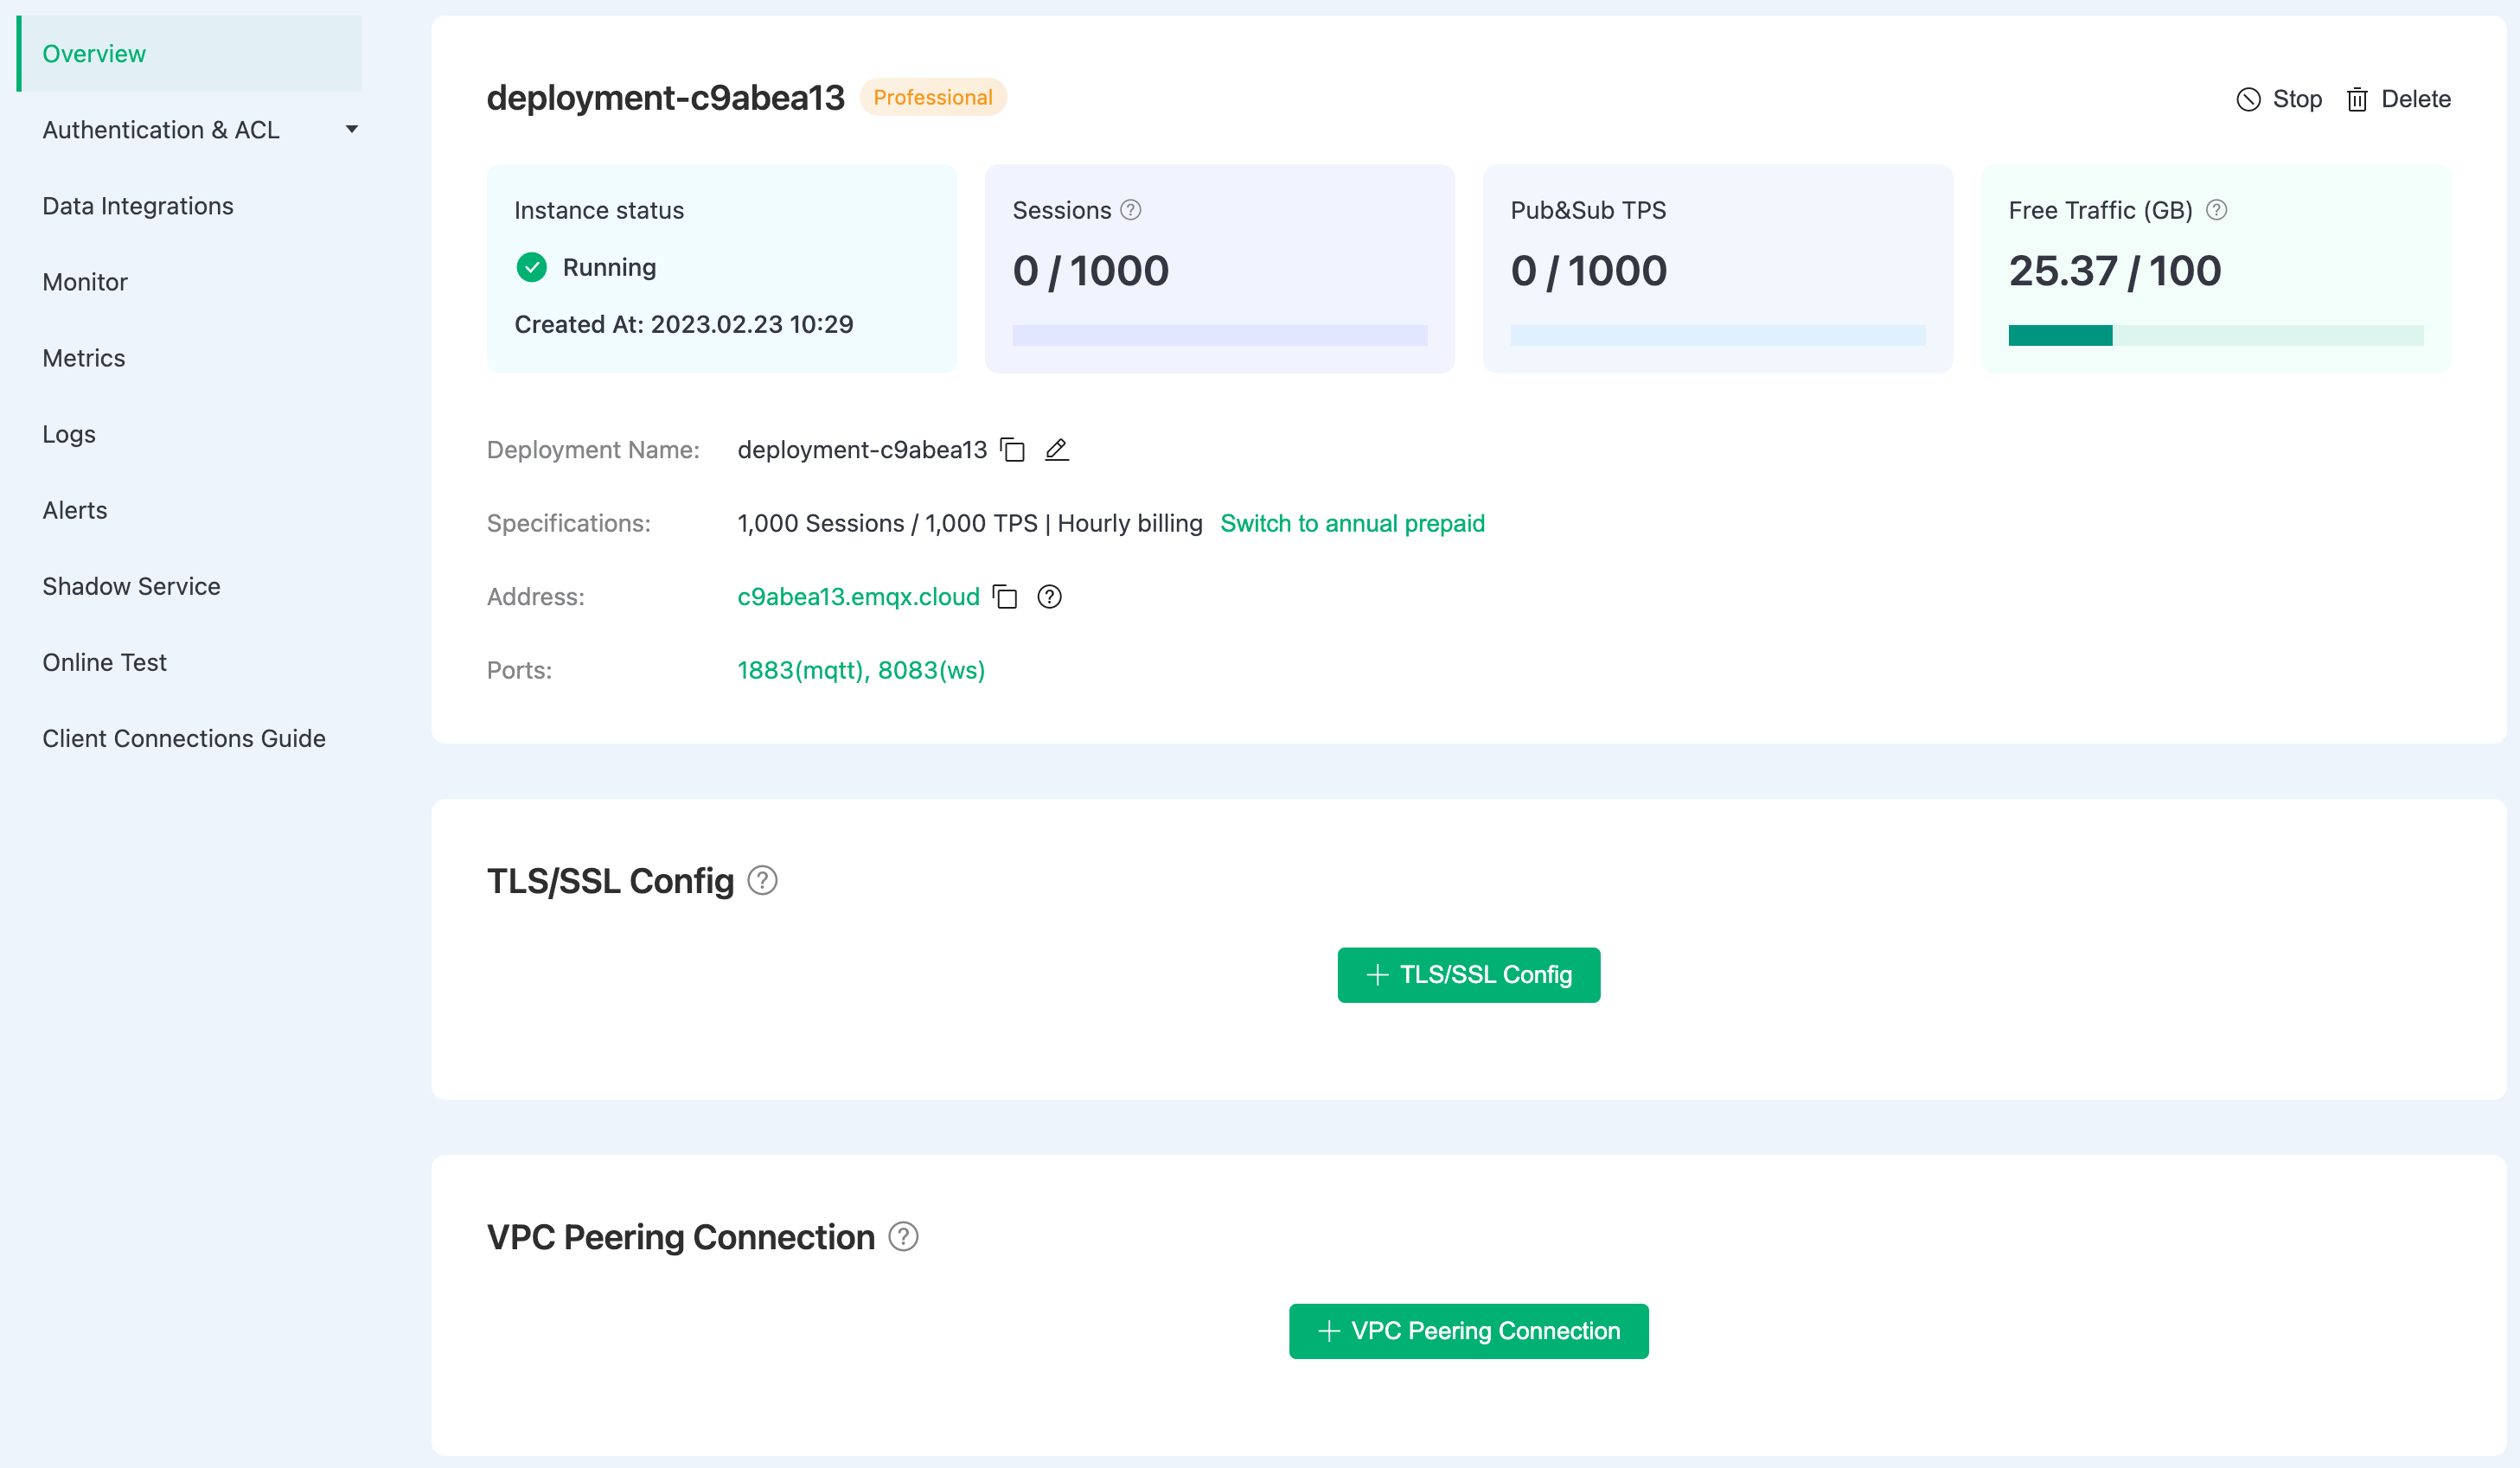
- Instance status: Running status and duration of operation.
- Sessions: Current and maximum connection counts.
- Pub&Sub TPS: Current messages sent and received per second, as well as the TPS limit.
- Traffic: Usage information for the deployed traffic, including monthly usage and free quota.
- Deployment name: A customizable name for the deployment.
- Tiers: The current tier of the deployment, including the ability to switch from hourly billing to annual billing.
- Address:
- Professional Plan: IP
- Standard Plan: Domain name ending with emqx.cloud
- Ports:
- Professional Plan:
1883(mqtt) and8083(ws) are enabled by default. You can configure TLS/SSL to enable 8883 (mqtts) and 8084 (wss) ports. - Standard Plan:
15xxx(mqtt),15xxx(mqtts),8083(ws), and8084(wss) ports are enabled by default.
- Professional Plan:
Check out the Connection guide to learn more.
To explore the advanced features of the Dedicated Plan, click the links below.
Configure TLS/SSL
EMQX Cloud Professional Deployment provides custom one-way/two-way TLS/SSL configuration and supports self-signed and CA-signed certificates.
VPC Peering Connections
VPC peering connection is a network connection between two VPCs. Through this connection, the instances in different VPCs can communicate with each other as if they are in the same network.
Configure PrivateLink
PrivateLink enables the proprietary network VPC where the EMQX Cloud deployment is located to establish a secure and stable private connection to services on the public cloud. It simplifies the network architecture, enables private access to services, and avoids the potential security risks associated with accessing services over the public network.
REST API
EMQX Cloud API follows the REST architecture. You can access the functions of EMQX programmatically.
Internal Endpoint
Internal Endpoint allows you to create an internal load-balancing service that distributes traffic on-demand within an internal network. It can expand the application system's throughput by distributing traffic to different backend servers.
NAT Gateway
NAT gateways can provide network address translation services to provide Professional deployments with the ability to access public network resources without the need for VPC peering connections.