Integrate with MQTT Broker
In order to facilitate the message bridging of multiple MQTT Brokers, you can use the Data Integrations to operate.
This guide will create a data integration bridged by MQTT Broker to achieve the following functions:
- Forward all messages sent to the greet topic to another MQTT Broker
In order to achieve this function, we will complete the following 4 tasks:
- Start Mosquitto service
- Set the filter conditions of the data integration
- Create a resource and an action
- Complete the data integrations creation and test
Tip
- A deployment (EMQX Cluster) has been created on EMQX Cloud.
- For Professional Plan users: Please complete Peering Connection Creation first, all IPs mentioned below refer to the internal network IP of the resource.(Professional Plan with a NAT gateway can also use public IP to connect to resources).
- For Basic Plan users: There is no need to complete peering connection, and the IP mentioned below refers to the public IP of the resource.
- For BYOC Plan users: Please establish a peering connection between the VPC where BYOC is deployed and the VPC where the resources are located. All IPs mentioned below refer to the internal IP of the resources. If you need to access the resources via public IP addresses, please configure a NAT gateway in your public cloud console for the VPC where BYOC is deployed.
Create Mosquitto service
In your cloud server, create a mosquitto service. For the convenience of demonstration, we use docker to build quickly here. (Do not use it in production environment)
docker run -it -p 1883:1883 --name mosquitto eclipse-mosquitto:1.6After that, open the server's 1883 port
EMQX Cloud Data Integrations configuration
Enter EMQX Cloud Console, and click to enter the deployment to use MQTT Broker bridge.
On the deployment page, drop down to select the MQTT Bridge resource type.
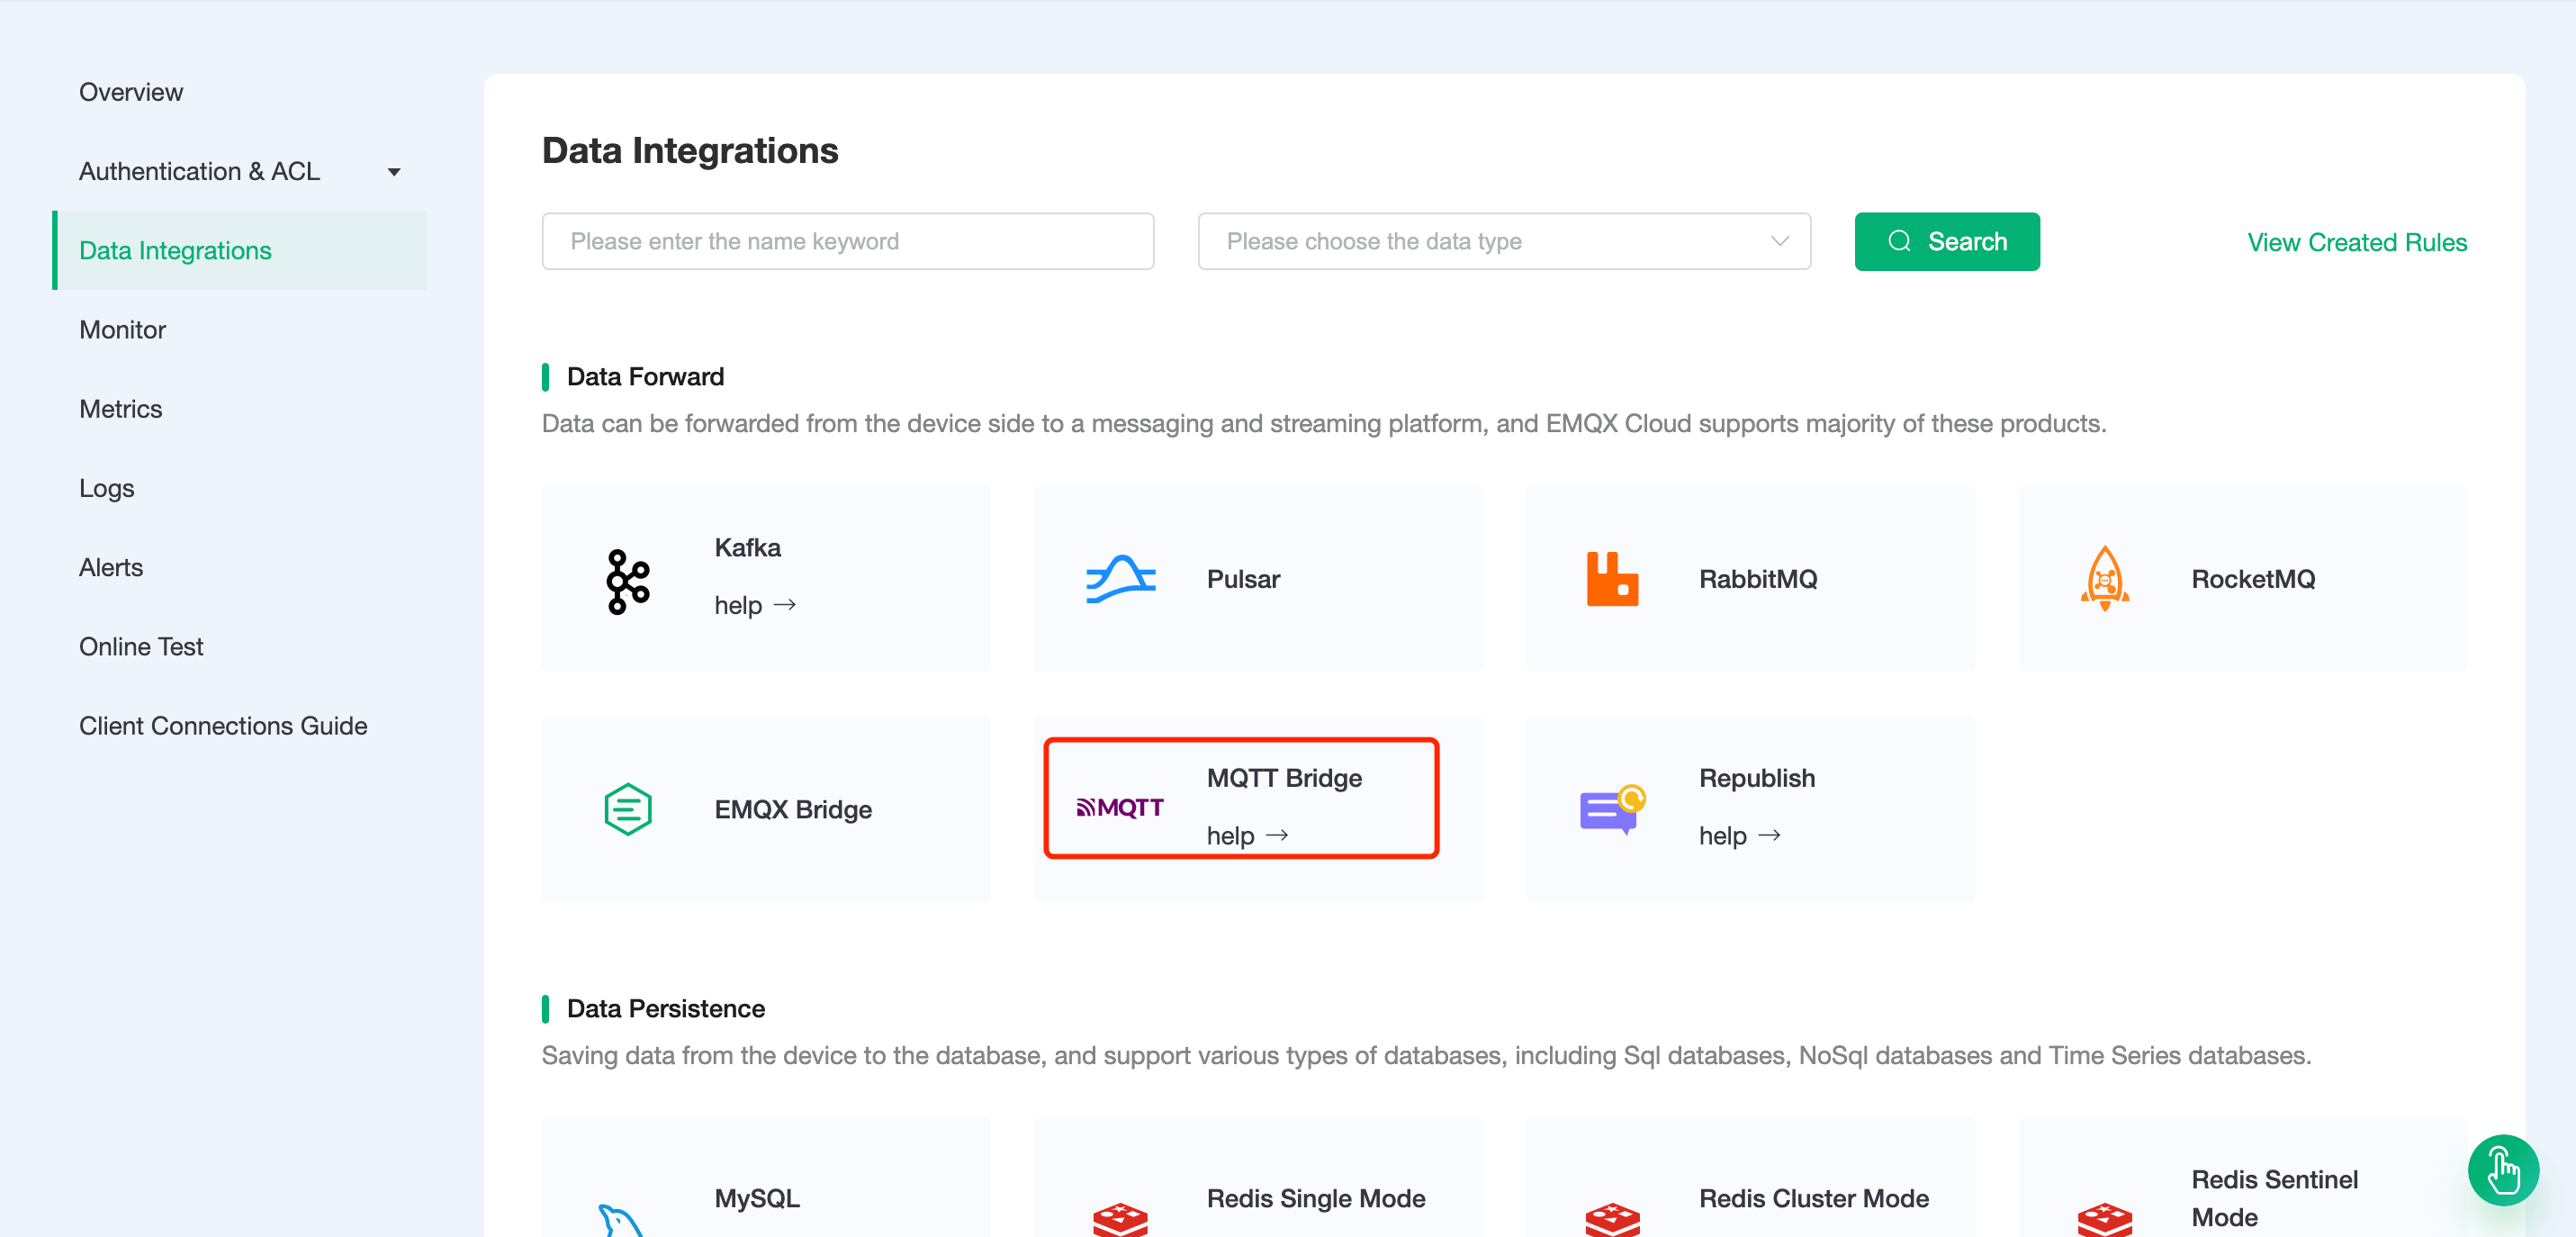
Create resources and actions
New Resource
Click on Data Integrations on the left menu bar, fill in the private address of the server in the remote broker address, place the mount point on
emqx/.- Remote broker address: fill in the IP address and port of the server.
- Bridge MountPoint (optional): fill in
emqx/, that is, add the mount point emqx/in front of the forwarding topic.
"Bridge MountPoint" refers to the mount point of the bridge topic, which is usually applicable to scenarios where a mount point needs to be added before forwarding the topic. For example, if the mount point of the bridge topic is set to
emqx/, when the local node sends a message totopic1, the topic of the remote bridge node will be changed toemqx/topic1.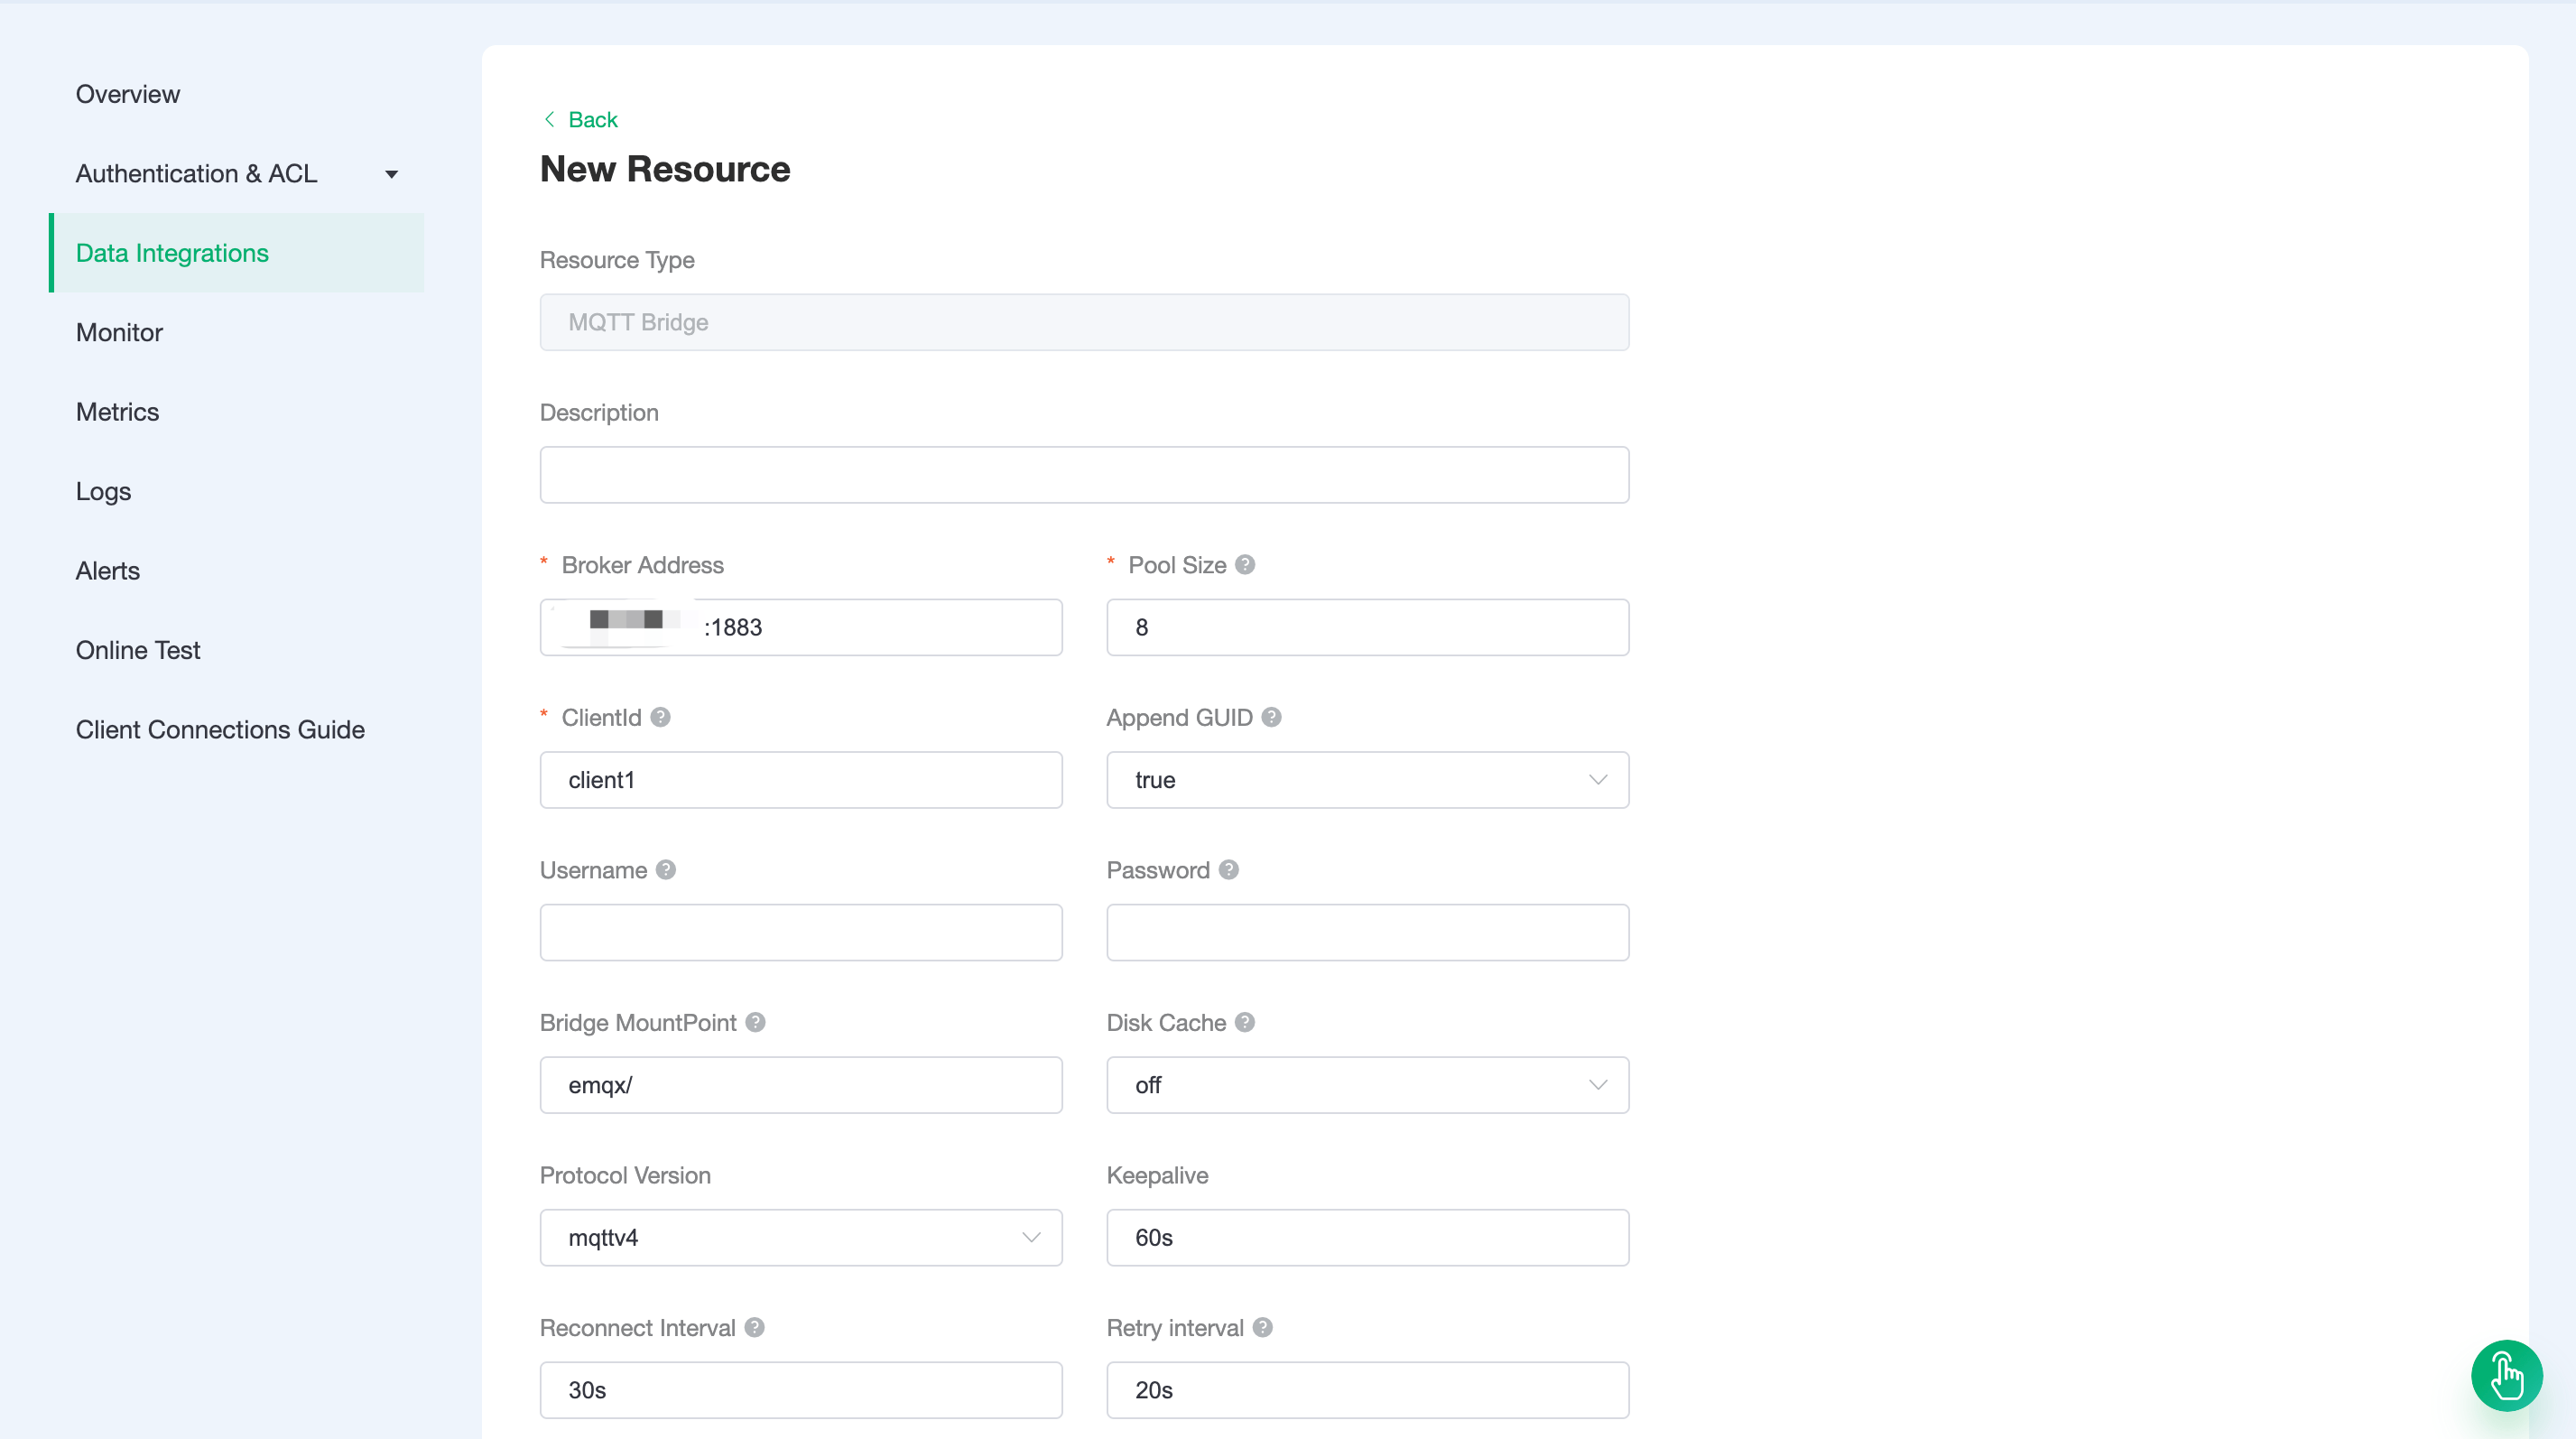
Then click Test. If "test available" returns, it means the test was successful.
TIP
If the test fails, please check whether the VPC peering connection is completed and whether the IP address is correct.
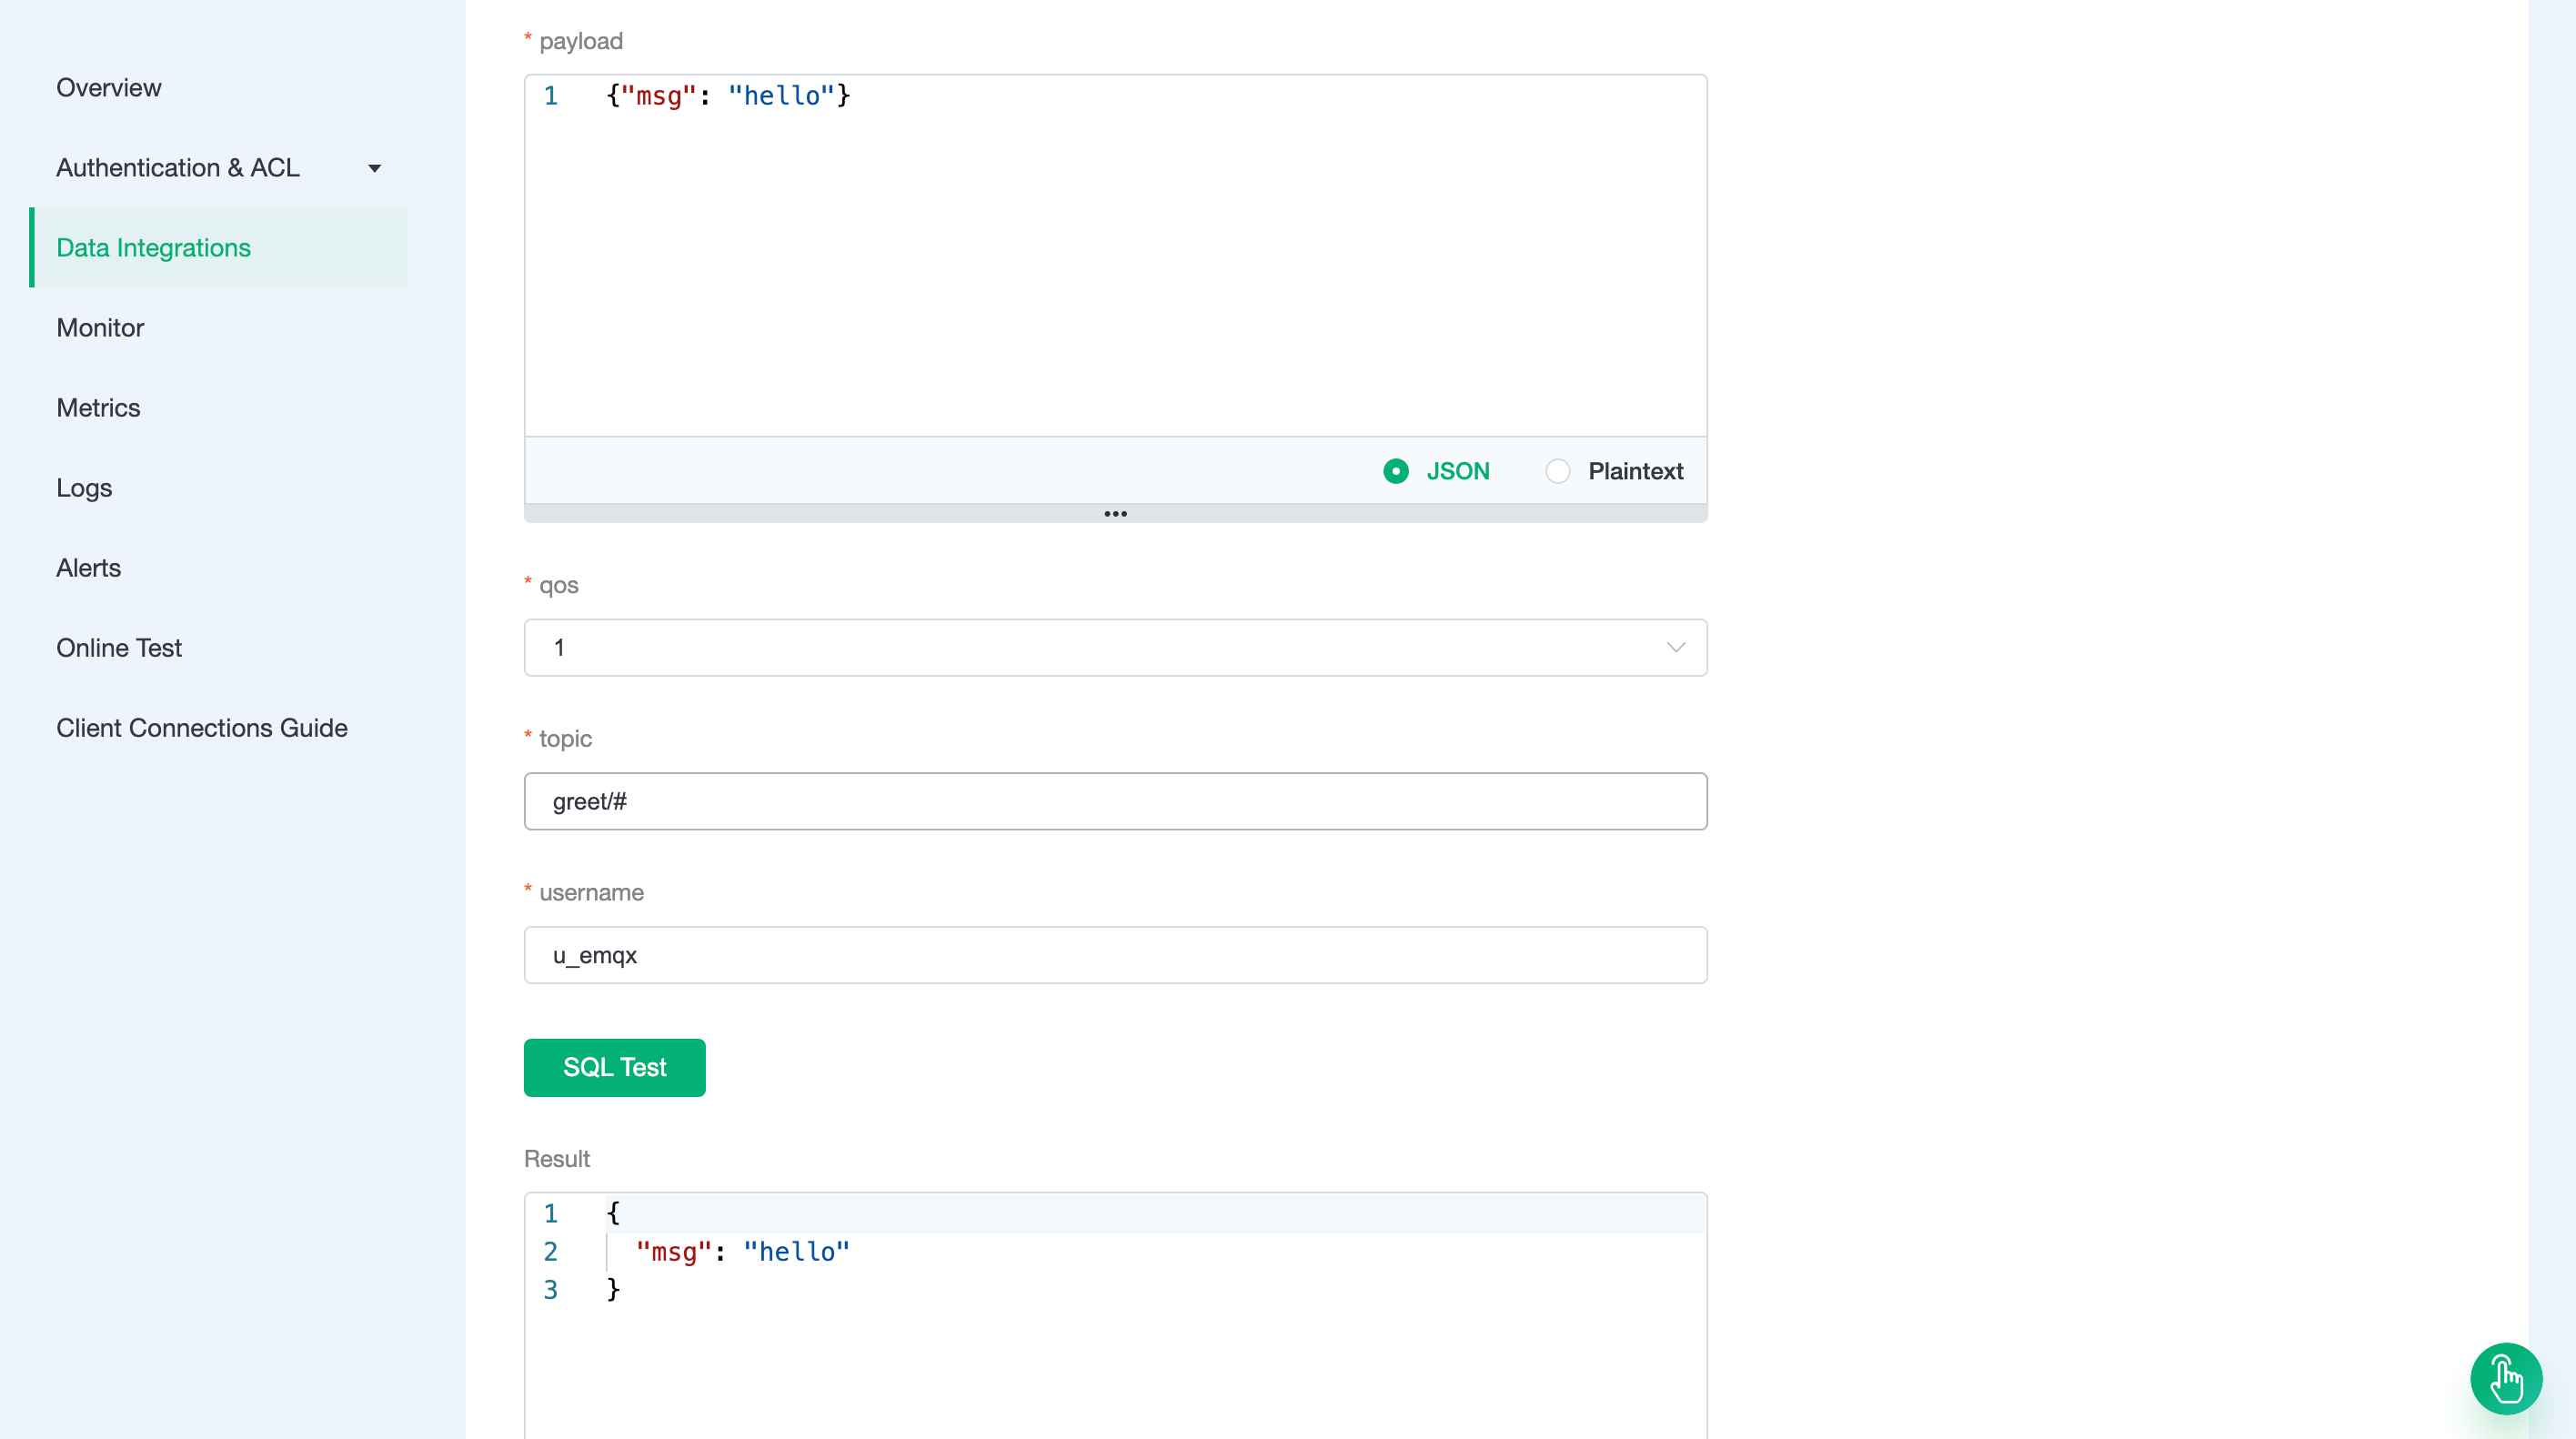
Rule Testing
Our goal is to trigger the engine when the topic of greet receives messages. Certain SQL processing is required here:
Only target 'greet/#'
According to the above principles, the SQL we finally get should be as follows:
sqlSELECT payload.msg as msg FROM "greet/#"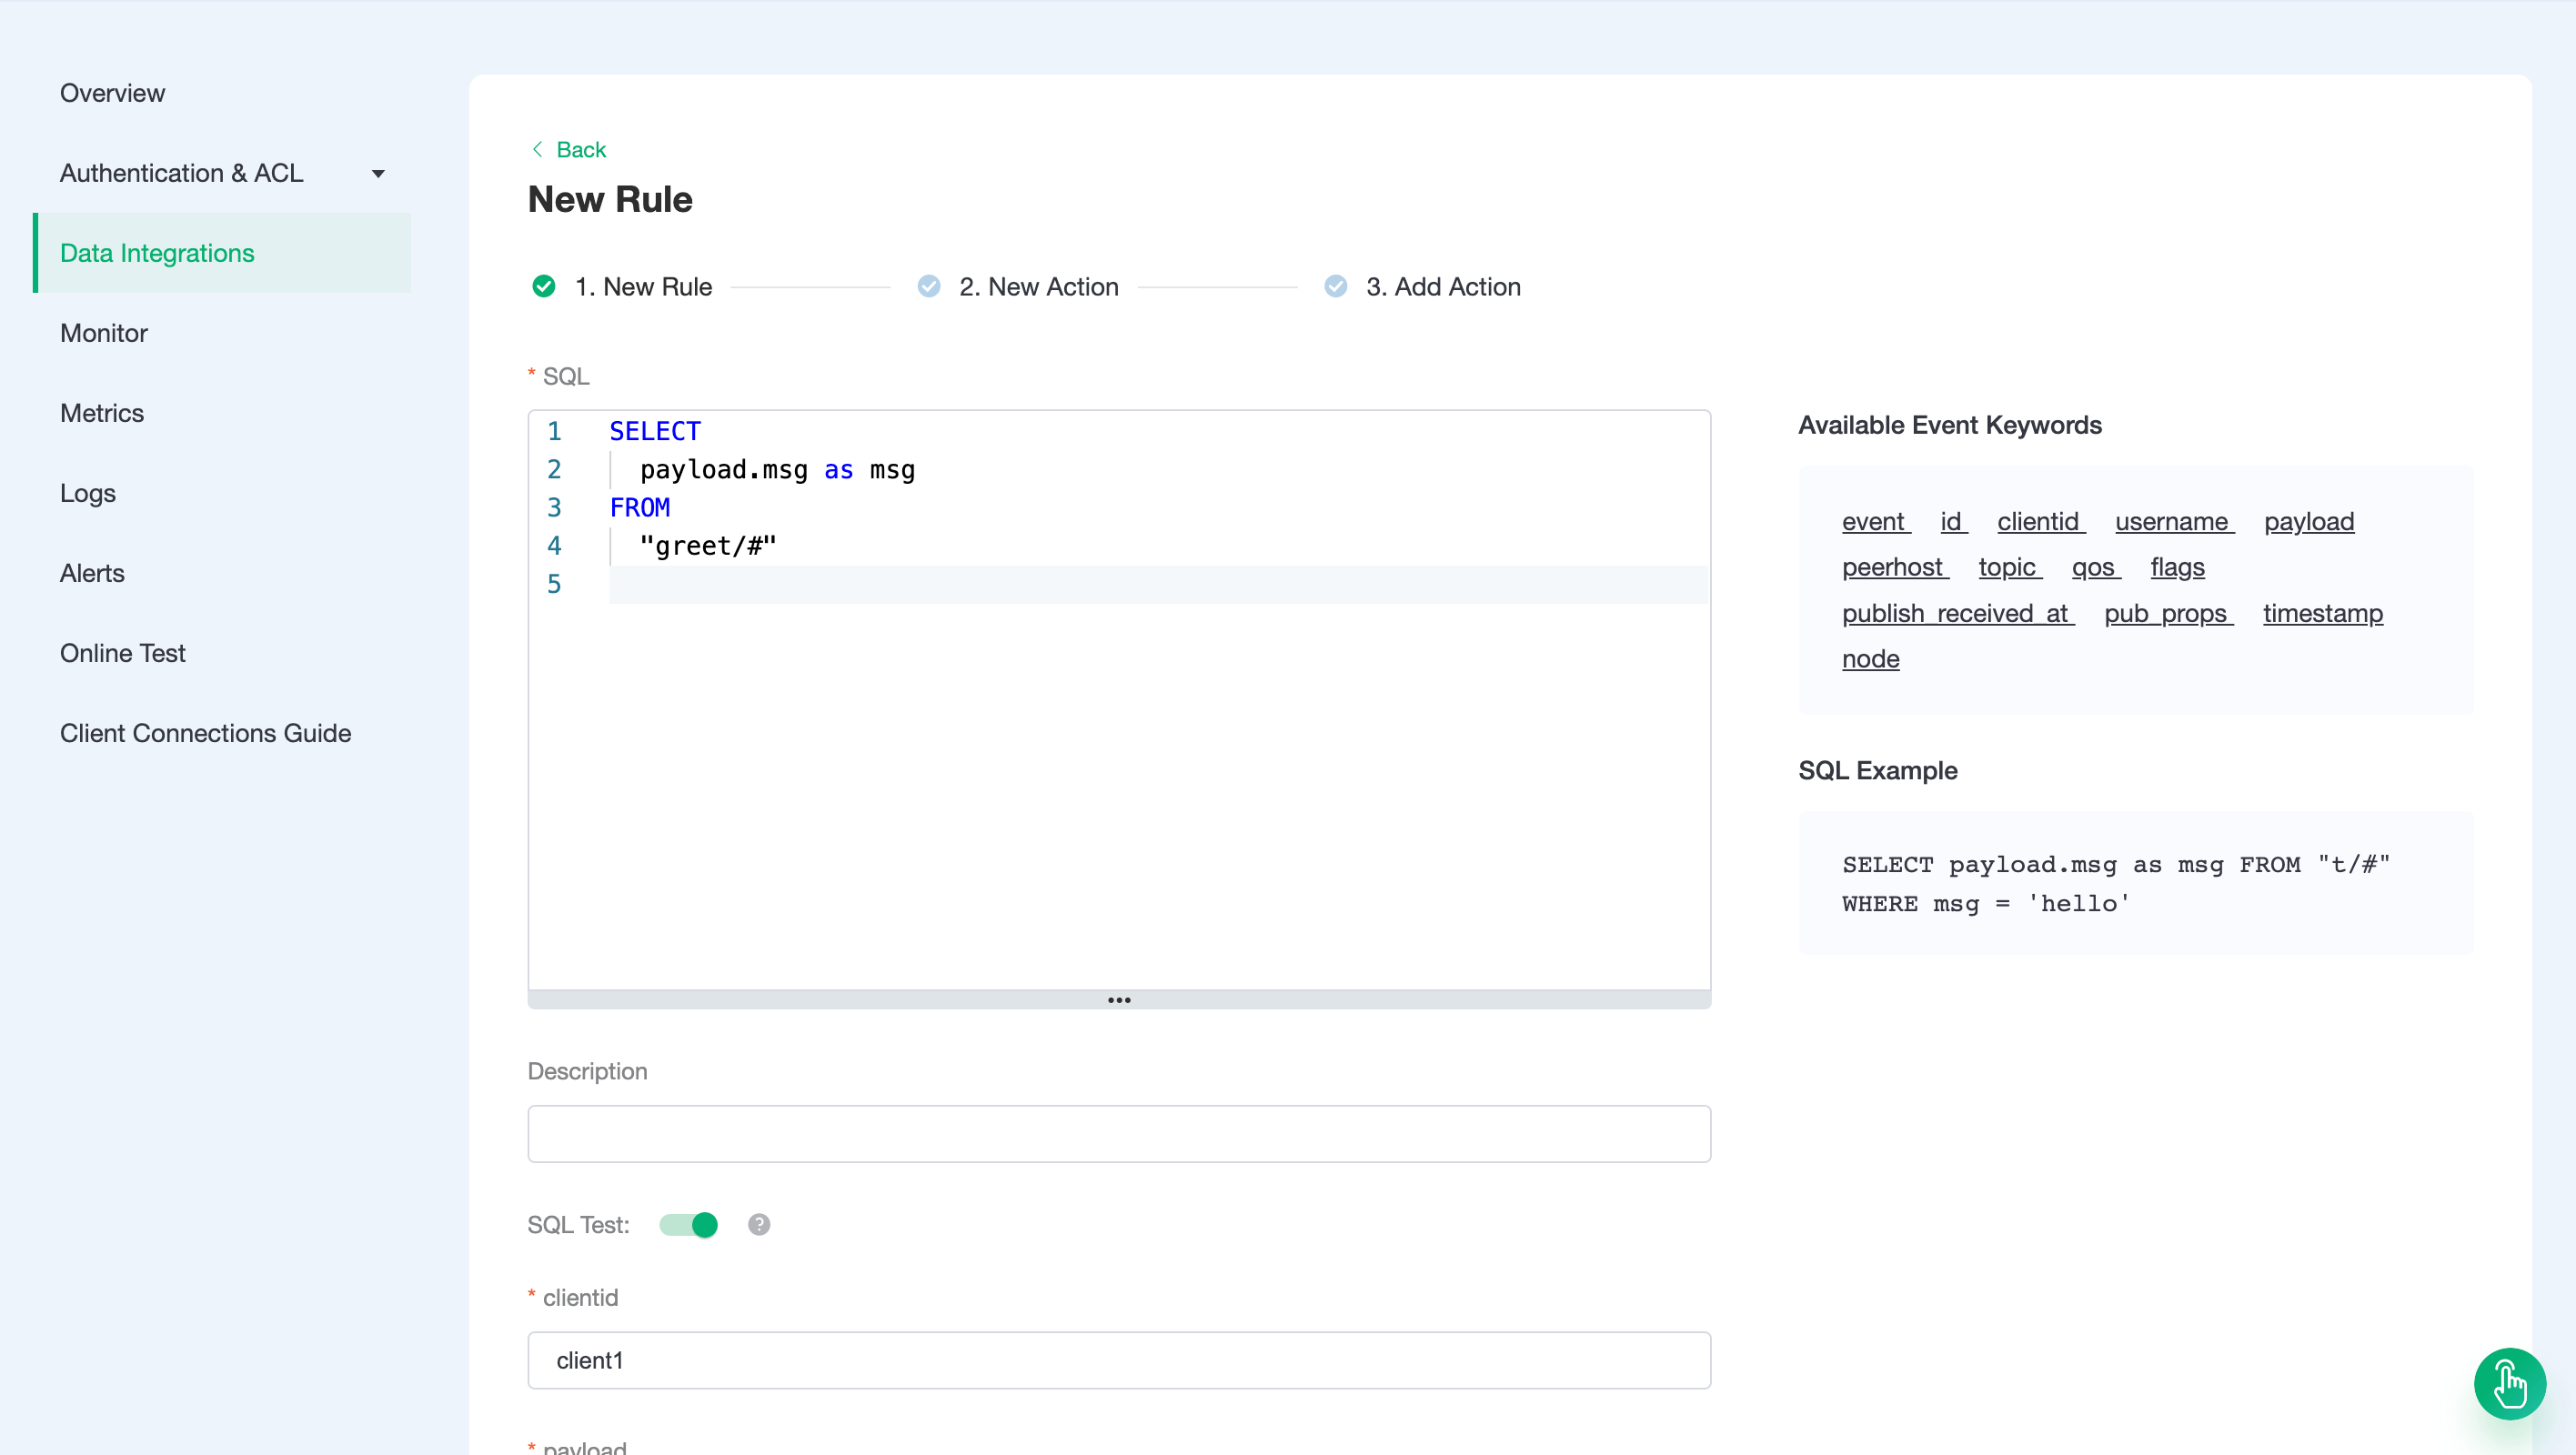
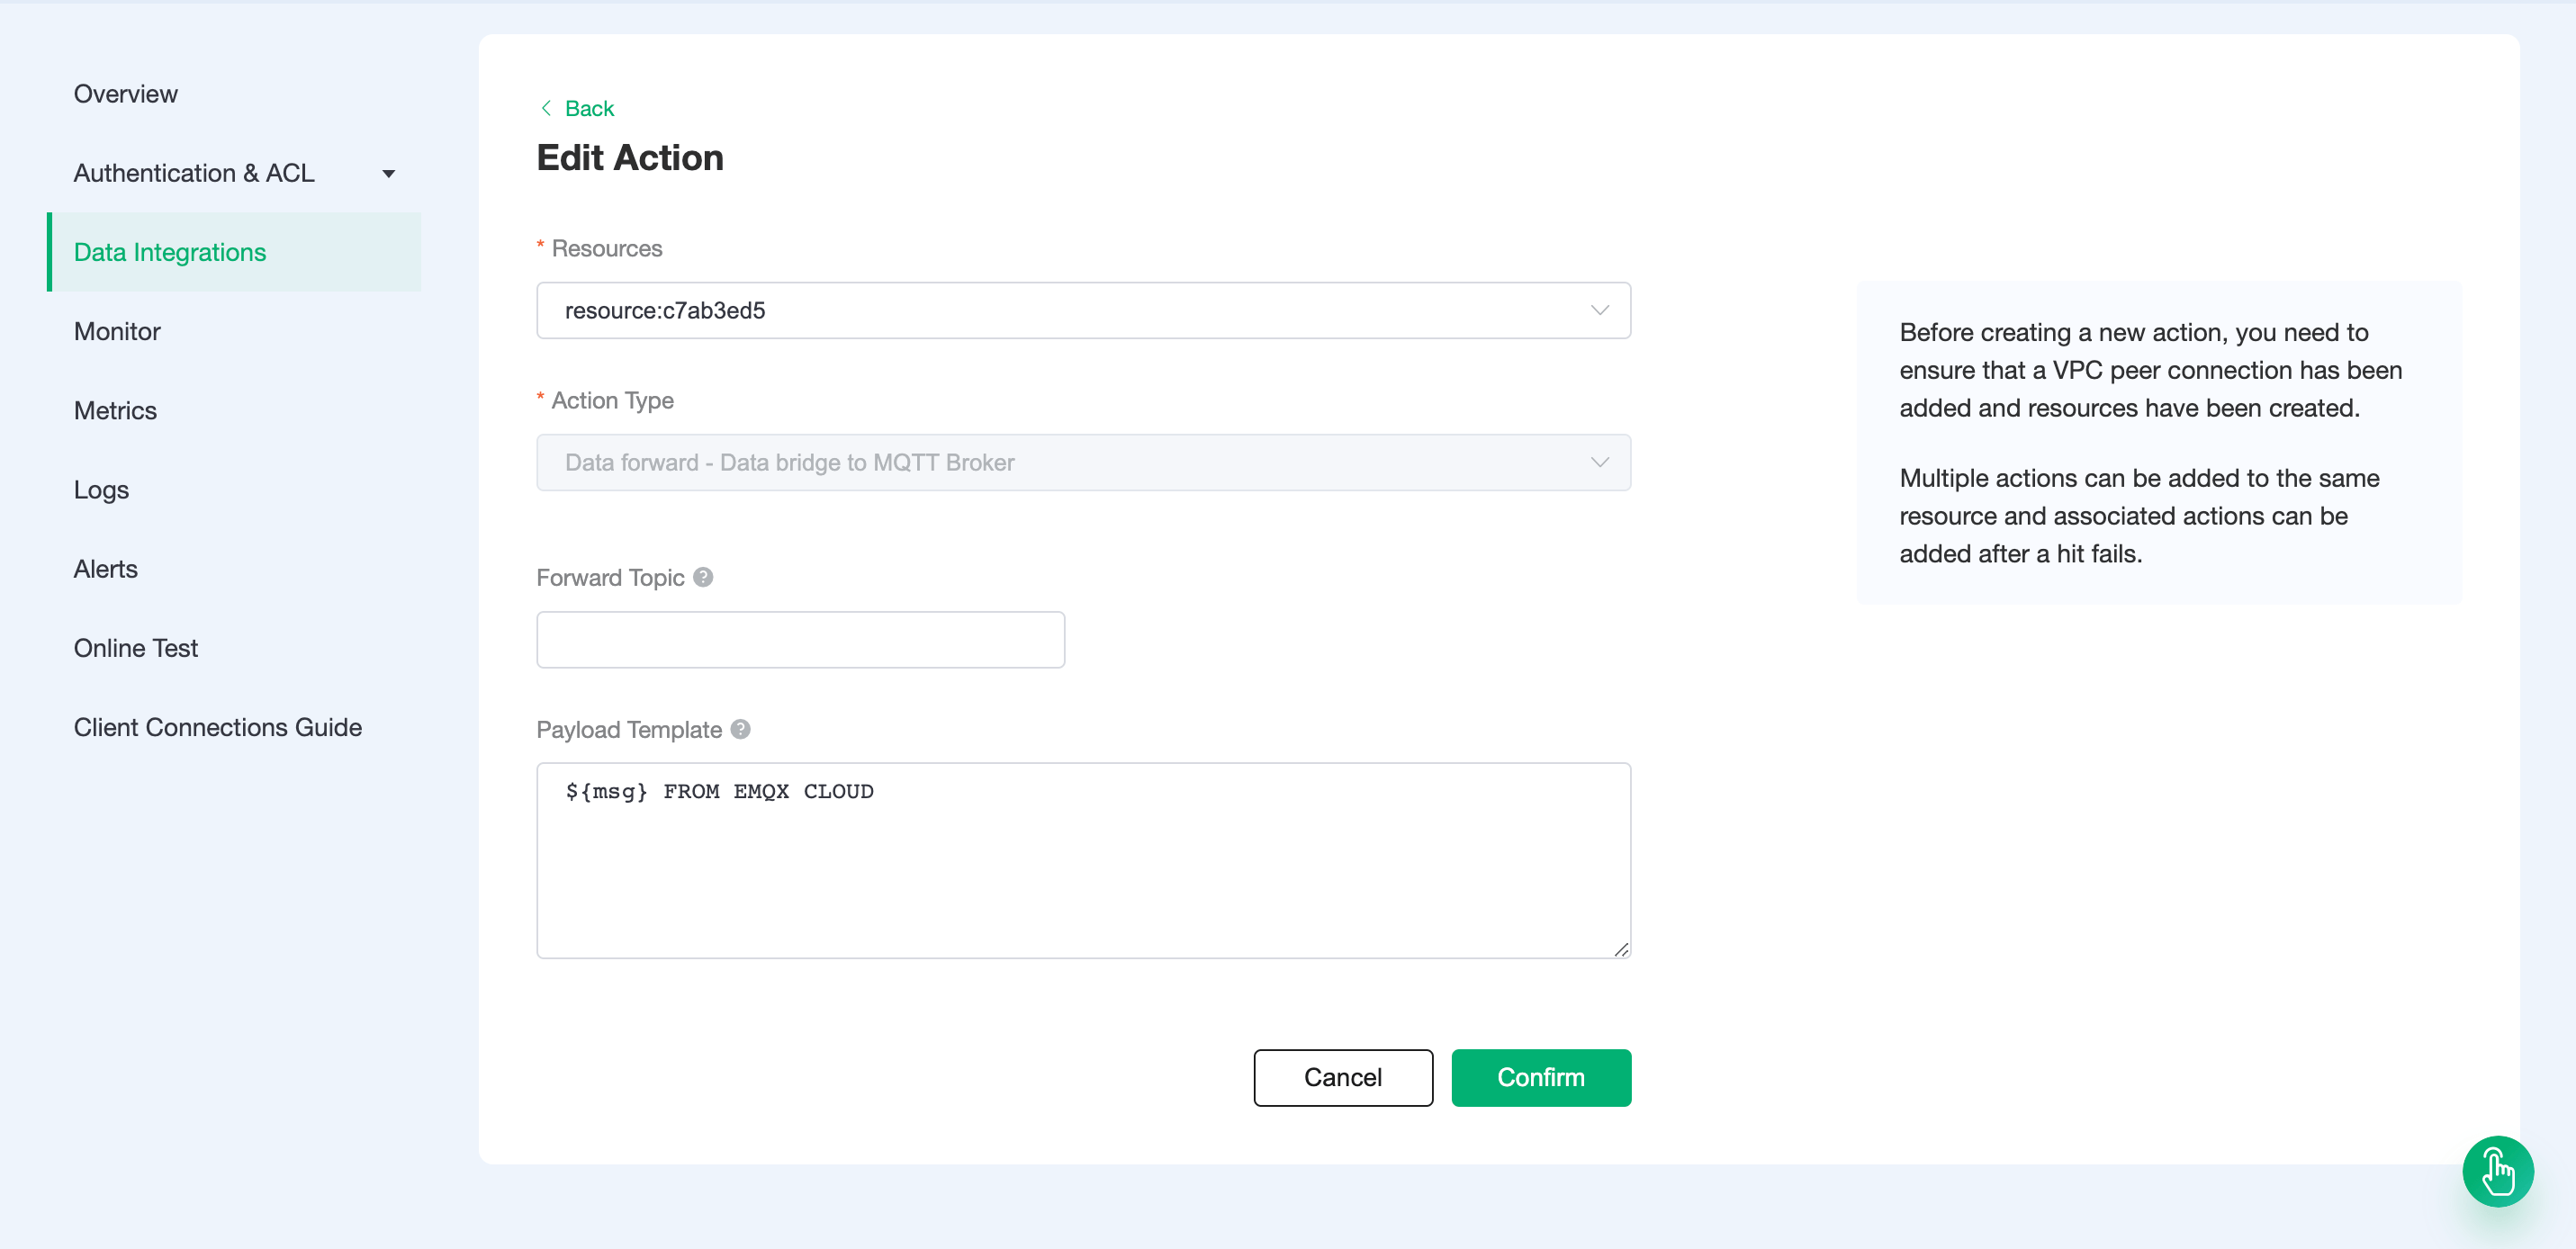
Add a response action
Click Next, select the resource created in the first step, and fill in "${msg} FROM EMQX CLOUD" in the message content template, and click confirm.
"Forwarding topic"(optional): The topic to use when forwarding messages. If it is not provided, it defaults to the topic of the bridged message.
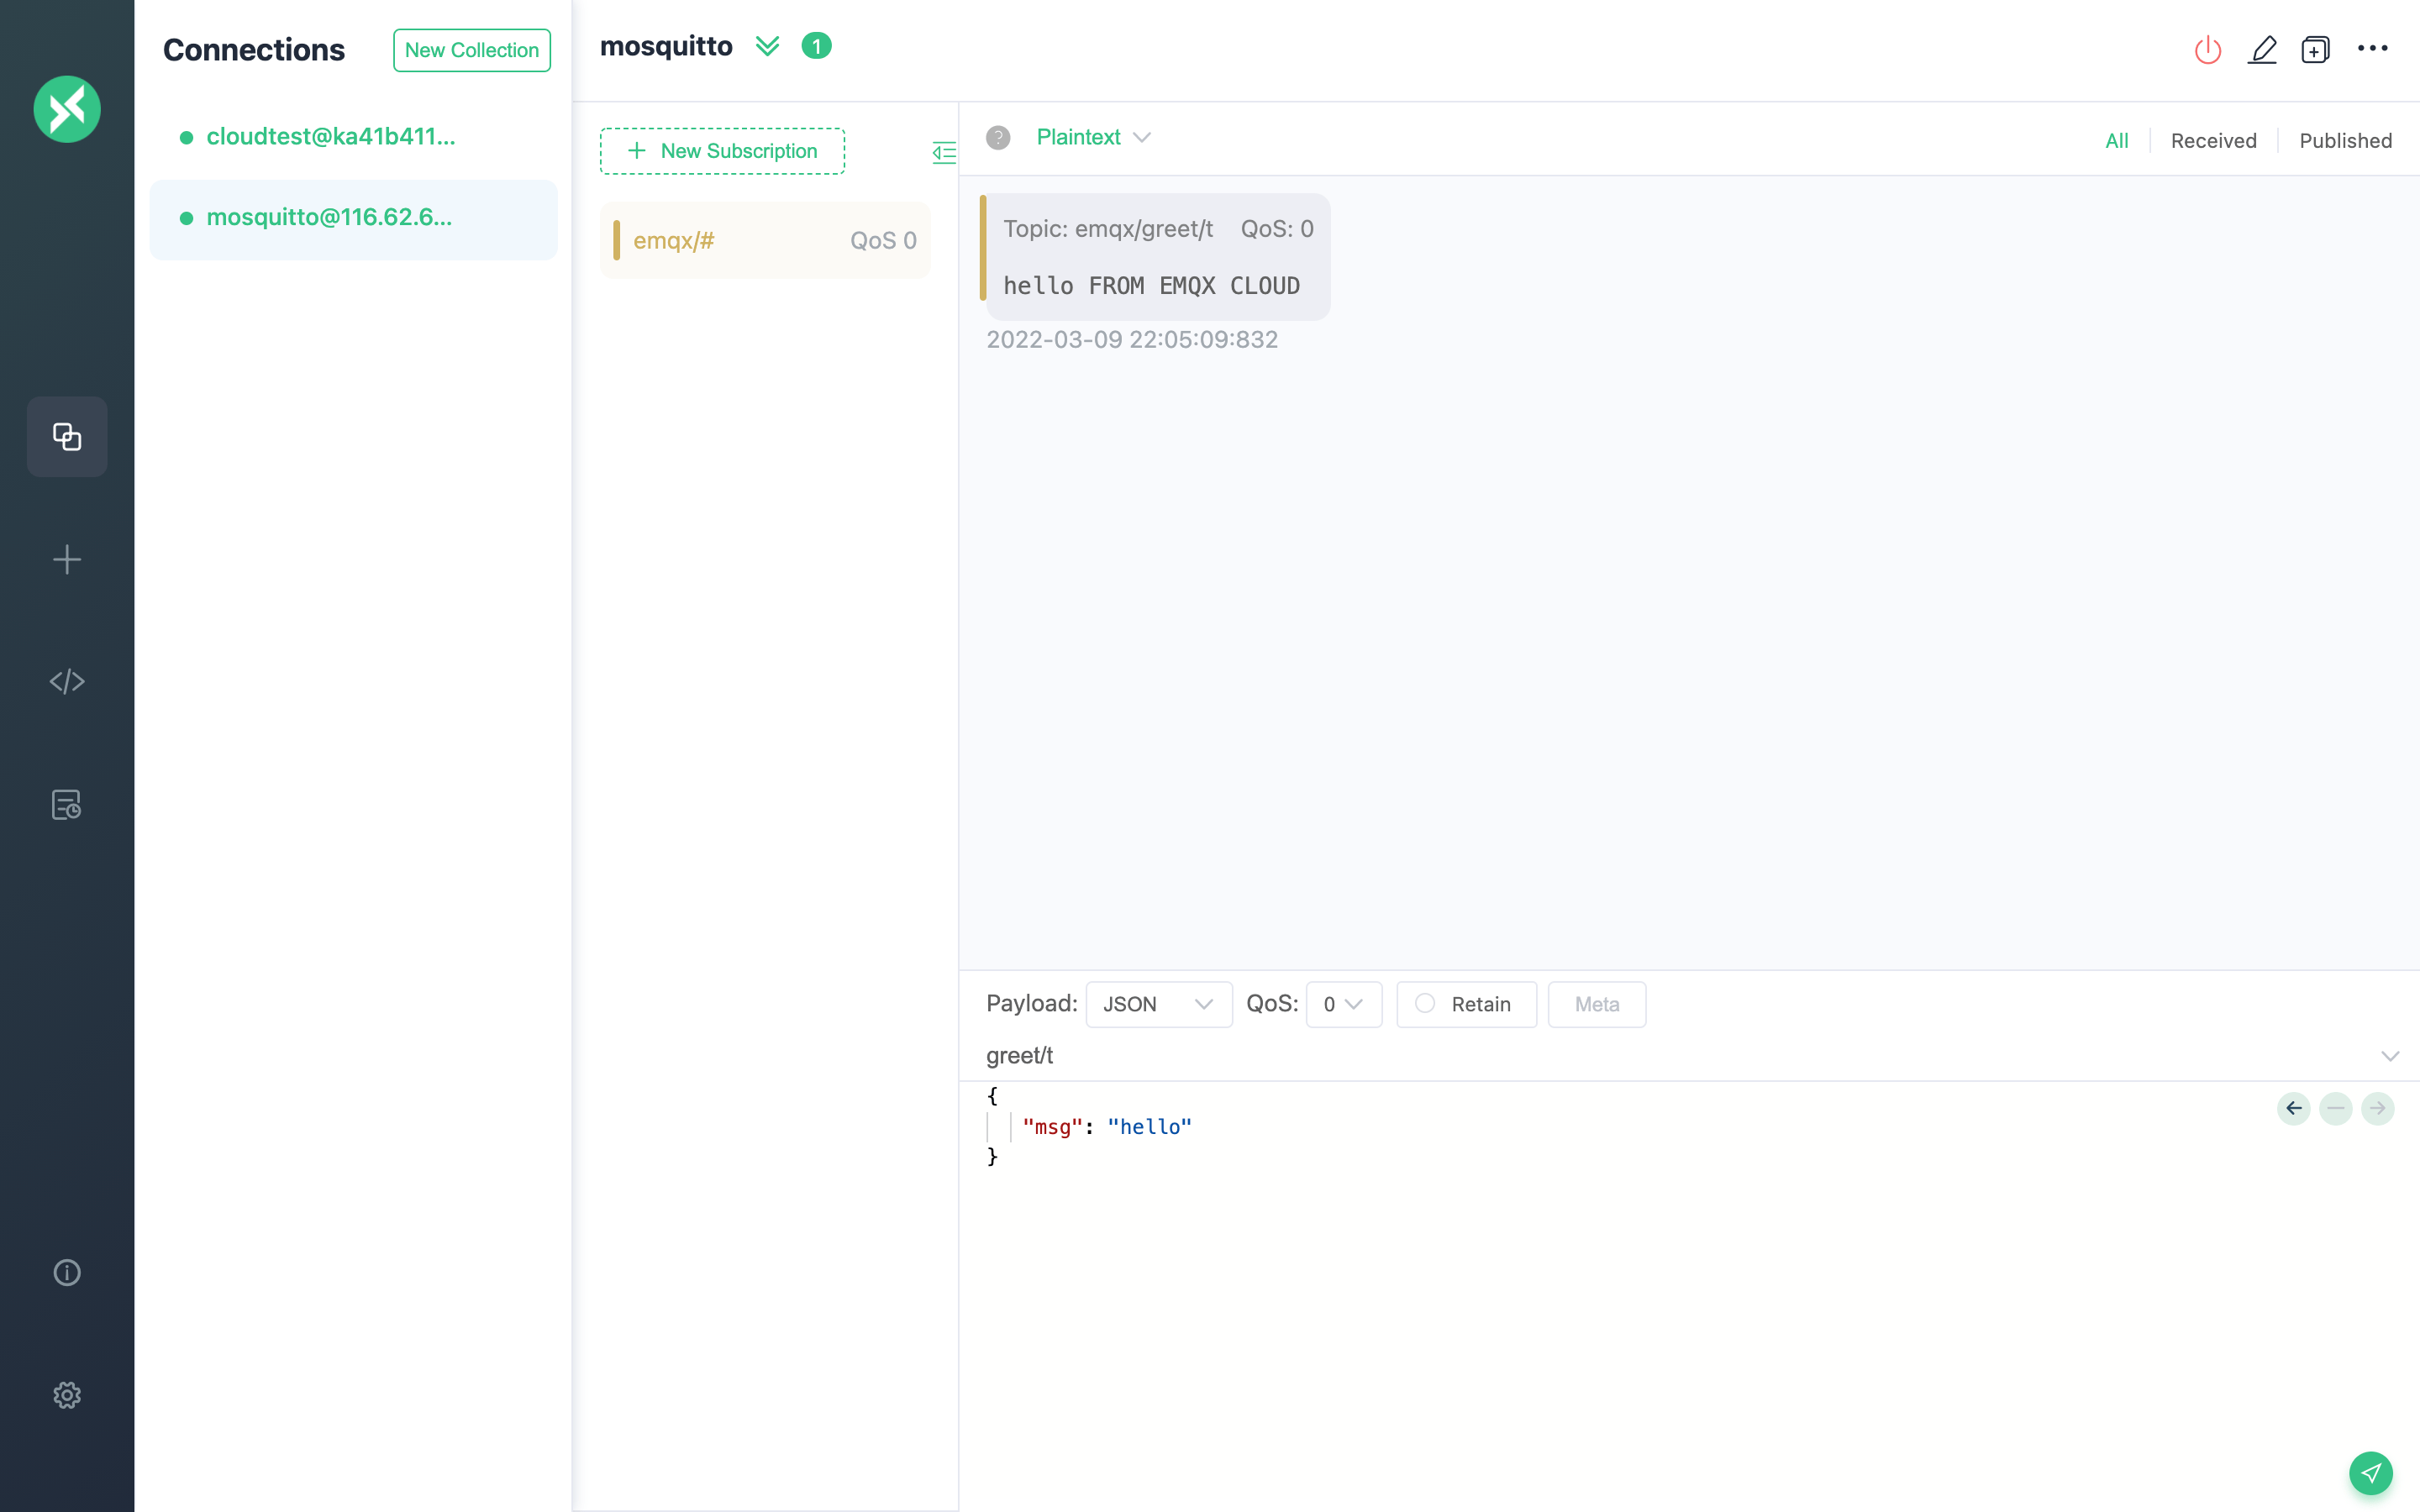
Test
If you are using EMQX Cloud for the first time, you can go to Deployment Connection Guide to view the MQTT client connection and test guide
When creating a resource, we set the bridge mount point to emqx/, and when creating a new action, we set the forwarding message topic as empty, where the client subscribes to Mosquitto's emqx/# topic. The topic of the actual received message is emqx/greet/t.
At the same time, we send "hello" to the greet/t topic of EMQX Cloud, and the rule engine will be triggered. We can see that Mosquitto has received the message of "hello FROM EMQX CLOUD"