Integrate with RocketMQ
RocketMQ is a distributed message and streaming data platform with low latency, high performance, high reliability, trillion-level capacity, and flexible scalability.
In this article, we will simulate temperature and humidity data and report these data to EMQX Cloud via the MQTT protocol and then use the EMQX Cloud Data Integrations to bridge the data into RocketMQ.
Before you start, you need to complete the following operations:
- A deployment (EMQX Cluster) has been created on EMQX Cloud.
- For Professional Plan users: Please complete Peering Connection Creation first, all IPs mentioned below refer to the internal network IP of the resource.(Professional Plan with a NAT gateway can also use public IP to connect to resources).
- For BYOC Plan users: Please establish a peering connection between the VPC where BYOC is deployed and the VPC where the resources are located. All IPs mentioned below refer to the internal IP of the resources. If you need to access the resources via public IP addresses, please configure a NAT gateway in your public cloud console for the VPC where BYOC is deployed.
RocketMQ configuration
Start NameServer
bashdocker run -d \ --restart=always \ --name rmqnamesrv \ -p 9876:9876 \ -e "MAX_POSSIBLE_HEAP=100000000" \ rocketmqinc/rocketmq \ sh mqnamesrvStart the broker container
bash# Modify the configuration file vi /opt/rocketmq/broker.conf brokerIP1=<Server private address> autoCreateTopicEnable = true docker run -d \ --restart=always \ --name rmqbroker \ --link rmqnamesrv:namesrv \ -p 10911:10911 \ -p 10909:10909 \ -e "NAMESRV_ADDR=namesrv:9876" \ -e "MAX_POSSIBLE_HEAP=200000000" \ -v /opt/rocketmq/broker.conf:/etc/rocketmq/broker.conf \ rocketmqinc/rocketmq \ sh mqbroker -c /etc/rocketmq/broker.confInstall RocketMQ Console
bashdocker run -d --restart=always --name rmqconsole \ --link rmqnamesrv:namesrv \ -e "JAVA_OPTS=-Drocketmq.namesrv.addr=namesrv:9876 -Dcom.rocketmq.sendMessageWithVIPChannel=false" \ -p 8080:8080 \ -t styletang/rocketmq-console-ng
Deployment Data Integrations Configuration
Go to the Data Integrations page
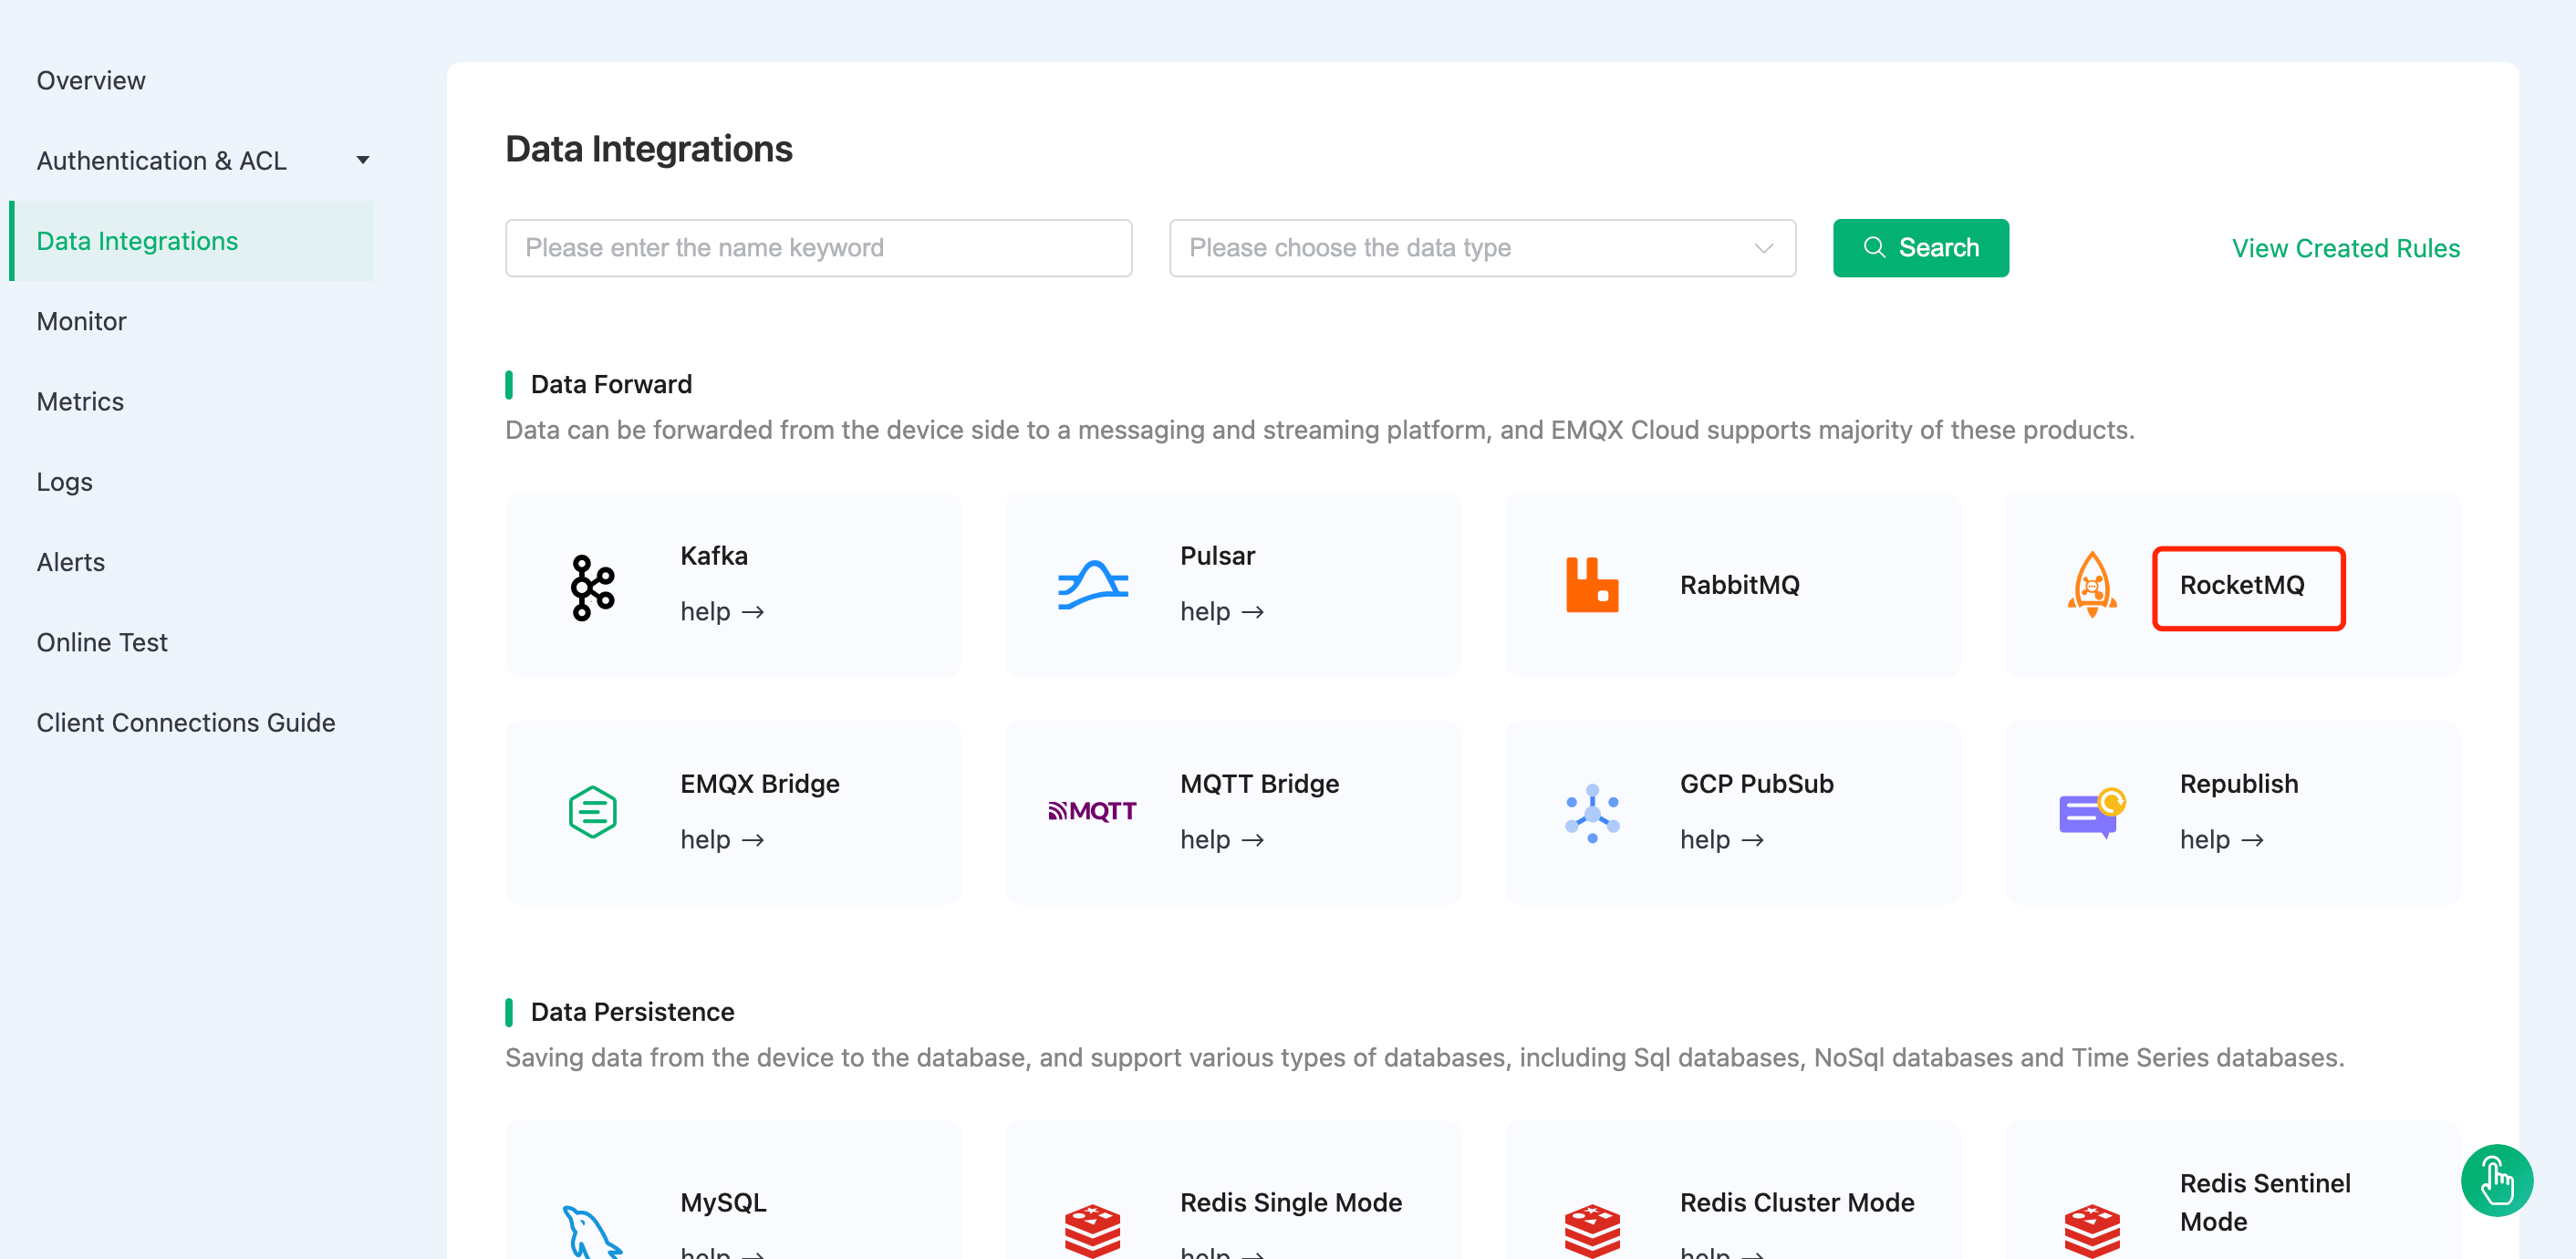
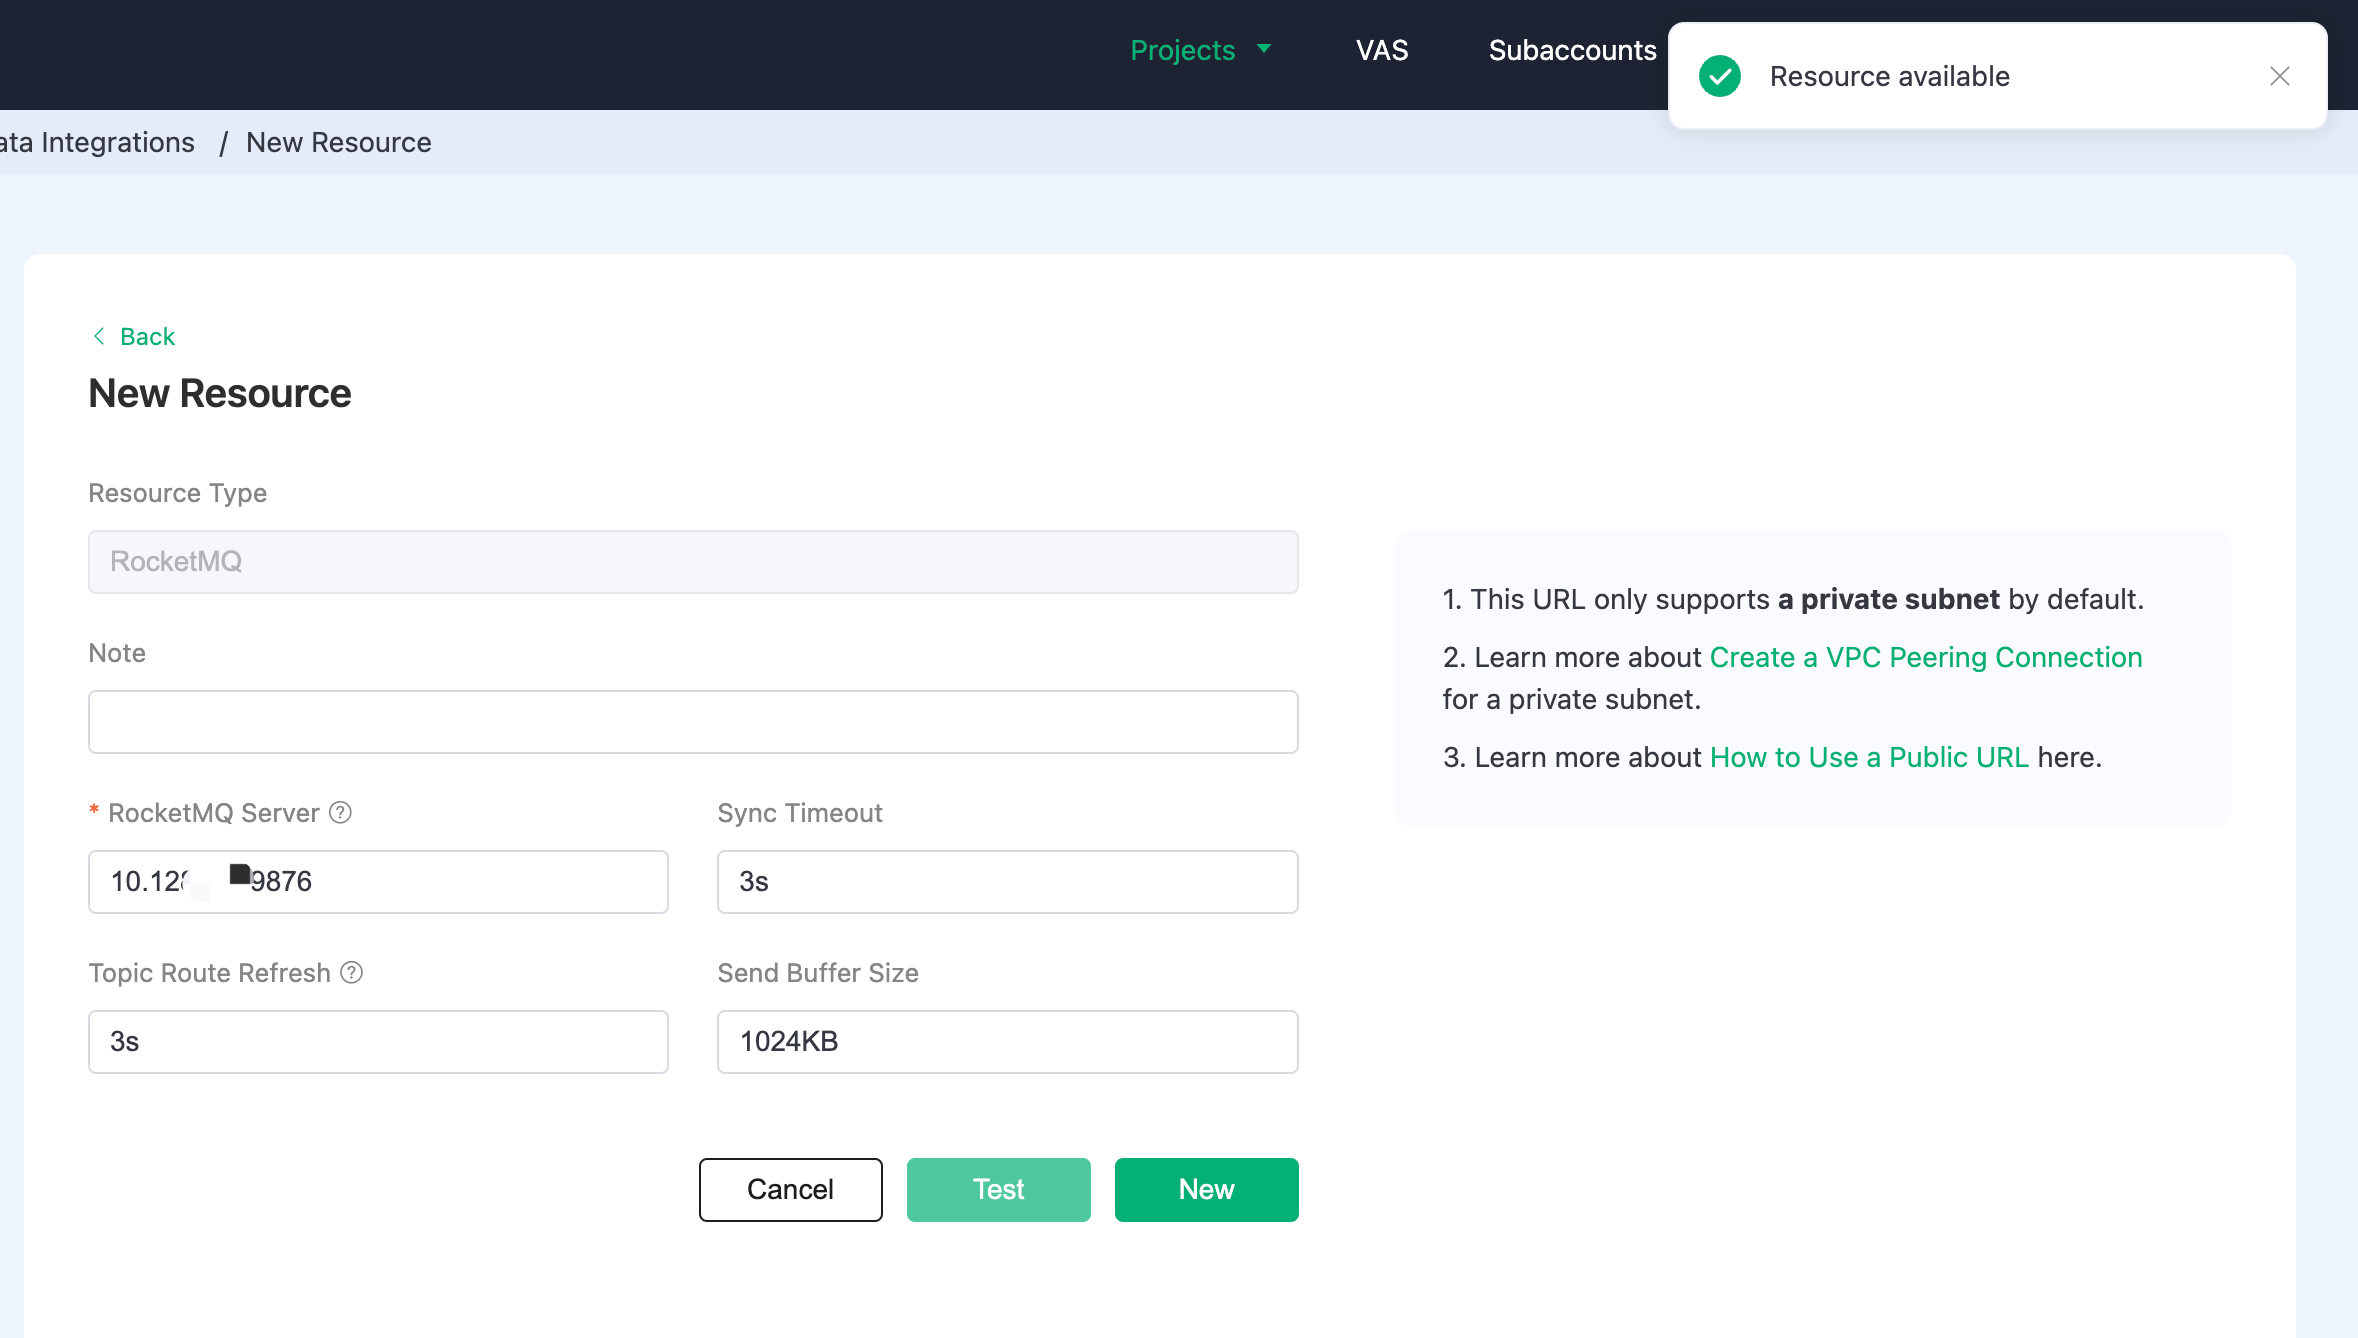
Create RocketMQ resources and verify that they are available.
Click RocketMQ resources, fill in the rocketmq connection details, and then click test. Please check the RocketMQ service if the test fails.
Create a new rule
Put the following SQL statement in the SQL input field. The device reporting message time (up timestamp), client ID, and message body (Payload) will be retrieved from the temp hum/emqx subject in the SQL rule, and the device ambient temperature and humidity will be read from the message body.
sqlSELECT timestamp as up_timestamp, clientid as client_id, payload.temp as temp, payload.hum as hum FROM "temp_hum/emqx"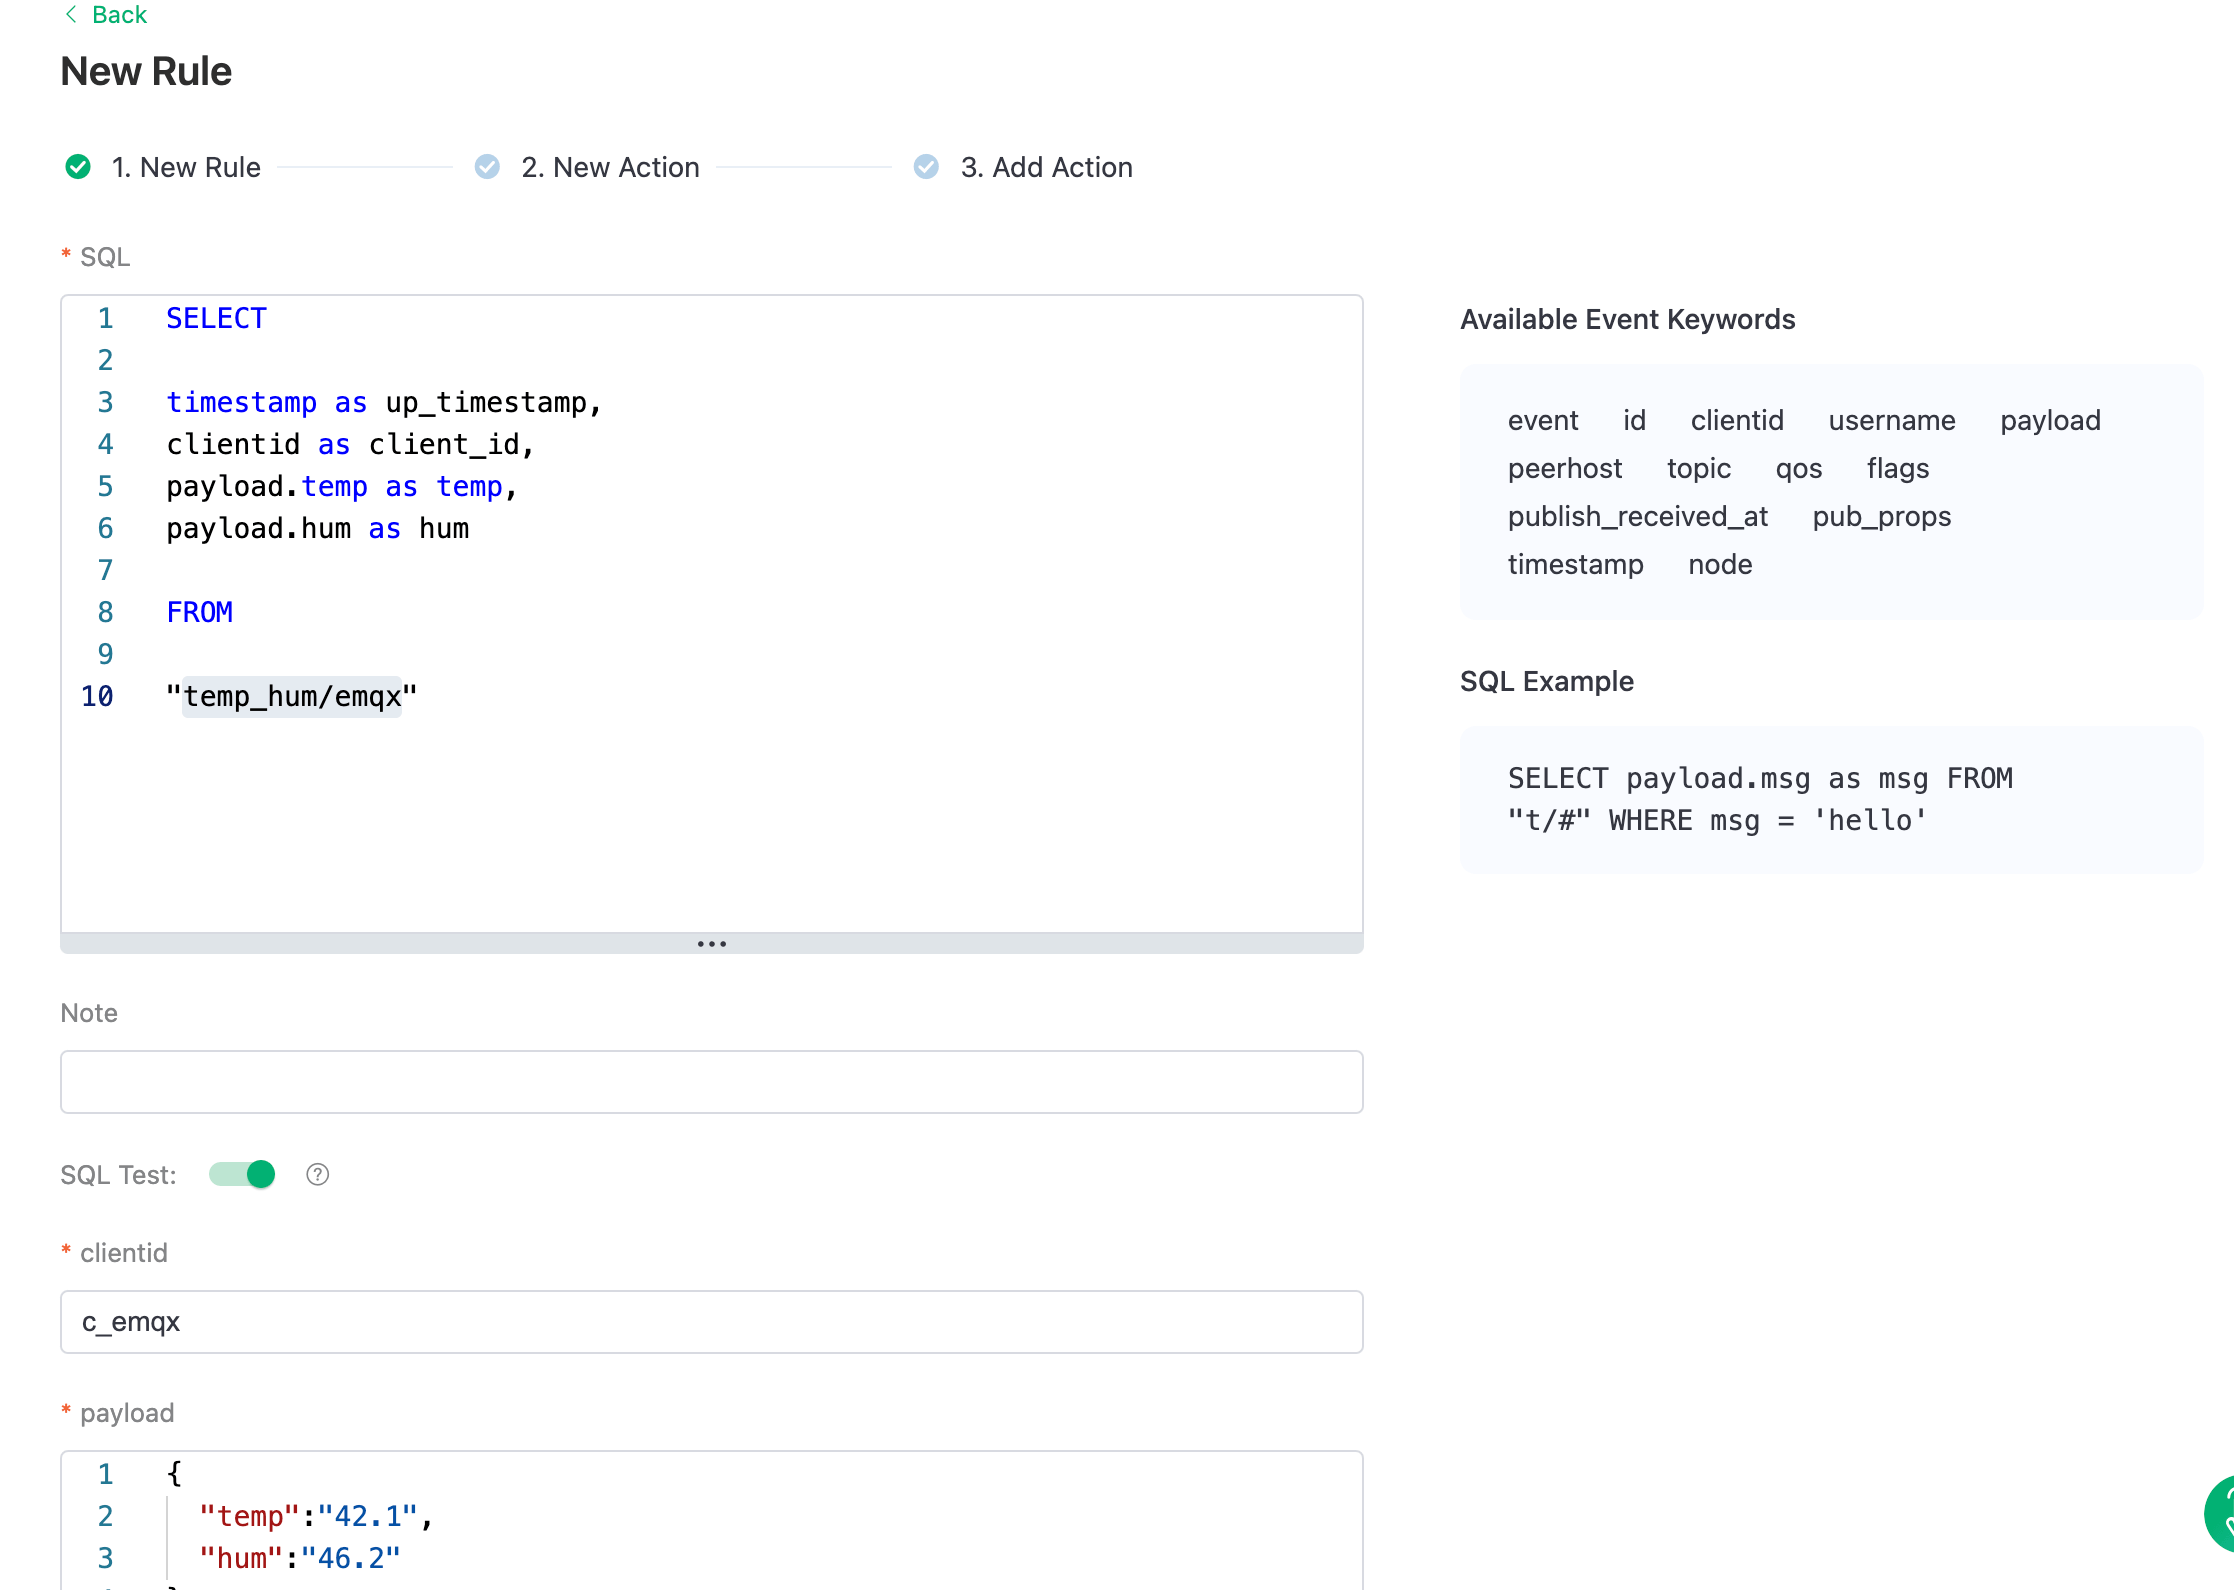
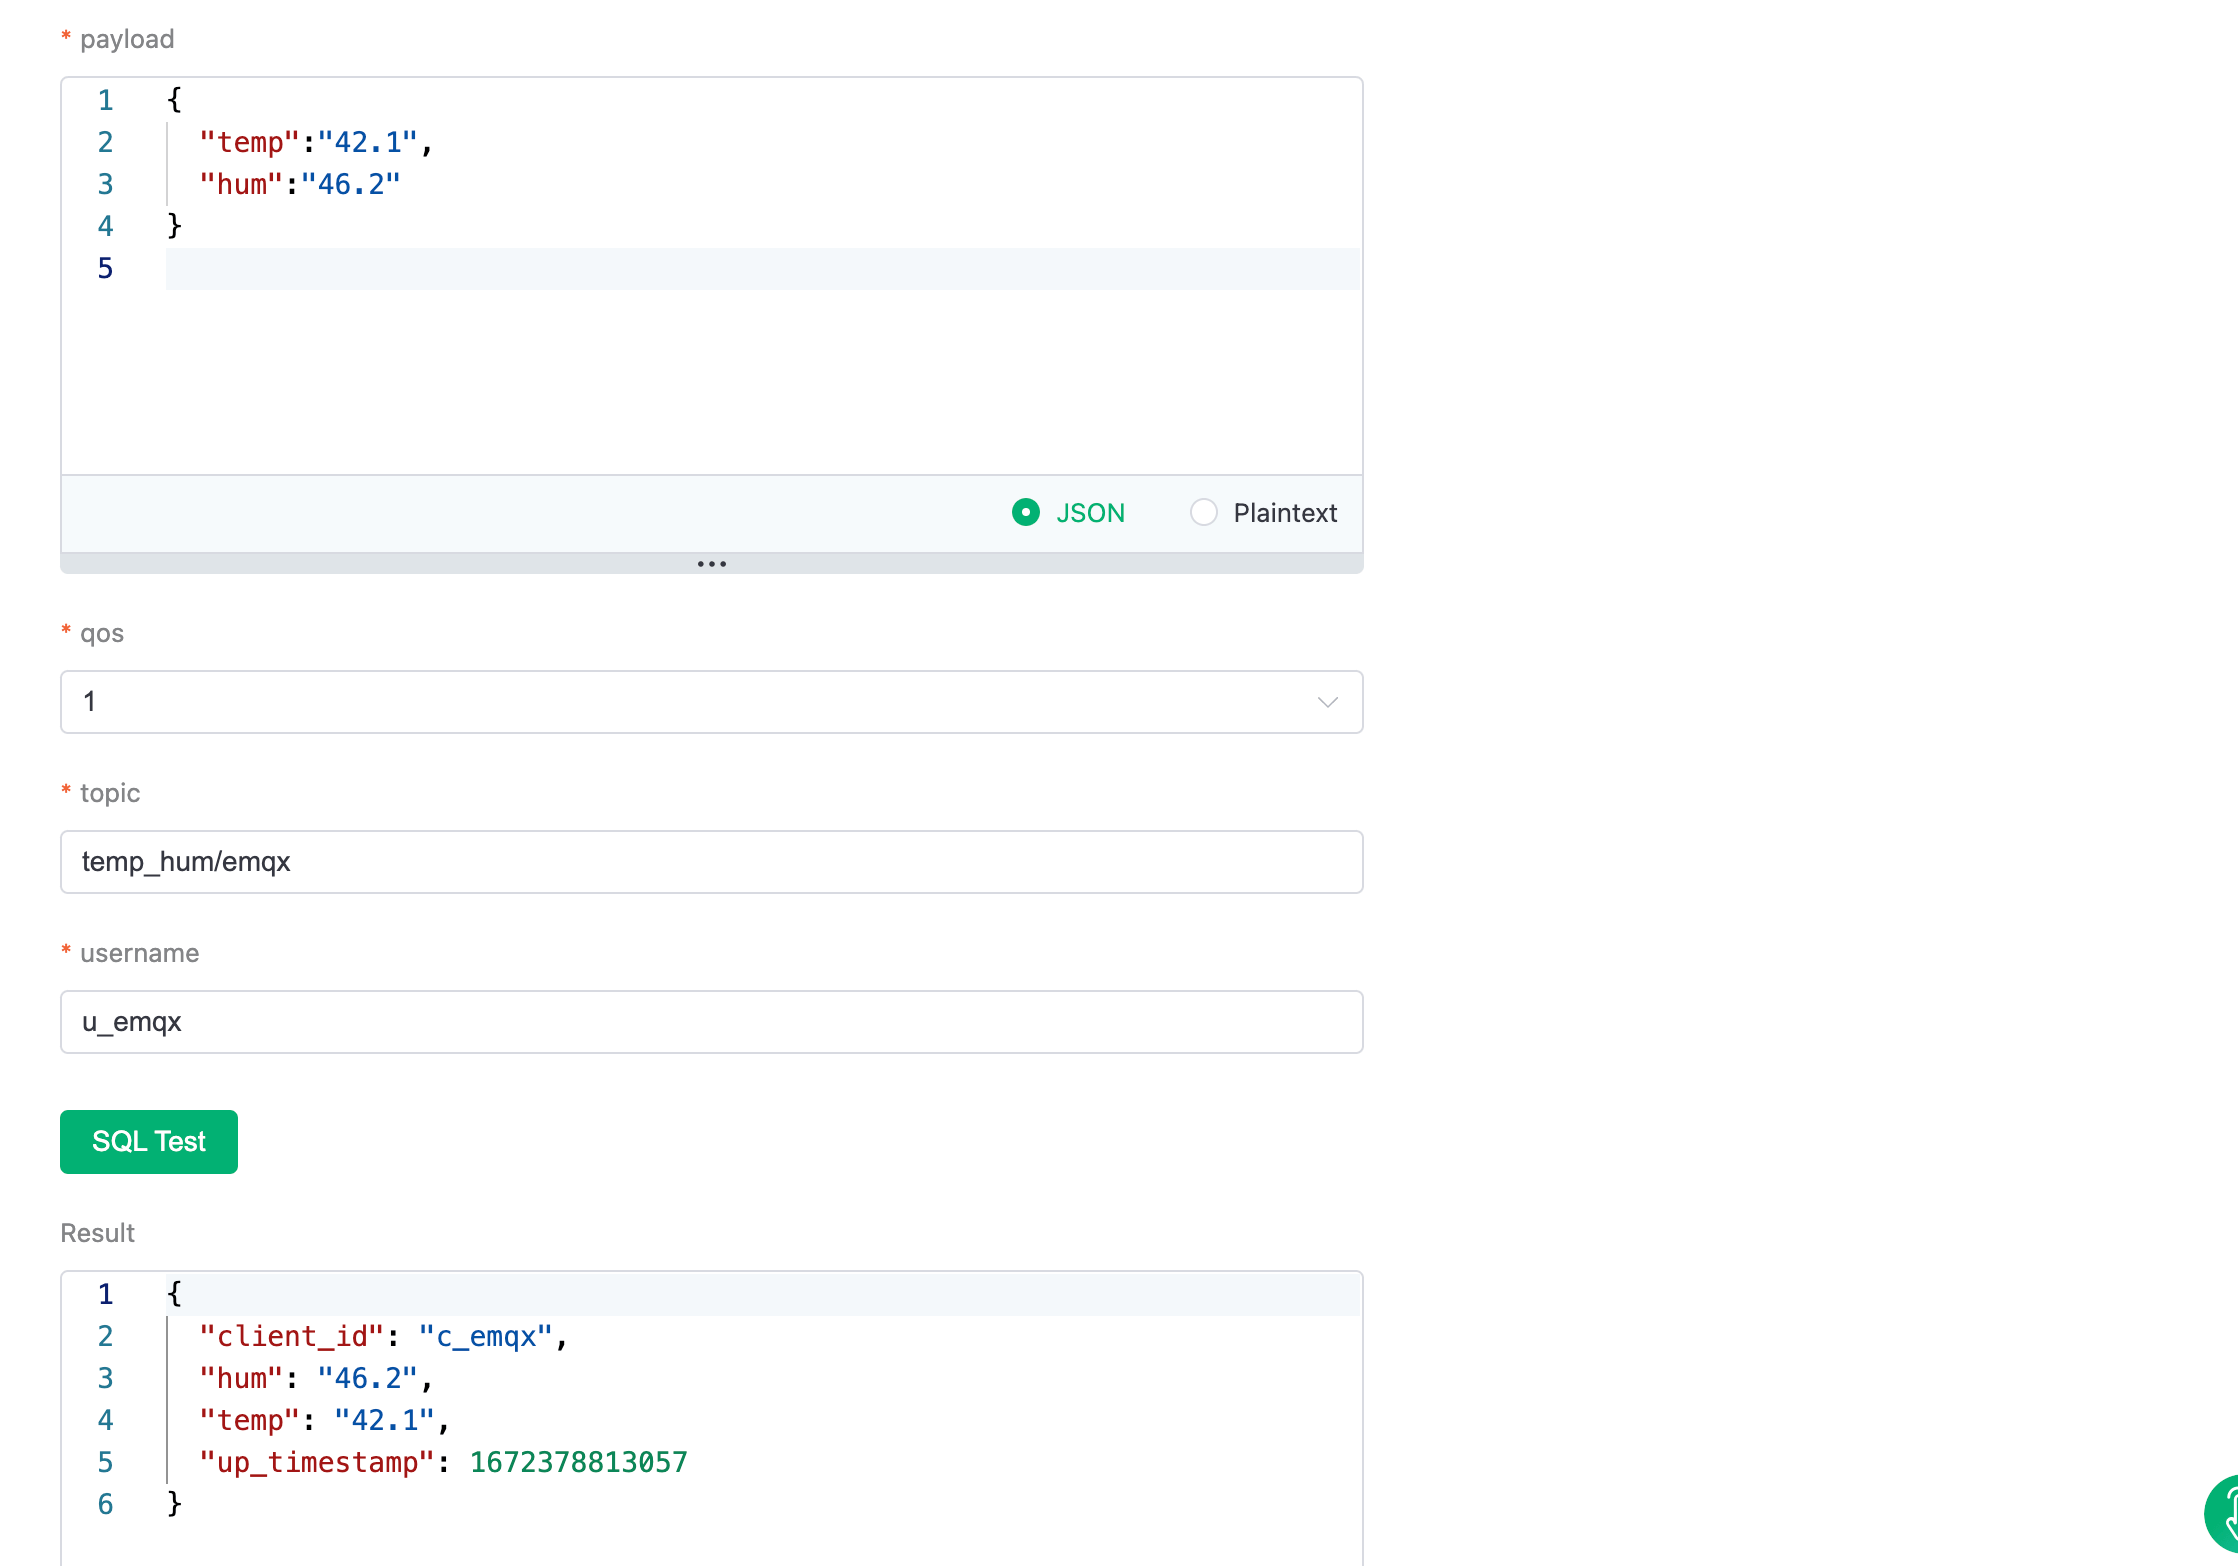
Rule SQL Testing
To see if the rule SQL fulfills our requirements, click SQL test and fill in the test payload, topic, and client information.
Add Action to Rule
Click Next to add a RocketMQ forwarding action to the rule once the SQL test succeeds. To demonstrate how to bridge the data reported by the device to RocketMQ, we'll utilize the following RocketMQ topic and message template.
bash# rocketmq topic emqx # rocketmq message template {"up_timestamp": ${up_timestamp}, "client_id": ${client_id}, "temp": ${temp}, "hum": ${hum}}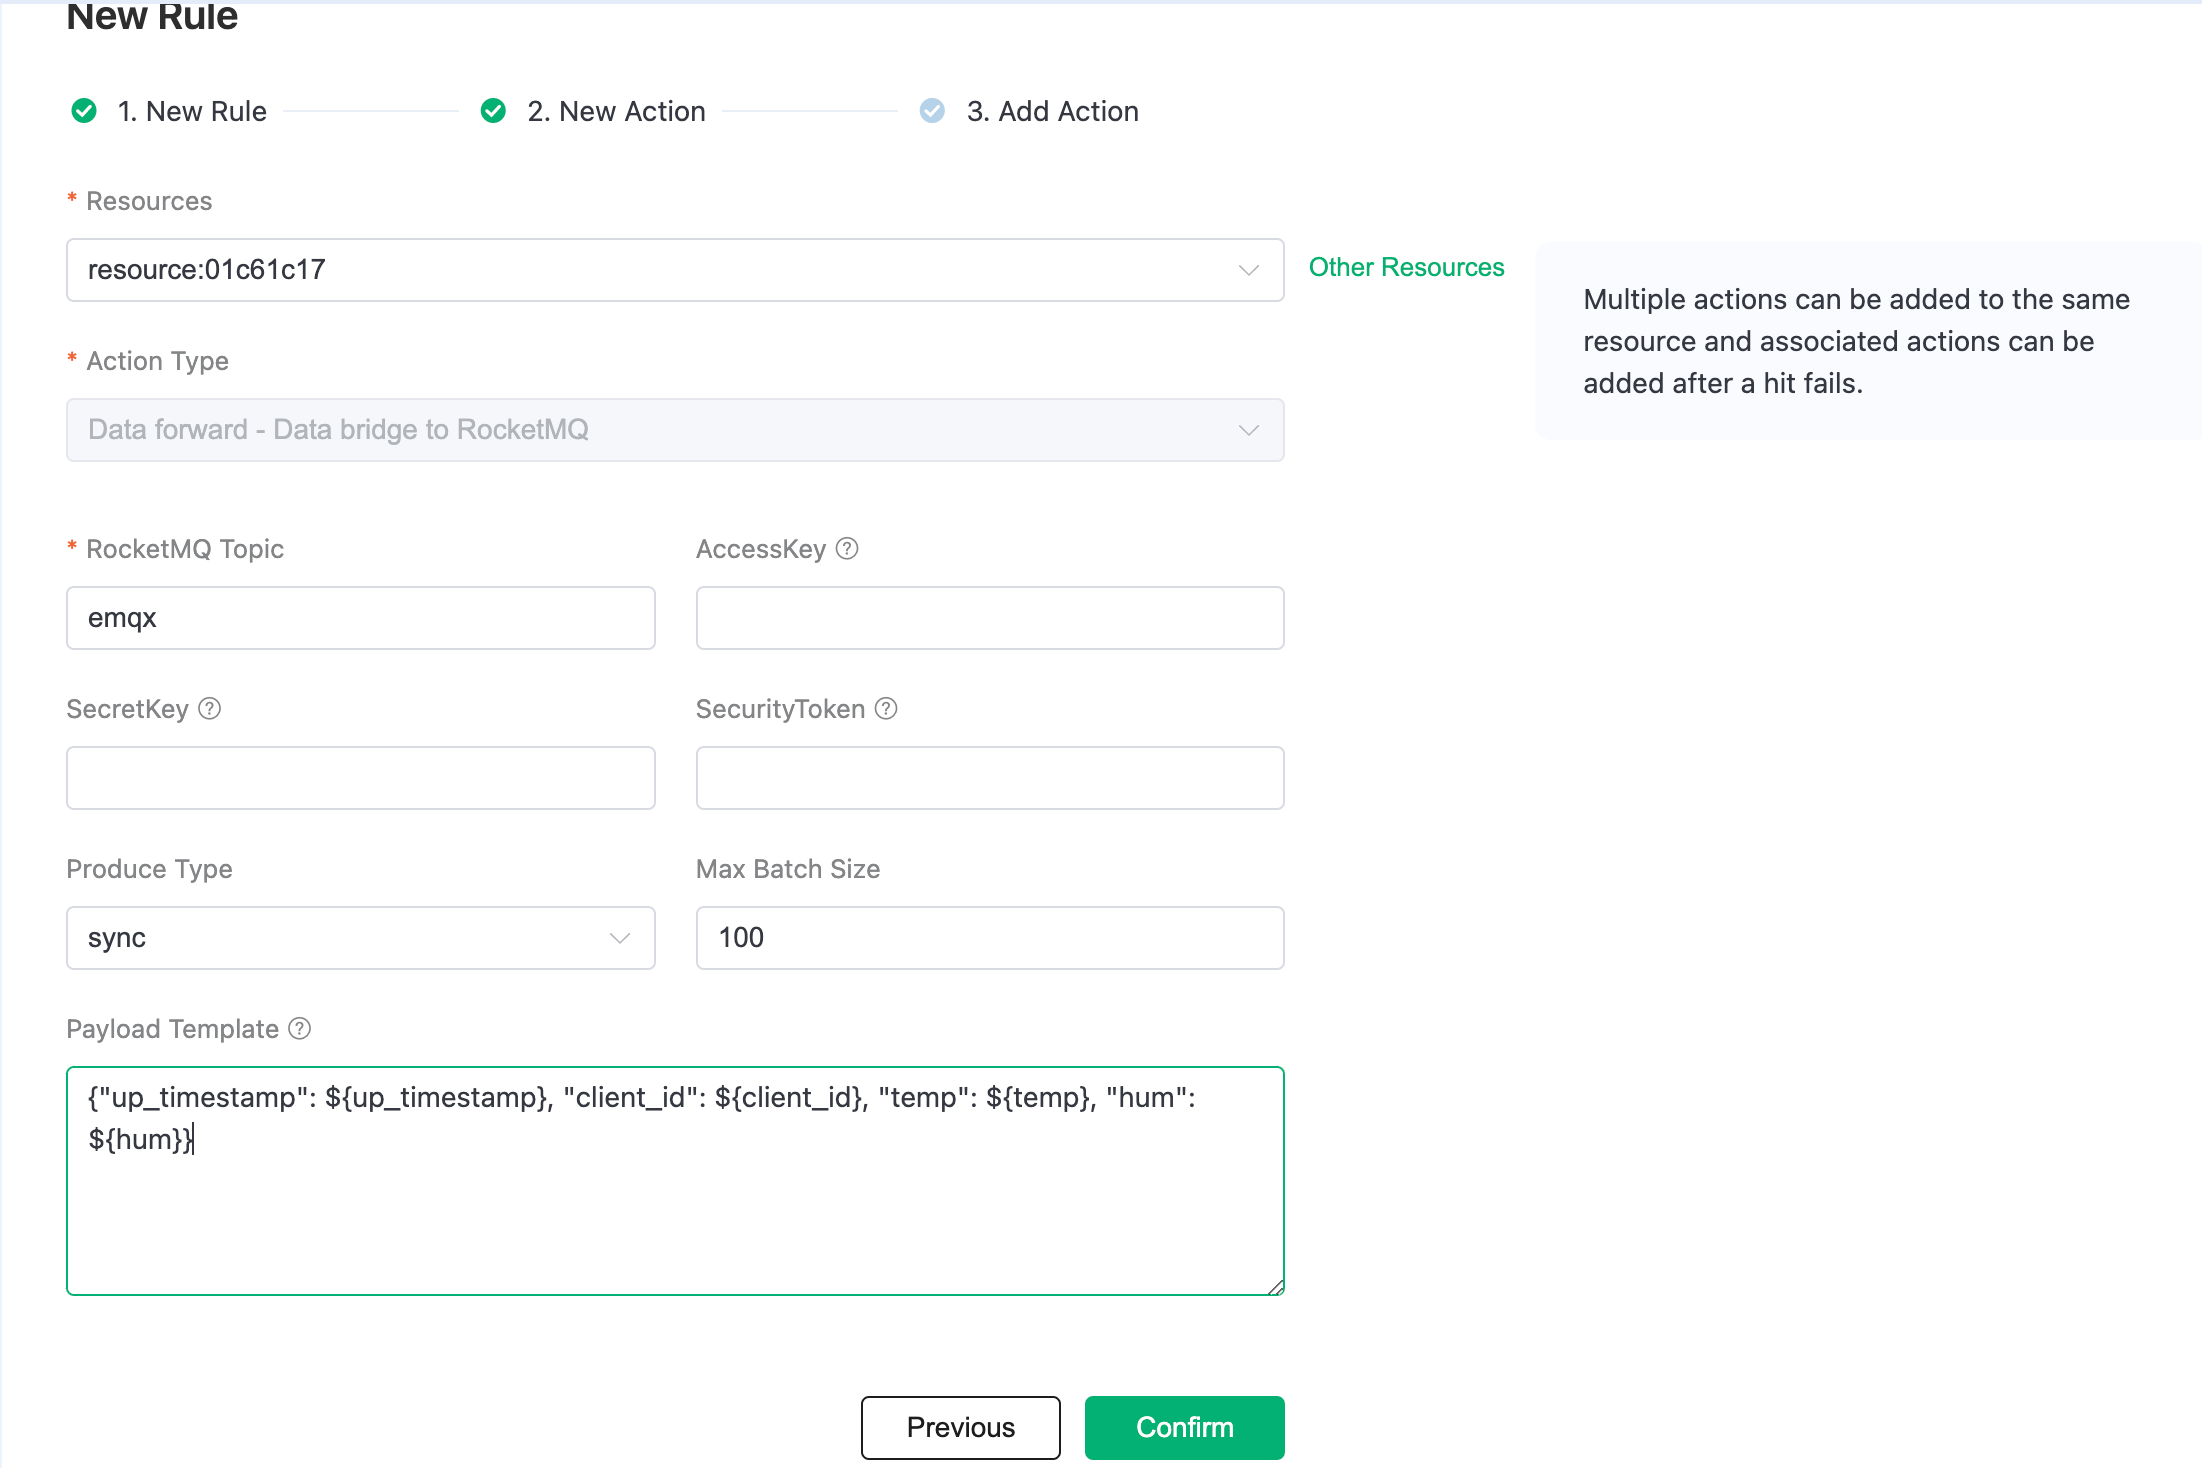
After successfully binding the action to the rule, click View Details to see the rule sql statement and the bound actions.
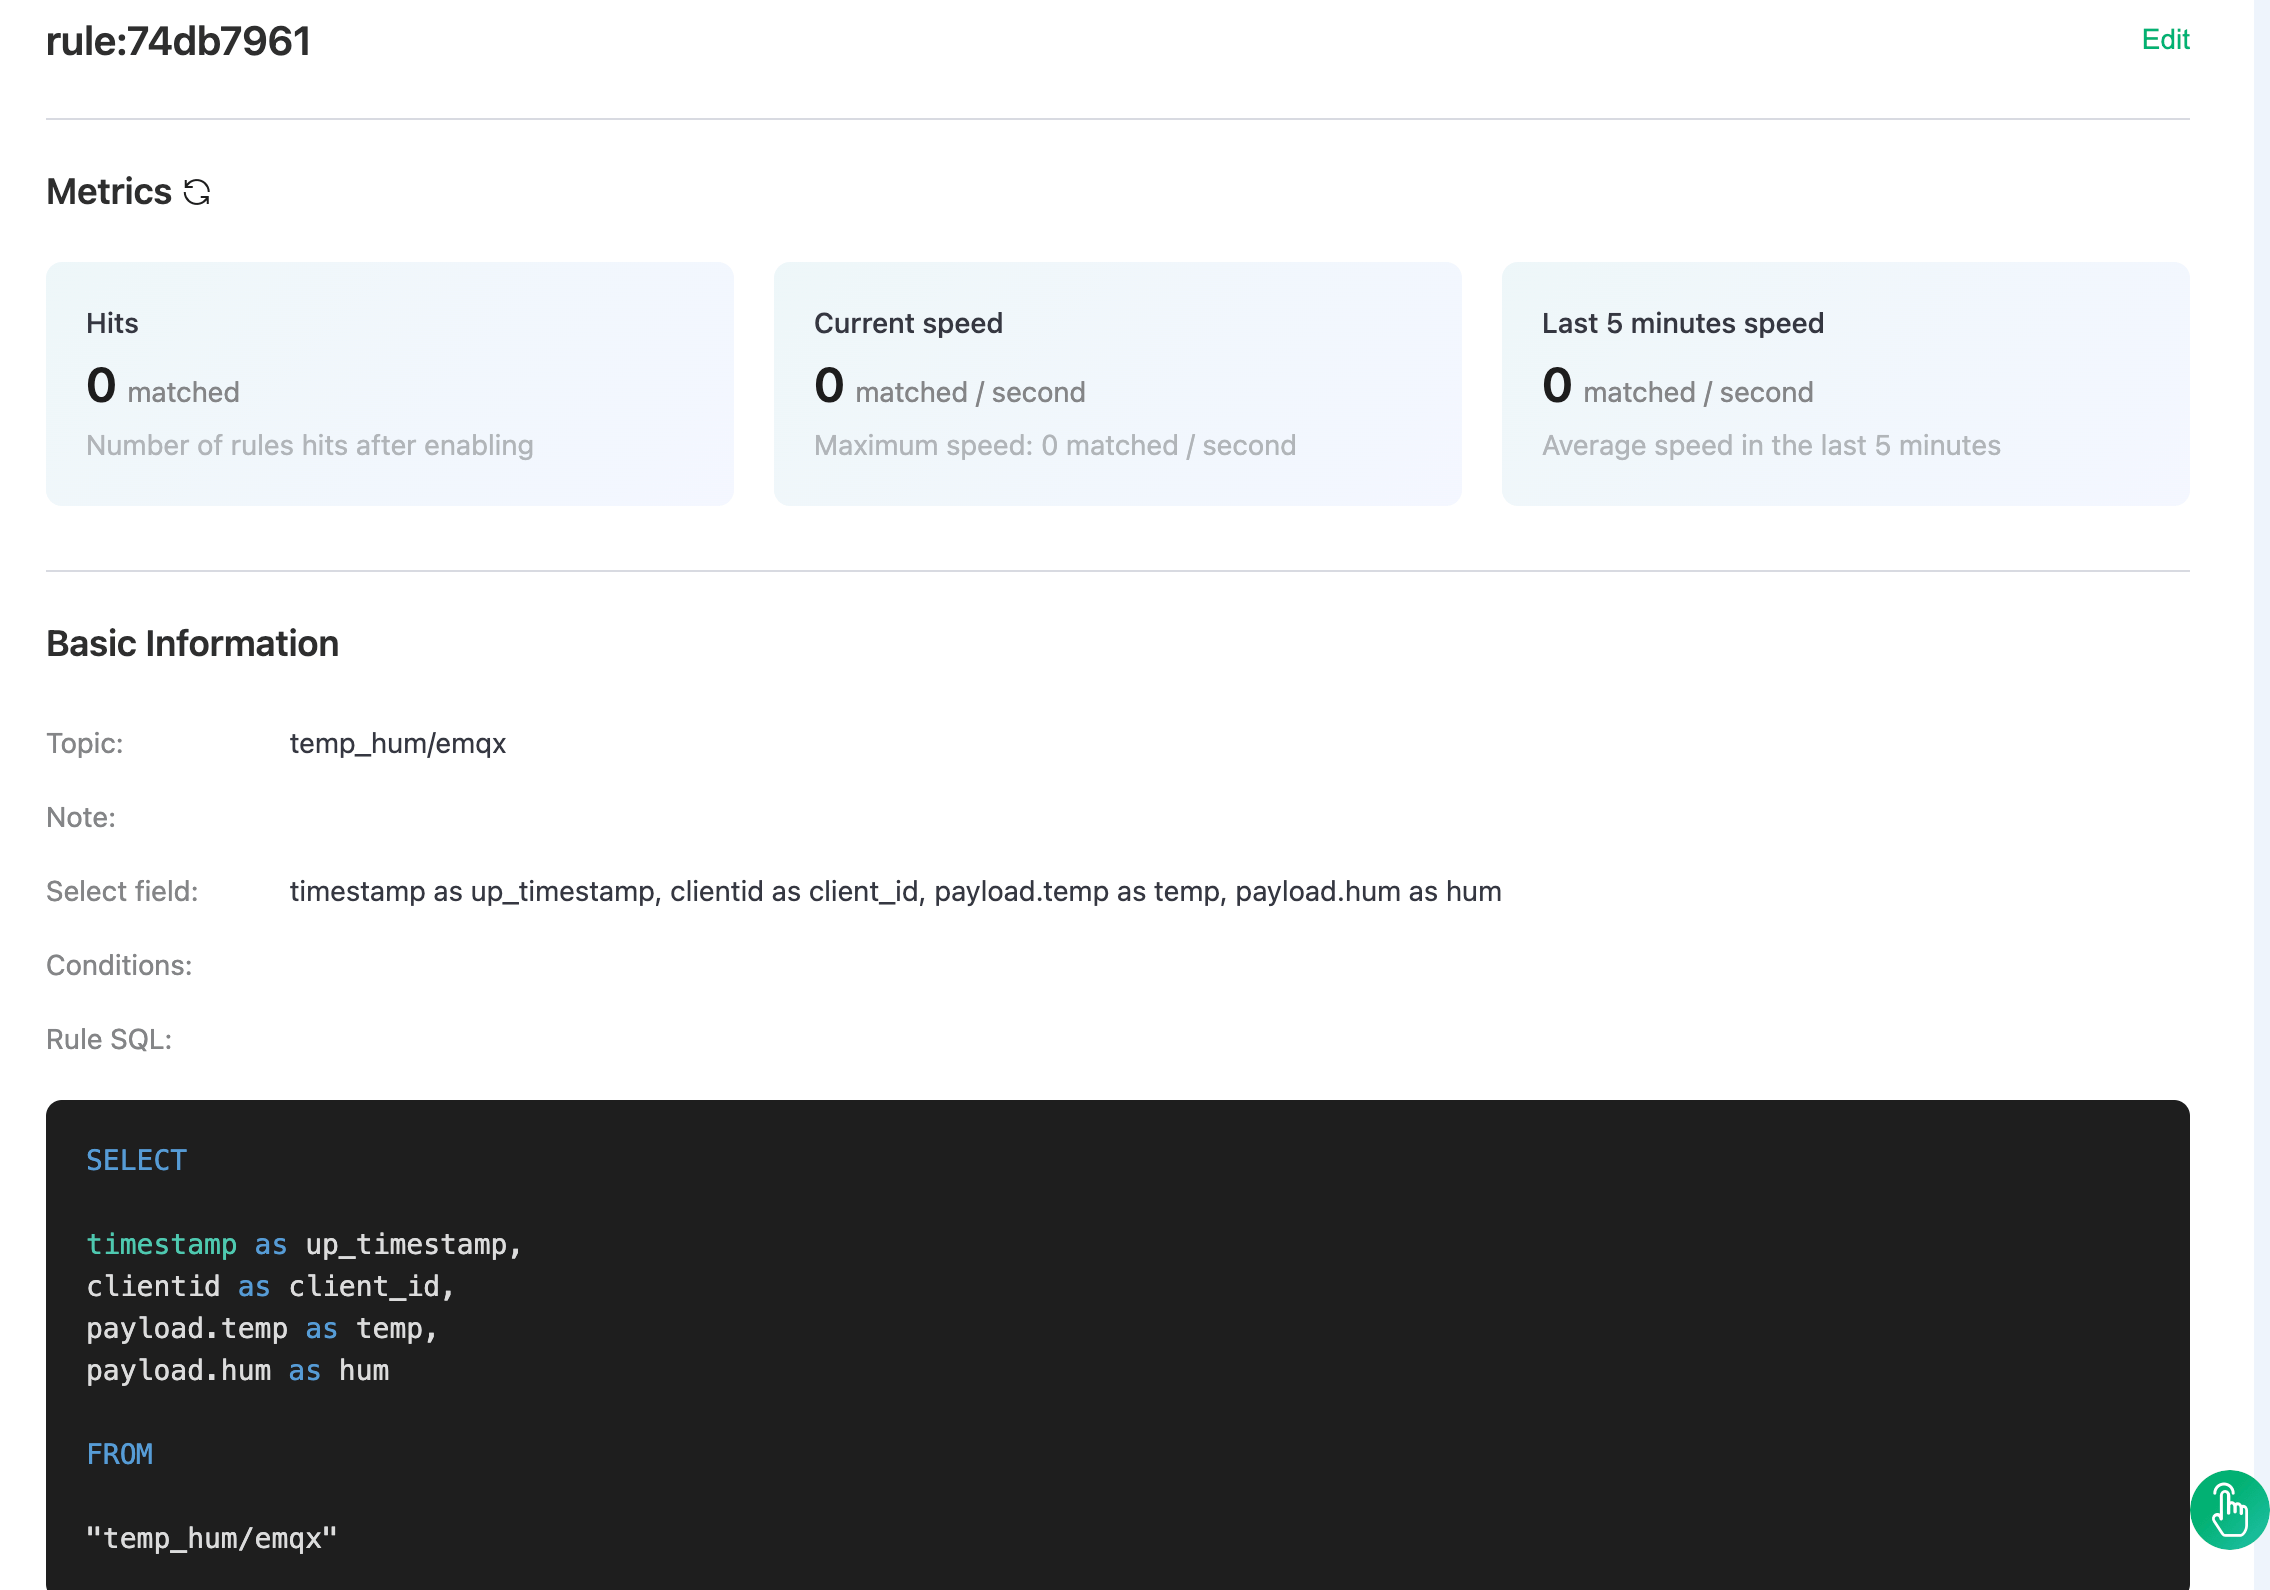
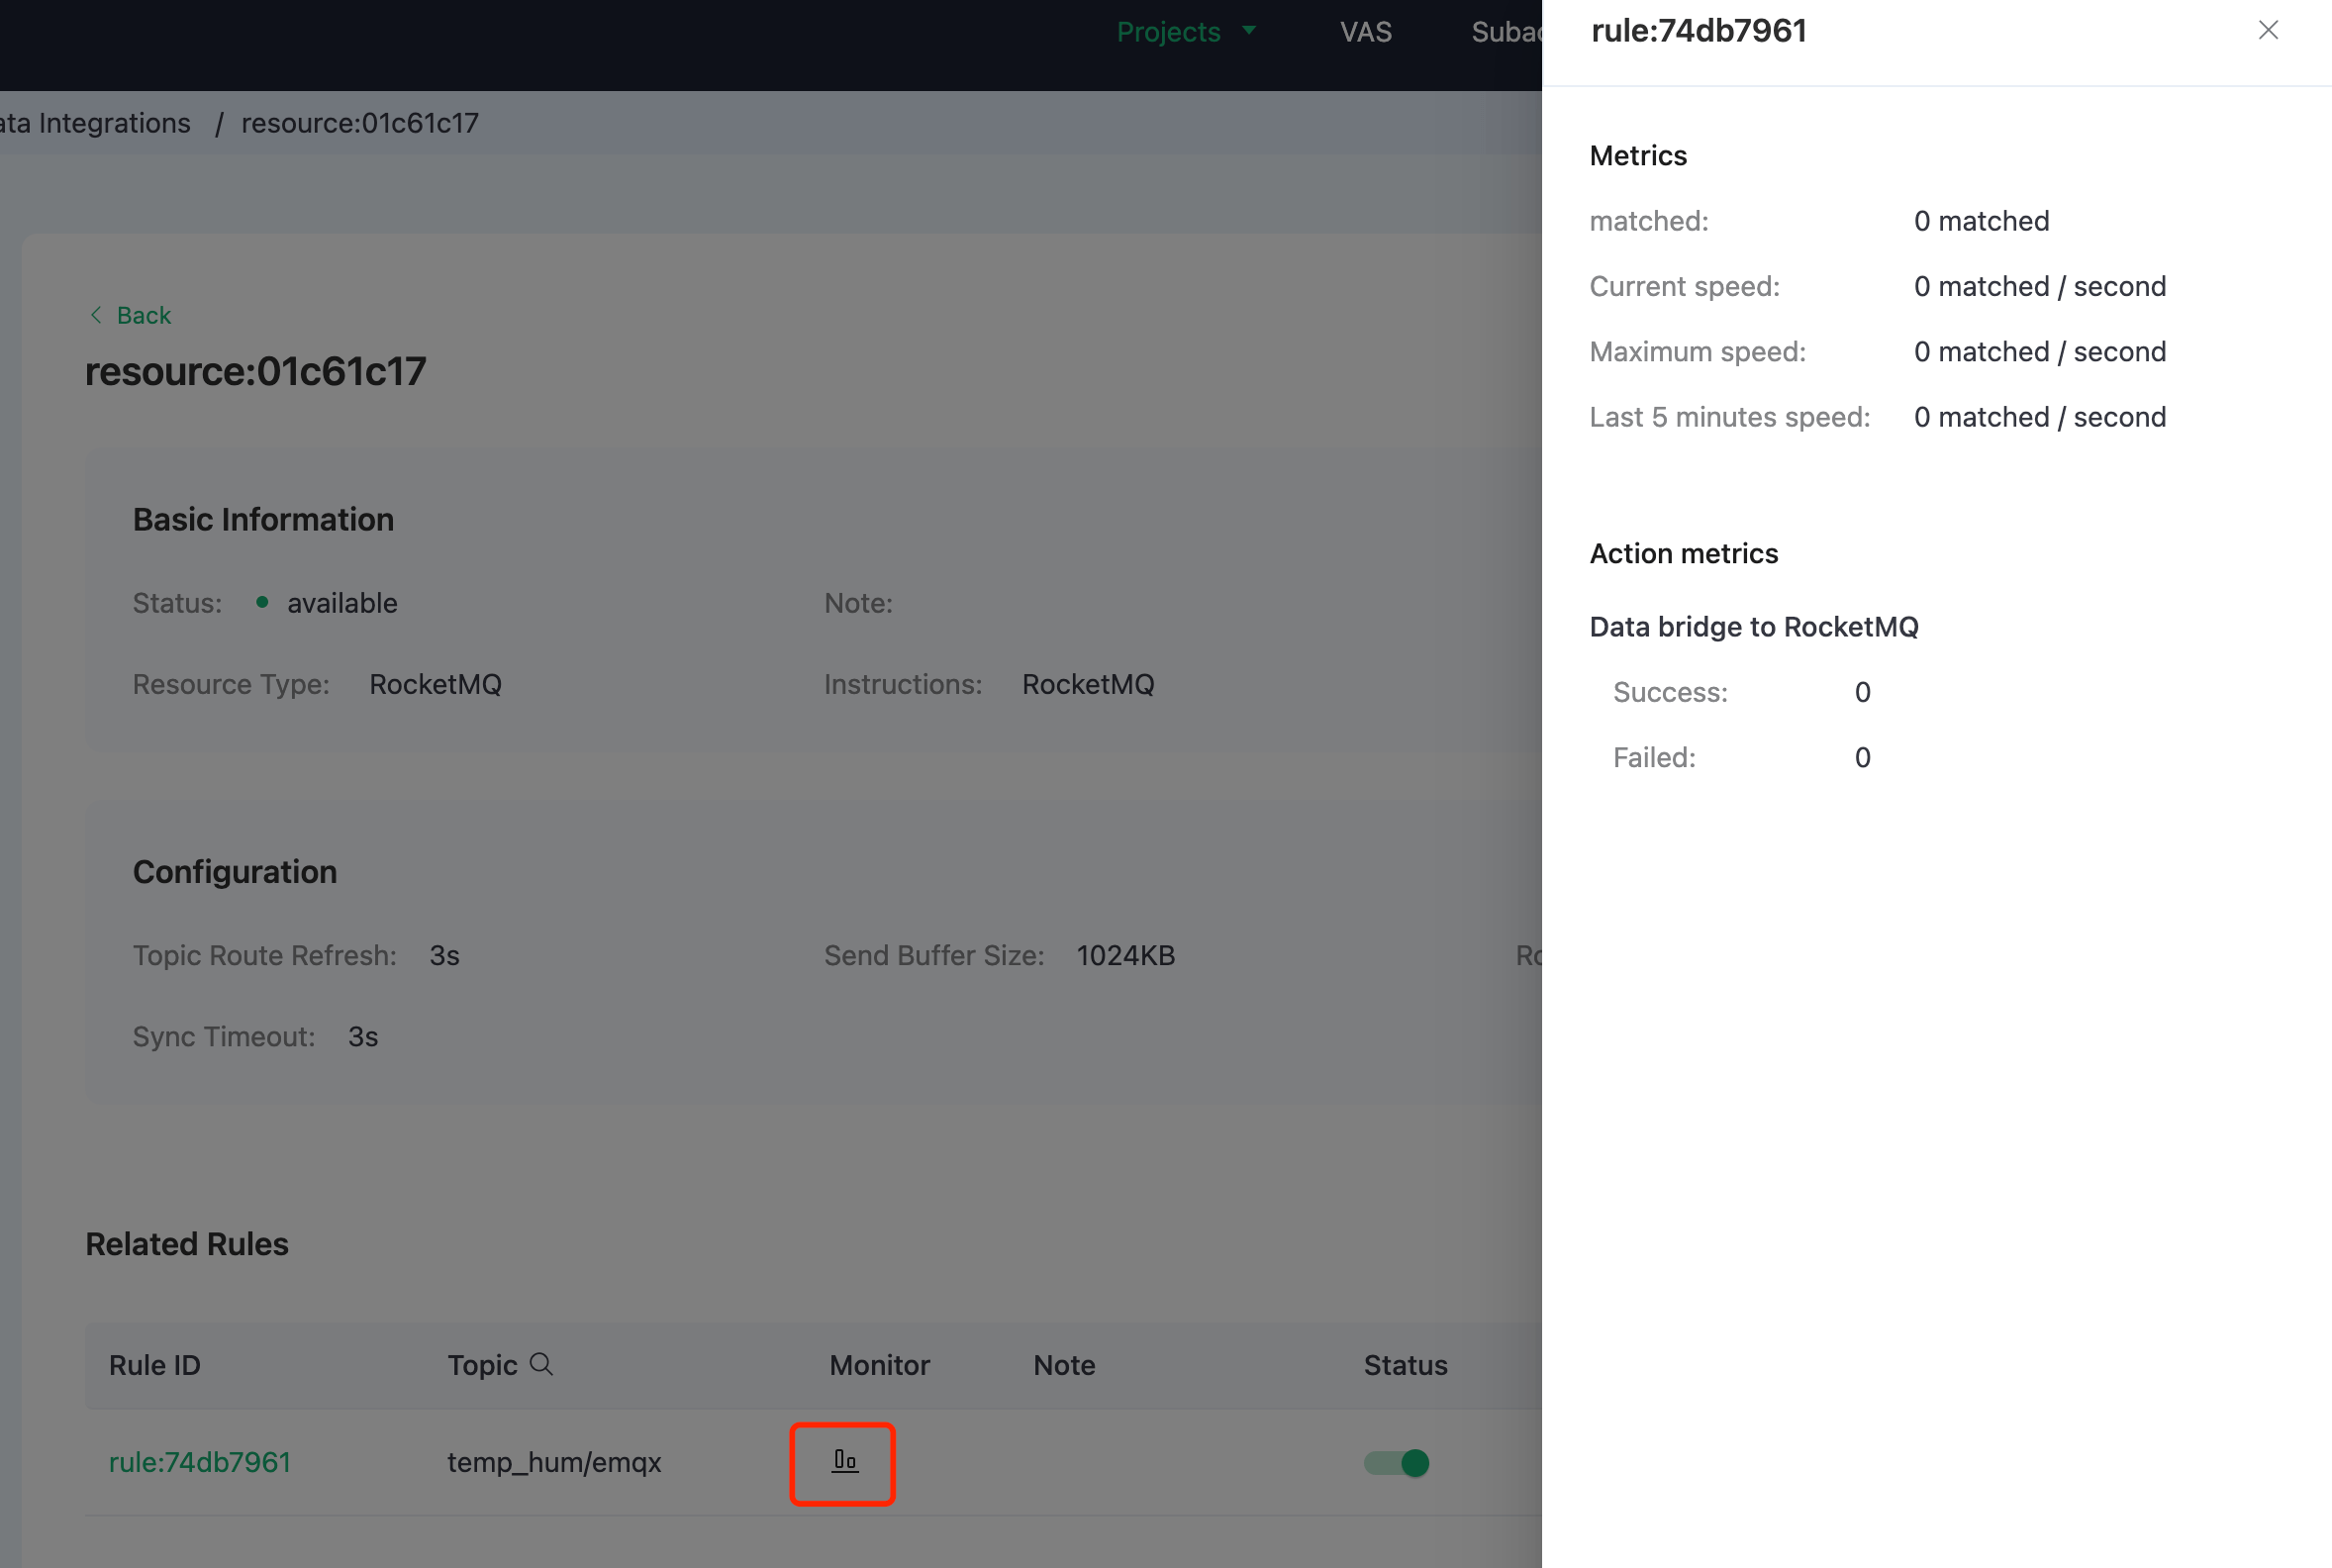
To see the created rules, go to Data Integrations/View Created Rules. Click the Monitor button to see the detailed match data of the rule.
Test
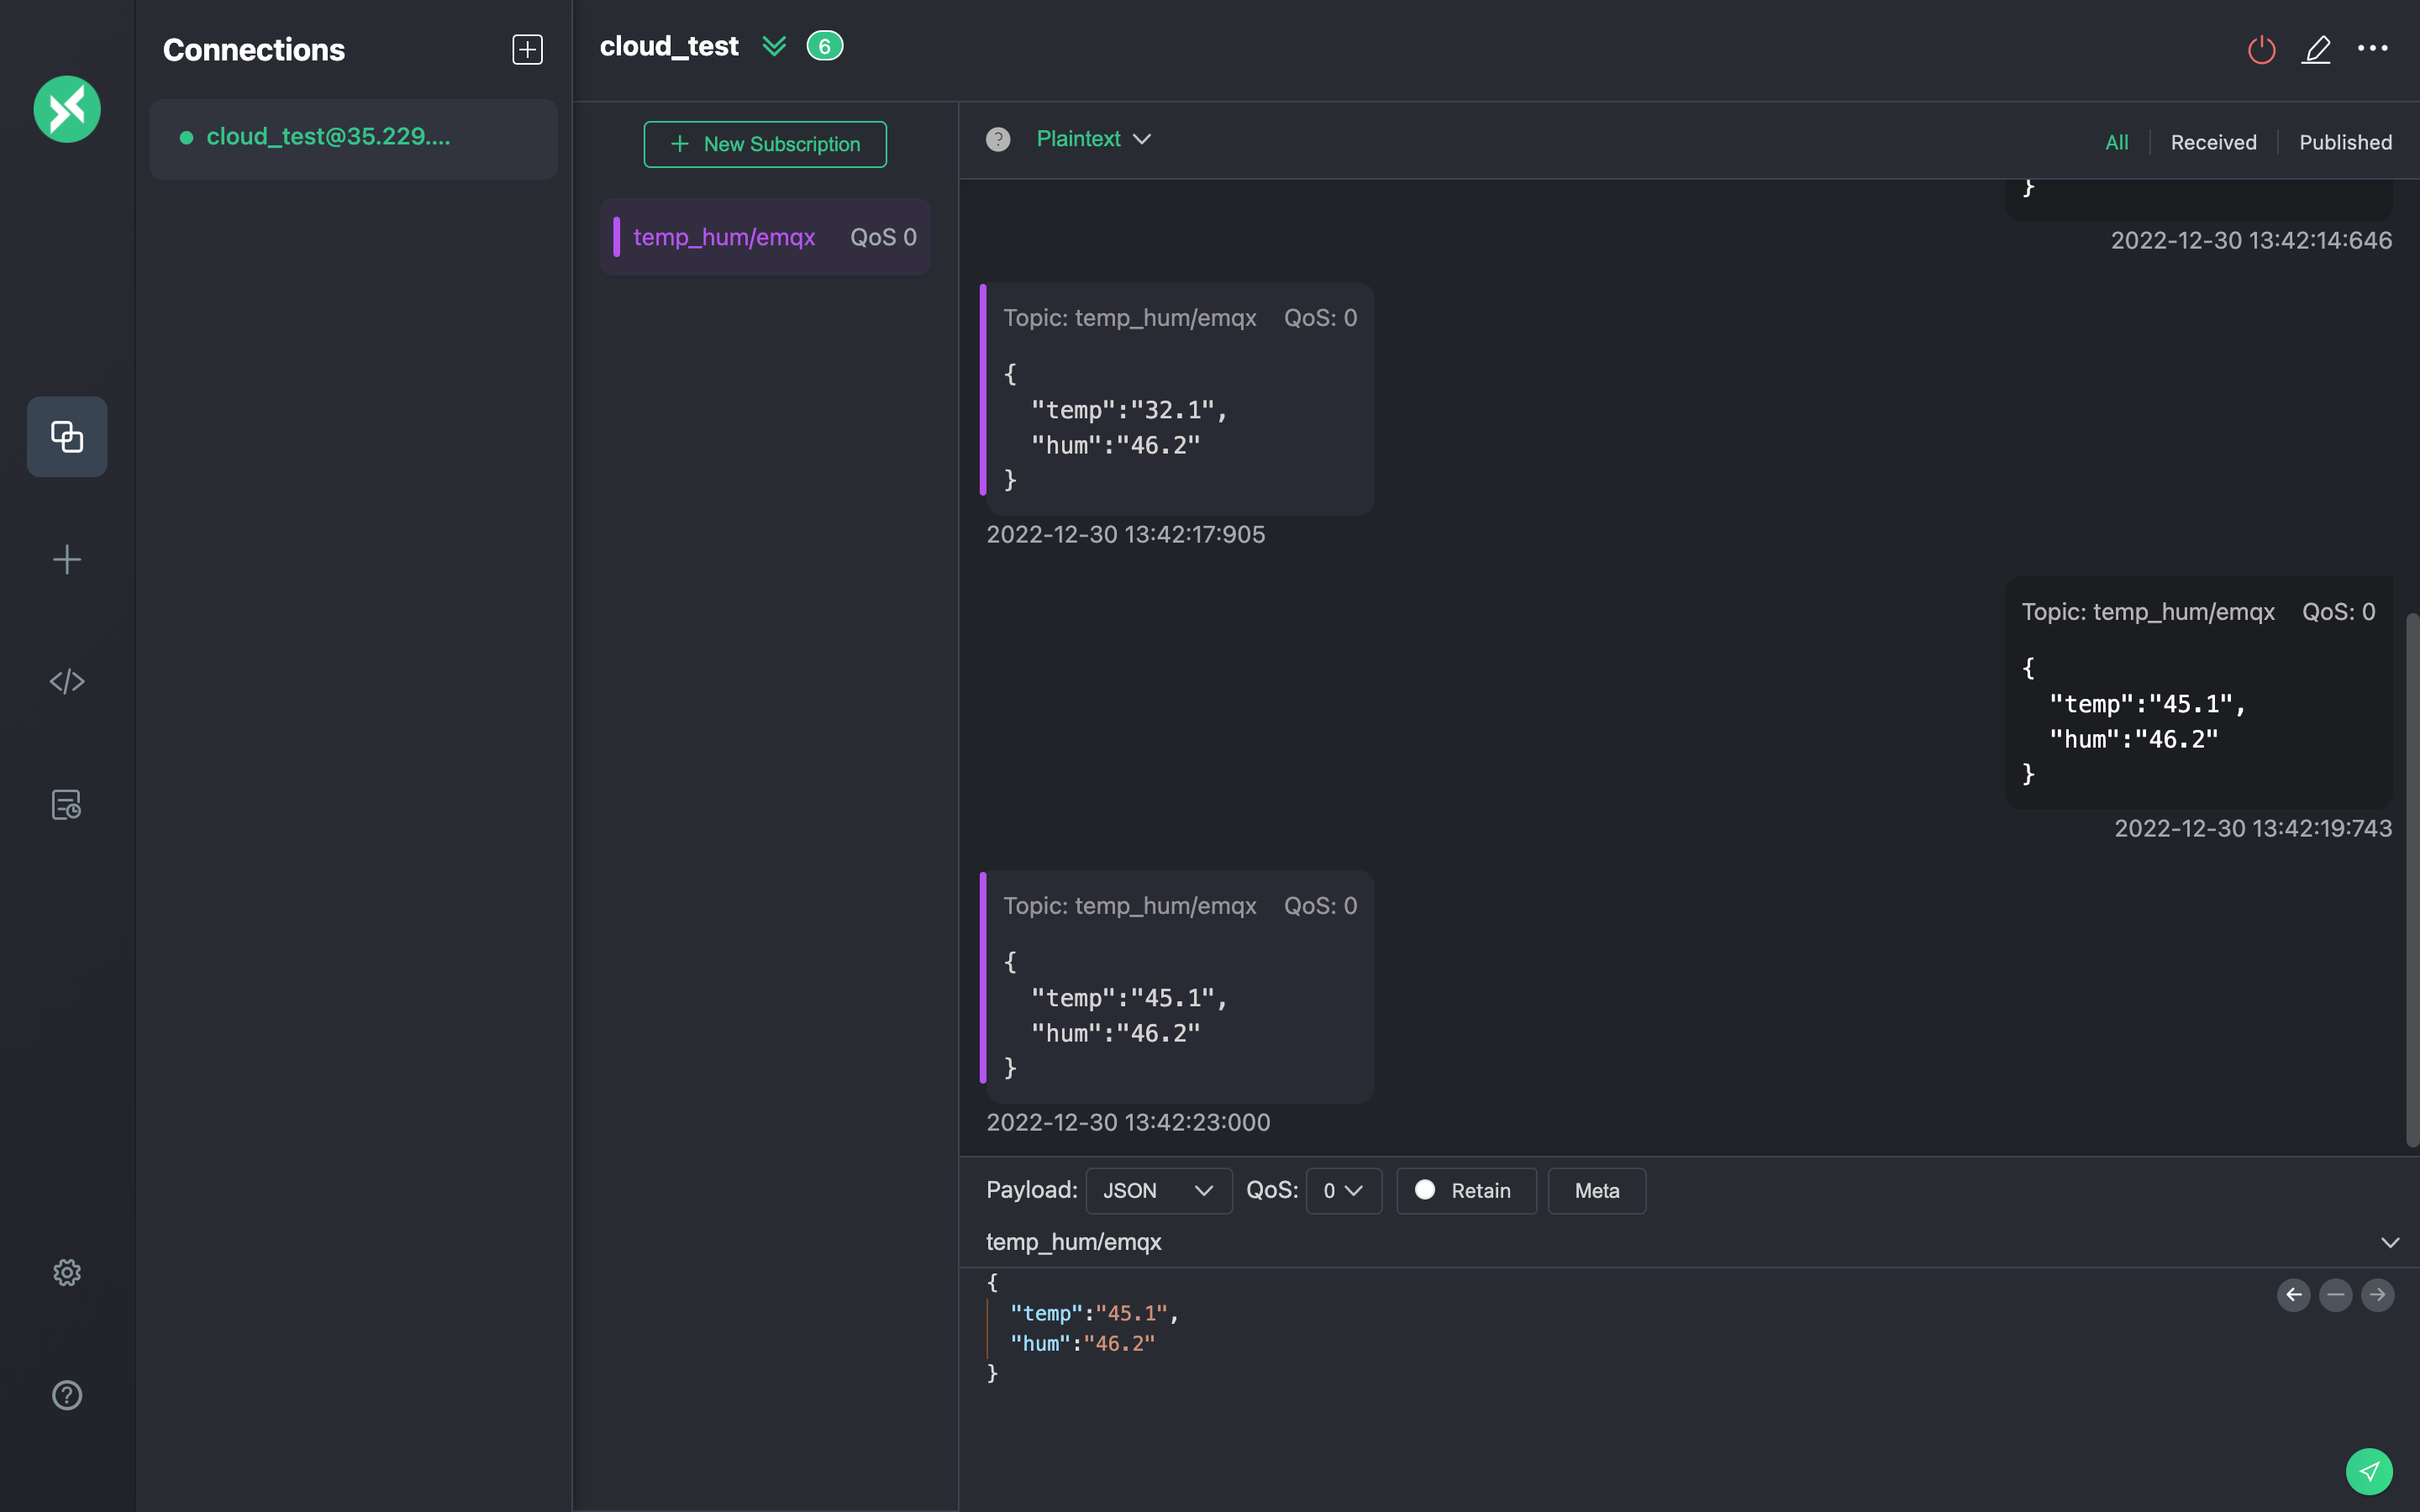
Use MQTTX to simulate temperature and humidity data reporting
You need to replace broker.emqx.io with the created deployment connection address, add client authentication information to the EMQX Dashboard.
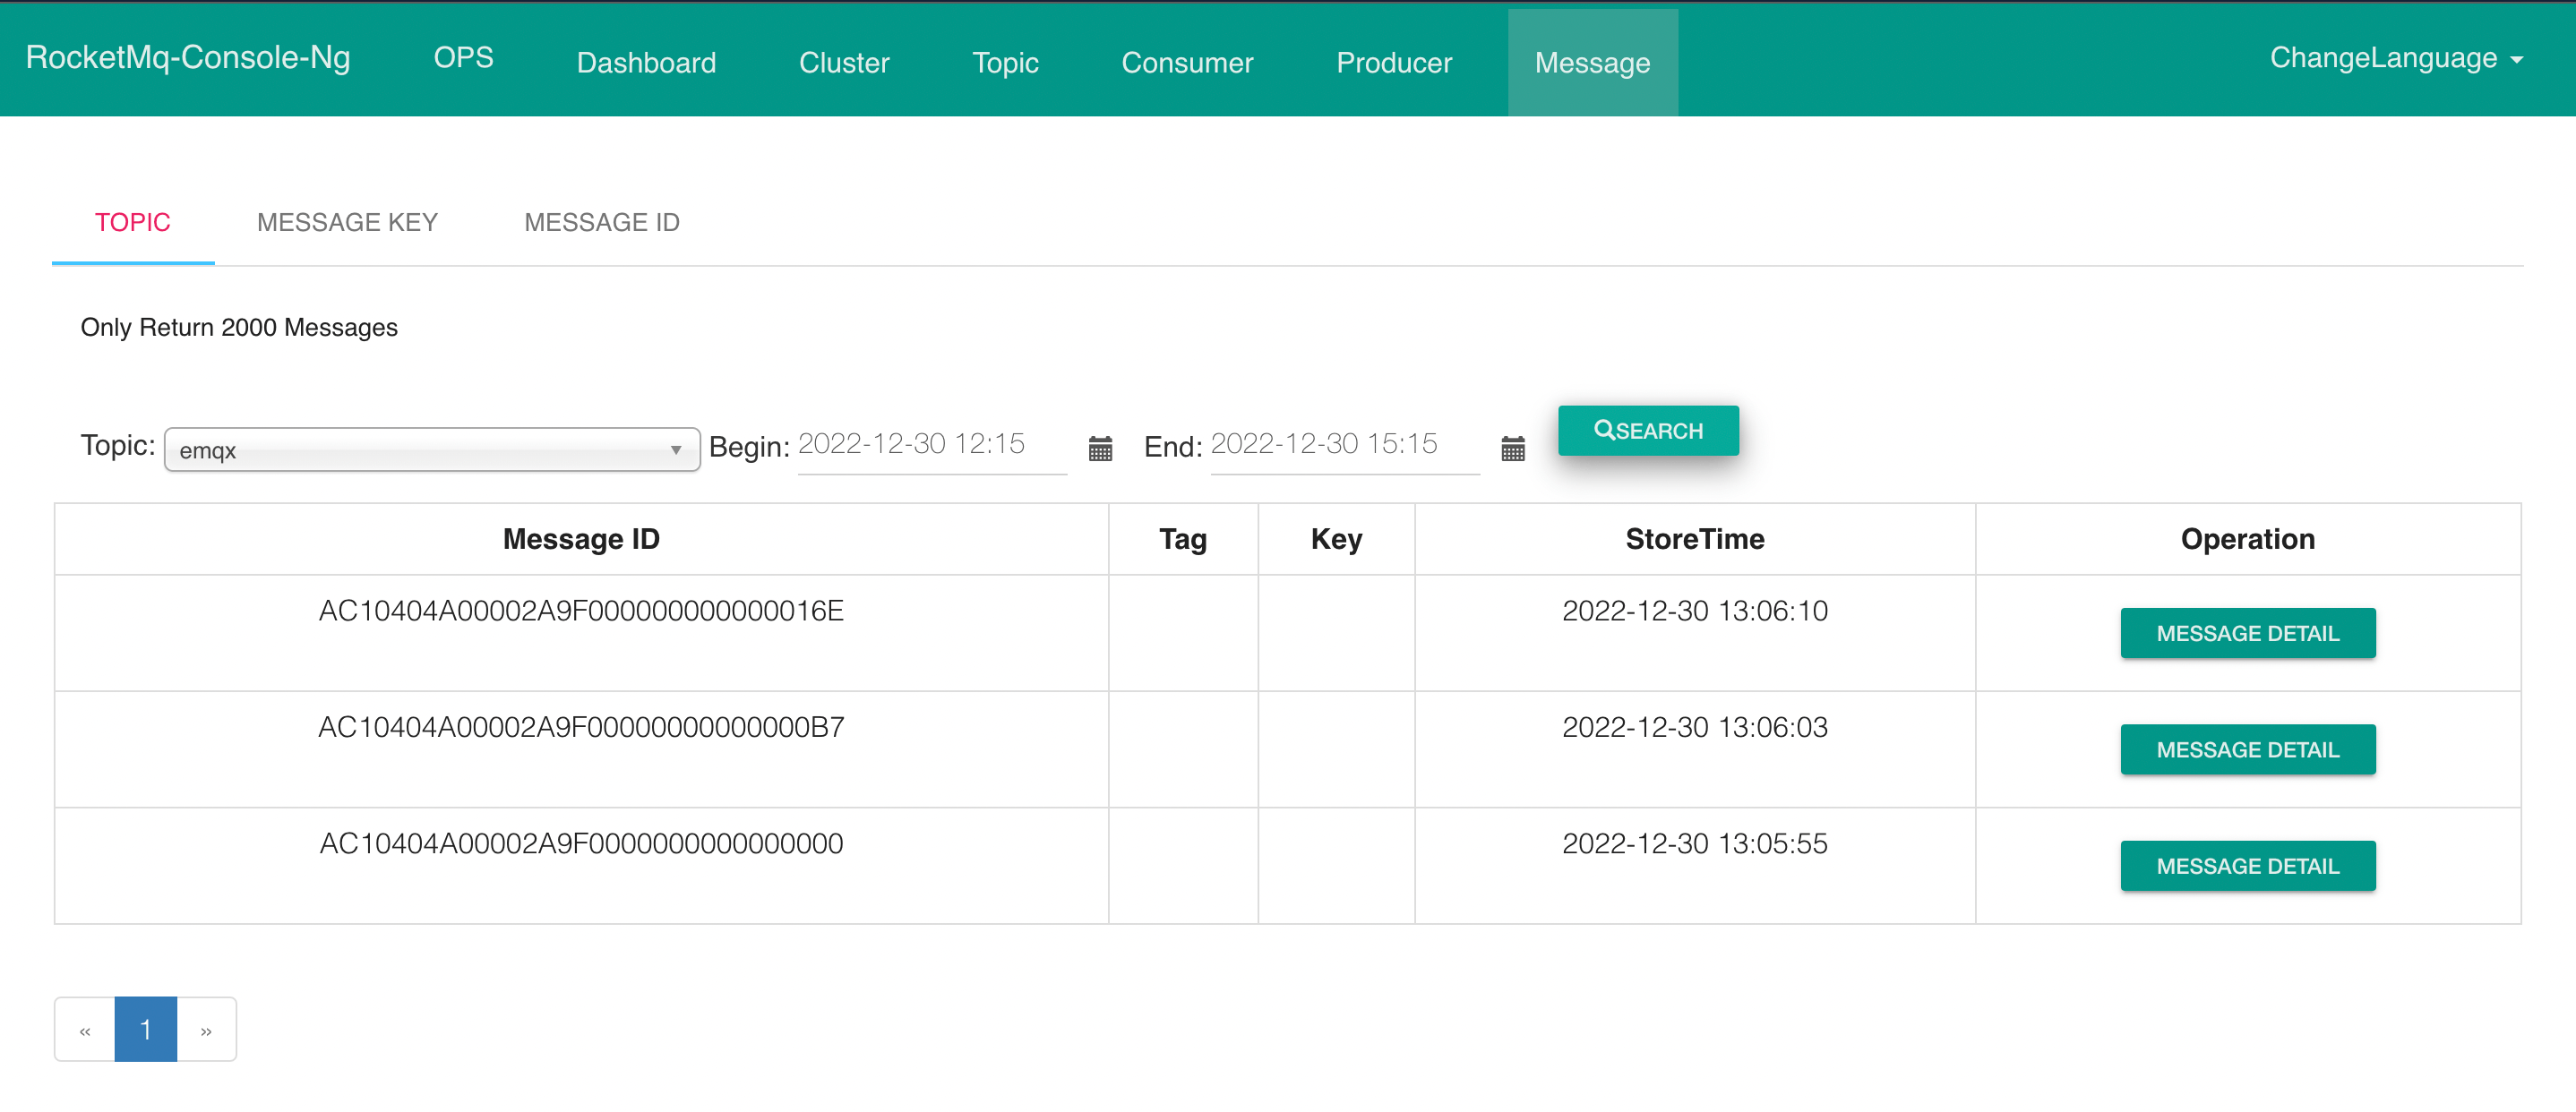
View data bridging results
Access your server's RocketMQ address and port through a browser, and you can get the message forwarding result for the corresponding topic on the Console page: