Integrate with Upstash for Kafka
Upstash is a cloud-based, serverless data platform that empowers developers to seamlessly integrate Redis databases and Kafka into their applications without the hassle of managing infrastructure. Offering a serverless architecture, Upstash allows users to enjoy the benefits of Redis, a high-performance, in-memory data store, and Kafka, without dealing with the complexities of deployment, scaling, or maintenance.
This tutorial introduces how to stream the MQTT data to Upstash by creating a data integration. Through the data integration, clients can send the temperature and humidity data to EMQX Cloud using the MQTT protocol and stream the data into Upstash for Kafka topic.
Set Up Upstash for Kafka Clusters
To begin using Upstash, visit https://upstash.com/ and create an account.
Create a Kafka Cluster
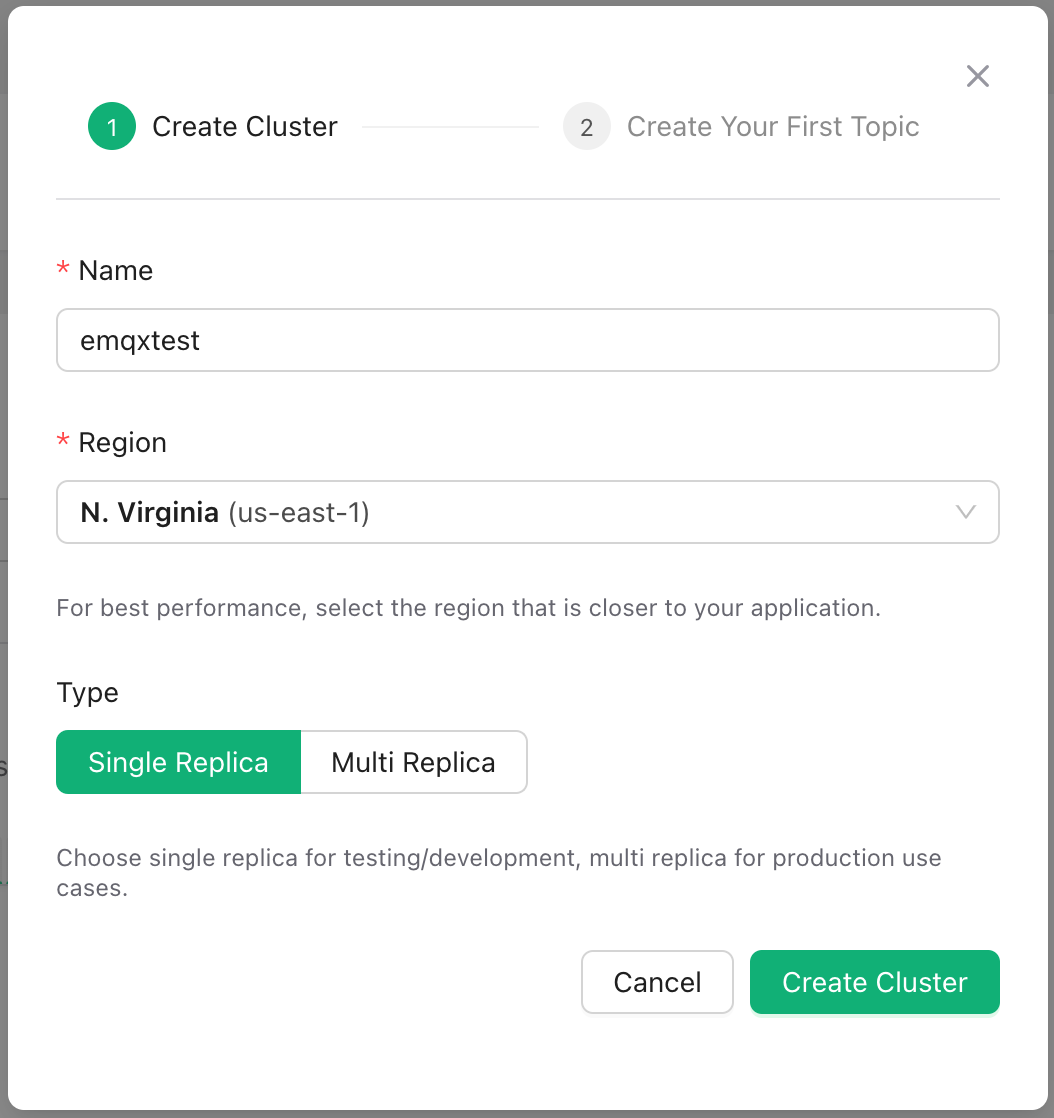
Once you logged in, you can create a Kafka cluster by clicking on the Create Cluster button.
Type a valid name. Select the region in which you would like your cluster to be deployed. To optimize performance, it is recommended to choose the region that is closest to your EMQX Cloud deployment's region.
Select the cluster type. Currently there are two options, choose single replica for testing/development, multi replica for production use cases.
Click Create Cluster. Now you have a serverless Kafka cluster.
Create a topic
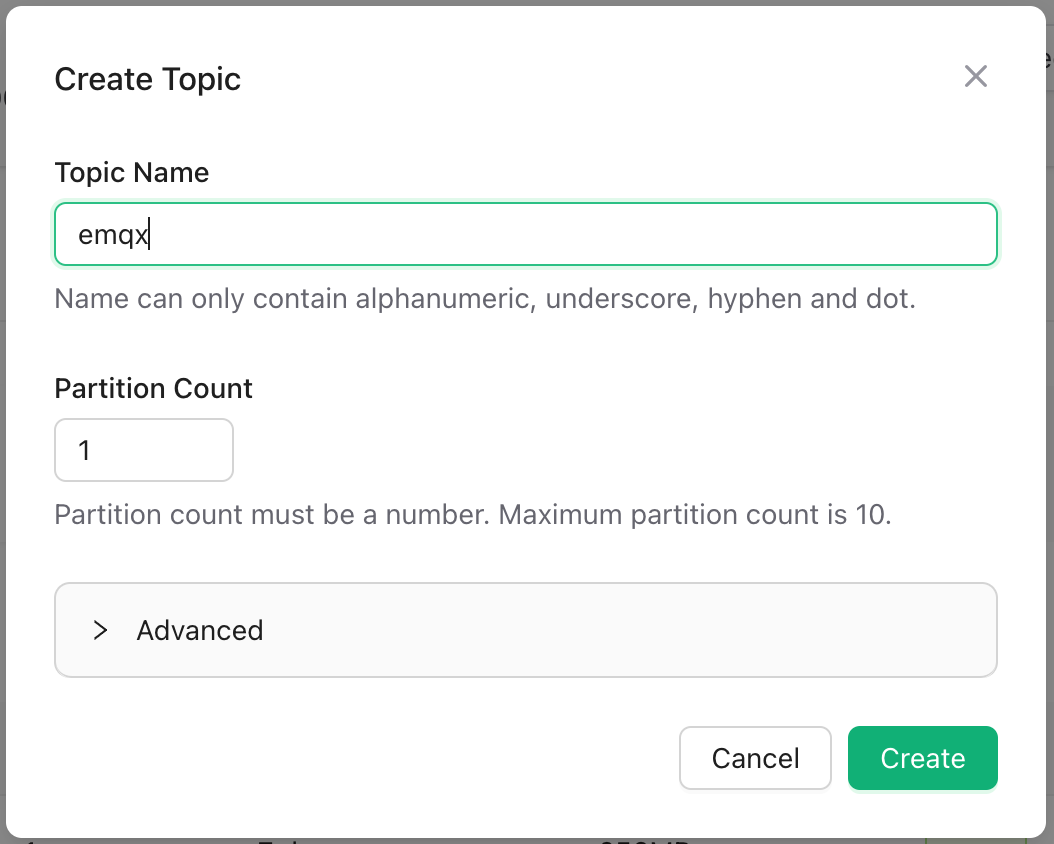
- Enter the Cluster console, click Topics, and then click Create Topic.
- In the Topic name field, type
emqx. Leave remains as default, then select Create.
Create Credentials
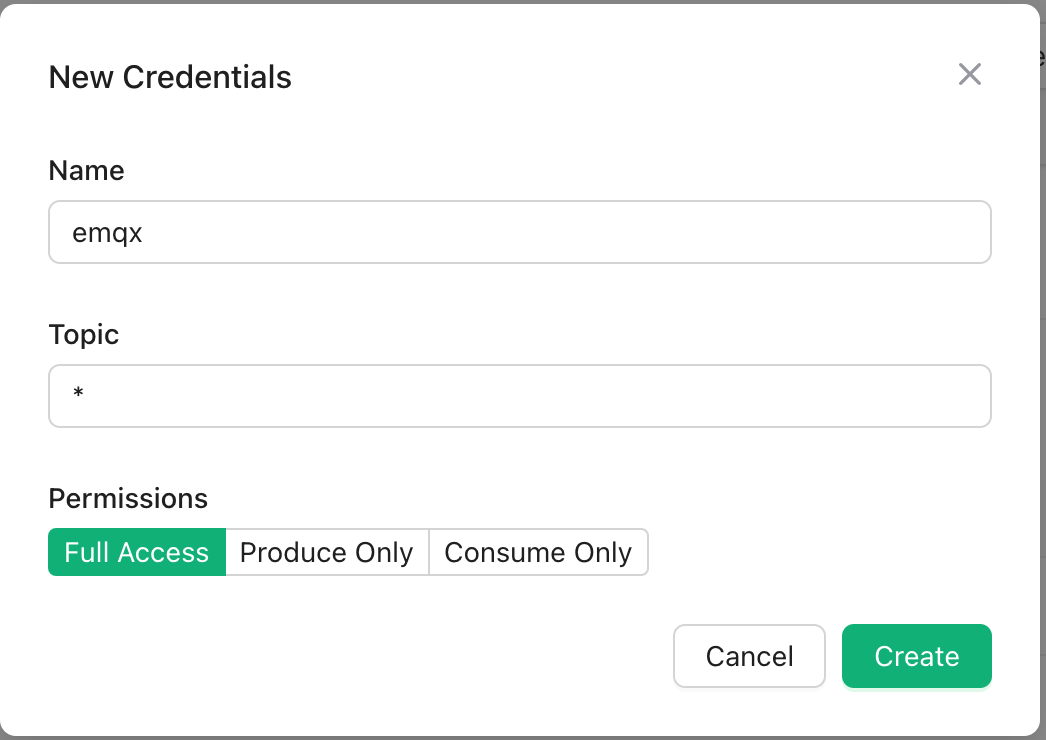
From the navigation menu, click Credentials, and then click New Credentials.
You can define topic and permission for the credential. In this tutorial, we leave the configuration as defalut and click Create.
In the above steps, we have completed the prerequisite settings of Upstash side.
Create Upstash Data Integration
Enable NAT Gateway in EMQX Cloud
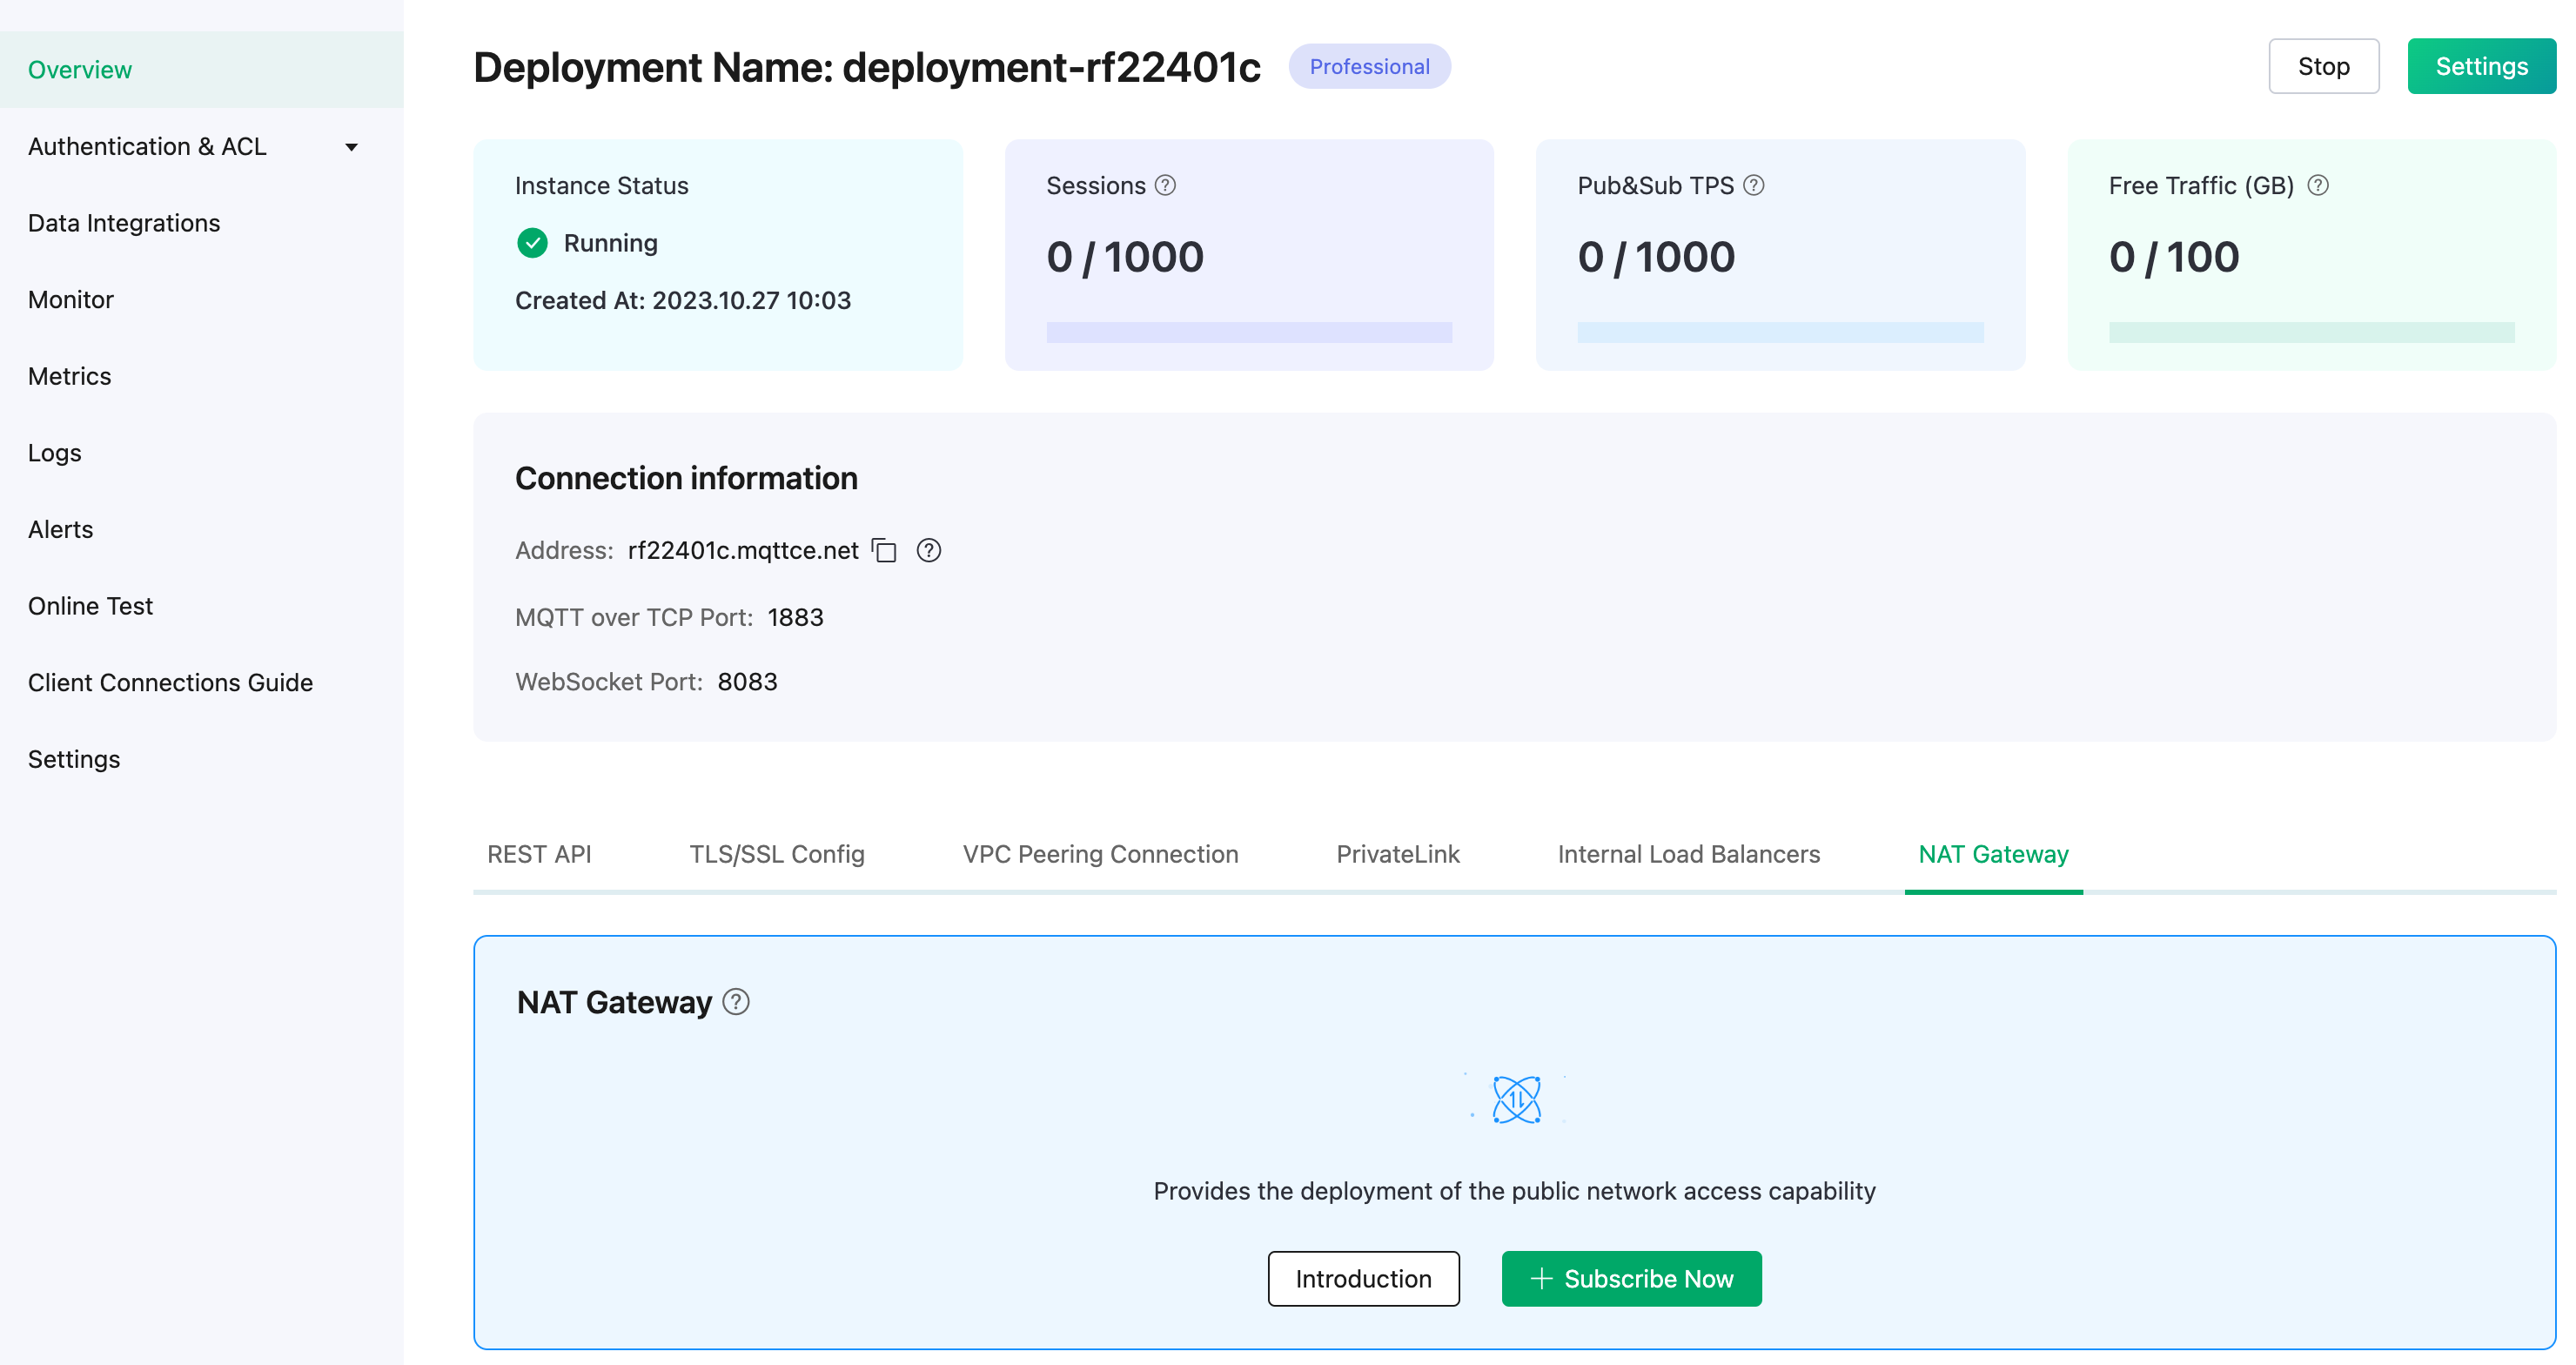
Login to EMQX Cloud console, and enter the deployment Overview page.
Click the NAT Gateway tab on the lower section of the page, and click Subscribe Now. Learn more about NAT Gateway.
Data Integration Configuration
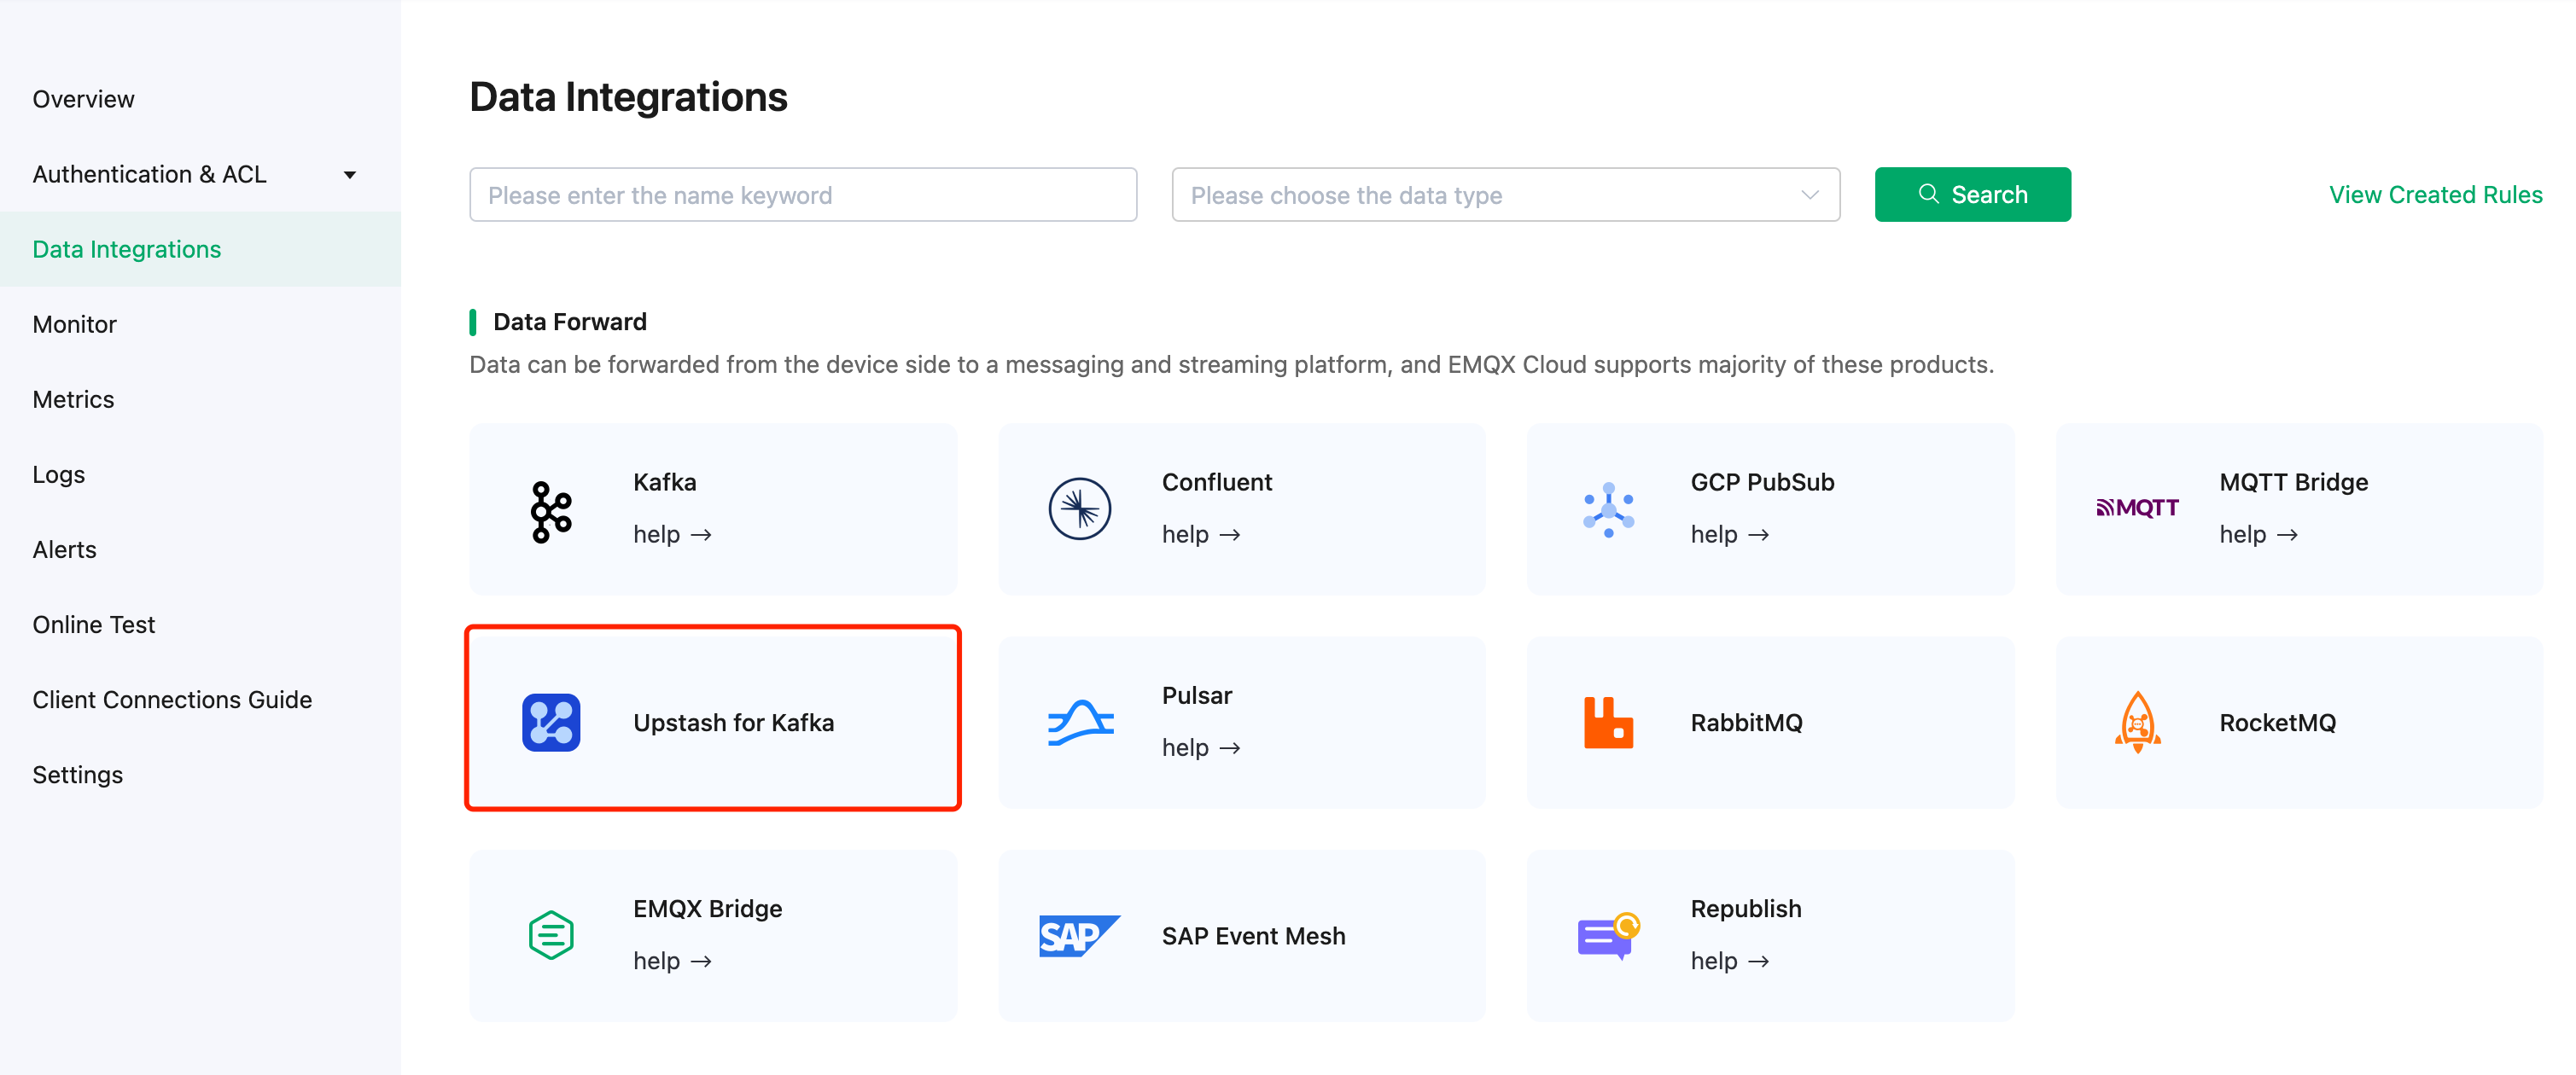
In the EMQX Cloud console, click Data Integrations from the navigation menu in your deployment and click Upstash for Kafka.
Enter the information in Endpoints on Upstash Cluster detail page to the Kafka Server. Enter the username and password generated in Create Credentials in Username and Password fields. Click Test to verify the connection to the Upstash server.
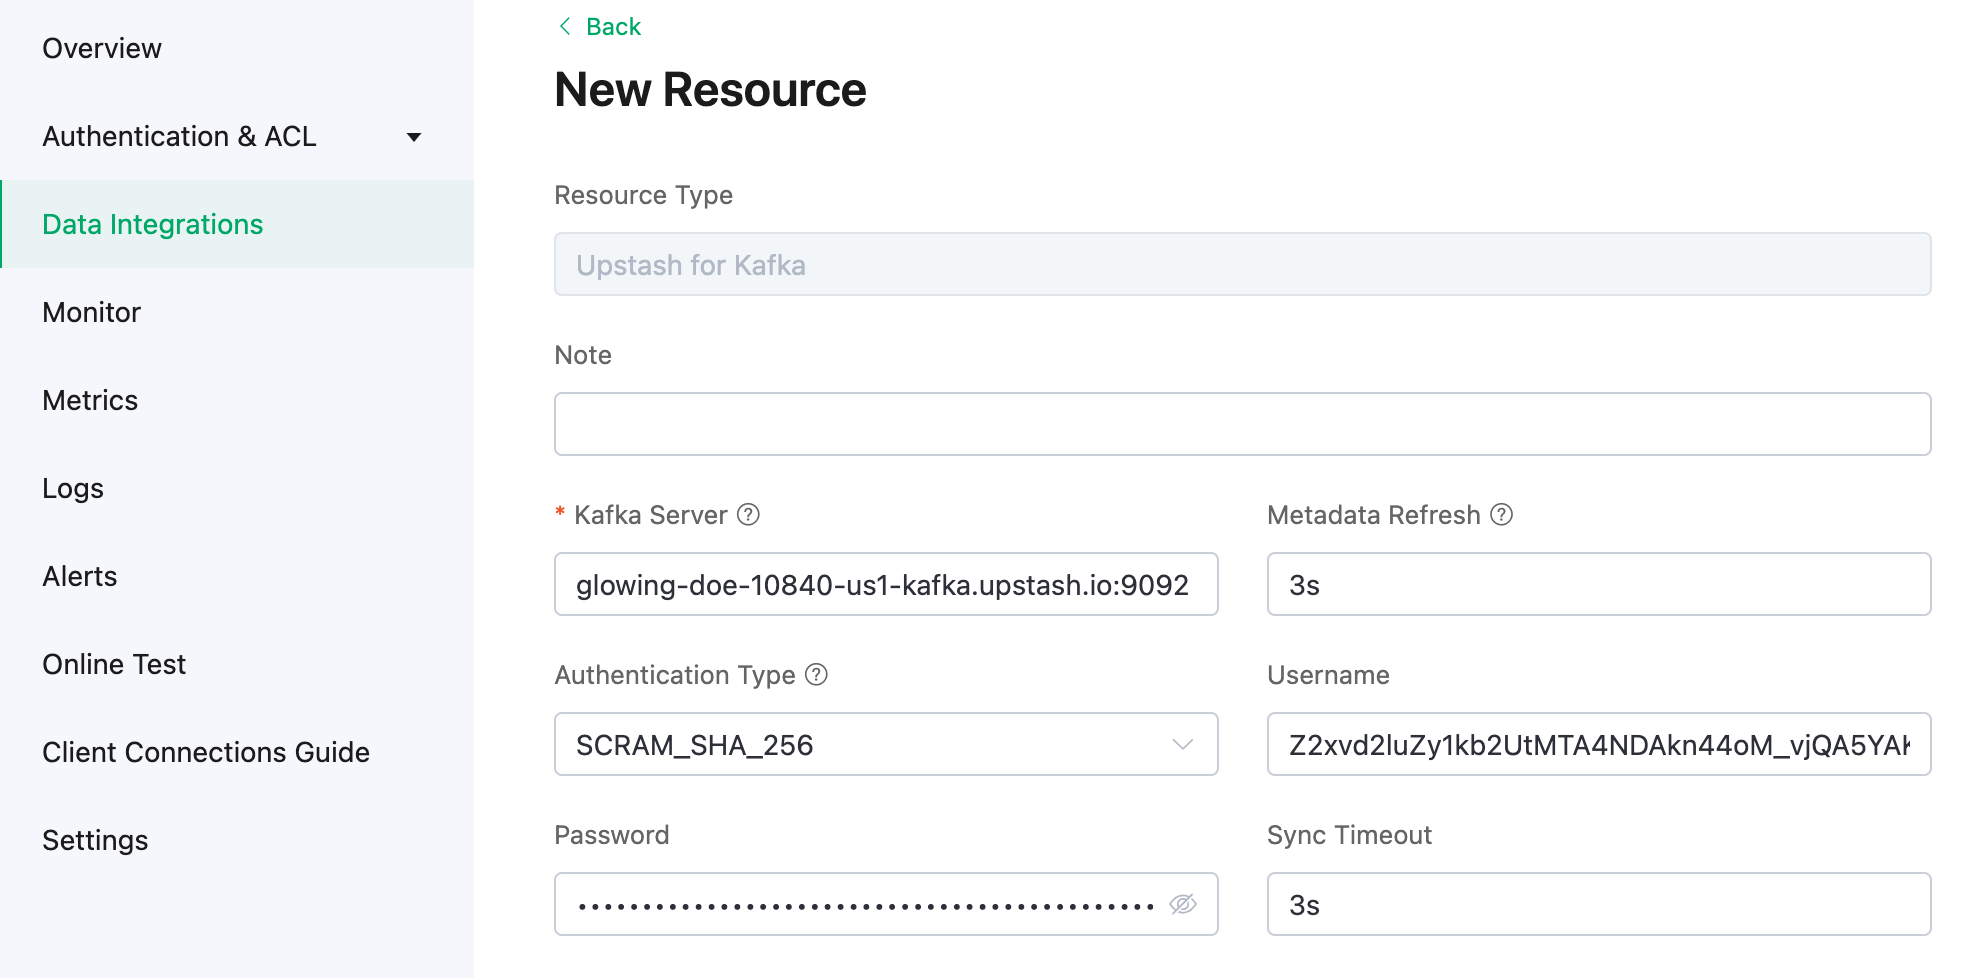
Click New to create a Kafka resource. Under the Configured Resources, you can see a new Upstash for Kafka is created.
Create a new rule. Enter the following SQL statement in the SQL input field. The rule used in this demonstration will read the messages from the
temp_hum/emqxtopic and enrich the JSON object by adding client_id, topic, and timestamp info.up_timestamp: the time when the message is reportedclient_id: the ID of the client that publishes the messagetemp: the temperature data in the message payloadHum: the humidity data in the message payload
SELECT
   timestamp as up_timestamp,
   clientid as client_id,
   payload.temp as temp,
   payload.hum as hum
   FROM
   "temp_hum/emqx"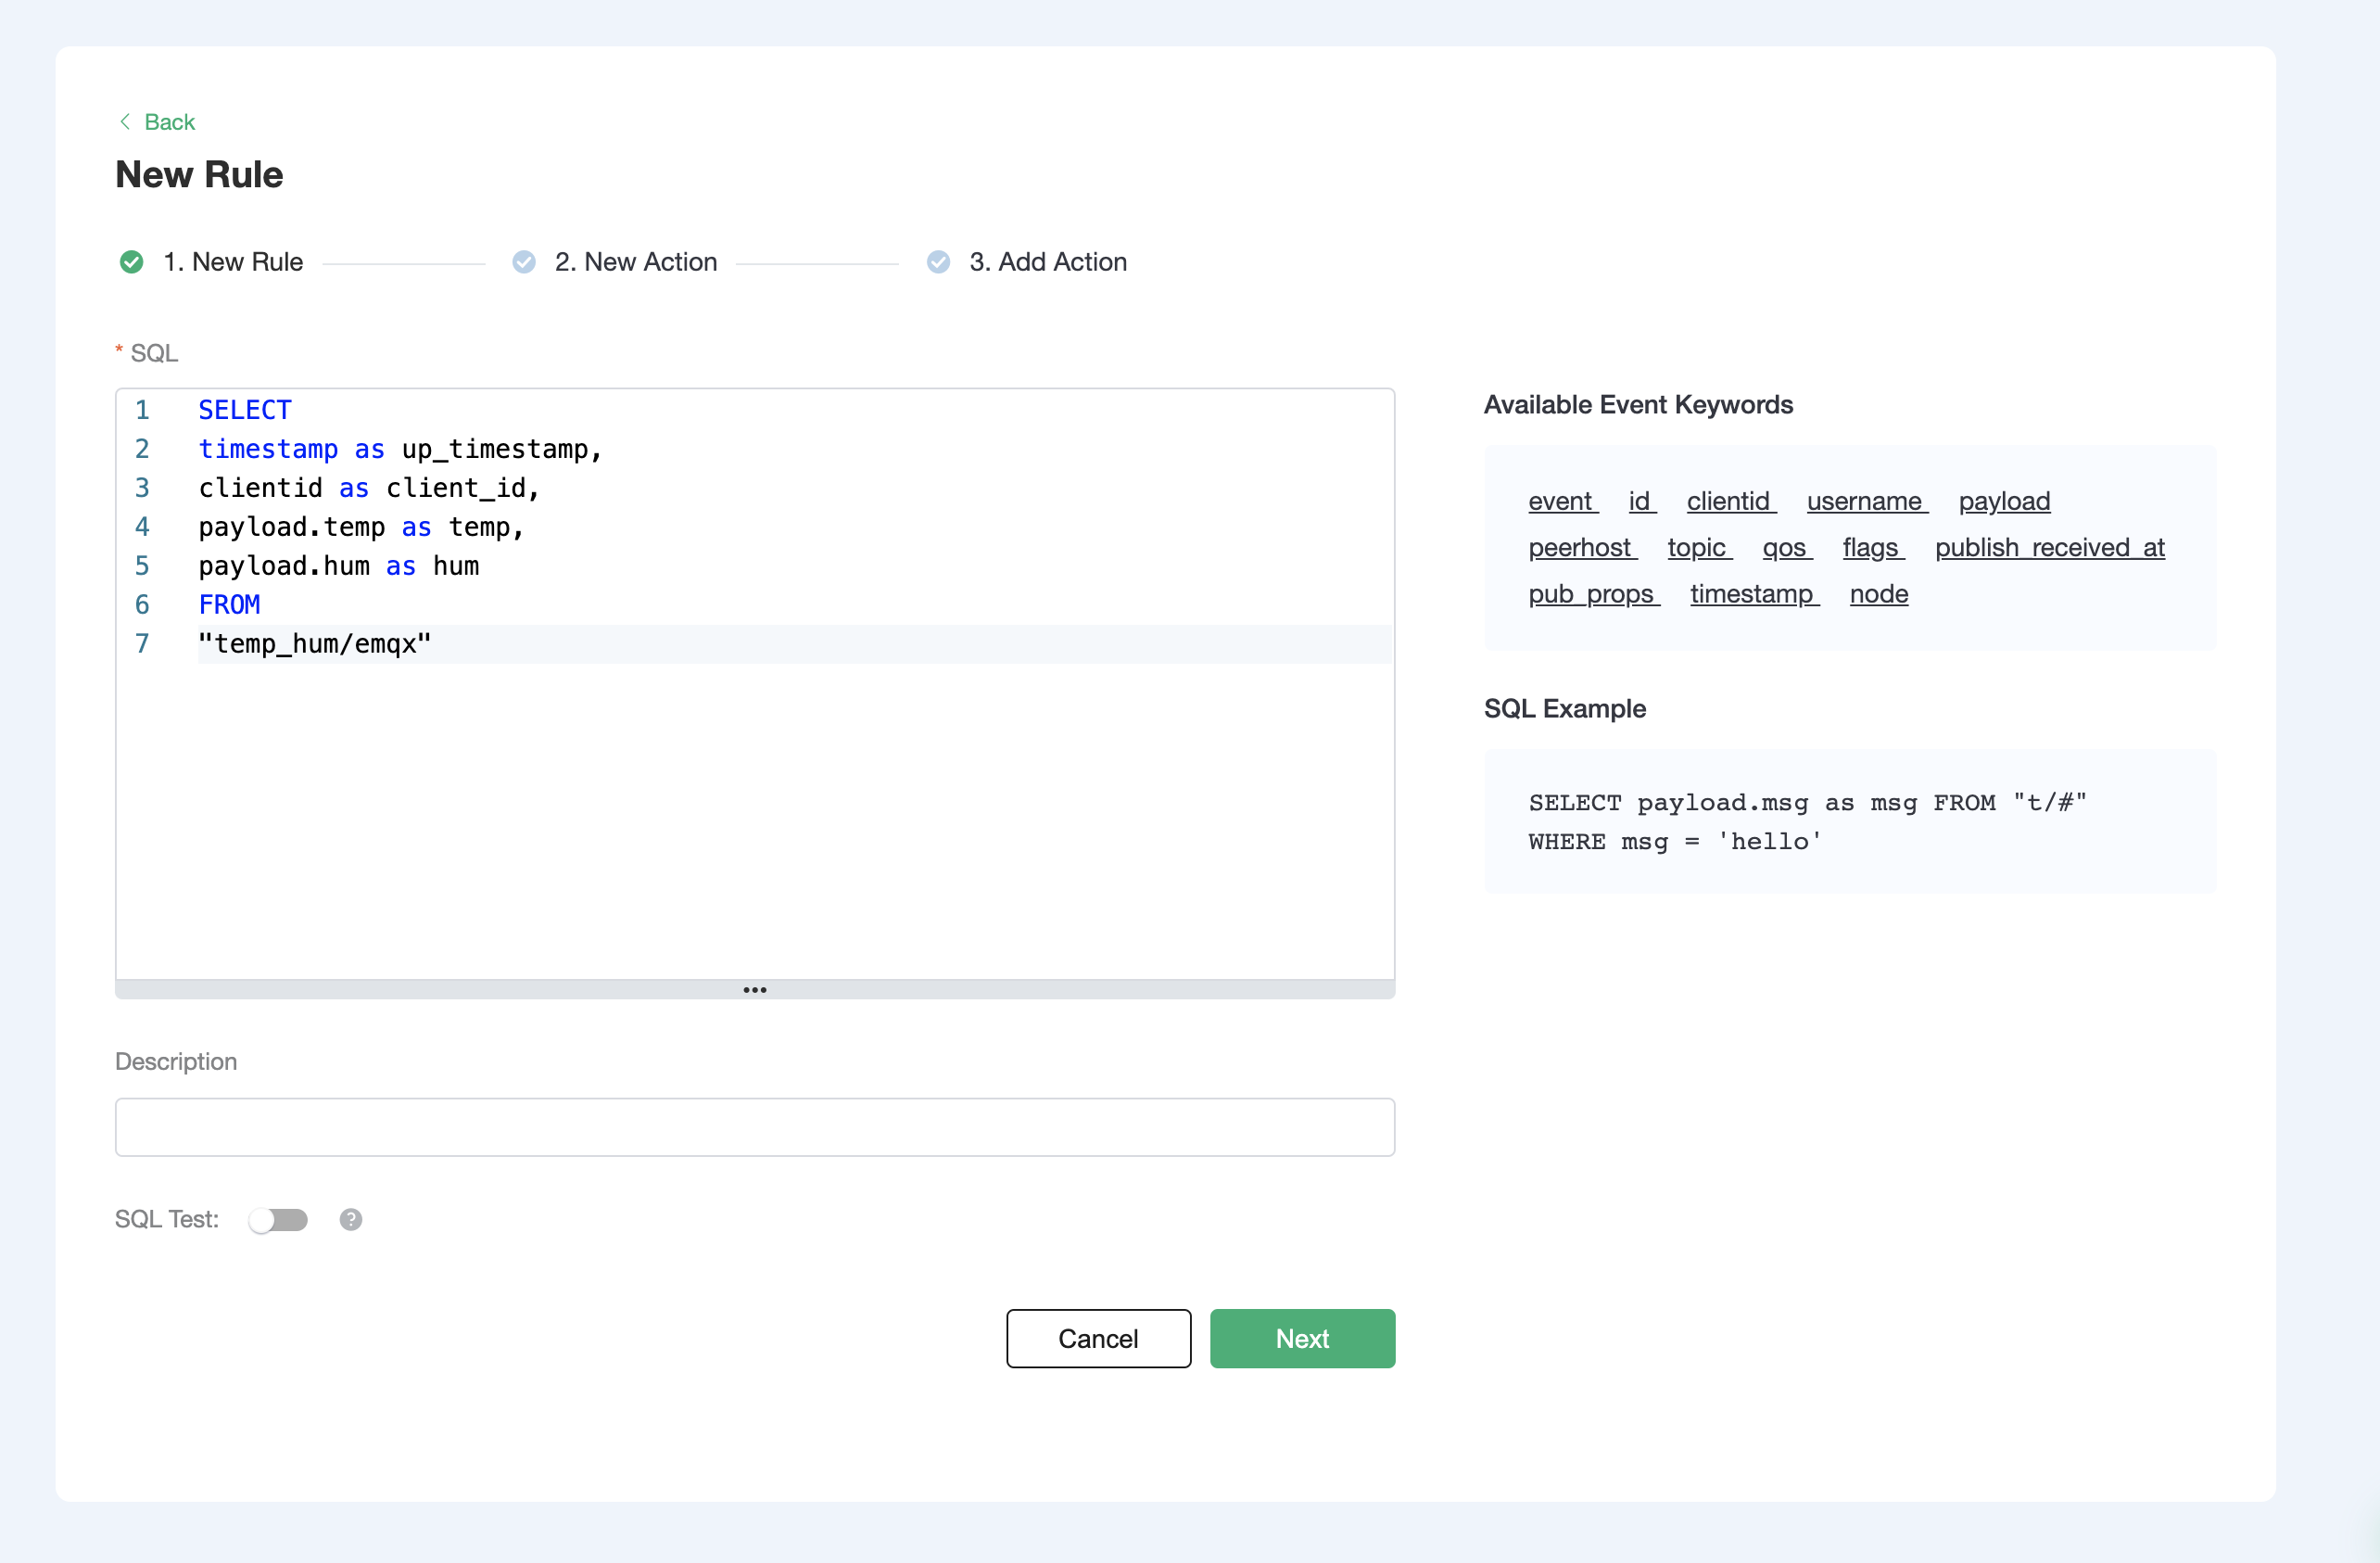
Test the SQL rule by entering the test payload, topic, and client information, and click SQL Test. If you see the results like the following, it means the SQL test succeeds.
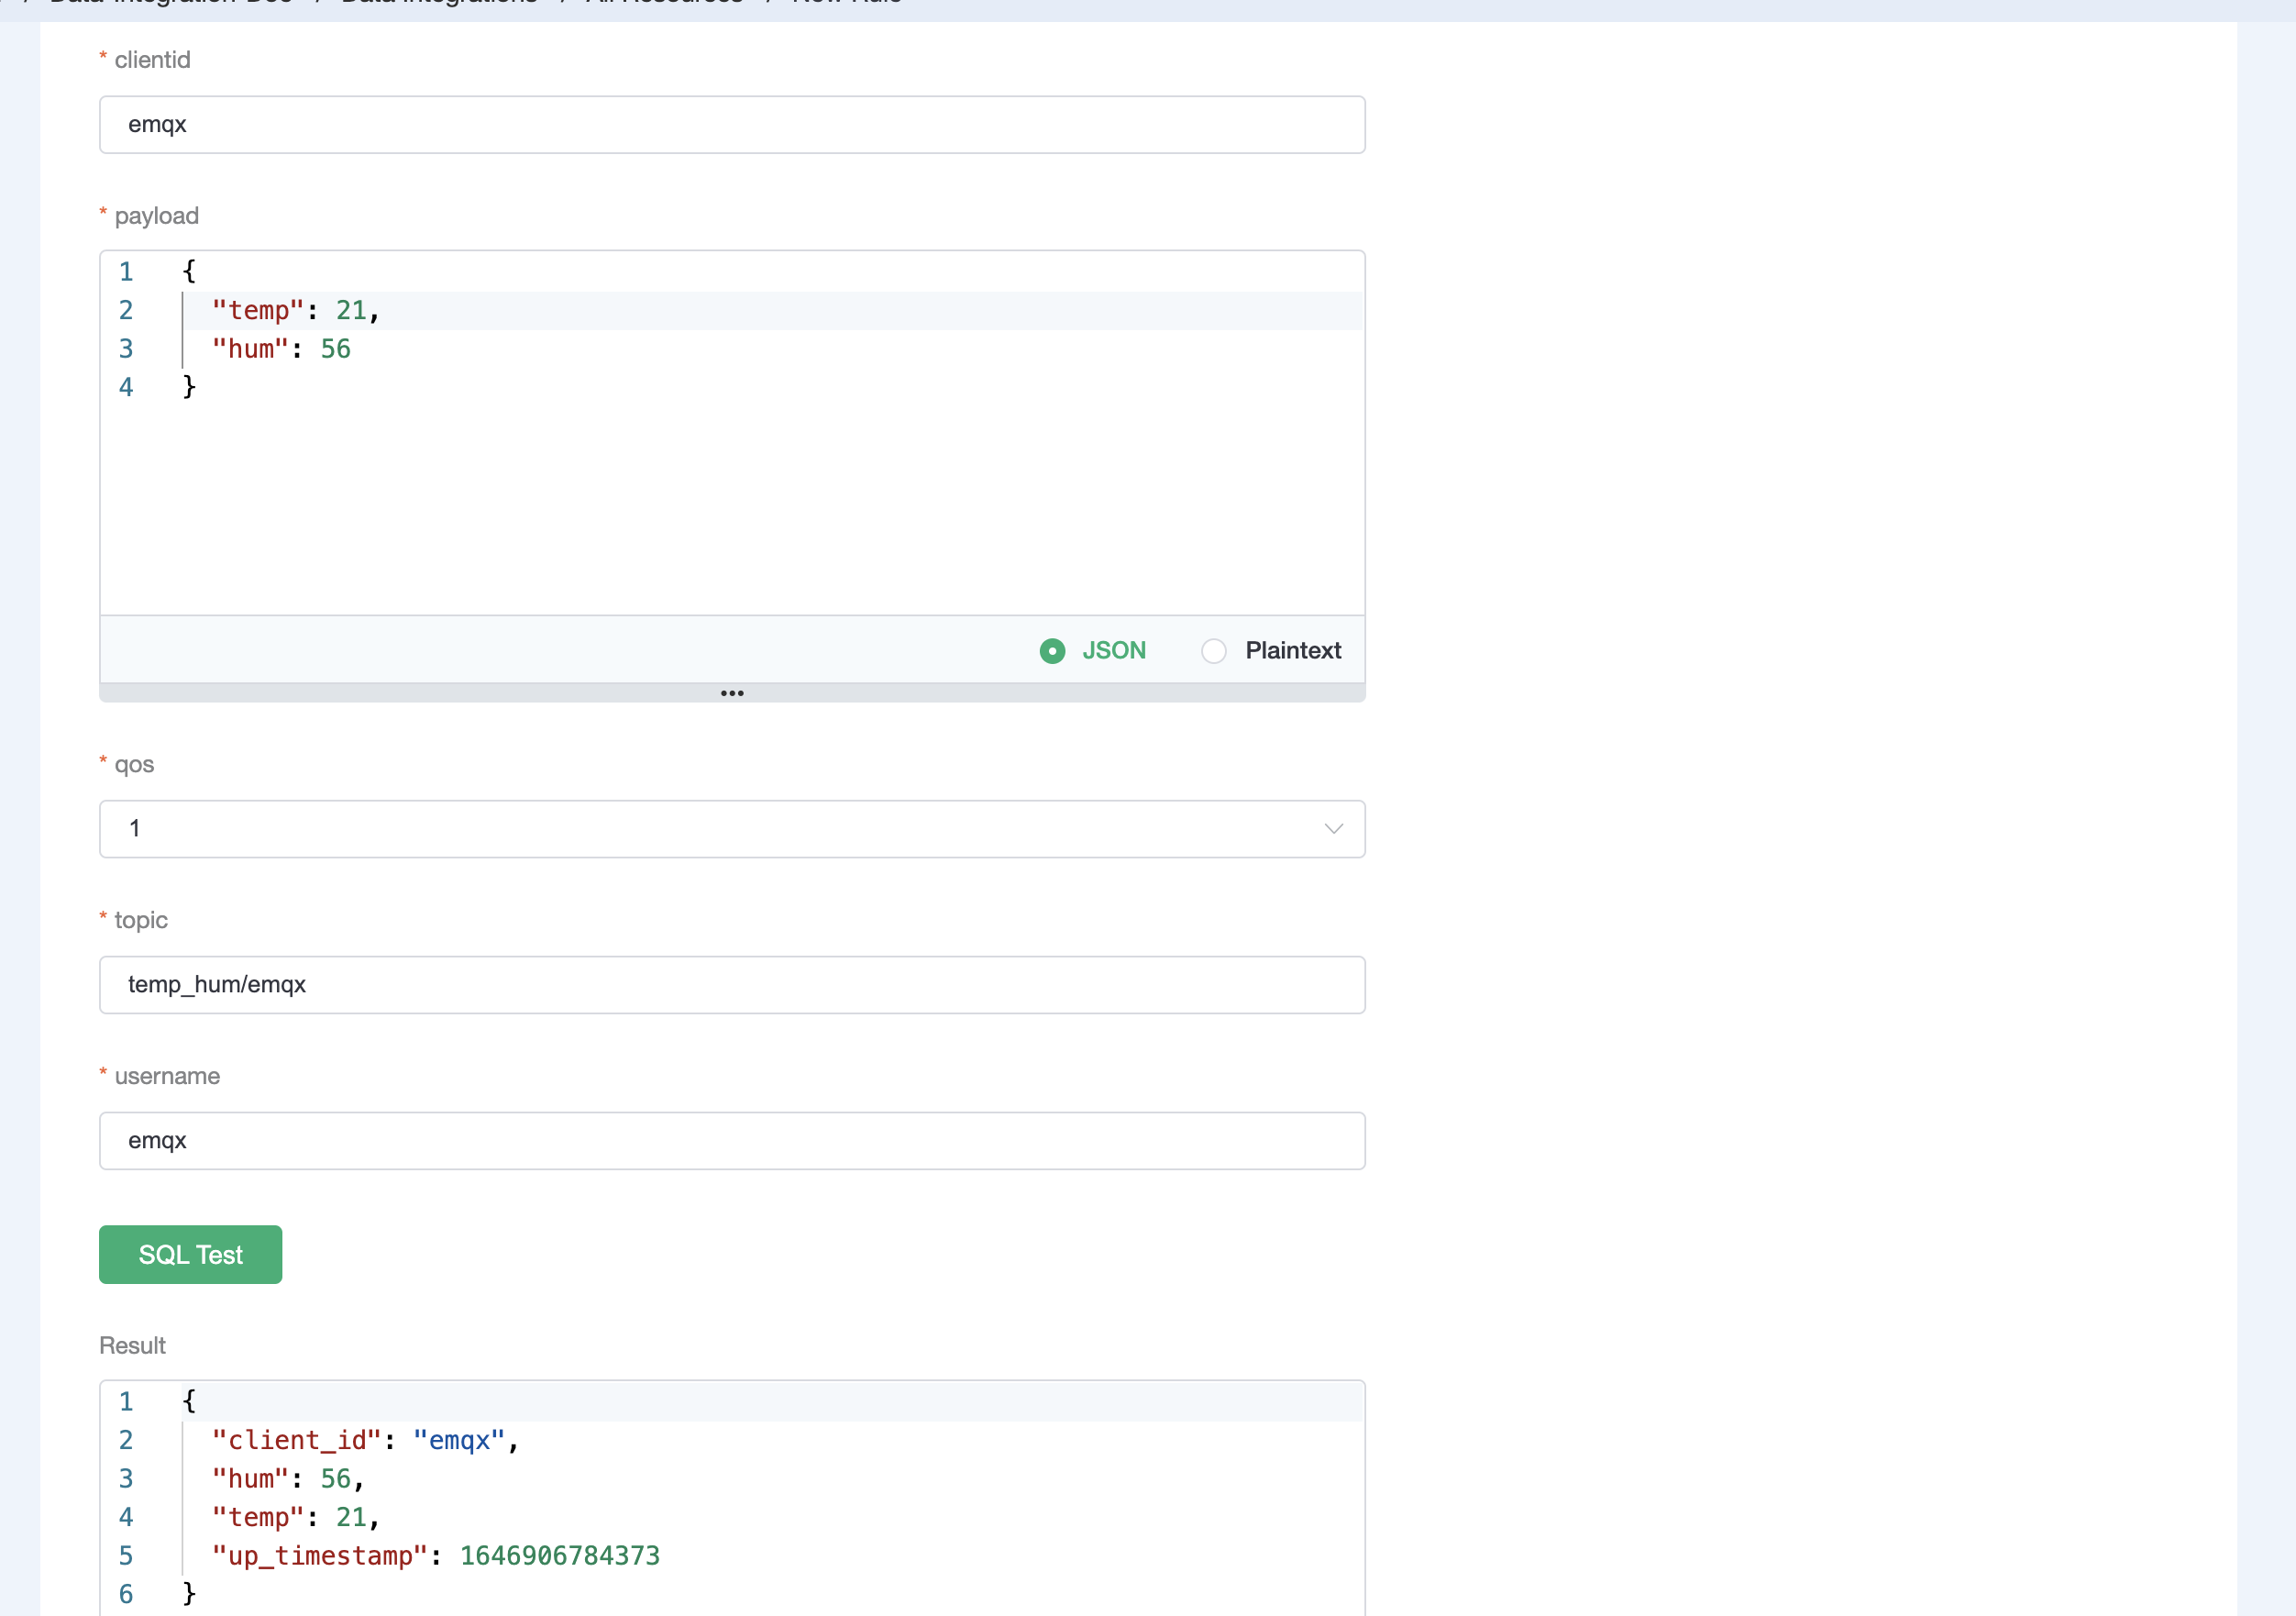
Click Next to add an action to the rule. Use the following Kafka topic and message template. Click Confirm.
bash# kafka topic emqx # kafka message template {"up_timestamp": ${up_timestamp}, "client_id": ${client_id}, "temp": ${temp}, "hum": ${hum}}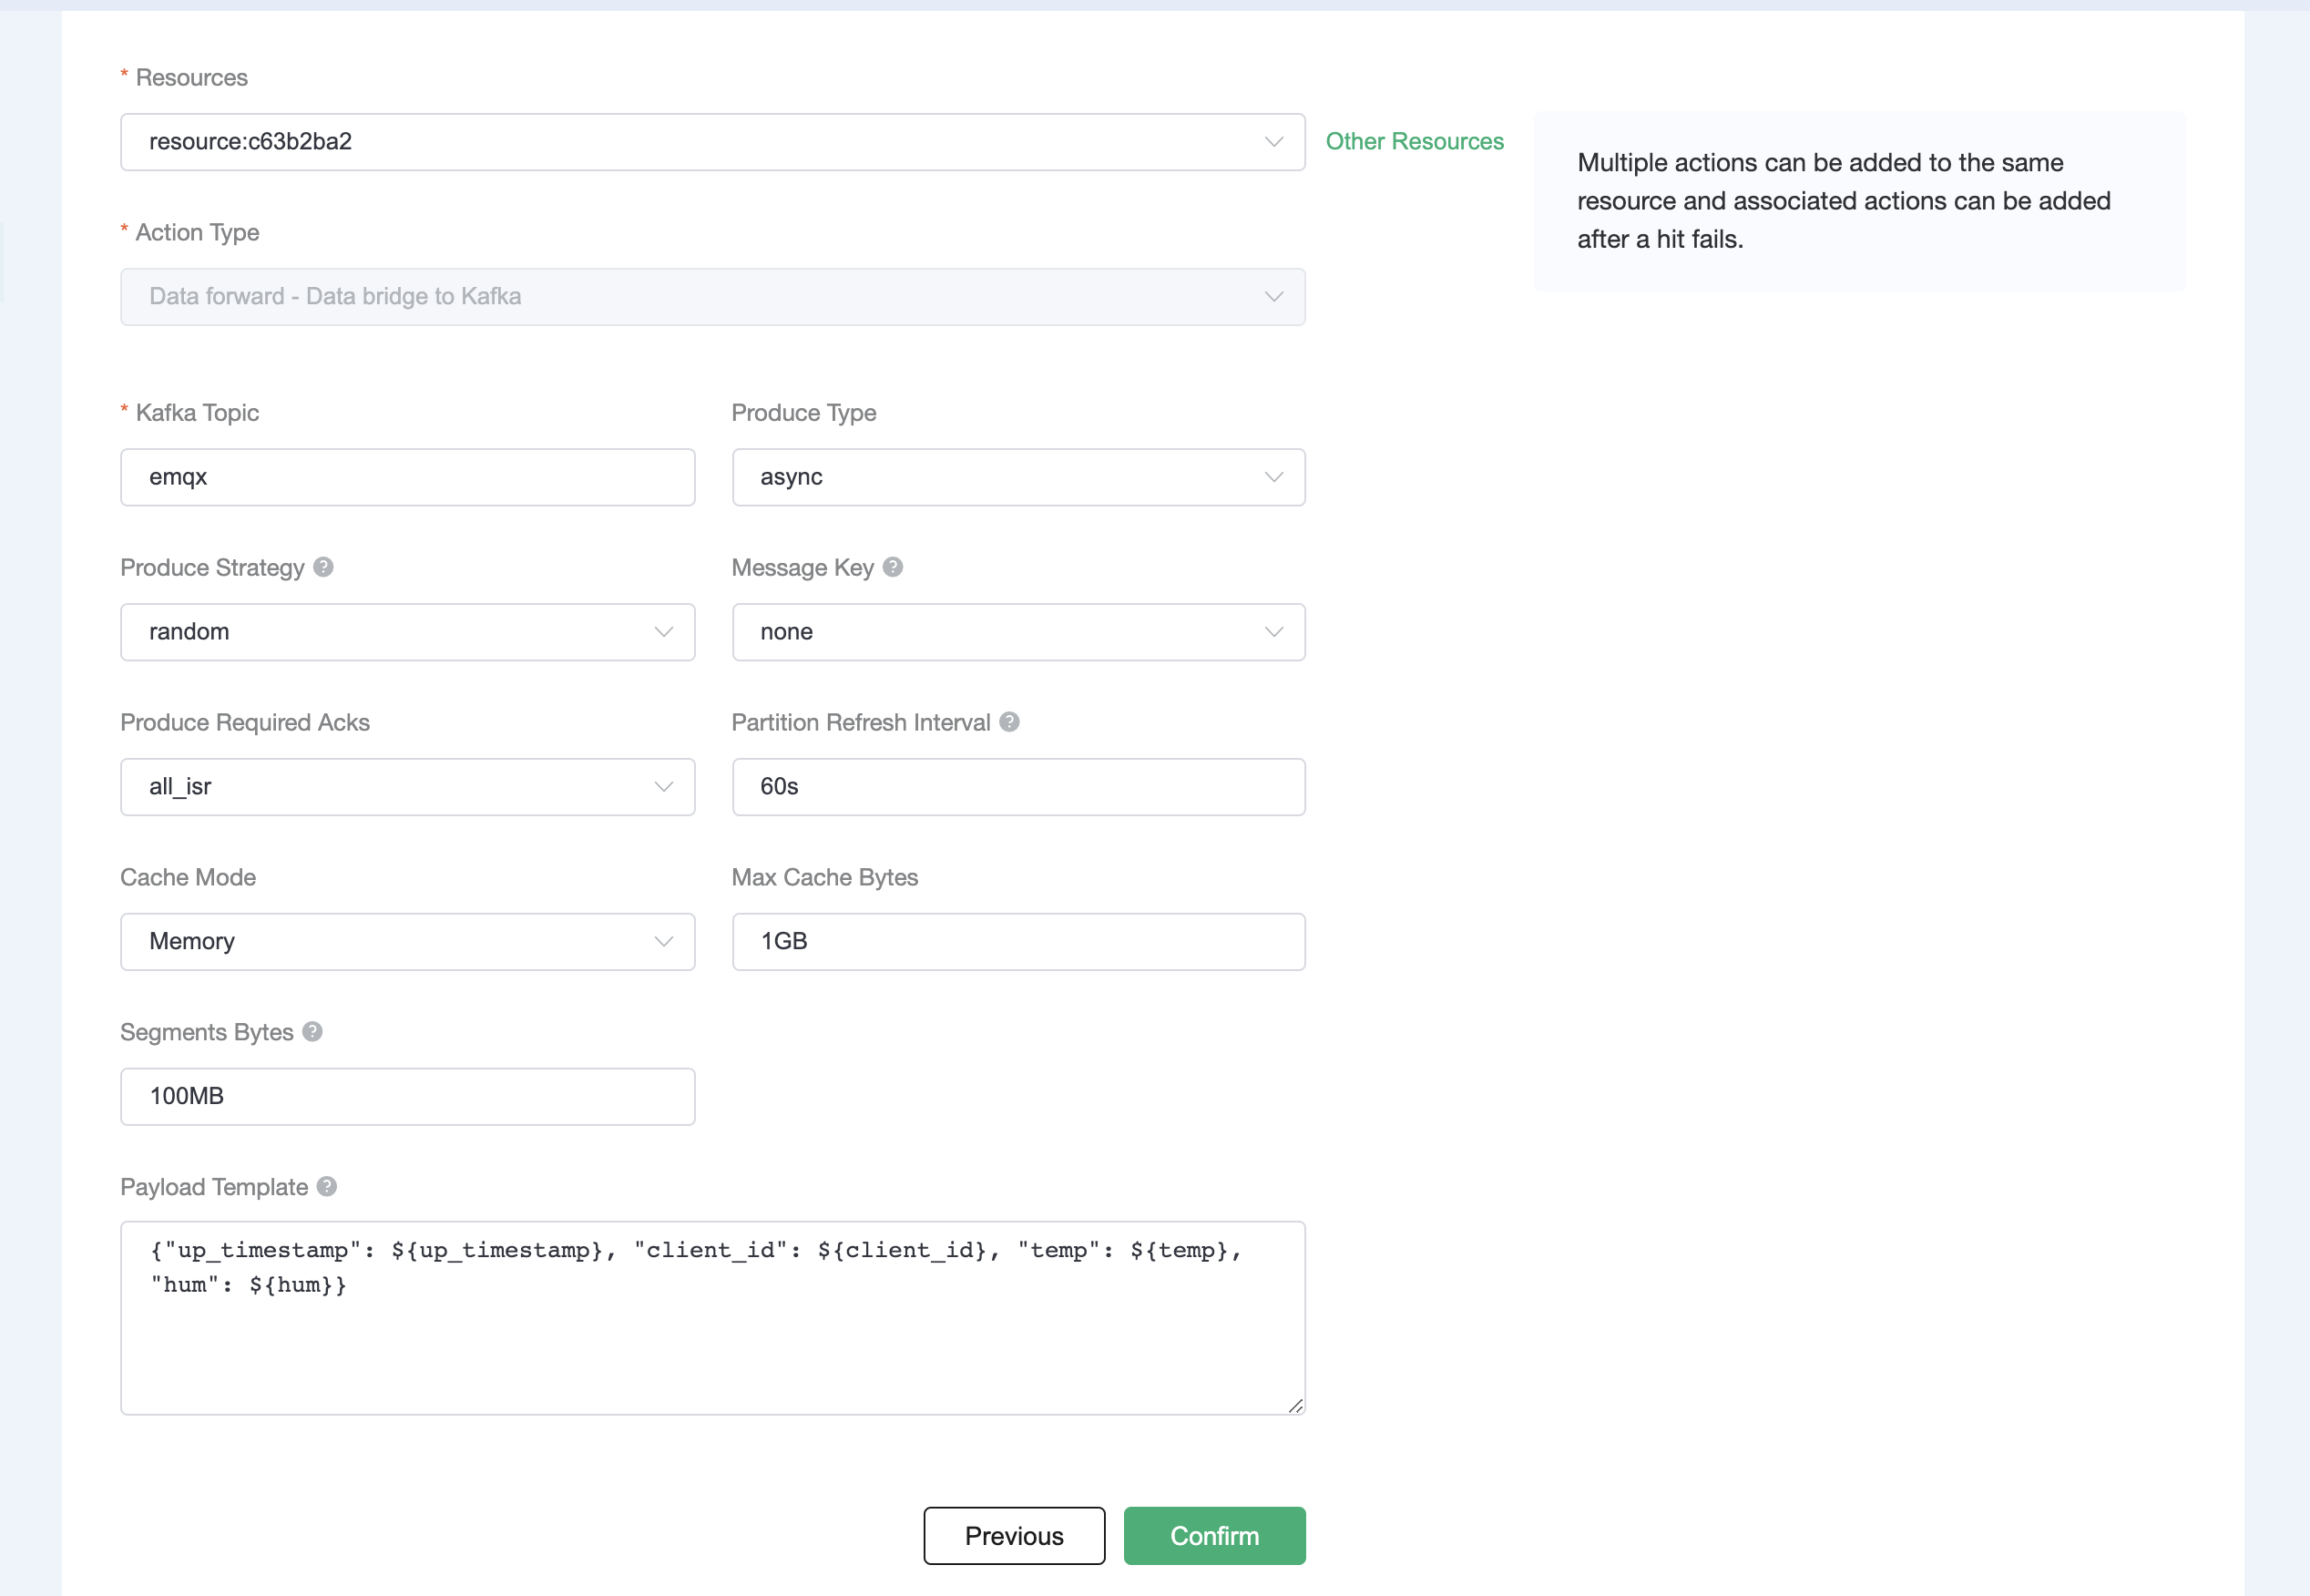
After successfully binding the action to the rule, you can click View Details to see the rule sql statement and the bound actions.
To see the created rules, click the View Created Rules button on the Data Integrations page. Click the icon in the Monitor column to see the detailed metrics of the rule and action.
Test Data Bridge
Use MQTTX to simulate temperature and humidity data reporting.
You need to enter the deployment connection address and add client authentication information for connecting to the EMQX Dashboard.
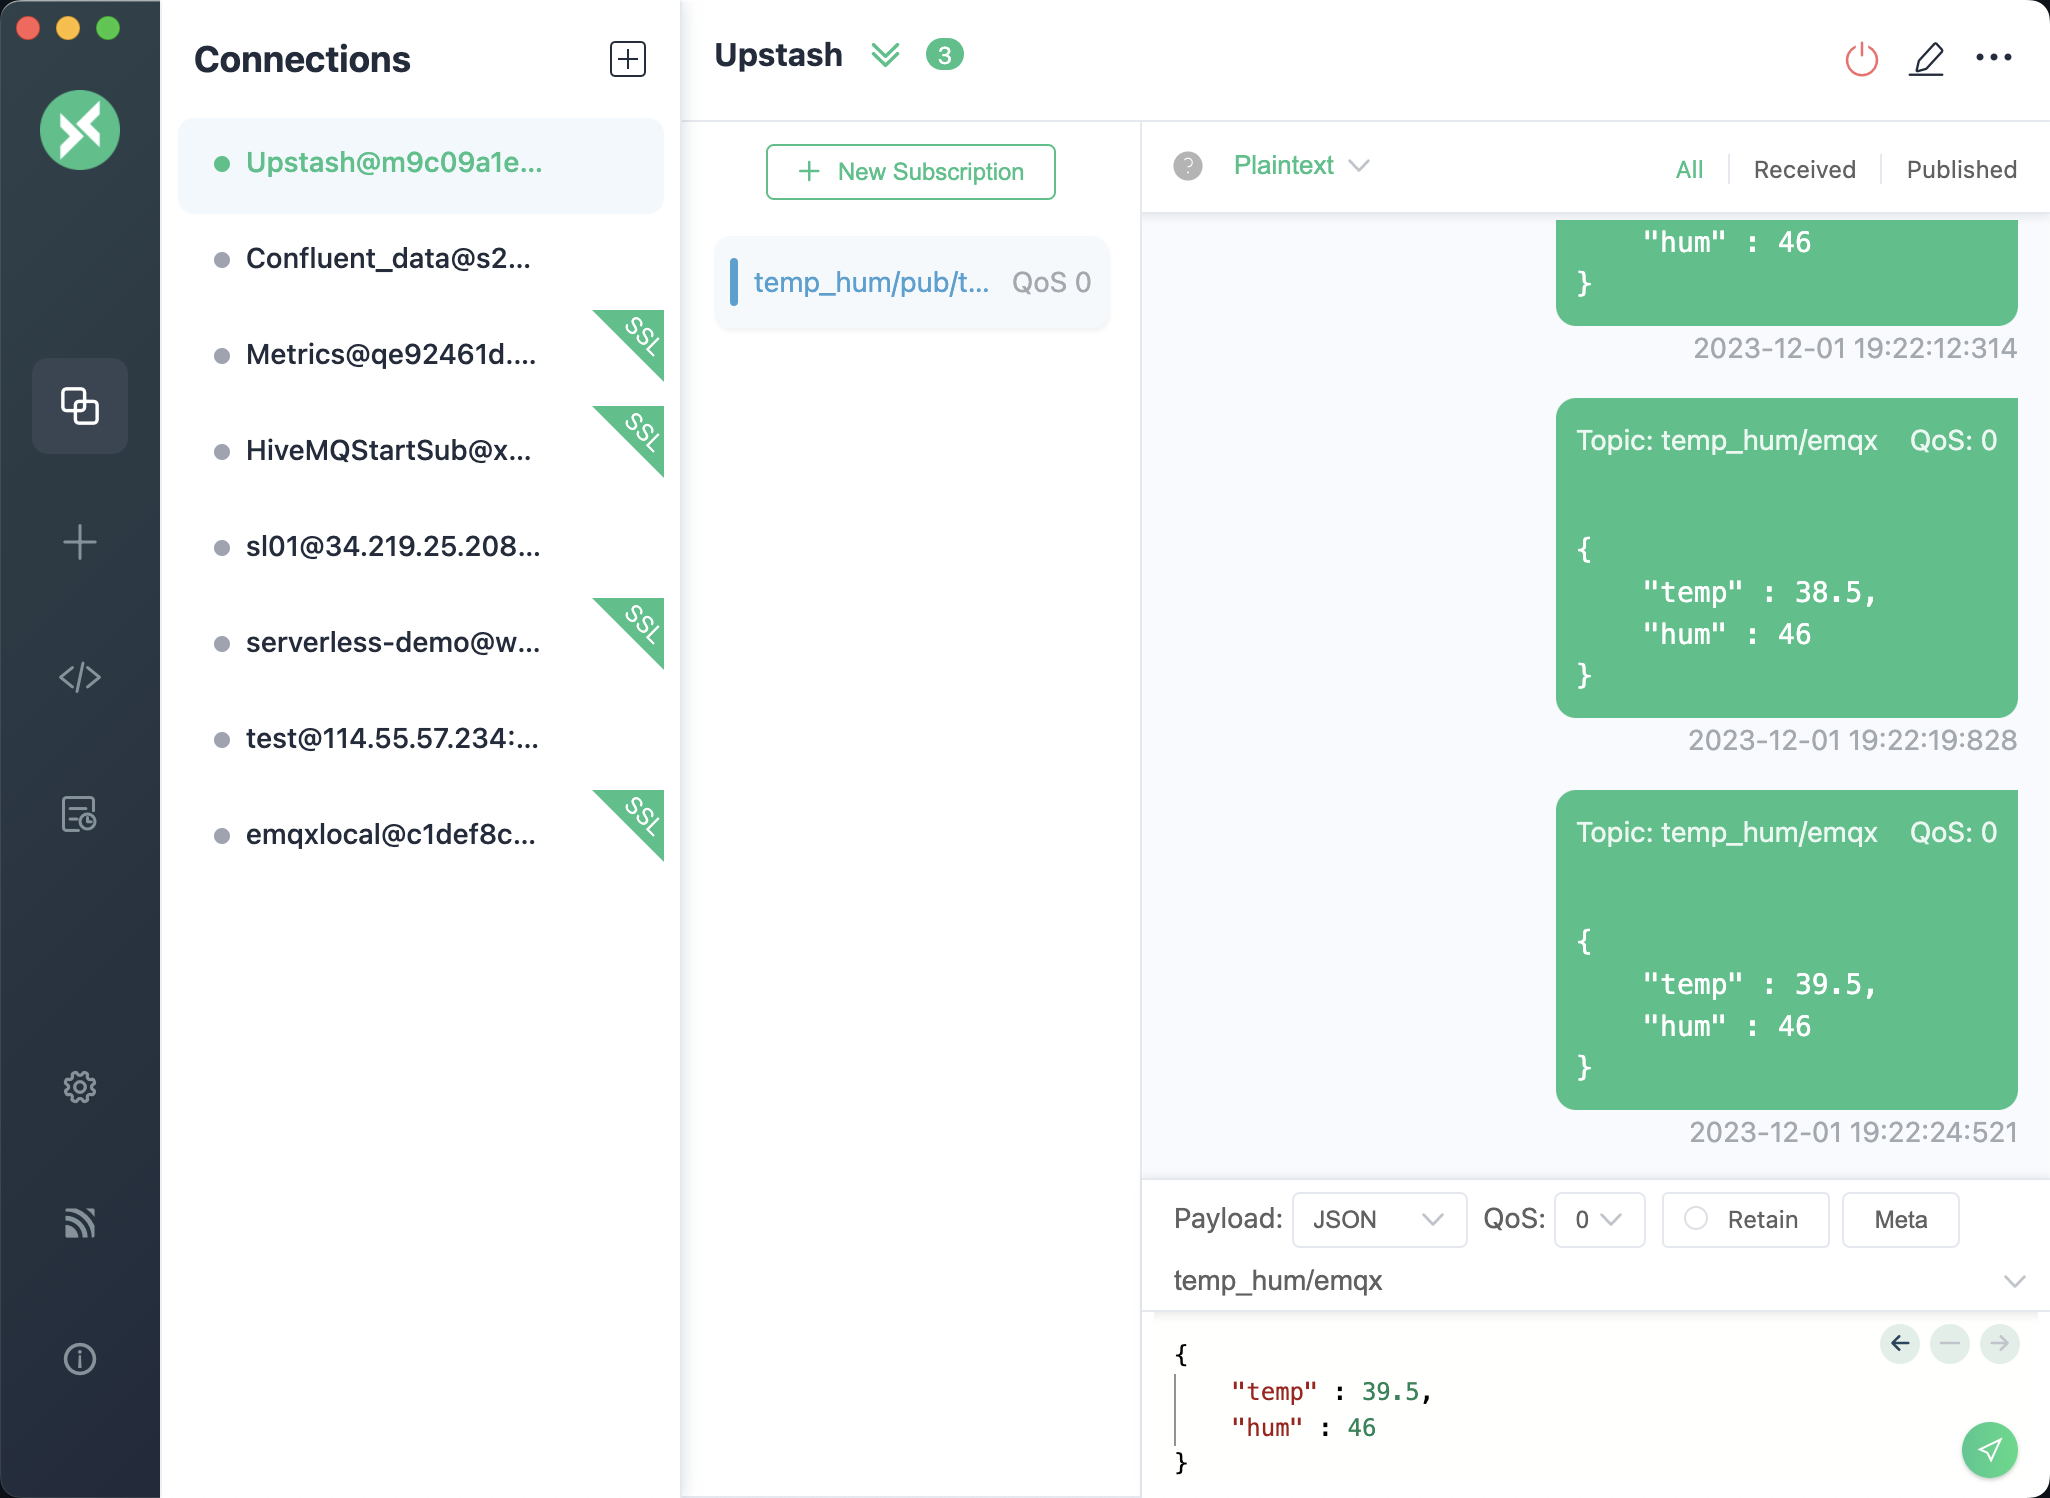
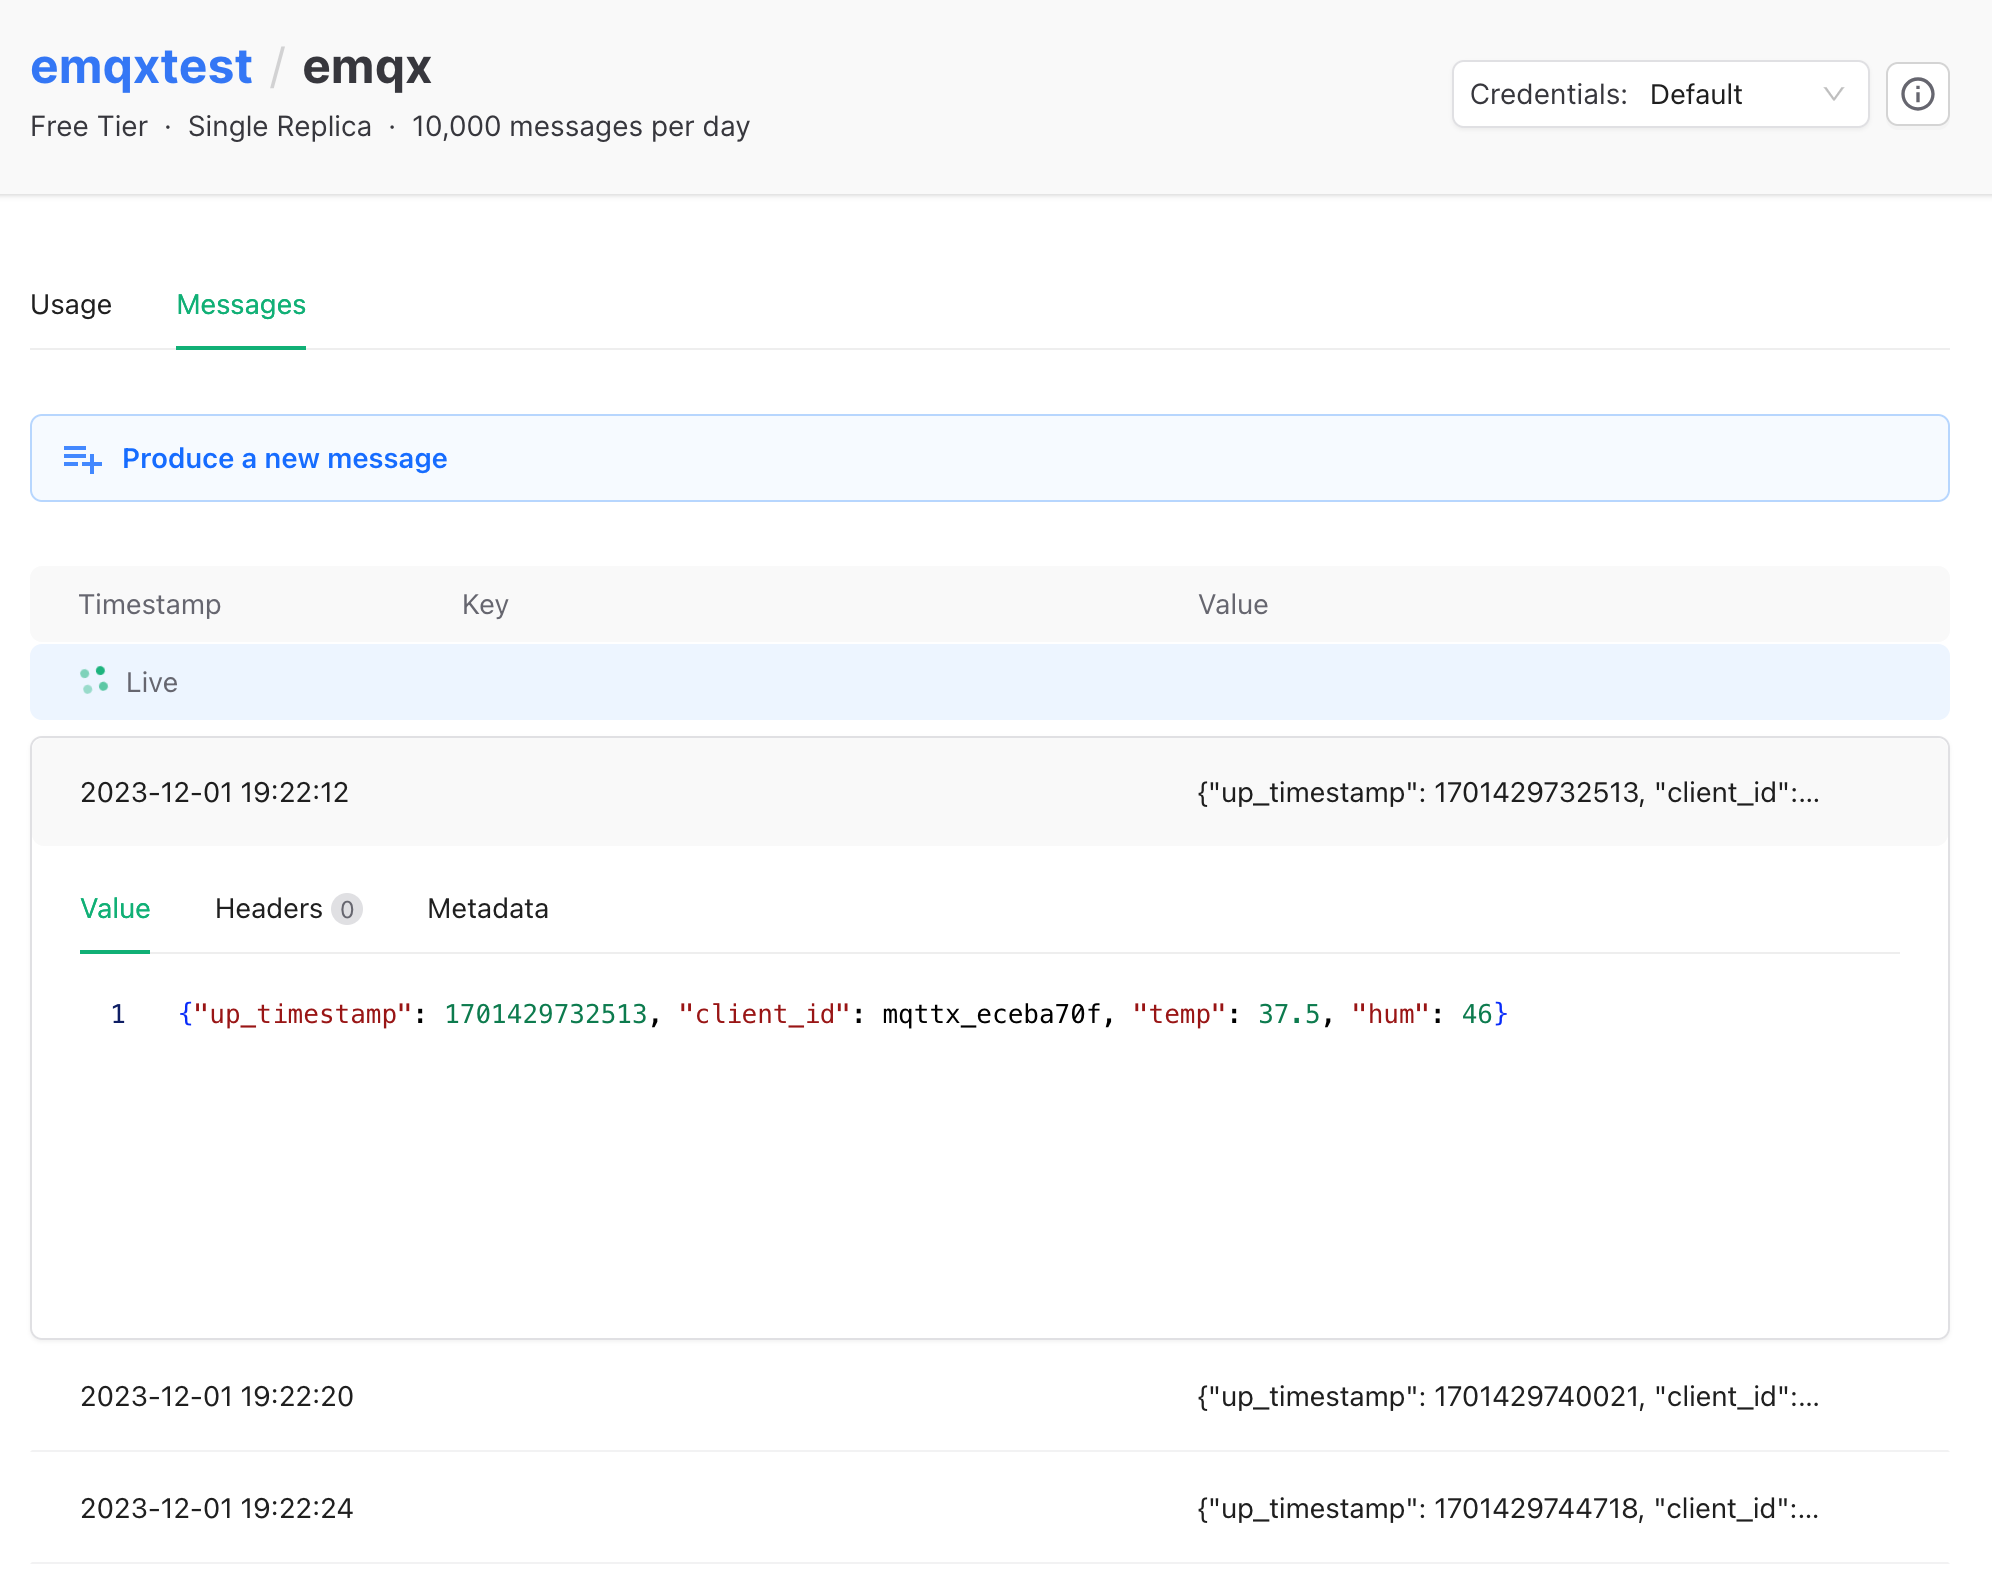
View data in Upstash Console. In Topic, we select 'emqx', click Messages, then we can check the messages.
