Integrate with Webhook
In this article, we will simulate temperature and humidity data and report these data to EMQX Cloud via the MQTT protocol and then use the EMQX Cloud Data Integrations to dump the data into Webhook.
Before you start, you need to complete the following operations:
A deployment (EMQX Cluster) has been created on EMQX Cloud.
For Professional Plan users: Please complete Peering Connection Creation first, all IPs mentioned below refer to the internal network IP of the resource.(Professional Plan with a NAT gateway can also use public IP to connect to resources).
For Standard Plan users: No peering connection is required, all IPs below refer to the public IP of the resource.
For BYOC Plan users: Please establish a peering connection between the VPC where BYOC is deployed and the VPC where the resources are located. All IPs mentioned below refer to the internal IP of the resources. If you need to access the resources via public IP addresses, please configure a NAT gateway in your public cloud console for the VPC where BYOC is deployed.
Create a Web server
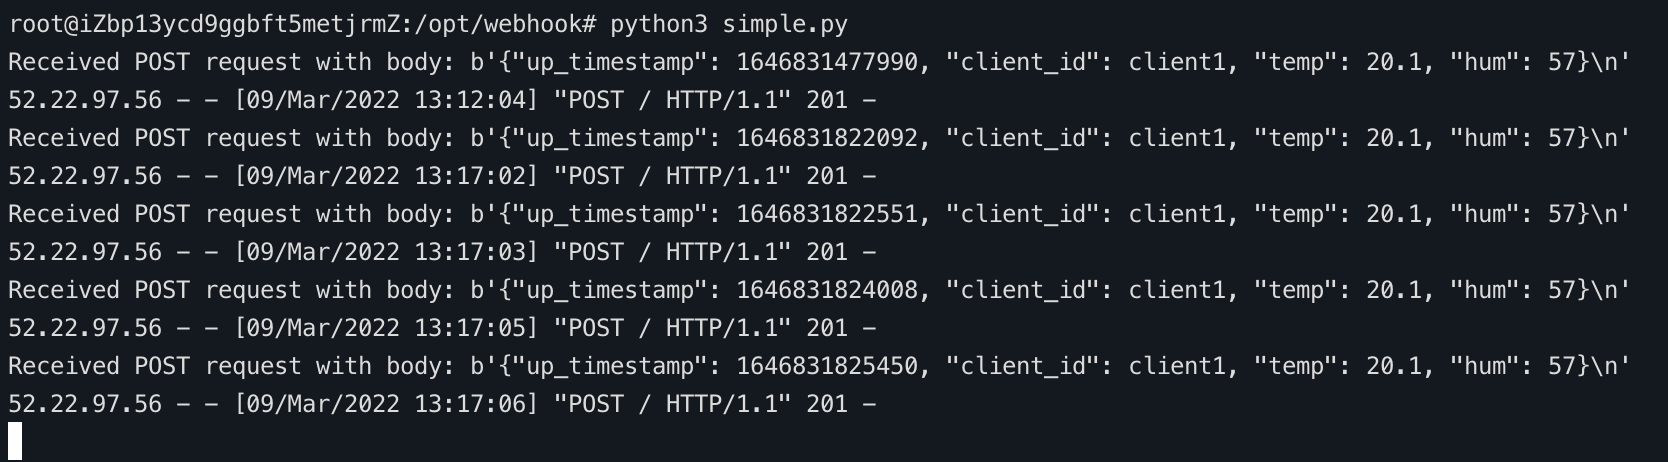
You could use the following python code to create a simple Web server.
pythonfrom http.server import HTTPServer, BaseHTTPRequestHandler class SimpleHTTPRequestHandler(BaseHTTPRequestHandler): def do_GET(self): self.send_response(200) self.end_headers() self.wfile.write(b'Hello, world!') def do_POST(self): content_length = int(self.headers['Content-Length']) body = self.rfile.read(content_length) print("Received POST request with body: " + str(body)) self.send_response(201) self.end_headers() httpd = HTTPServer(('0.0.0.0', 8080), SimpleHTTPRequestHandler) httpd.serve_forever()
EMQX Cloud Data Integrations configuration
Go to Deployment Details and click on EMQX Dashboard to go to Dashboard.
New Resource
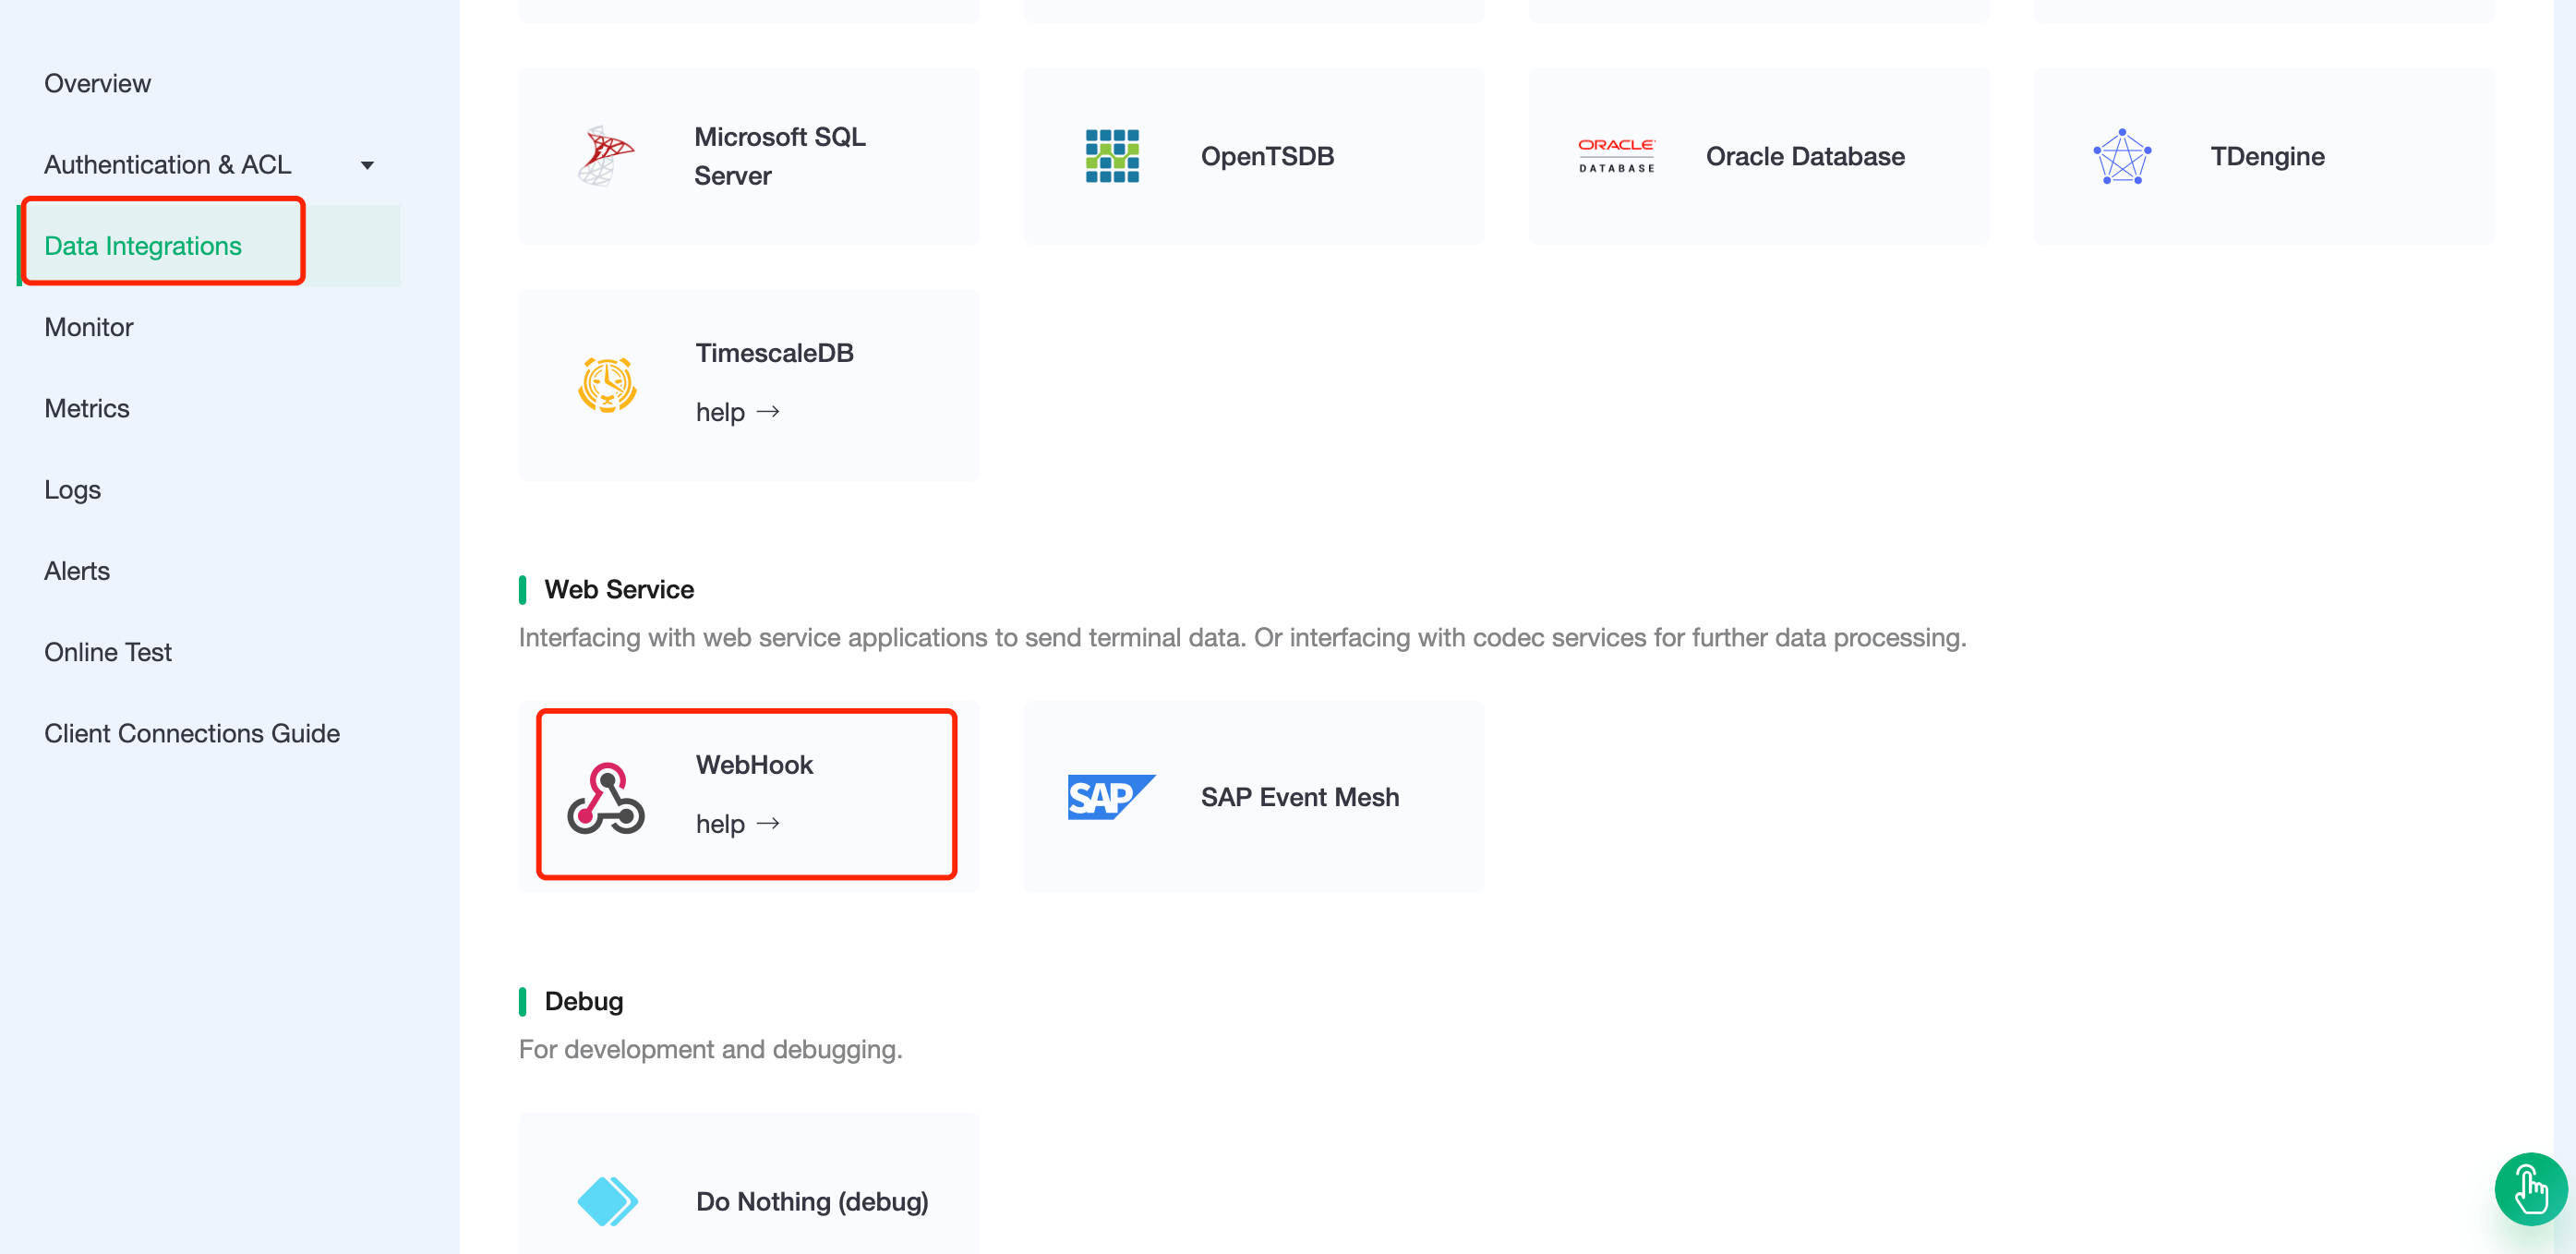
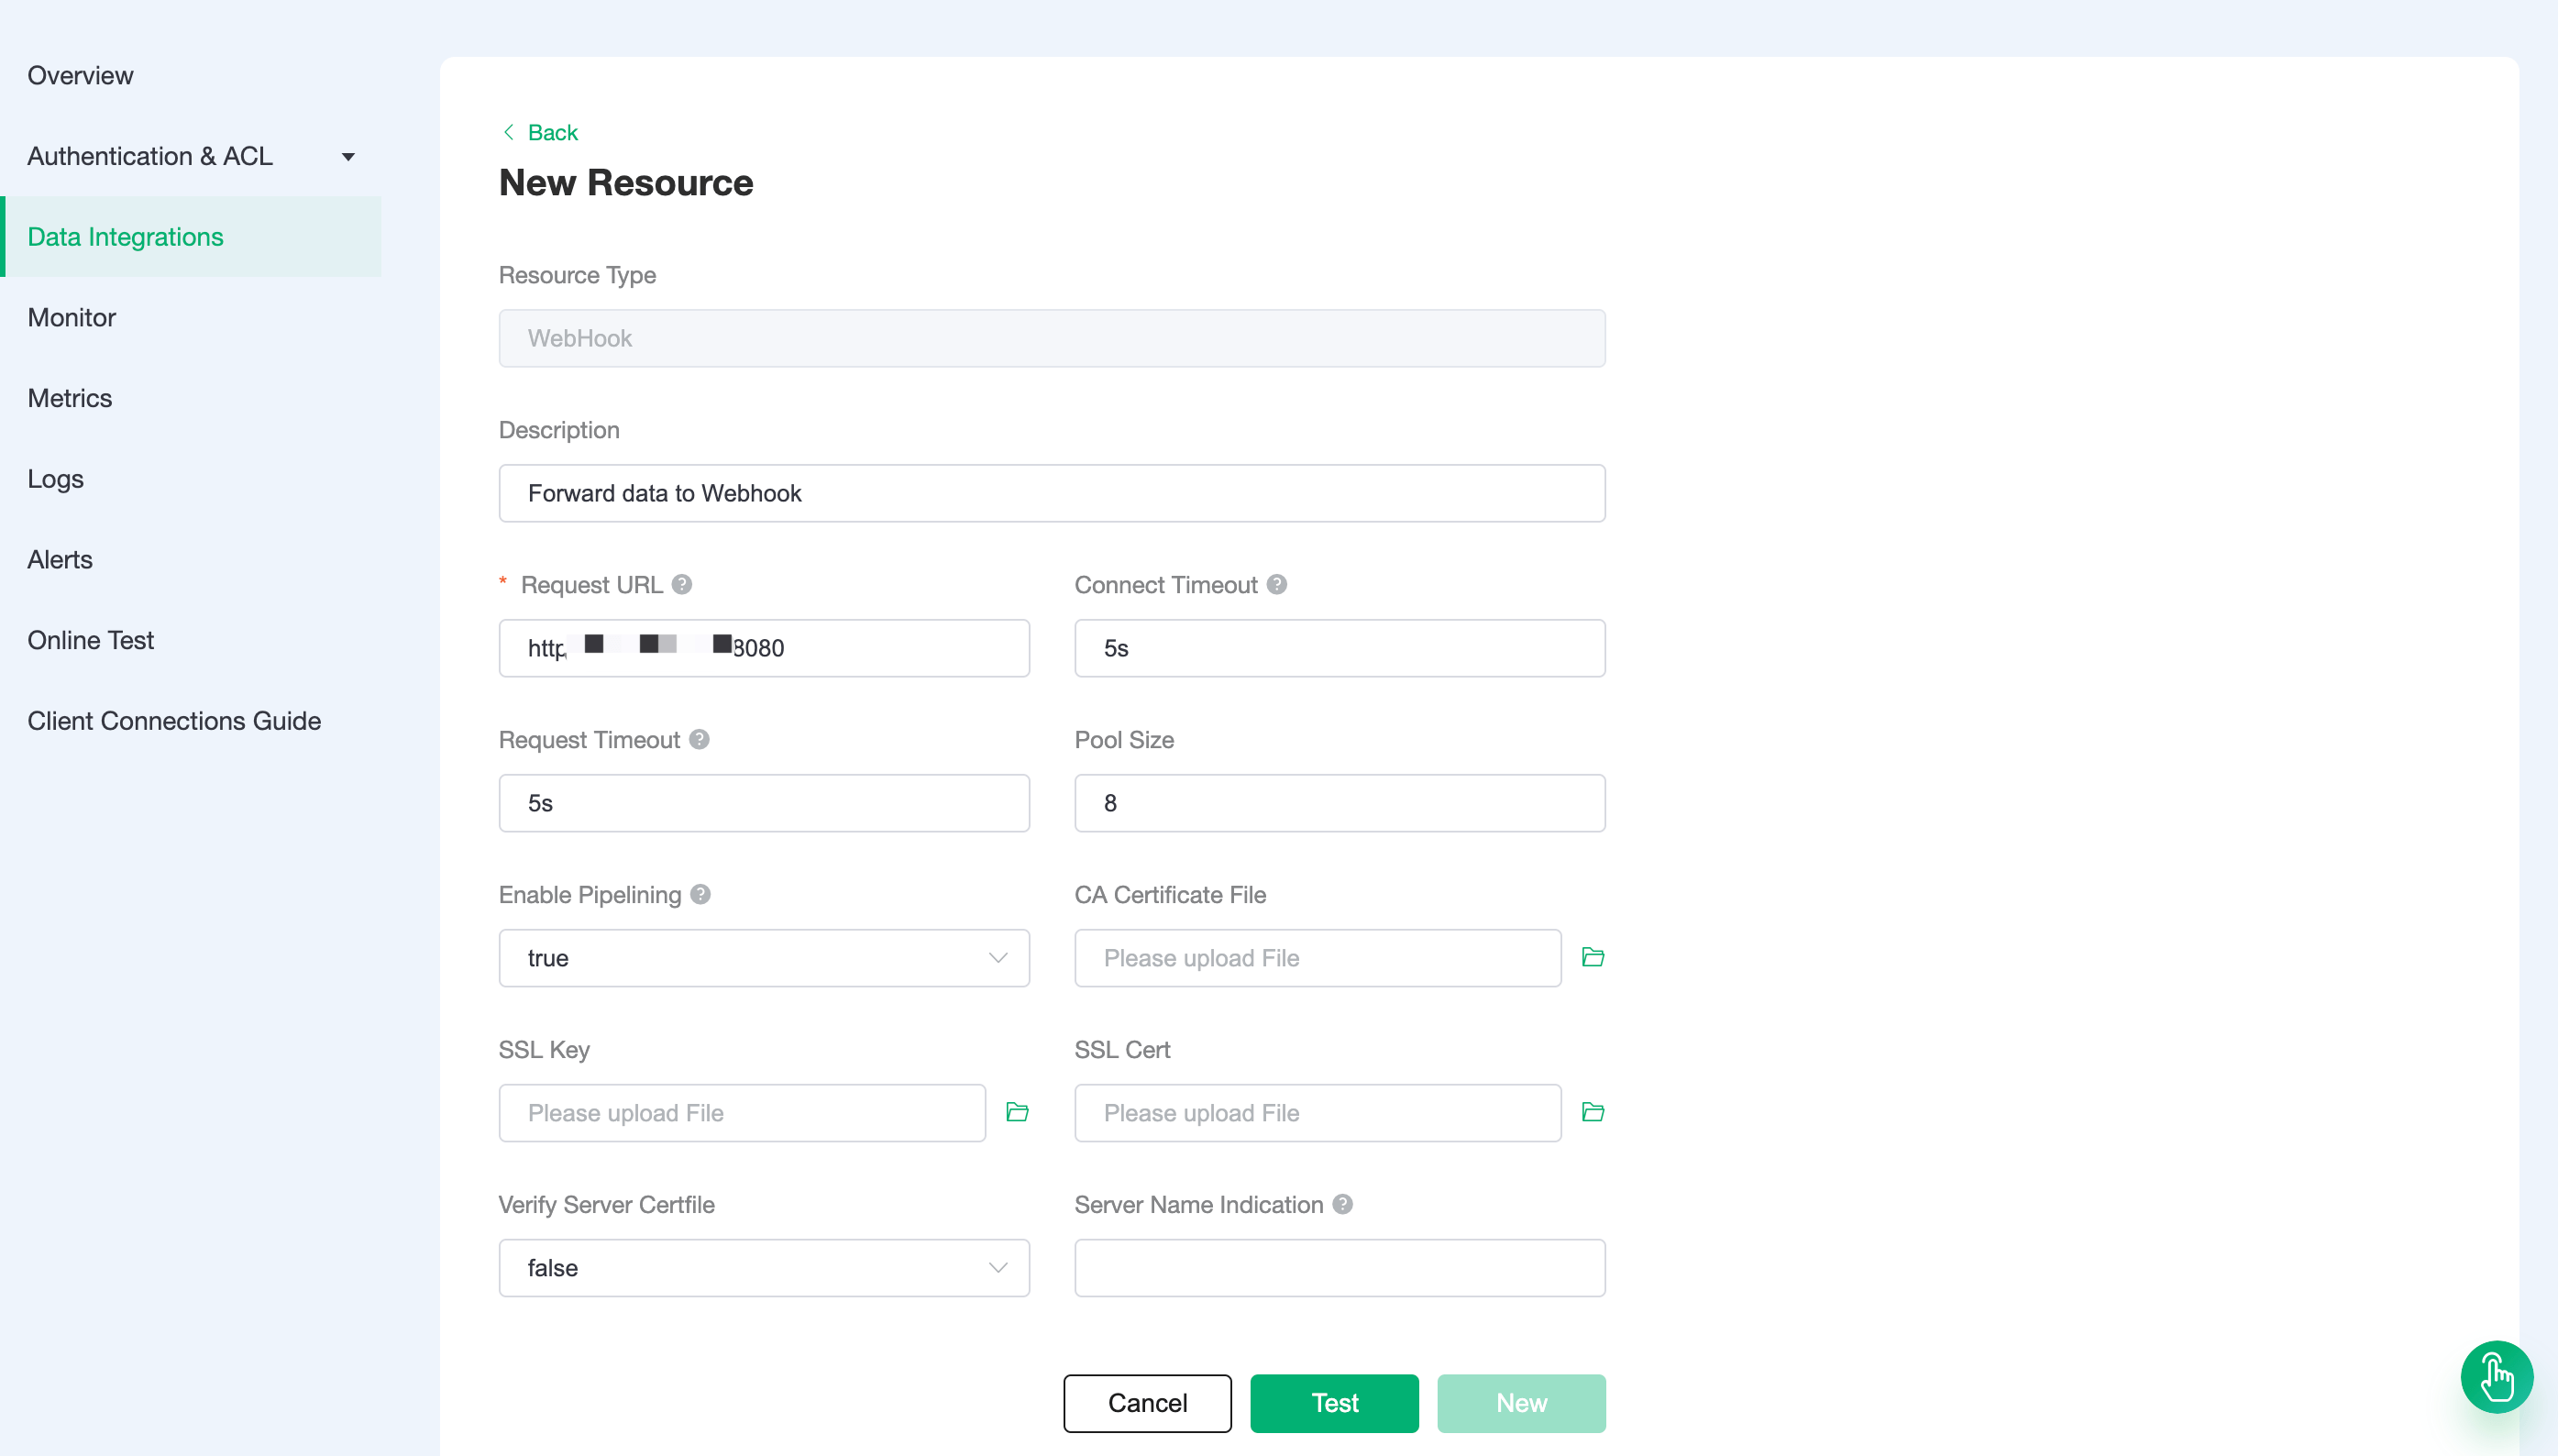
Click on Data Integrations on the left menu bar, drop down to select the Webhook resource type. Fill in the webhook information you have just created and click Test. If you get an error, instantly check that the configuration is correct.
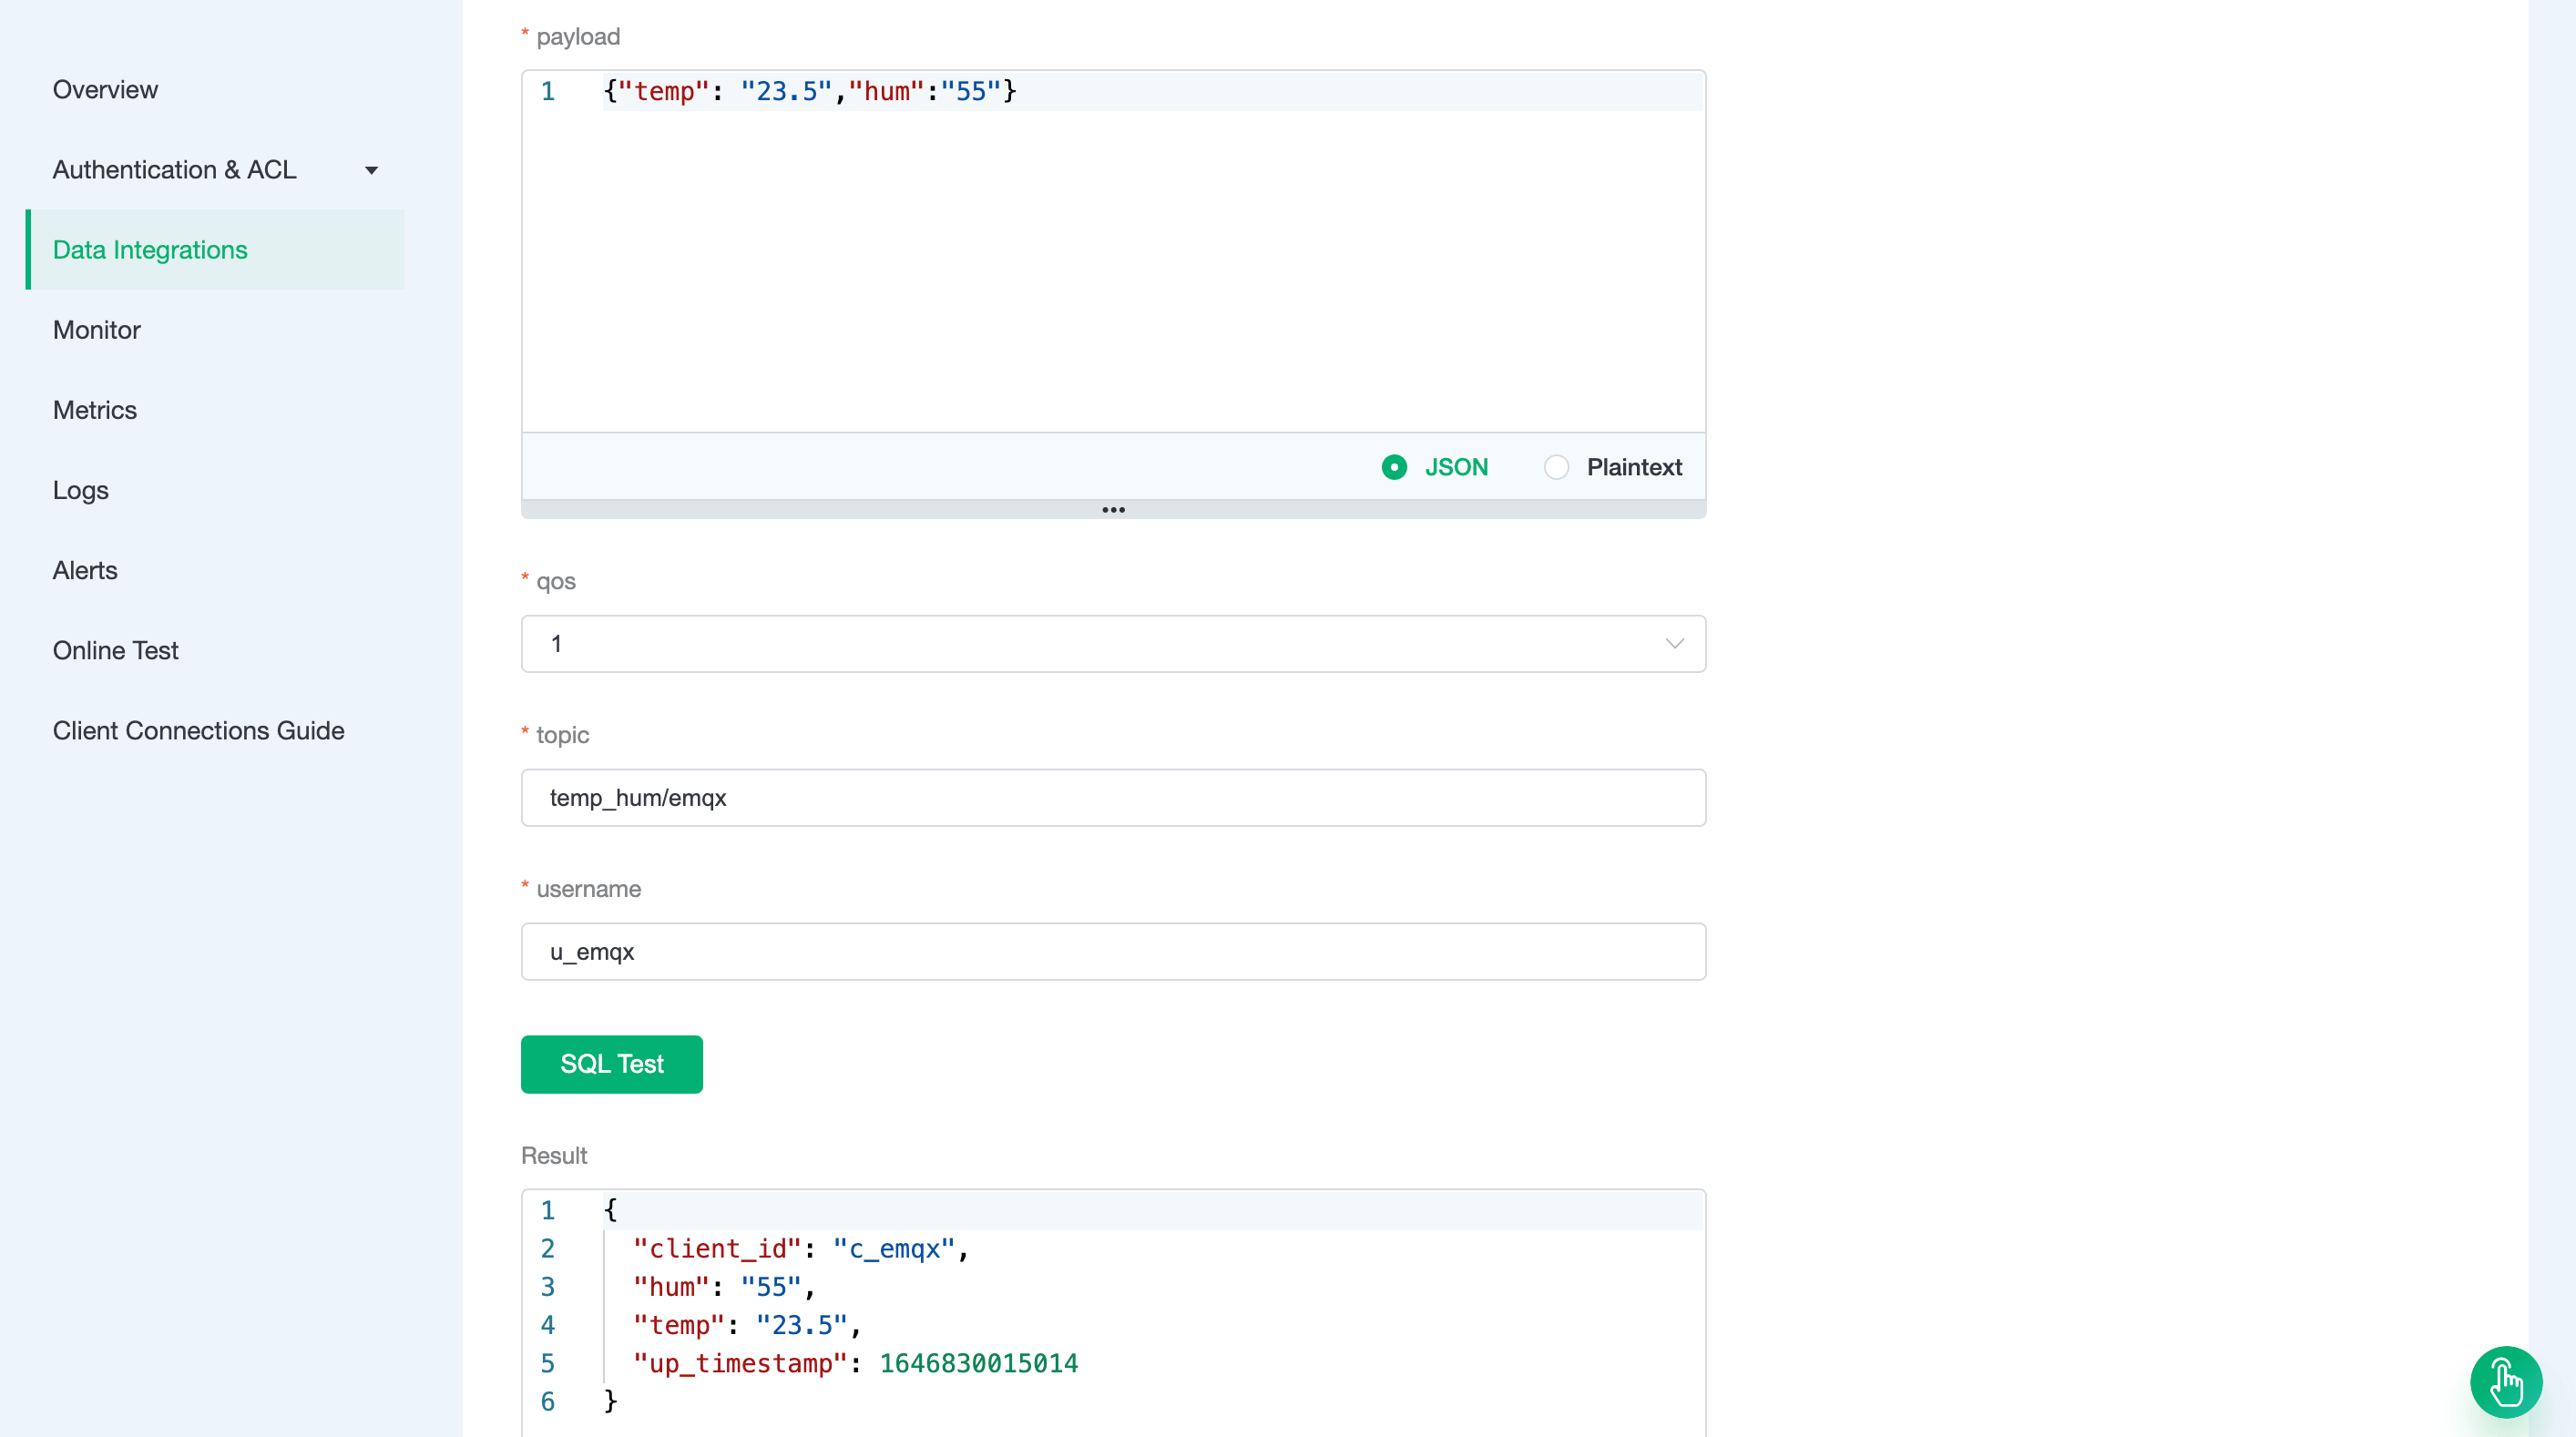
Rule Testing
Click
Data Integrationon the left menu bar, find the configured resource, click New Rule, and then enter the following rule to match the SQL statementsqlSELECT timestamp as up_timestamp, clientid as client_id, payload.temp as temp, payload.hum as hum FROM "temp_hum/emqx"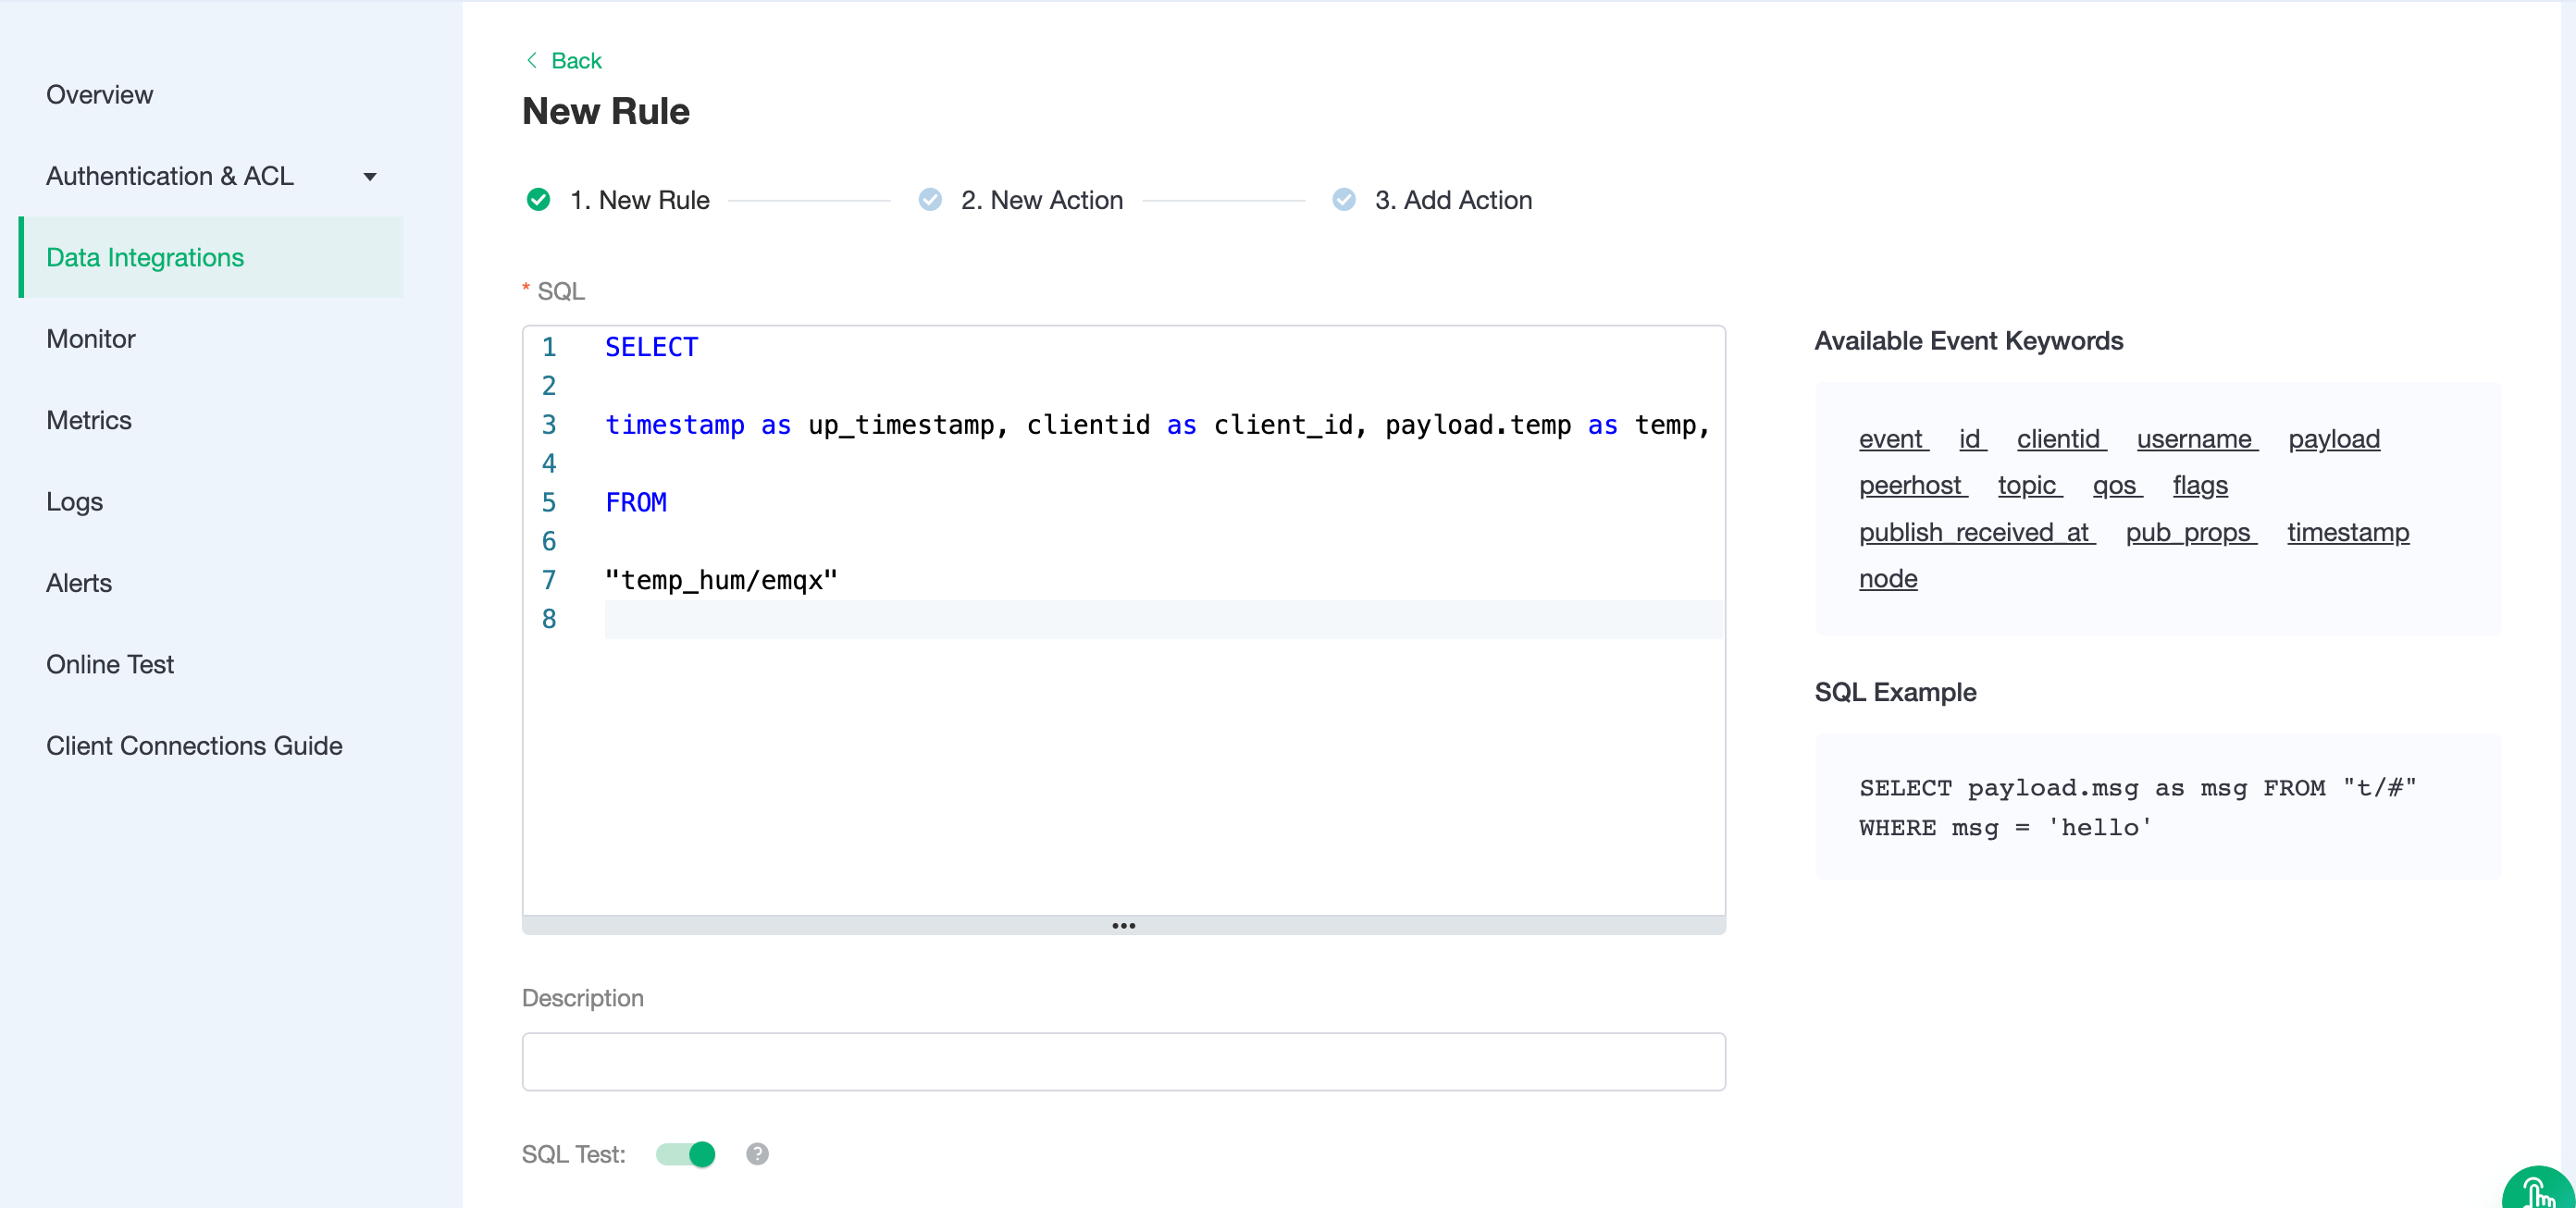
Add a response action
Click Next, select the resource created in the first step, make sure Action Type → Send Data to Web Service, and fill in the blanks and following data:
Message content template:
{"up_timestamp": ${up_timestamp}, "client_id": ${client_id}, "temp": ${temp}, "hum": ${hum}}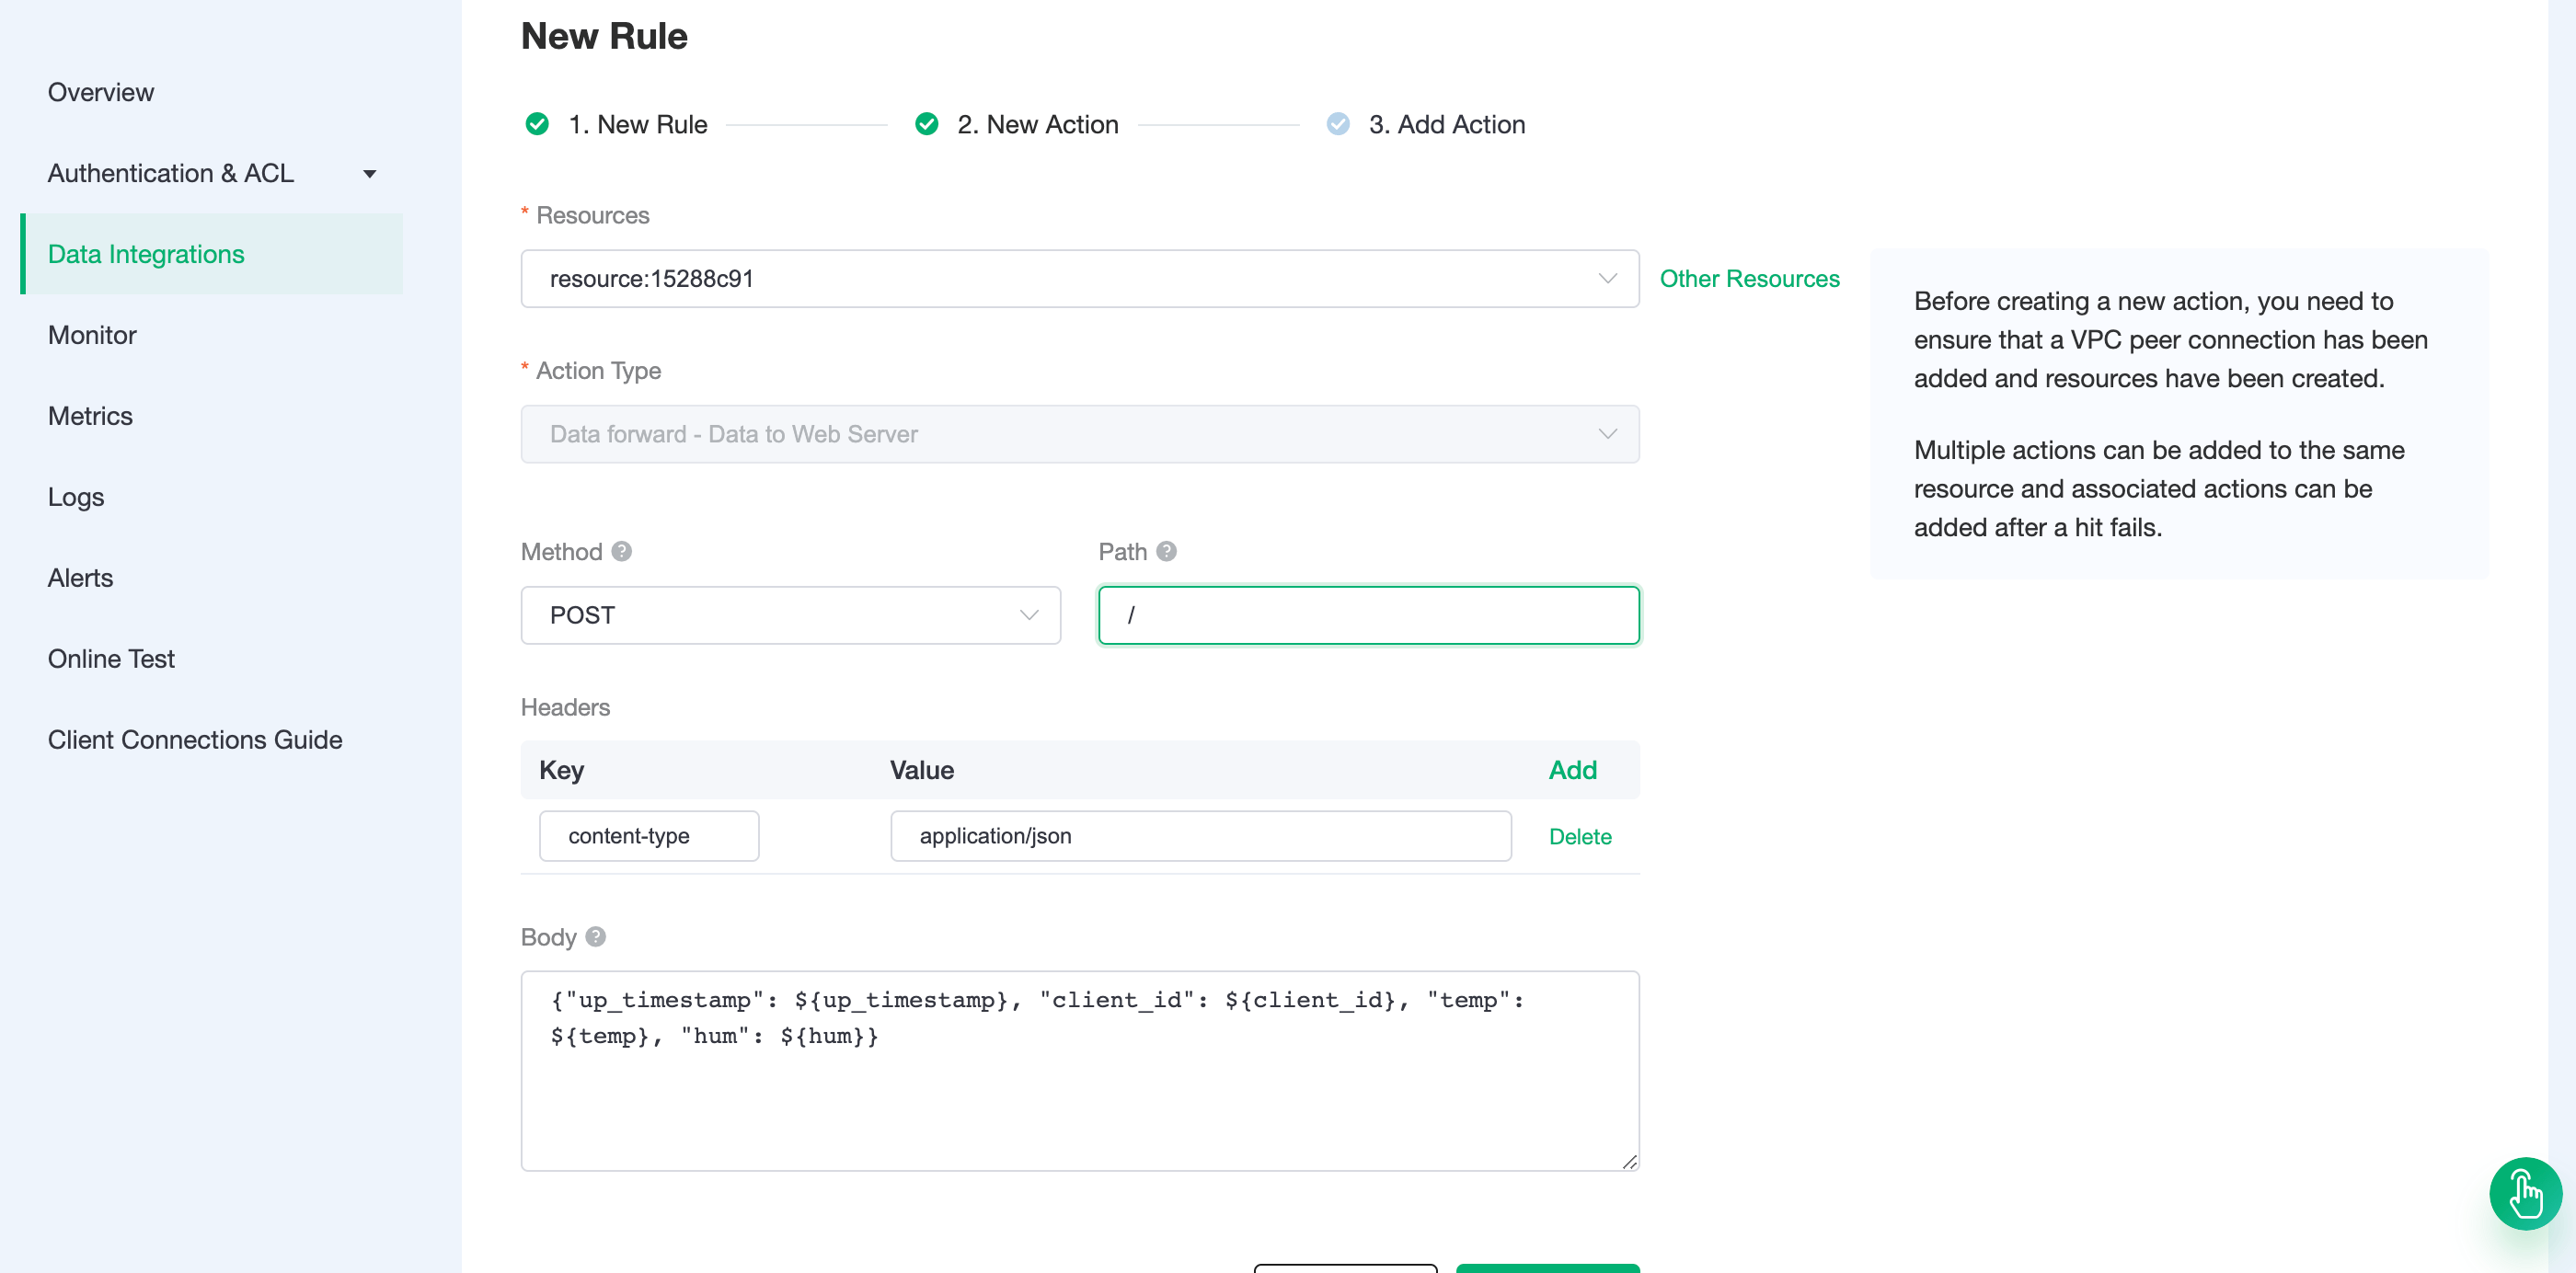
Return to the list of rules
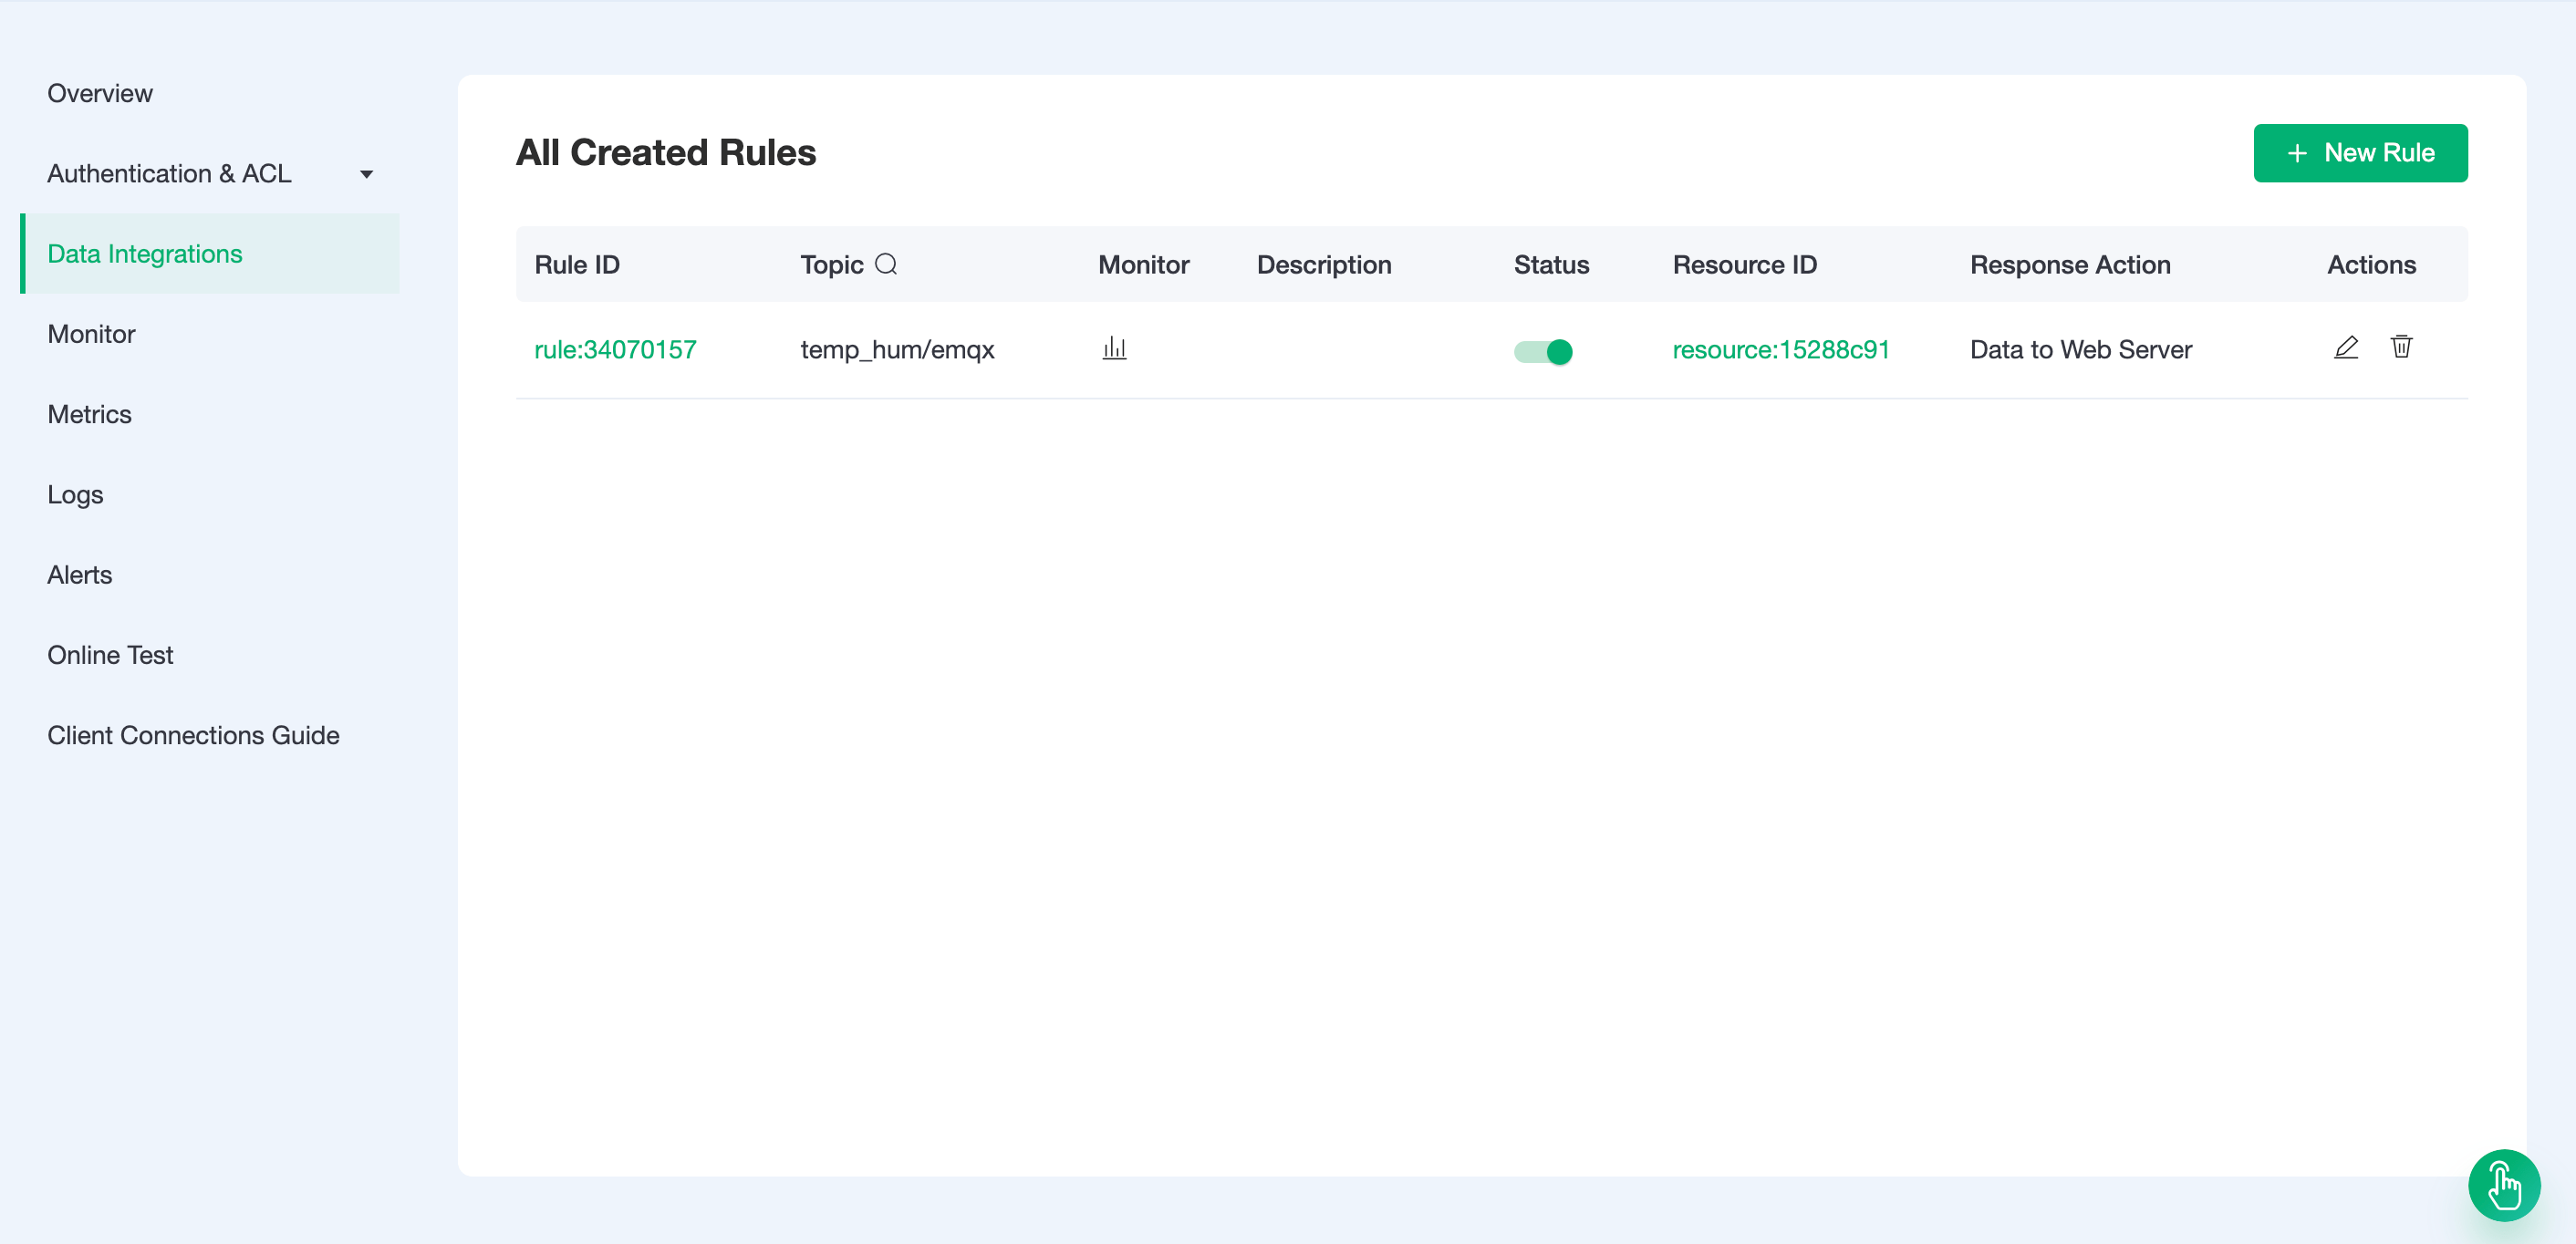
View rules monitoring

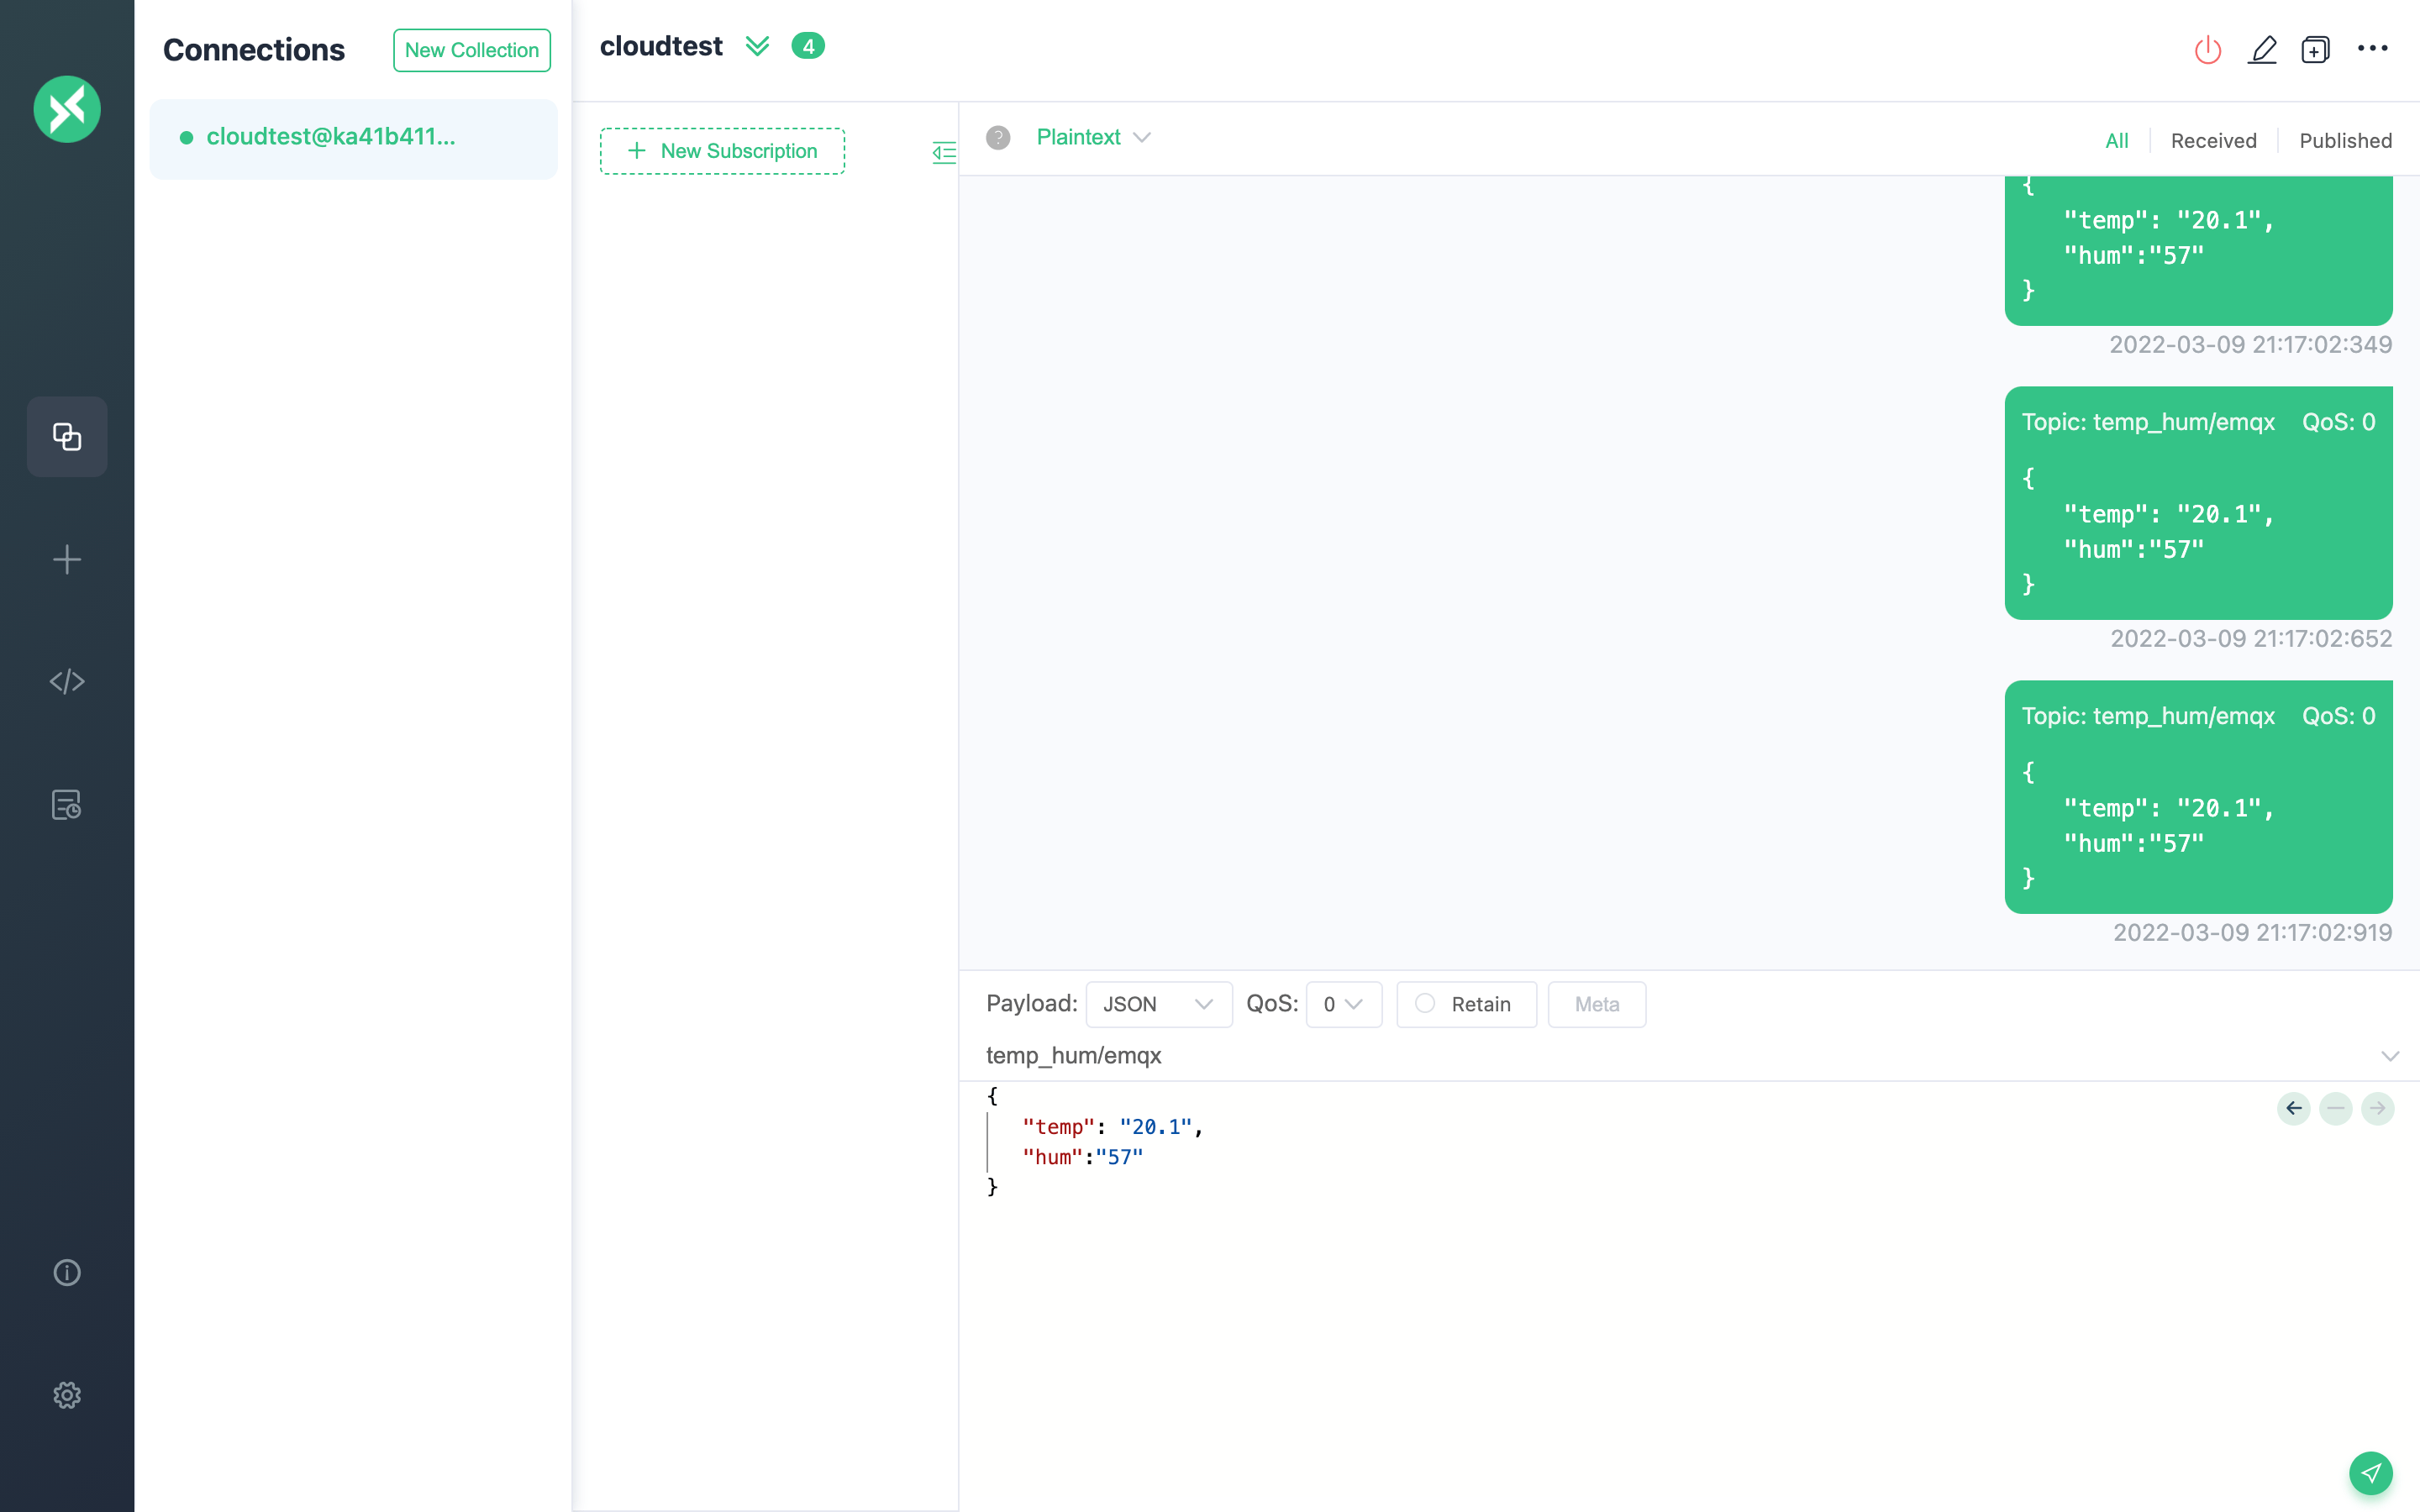
Test
Use MQTTX to simulate temperature and humidity data reporting
You need to replace broker.emqx.io with the created deployment connection address, and add client authentication information to the EMQX Dashboard.
View data dump results