Authorization
In EMQX, authorization refers to the permission control over the publish/subscribe operation of the MQTT clients. When a client performs a publish/subscribe operation, EMQX follows a specific procedure or uses the user-specified query statement to query the client's permission list from the configured data source. Based on the query result, EMQX allows or rejects the current operation.
A single permission data of a client has the following components:
| Permission | Client | Operation | Operation Details |
|---|---|---|---|
| Allow/Deny | Client ID/Username/IP | Publish/Subscribe/Publish-Subscribe | Topic/QoS/Retained Message |
TIP
Starting from EMQX 5.1.1, the support for checking QoS and retained messages in operation details is introduced.
The permission list of the client needs to be stored in a specific data source (database, file) in advance. You can update the list during runtime by updating the corresponding data record.
A file-based authorizer is configured in EMQX by default and you can use the authorizer directly. The authorization is processed based on the predefined rules configured in the ACL file.
Integrate with Data Storage Objects
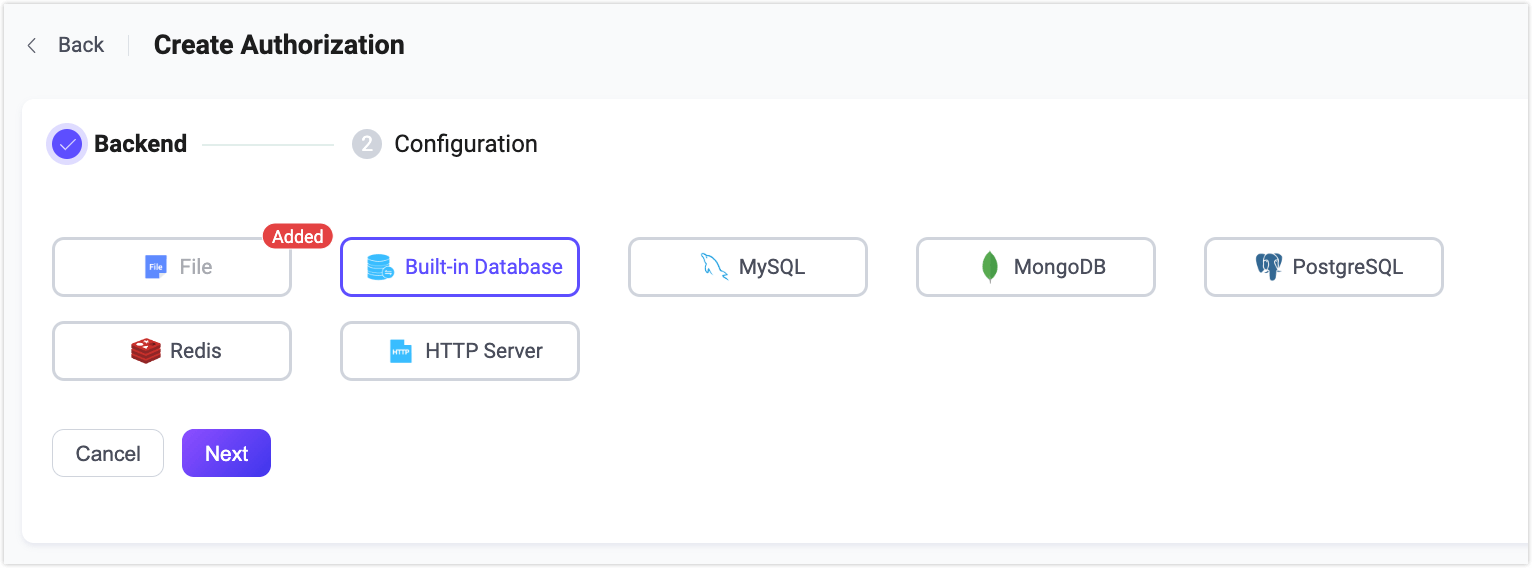
The EMQX authorization mechanism supports integration with various data storage objects, including built-in databases, files, MySQL, PostgreSQL, MongoDB, and Redis. You can manage permission data through REST API or EMQX Dashboard. .
In addition, EMQX can also connect to HTTP services developed by our users to meet different authorization requirements.
According to the backend data storage used, there are different types of EMQX authorizers as listed below. Each authorizer has its own configuration options. You can click the corresponding links in the table for more details.
Below is an example of how to configure an EMQX MySQL authorizer.
Example:
{

    type = mysql
    database = "mqtt"
    username = "root"
    password = "public"

    query = "SELECT permission, action, topic FROM mqtt_acl WHERE username = ${username}"
    server = "10.12.43.12:3306"
}
Authorization Chain
EMQX allows users to create an authorization chain by configuring multiple authorizers rather than one single authorizer to make authorization more flexible. EMQX follows the authorizers' position in the chain to perform the authorization in sequence. With the authorization chain configured, when EMQX fails to retrieve the matching authentication information from the first authorizer, it switches to the next authenticator to continue the process.
The process of the authorization check is as follows:
If EMQX successfully retrieves the client's permission information, it matches the client's operation to the retrieved permission list.
- If they match, EMQX allows or denies the operation based on permission setting.
- If they do not match, EMQX switches to the next authorizer to continue the process.
If EMQX fails to retrieve the client's permission information, it checks if there are any other authorizers configured.
- If yes, EMQX switches to the next authorizer to continue the process.
- If it is already the last authorizer, EMQX follows the setting of
no_matchto determine whether to allow or reject the client operation.
Note
To avoid problems with the authorization, you need to remember to disable or remove the ACL file authorizer when necessary because it has {allow, all} at the end by default to allow all authz requests.
For information on how to adjust the sequence of the authorizer in an authorization chain and how to check the running metrics, see Manage Authorizers.
Client Authorization Cache
EMQX provides a session-based authorization data cache mechanism. This cache stores authorization results in the client’s session state and reduces the need for repeated authorization rule evaluation during the same connection. The client authorization cache mechanism improves the efficiency of permission checks for client publish/subscribe operations and helps reduce the access load on the authorization data backend caused by a large number of client requests.
How Client Authorization Cache Works
When a client connects and performs publish/subscribe operations:
- EMQX checks the authorization cache stored in the current session.
- If a matching rule is found in the session cache, EMQX uses it directly.
- If no cached rule exists (or the rule has expired), EMQX performs a full authorization check using the configured authorizers.
- The result is cached in the session for subsequent reuse during the connection.
TIP
The cache is client-session specific and is cleared when the client disconnects or reconnects.
Configure Client Authorization Cache in Dashboard
You can enable or configure the client authorization cache in the EMQX Dashboard:
Go to Access Control -> Authorization -> Settings.
Configure the following options:
Field Name Description Enable Cache Toggle to enable or disable client authorization cache for each client session. Max number of cached Items Maximum number of cached entries per client. Default: 32.Time to live for the cached data Lifetime of each cached entry. Default: 1 minute.Excluded Topics List of topics for which caching is disabled. No Match Action Action to take if no authorizer returns a match. Options: allow(the client's operation) /deny(the client's operation). Default:allow.Deny Action Action when an operation is denied. Options: ignore(operation request) /disconnect(the connection of current client). Default:ignore.Clear Cache Button to manually clear all active session authorization caches. Click Save to apply the settings.
You can also configure these options via the configuration file. For more details, see Configuration file.
TIP
If set properly, caching can greatly improve performance. So, it is recommended to timely adjust the setting based on your system performance.
External Resource Cache
In addition to session-based caching, EMQX also supports a node-level cache for storing authorization results retrieved from external backends, such as MySQL, MongoDB, or Redis. This feature improves performance by reducing repeated access to remote data sources.
Note
The external resource cache applies only to external data sources. For local sources such as the built-in database or file-based authorizers, EMQX does not use this cache.
How External Resource Cache Works
When a publish/subscribe operation triggers an external backend query:
EMQX checks the external resource cache (shared across all clients on the node).
EMQX checks the cache for a previously stored result:
- If a valid result is found, it counts as a Cache Hit, and no call to the external backend is made.
- If no result is found, it counts as a Cache Miss, and EMQX queries the external backend.
The result returned from the backend is stored in the cache for future use, incrementing the Cache Insert metric.
Note
Unlike the session-based Authorization Cache, the External Resource Cache is node-wide, shared across all clients on the same node, and persists across client sessions.
Enable and Configure External Resource Cache
You can enable and configure the external resource cache through the EMQX Dashboard:
Navigate to Access Control -> Authorization.
Click the External Resource Cache Settings button in the upper-right corner. A side panel will appear from the right.
In the panel, use the Enable External Resource Cache button to turn the caching feature on or off. Once enabled, configure the following cache settings:
Field Name Description Maximum Number of Cache Items Maximum number of cached entries per node. Default: 1,000,000.Maximum Memory Limit on cache memory usage. Default: 100 MB.Cache TTL Duration a cached entry remains valid. Default: 1 minute.Click Update to apply the settings.
These settings are applied cluster-wide to ensure consistent behavior across all nodes.
Monitor External Resource Cache Status
To view cache metrics and monitor usage in real-time:
- Click the arrow next to External Resource Cache Settings and select External Resource Cache Status. A side panel will appear showing cache metrics.
- Use the drop-down to view metrics per node or across the cluster.
The metrics include the following:
- Memory Usage: Total memory currently used by the cache.
- Cache Entries: Total number of stored cache results.
- Cache Hits: Number of times EMQX found a valid result in the cache, avoiding a call to the external backend.
- Metrics shown: Current rate, 5-minute average, Maximum rate
- Cache Misses: Number of times EMQX looked for a result in the cache but didn’t find one, resulting in a backend query.
- Metrics shown: Current rate, 5-minute average, Maximum rate
- Cache Inserts: Number of new results added to the cache after a miss.
- Metrics shown: Current rate, 5-minute average, Maximum rate
At the bottom of the panel, a node list provides an overview of Memory Usage, Cache Entries, and Cache Hits for each node in the cluster.
You can refresh or reset the statistics using the buttons in the top-right corner of the panel.
Authorization Placeholders
EMQX authorizers allow using placeholders in their configuration. During the authorization step, these placeholders are replaced with actual client information to construct a query or HTTP request that matches the current client.
A valid placeholder follows the format ${PATH.TO.VALUE}, where PATH.TO.VALUE is a dot-notated path to a value in an object. Valid characters include letters, digits, dots (.), and underscores (_). Placeholders containing unsupported characters will be treated as plain text.
Placeholders in Data Queries
Placeholders are used to construct query statement. For example, in one EMQX MySQL authorizer, the default query SQL uses the placeholder ${username}:
SELECT action, permission, topic FROM mqtt_acl where username = ${username}When a client (name: emqx_u) initiates a connect request, the constructed query statement is like:
SELECT action, permission, topic FROM mqtt_acl where username = 'emqx_u'The following placeholders are supported in query statements:
${username}: It is replaced with the username at runtime. The username comes from theUsernamefield in theCONNECTpacket. Ifpeer_cert_as_usernameis enabled, it is overridden by the fields or the content of the certificate.${clientid}: It is replaced by the client ID at runtime. The client ID is normally explicitly specified by the client in theCONNECTpacket. Ifuse_username_as_clientidorpeer_cert_as_clientidis enabled, this field is overridden by the username, fields in the certificate, or the content of the certificate.${peerhost}: It is replaced with the client's IP address at runtime. EMQX supports Proxy Protocol, that is, even if EMQX is deployed behind some TCP proxy or load balancer, users can still use this placeholder to get the real IP address.
${peername}: It will be replaced with the client's IP address and port at runtime, and the format isIP: PORT.
${cert_common_name}: It is replaced by the Common Name of the client's TLS certificate at runtime. If the load balancer sends client certificate information to the TCP listener, ensure that Proxy Protocol v2 is in use.${cert_subject}: It is replaced by the subject of the client's TLS certificate at runtime. If the load balancer sends client certificate information to the TCP listener, ensure that Proxy Protocol v2 is in use.${client_attrs.NAME}: A client attribute.NAMEwill be replaced by an attribute name set based on predefined configurations at runtime. For details about the client attributes, see MQTT Client Attributes.${zone}: It will be replaced with the client's Zone at runtime. The${zone}placeholder can be used directly in authorization templates. For details about the Zone configuration, see Zone Override.
Topic Placeholders
EMQX also allows placeholders to be used in topics to support dynamic themes. The supported placeholders are as follows:
${clientid}${username}${client_attrs.NAME}: A client attribute.NAMEis to be replaced by an attribute name extraction rule configured inmqtt.client_attrs_init.
Placeholders can be used as topic segments, like a/b/${username}/c/d.
To avoid placeholder interpolation, starting from EMQX 5.4, you can escape $ as ${$}. For example, t/${$}{username} is treated as t/${username} literally without interpolation, rather than the topic name with username replaced.
TIP
If you use the eq syntax in query statements, note that the topic following eq does not support placeholder interpolation. This behavior can change in future versions.
The eq syntax is to match exactly a topic filter, but not any topic that matches the filter. For example, eq t/# matches t/#, not t/1 or t/2.
Authorization Check Priority
Besides the cache and authorization checker, the authorization result may also be affected by the Super User Role and Permission set during the authentication phase.
For super users, all their operations will be skipped from the authorization check. If the Access Control List (ACL) list is set, EMQX will first follow the client's permission data before running the authorization checker. The priority is as follows:
Super user > permission data > authorization checkConfigure Authorization Mechanisms
EMQX provides three ways to configure authorization, namely: Dashboard, Configuration file, and HTTP API.
Configure Authorization via Dashboard
EMQX Dashboard is an intuitive way to configure EMQX authorizer, where you can configure relevant parameters, check their working status, and adjust their position in the authorization chain.
Configure Authorization via Configuration File
You can also configure authorization in the authorization fields in the configuration file. The general config structure is the following:
authorization {
  sources = [
    { ...   },
    { ...   }
  ]
  no_match = deny
  deny_action = ignore
  cache {
    max_size = 32
    excludes = ["t/1", "t/2"]
    ttl = 1m
  }
}
Where,
sources(optional): An ordered array; each array element defines the data source of the corresponding authorizer. For detailed configurations, see the corresponding configuration file.no_match: Determines the default action for a publish/subscribe request if none of the configured authorizers find any authorization rules; optional value:allowordeny; starting from EMQX 6.0, the default value has been changed todeny.deny_action: Determines the next step if a publish/subscribe operation is rejected; optional value:ignoreordisconnect; default:ignore. If set toignore, the operation is silently ignored; if set todisconnect, the client connection is dropped.cache: Defines the client authorization cache settings, including:cache.enable: Specifies whether to enable client authorization cache, default:true. If the authorization is solely based on the JWT packets, it is recommended to configure this fieldfalse.cache.max_size: Specifies the maximum number of elements in the cache; default: 32. Older records will be removed from the cache if the specified number exceeds.cache.excludes: A list of excluded topics, for which authorization cache will not be generated; default value:[].cache.ttl: Specifies the effective time of cached values, default:1m(one minute).
Configure Authorization via HTTP API
There are several API endpoints for managing authorization:
/api/v5/authorization/settings: for general parameters,no_match,deny_action, andcache;/api/v5/authorization/sources: for managing and arranging authorizers;/api/v5/authorization/cache: for cleaning client authorization cache;/api/v5/authorization/sources/built_in_database: for managing authorization rules ofbuilt_in_databaseauthorizer.
For detailed operation steps, see HTTP API.
Manage Authorizers
You can view and manage authorizers in the Access Control->Authorization page in the Dashboard.
Adjust Authorizer Order
As mentioned in Authorization chain, authorizers are executed according to the configured sequence. You can select Up, Down, Move to top, and Move to bottom from the More dropdown list to move the authorizer. You can also adjust the authorizer positions in the authorization.sources configuration item.
Check Authorizer Status
You can check the connection status in the Status column:
| Status | Meaning | Troubleshooting |
|---|---|---|
| Connected | All nodes are connected to the data source successfully. | - |
| Disconnected | Parts of or all nodes are not connected to the data source (database, file). | Check if the data source is available; Restart the authorizer manually (Disable and Enable again) after troubleshooting. |
| Connecting | Parts of or all nodes are reconnecting to the data source (database, file). | Check if the data source is available; Restart the authorizer manually (Disable and Enable again) after troubleshooting. |
Running Metrics
You can view the statistic metrics of each authorizer on the Overview page of the authorizer. The following metrics are listed:
- Allow: Number of authorizations passed.
- Deny: Number of authorizations failed.
- No match: Number of times client authorization data is not found.
- Ignored: Number of ignored authorization queries because the authorization is not applicable or encounters an error, resulting in an undecidable outcome.
- Rate(tps): Execution rates of authorizations.
You can also check the authorization status and execution status on each node through Node Status.
If you want to view the overall running metrics of authorization, see Metrics - Authentication & Authorization.