Delayed Publish
Delayed Publish is an extended MQTT feature supported by EMQX. When a client publishes a message to EMQX with the topic prefix $delayed/{DelayInteval}, it triggers the delayed publish feature. The messages will be published after a period of time predefined by the user.
The specific format of the delay-publish topic is as below:
$delayed/{DelayInterval}/{TopicName}$delayed: Messages prefixed with$delaywill be treated as messages that need to be delayed. The delay interval is determined by the content of the next topic level.{DelayTime}: Specify the time interval or timestamp for delaying the publishing of this MQTT message with the unit of seconds. If it's an interval, the maximum allowed interval is 42949669 seconds (about 497 days). If it's a timestamp, it cannot be earlier or later than 42949669 seconds from the current system time. The message is discarded if it fails to parse{DelayTime}as an integer or if it's not in the valid range.{TopicName}: The topic name of the MQTT message.
Example:
$delayed/15/x/y: Publish MQTT message to the topicx/yafter 15 seconds$delayed/60/a/b: Publish MQTT message to the topica/bafter 1 minute$delayed/1743490800/chat/id: Publish message to the topicchat/idon April 1st, 2025 at 9:00 (Stockholm timezone).$delayed/3600/$SYS/topic: Publish MQTT message to the topic$SYS/topicafter 1 hour
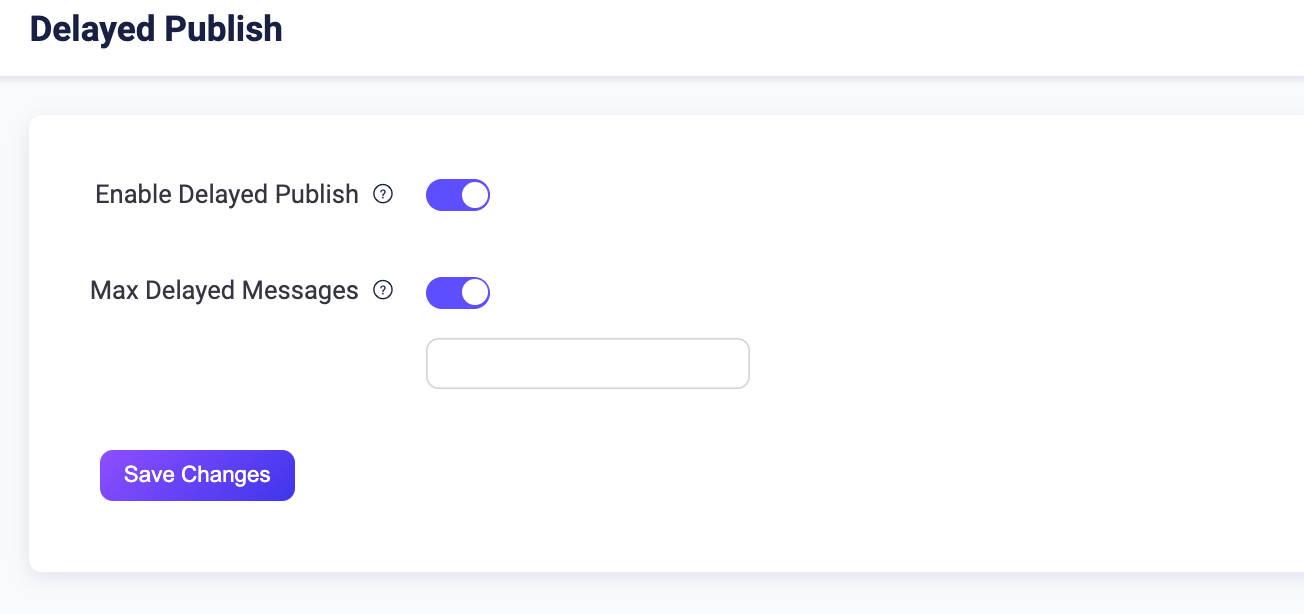
Configure Delayed Publish via Dashboard
Open EMQX Dashboard. In the left navigation menu, click Management -> Delayed Publish.
On the Delayed Publish page, you can configure as follows:
- Enable: Enable or disable delayed publish. By default, it is enabled.
- Max Delayed Messages: You can specify the max number of delayed messages.
Try Delayed Publish with MQTTX Desktop
Prerequisite
Basic publishing and subscribing operations using MQTTX Desktop
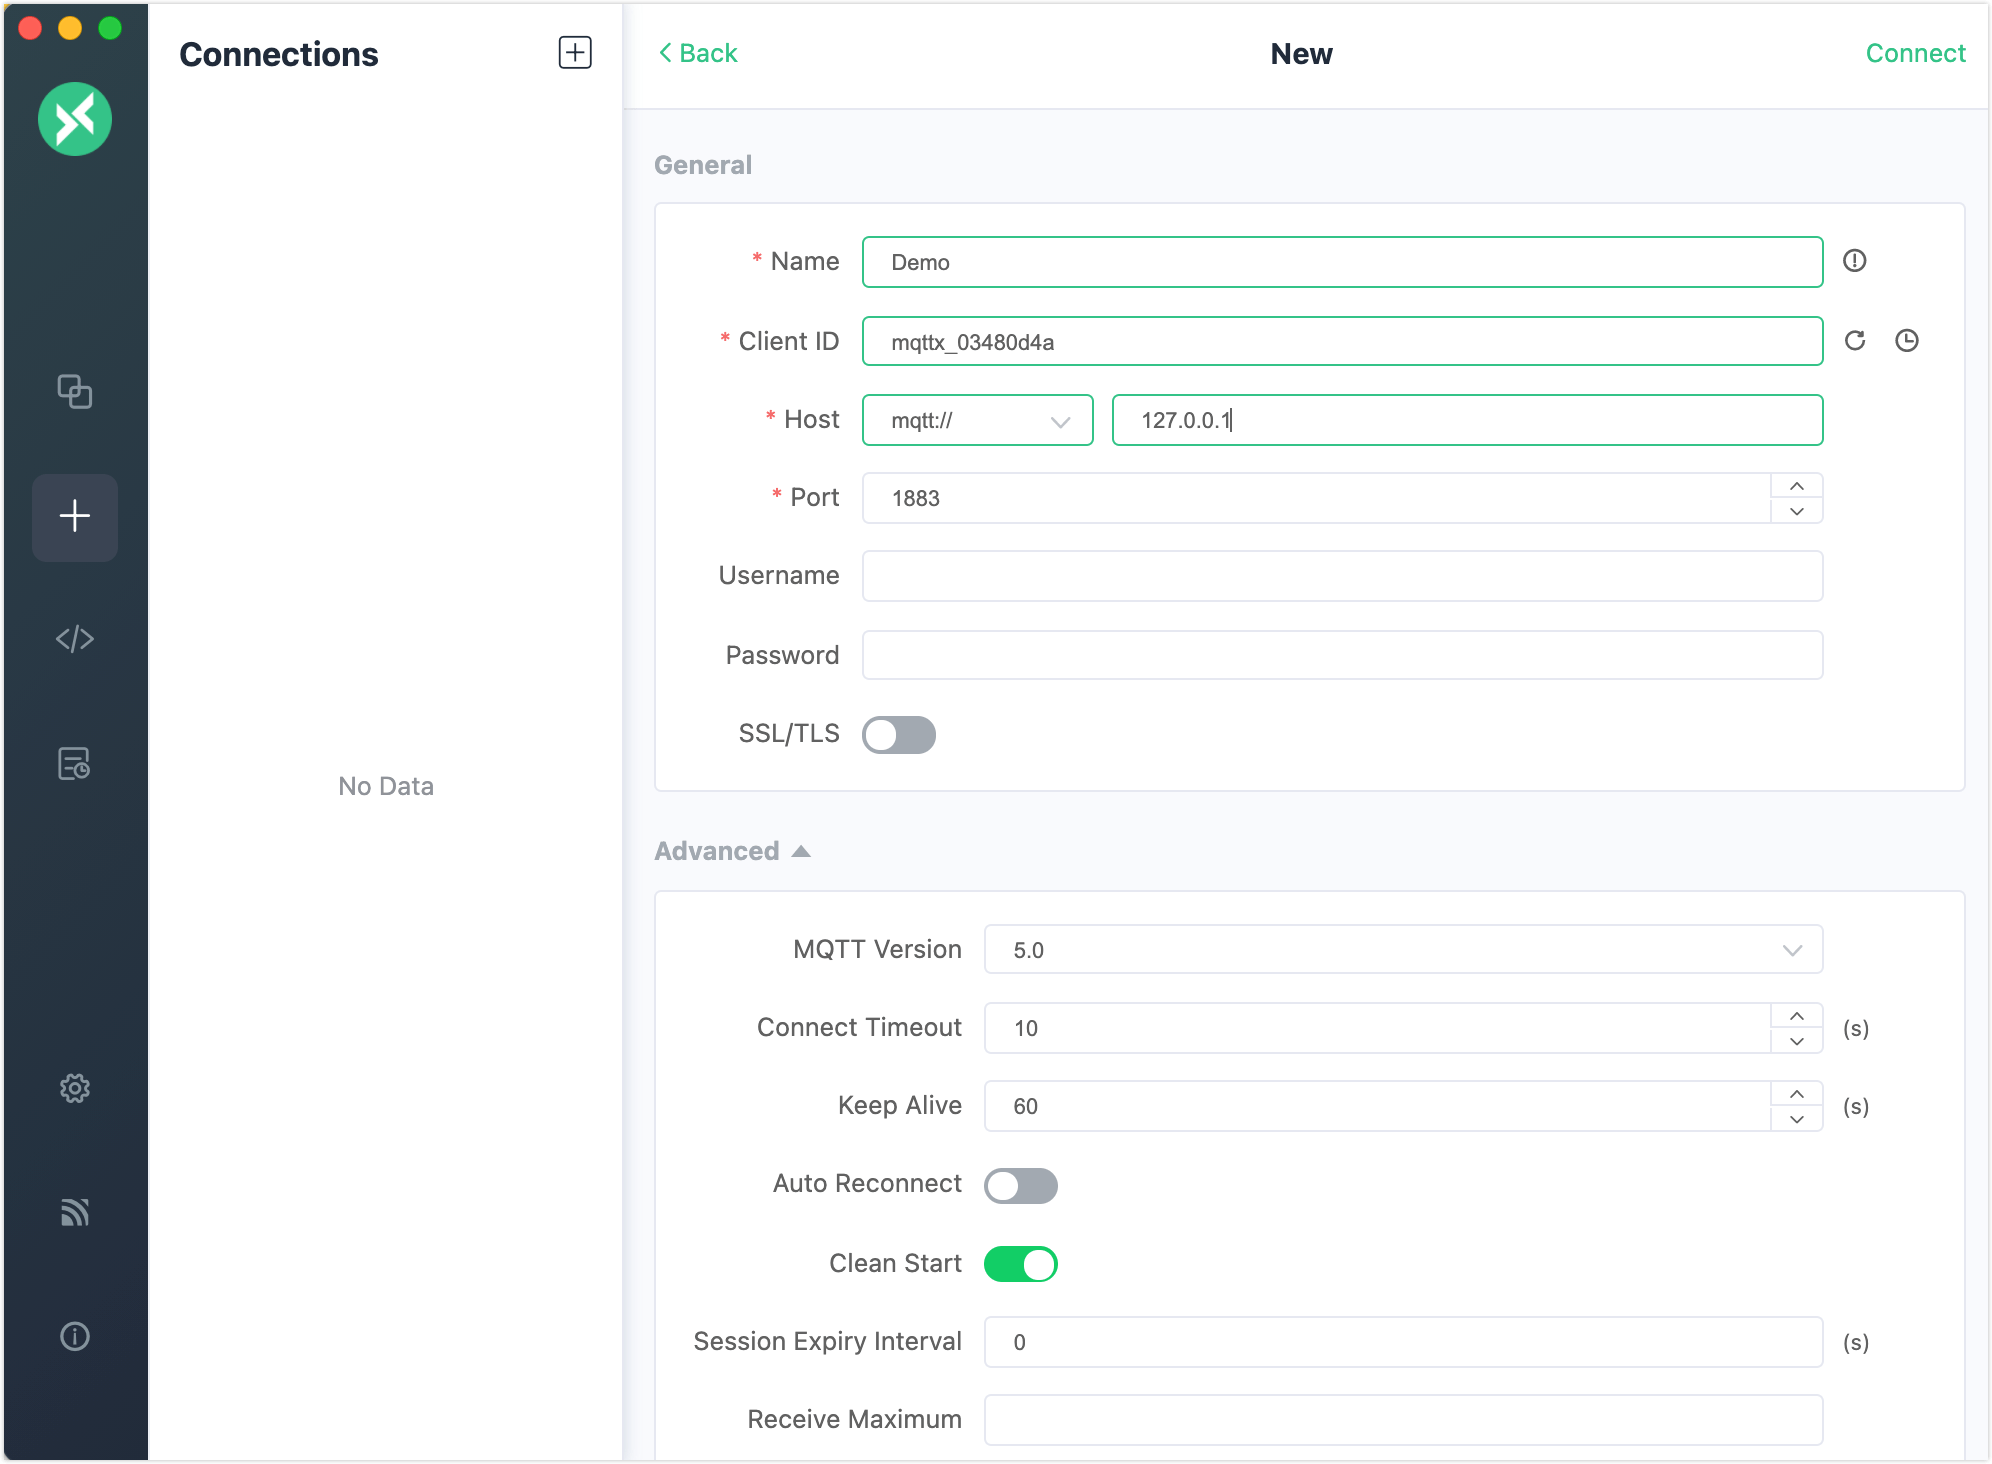
Start EMQX and MQTTX Desktop. Click the New Connection to create a client connection as a publisher.
- Enter
Demoin the Name field. - Enter the localhost
127.0.0.1in Host to use as an example in this demonstration. - Leave other settings as default and click Connect.
TIP
More detailed instructions on creating an MQTT connection are introduced in MQTTX Desktop.
- Enter
Create another MQTT connection. Configure it as a subscriber.
Select the connection named
Demoin the Connections pane. Type the topic name$delayed/10/x/yin the topic text box and type the message asDelayed Message.$delayed: Indicates it is a delay message.10: Indicates the delayed interval is 10 seconds.x/y: Indicates the topic name of the message.
Select the connection named
Subscriber. Click the New Subscription button to create a subscription. Typex/yin the Topic textbox to subscribe to this topic. Click Confirm.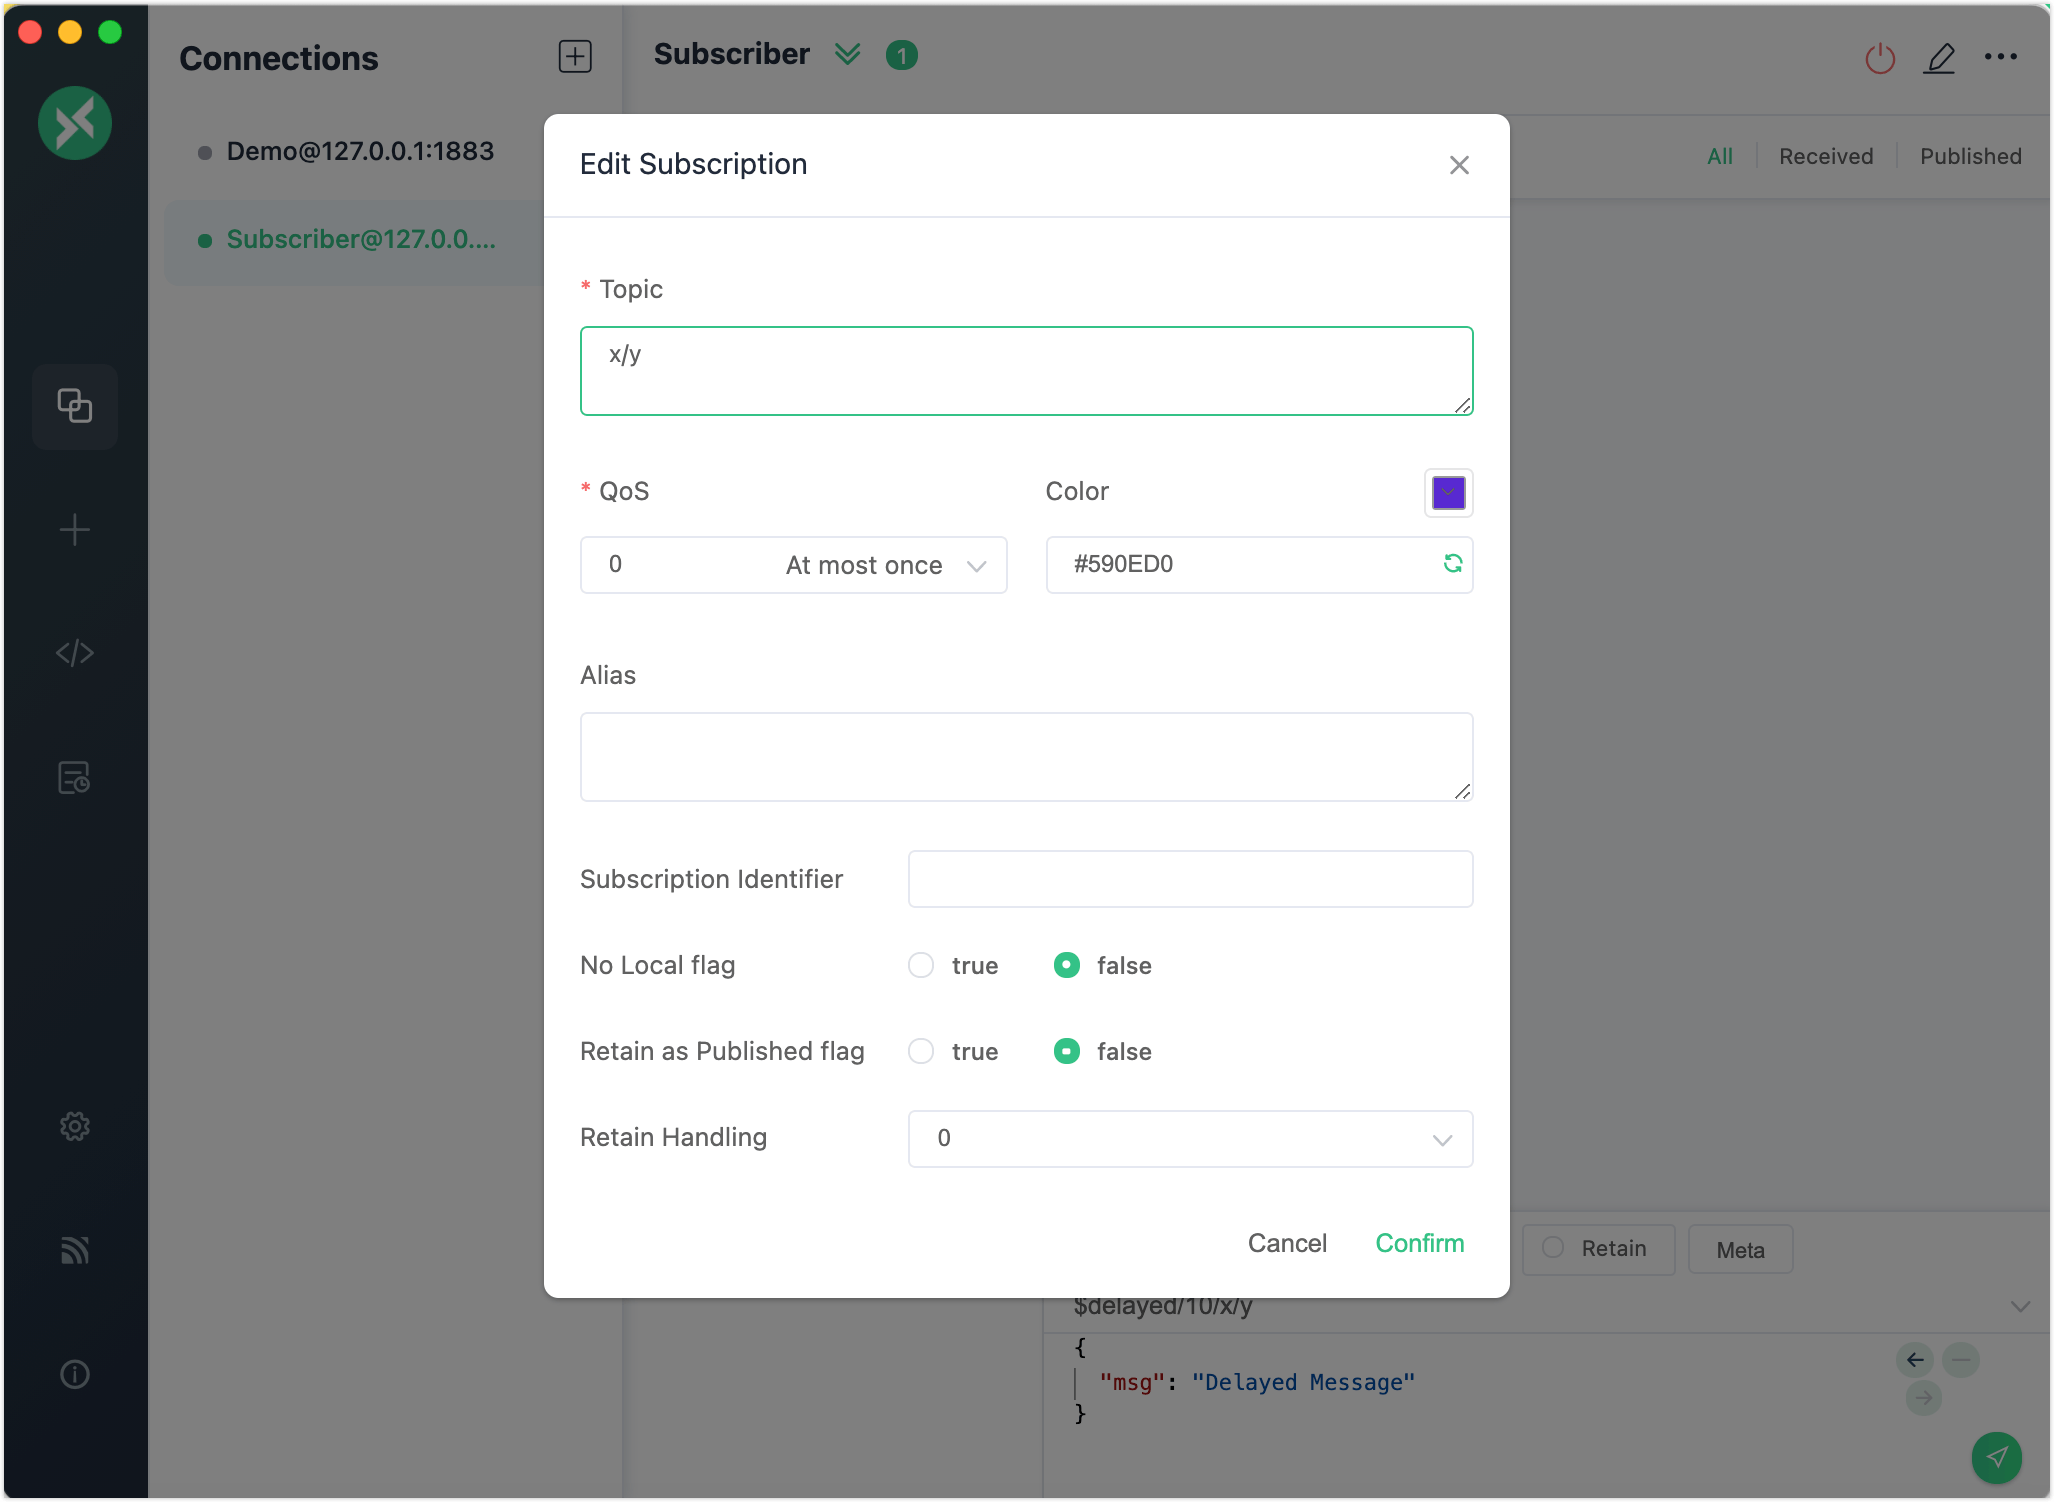
Select the connection named
Demoin the Connections pane. Click the send button to send theDelayed Messagewith topic$delayed/10/x/y.Wait for 10 seconds. You will see the connection named
Subscriberreceive the delayed message after 10 seconds.
Try Delayed Publish with MQTTX CLI
Prerequisite
Basic publishing and subscribing operations using MQTTX CLI
Create a new connection as a subscriber and subscribe to the topic
t/1.bashmqttx sub -t t/1 -vOpen a new window in the terminal for the client as publisher. Use the following command to send a delayed message. The subscriber will receive the message after 5 seconds.
bashmqttx pub -t "\$delayed/5/t/1" -m "Hello Delayed msg"