System
The System menu in the EMQX Dashboard provides access to system management options such as user and role management, audit logs, API keys, licensing, SSO, data backup and restore, hot upgrade, and general settings.
Users
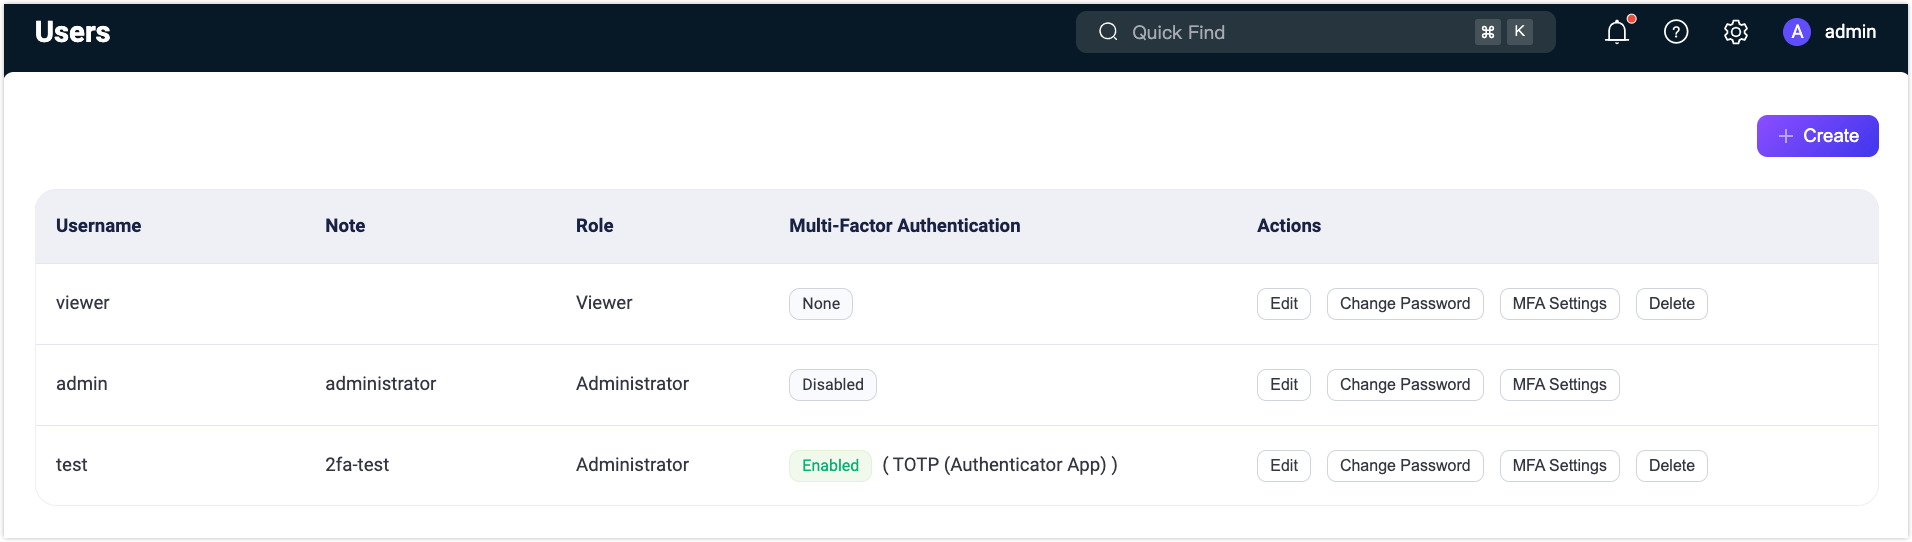
The Users page provides an overview of all active Dashboard users, including those generated via the CLI.
To add new users, click the + Create button in the page's top-right corner. A pop-up dialog will appear, prompting you to input the necessary user details. Once entered, click the Create button to generate the user account. You can easily access these options through the Actions column for further user management, such as editing users, updating passwords, or deleting users' information.
For security reasons, starting with EMQX 5.0.0, Dashboard users cannot be used for REST API authentication.
Role-Based Access Control
Starting from EMQX 5.3, the Dashboard introduces the Role-Based Access Control (RBAC) feature for EMQX Enterprise users.
RBAC allows you to assign permissions to users based on their roles within the organization. This feature simplifies authorization management, enhances security by restricting access, and improves organizational compliance, making it an essential access control mechanism for the Dashboard.
Currently, either of the following two predefined roles can be set for a user. You can select the role from the Role dropdown when you create users.
Administrator
Administrators have full access to manage all EMQX features and resources, including client management, system configuration, API key, and user management.
Viewer
Viewers can access all EMQX data and configurations, corresponding to all
GETrequests in the REST API. However, they do not have the right to create, modify, or delete any data.
Namespaced Roles
Starting from EMQX 6.0, the Dashboard supports namespaced roles. This feature extends role-based access control to enable multi-tenancy, where each user can be restricted to operate only within a specific namespace.
TIP
To learn more about the namespaces, see Namespace.
Create a User with a Namespaced Role
When creating a new user in the Dashboard, you will now see a Namespace option.
Prerequisite
- Create a managed namespace (for example,
namespace_01) in the Dashboard. For instructions, see Create Namespaces. - Ensure your EMQX license and cluster are running EMQX 6.0 or later.
- Navigate to System -> Users and click + Create.
- Fill in the required fields:
- Username: Unique identifier for the user.
- Note: Optional description.
- Password: User’s login password.
- Role: Select either Administrator or Viewer.
- Toggle the Namespace option and select an existing namespace (for example,
namespace_01). - Click Create to finish.
When creating users via the CLI or API, the role must be explicitly specified in the following format:
ns:<NAMESPACE>::<ROLE>For example:
ns:namespace_01::administratorns:namespace_01::viewer
Behavior of Namespaced Users
- Scoped resources: Namespaced users can view and manage only the resources within their assigned namespace, such as Connectors, Actions, Sources, Rules, and other namespace-aware modules.
- Cluster-level settings: Configurations not yet namespace-aware remain read-only for namespaced users. Only global administrators can modify them.
- Default landing page: Namespaced users log in to the Dashboard normally and start on the Overview page. All menu items remain visible, but resource data is automatically filtered to their namespace.
- License management: Namespaced users do not see license notifications. License handling remains a responsibility of system administrators.
Role Semantics within a Namespace
- Administrator: Full control (create, update, delete, and read) over resources in the assigned namespace.
- Viewer: Read-only access (equivalent to
GETrequests) within the assigned namespace.
Audit Logs
The Audit Logs page allows administrators to configure audit logging for monitoring critical operational changes within the EMQX cluster in real time.
For a detailed overview of the Audit Log feature, see Audit Log.
API Keys
On the API Keys page, you can generate an API key and secret key for accessing the HTTP API by following the steps below.
Click the + Create button in the top right corner of the page to bring up the Create API Key pop-up dialog.
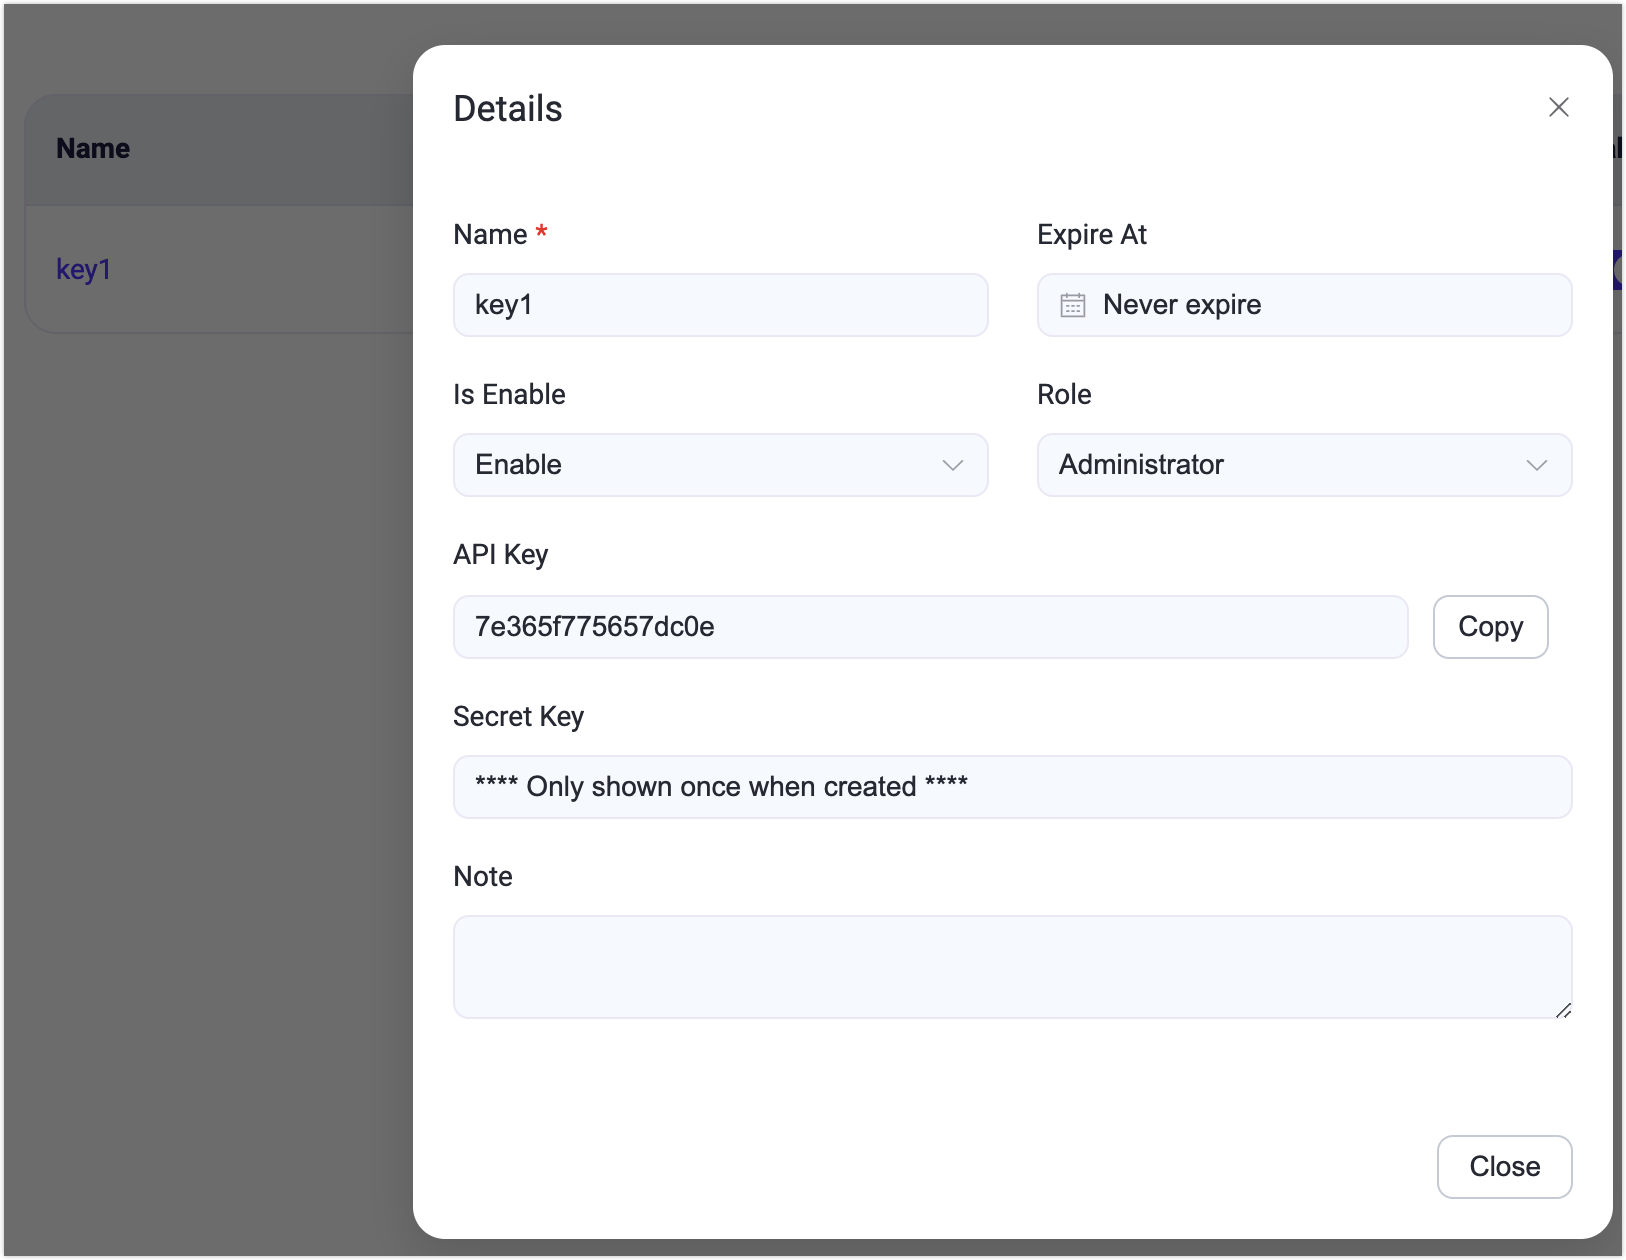
On the Create API Key dialog, configure the detailed information for the API key.
- The API key will never expire if the Expire At box is left empty.
- Select a role for the API key (optional). For more information about roles, see Roles and Permissions.
Click the Confirm button, and the API key and secret Key are created and displayed in the Created Successfully dialog.
Notice
You need to save the API Key and Secret Key in a safe place because the secret key will not be shown again.
Click the Close button to close the dialog.
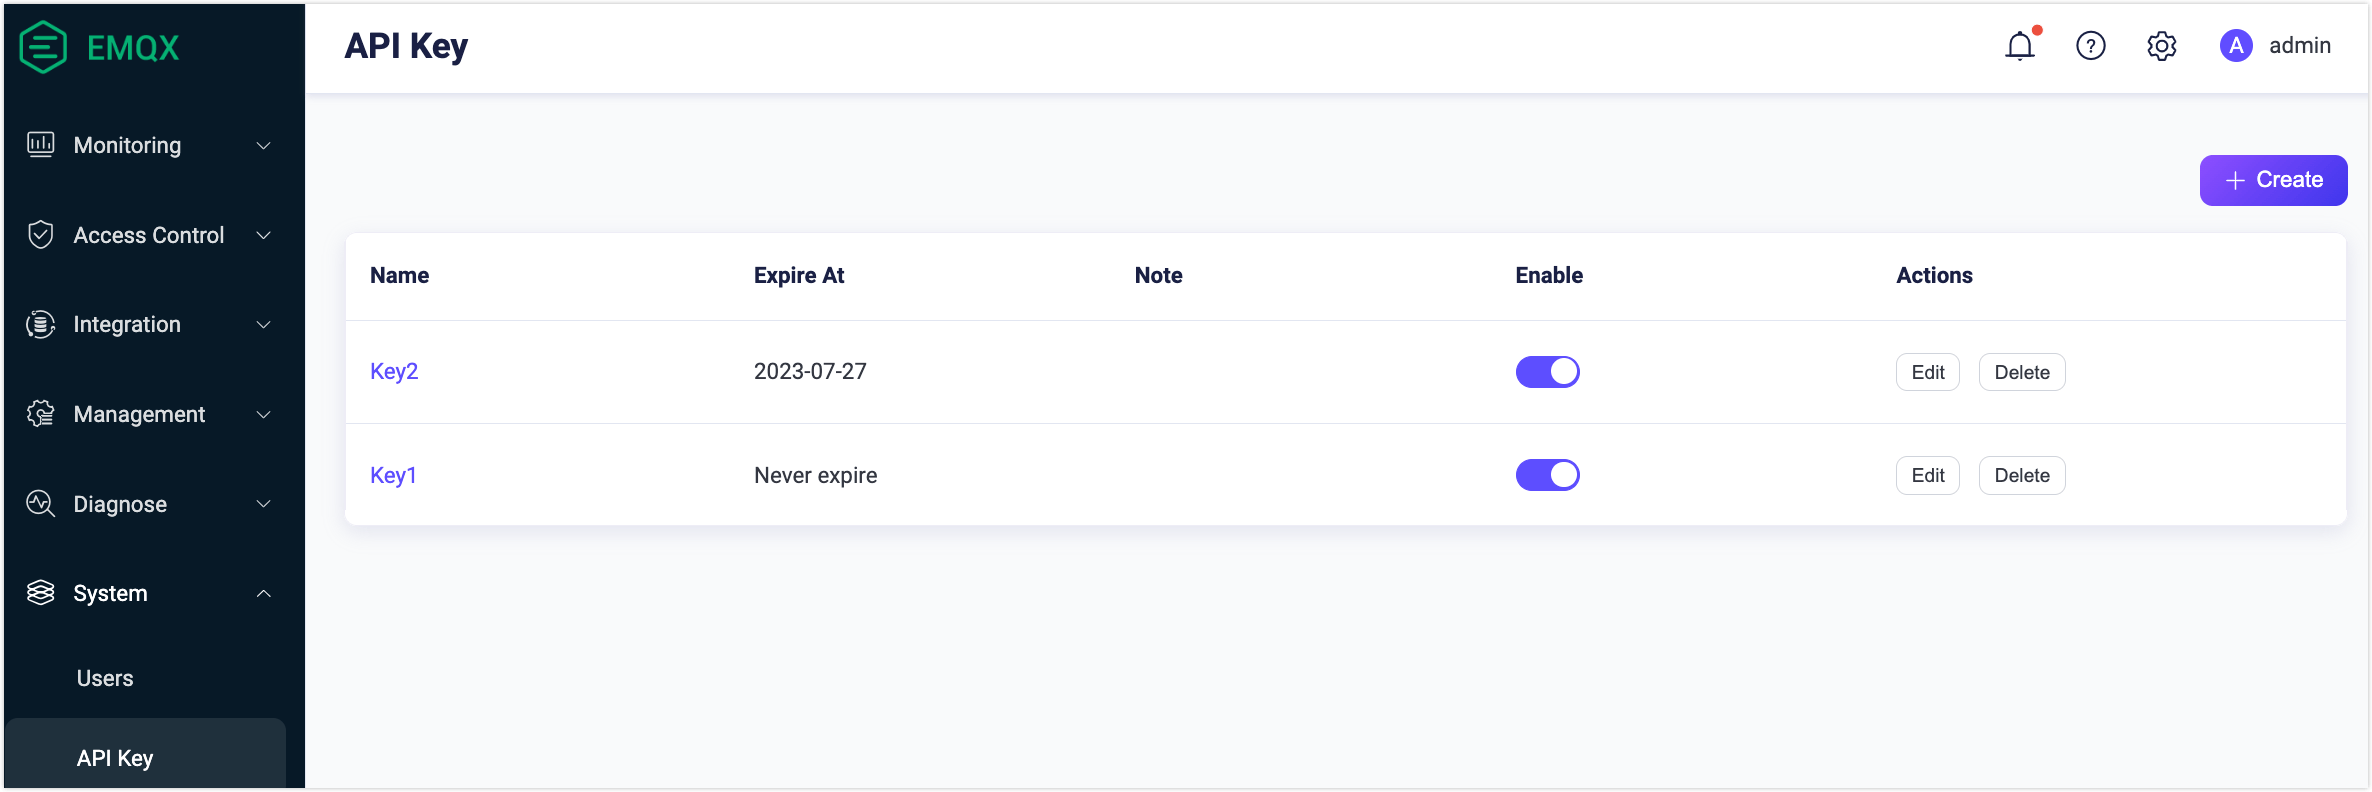
You can view the details of the API key by clicking the name in the Name column. You click the Edit button in the Actions column to reset the expiration time, change the status, and edit the note of the API key. If an API key is no longer needed, you can delete it by clicking the Delete button.
License
Click on License under the System menu on the left to access the License page. On this page, you can view the basic information of your current License, including the License connection quota usage, EMQX version, customer, and issue information.
Click Update License to upload your License Key. In the License Settings section, you can set the high and low watermark limits for the license connection quota usage. For more information about the license, see Work with EMQX Enterprise License.
SSO
The SSO page provides settings for the administrators to configure the SSO feature for user login management. For more information about the SSO feature, see Single Sign-On (SSO).
Backup & Restore
The Backup & Restore page provides settings for backing up your operating data and configuration files. You can perform data import and export operations on this page. For details of the Backup and Restore function, see Backup and Restore.
Hot Upgrade
The Hot Upgrade page allows you to upgrade EMQX without service interruption by uploading a hot upgrade package. To obtain an upgrade package, please contact the EMQX team.
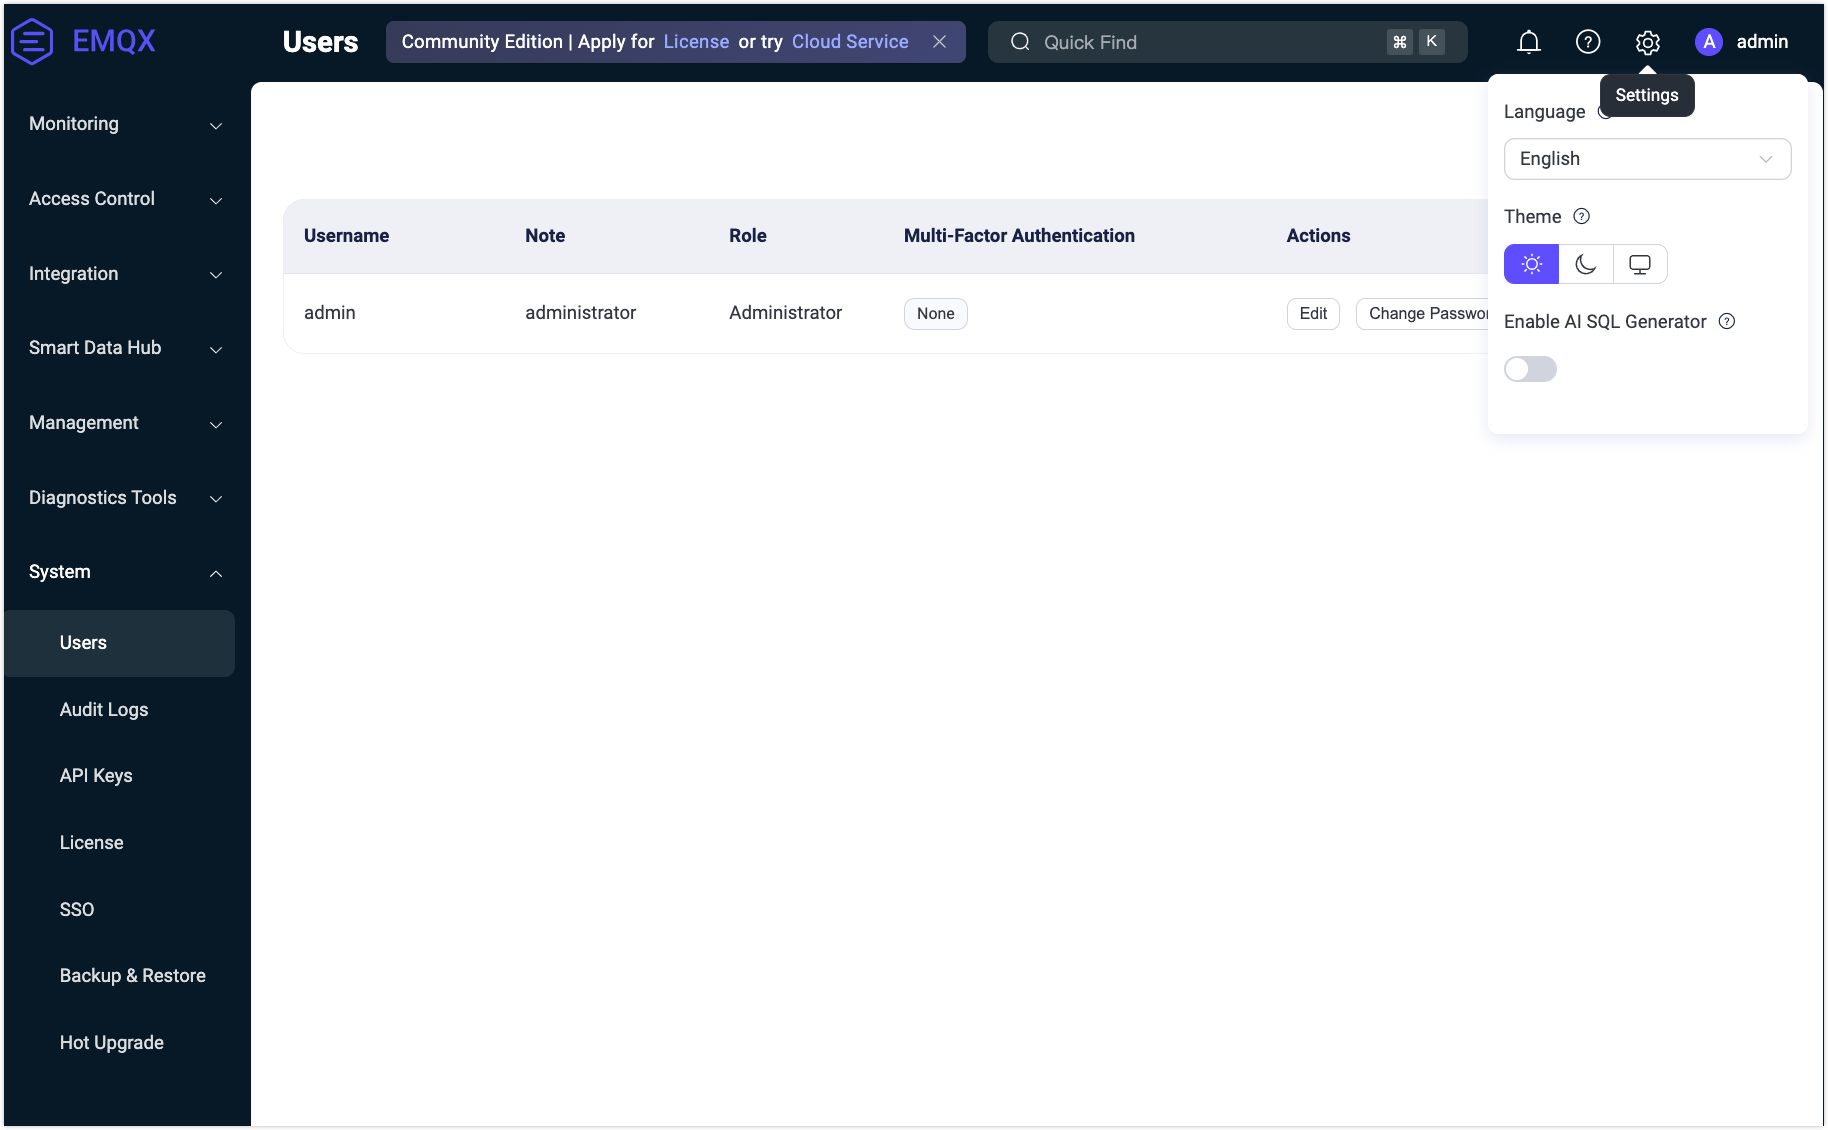
Settings
To access the settings, click the gear icon in the upper-right corner of the Dashboard.
In the Settings menu, you can customize the Dashboard's language and theme:
- Language: Choose your preferred display language.
- Theme: Select between light and dark themes, or enable automatic synchronization with your operating system's theme. When sync is enabled, the theme will follow your OS settings, and manual selection will be disabled.
Additionally, the Settings menu includes a toggle to enable or disable the AI SQL Generator feature on the Rules page.