Collecting PLC Data with the Beckhoff ADS Driver
In this tutorial, we introduce how to collect data from Beckhoff software PLCs using the EMQX Neuron ADS driver.
Environment Setup
We use two PCs connected to a local area network in this tutorial.
- One is a Linux machine with EMQX Neuron installed. Consult the the installation instruction on how to install EMQX Neuron.
- The other is a Windows machine with TwinCAT 3 installed. Refer to the Beckhoff TwinCAT website to download and install TwinCAT.
| PC 1 | PC 2 | |
|---|---|---|
| Operating System | Linux | Windows |
| IP address | 192.168.1.152 | 192.168.1.107 |
| AMS Net ID | 192.168.1.152.1.1 | 192.168.1.107.1.1 |
| Software | EMQX Neuron | TwinCAT 3 |
| Network | Connected | Connected |
Configure TwinCAT
Before EMQX Neuron and the TwinCAT PLC can communicate with each other, we first need to add a static route for EMQX Neuron in TwinCAT. We also need to find the AMS Net ID of the TwinCAT PLC and the index group and index offset of the variables.
Add Static Route in TwinCAT
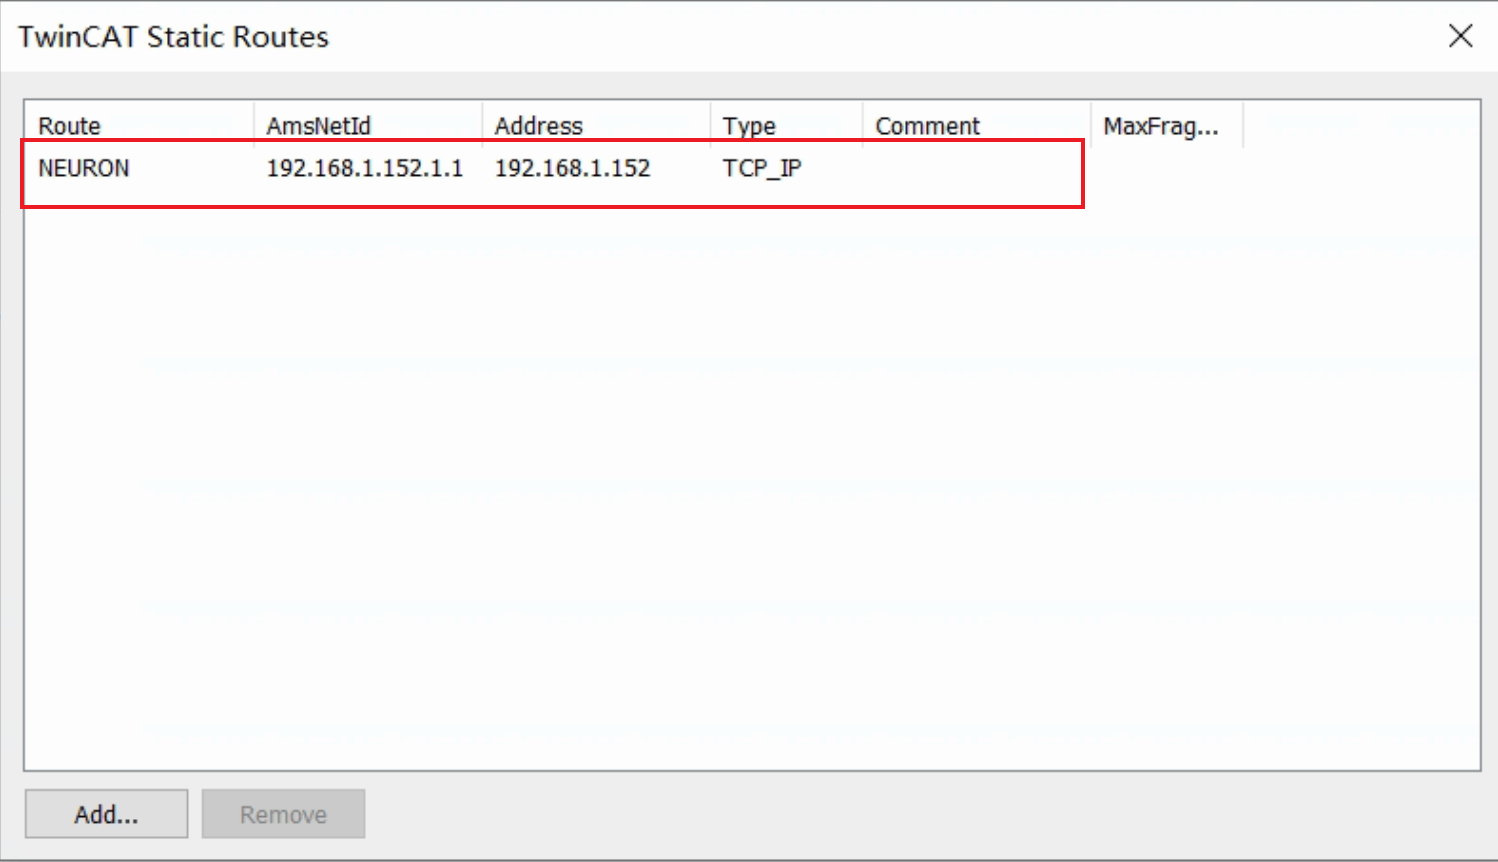
- Open the TwinCAT Static Routes dialog box.
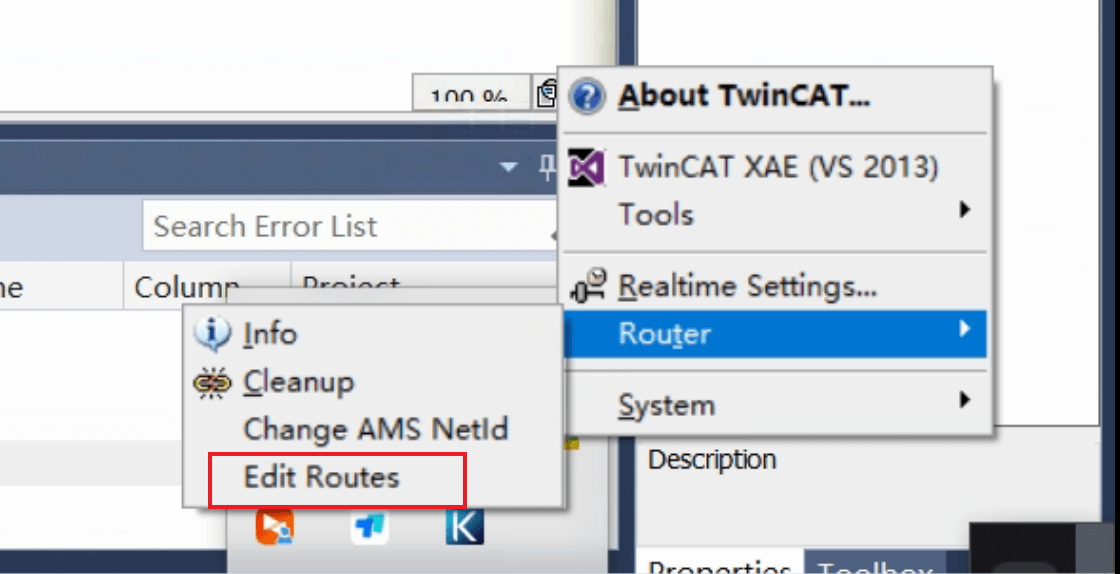
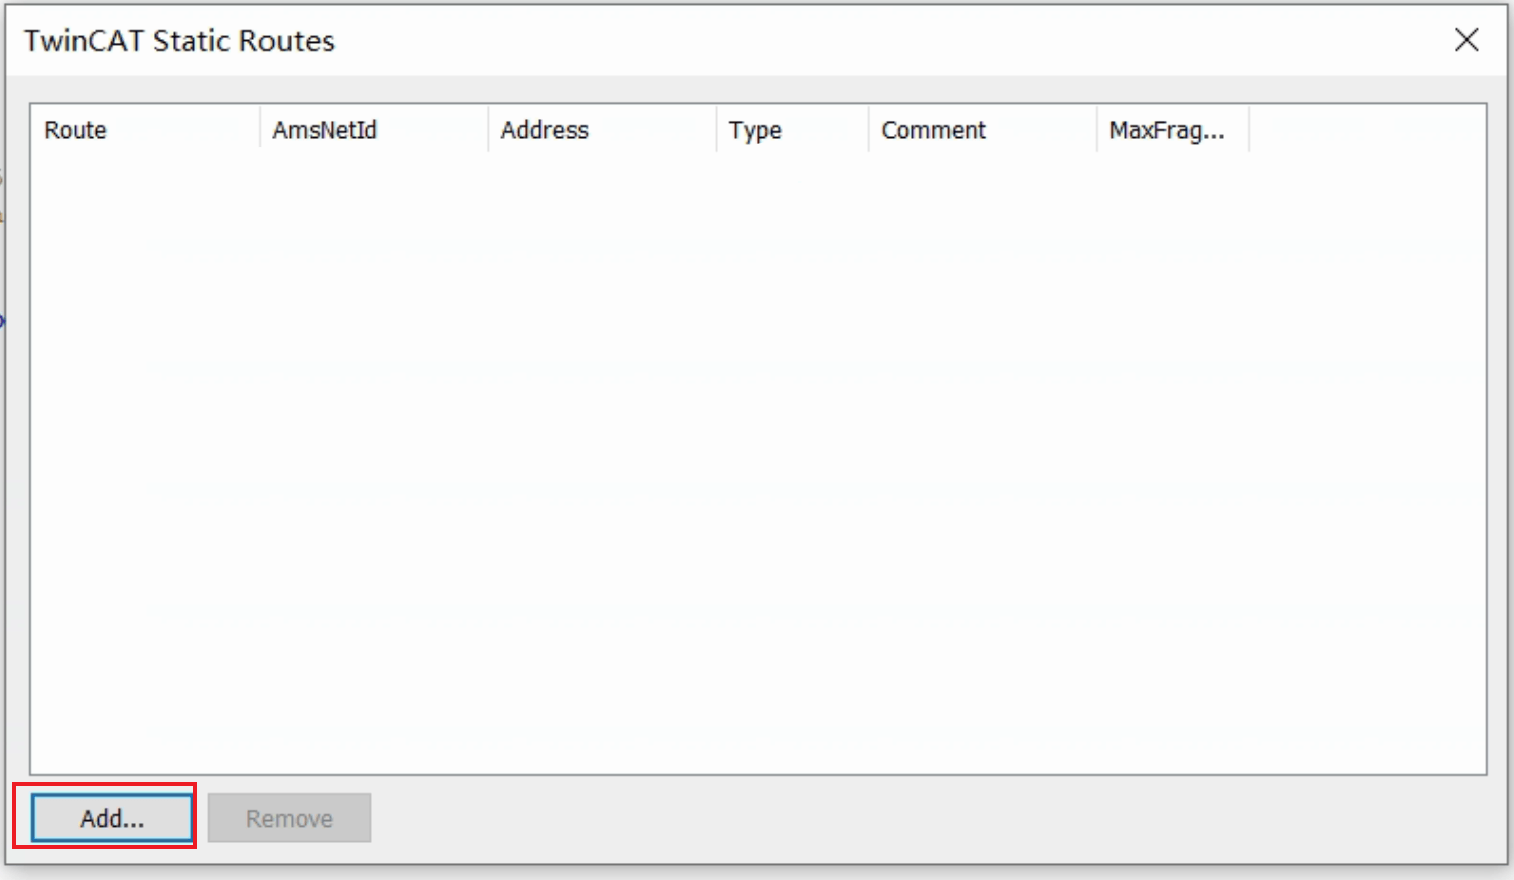
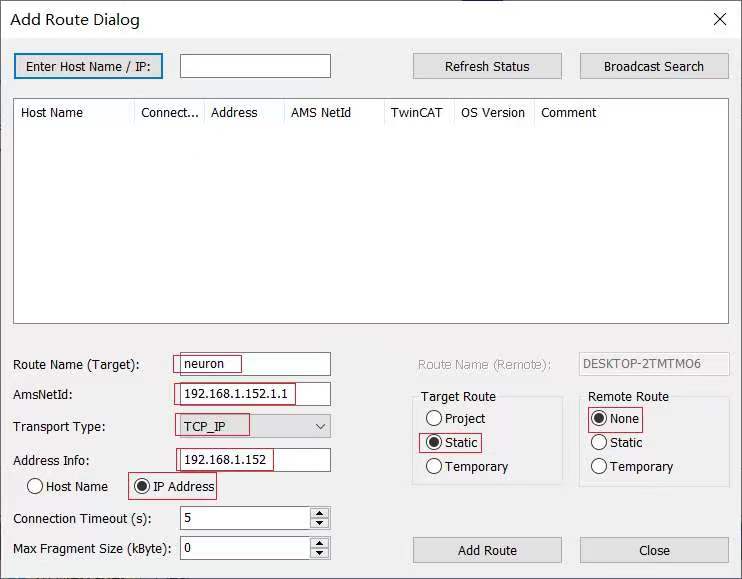
- A successfully added route is shown as follows.
Get AMS Net ID and Port Number
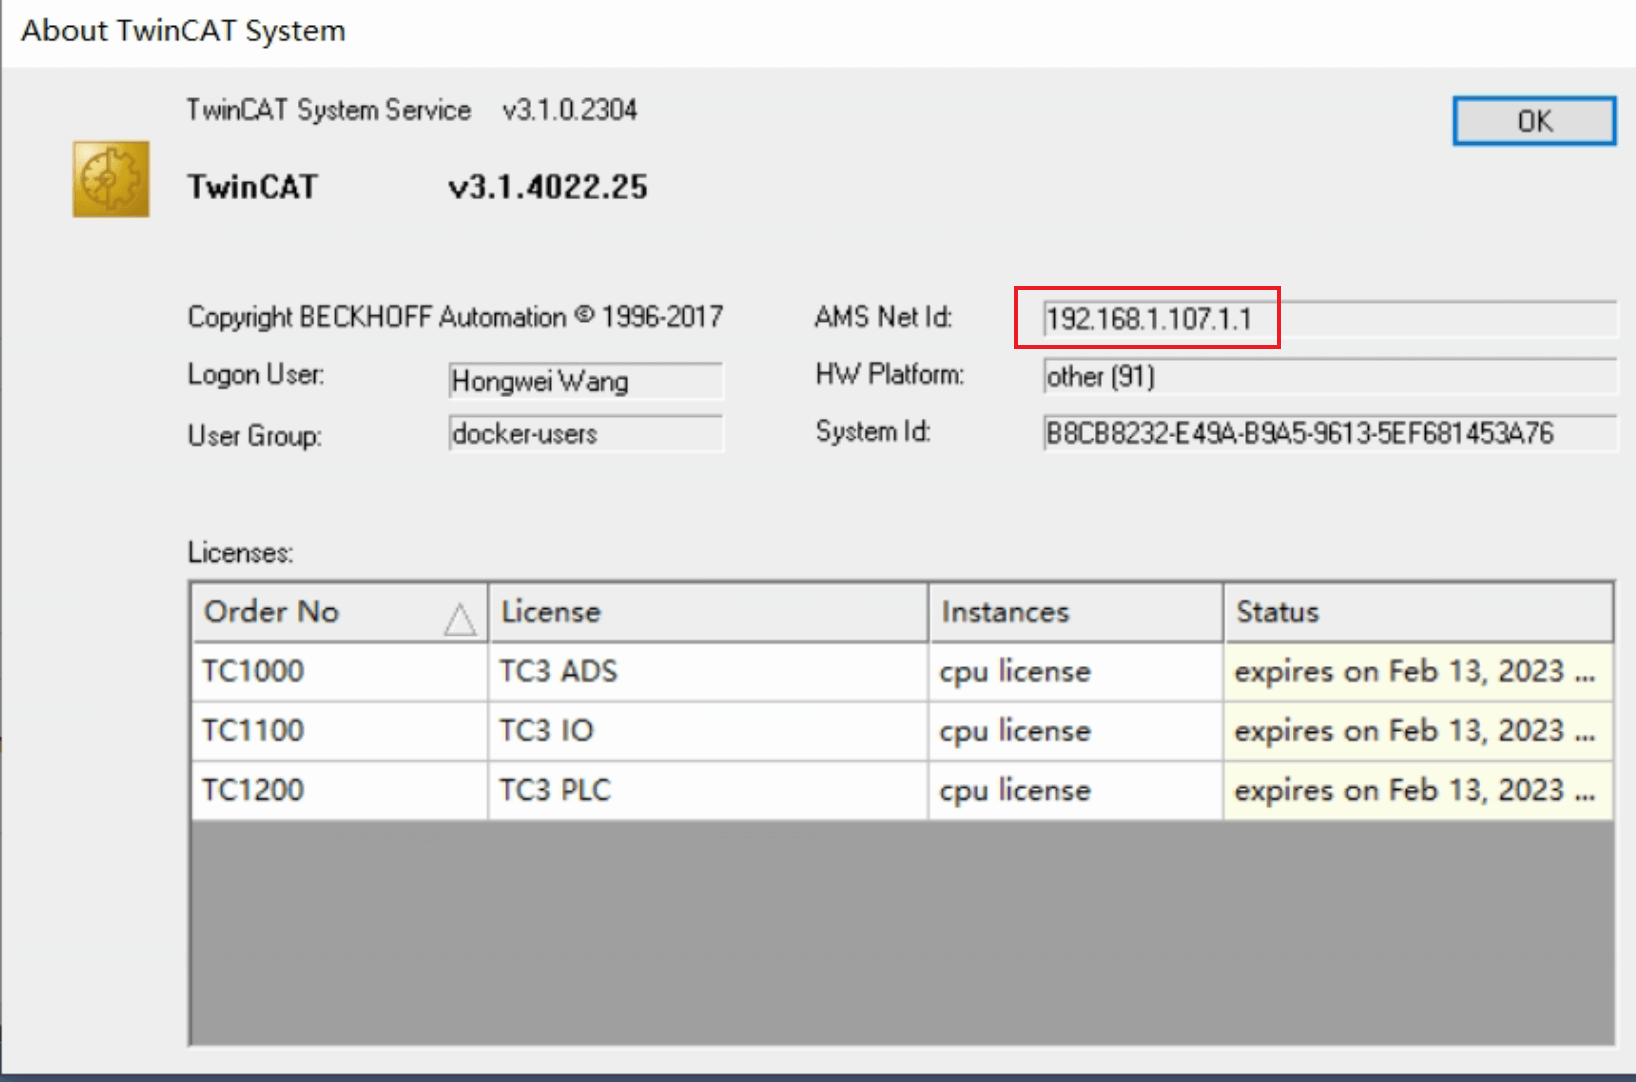
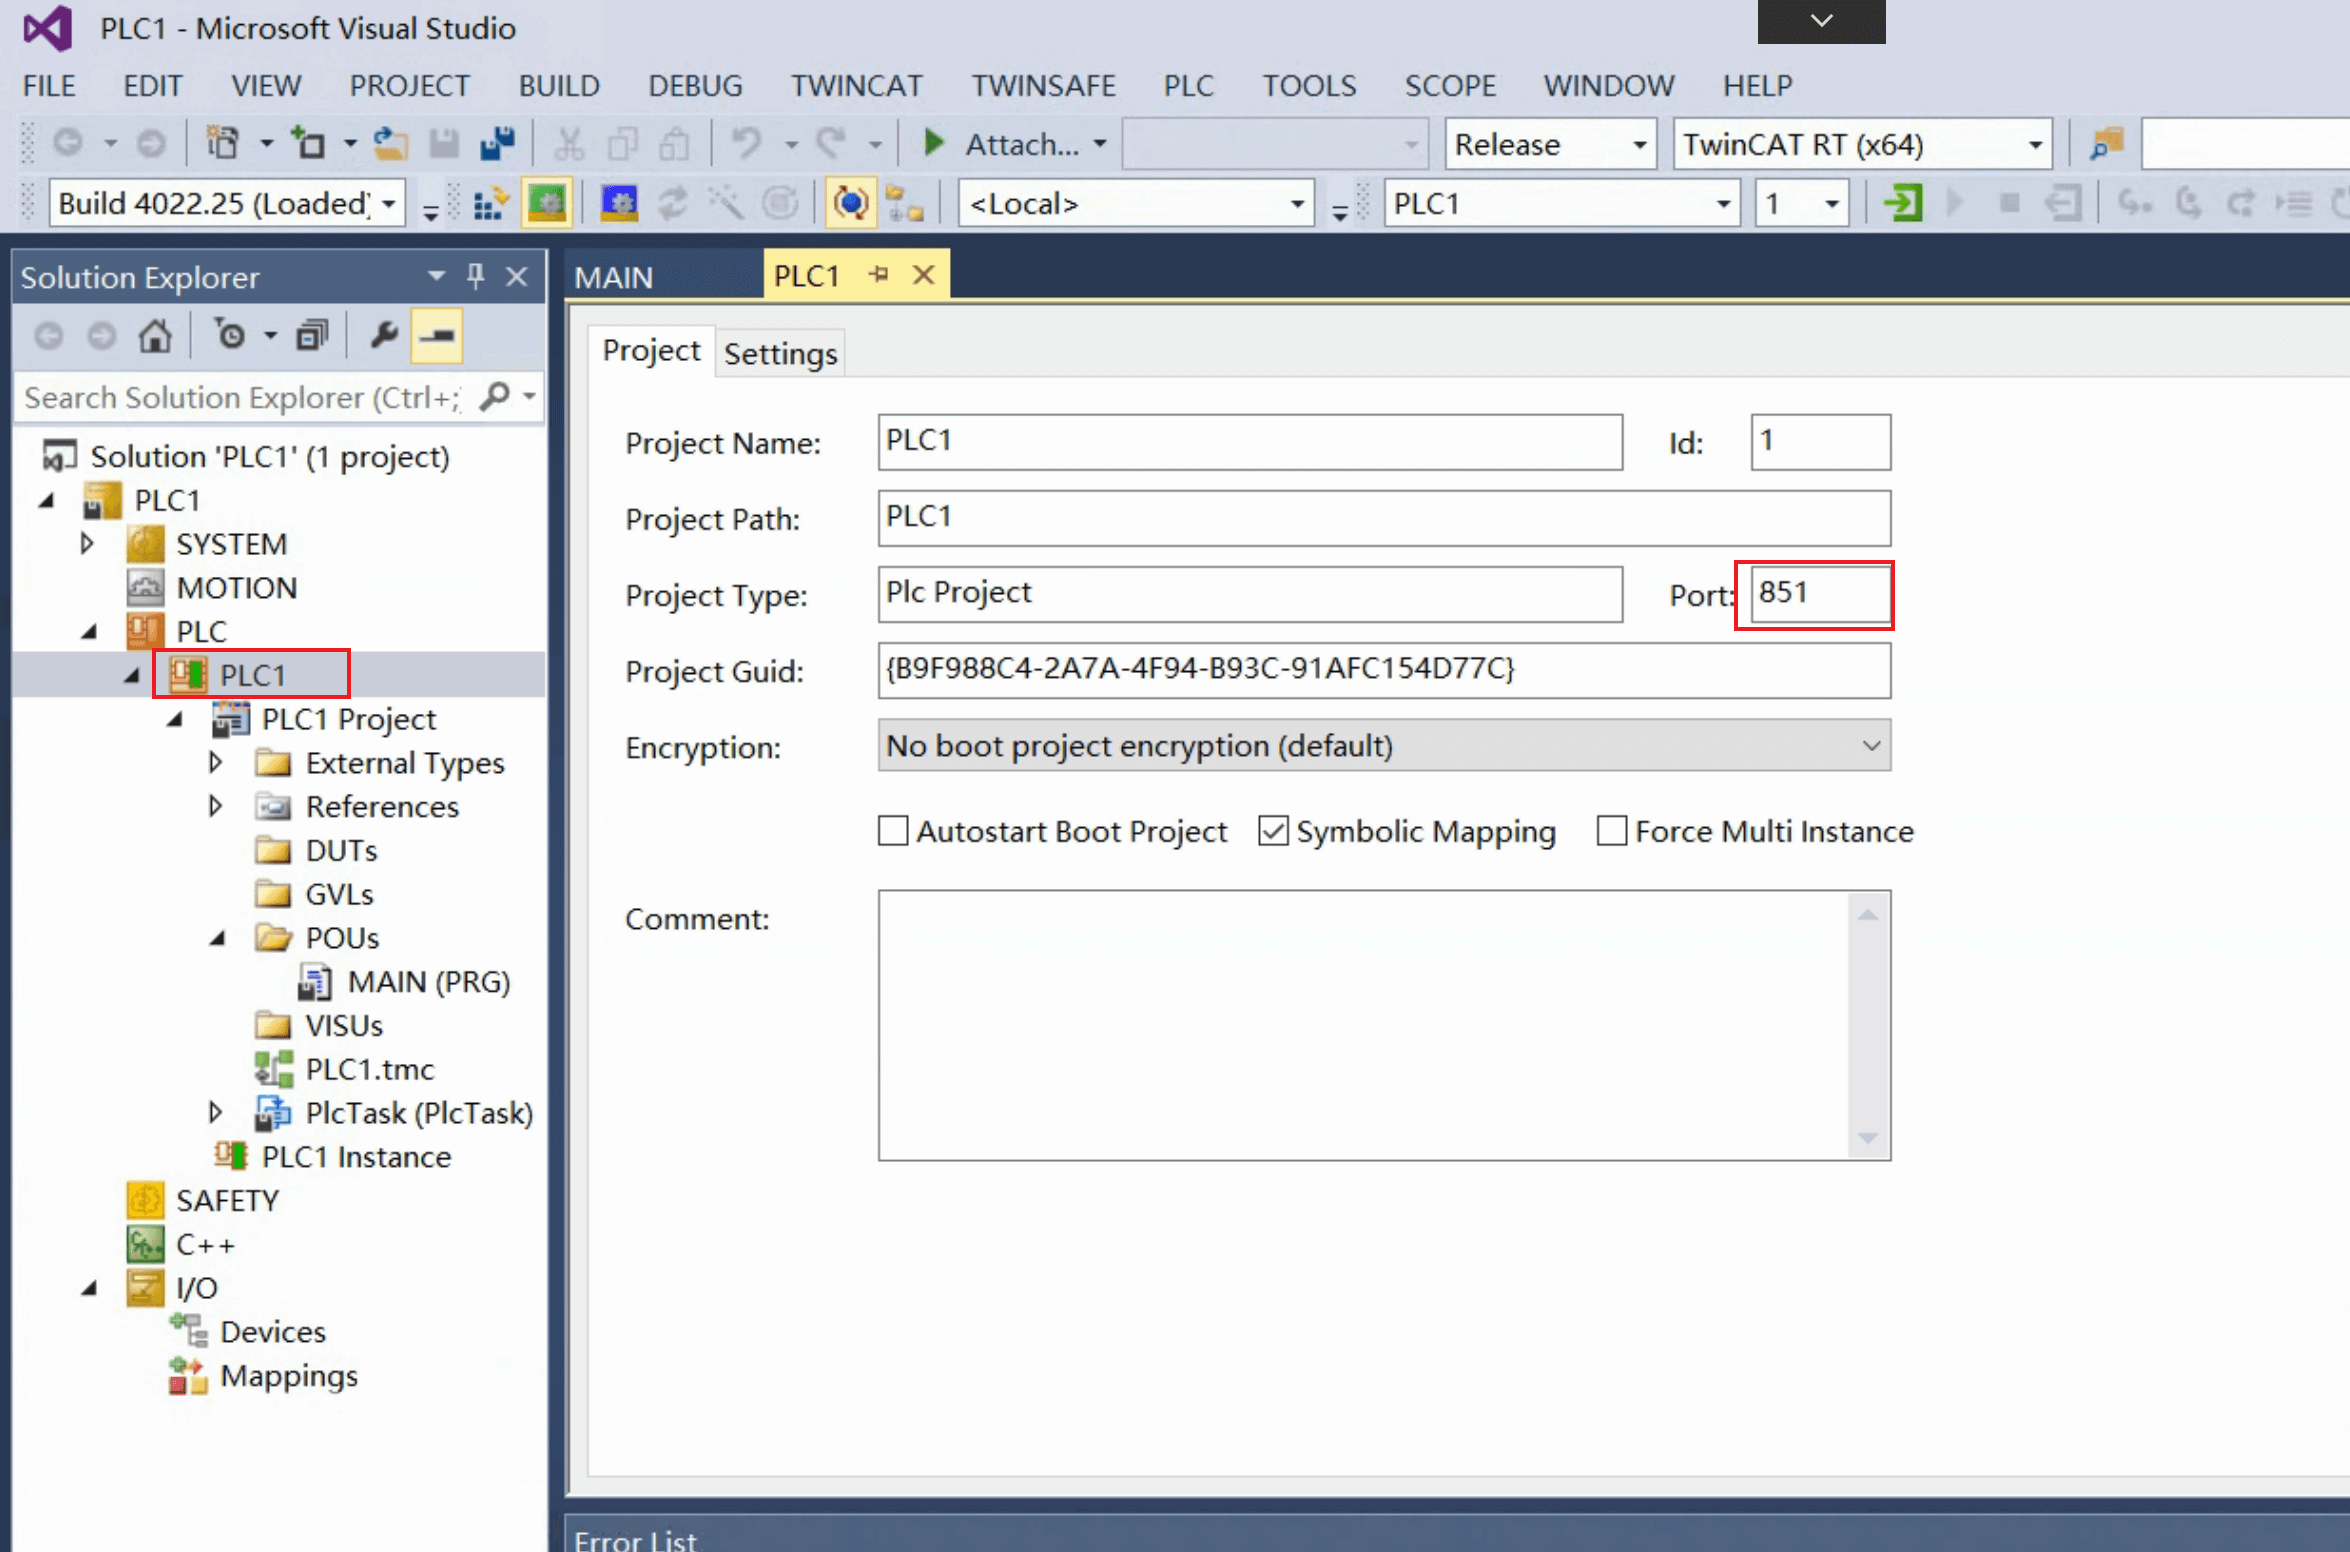
- Open the TwinCAT System dialog to show the AMS Net ID.
Get Index Group and Index Offset of Variables
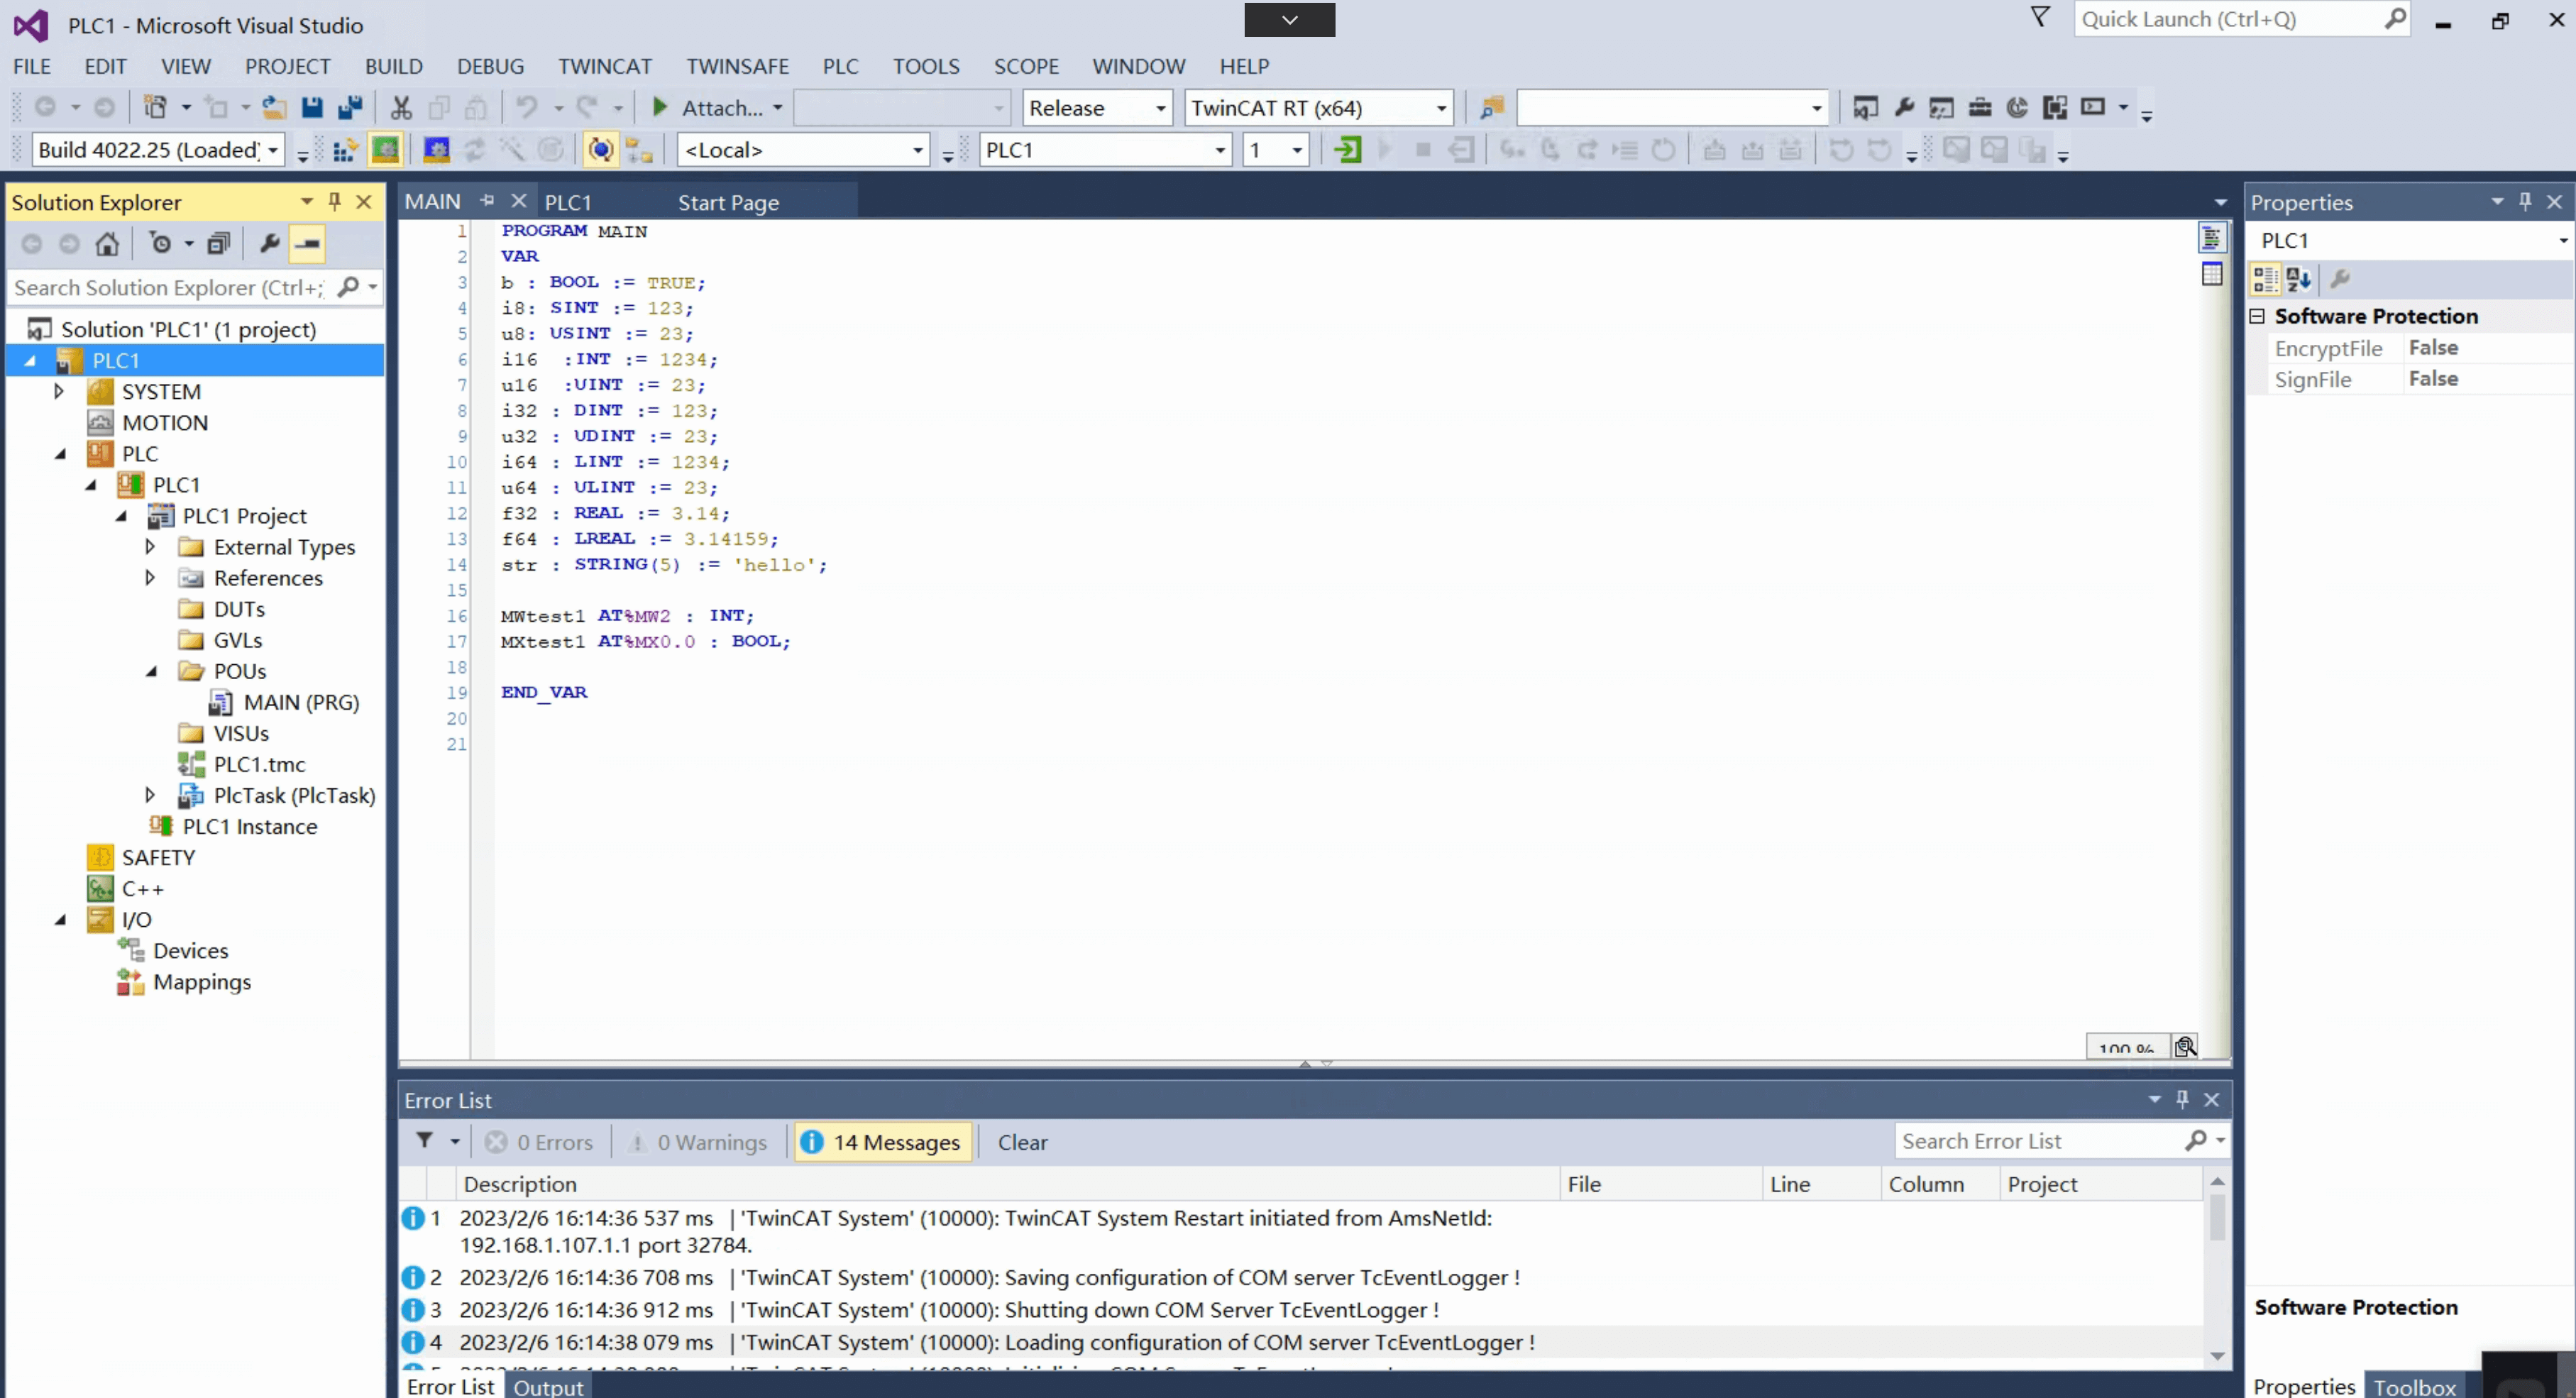
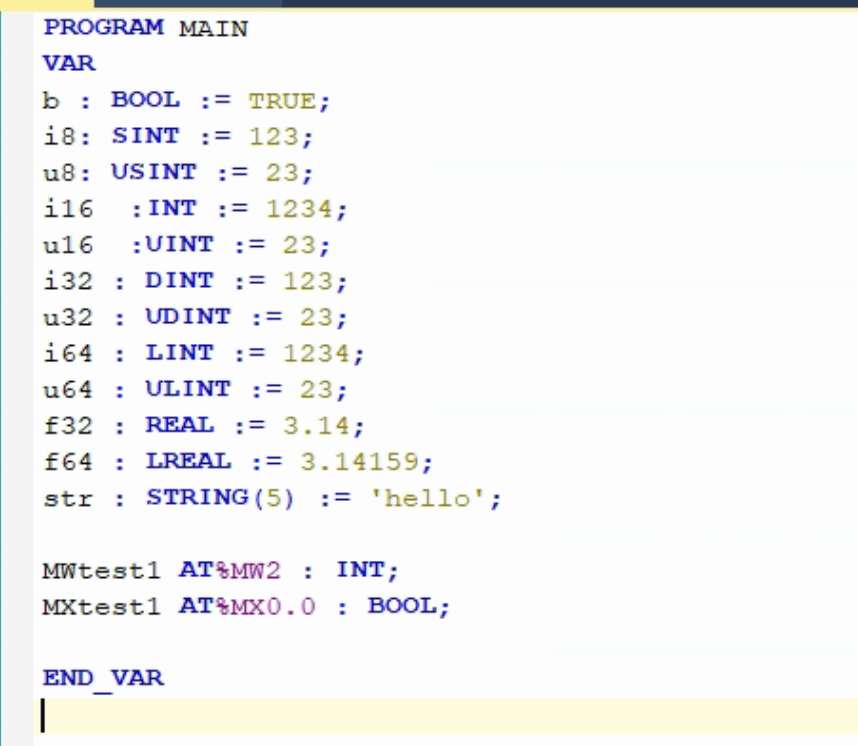
We use the following TwinCAT PLC program, which defines enough variables for testing in this tutorial.
Find the Index Group
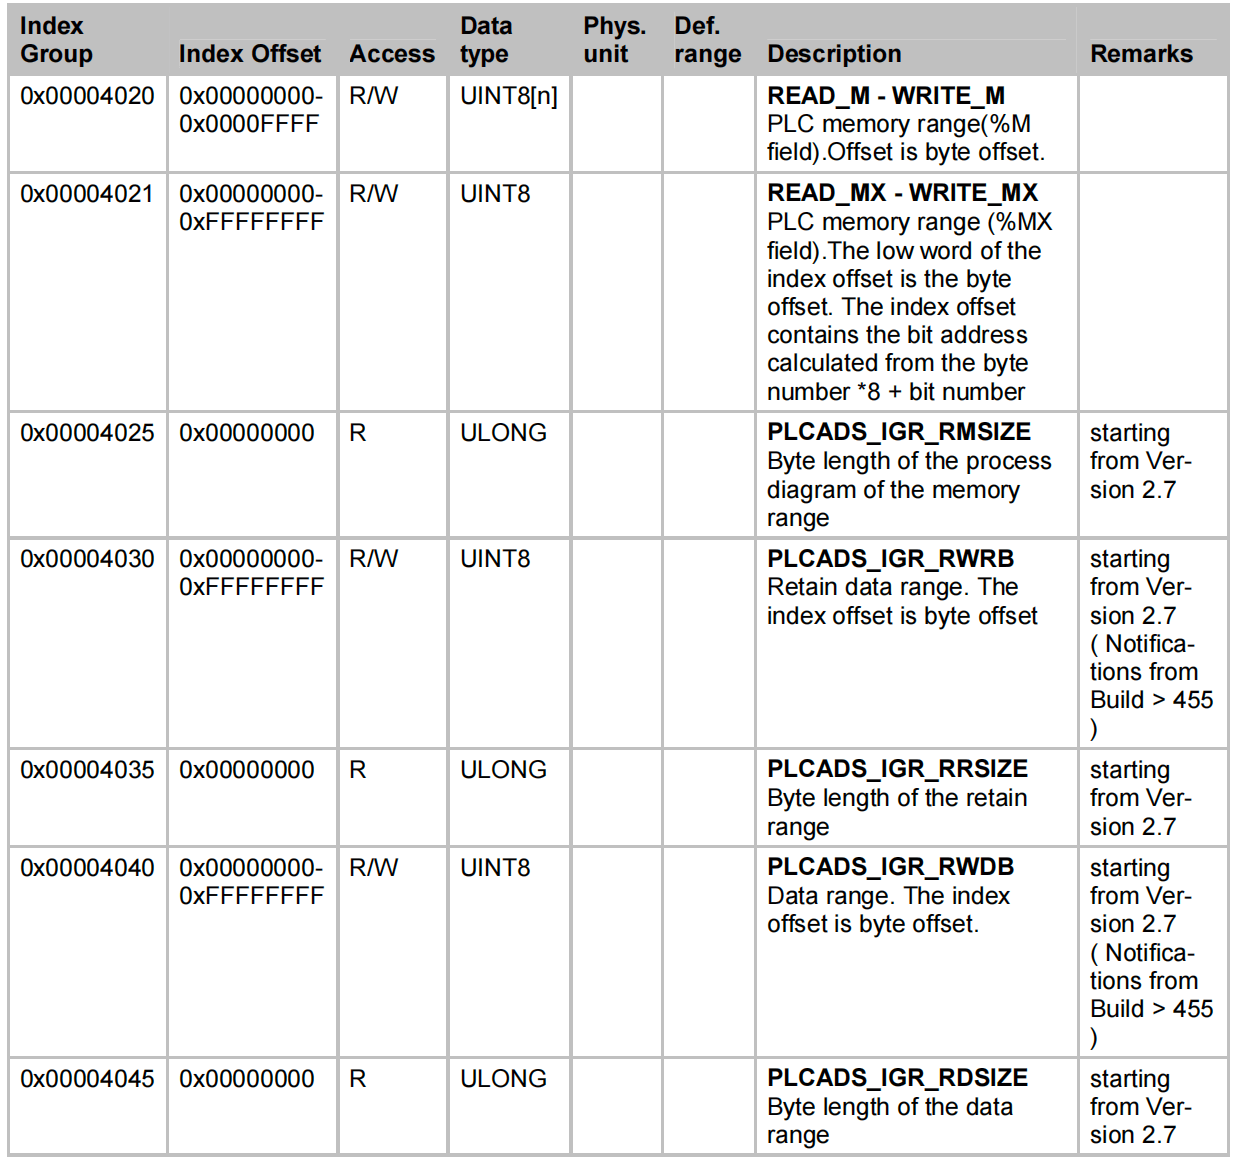
The Beckhoff index group/offset page lists the index group to access the PLC memory range. For the %MW field, the index group is 0x4020. For the %MX field, the index group is 0x4021. For the variables b, i8, u8, i16, u16, i32, u32, i64, u64, f32, f64, str defined in the main program, the index group is 0x4040.
Find the Index Offset
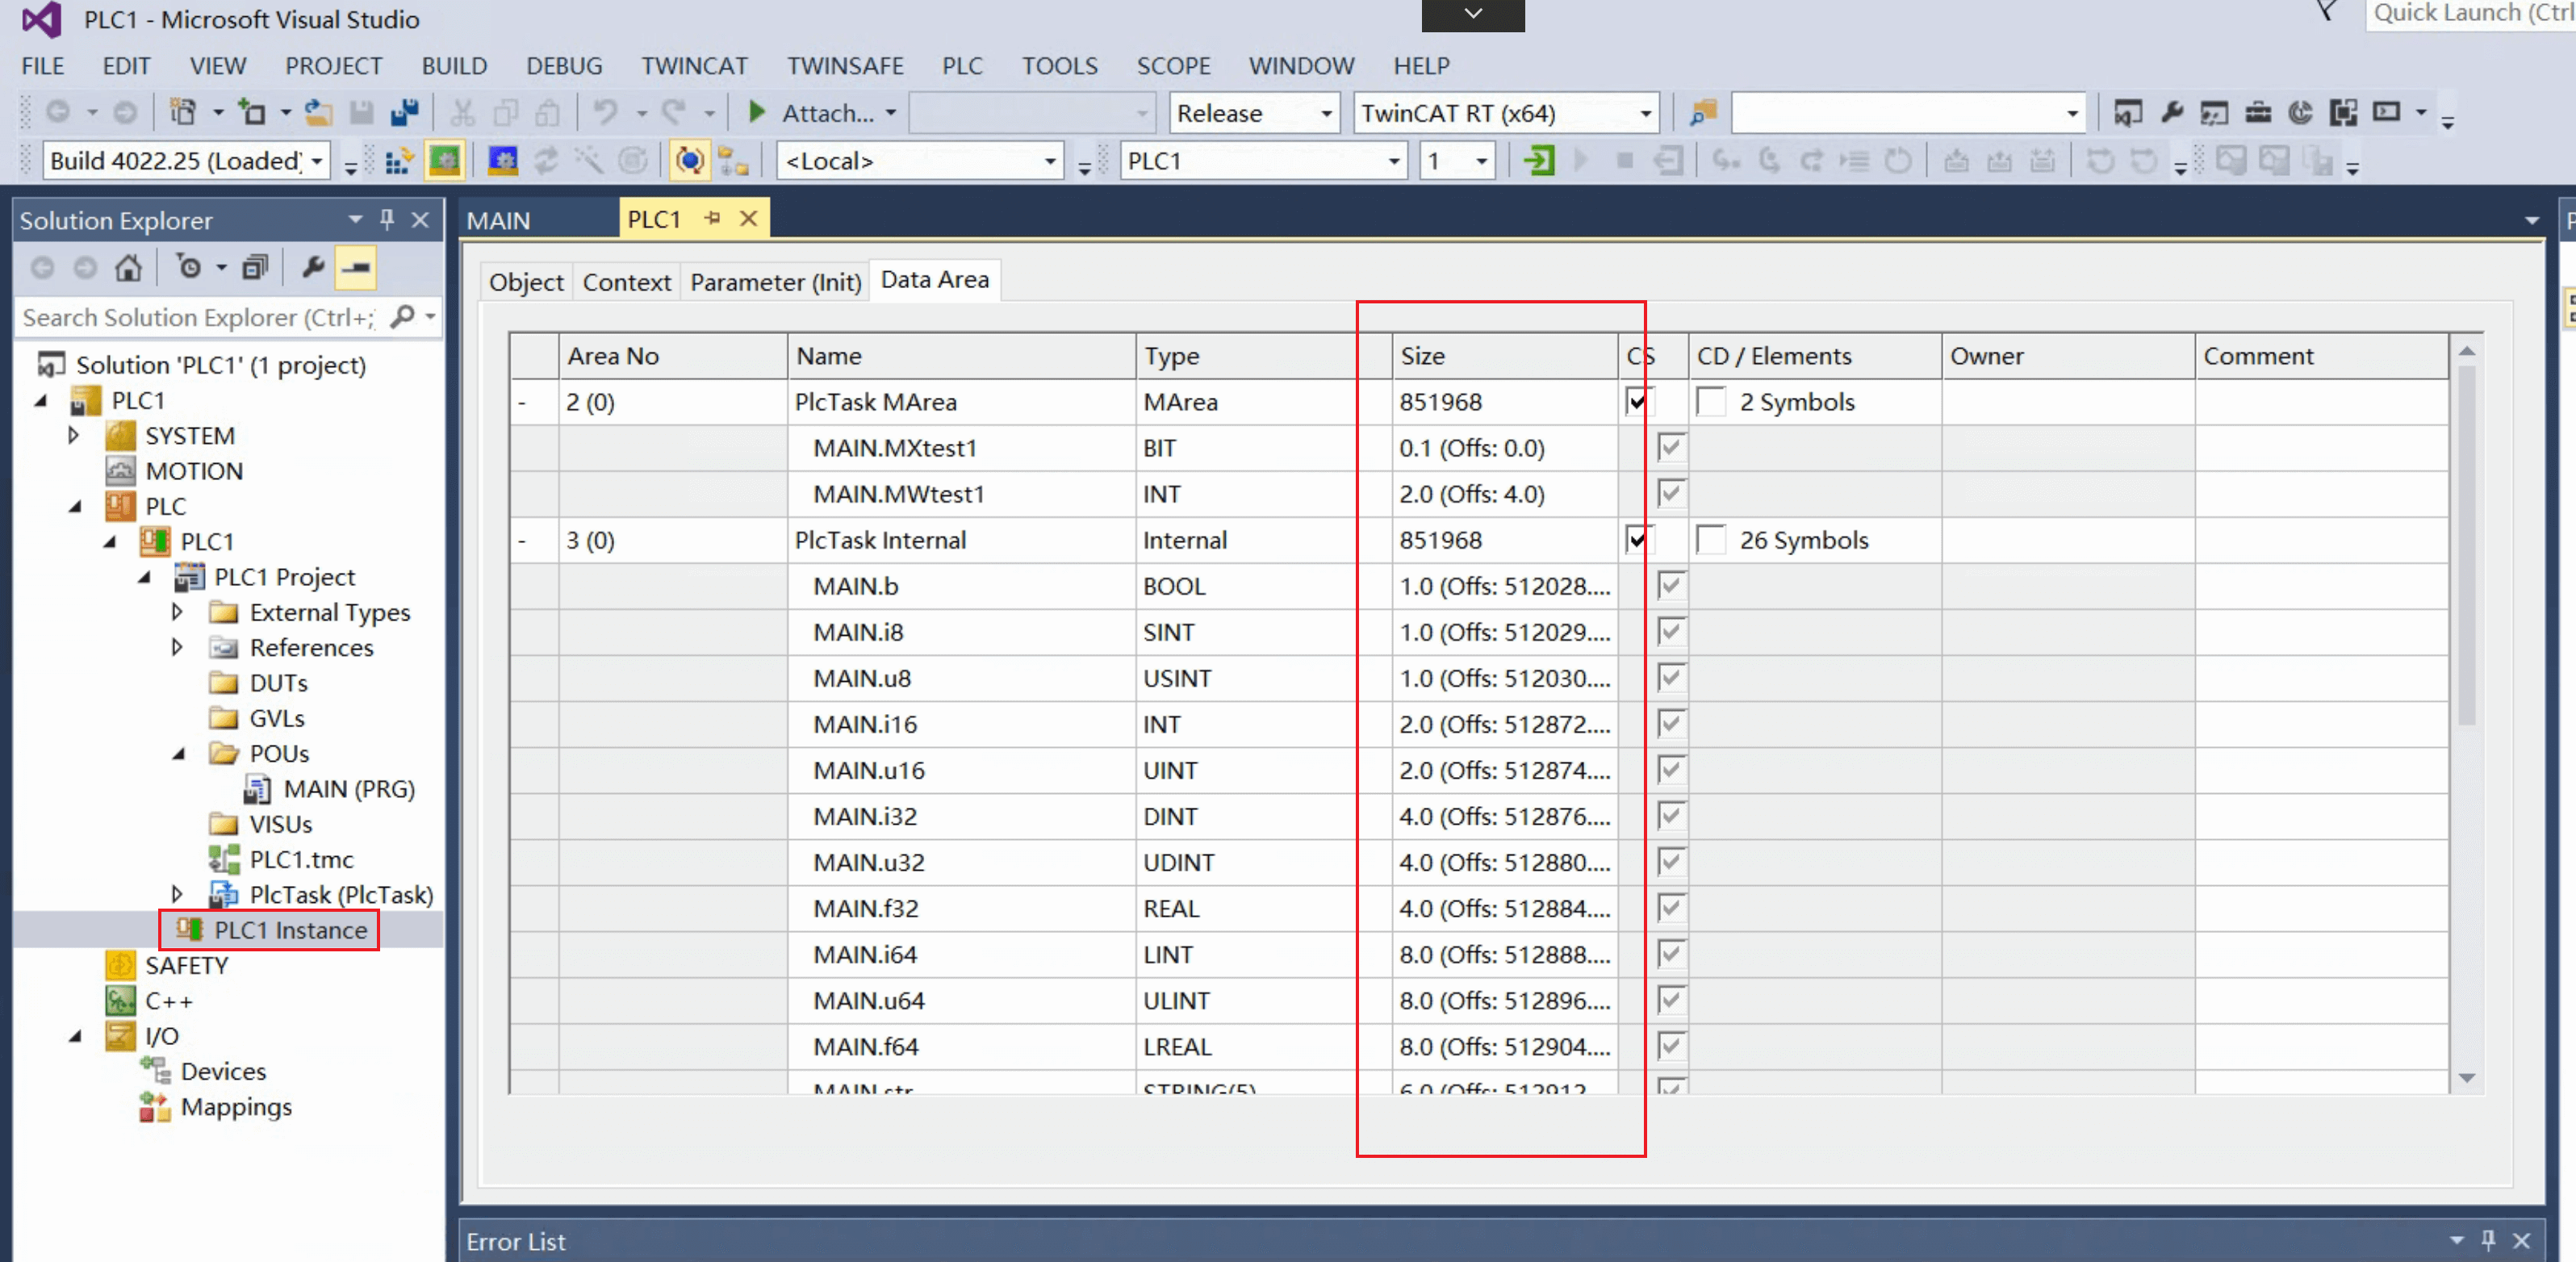
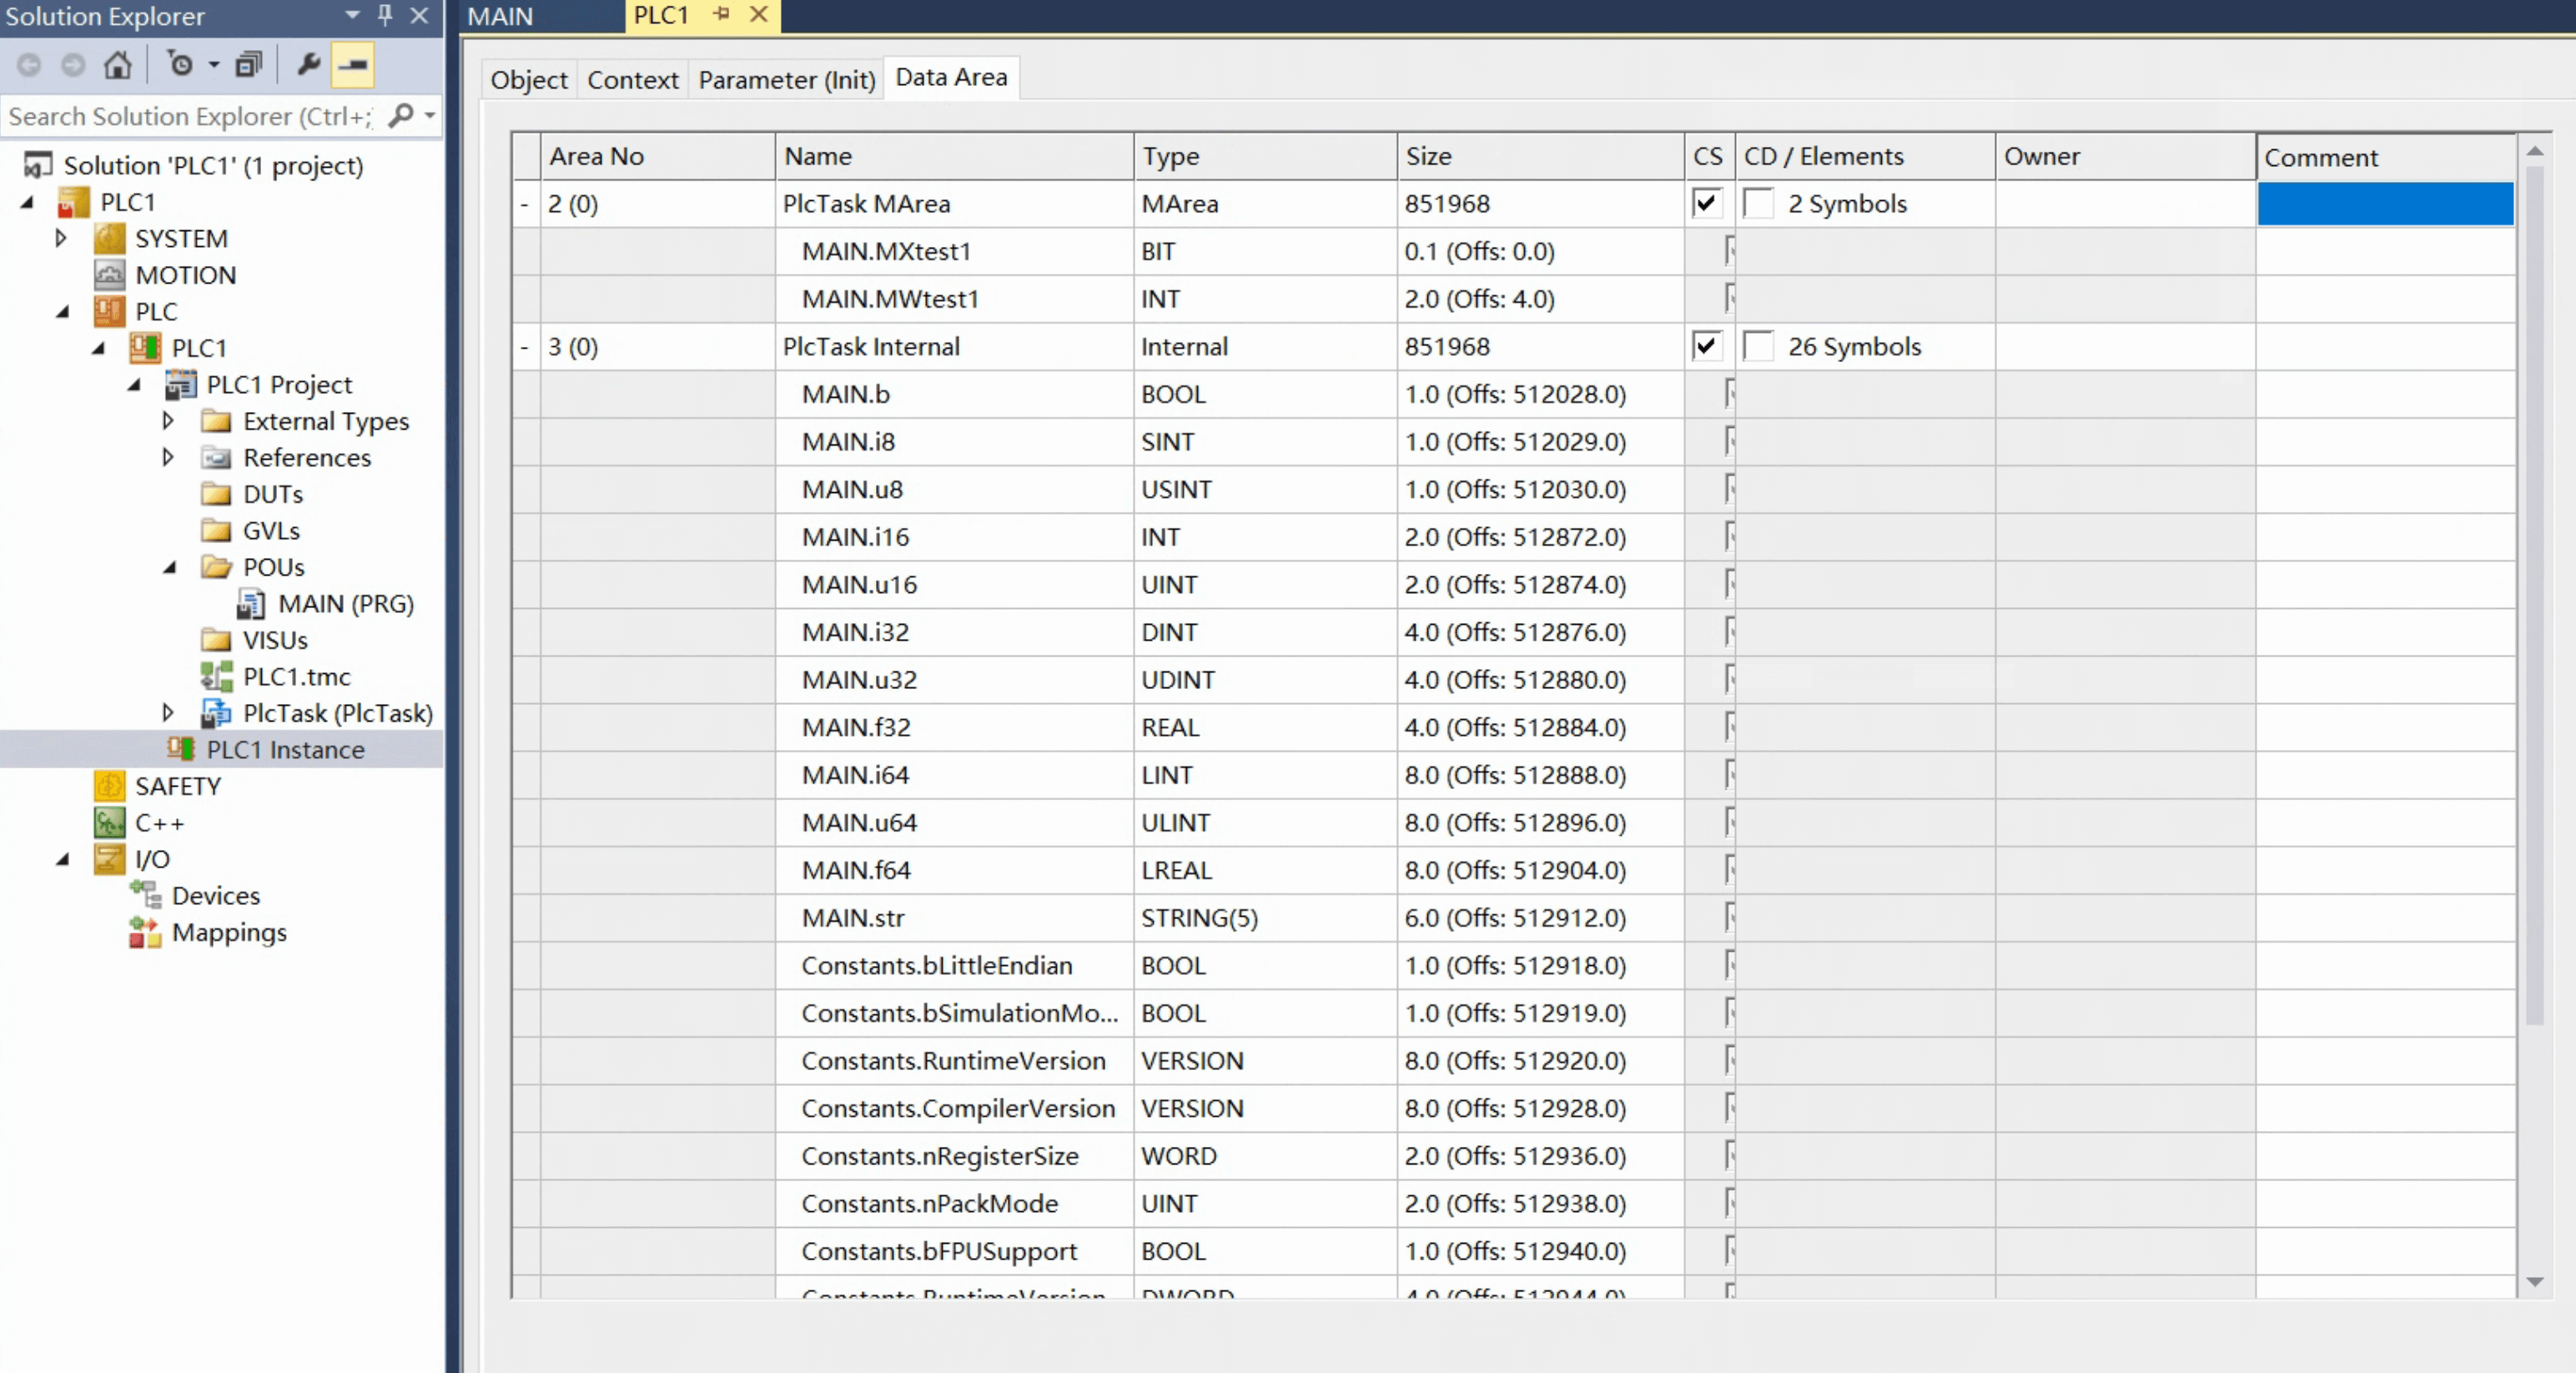
Open the TwinCAT PLC data area tab to find the index offset of the variables.
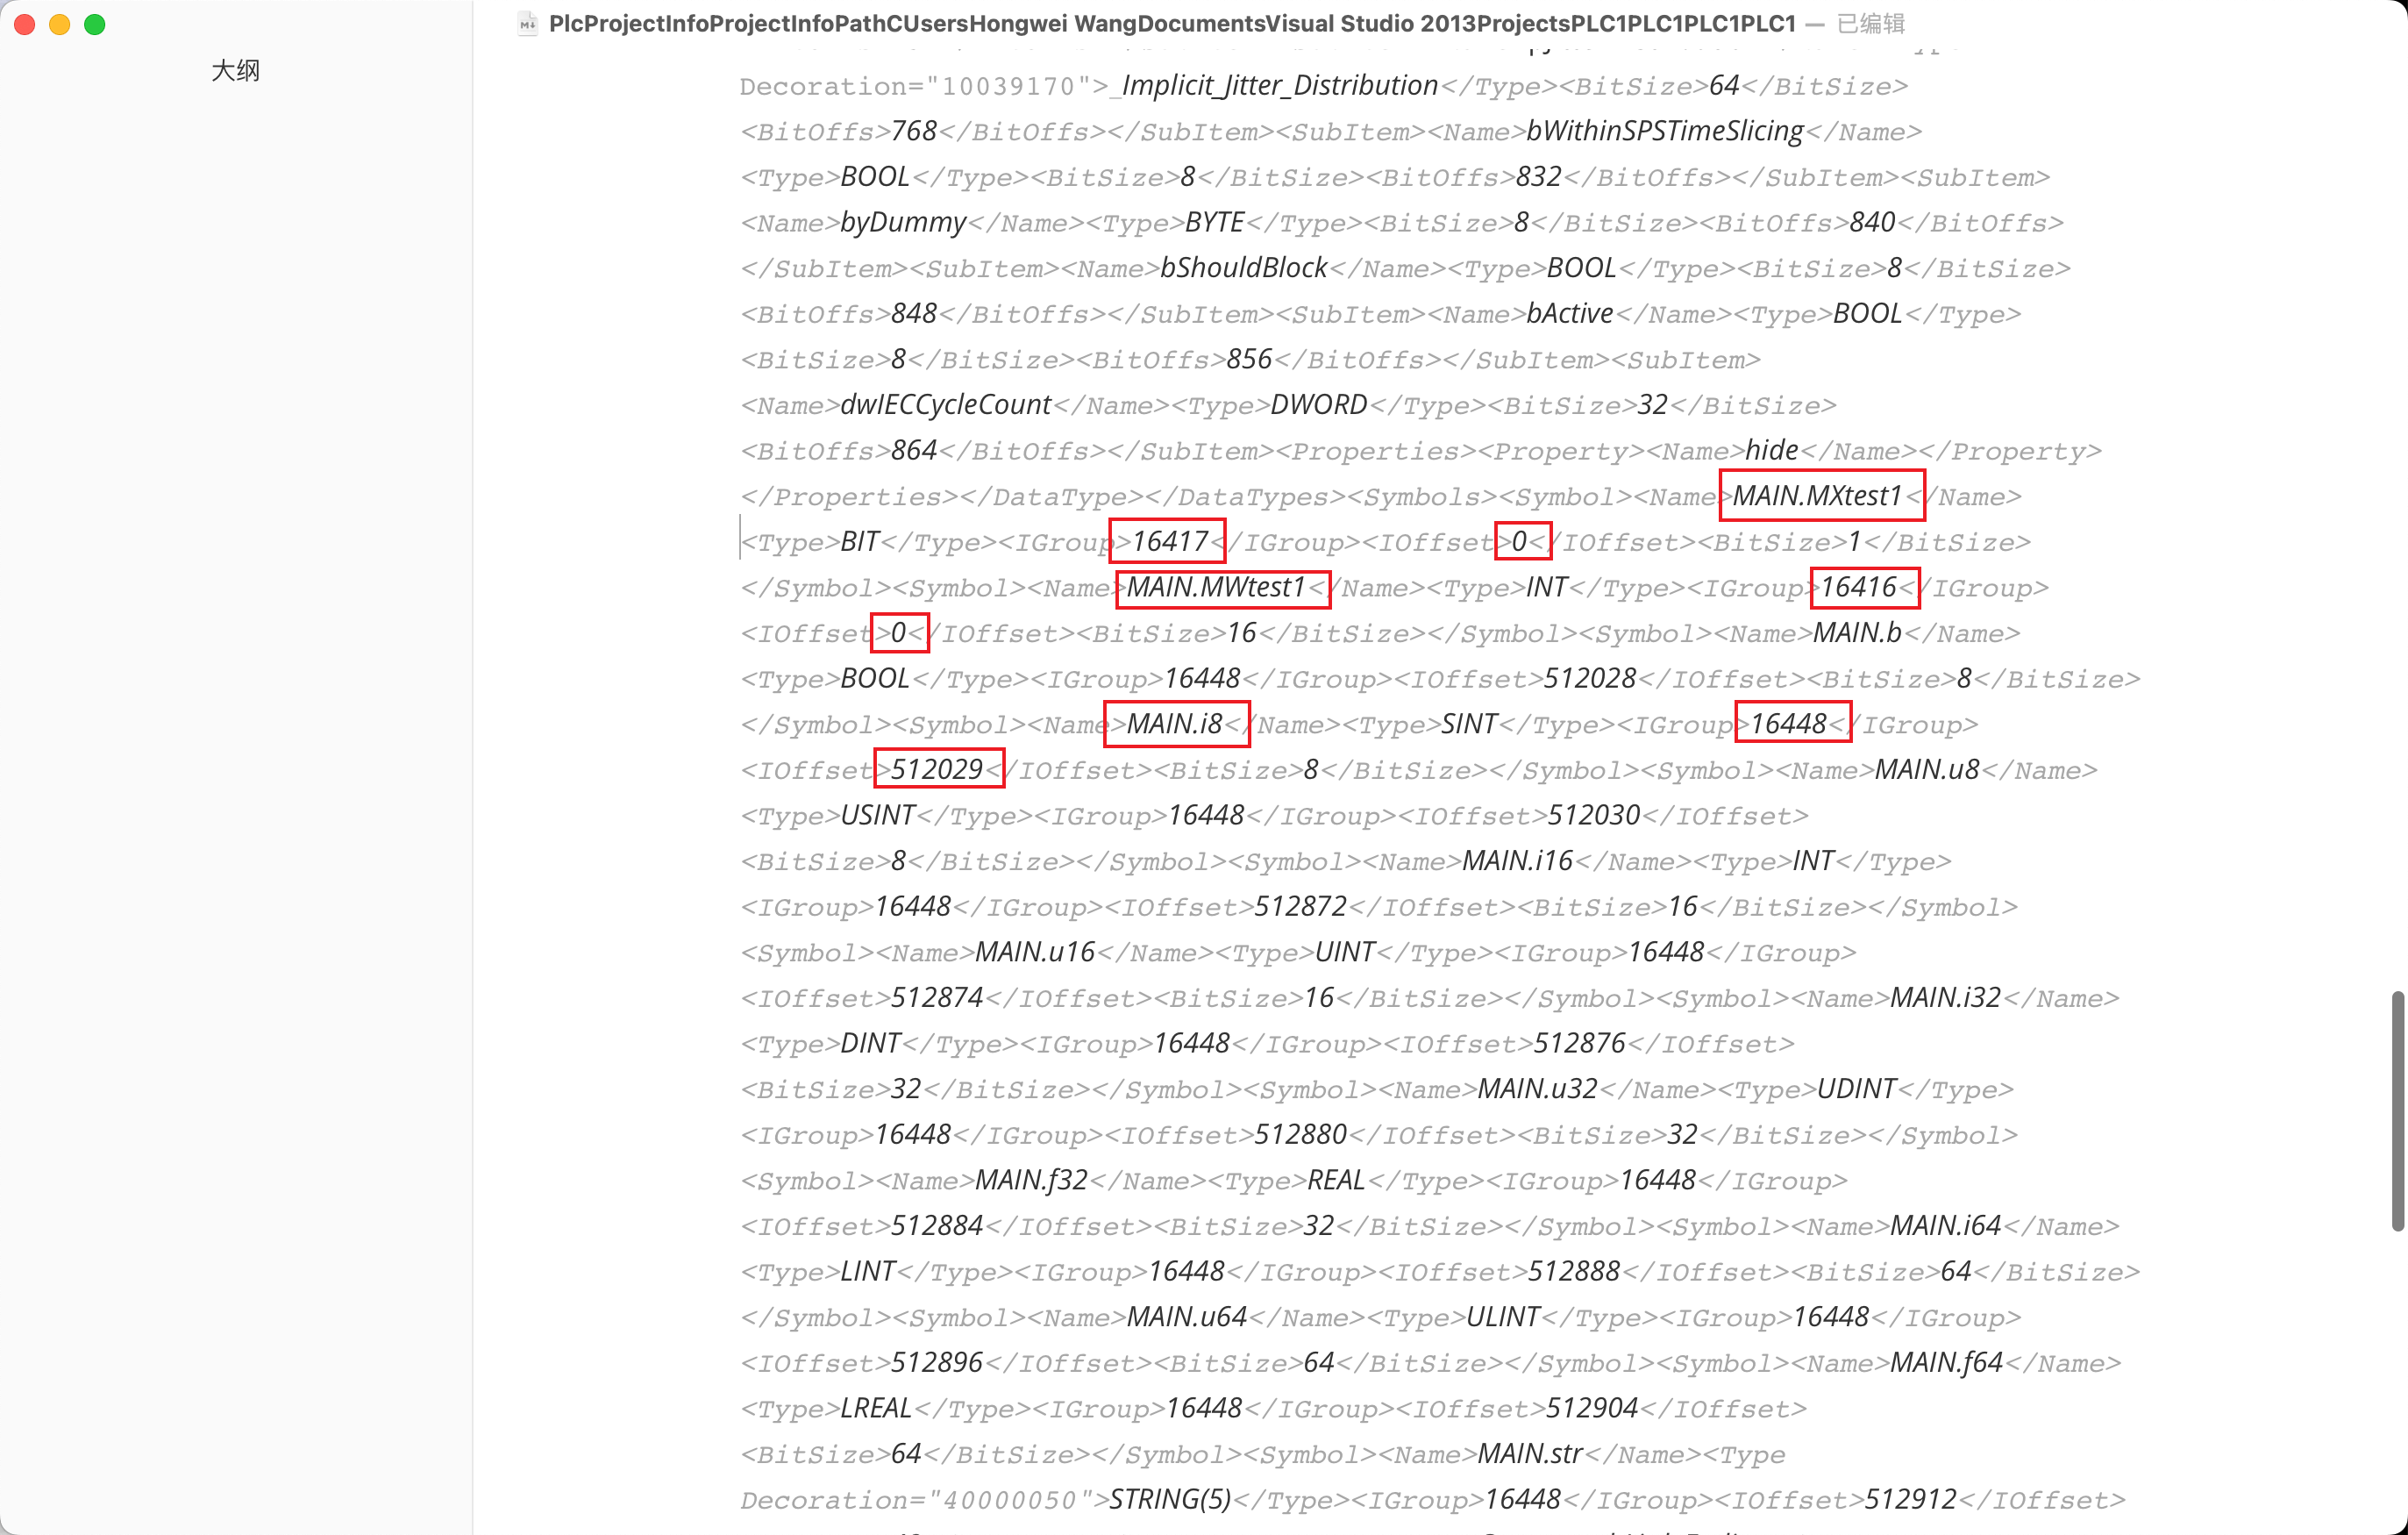
Get the Index Group/Offset by TPY File
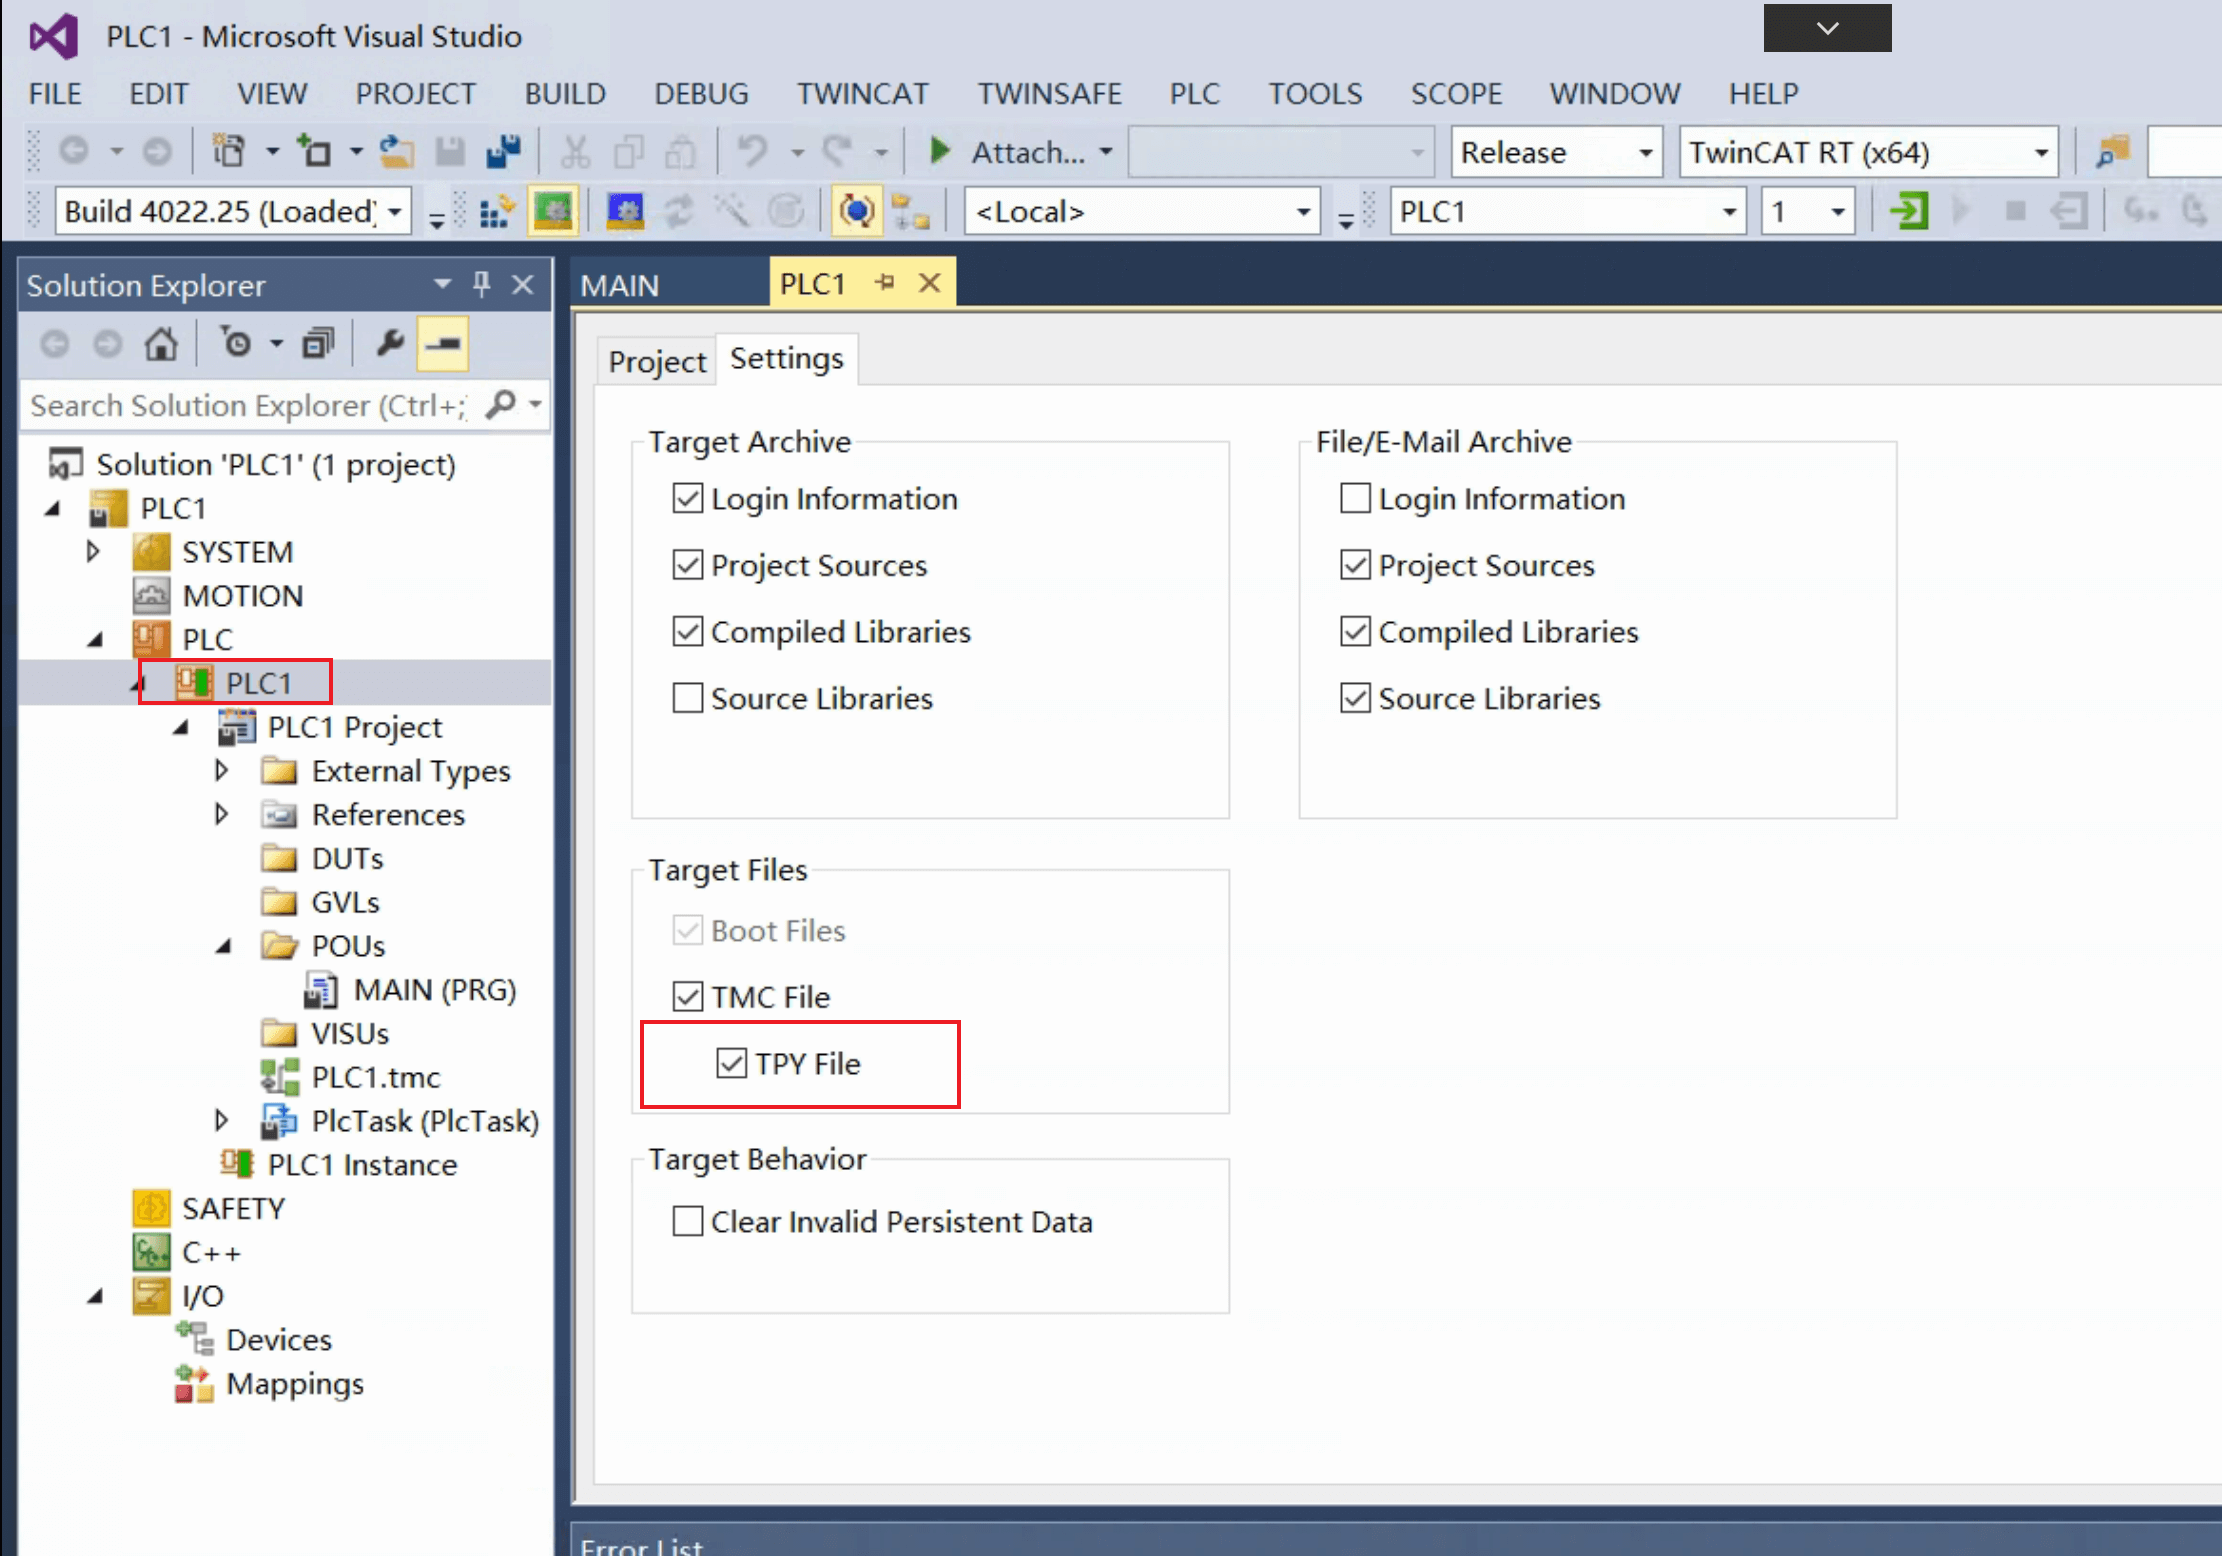
We could also find the index group and index offset through the TPY file.
- Ensure TPY File is enabled.
- Open the TPY file in the TwinCAT project directory.
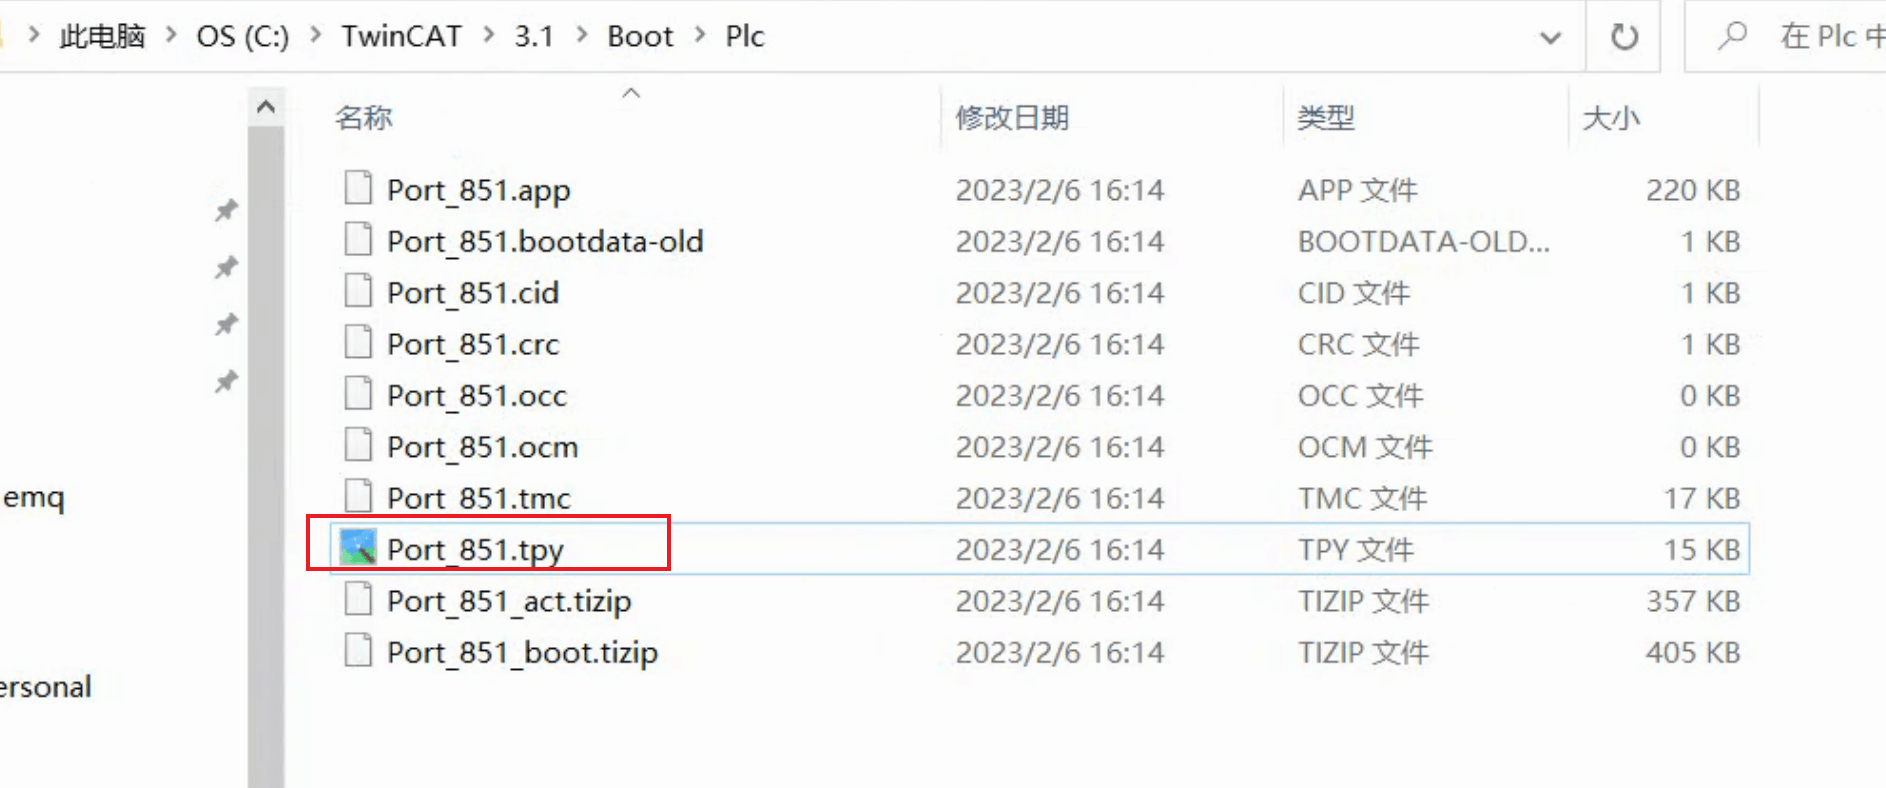
- The TPY file contains the index group and index offset of each variable defined in the PLC program.
Configure EMQX Neuron
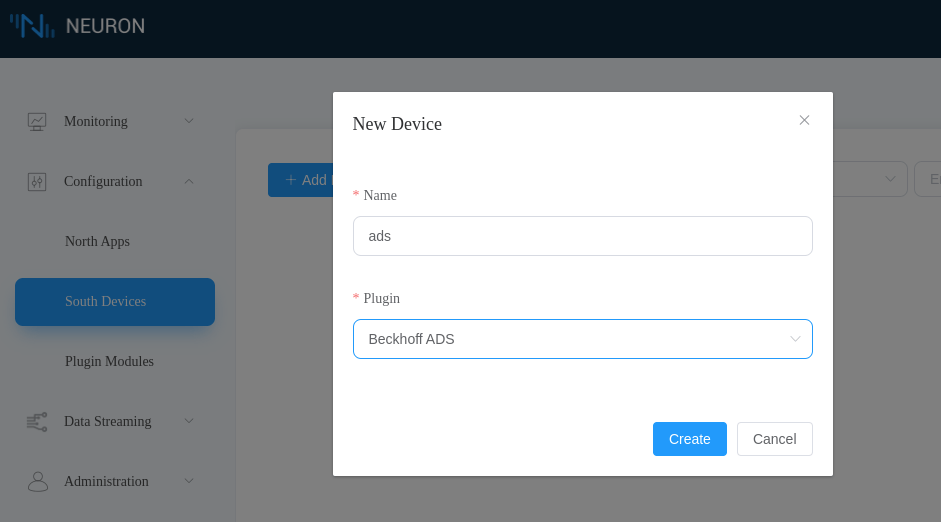
Add ADS South Node
In the EMQX Neuron dashboard, click South Devices -> Add Device to add an ADS node.
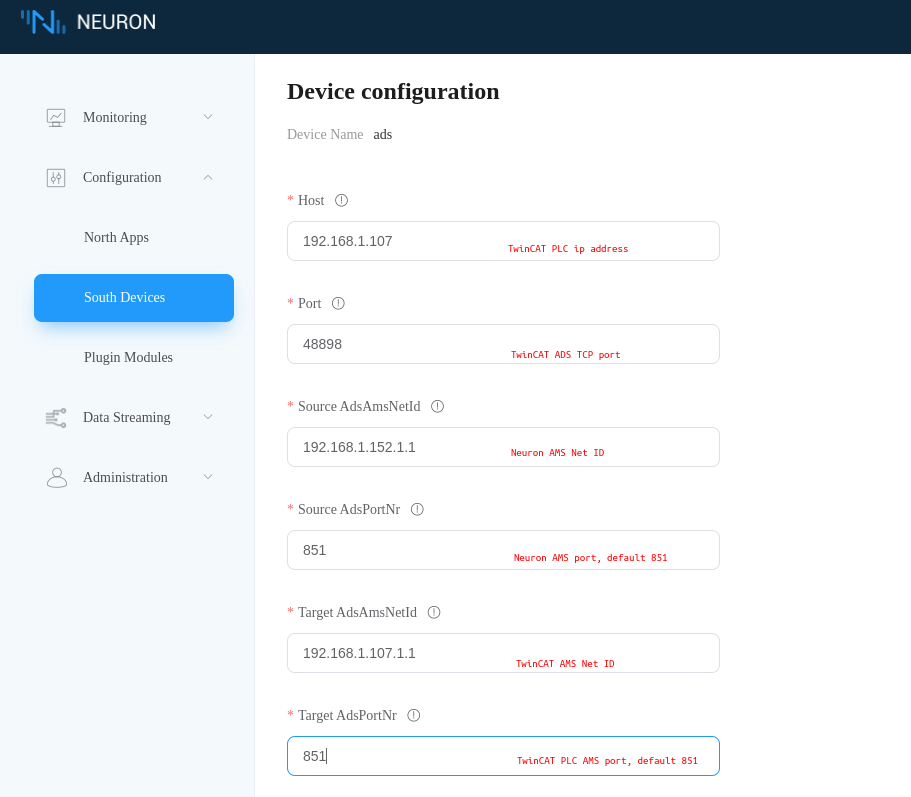
Configure ADS Node
Click the node configuration icon to configure the newly created ADS node.
Add Tags to the ADS Node
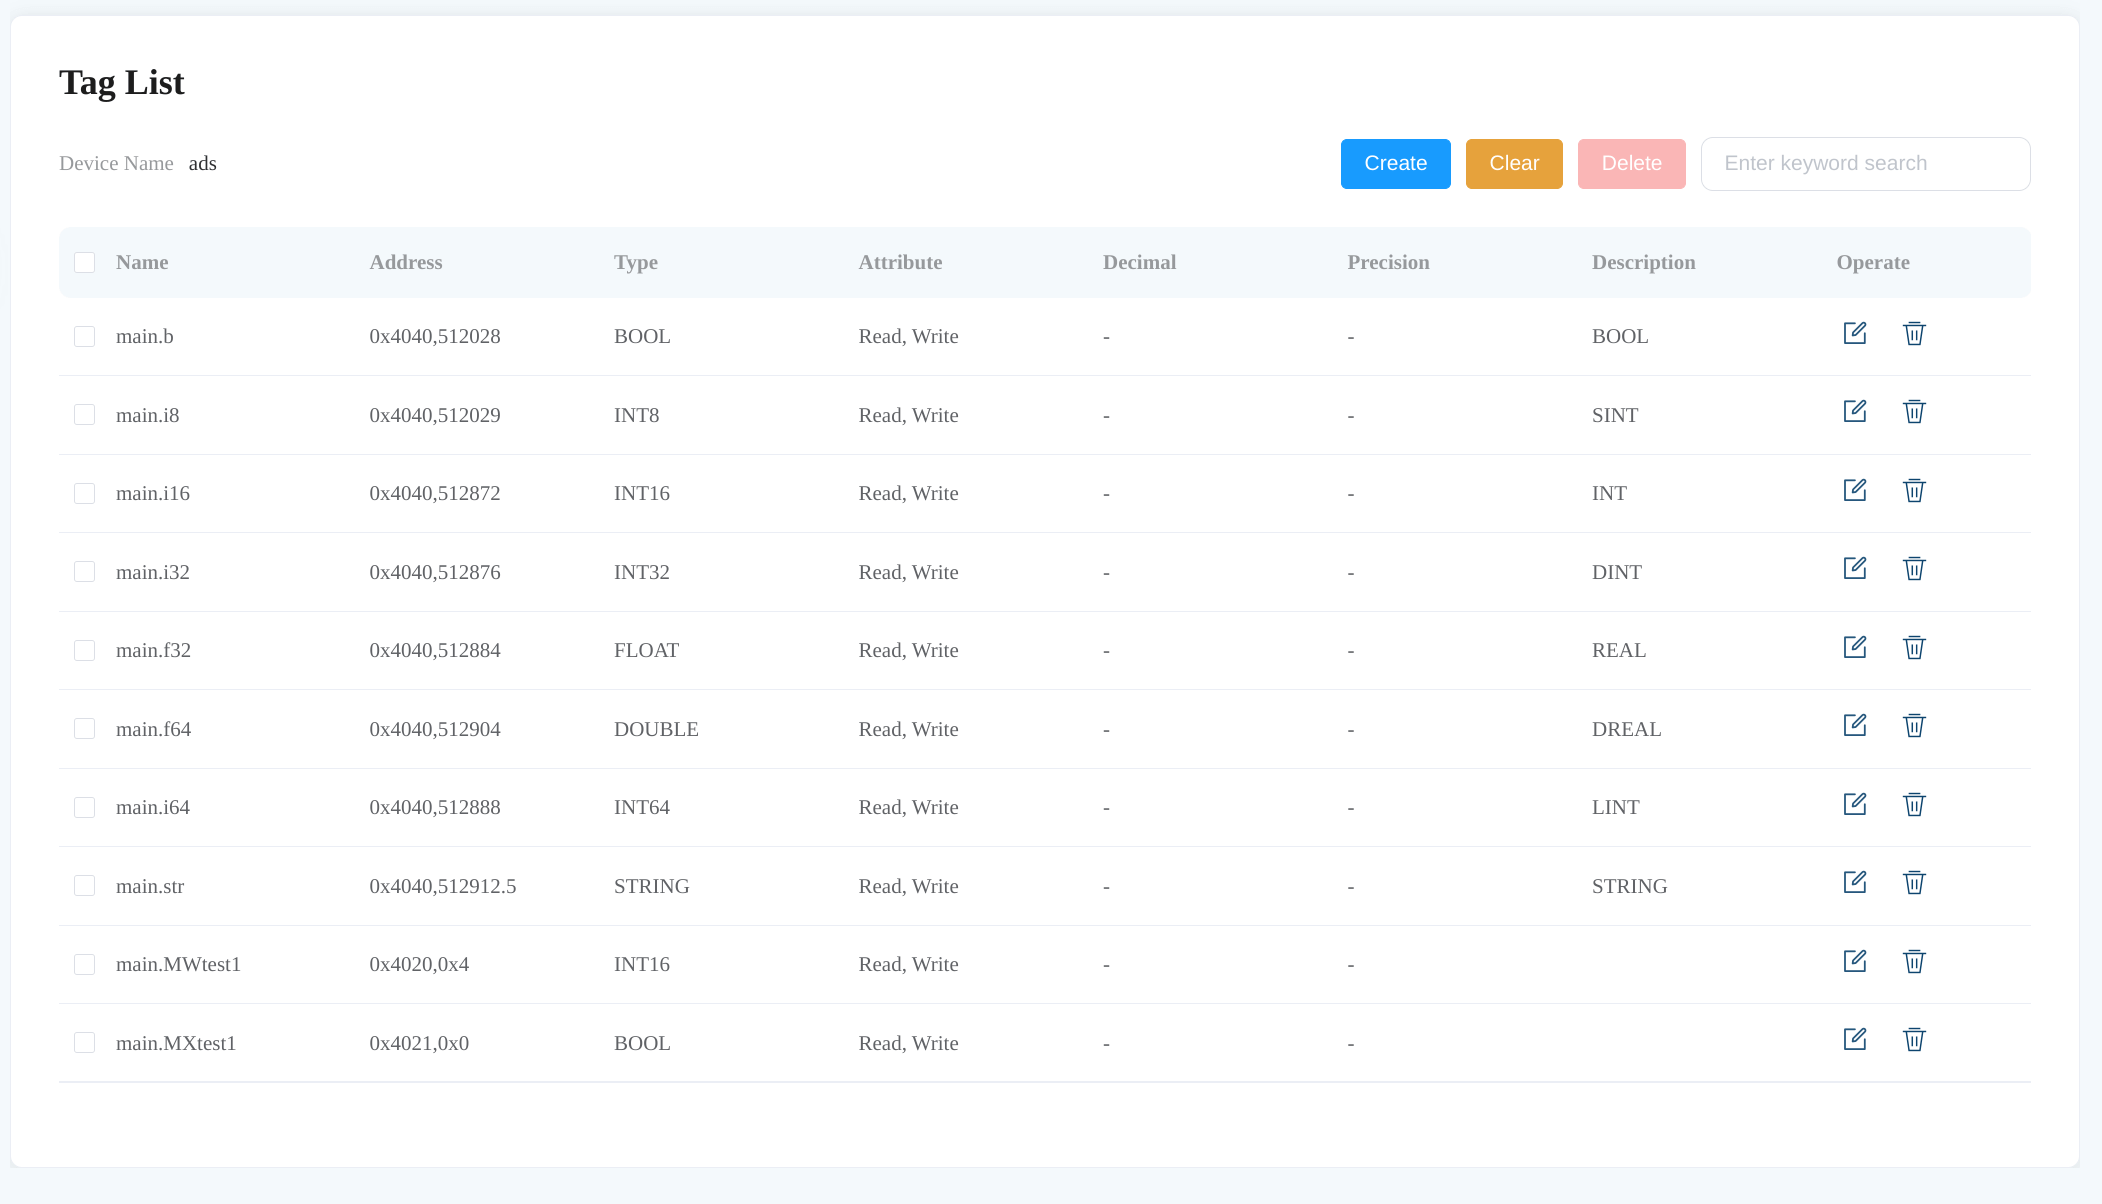
For each variable in the aforementioned TwinCAT PLC program, we add a corresponding tag to the EMQX Neuron ADS node. The [Beckhoff data types] page lists the size of the data types. Together with the program source code we could derive the data types of the tags.
For tag addresses, the index offset component is shown in the TwinCAT PLC data area tab.
The following figure shows all added tags in the ADS node.
Monitor Data
Read Tags
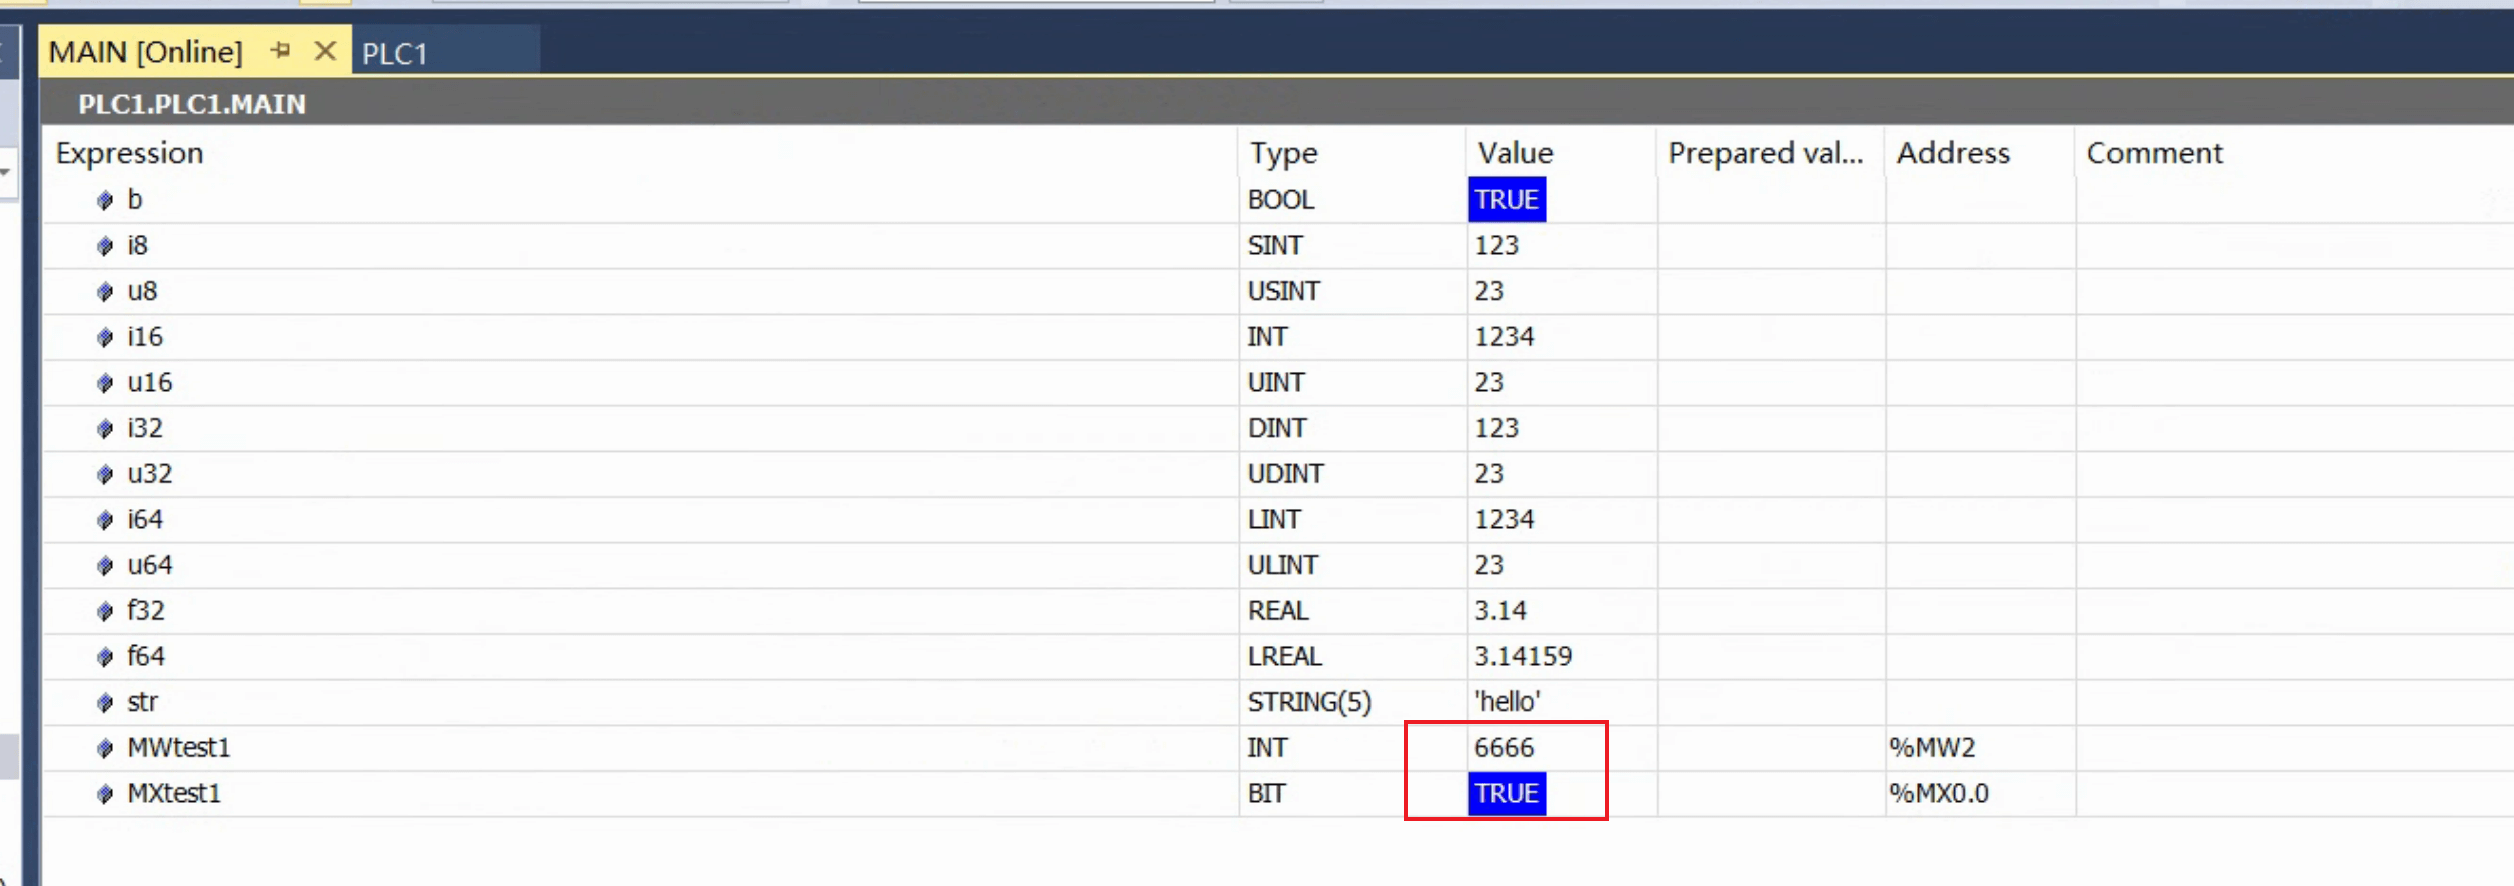
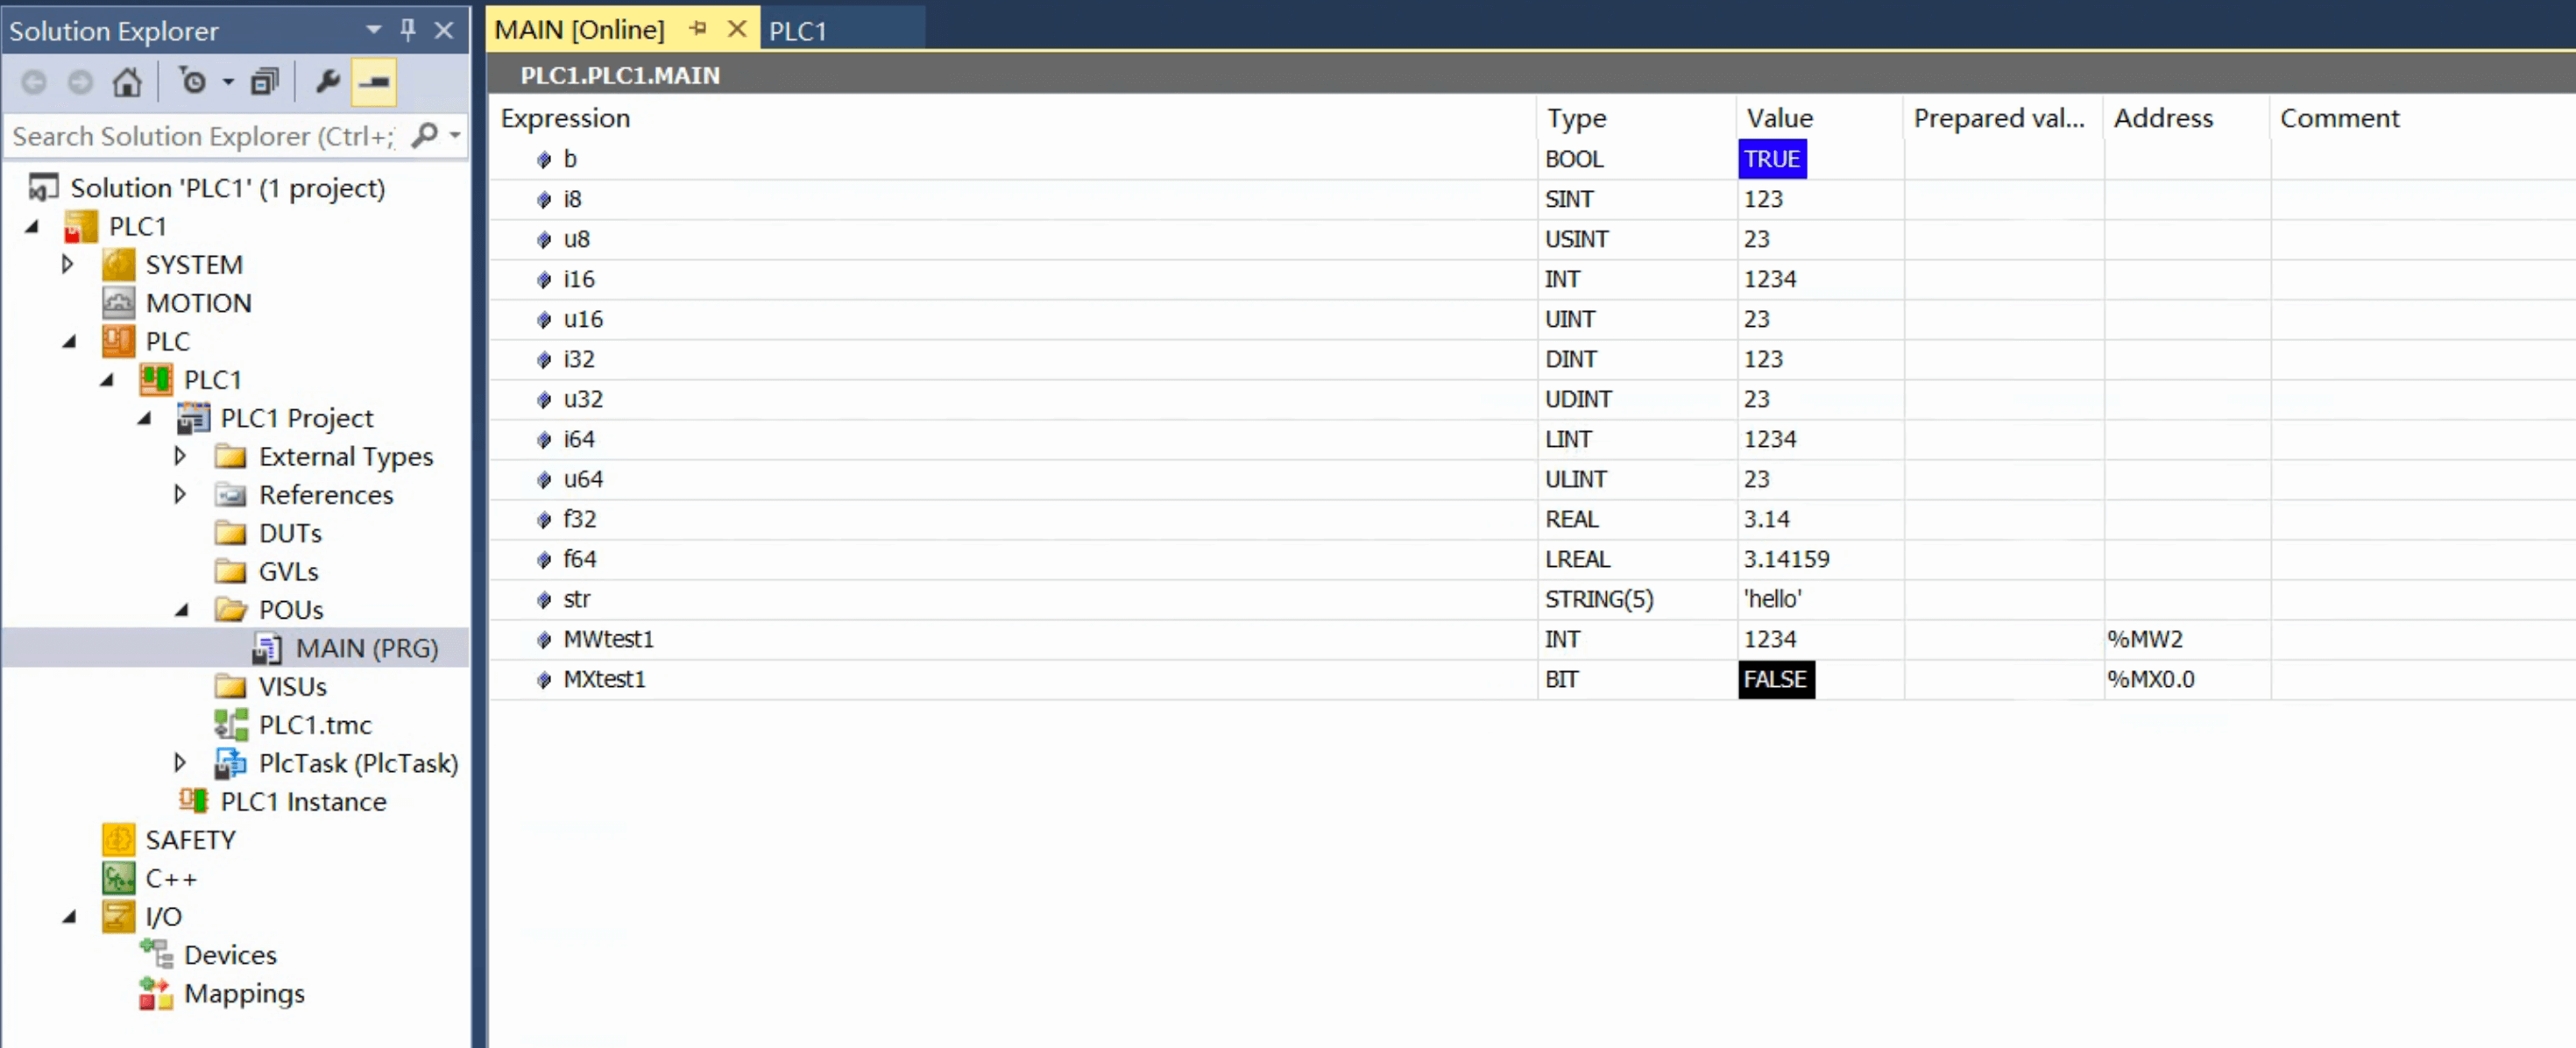
Once the TwinCAT PLC is in running mode, we could see the variable values in the interface.
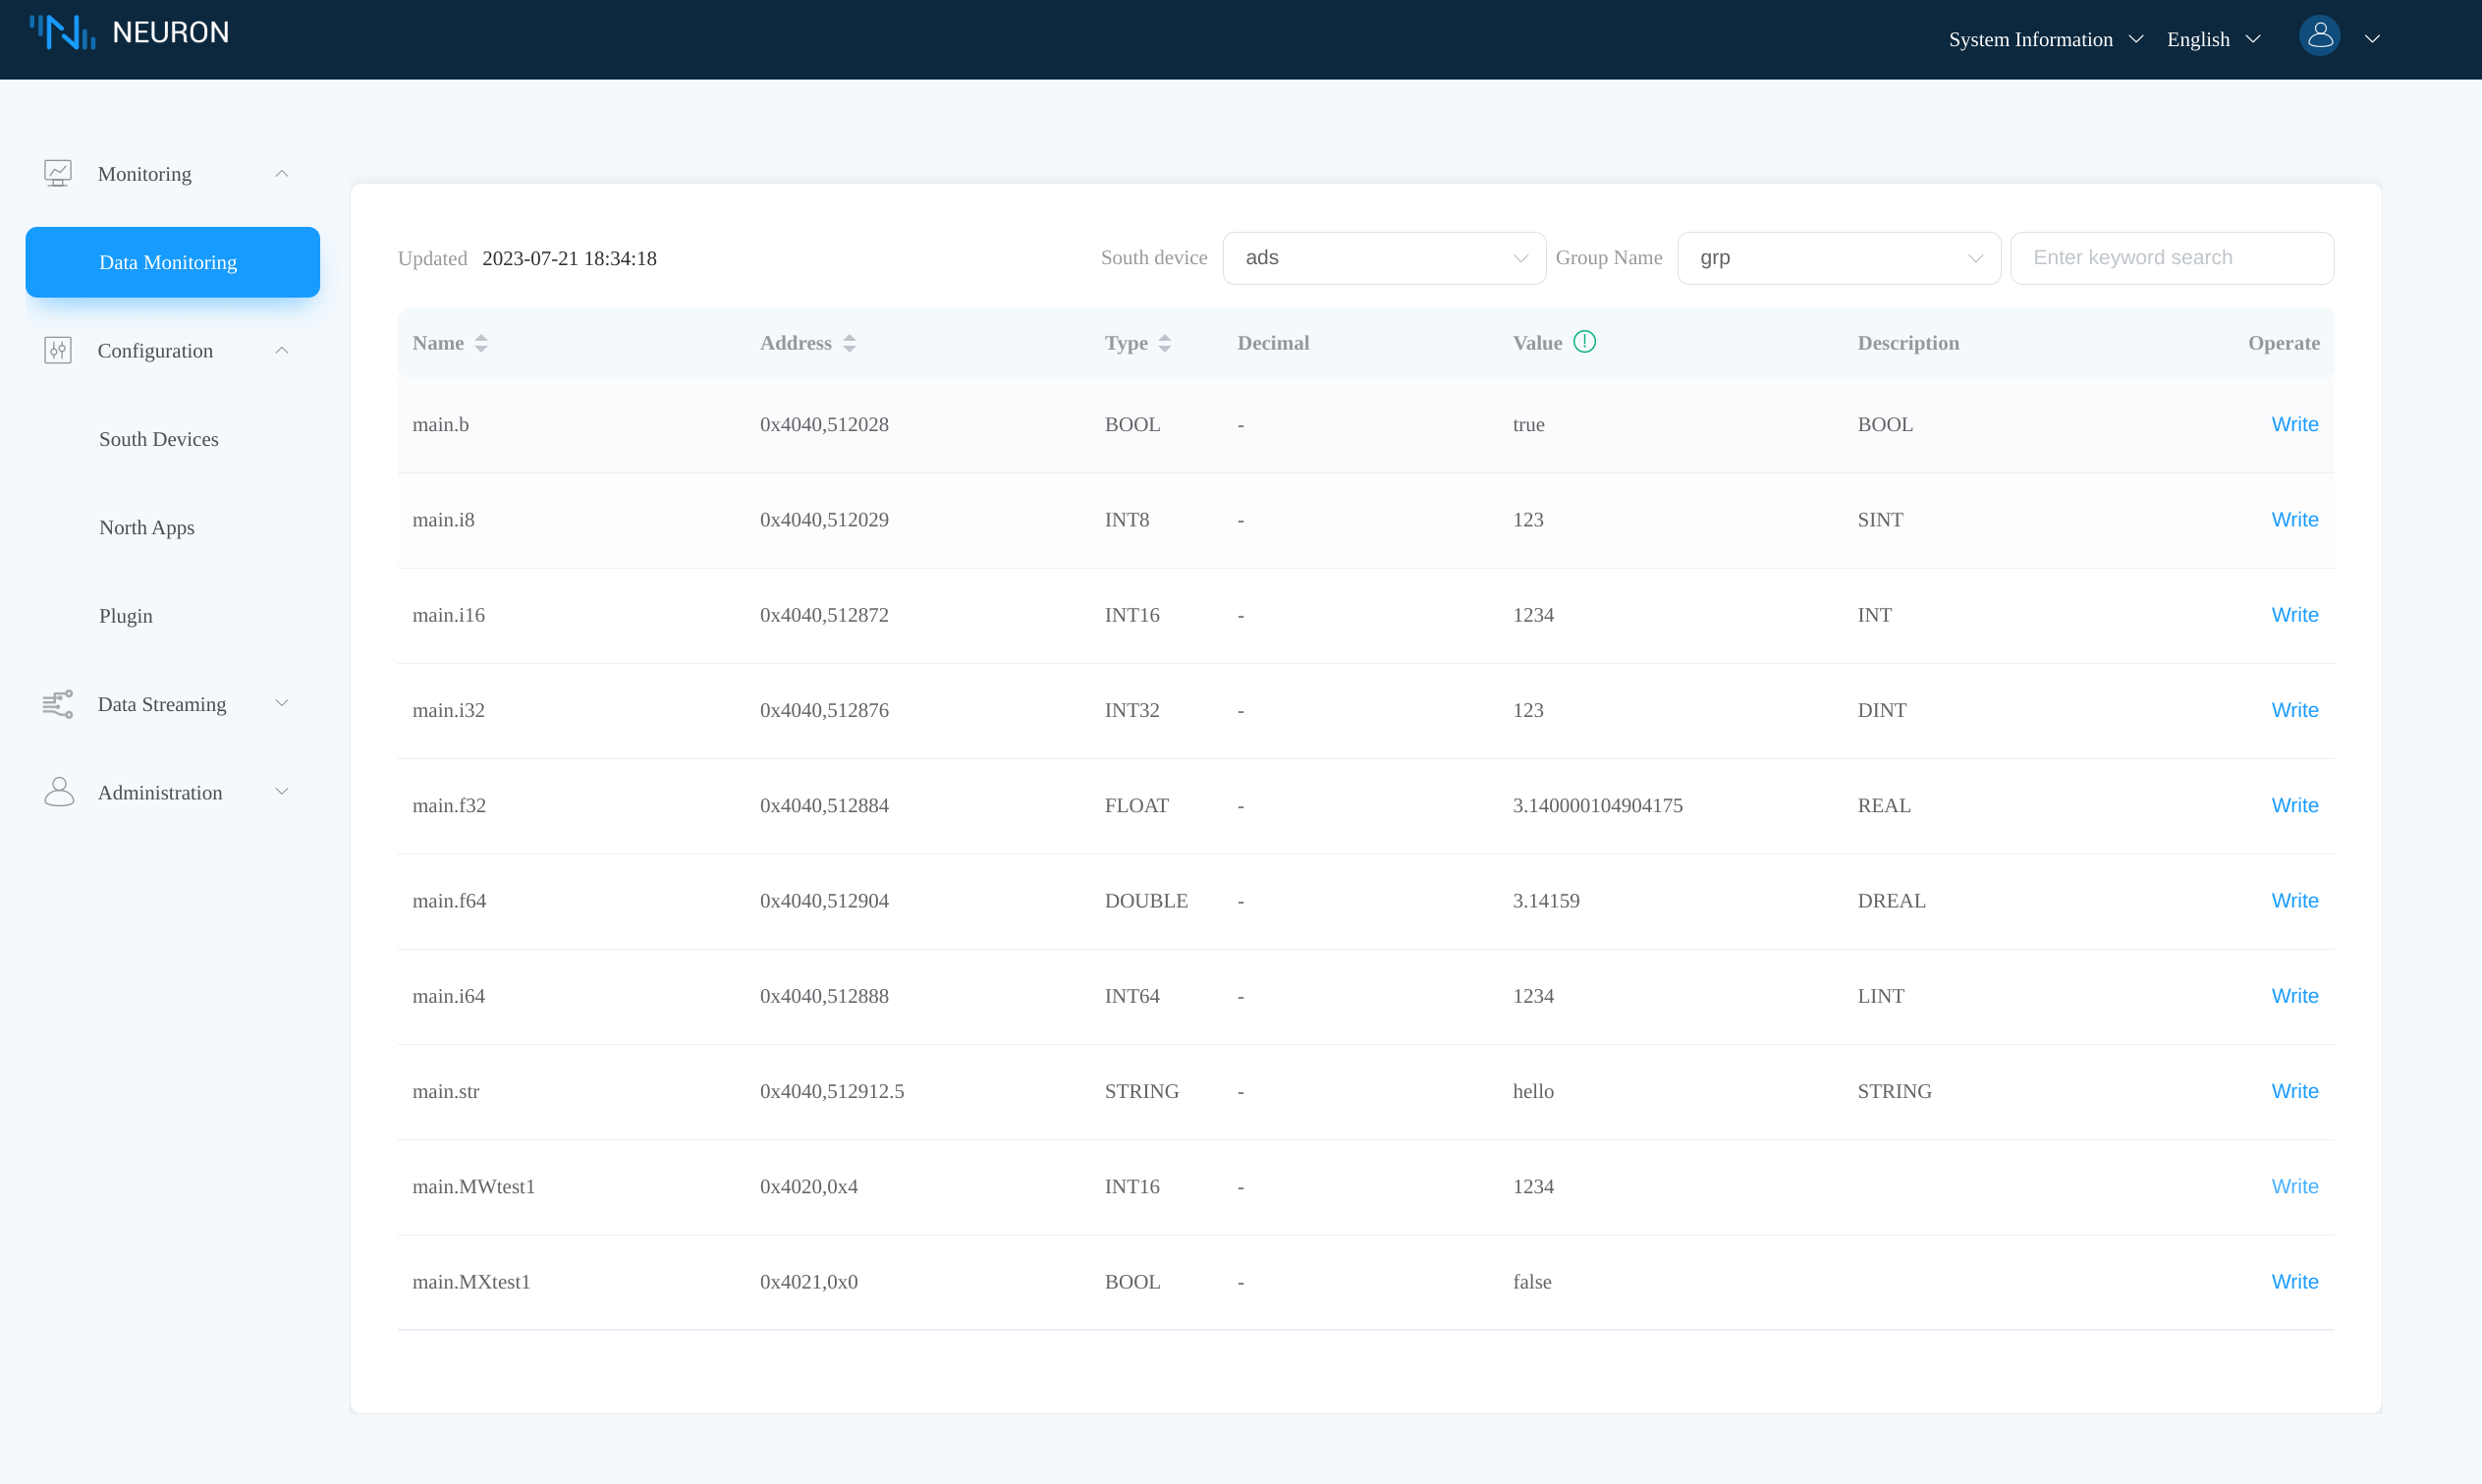
In the EMQX Neuron dashboard, click Monitoring -> Data Monitoring, check whether the tag values are read correctly.
Write Tags
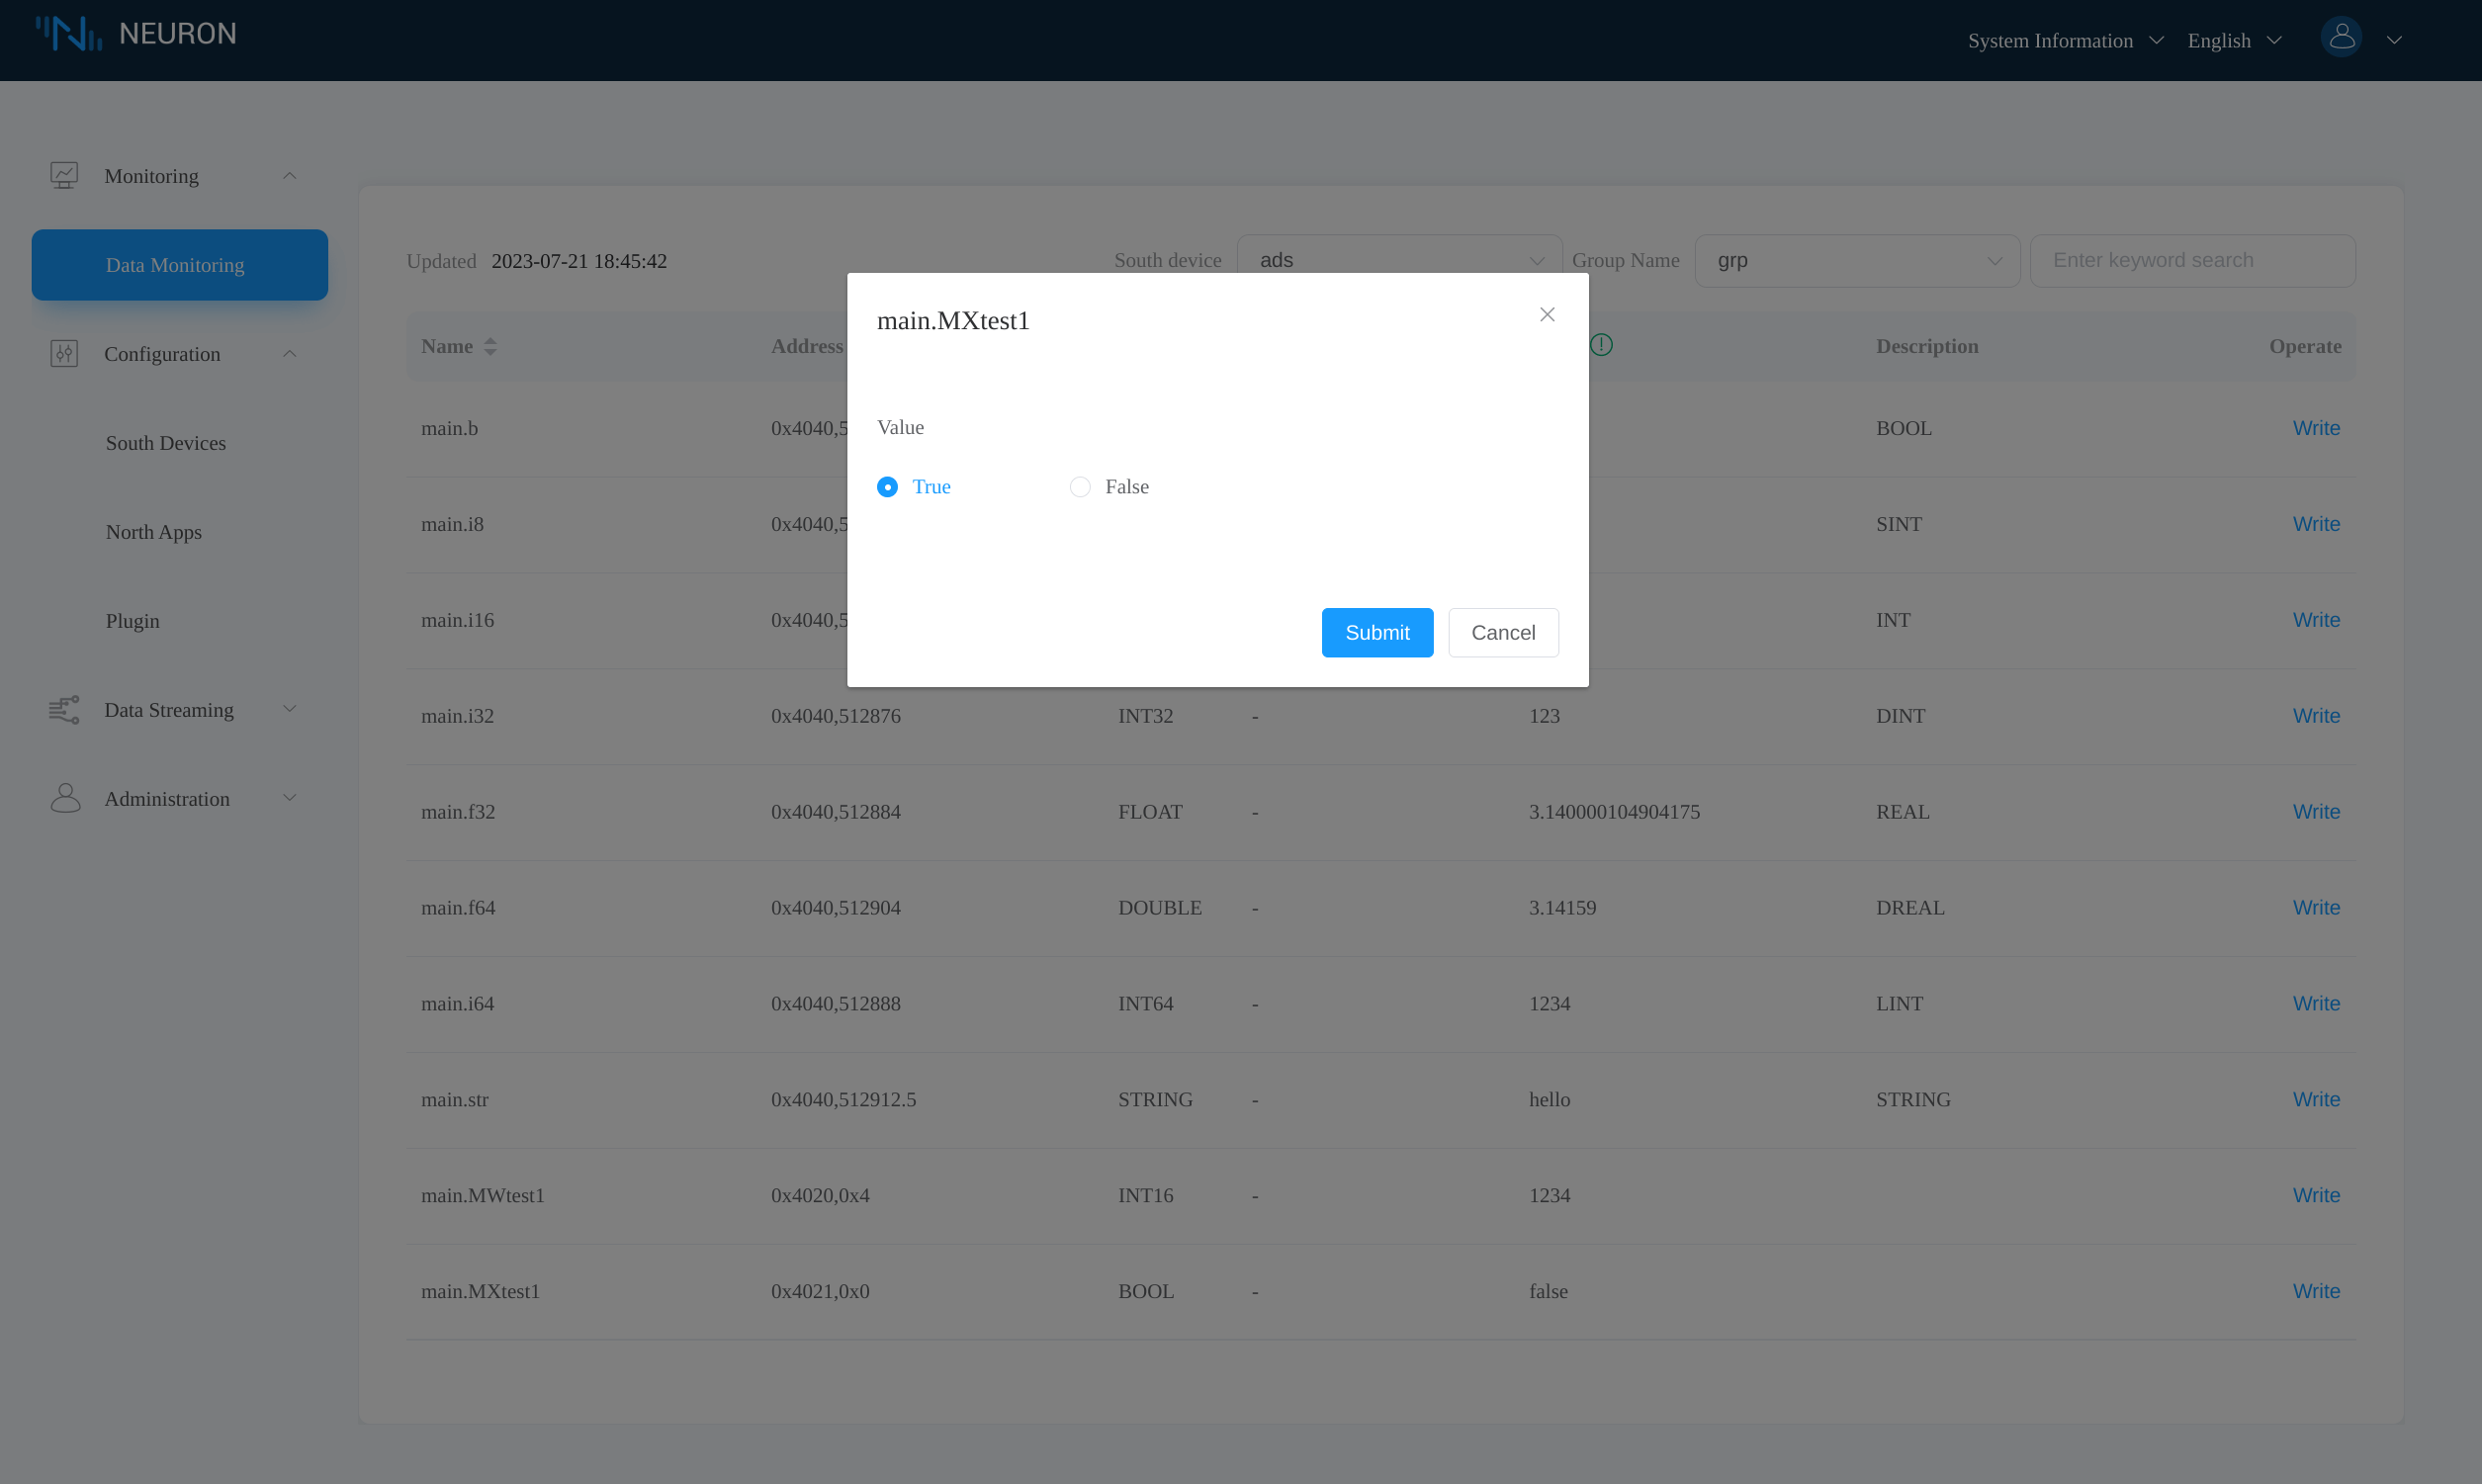
In the EMQX Neuron Data Monitoring tab, click Write on the main.MXtest1 tag to write a true value.
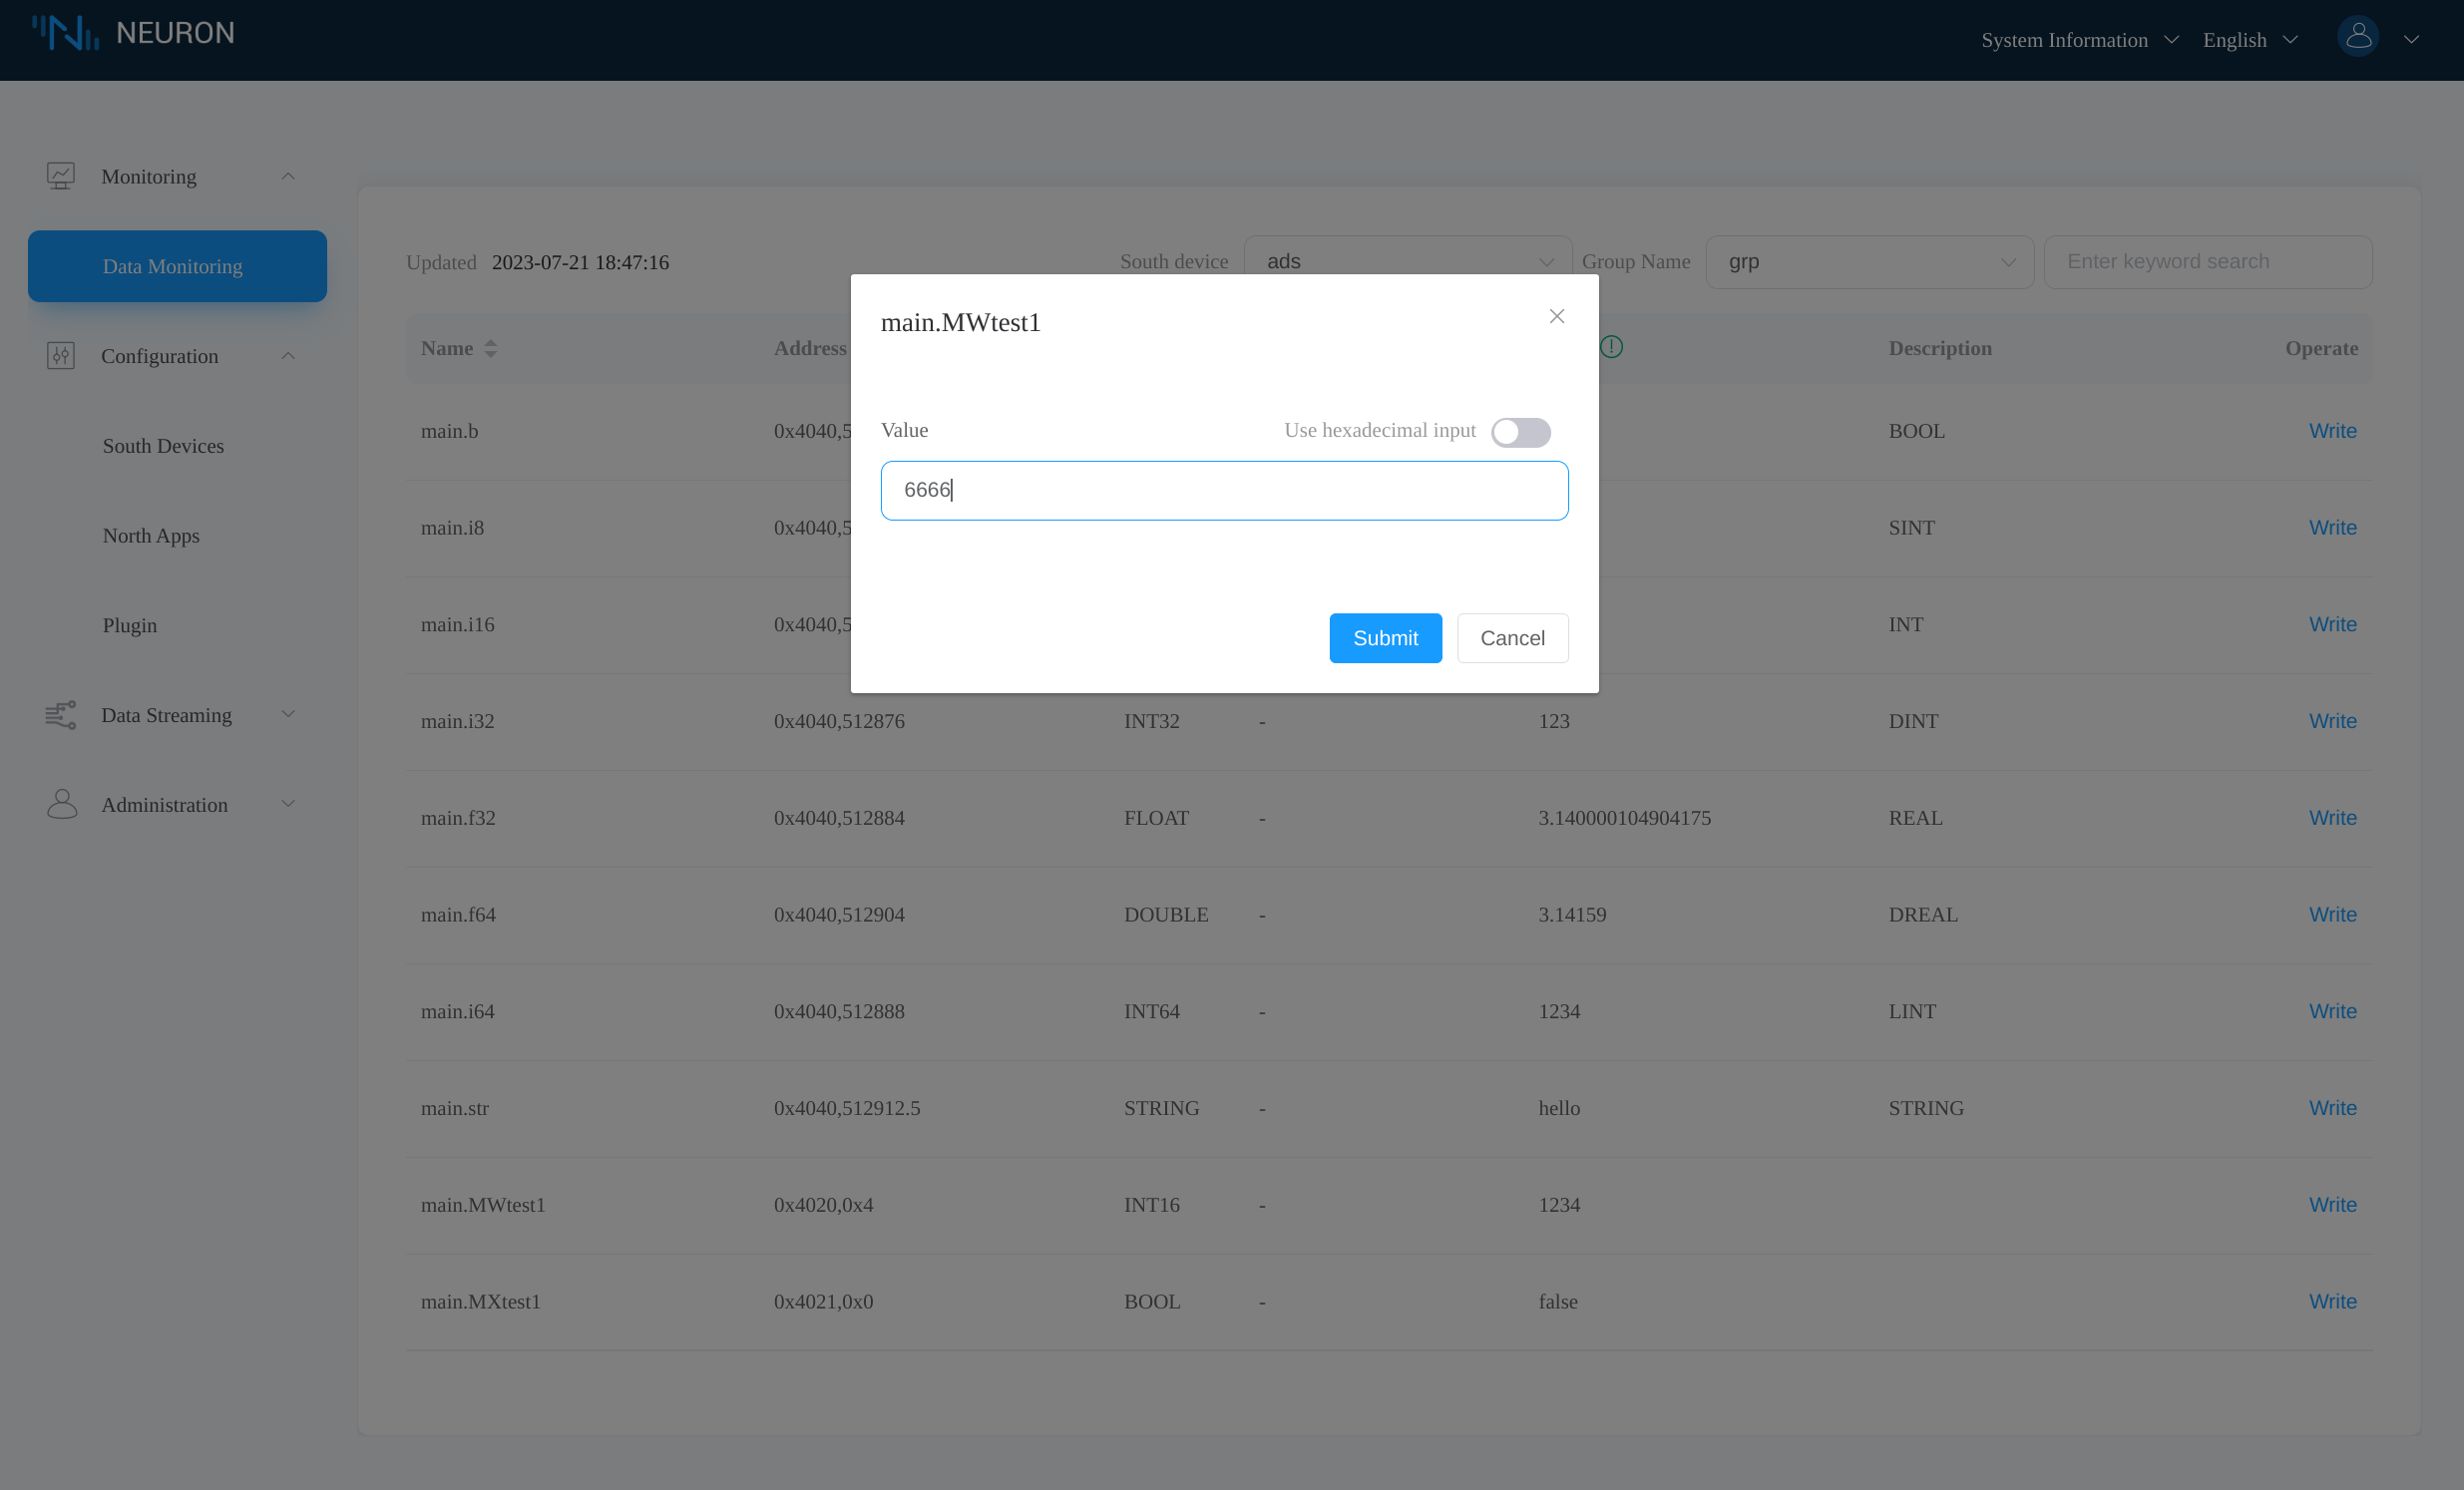
Click Write on the main.MWtest1 tag to write the value 6666.
After a successful write, we could see that variable values do update in TwinCAT.