rule
All calculation logic is handled through Rules in NeuronEX. The rules take the data source as input, define the calculation logic through SQL, and output the results to Sink (Action). Once a rule definition is submitted, it will continue to run. It will continuously obtain data from the source, perform calculations based on SQL logic, and trigger Sink (Action) in real time based on the results.
NeuronEX supports running multiple rules simultaneously. These rules run in the same memory space and share the same hardware resources. Multiple parallel rules are separated at run time, and an error in one rule will not affect other rules.
TIP
NeuronEX rules that at least one data source in SQL should be of type Stream. For information on how to create a stream, please refer to Stream.
Create rules
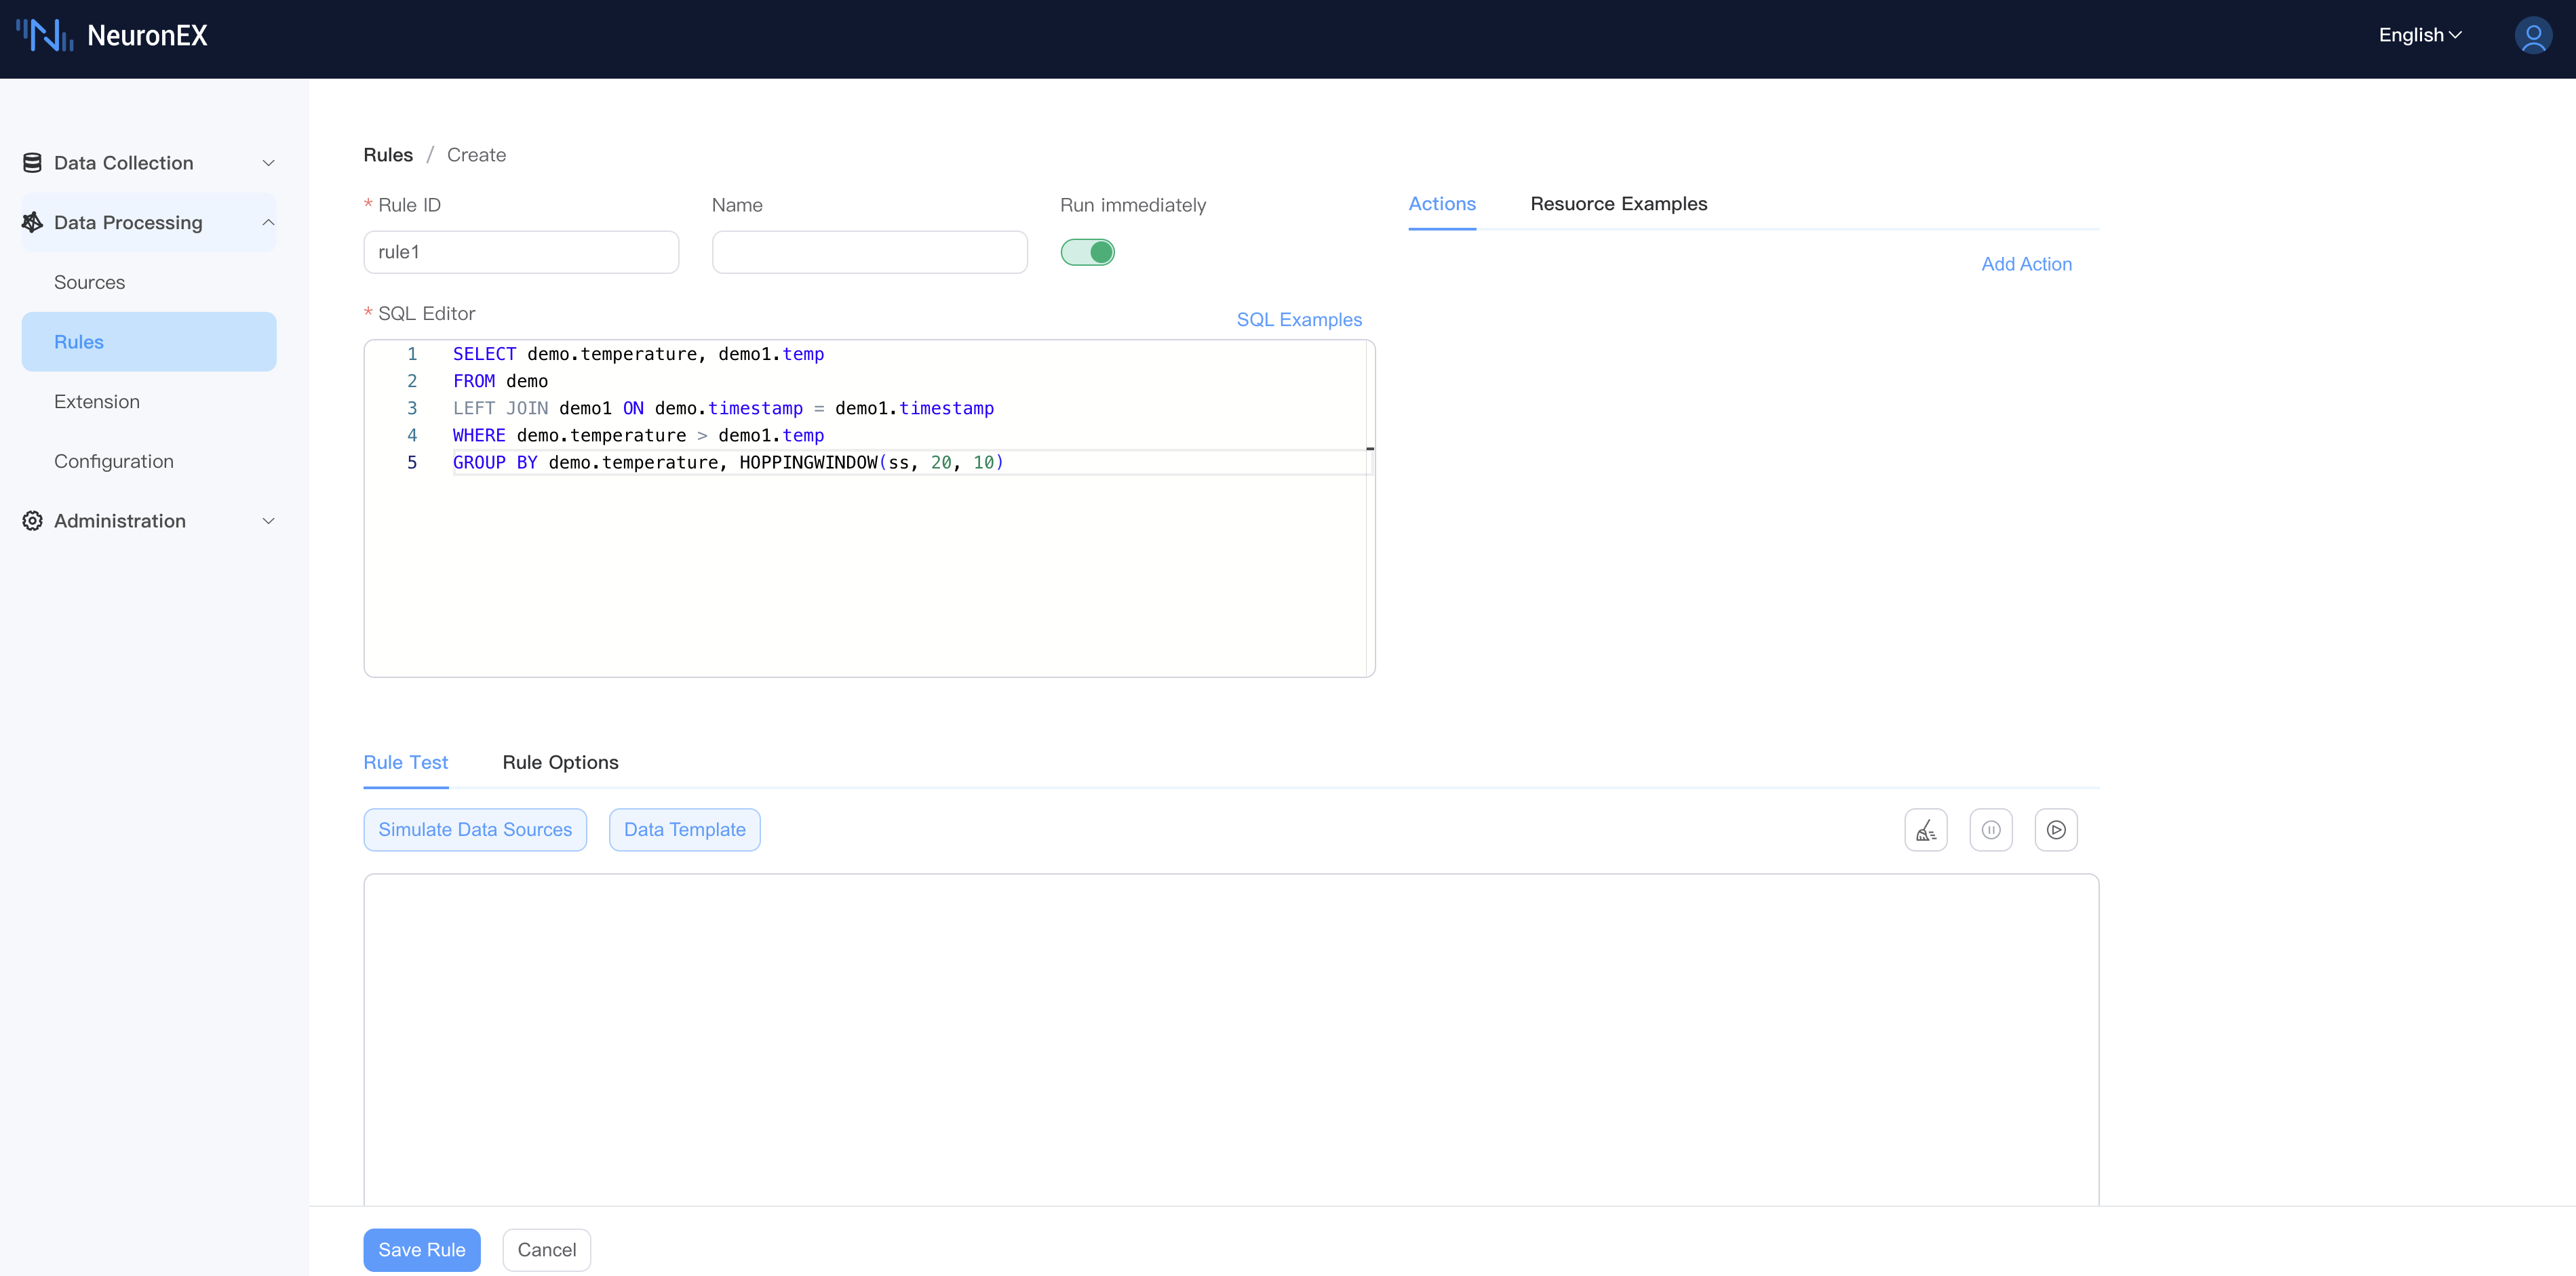
In the NeuronEX dashboard, click Data Processing -> Rules. Click the Create Rule button:
Rule ID: Enter the rule ID, which must be unique within the same NeuronEX instance.
Name: Enter the rule name
Enable:Run the rule immediately after creating it
Enter rule SQL,for example:
sqlSELECT demo.temperature, demo1.temp FROM demo LEFT JOIN demo1 ON demo.timestamp = demo1.timestamp WHERE demo.temperature > demo1.temp GROUP BY demo.temperature, HOPPINGWINDOW(ss, 20, 10)
Rules SQL
Rules sql define the streams or tables to be processed and how to process them. The rule SQL is and sends the processing results to one or more actions (Sink). You can use built-in functions and operators in rules sql, or you can use custom functions and algorithms.
The simplest rule SQL is SELECT * FROM neuronStream. This rule will get all the data from the neuronStream data stream. NeuronEX provides a wealth of operators and functions. For more usage, please see the SQL chapter.
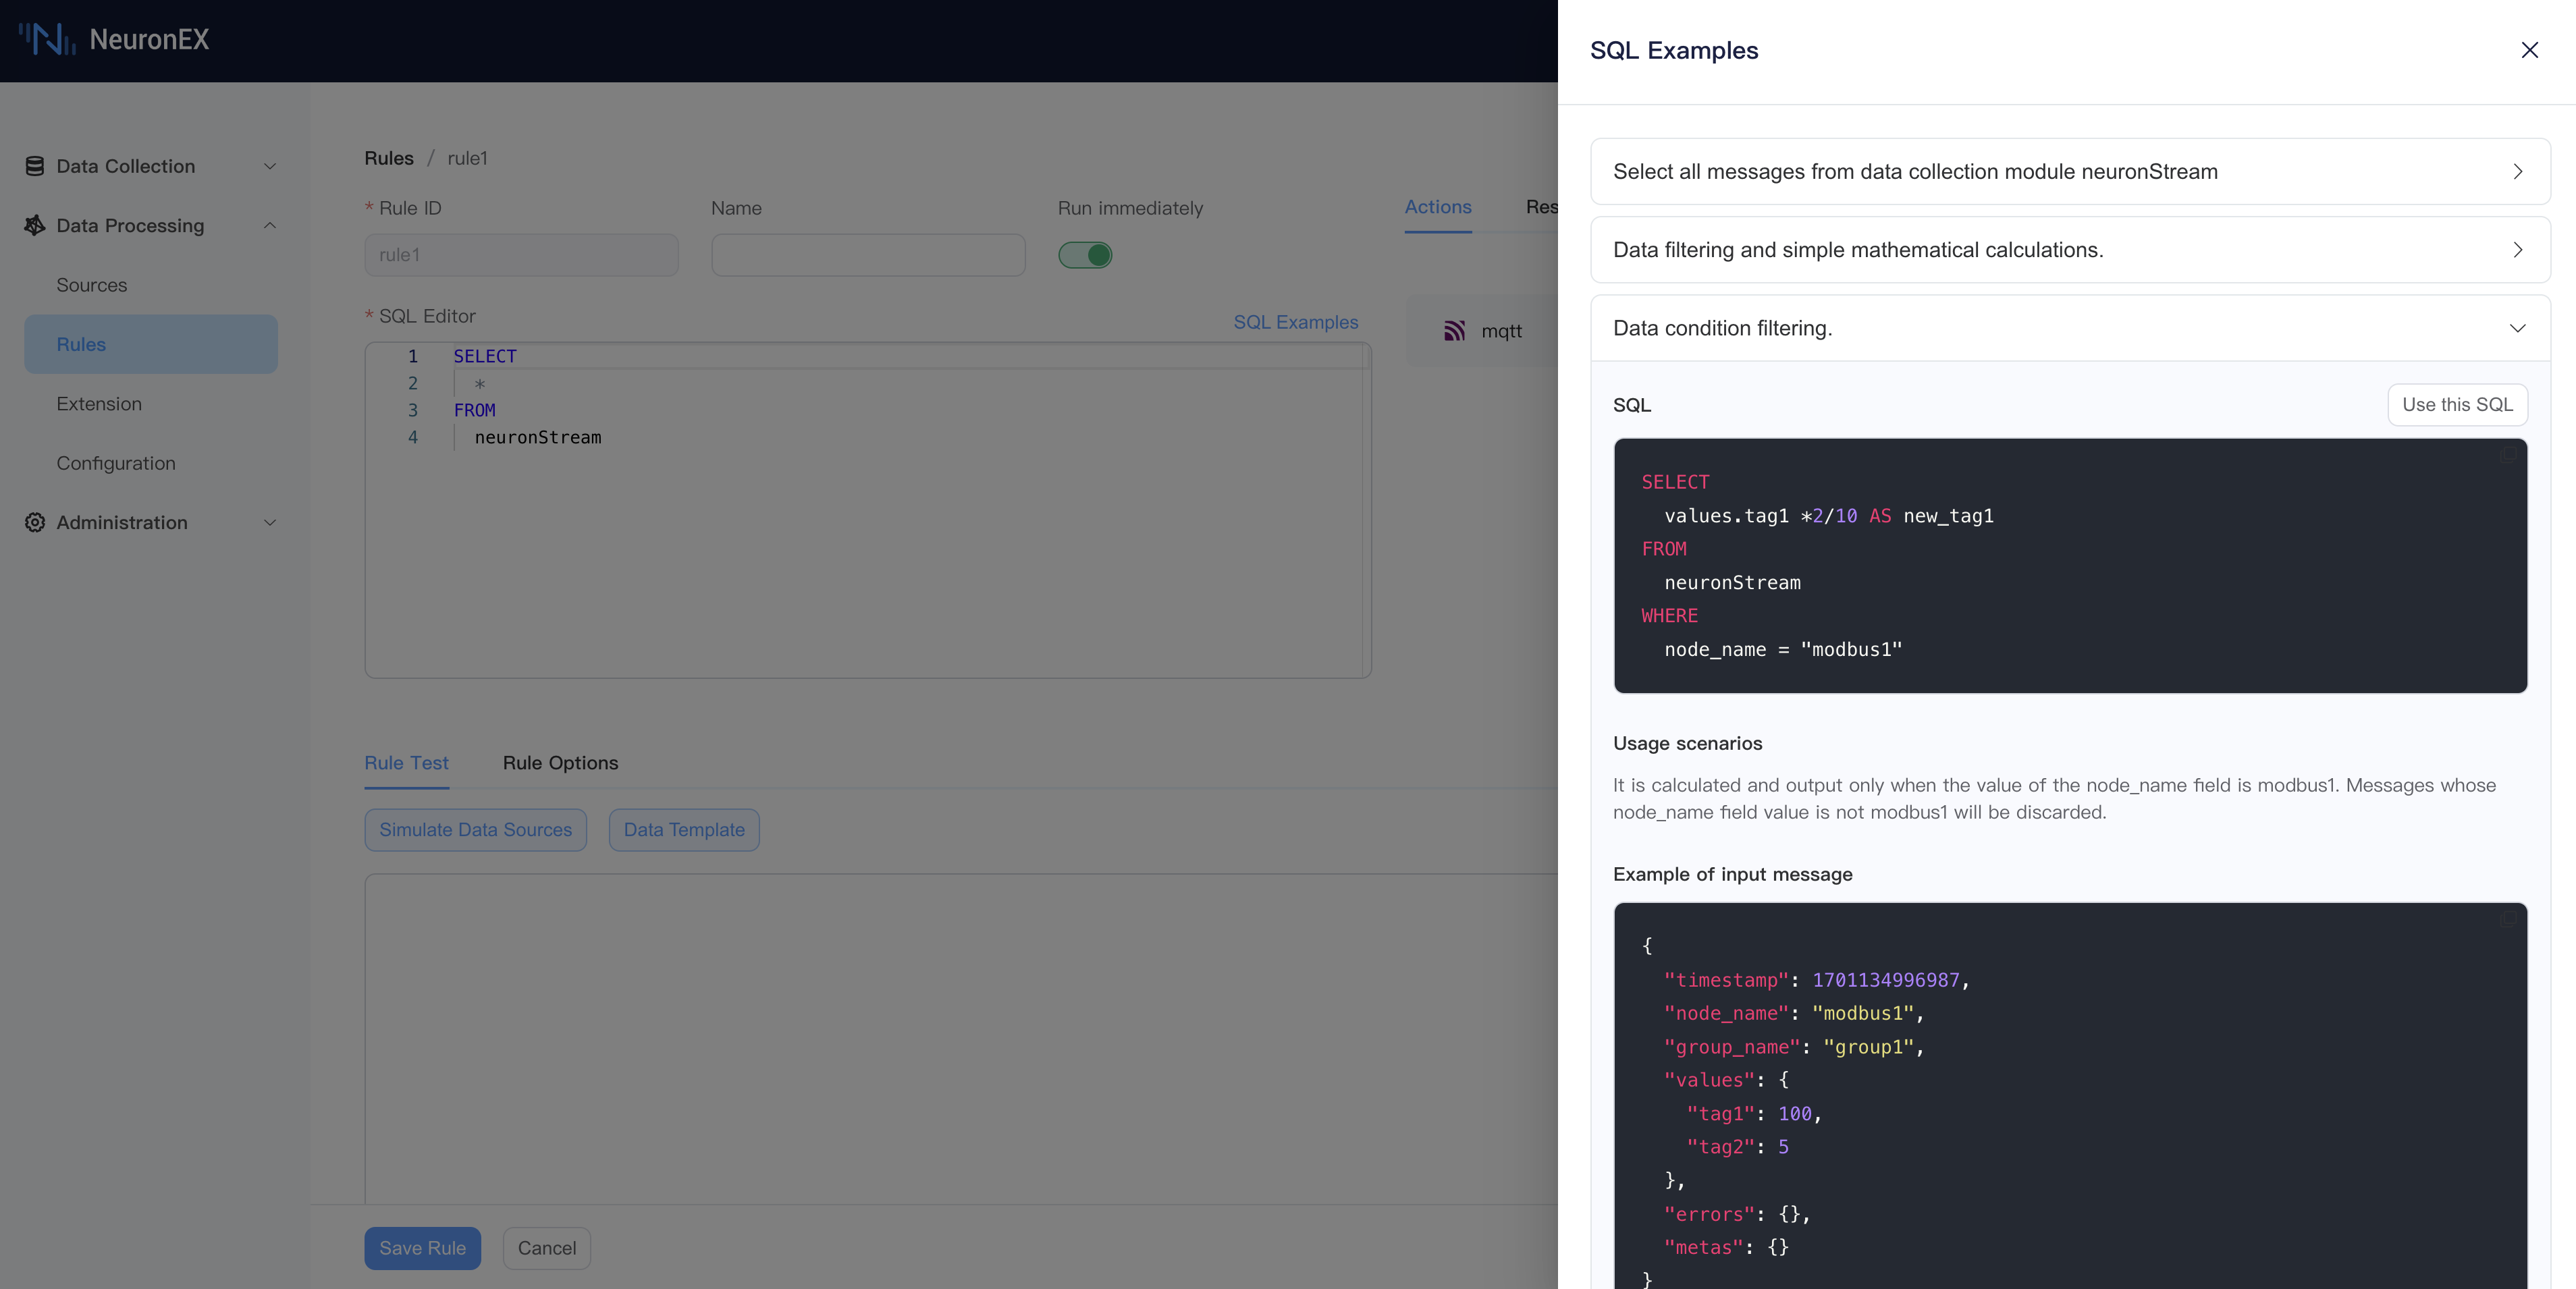
Click the SQL Examples button to view commonly used SQL examples, where you can get SQL statements, application scenarios, input message examples, and processing results.
Add action (Sink)
The action (Sink) part defines the output behavior of a rule. Each rule can have multiple actions.
- In the Actions area, click the Add Action button.
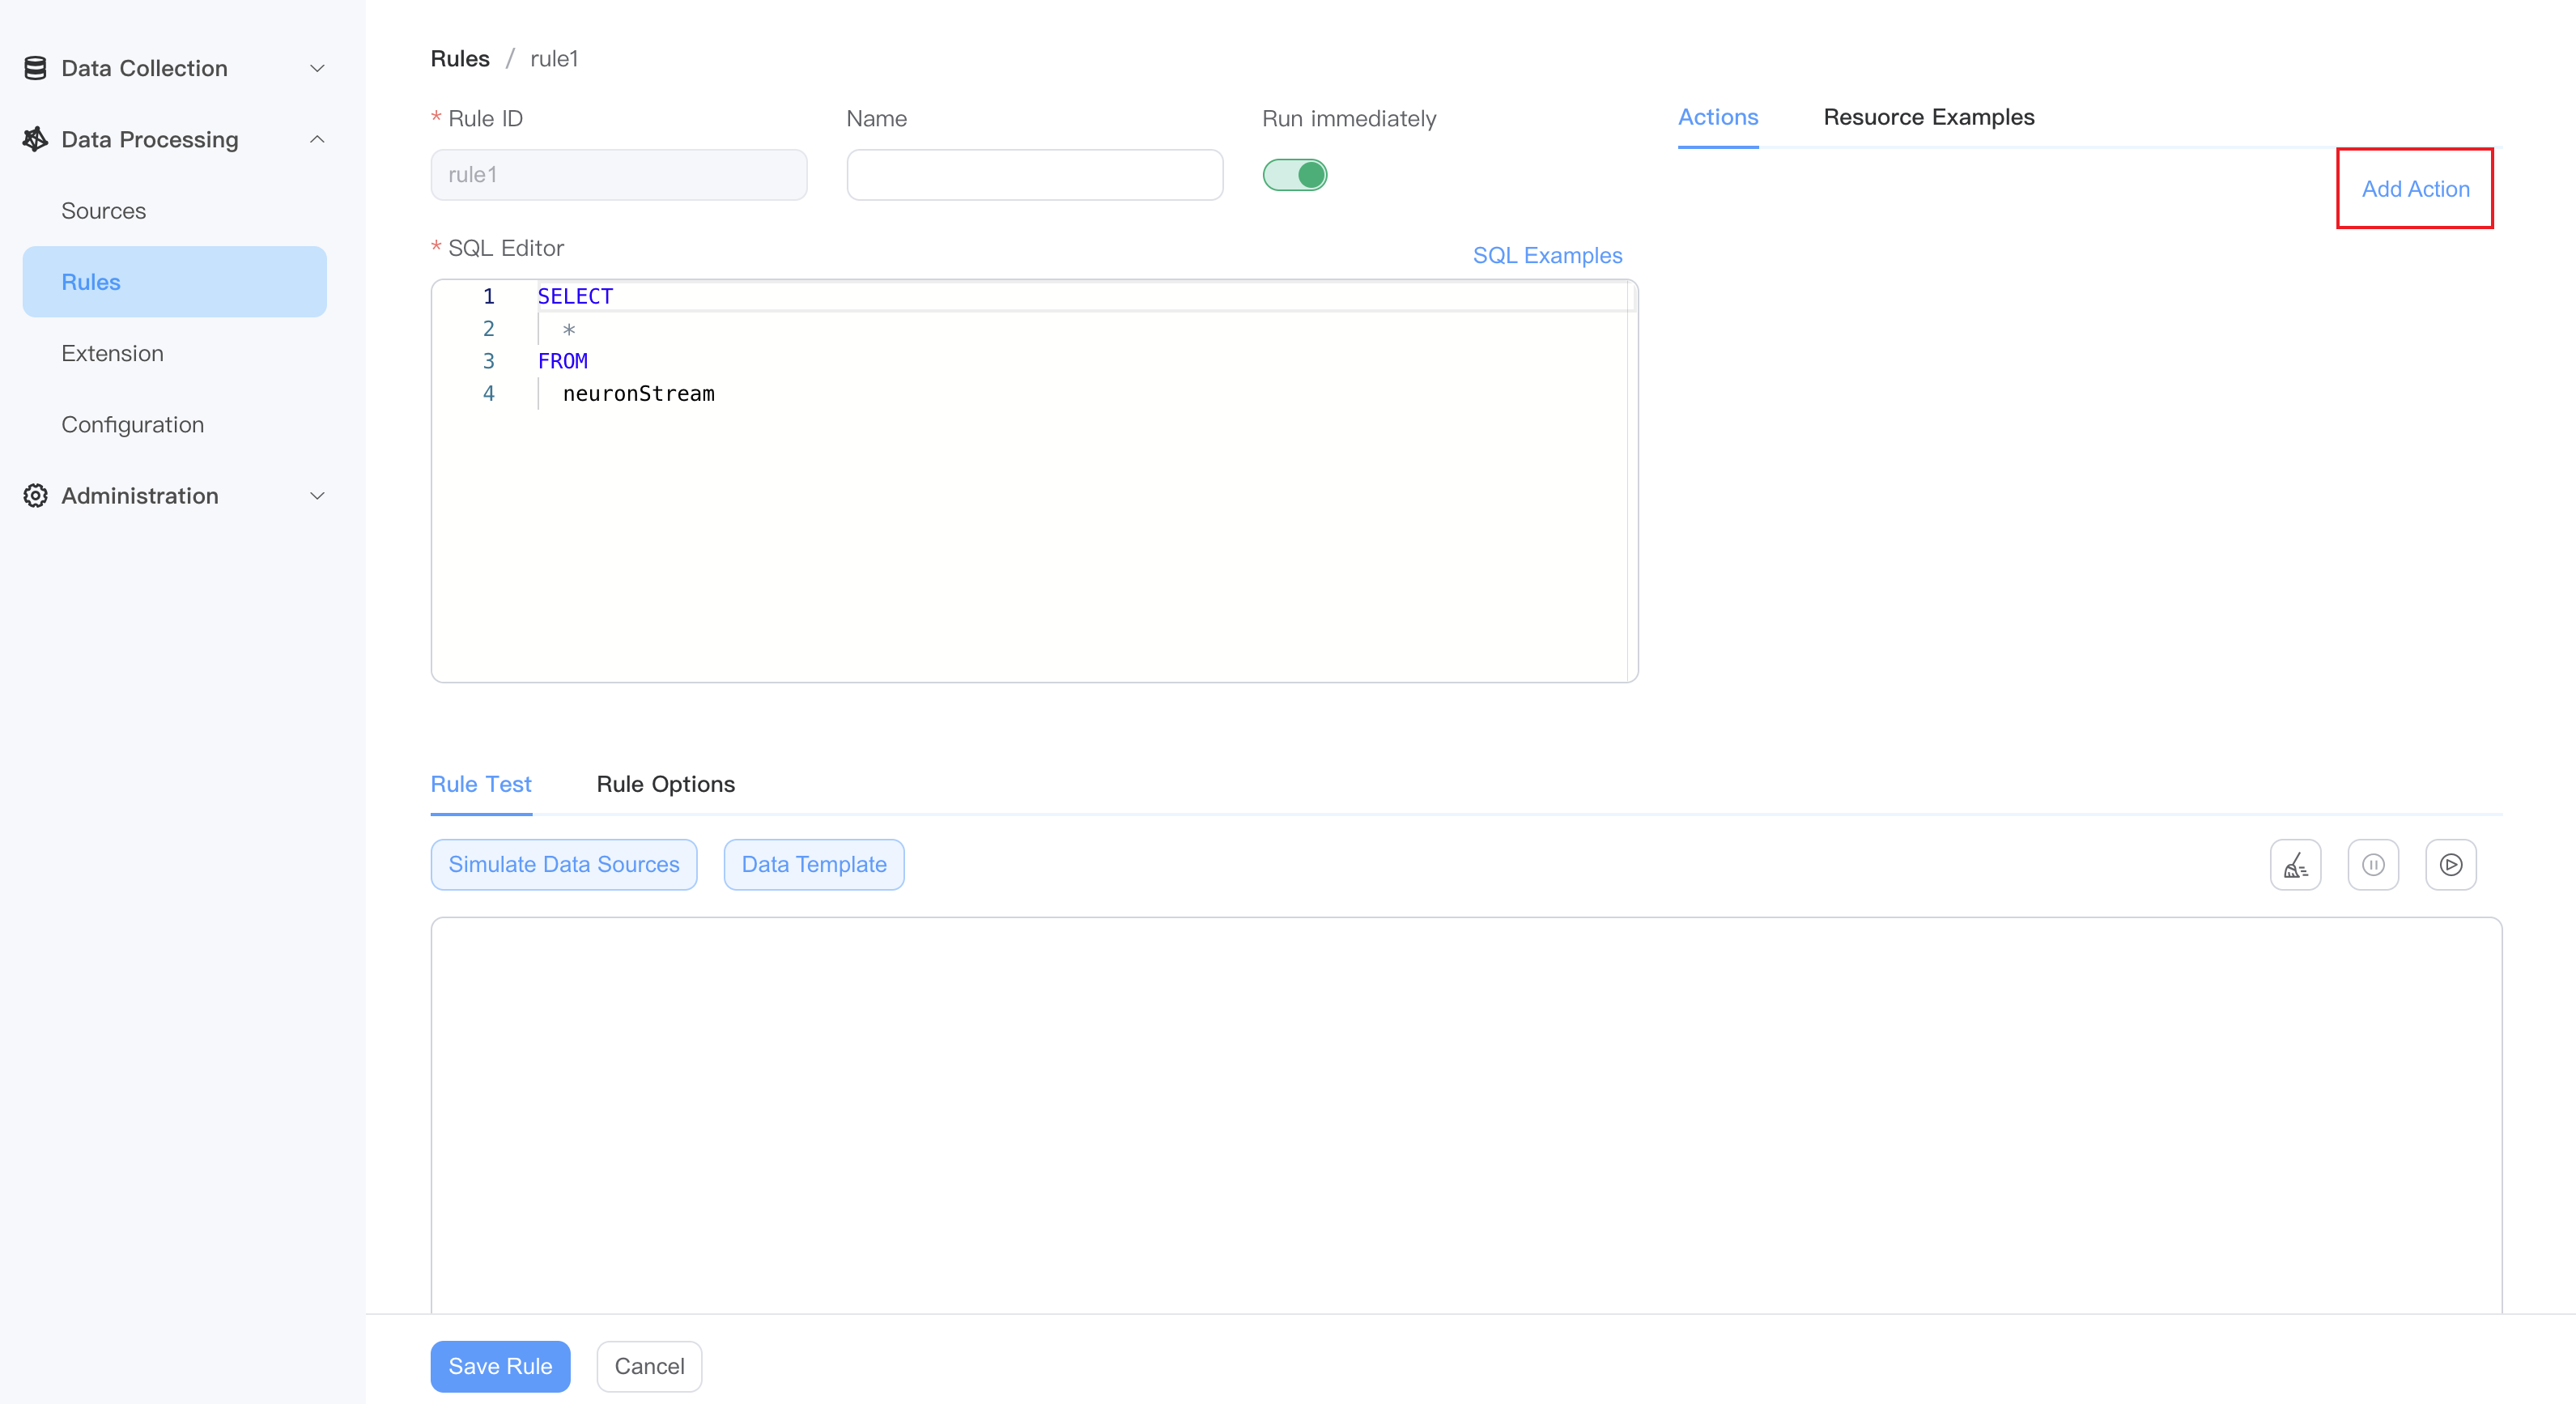
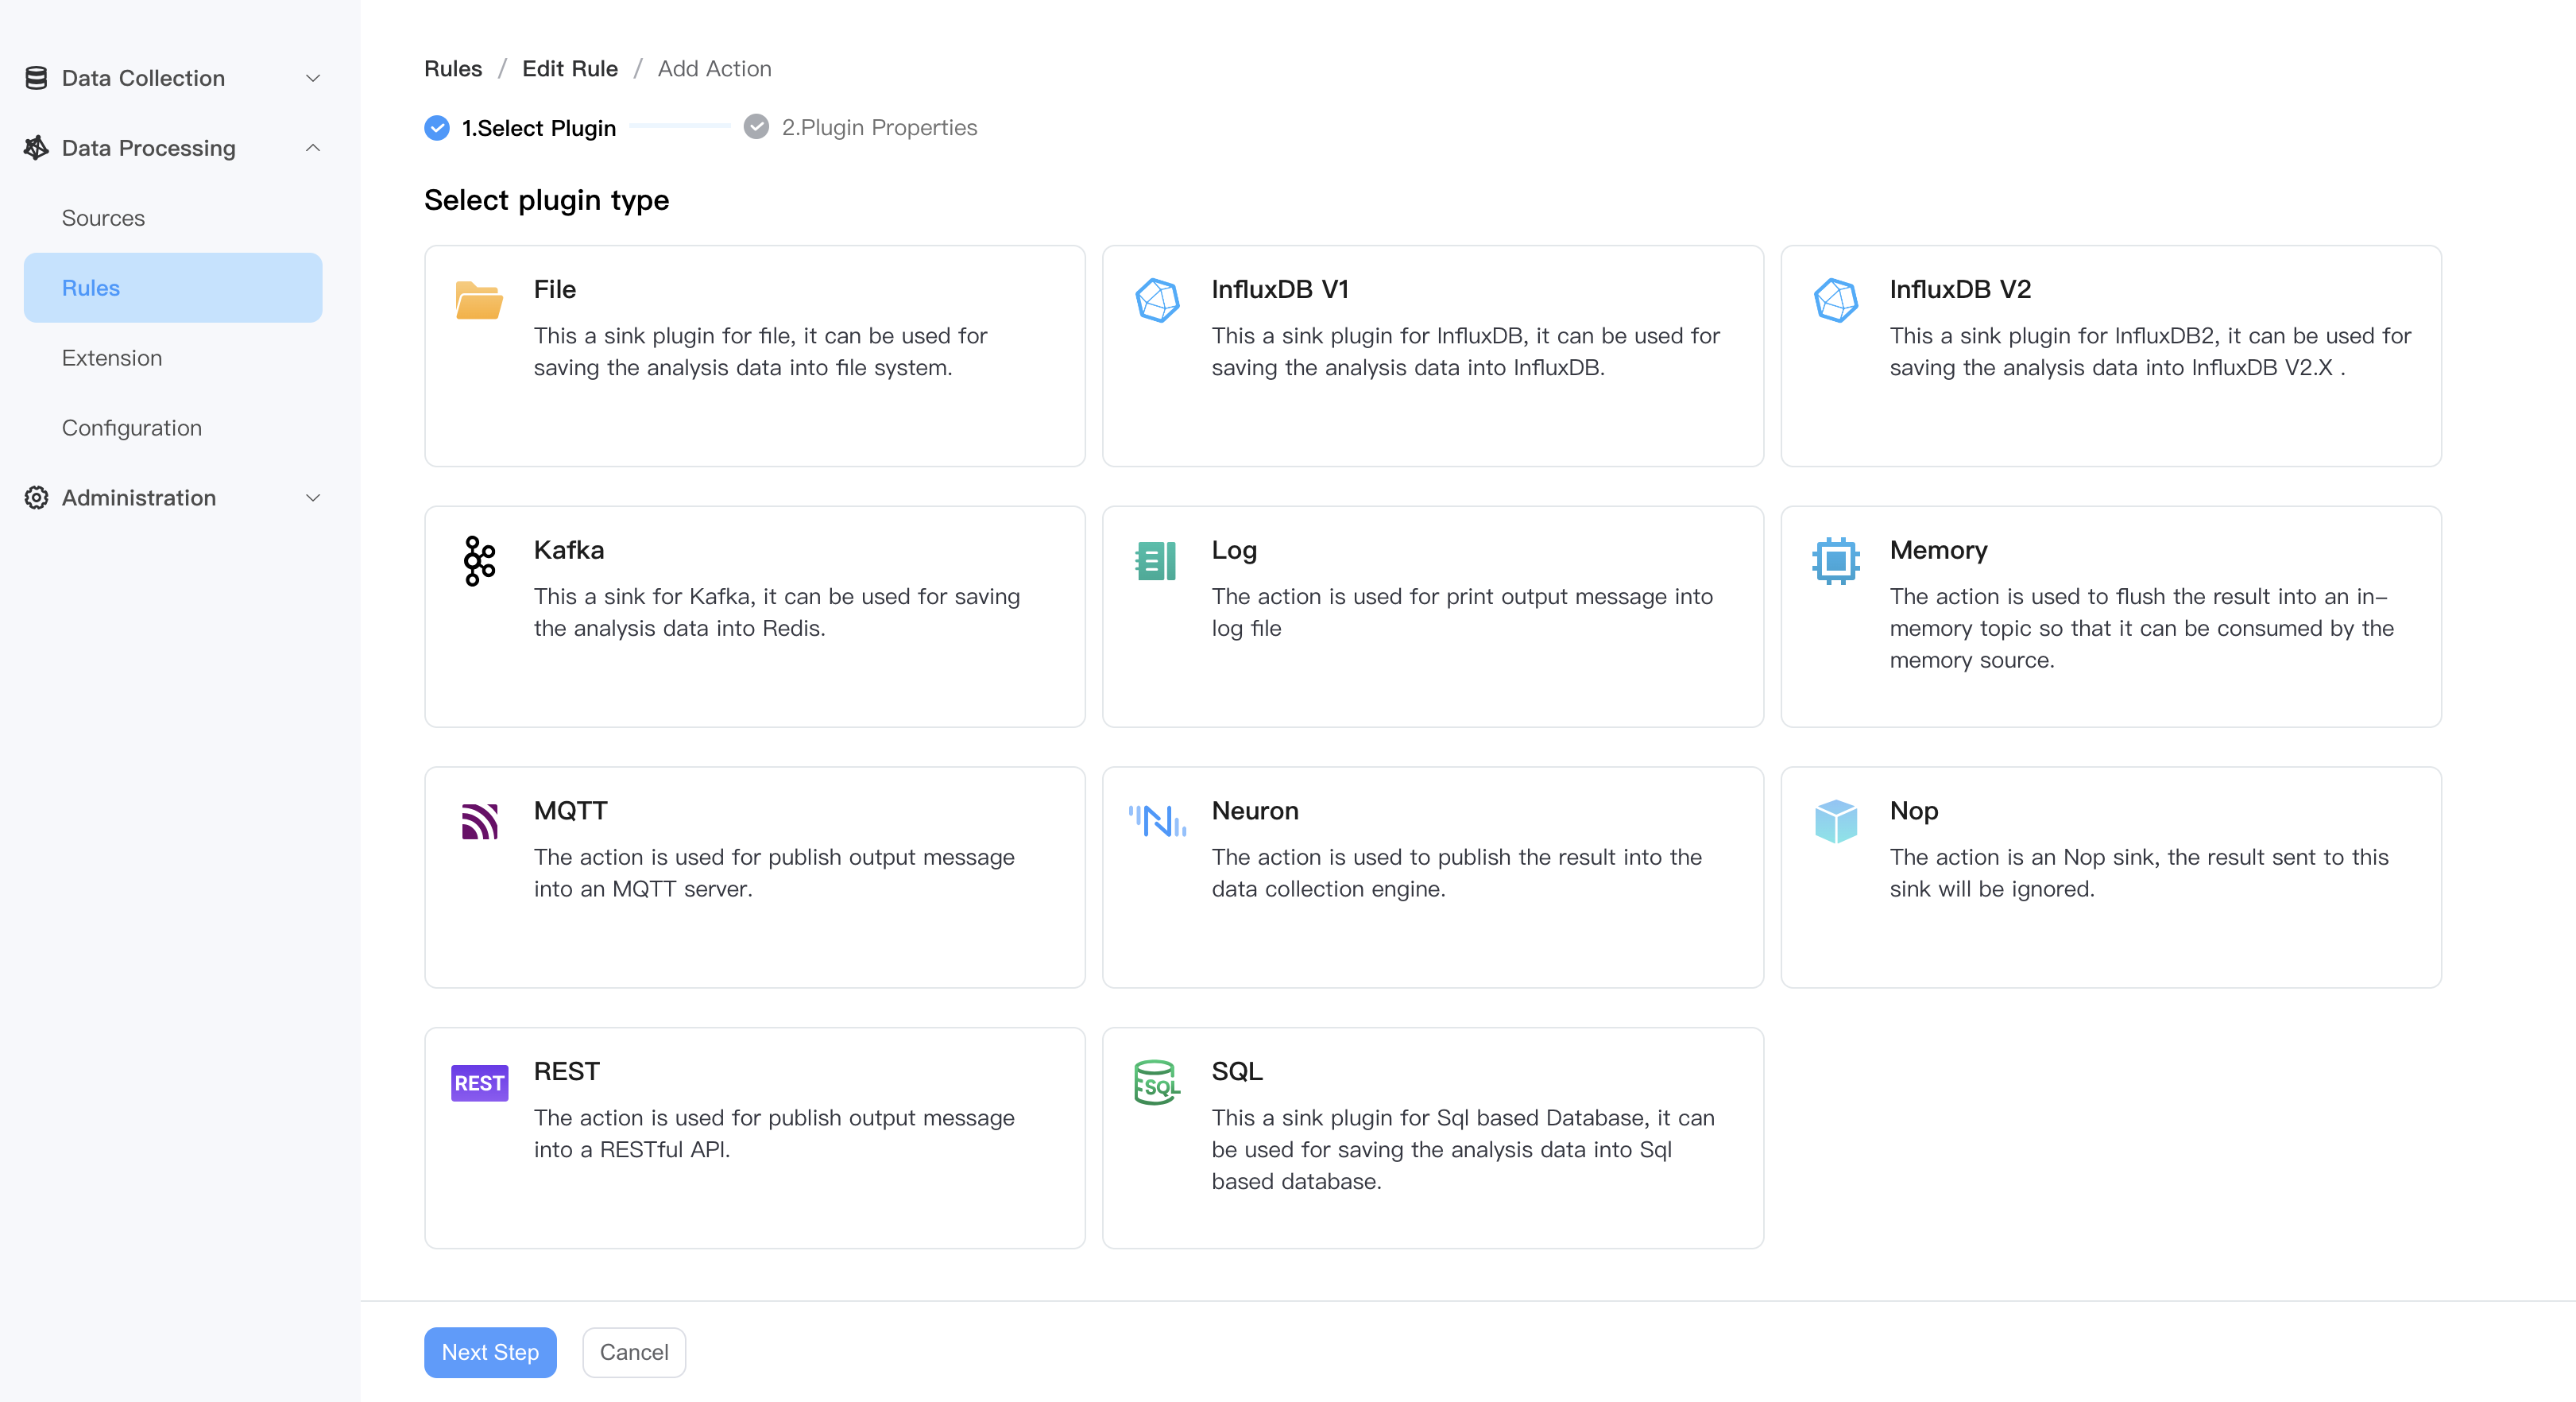
- Select sink plugin type.
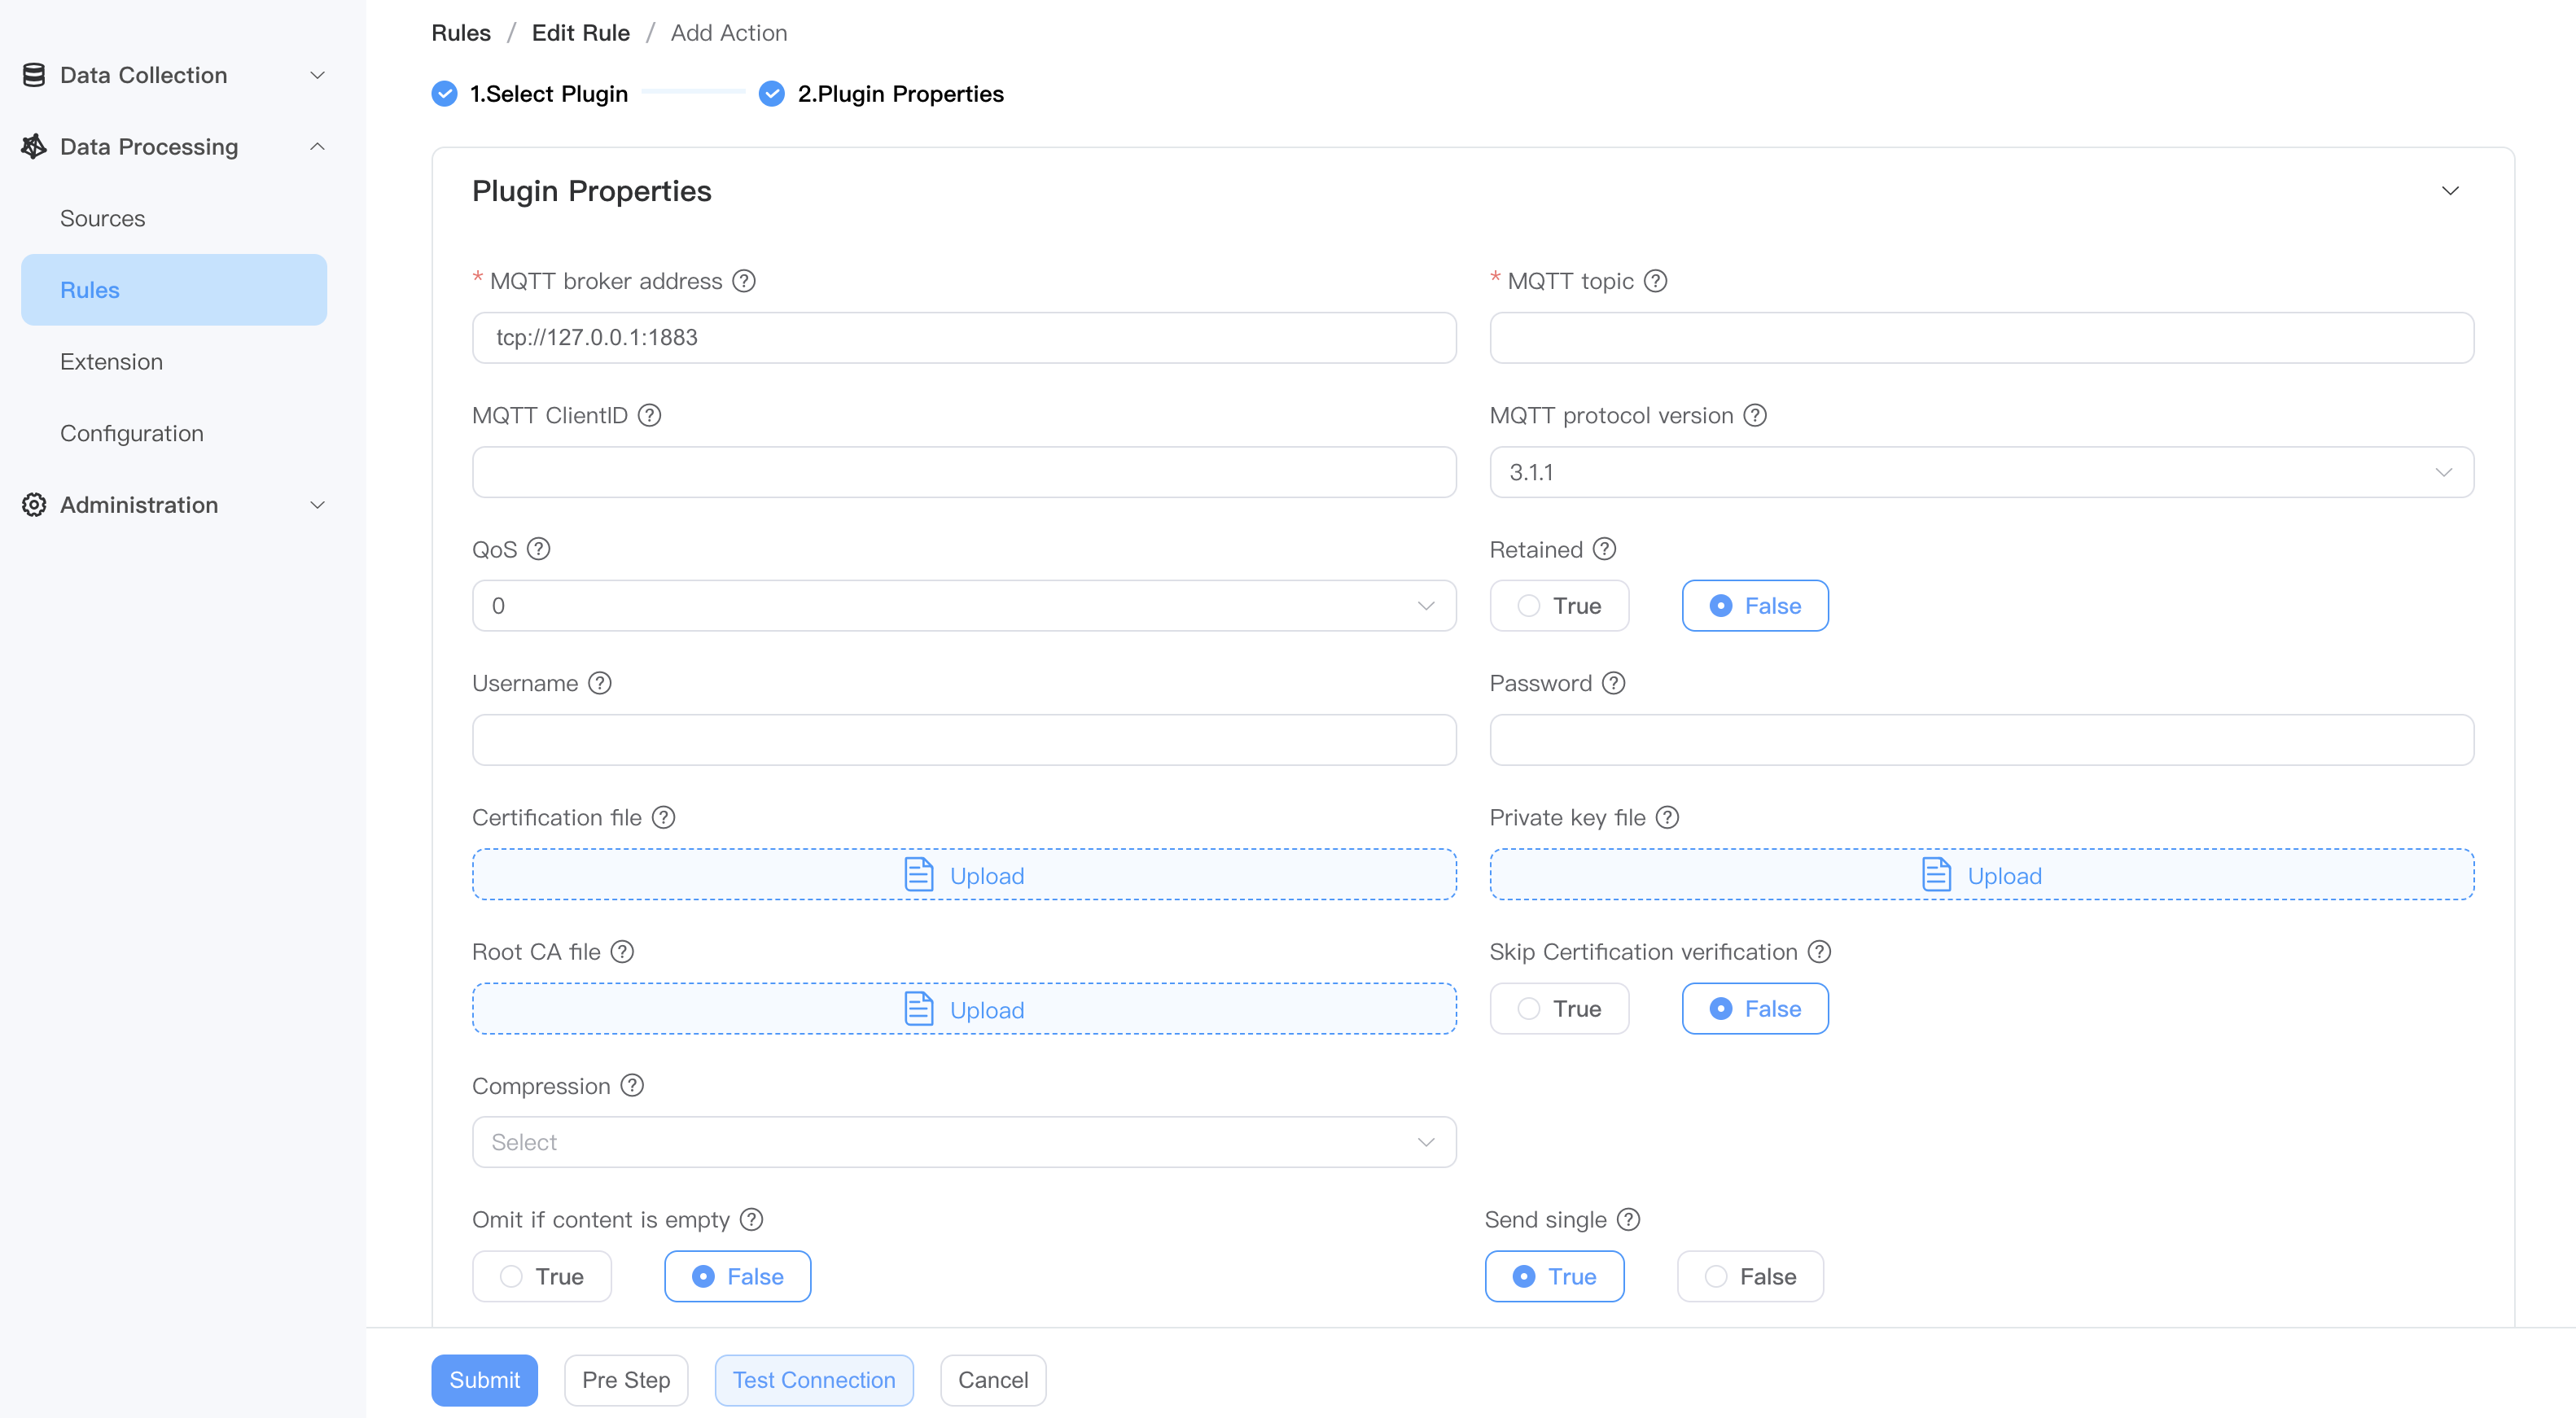
- Fill in the plugin configuration and submit it.
TIP
Sink are used to write data to external systems. You can go to the Action(Sink) page to get detailed configuration information.
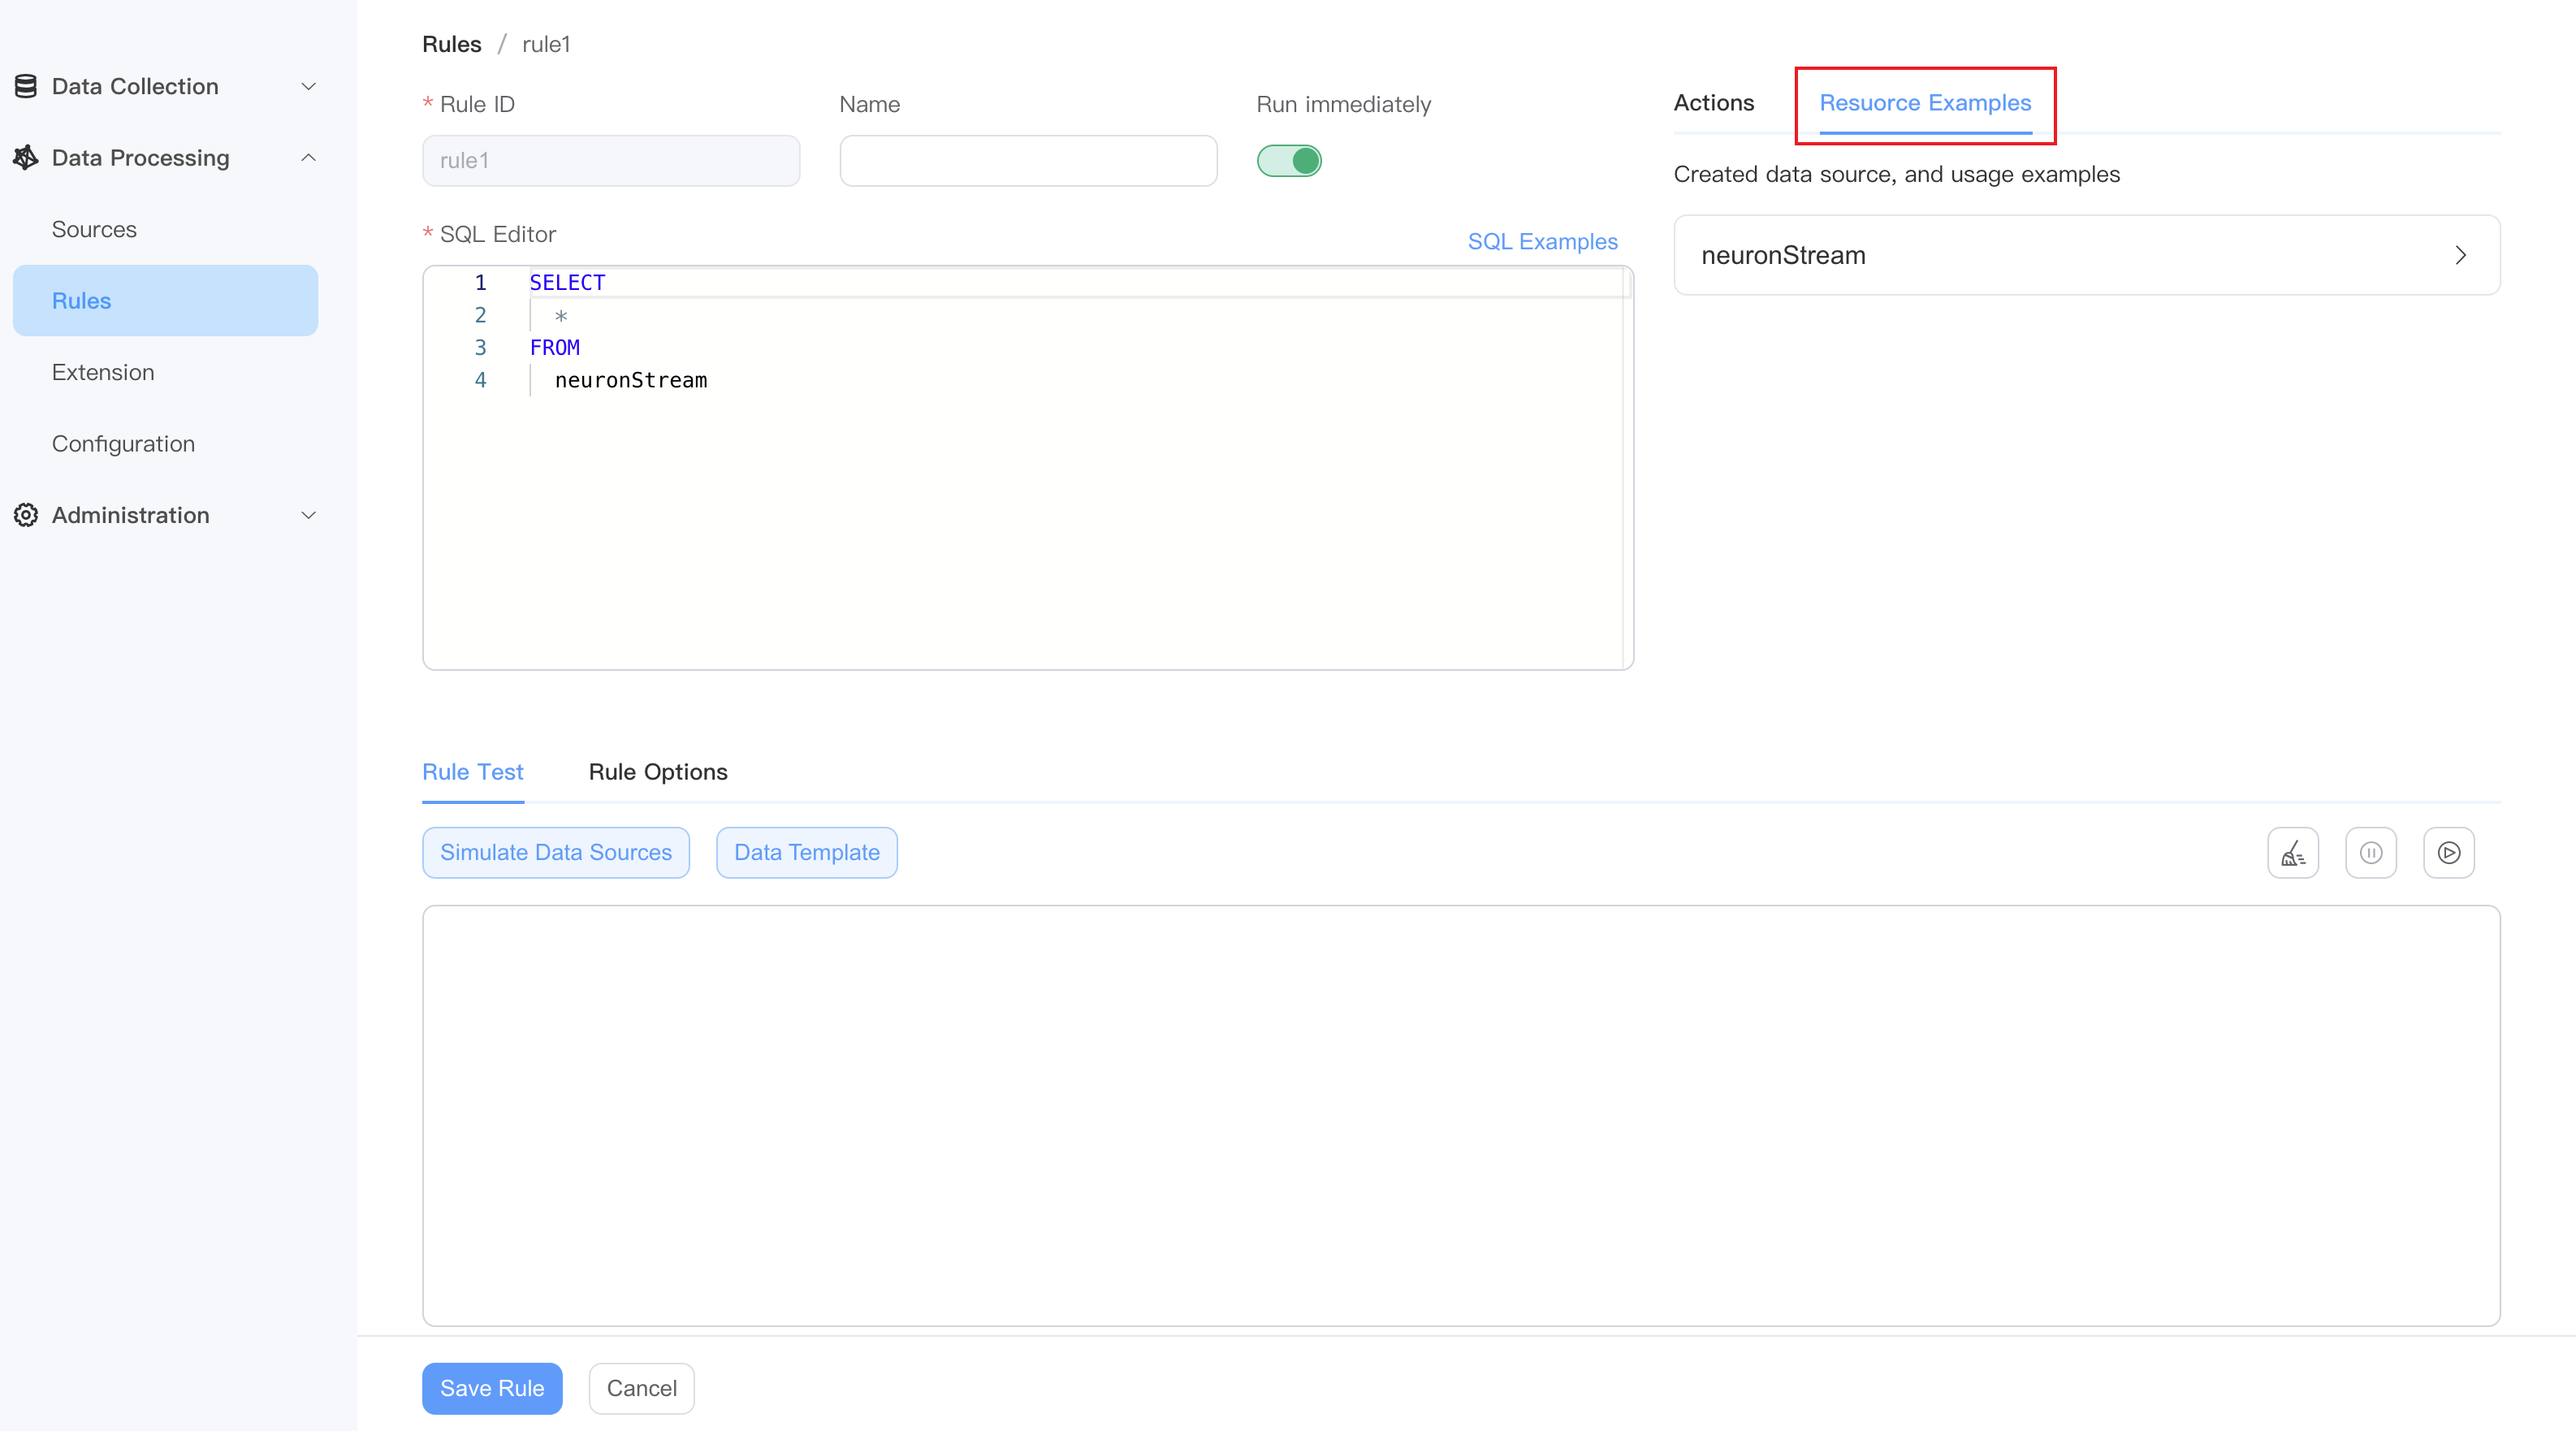
Resource Examples
You can view the created data sources and usage examples.
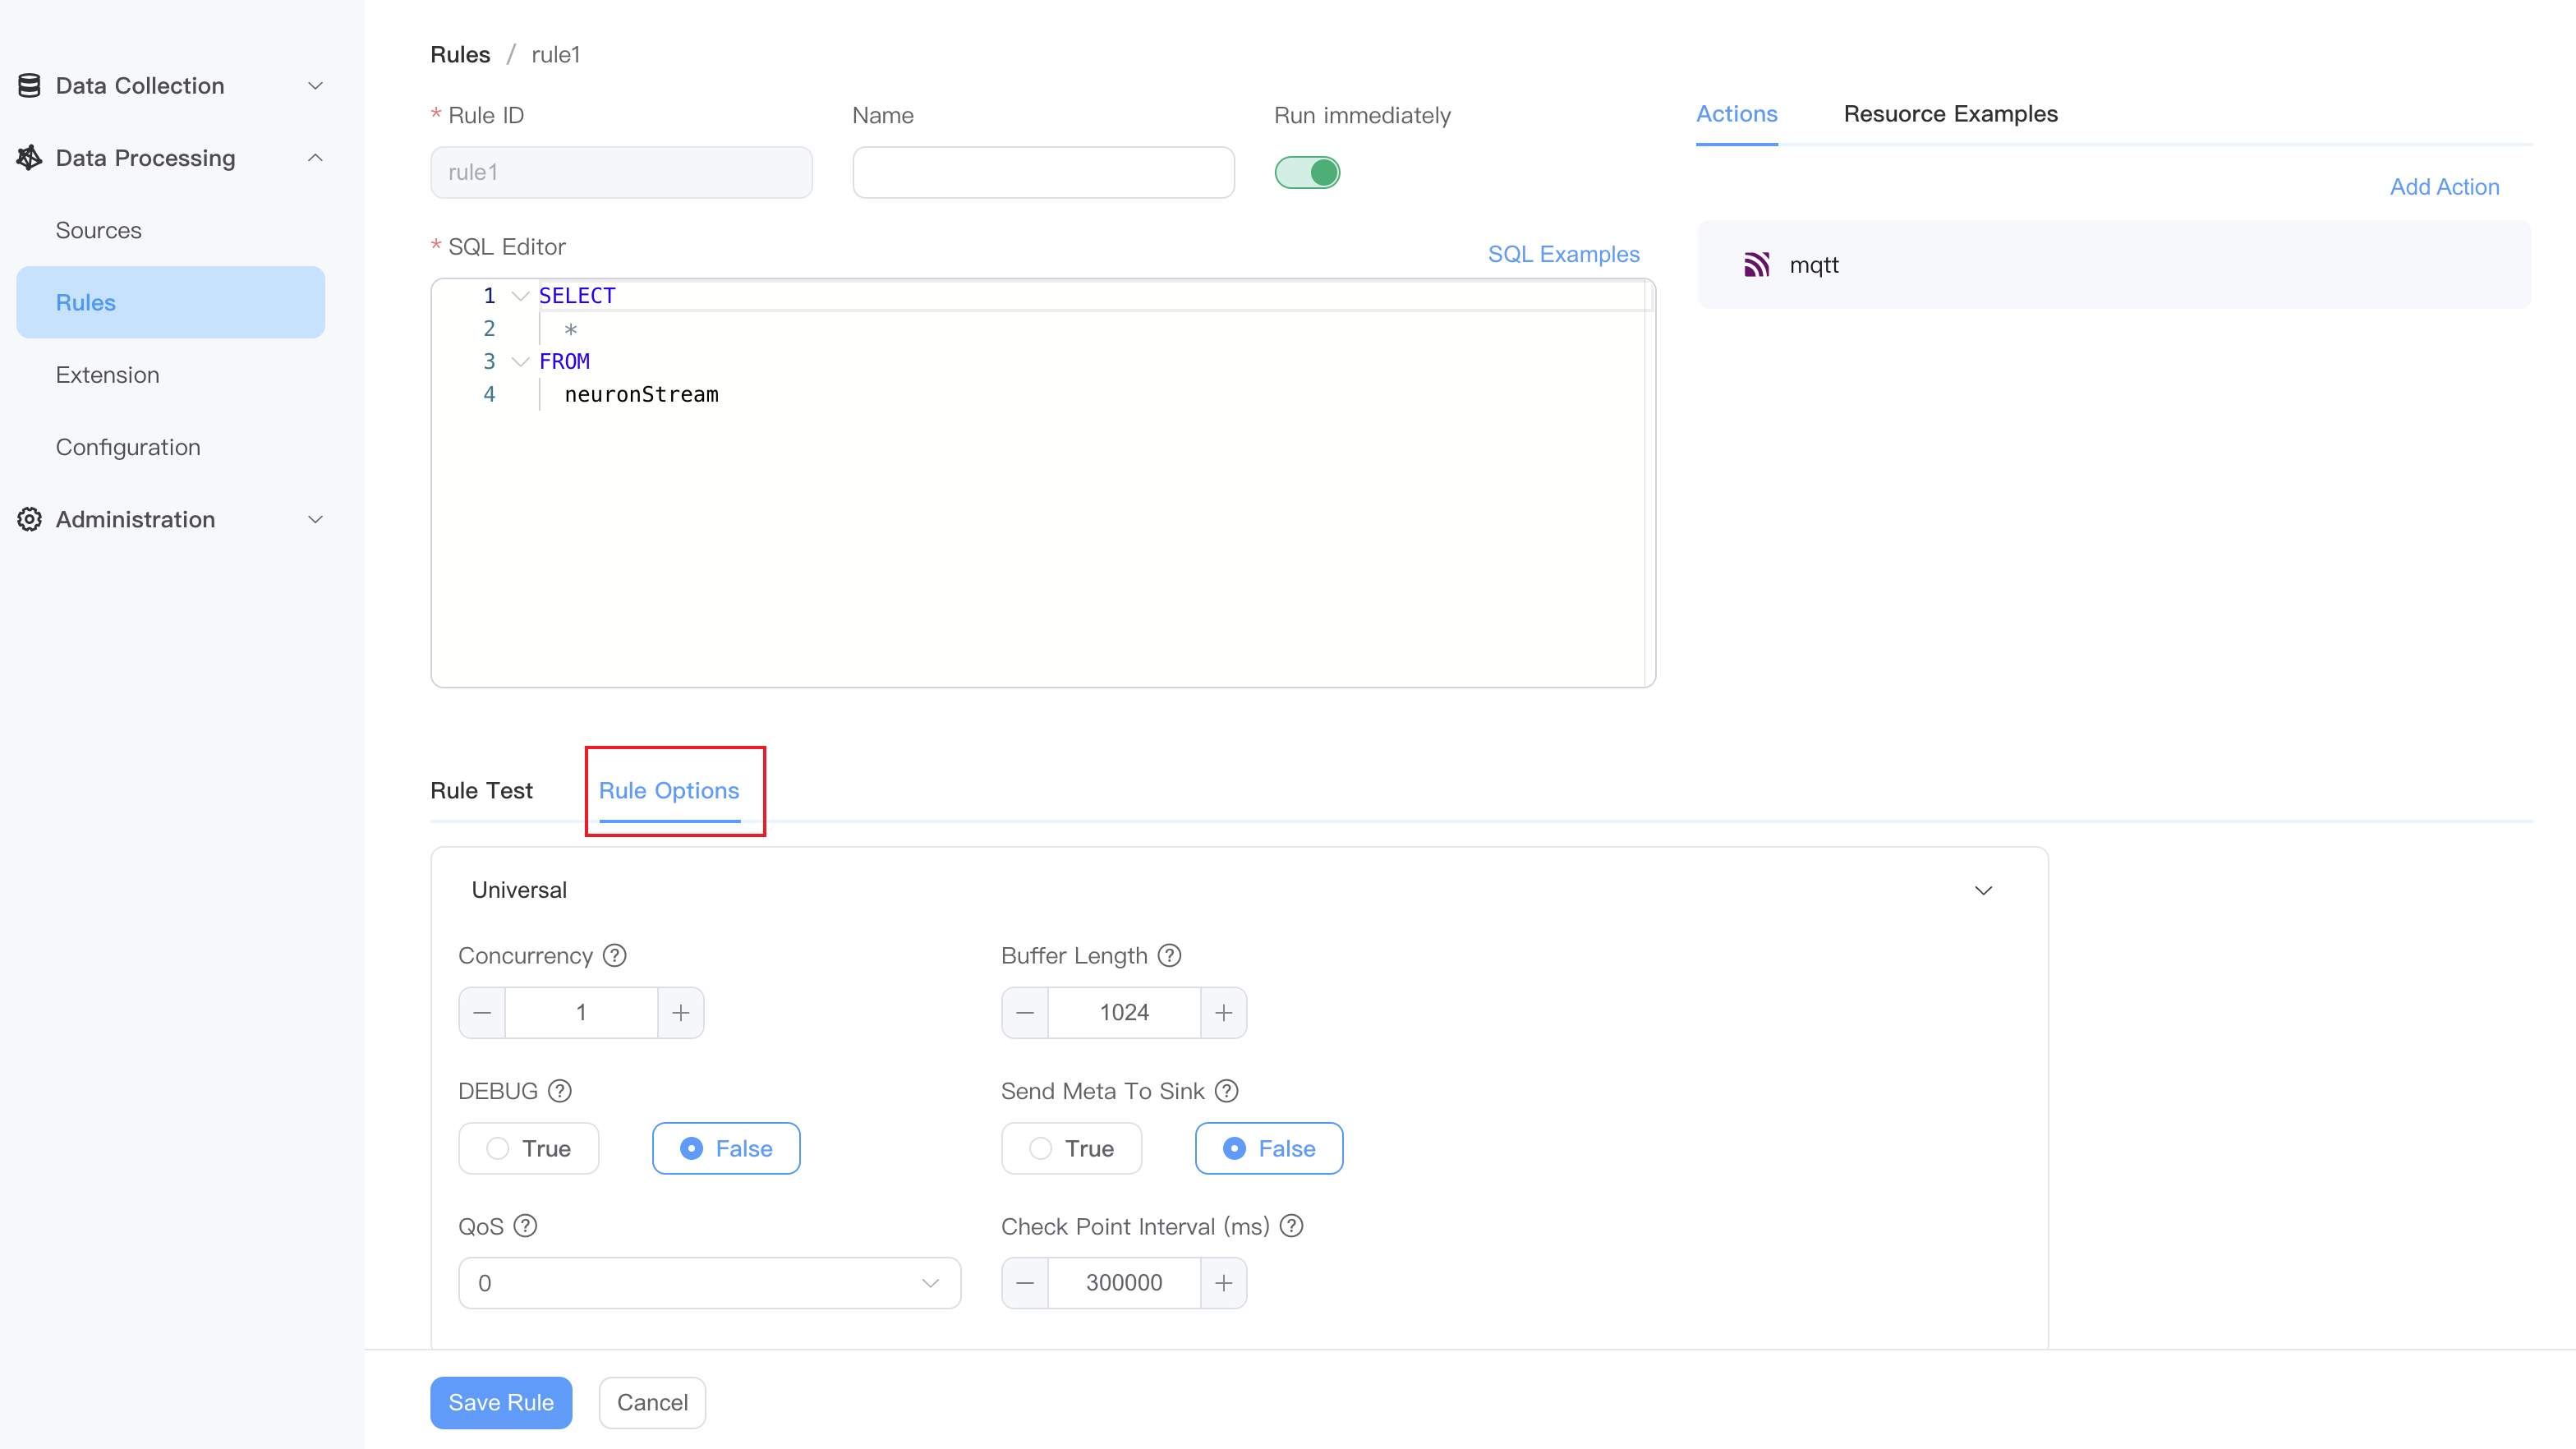
Rule options (optional)
Click the Options section to continue configuring the current rule:
| Option name | Type & Default Value | Description |
|---|---|---|
| Concurrency | int: 1 | A rule is processed by several phases of plans according to the sql statement. This option will specify how many instances will be run for each plan. If the value is bigger than 1, the order of the messages may not be retained. |
| Buffer Length | int: 1024 | Specify how many messages can be buffered in memory for each plan. If the buffered messages exceed the limit, the plan will block message receiving until the buffered messages have been sent out so that the buffered size is less than the limit. A bigger value will accommodate more throughput but will also take up more memory footprint. |
| QoS | int:0 | Specify the qos of the stream. The options are 0: At most once; 1: At least once and 2: Exactly once. If qos is bigger than 0, the checkpoint mechanism will be activated to save states periodically so that the rule can be resumed from errors. |
| Check Point Interval | string:5m0s | Specify the time interval in milliseconds to trigger a checkpoint. This is only effective when qos is bigger than 0. |
| Cron | string:null | The periodic trigger strategy of the rule, which describes the period through the cron expression. |
| Duration | string:null | The duration of the rule. The syntax is Go duration string, e.g. '1m' means 1 minute, '1h' means 1 hour. |
| DEBUG | bool: false | Specify whether to enable the debug level for this rule. By default, it will inherit the Debug configuration parameters in the global configuration. |
| Send Meta To Sink | bool:false | Specify whether the meta data of an event will be sent to the sink. If true, the sink can get te meta data information. |
| Send Error To Sink | bool:false | Whether to send the error to sink. If true, any runtime error will be sent through the whole rule into sinks. Otherwise, the error will only be printed out in the log. |
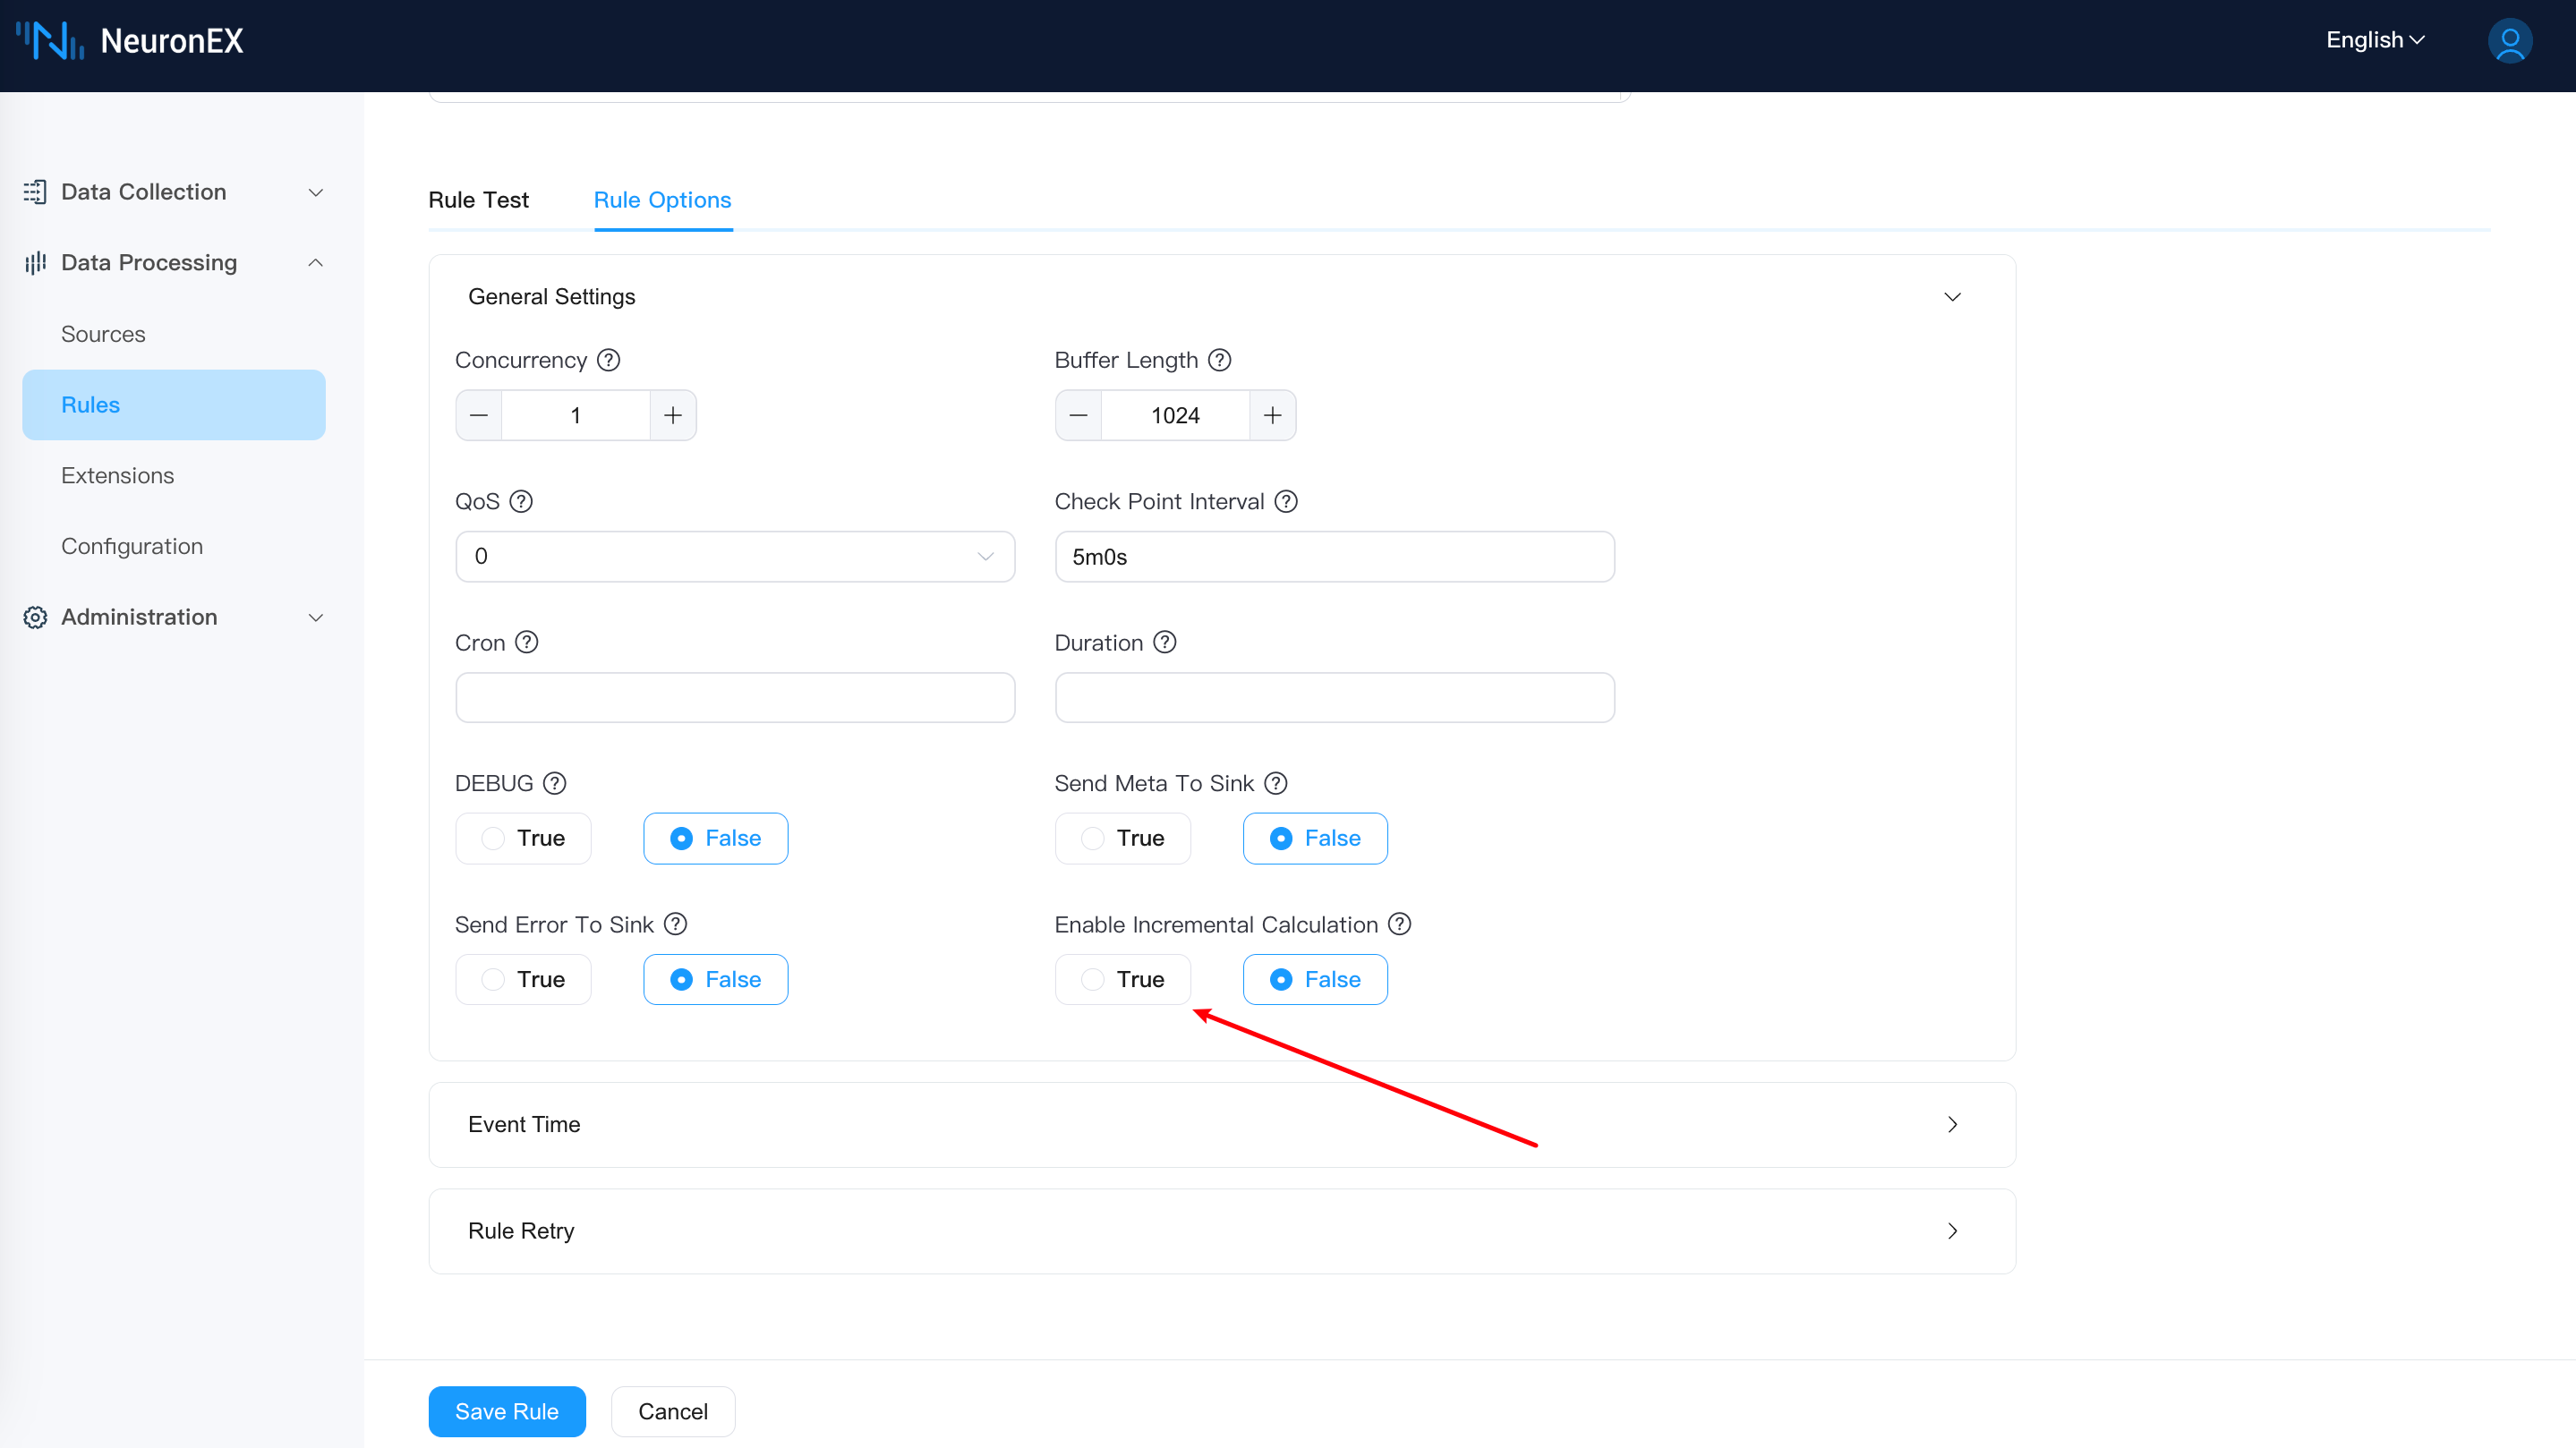
| Enable Incremental Calculation | bool:false | Enable incremental calculation when the rule contains both time window and aggregate functions that support incremental calculation. |
| SendNilField | bool:false | Specify whether the rule outputs columns with a value of nil. |
| LateTolerance | string:0 | When working with event-time windowing, it can happen that elements arrive late. LateTolerance can specify by how much time(unit is millisecond) elements can be late before they are dropped. By default, the value is 0 which means late elements are dropped. |
| Is Event Time | boolean: false | Whether to use event time or processing time as the timestamp for an event. If event time is used, the timestamp will be extracted from the payload. |
| Attempts | int: 0 | Maximum number of retries. If set to 0, the rule will fail immediately without retrying. |
| Delay | string: 5s | Default retry interval in milliseconds. If the multiplier is not set, the retry interval will be fixed to this value. |
| Max Delay | string: 30s | The maximum interval between retries, in milliseconds. This only takes effect if the multiplier is set so that the delay is increased for each retry. |
| Multiplier | float: 1 | Multiplier for the retry interval. |
| Jitter Factor | float: 0.1 | Adds or subtracts a random value coefficient to the delay to prevent multiple rules from being restarted at the same time. |
Tips
In most scenarios, the default values for rule options are sufficient.
After completing the settings, click Save Rule to complete the creation of the current rules. The new rule will appear in the rules list. Here you can view rule status, edit rules, stop rules, refresh rules, view rule topology map, copy rules or delete rules.
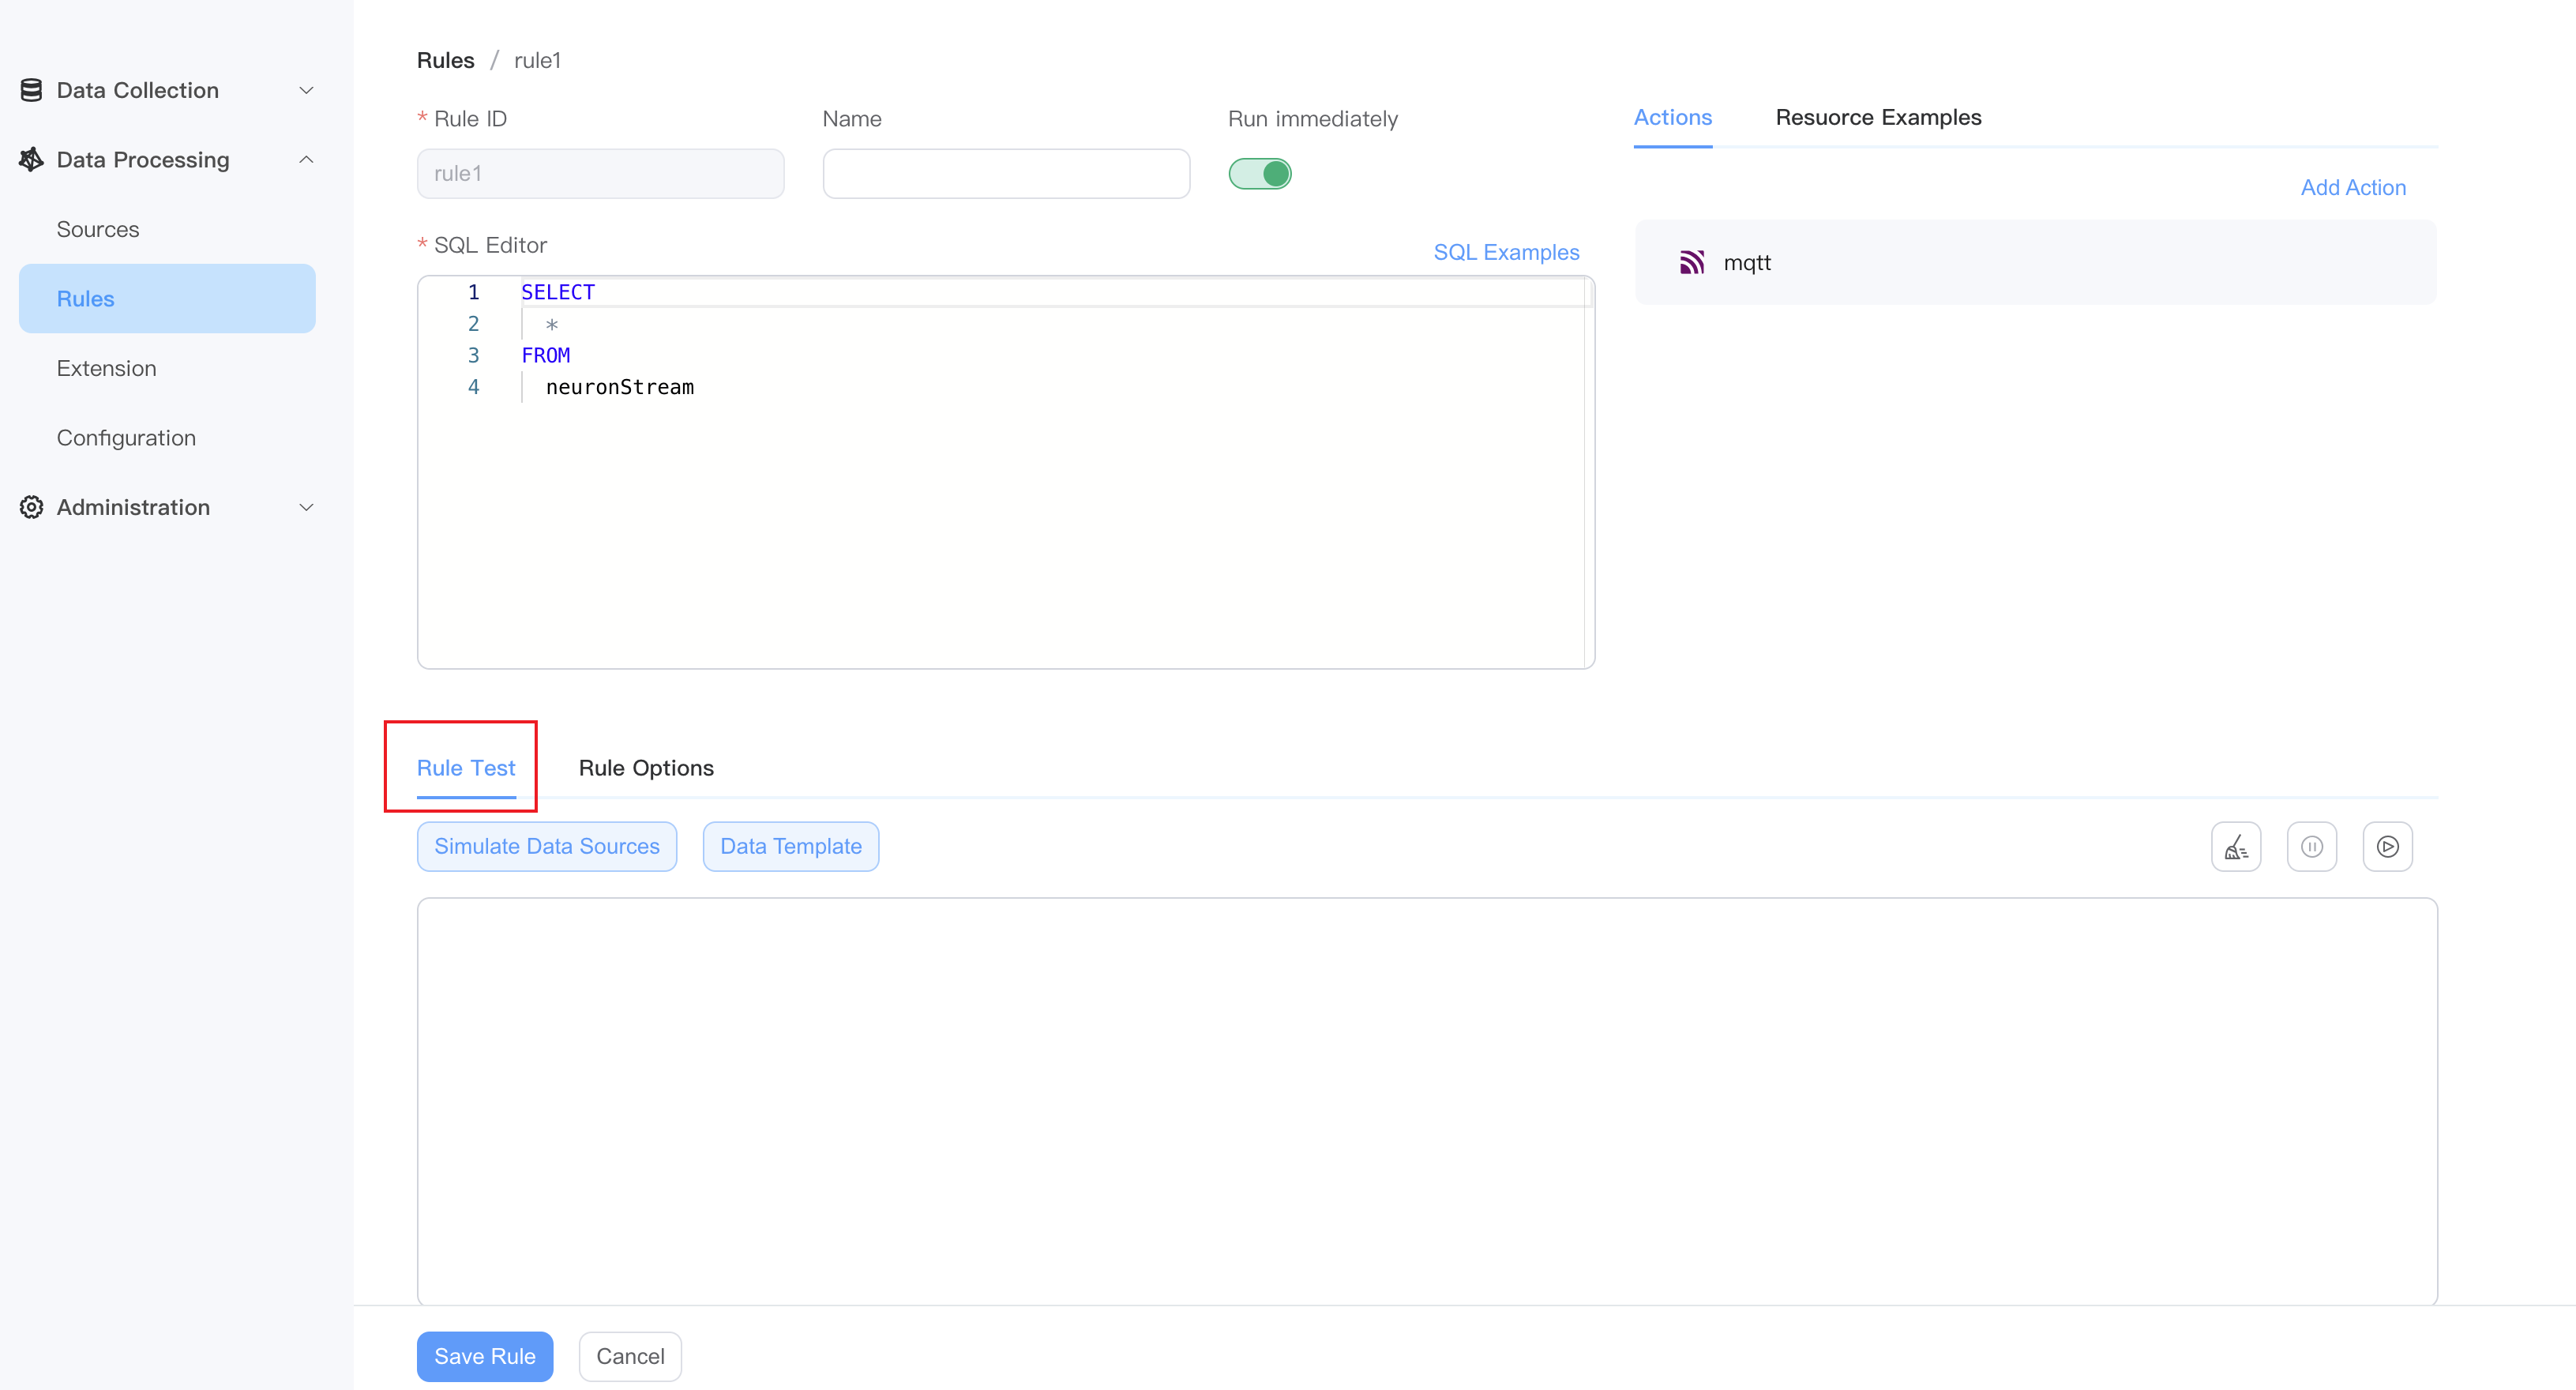
Rule test
When creating rules, rule test allows you to view the output results of rules after SQL processing in real-time, ensuring that SQL syntax, built-in functions, and data templates meet the expected output results.
Additionally, NeuronEX supports debugging rules with simulated data sources, where you can replace the original data source in the SQL editor with a custom simulated data source, providing a more flexible way to simulate data sources.
For more details, please refer to Rule Test.
Import and export rules
In the NeuronEX dashboard, click Data Processing -> Rules. Click the Import Rules button. In the pop-up window, you can choose:
- Paste file content directly
- Import file contents by uploading files
After clicking Submit, the new rule will appear in the rules list. Here you can view rule status, edit rules, stop rules, refresh rules, view rule topology map, copy rules or delete rules.
TIP
When importing rules, if there are rules with the same ID, the original rules will be overwritten.
In the NeuronEX dashboard, click Data Processing -> Rules, click the Export Rules button, and the JSON file of the current rules will be exported.
Rule Status
When a rule is run in NeuronEX, we can understand the current rule running status through the rule indicators. See Rule Status for details.
Rule Pipeline
Multiple rules can form a processing pipeline by specifying sink/source union points. For example, the first rule produces results in an memory sink, and other rules subscribe to the topic in their memory sources. For more usage, please see the Rule Pipeline chapter.
Incremental Computation
When using data processing functions to perform aggregate calculations on data within a window, the default implementation method is to segment the continuous stream data into windows according to the window definition and cache it in memory. After the window ends, all data in the window is aggregated for calculation. One problem with this method is that when the data has not been aggregated for calculation, caching in memory can easily cause memory expansion and lead to OOM (Out of Memory) issues. For detailed information about incremental computation, please refer to Incremental Computation
To enable incremental computation in rules, please enable it in the rule options.
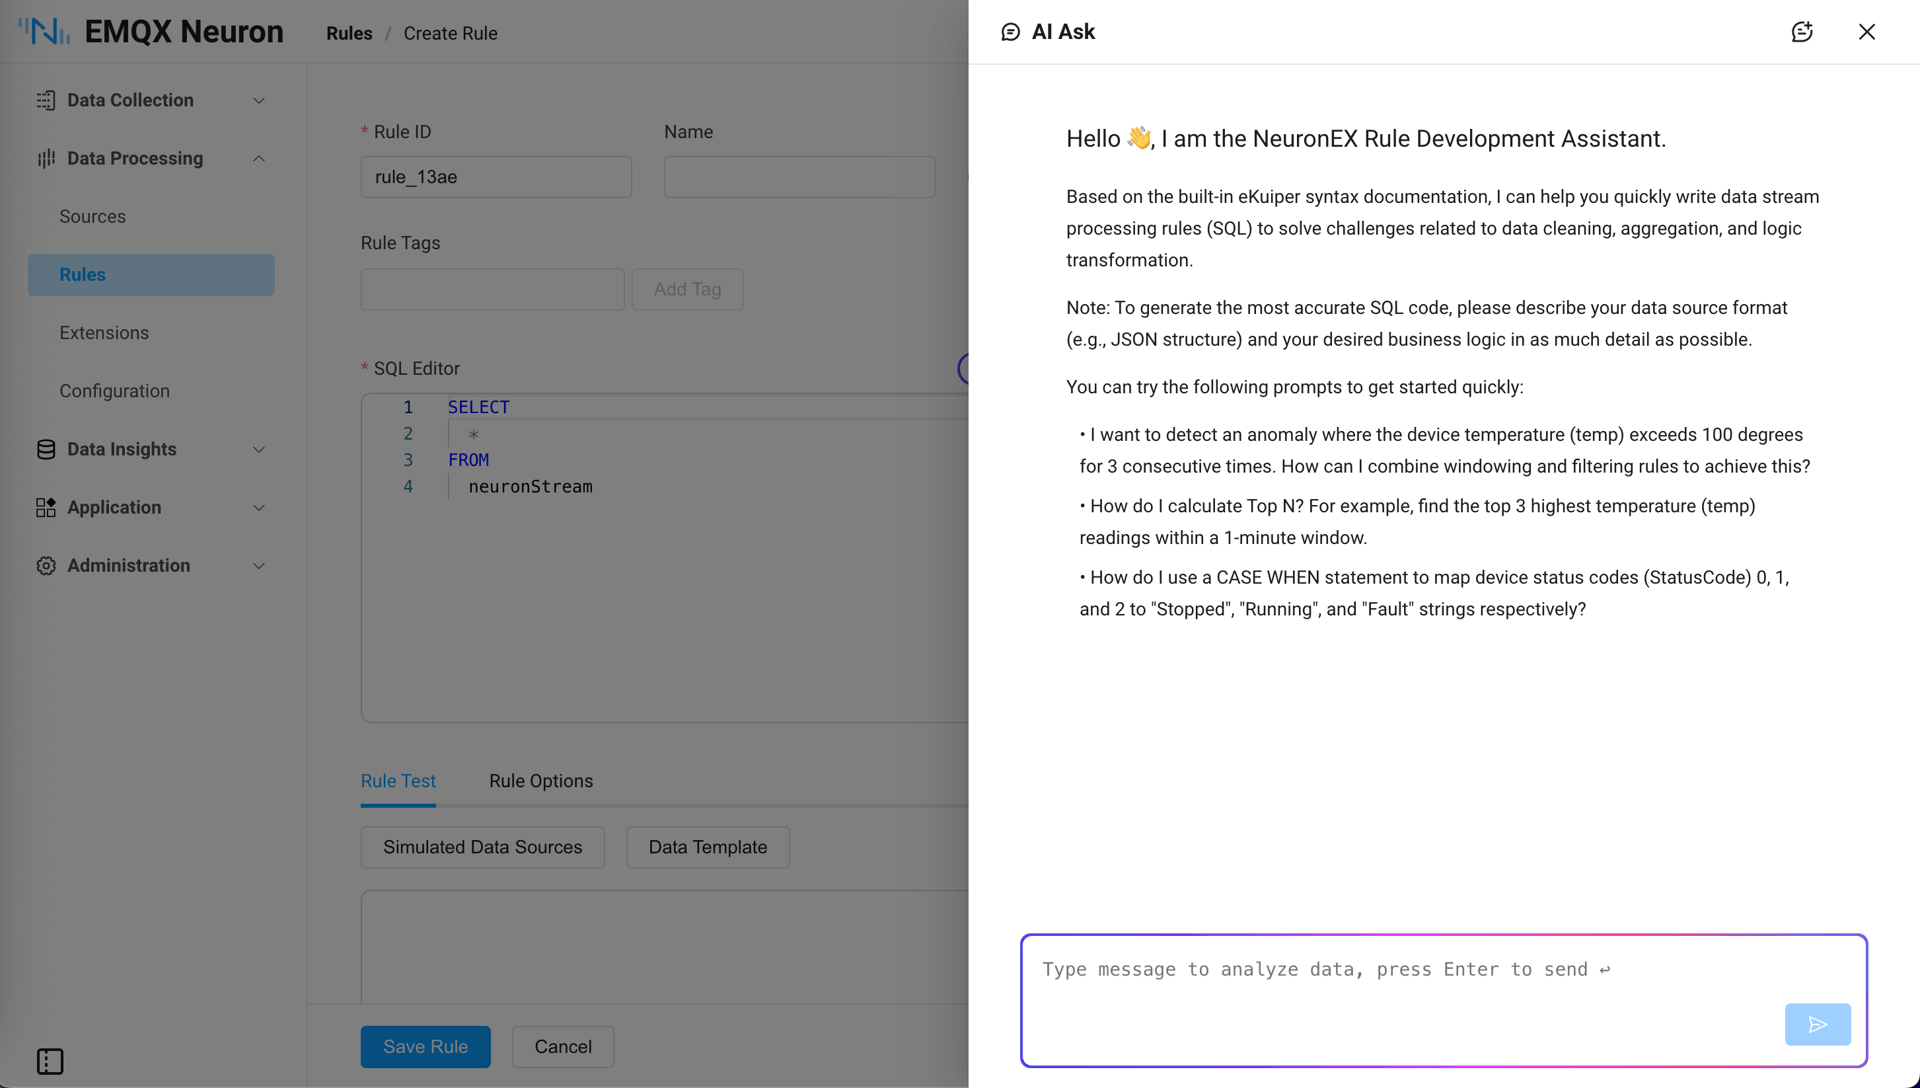
AI-powered Rule Writing
NeuronEX 3.8.0 deeply integrates AI capabilities into the data processing workflow, significantly lowering the technical barrier for industrial data analysis.
AI Q&A Integration in Rule Creation Page When creating data processing rules, the AI assistant has deeply integrated the eKuiper knowledge base, supporting natural language queries for SQL rule writing and data stream processing questions. Users can directly ask various questions, and the AI will generate corresponding SQL code. For example:
I want to detect the abnormal situation where a device's temperature (temp) exceeds 100 degrees for 3 consecutive times. How can I achieve this by combining window and filtering rules?
How to map the device status codes (StatusCode) 0, 1, and 2 to the output strings "stopped", "running", and "fault" respectively?
The temperature sensor readings are fluctuating. I want to keep 2 decimal places. How to handle this?
