Bridging Data to AWS IoT using Neuron
This article will introduce how to use the Neuron to bridge data to AWS IoT through the public network so that you can easily build IoT applications.
Introduction to AWS IoT
What is AWS IoT
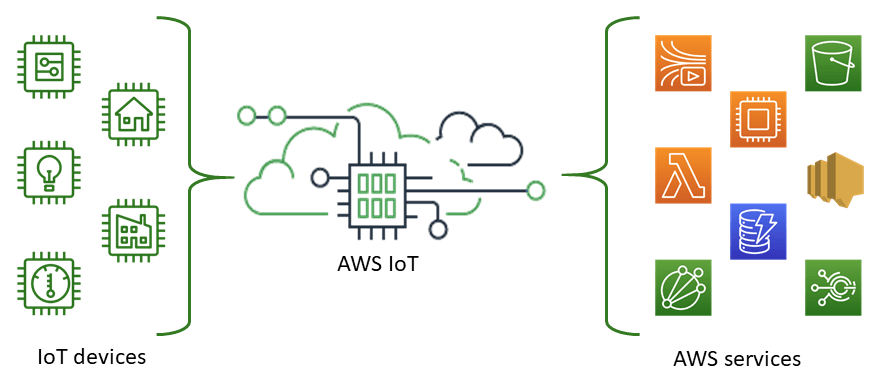
Amazon IoT Core is a hosted cloud platform that makes it easy for connected devices to securely interact with cloud applications and other devices. Amazon IoT can support billions of devices and trillions of messages and can process and securely route them to Amazon Cloud Technologies endpoint nodes and other devices. With Amazon IoT, your applications can track and communicate with all your devices at all times, even when they are not connected.
Benefits of the AWS IoT platform
- Broad and deep: AWS has broad and deep IoT services from the edge to the cloud, providing local data collection and analysis capabilities as well as data management and rich analytics integration services on the cloud designed for IoT.
- Multiple layers of security: including preventive security mechanisms (such as encryption and access control of device data), continuous monitoring and auditing of security configurations, etc.
- Superior AI integration: AWS brings AI and IoT together to make devices smarter. Multiple machine learning frameworks are supported.
- Proven at scale: AWS IoT is built on a scalable, secure, and proven cloud infrastructure that scales to billions of different devices and trillions of messages.
Configure AWS IoT
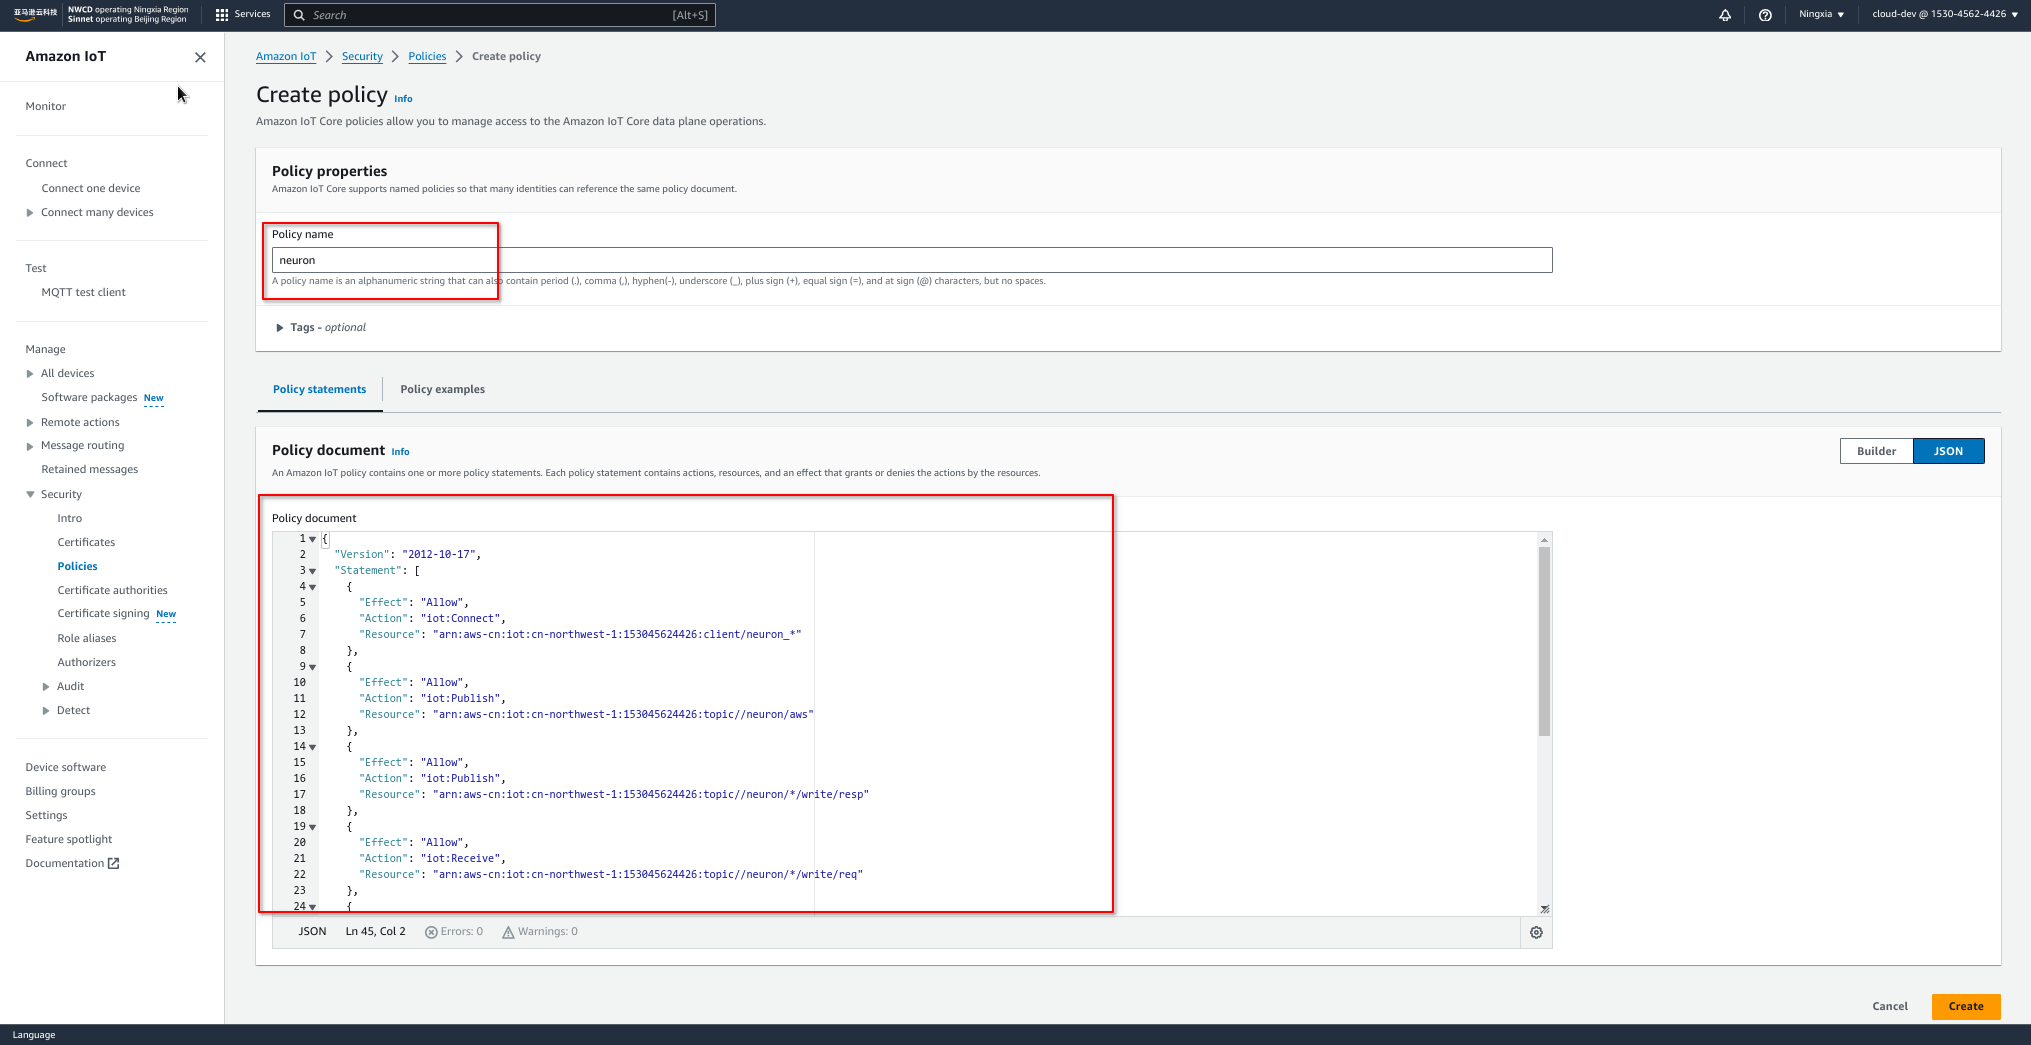
1. Create policy
Find Security -> Policy, create a policy named neuron, and write the policy with the following configuration.
{
"Version": "2012-10-17",
"Statement": [
{
"Effect": "Allow",
"Action": "iot:Connect",
"Resource": "arn:aws-cn:iot:cn-northwest-1:153045624426:client/neuron_*"
},
{
"Effect": "Allow",
"Action": "iot:Publish",
"Resource": "arn:aws-cn:iot:cn-northwest-1:153045624426:topic//neuron/aws"
},
{
"Effect": "Allow",
"Action": "iot:Publish",
"Resource": "arn:aws-cn:iot:cn-northwest-1:153045624426:topic//neuron/*/write/resp"
},
{
"Effect": "Allow",
"Action": "iot:Receive",
"Resource": "arn:aws-cn:iot:cn-northwest-1:153045624426:topic//neuron/*/write/req"
},
{
"Effect": "Allow",
"Action": "iot:Subscribe",
"Resource": "arn:aws-cn:iot:cn-northwest-1:153045624426:topicfilter//neuron/*/write/req"
},
{
"Effect": "Allow",
"Action": "iot:Publish",
"Resource": "arn:aws-cn:iot:cn-northwest-1:153045624426:topic//neuron/*/read/resp"
},
{
"Effect": "Allow",
"Action": "iot:Receive",
"Resource": "arn:aws-cn:iot:cn-northwest-1:153045624426:topic//neuron/*/read/req"
},
{
"Effect": "Allow",
"Action": "iot:Subscribe",
"Resource": "arn:aws-cn:iot:cn-northwest-1:153045624426:topicfilter//neuron/*/read/req"
}
]
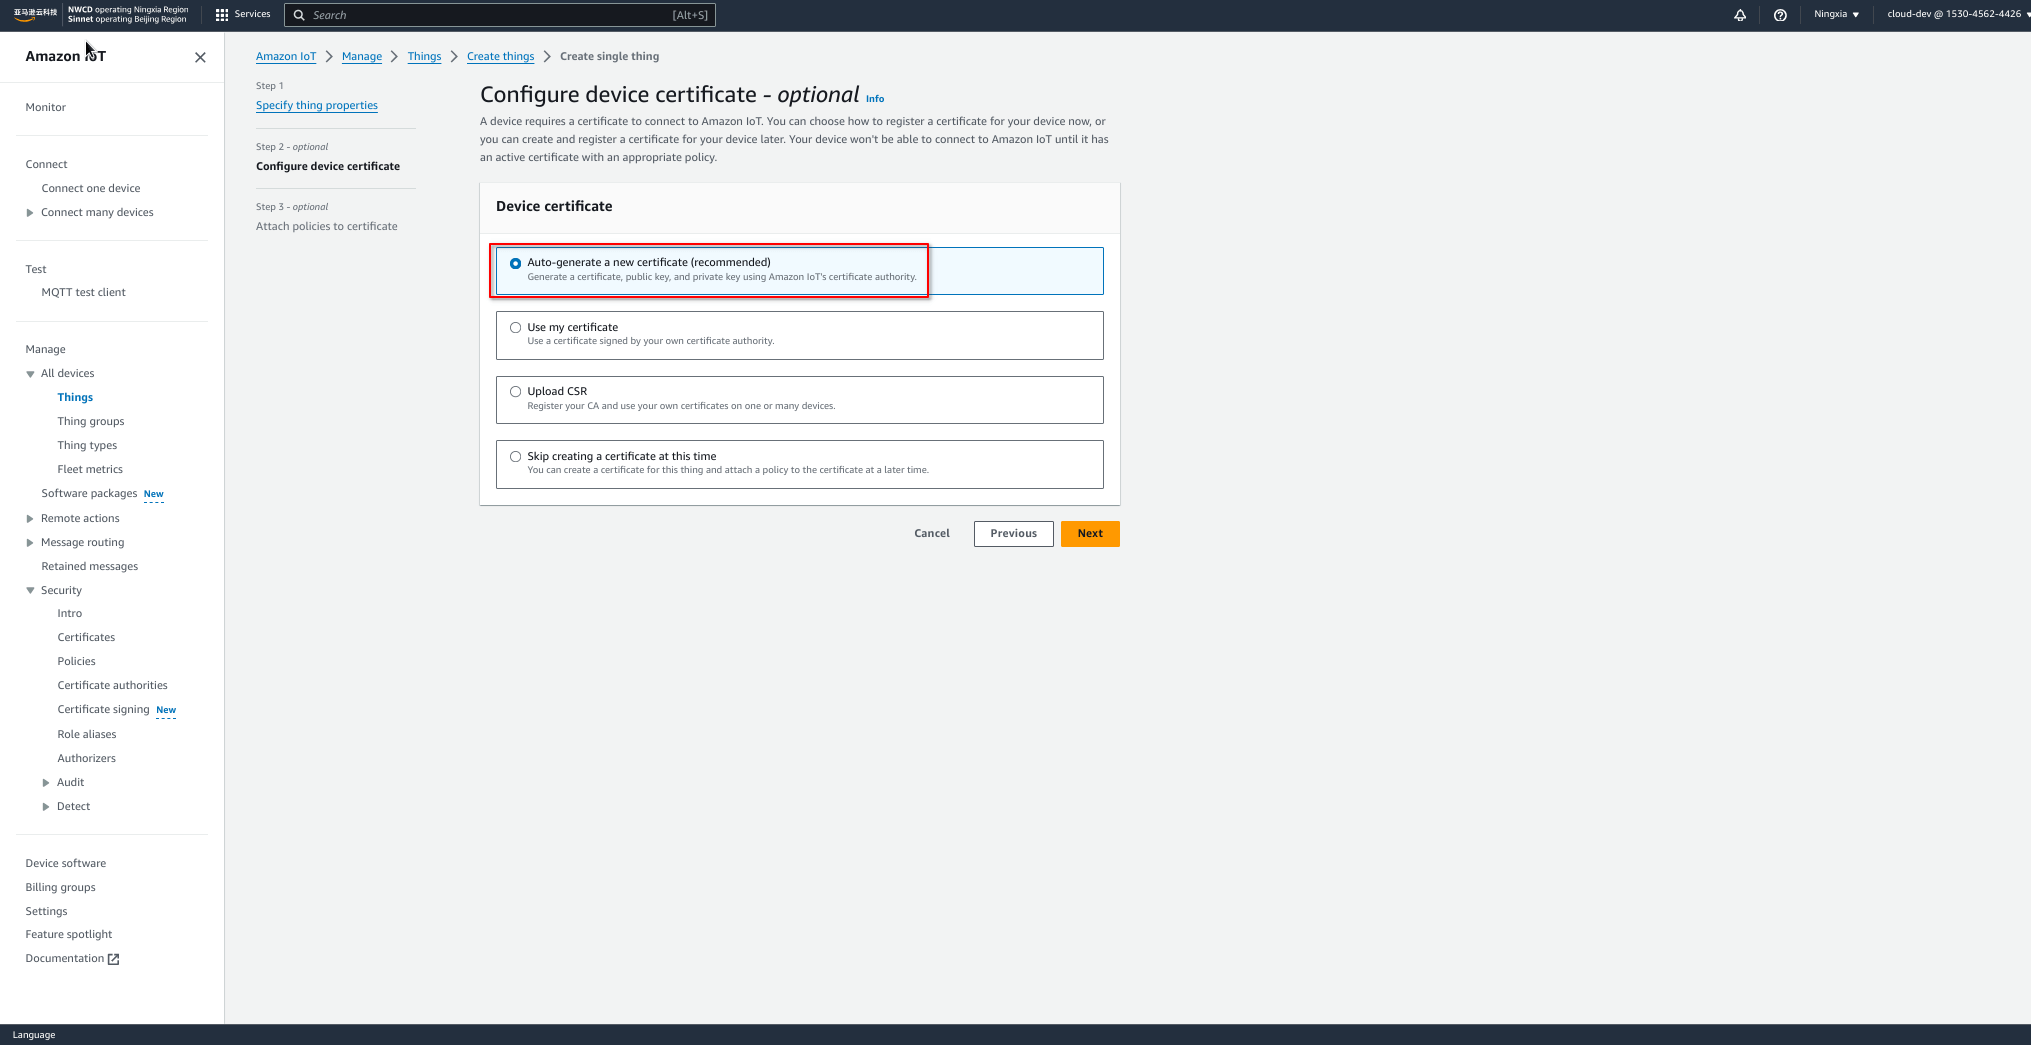
}2. Create a thing
Go to the AWS IoT control panel, find Manage -> Things, and click Create things to create a thing named neuron.

Select Auto-generate a new certificate.
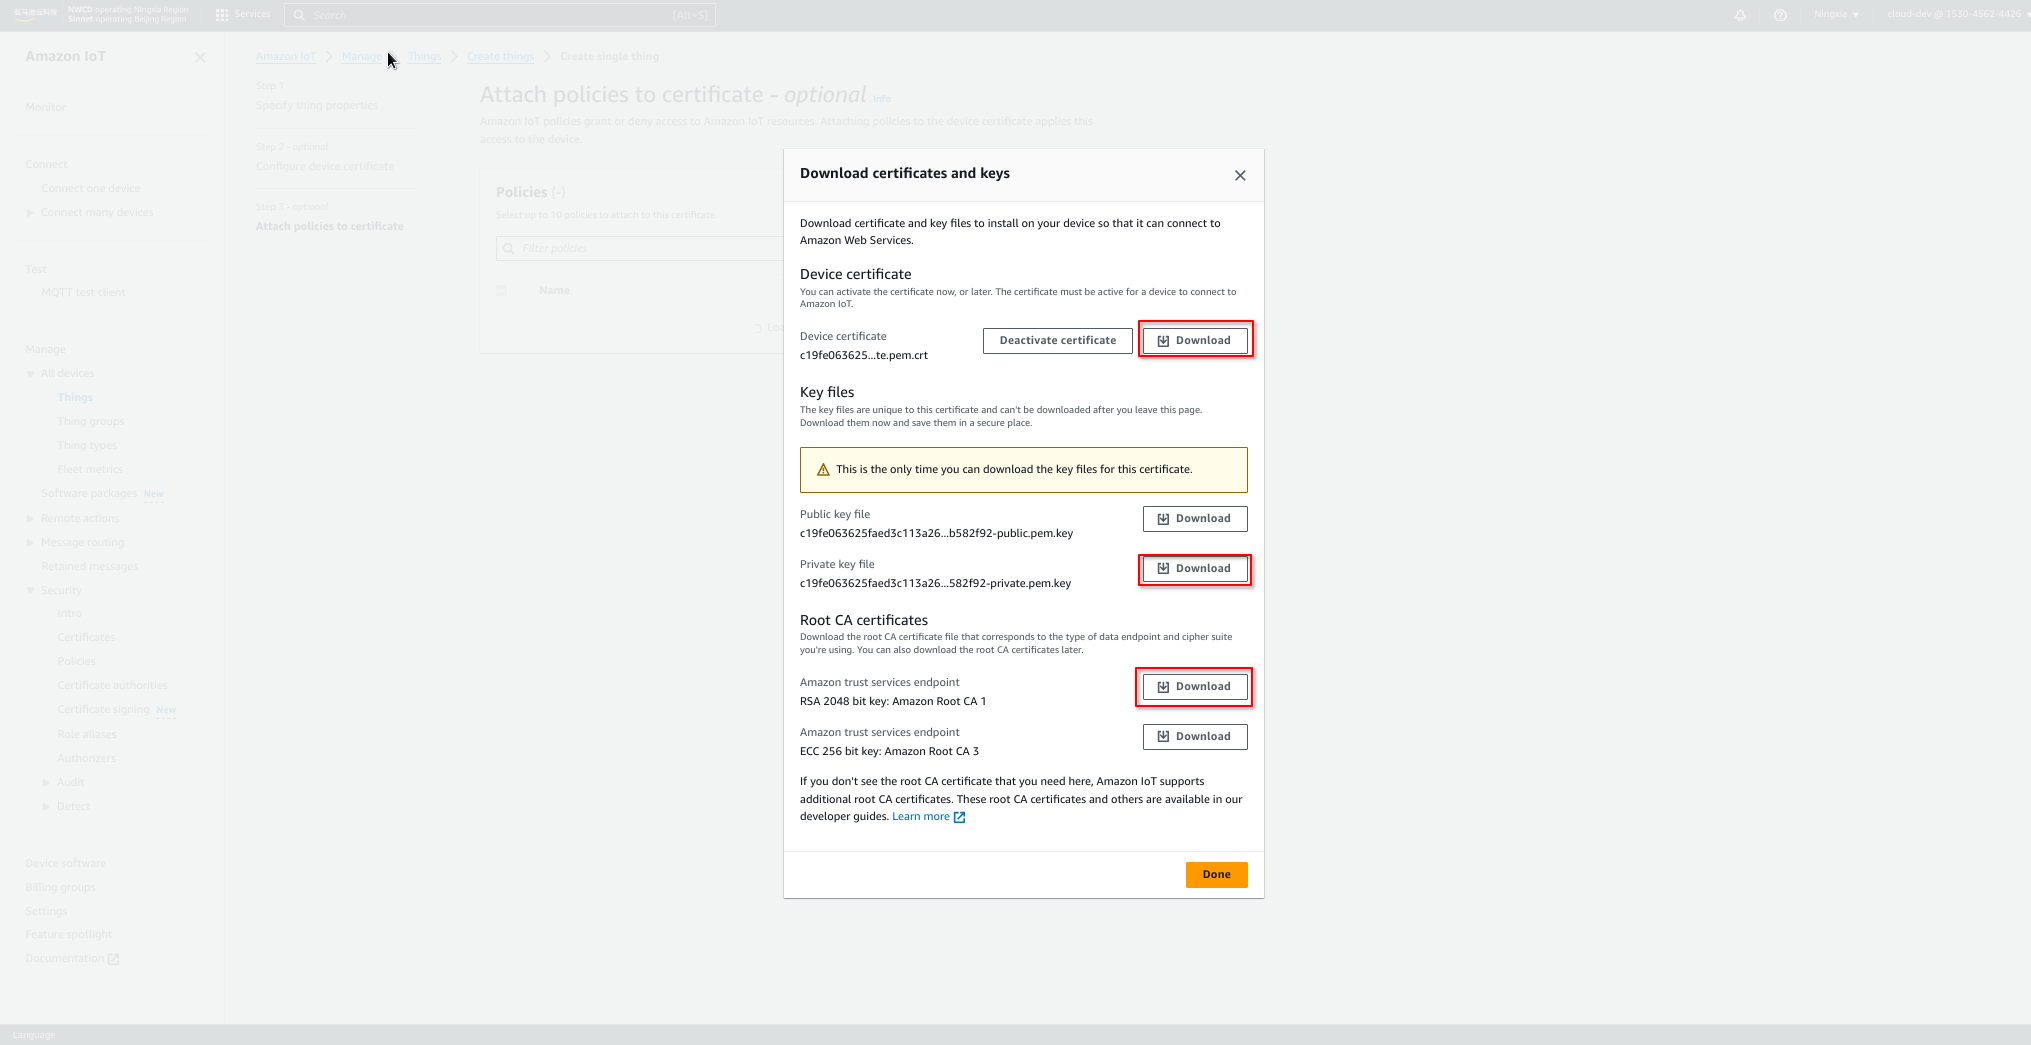
After the certificate is created, you need to download the certificate on this page for device two-way authentication.
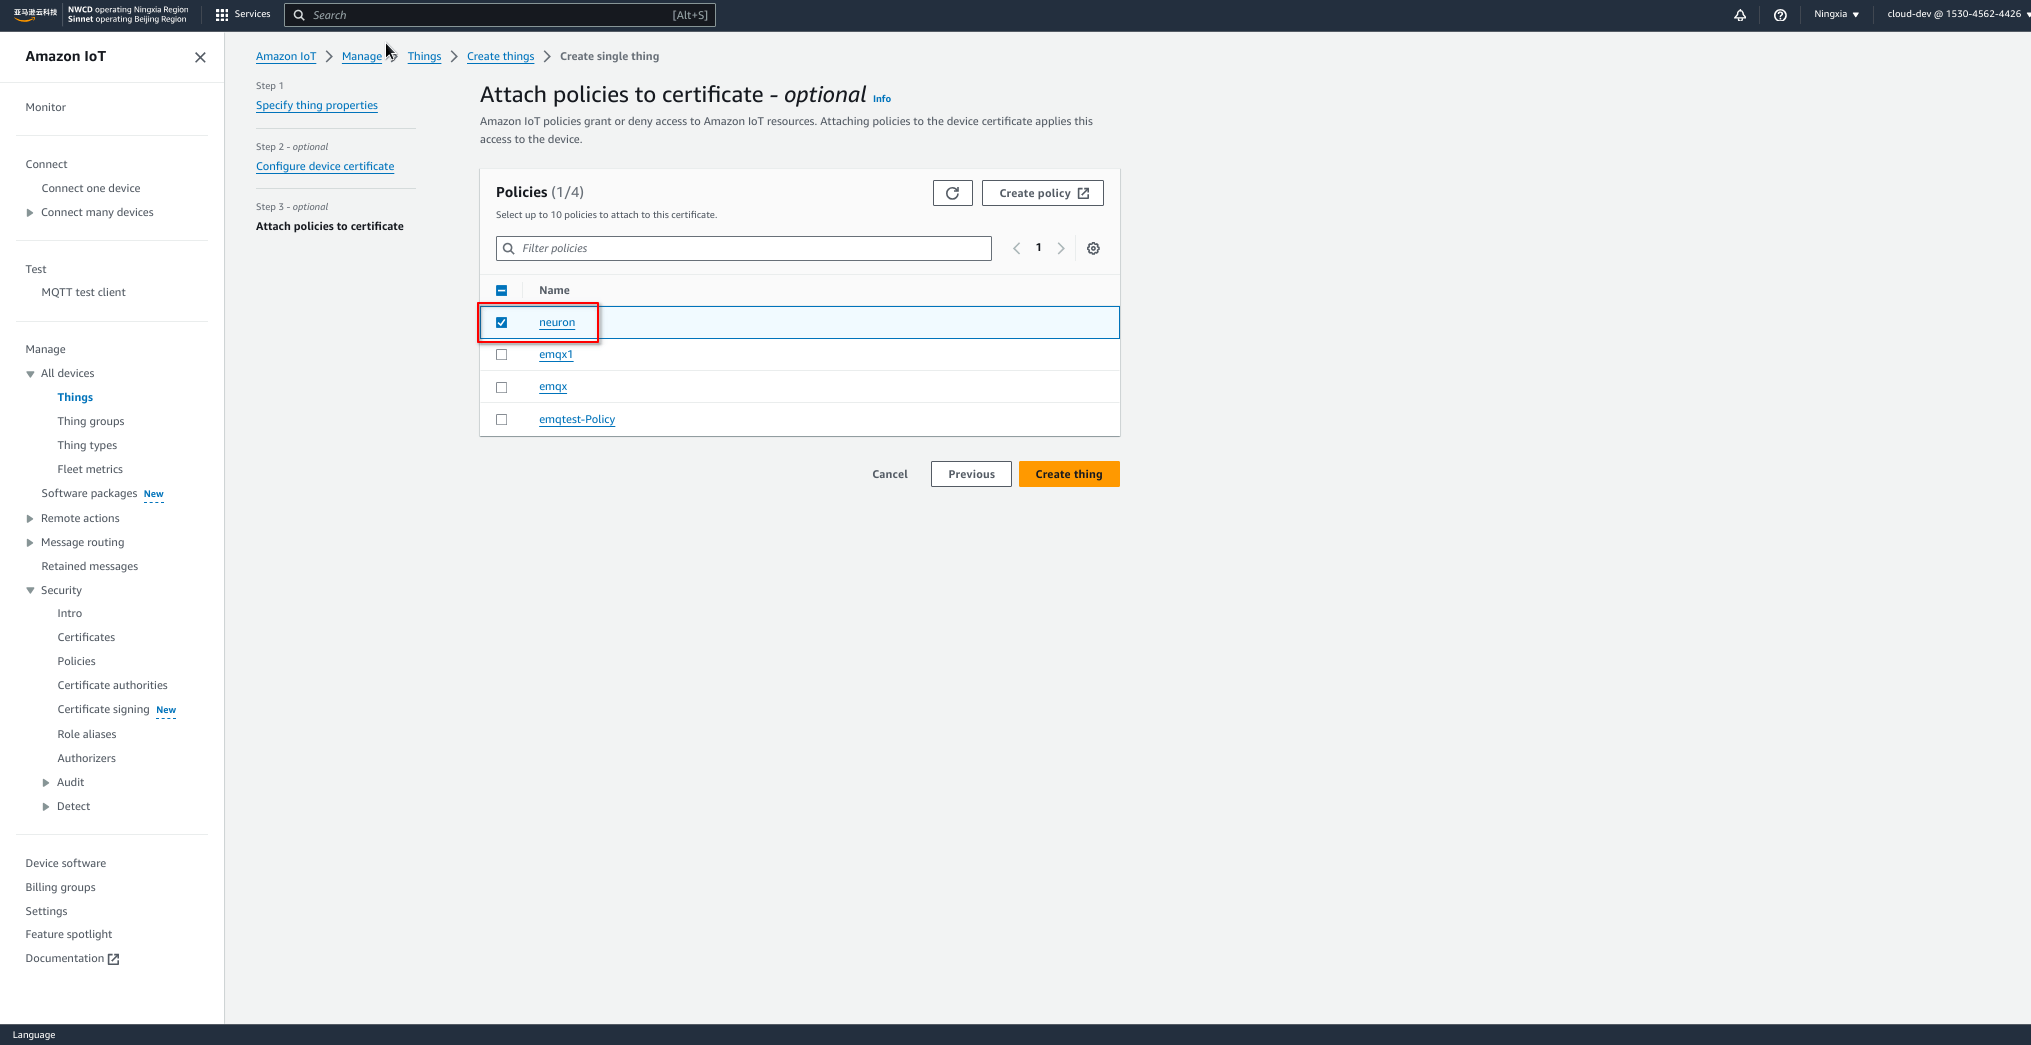
Finally, associate the policy created earlier with the thing.
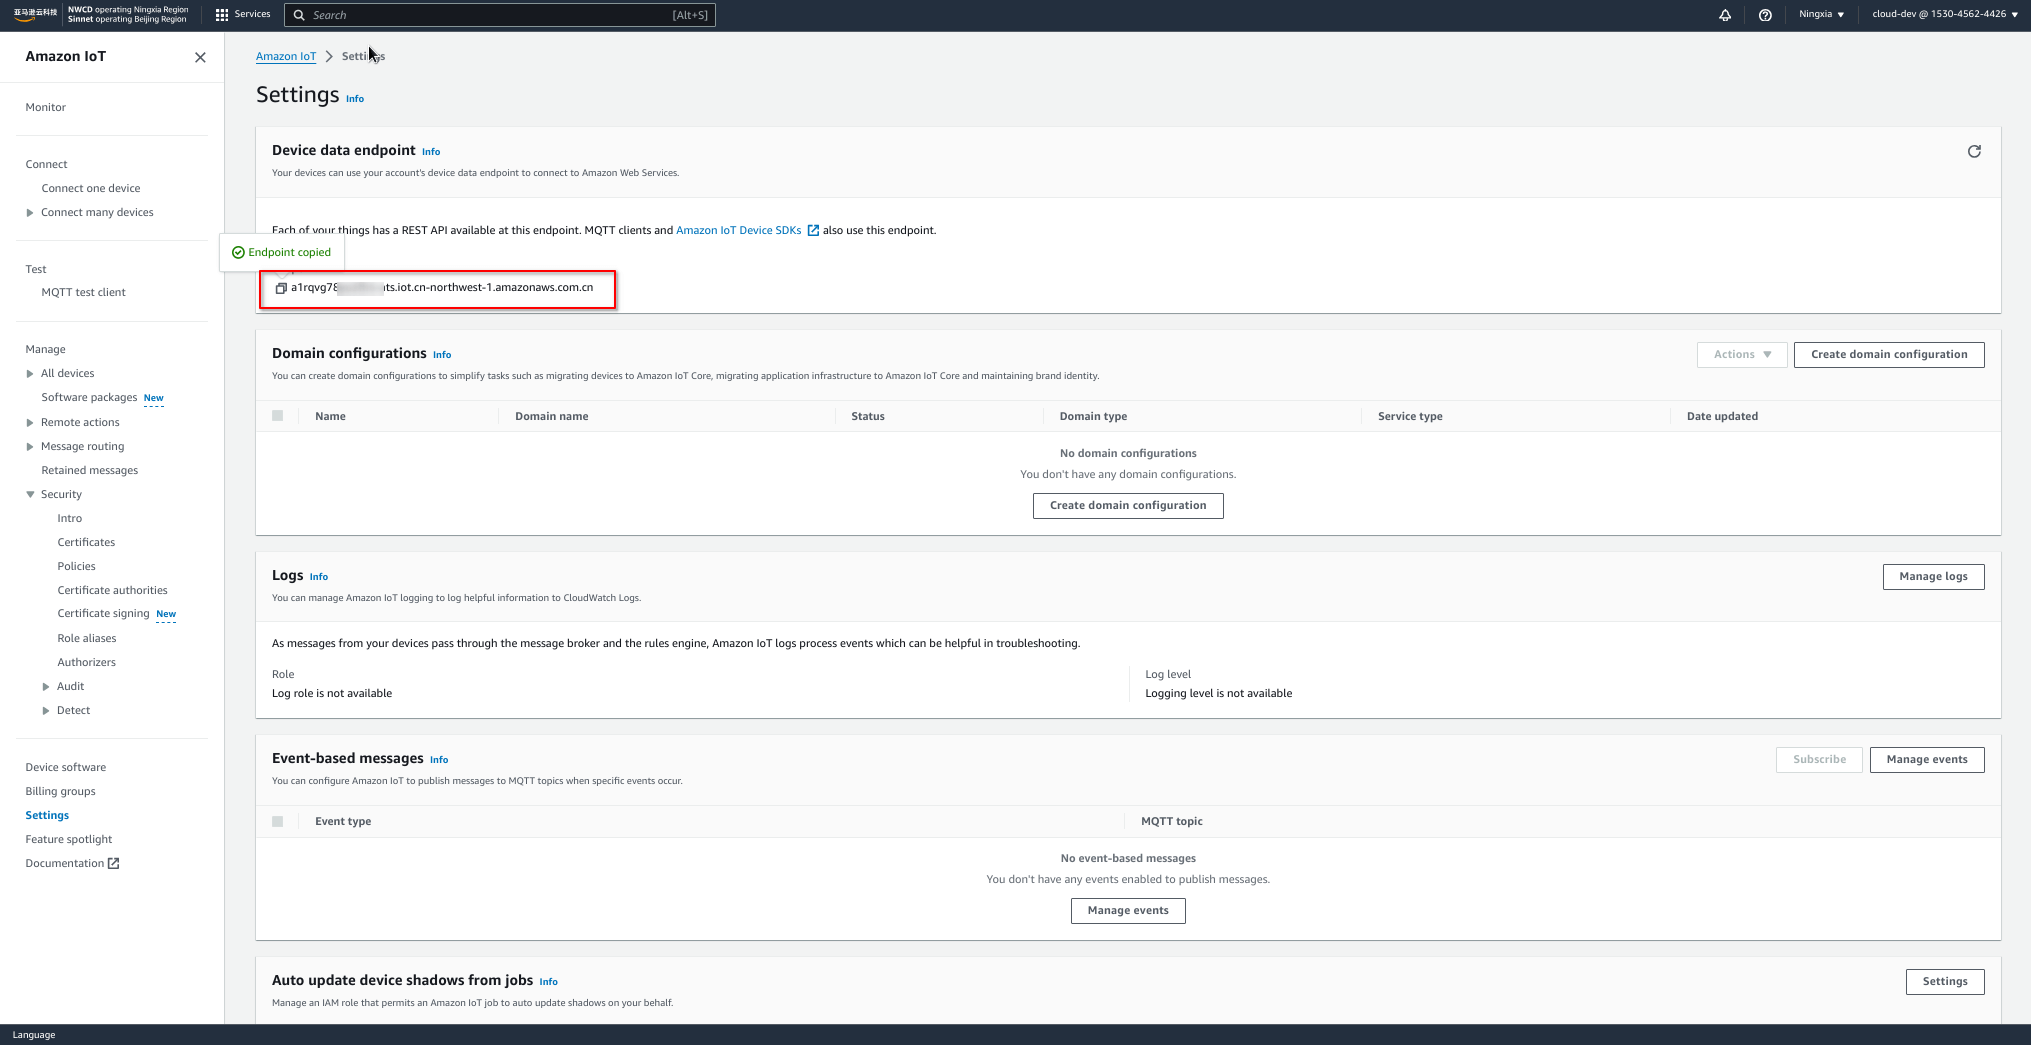
3. Lookup the device data endpoint
In the Settings tab, get the device data endpoint for device connection.
Configure Neuron
South device
We need some south devices to collect data from. Any Neuron southbound plugin will do for this tutorial, for example, the Modbus TCP plugin.
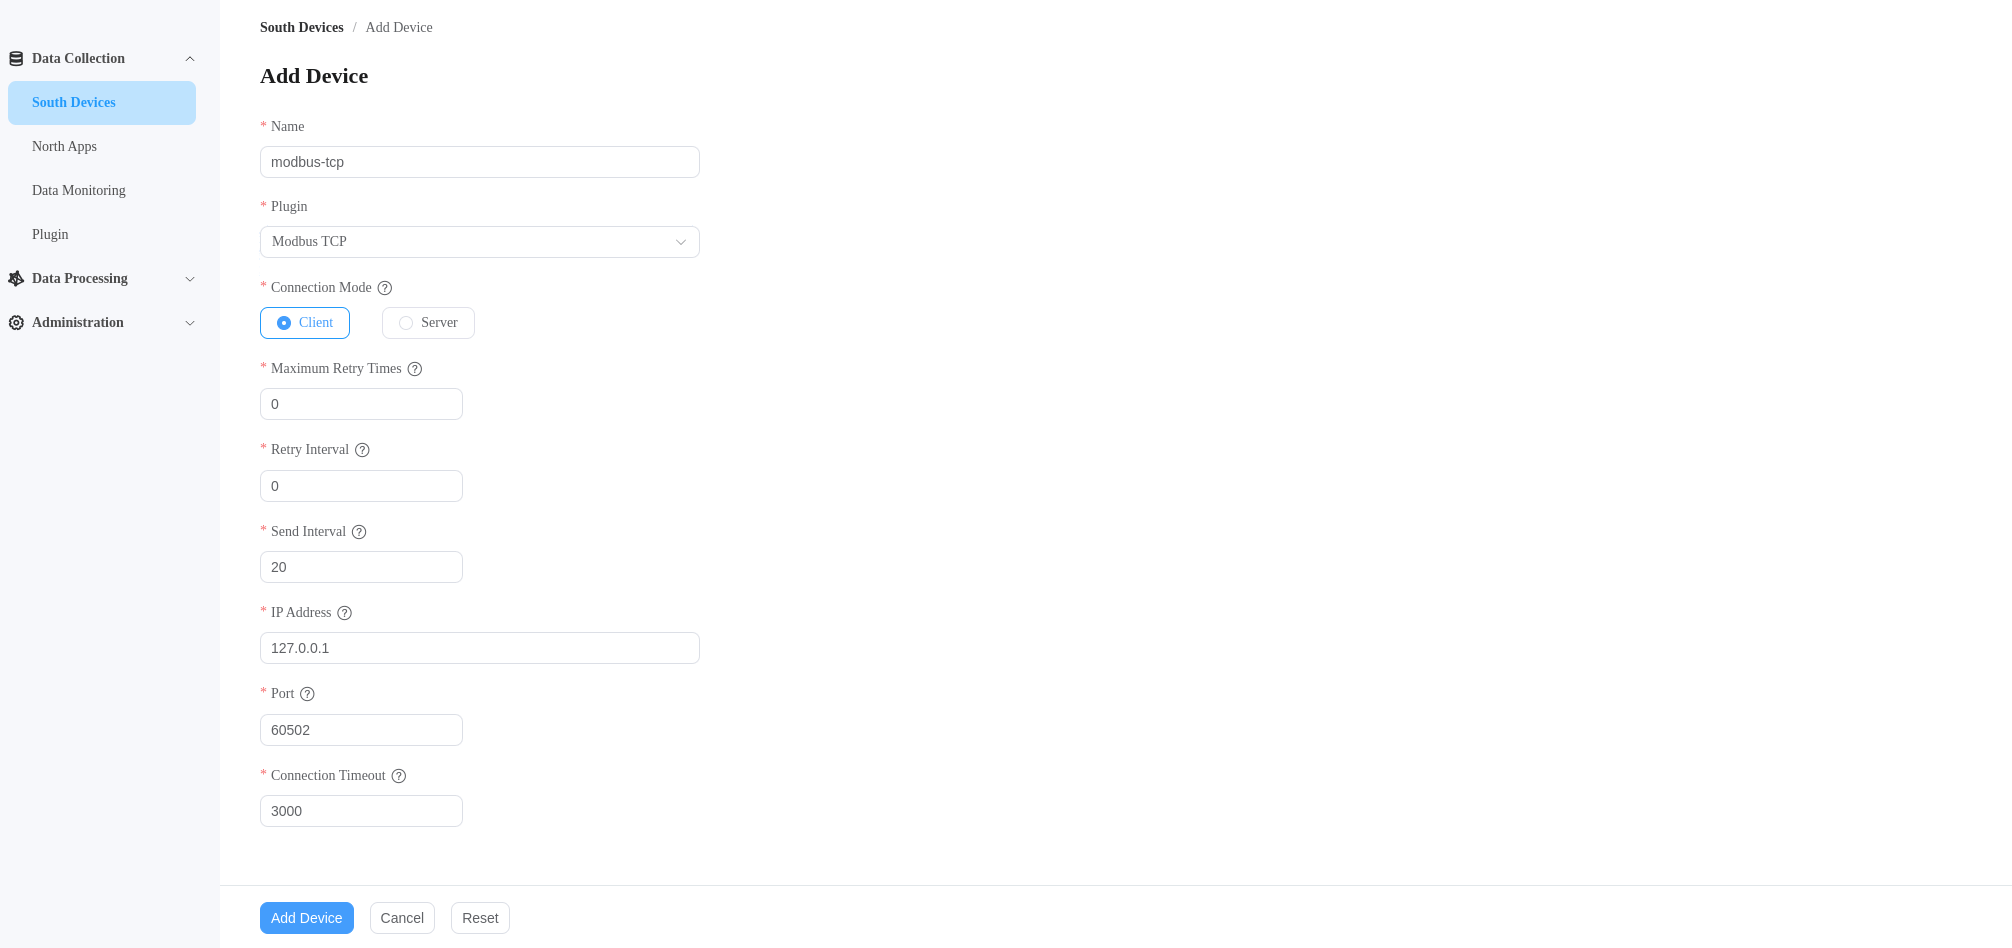
Add the modbus-tcp Node
Click South Devices -> Add Device to add a node using the Modbus TCP plugin. This tutorial will connect to a modbus simulator at port 60502.
Create a Group
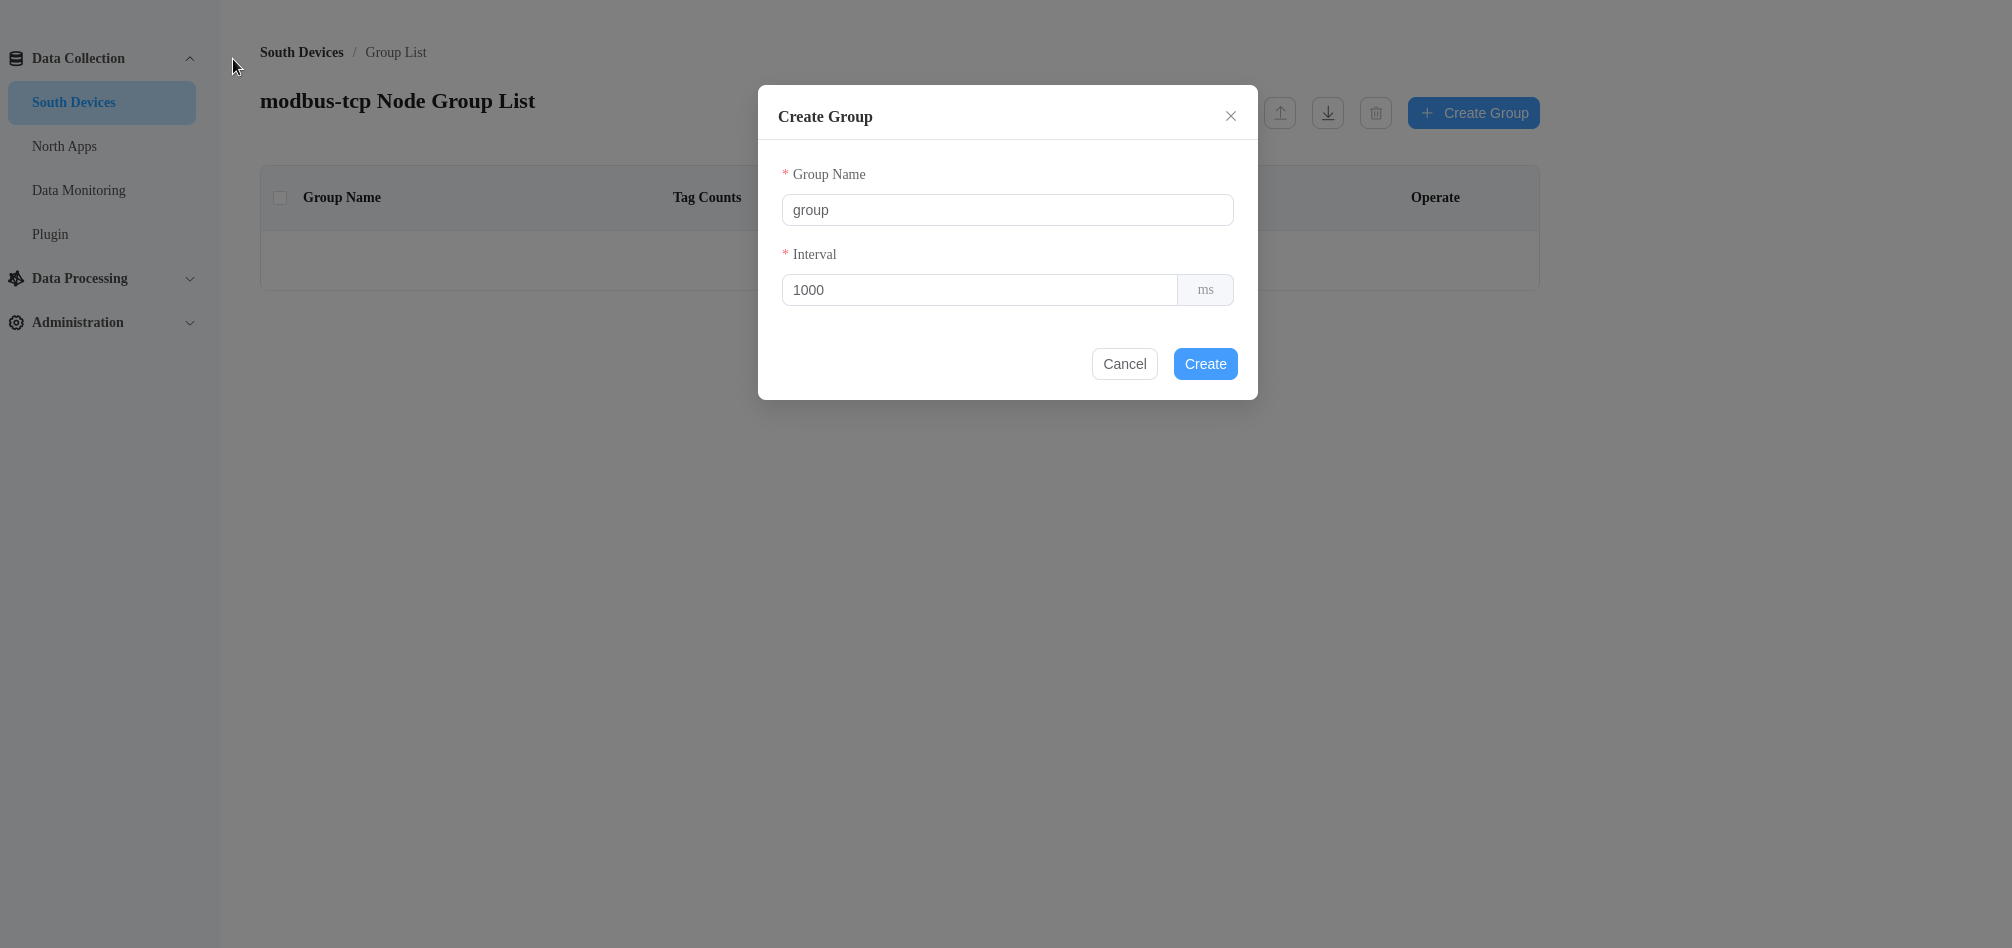
Click the modbus-tcp node to create a group. We set the group name to group and the interval to 1000.
Add Tag
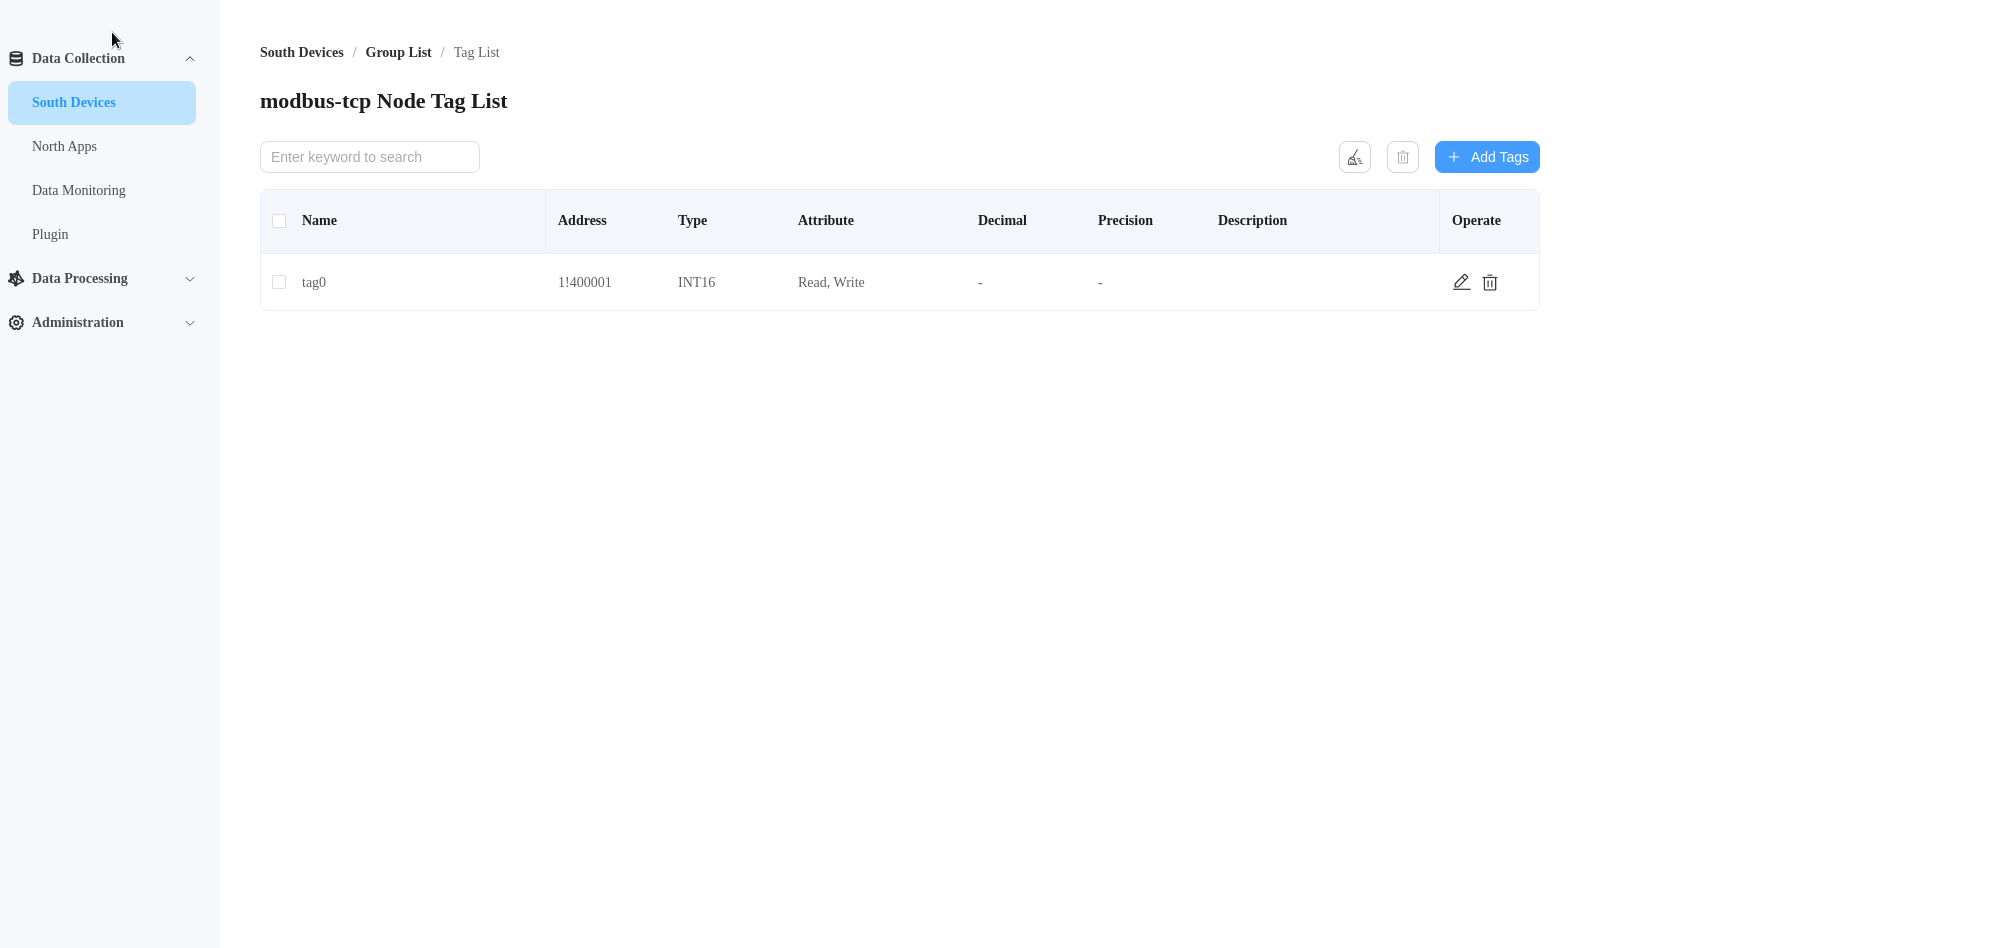
Click the created group group to create a tag with the name tag0 and with type INT16.
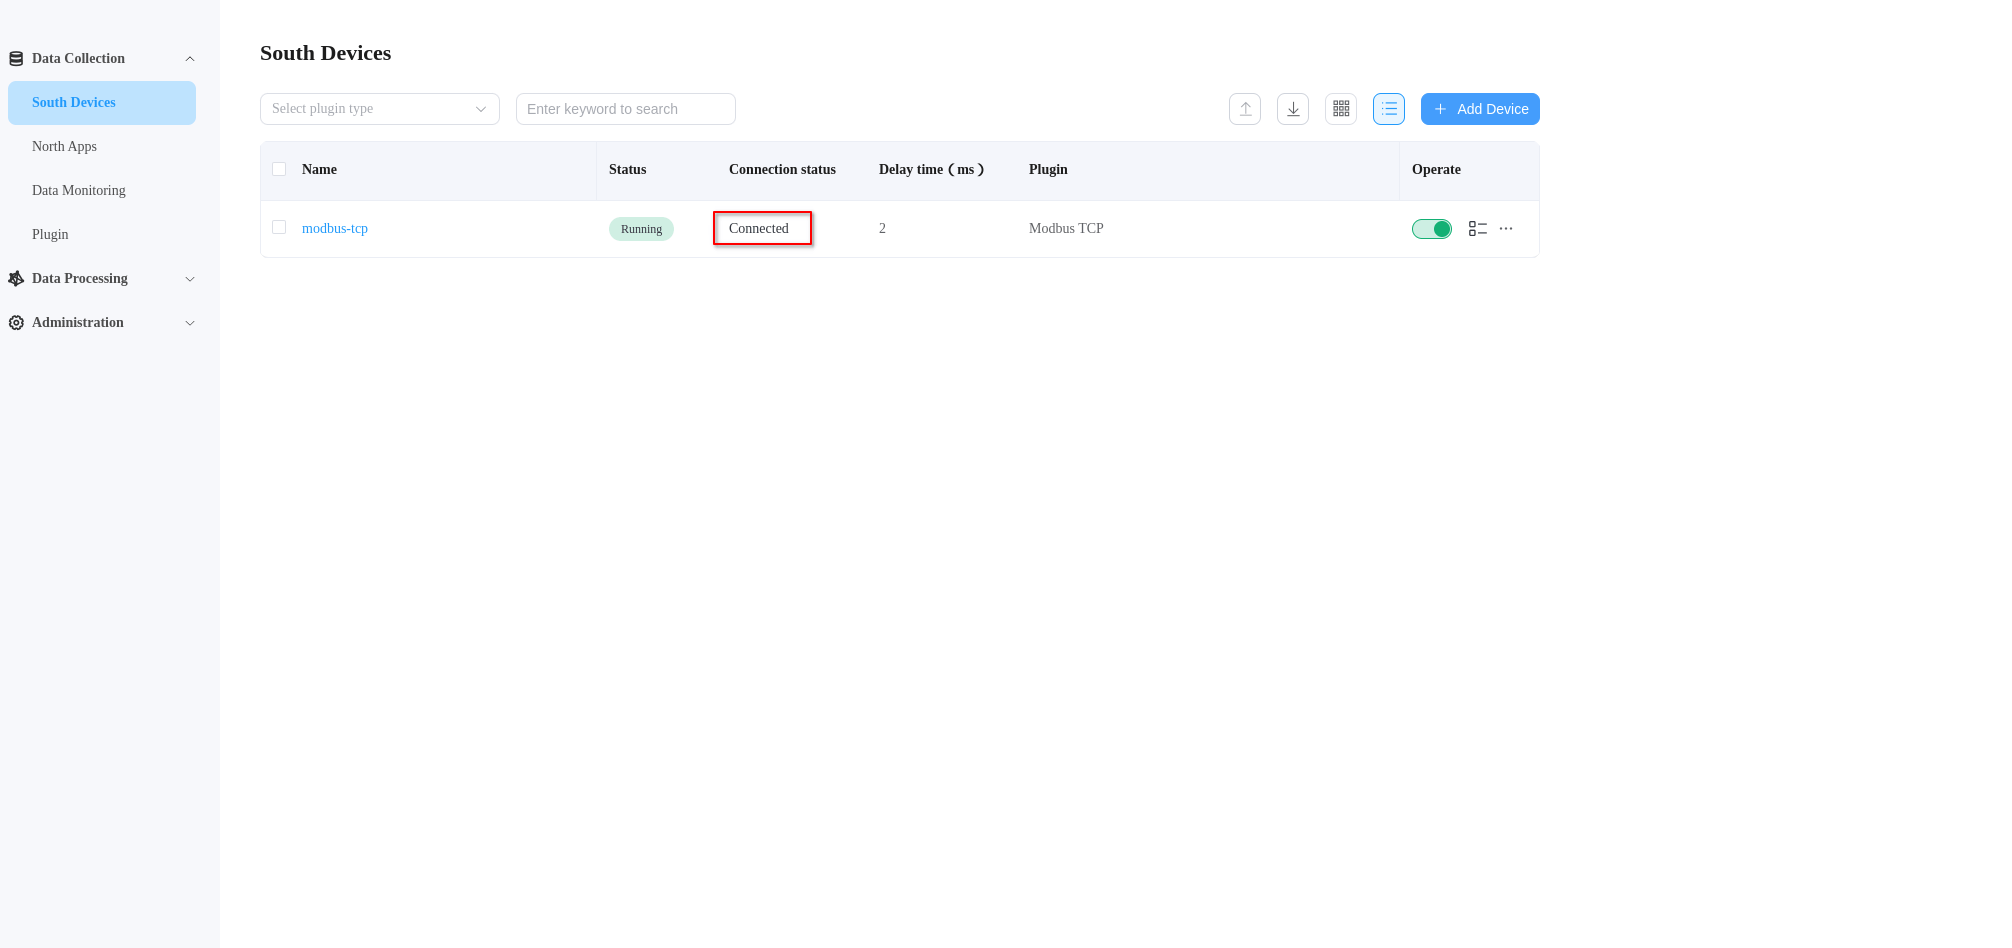
Finally, check that the modbus-tcp node is in Connected state.
North app
Add the aws Node
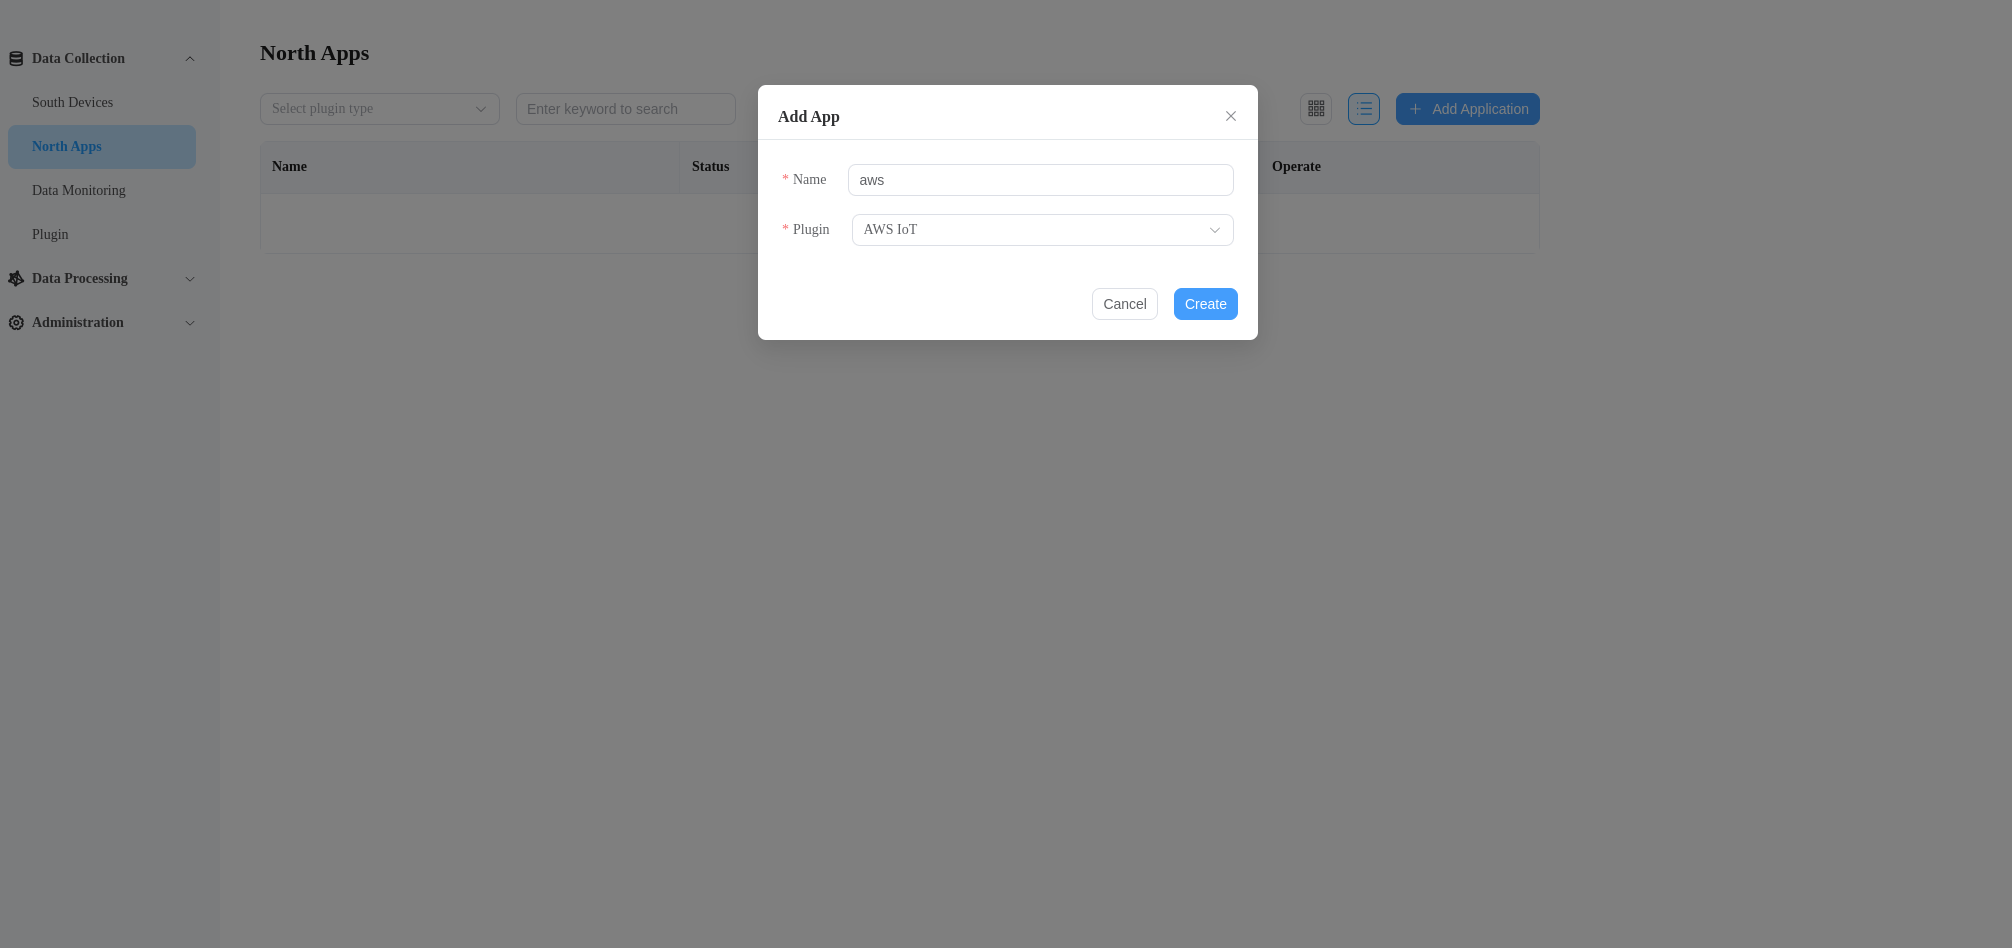
Click North Apps -> Add Application to add a node using the AWS IoT plugin.
In the Application Configuration tab, configure the aws node with the AWS data endpoint and device certificates.
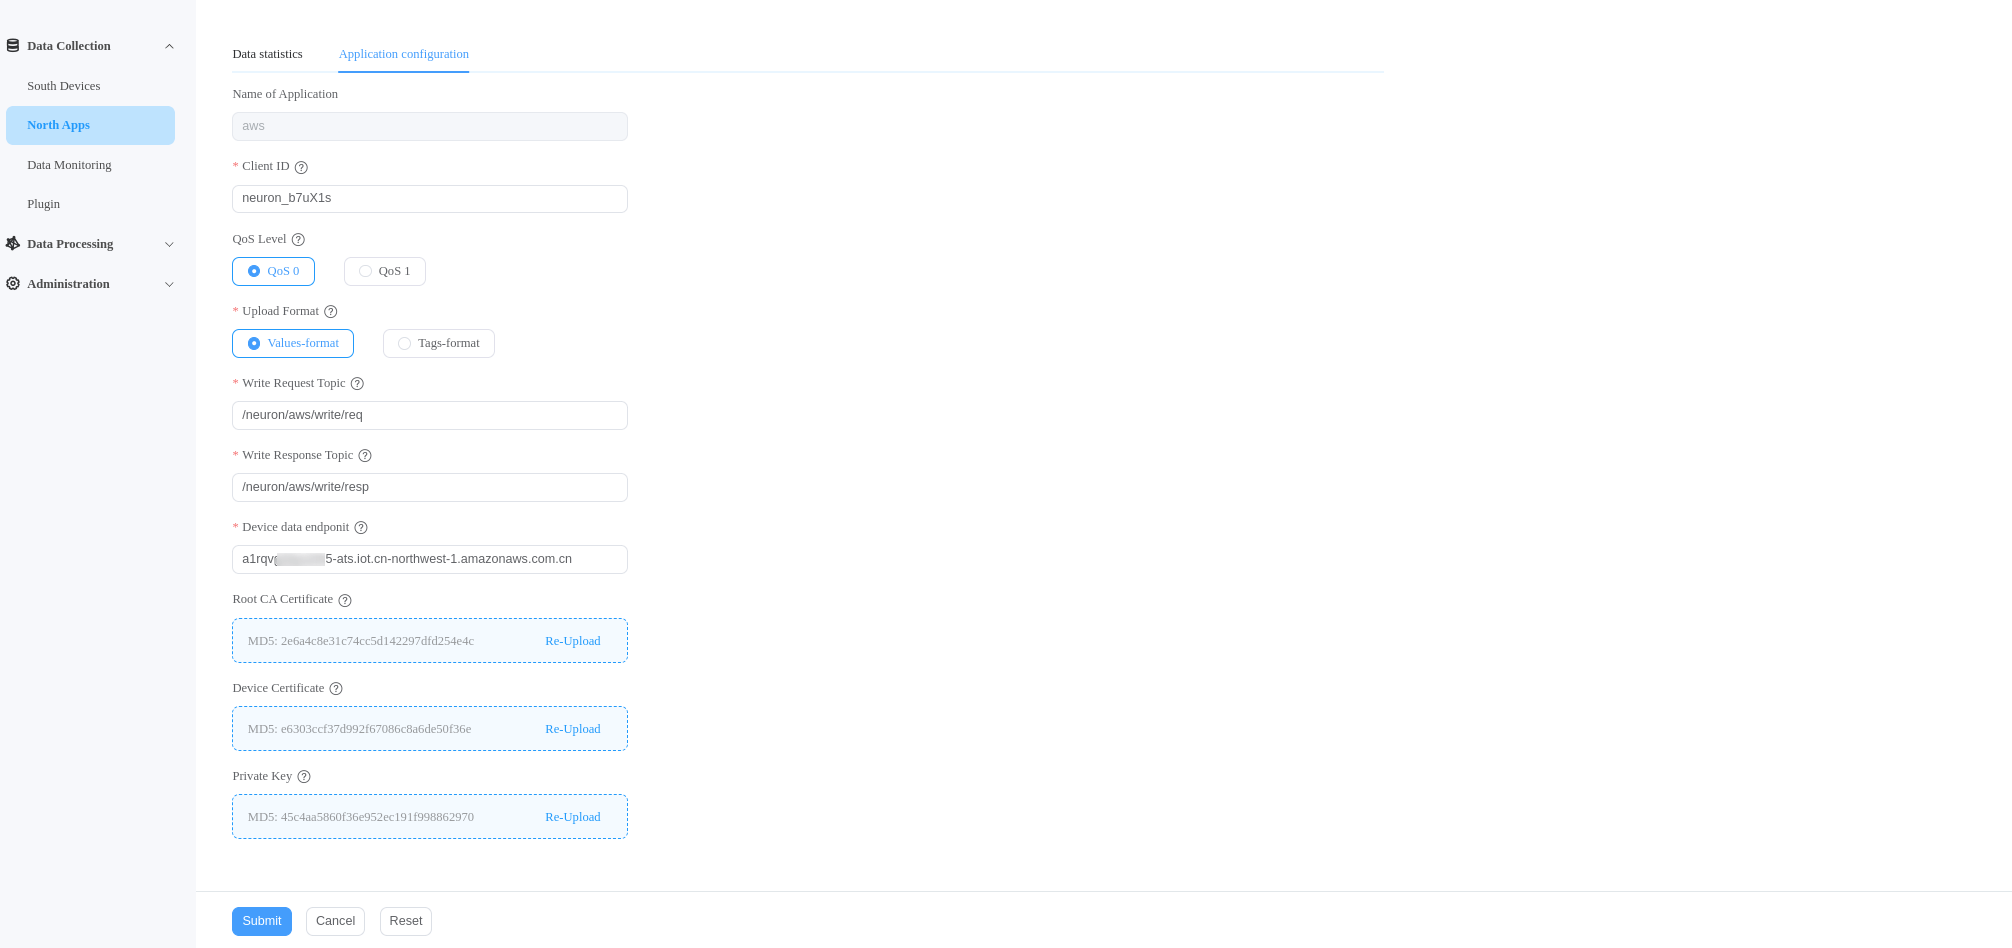
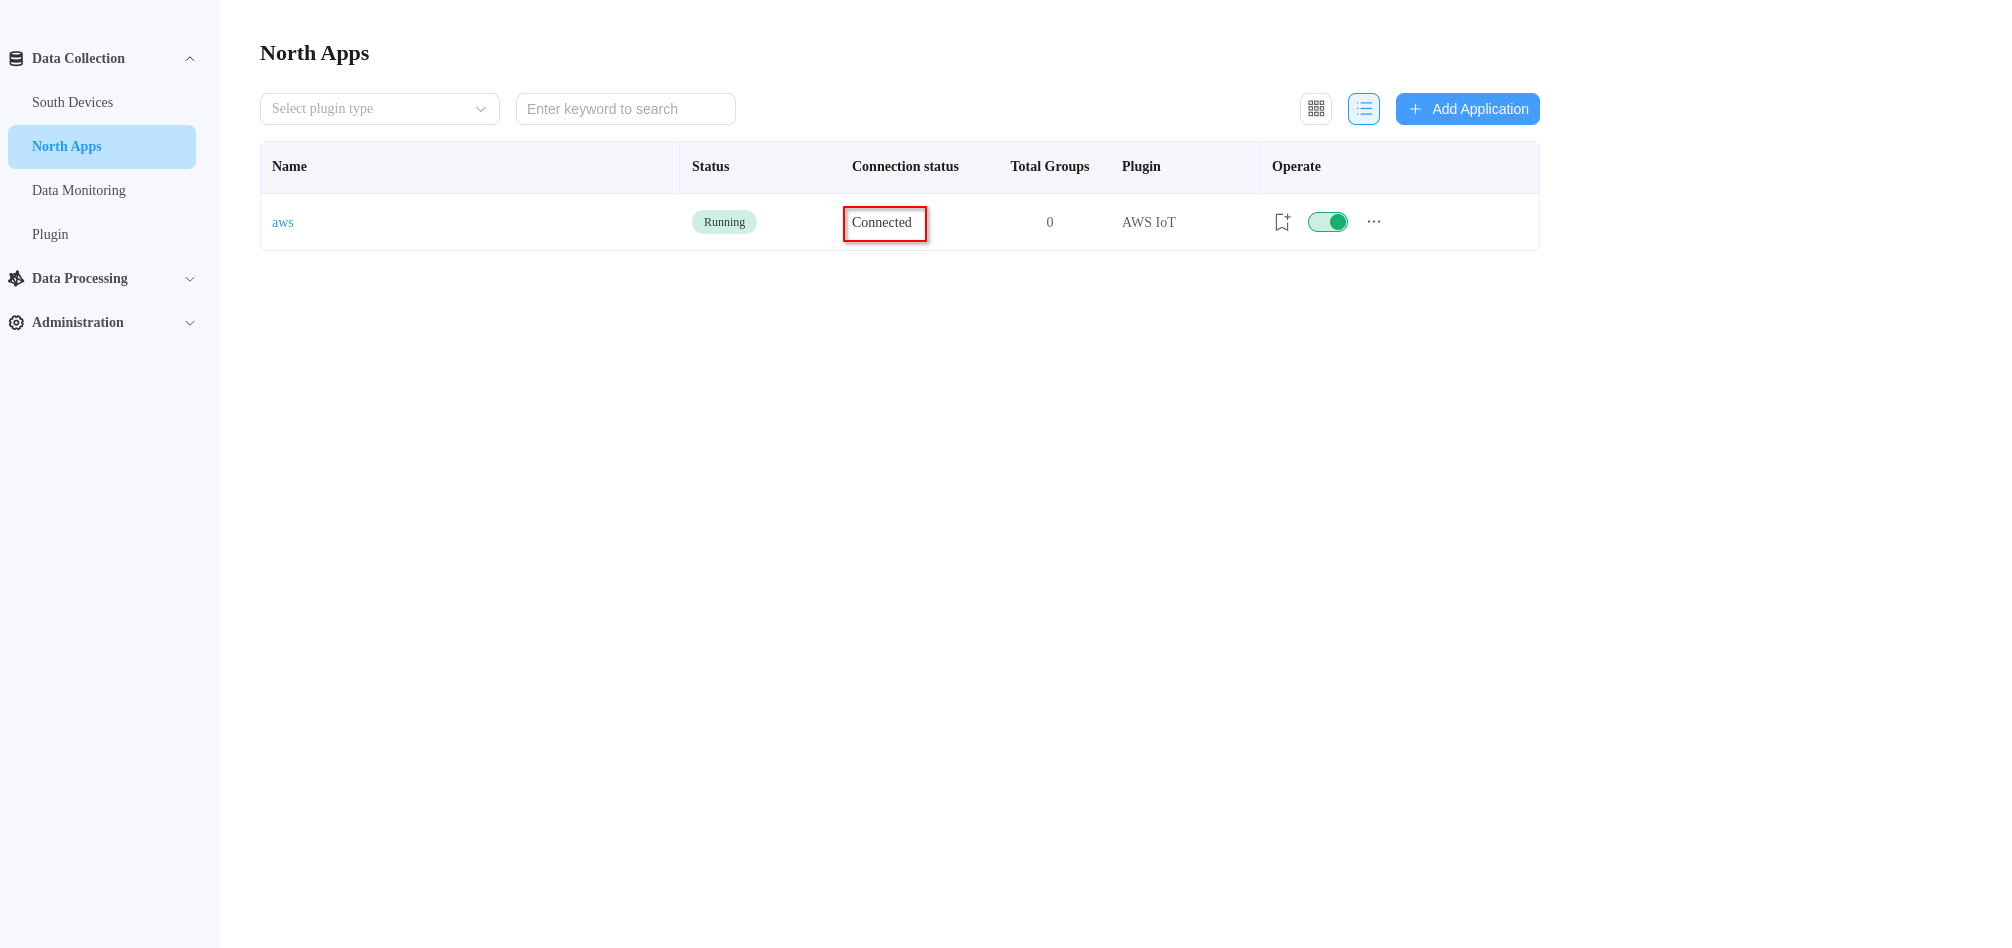
Once the configuration is submitted, the aws node connects to AWS IoT Core successfully.
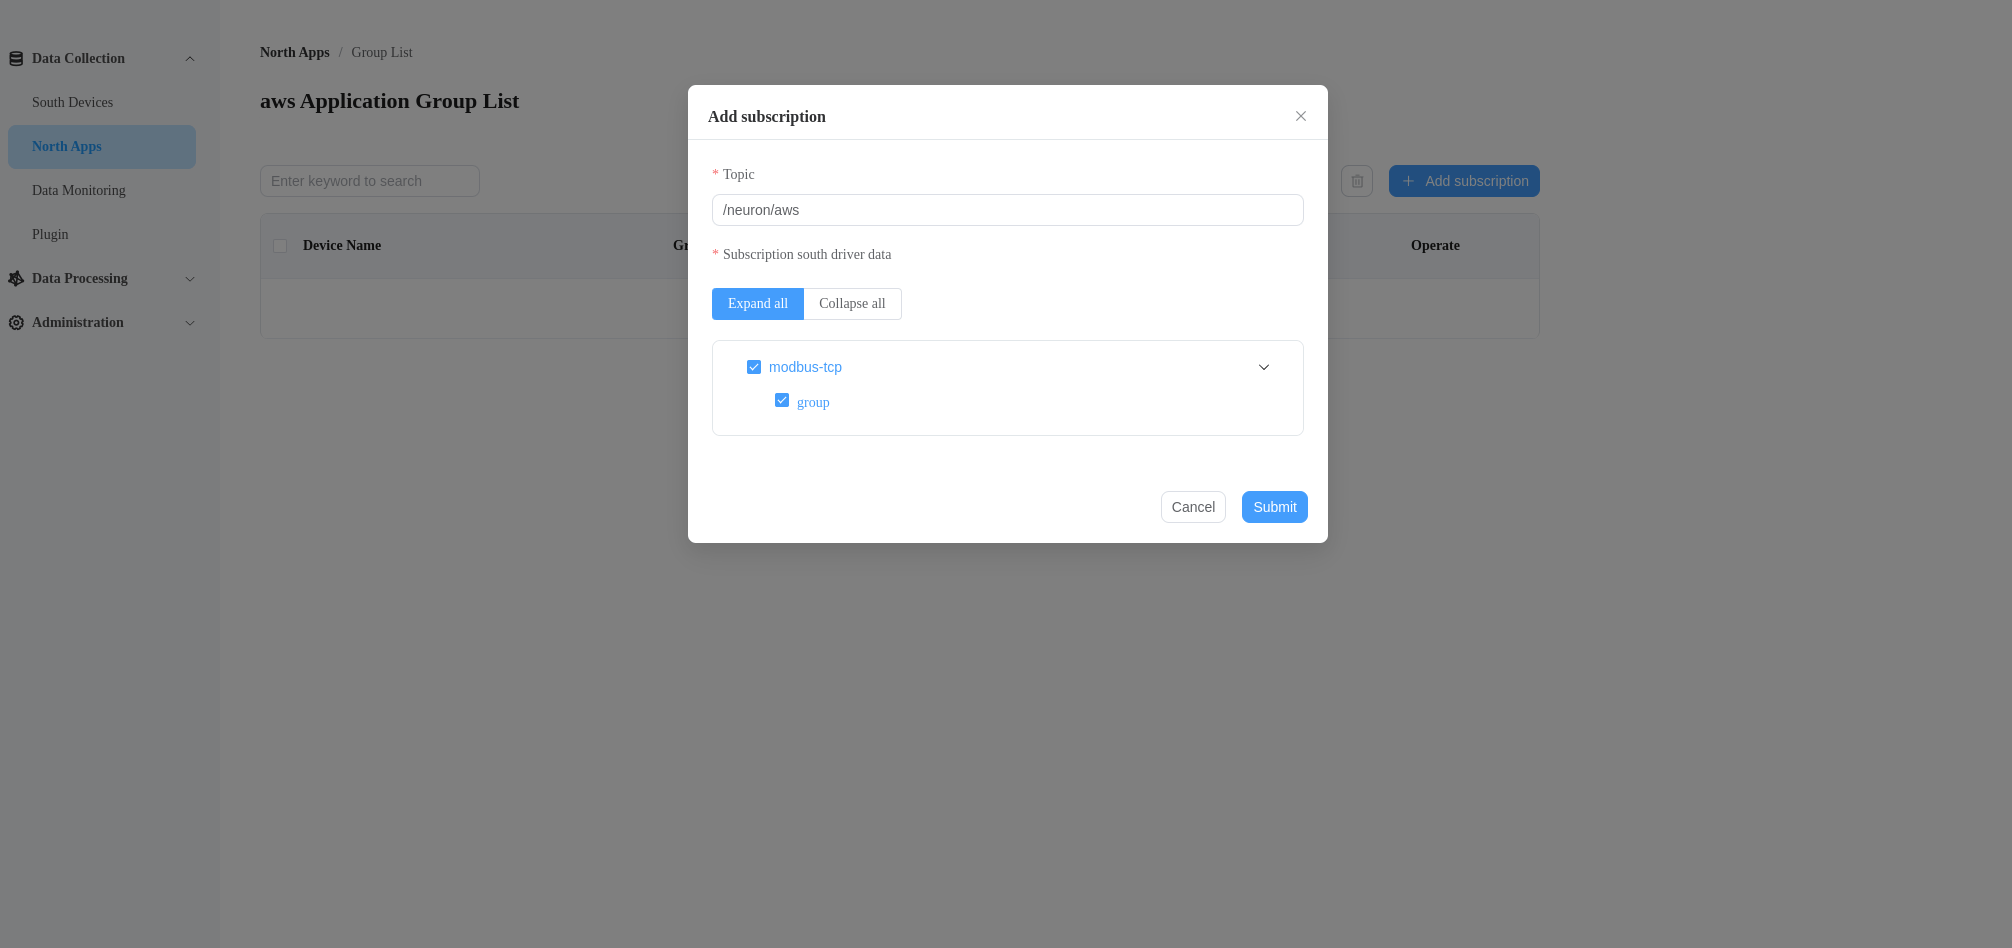
Subscribe to the modbus-tcp Node
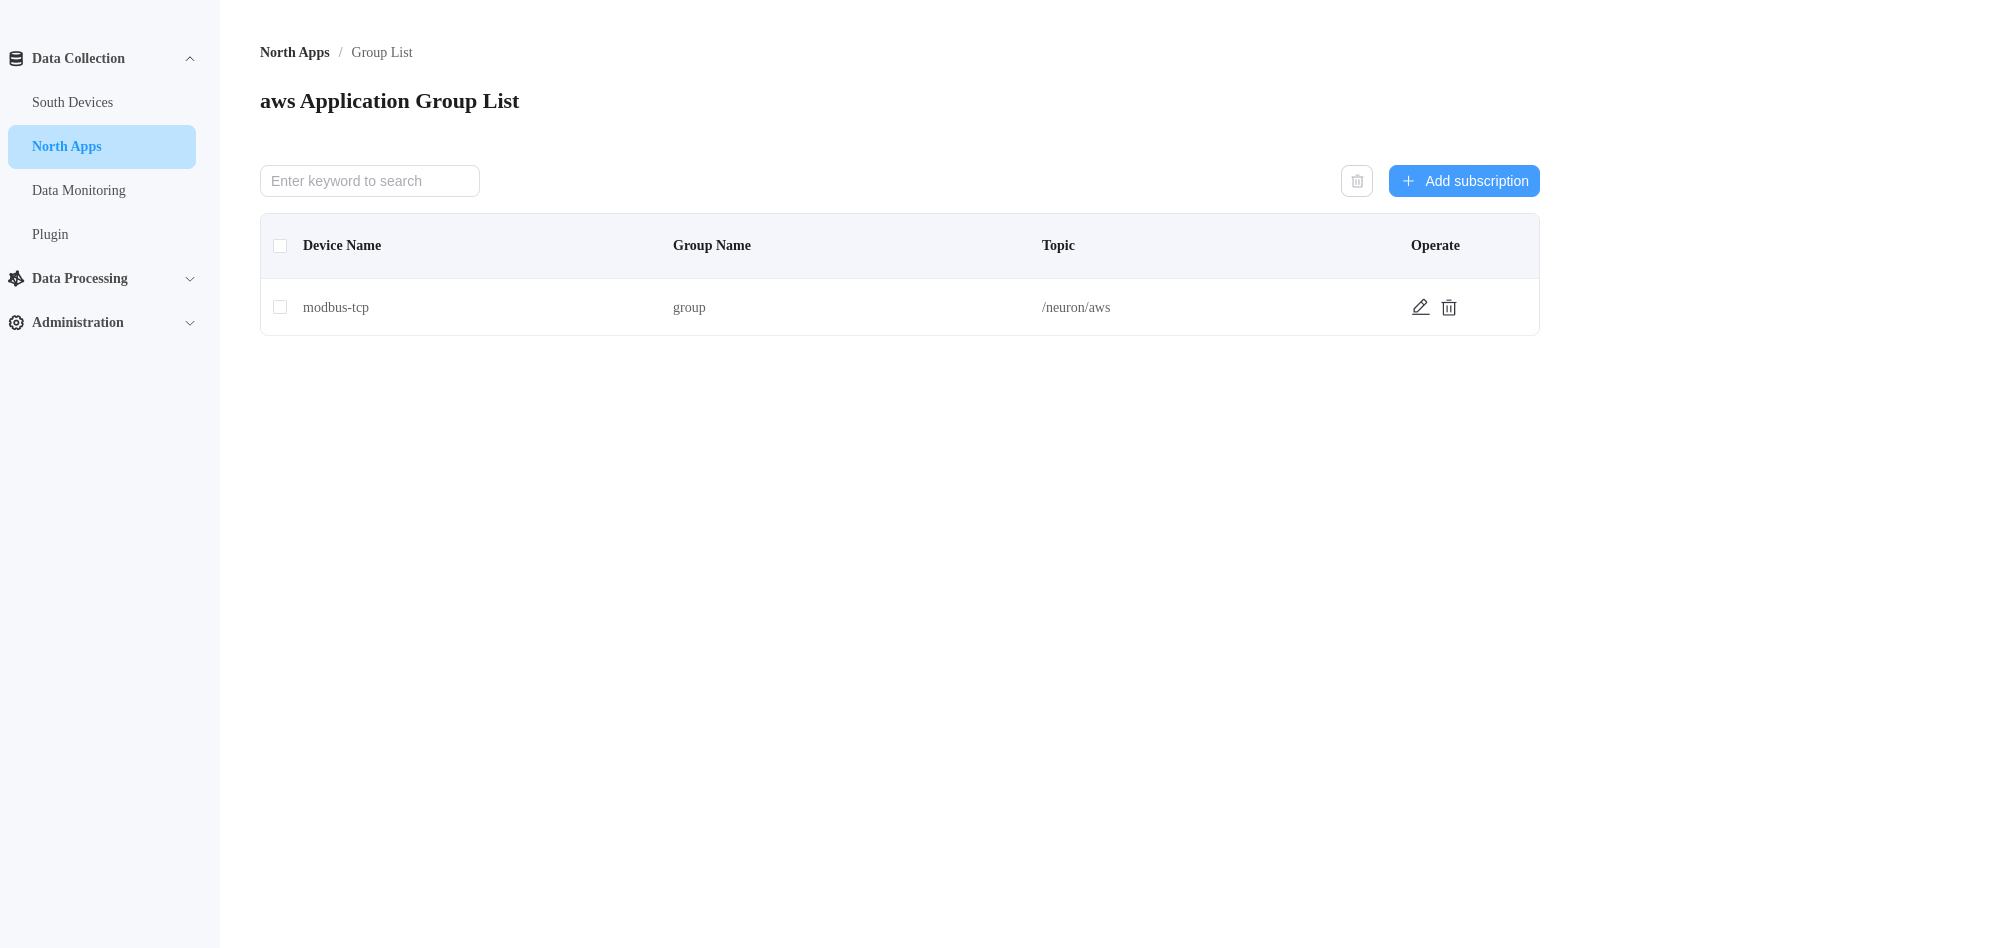
Click the aws node, then click Add subscription, select the modbus-tcp node and the group group. Set the data upload topic to /neuron/aws, which is the MQTT topic to publish south device data.
Monitor Data
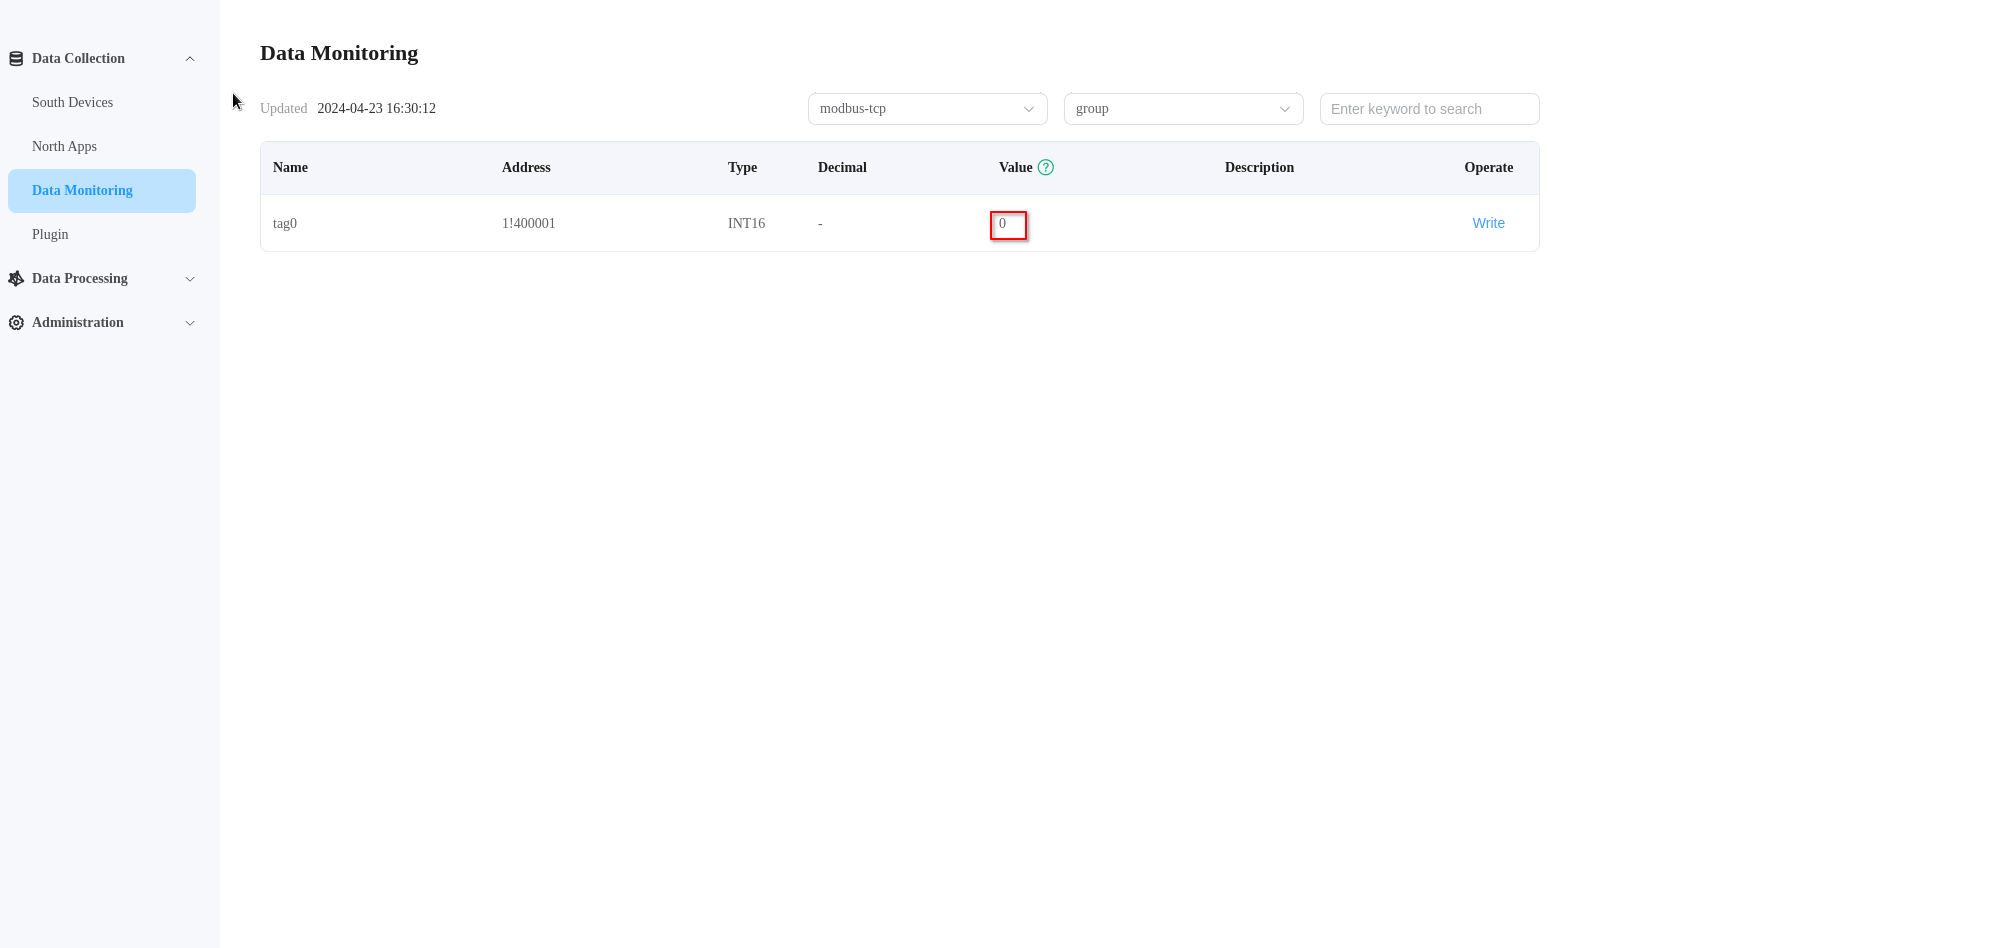
After subscribing to the group group of the modbus-tcp node, the aws node will begin pushing data to the AWS IoT Core. Click Monitoring, then select the modbus-tcp node and the group group. We see that Neuron reports a initial value 0 for tag0.
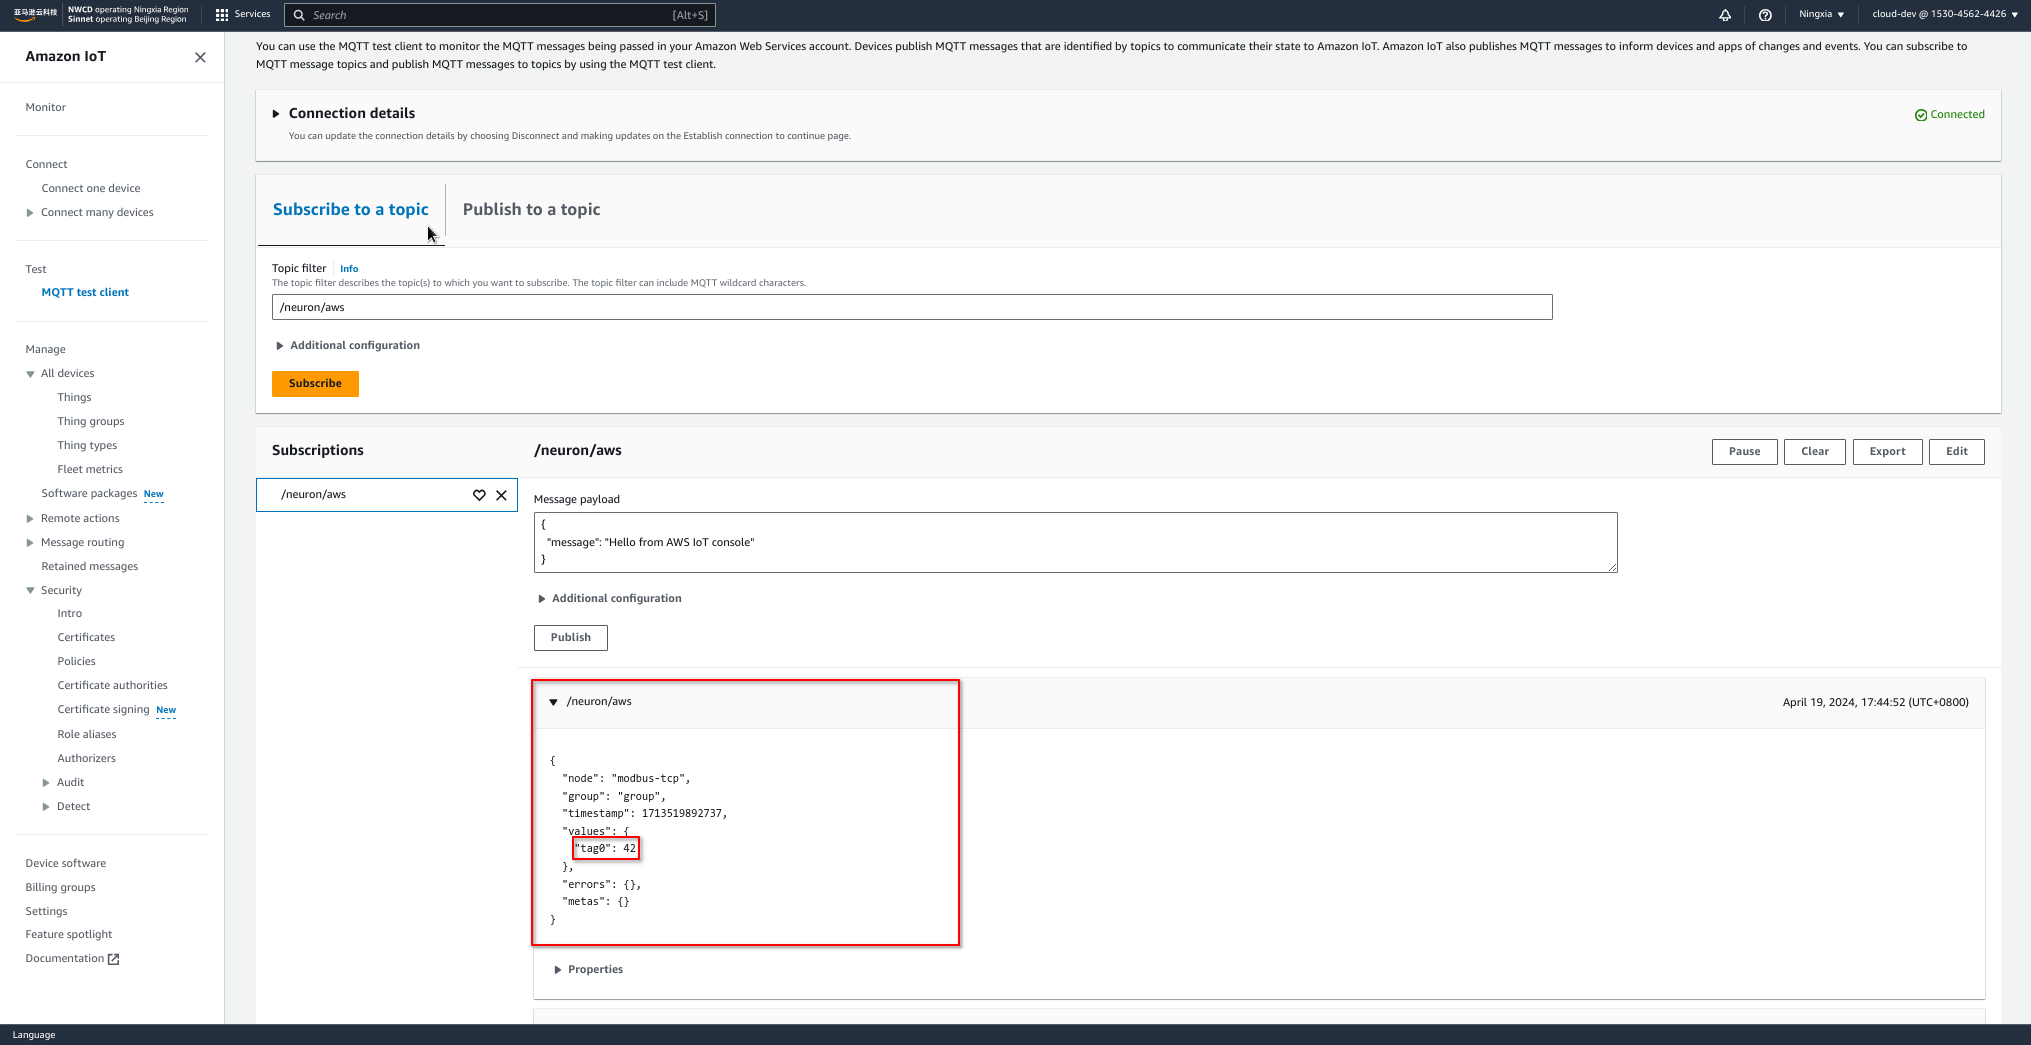
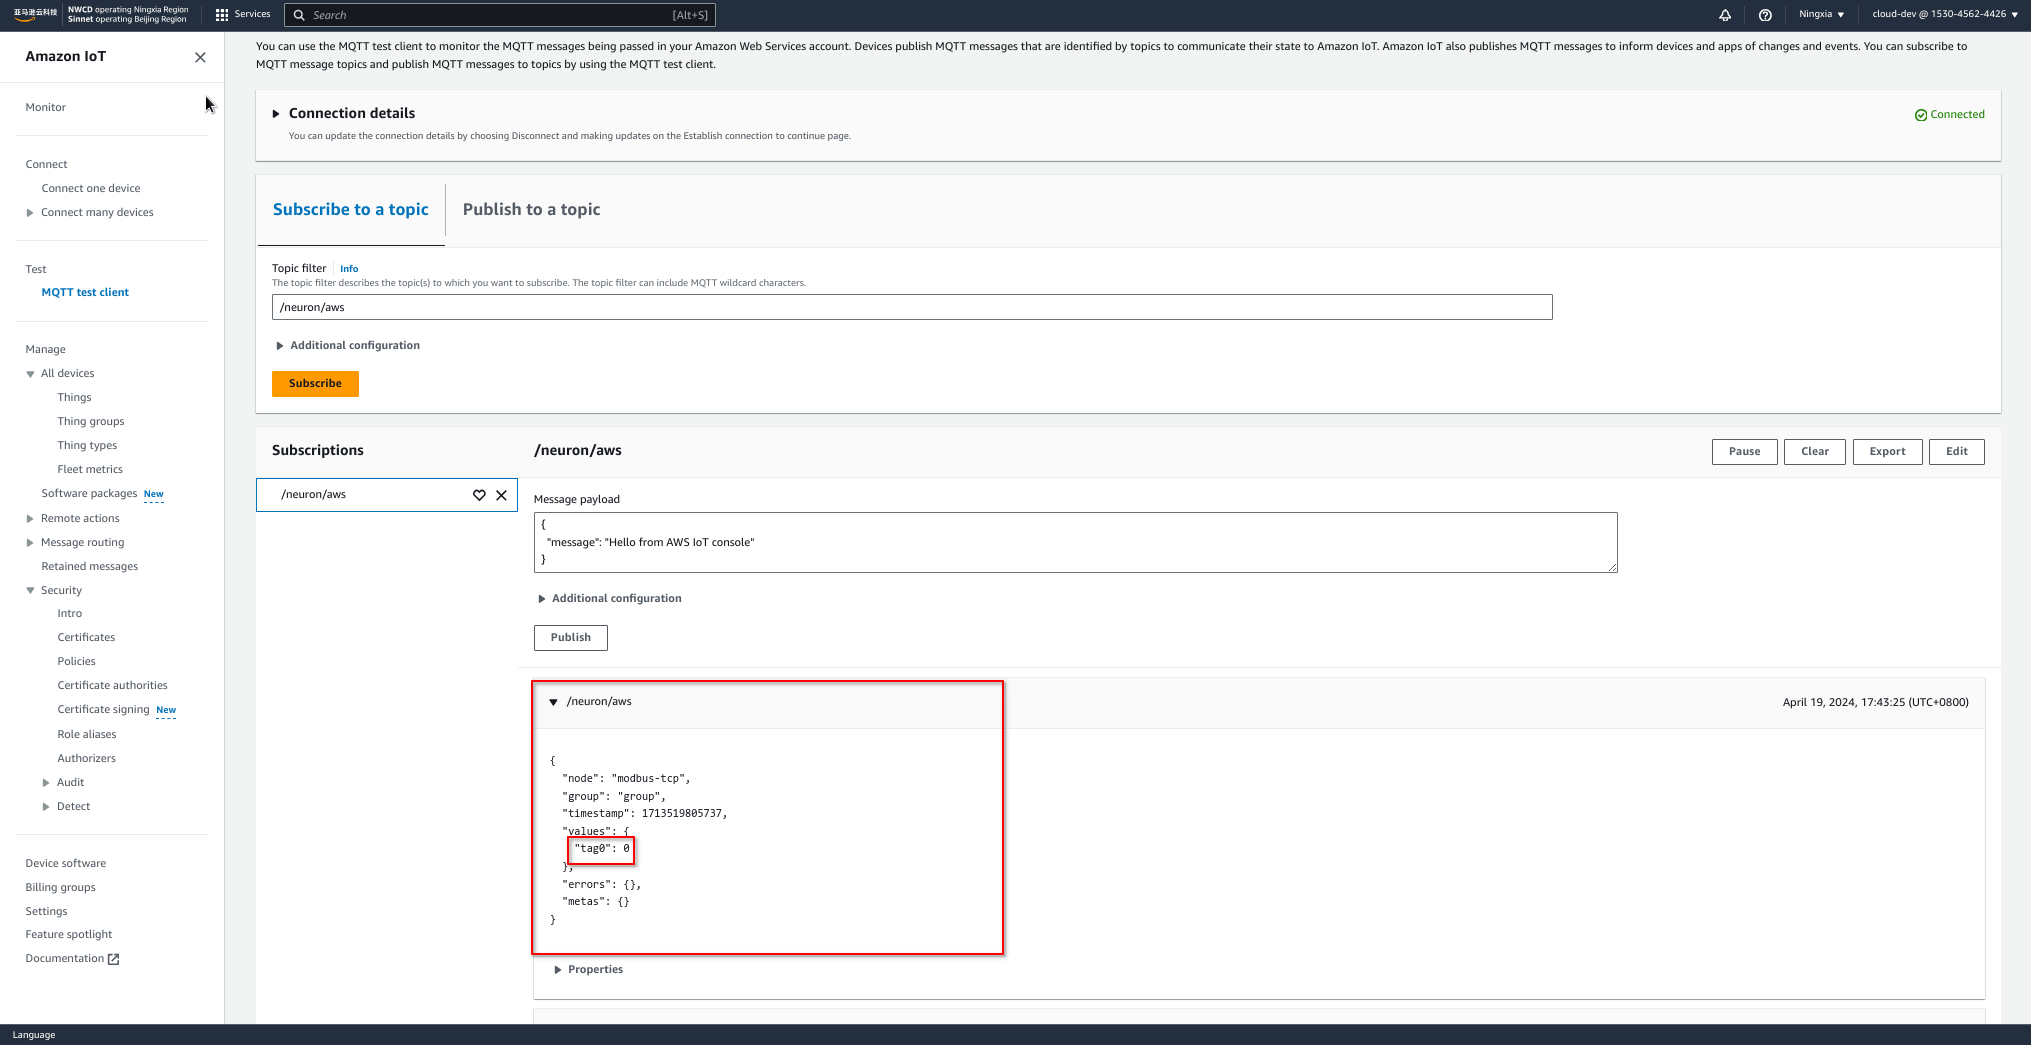
In the AWS IoT console, using MQTT test client to subscribe to the /neuron/aws topic. We can check that AWS IoT Core receives the data correctly.
Write Data
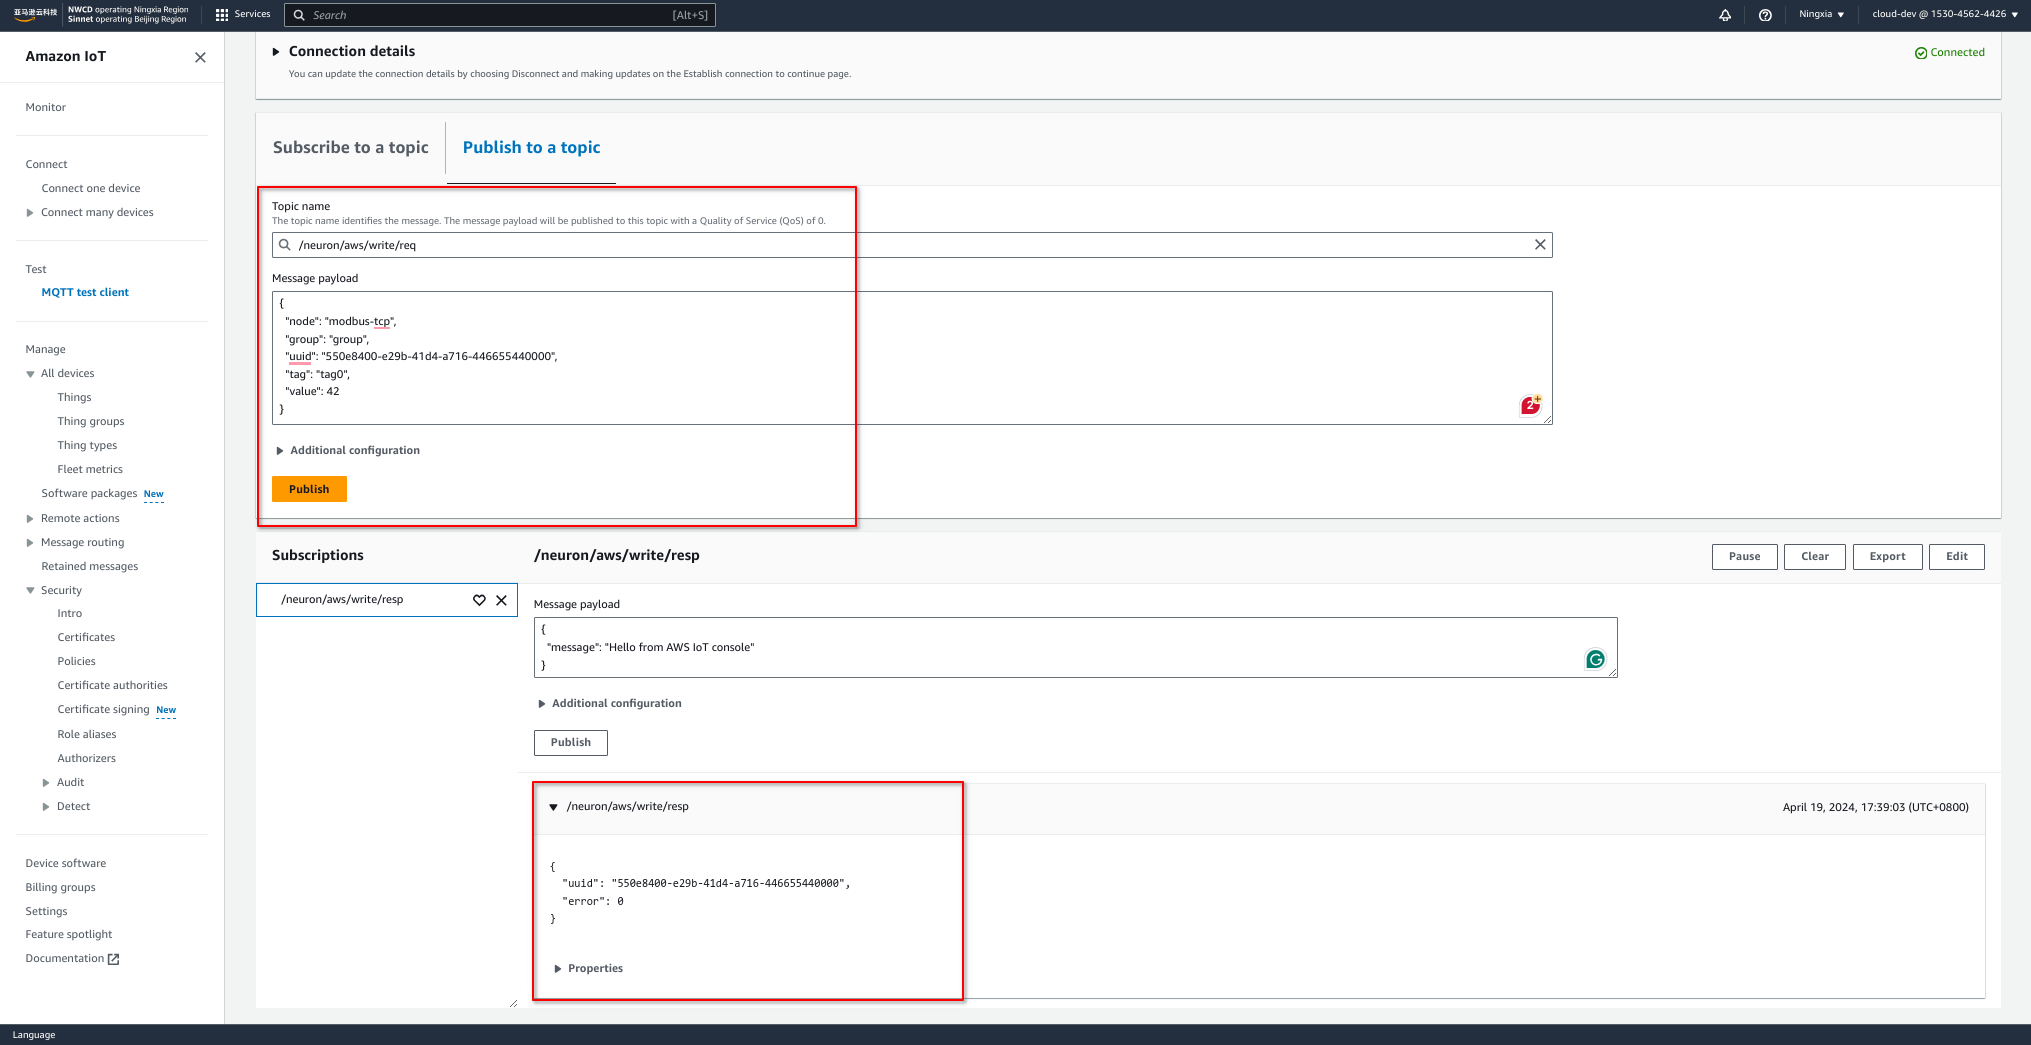
In the AWS IoT console, use the MQTT test client to send a write request to the topic /neuron/aws/write/req, which writes value 42 to the tag tag0.
Now we can see that Neuron updates tag0 correctly in the Data monitoring tab.

And AWS IoT Core receives the correct tag data, 42, which is expected.