Quick Start
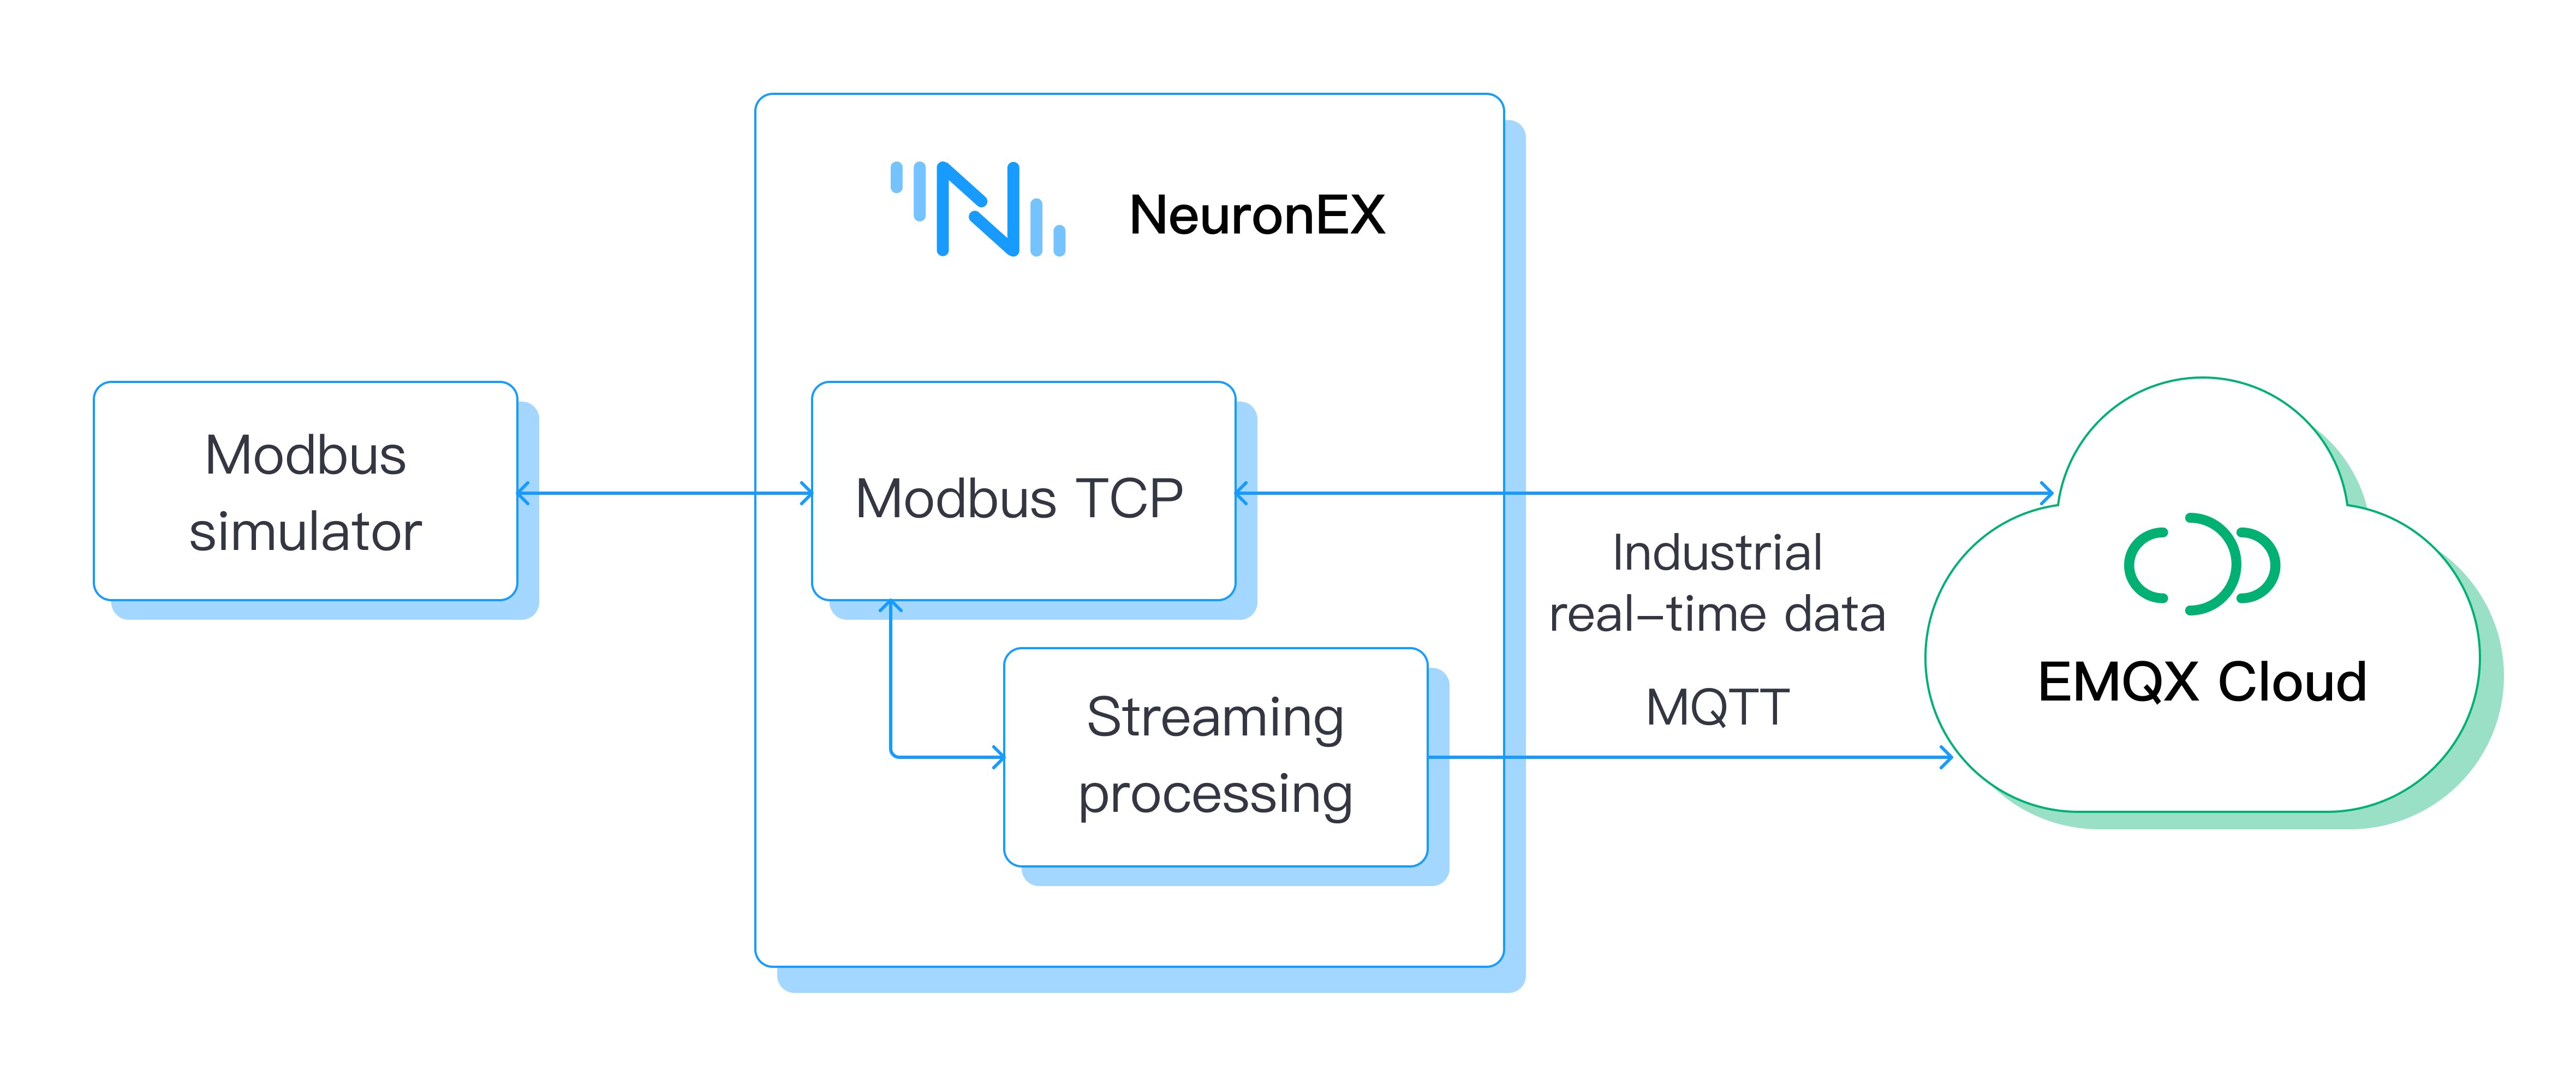
This tutorial starts with the download and installation, taking the Modbus TCP driver protocol as an example, and quickly starts using EMQX Neuron (formerly NeuronEX) to collect analog device data, directly uploading the data to the EMQX MQTT public cloud service, and simply using the data stream processing function.
EMQX Neuron Installation
EMQX Neuron provides a variety of installation methods. Users can view detailed installation methods in Installation. This example uses docker to start experiencing EMQX Neuron as quickly as possible.
- Get Docker image
$ docker pull emqx/neuronex:latest- Start Docker container
$ docker run -d --name neuronex -p 8085:8085 --log-opt max-size=100m emqx/neuronex:latestInstall Modbus simulator
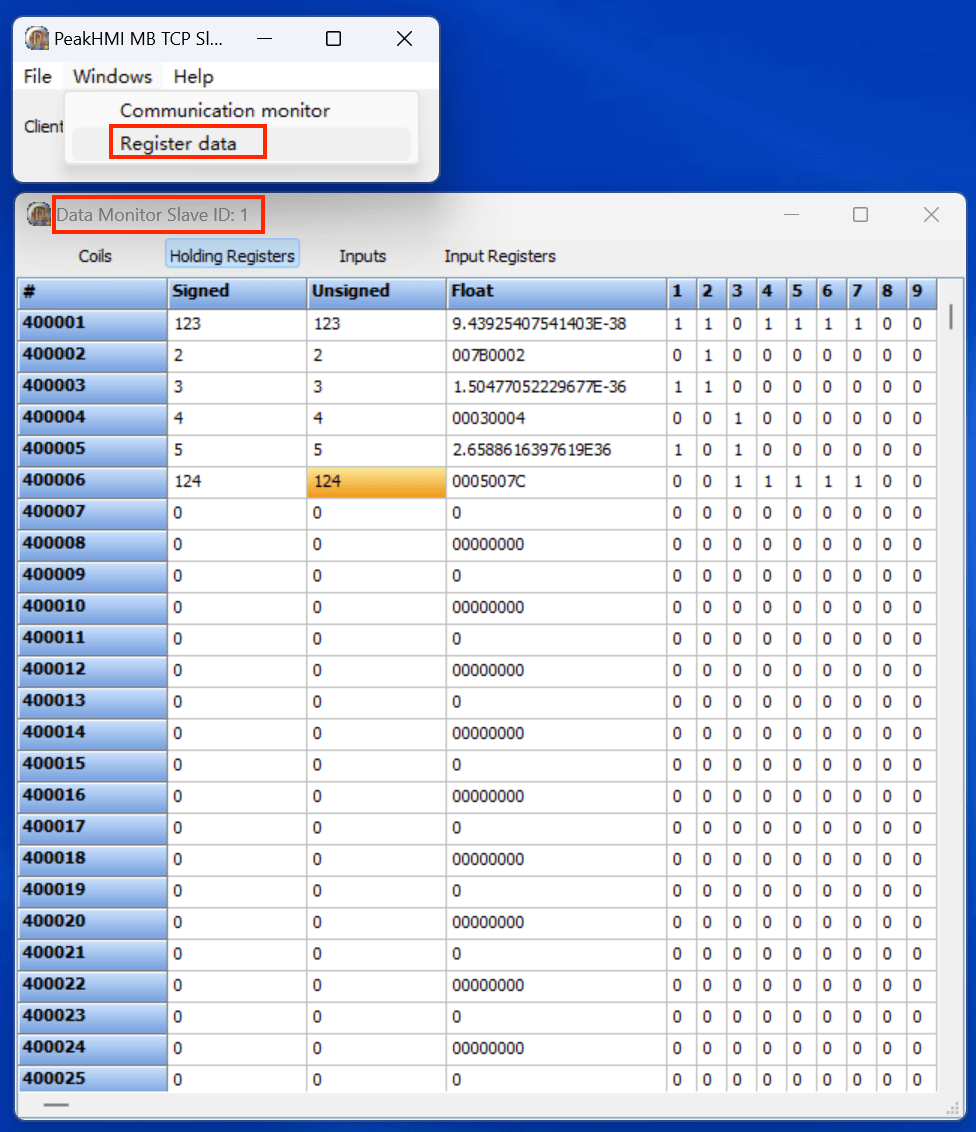
Install the PeakHMI Slave Simulators software. The installation package can be downloaded from PeakHMI official website.
After installation, run Modbus TCP slave EX. Set the simulator point value and site number, as shown in the figure below.
TIP
It is necessary to ensure that EMQX Neuron and the simulator are running in the same local network.
Try to turn off the firewall of Windows, otherwise EMQX Neuron may not be able to connect to the simulator.
Login to EMQX Neuron
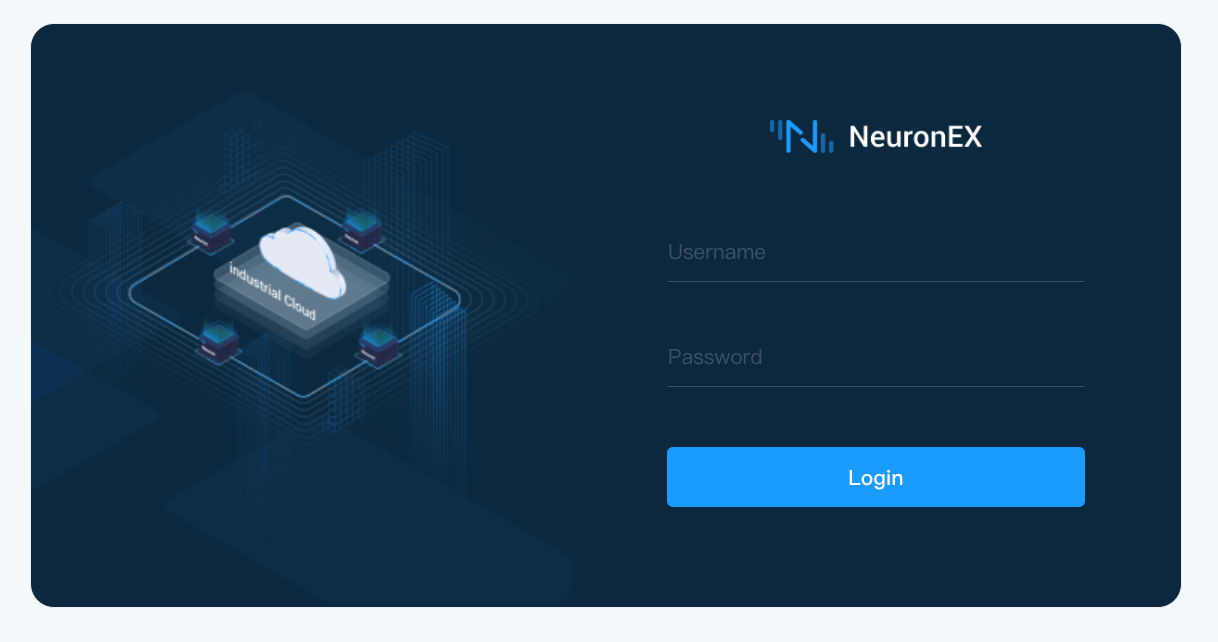
Open a web browser and enter the gateway address and port number running EMQX Neuron to enter the login page. The default port number is 8085. For example, http://127.0.0.1:8085
Use the initial username and password to log in to the management console page (initial username: admin, initial password: 0000). The login page is as shown in the figure below.
Southbound device configuration
Create southbound device
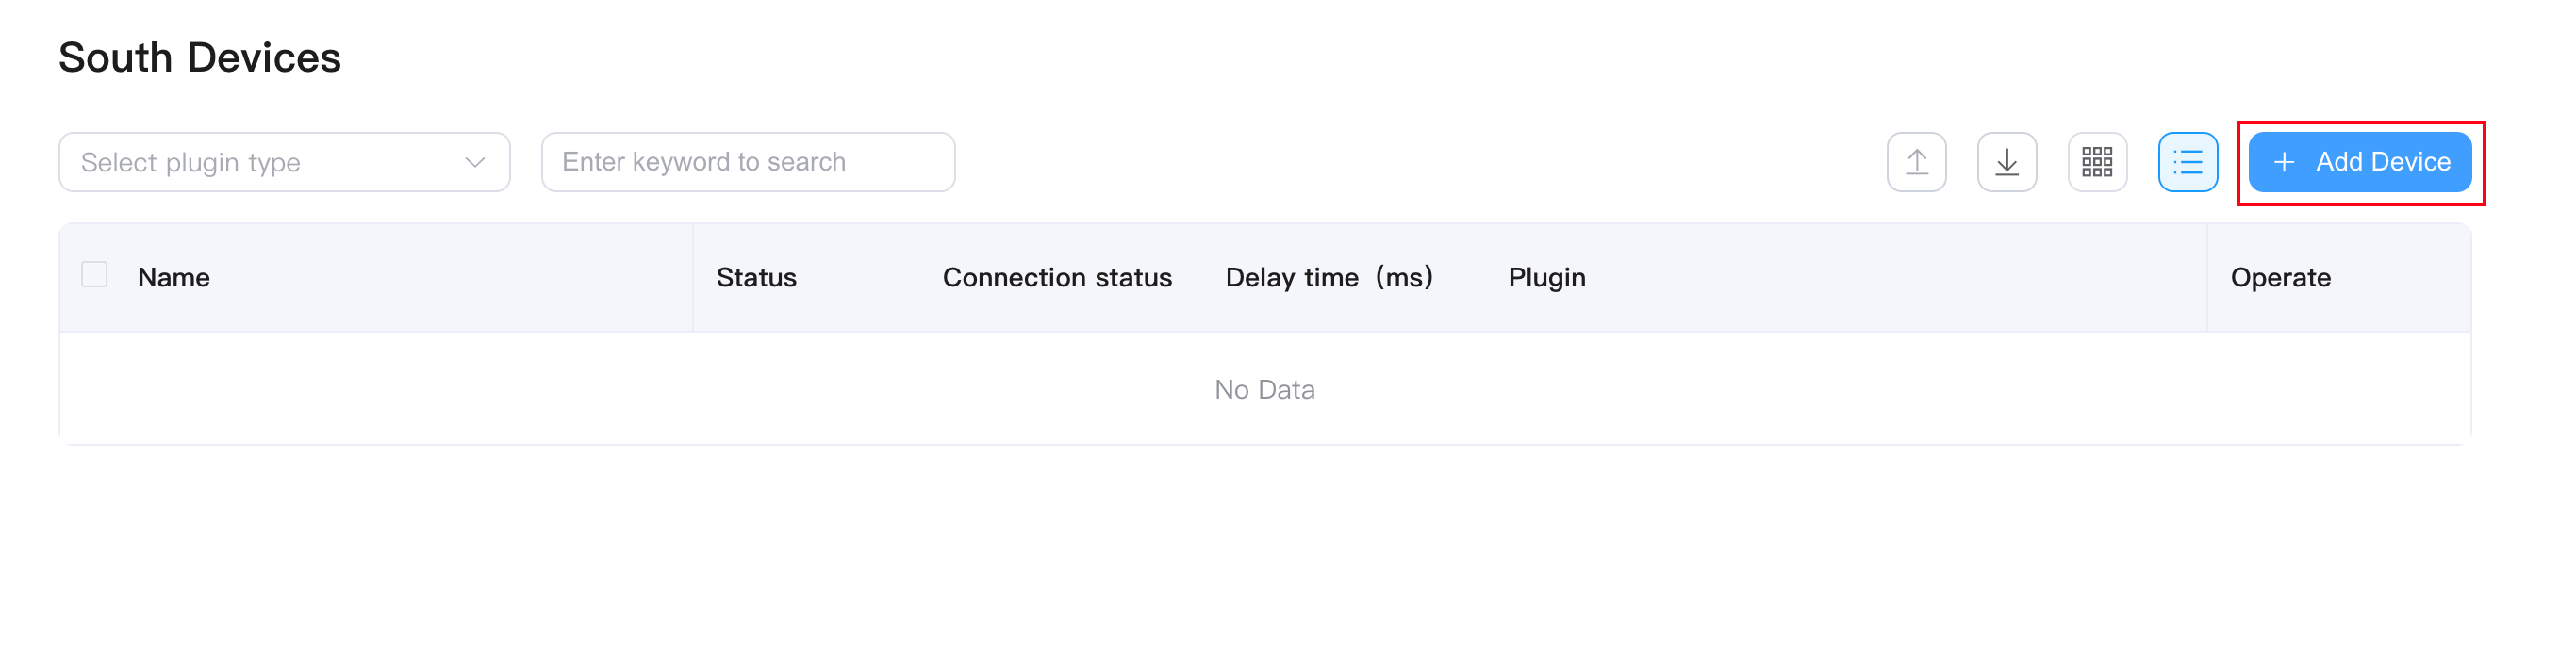
The southbound device is used to establish a connection between EMQX Neuron and the device, and get device data points. In this example, EMQX Neuron's Modbus TCP plugin is used to obtain data in the Modbus simulator.
Select South Devices in Data Collection menu to enter the southbound device management page, click Add Device to add a new device, as shown in the figure below.
Configure Southbound Driver
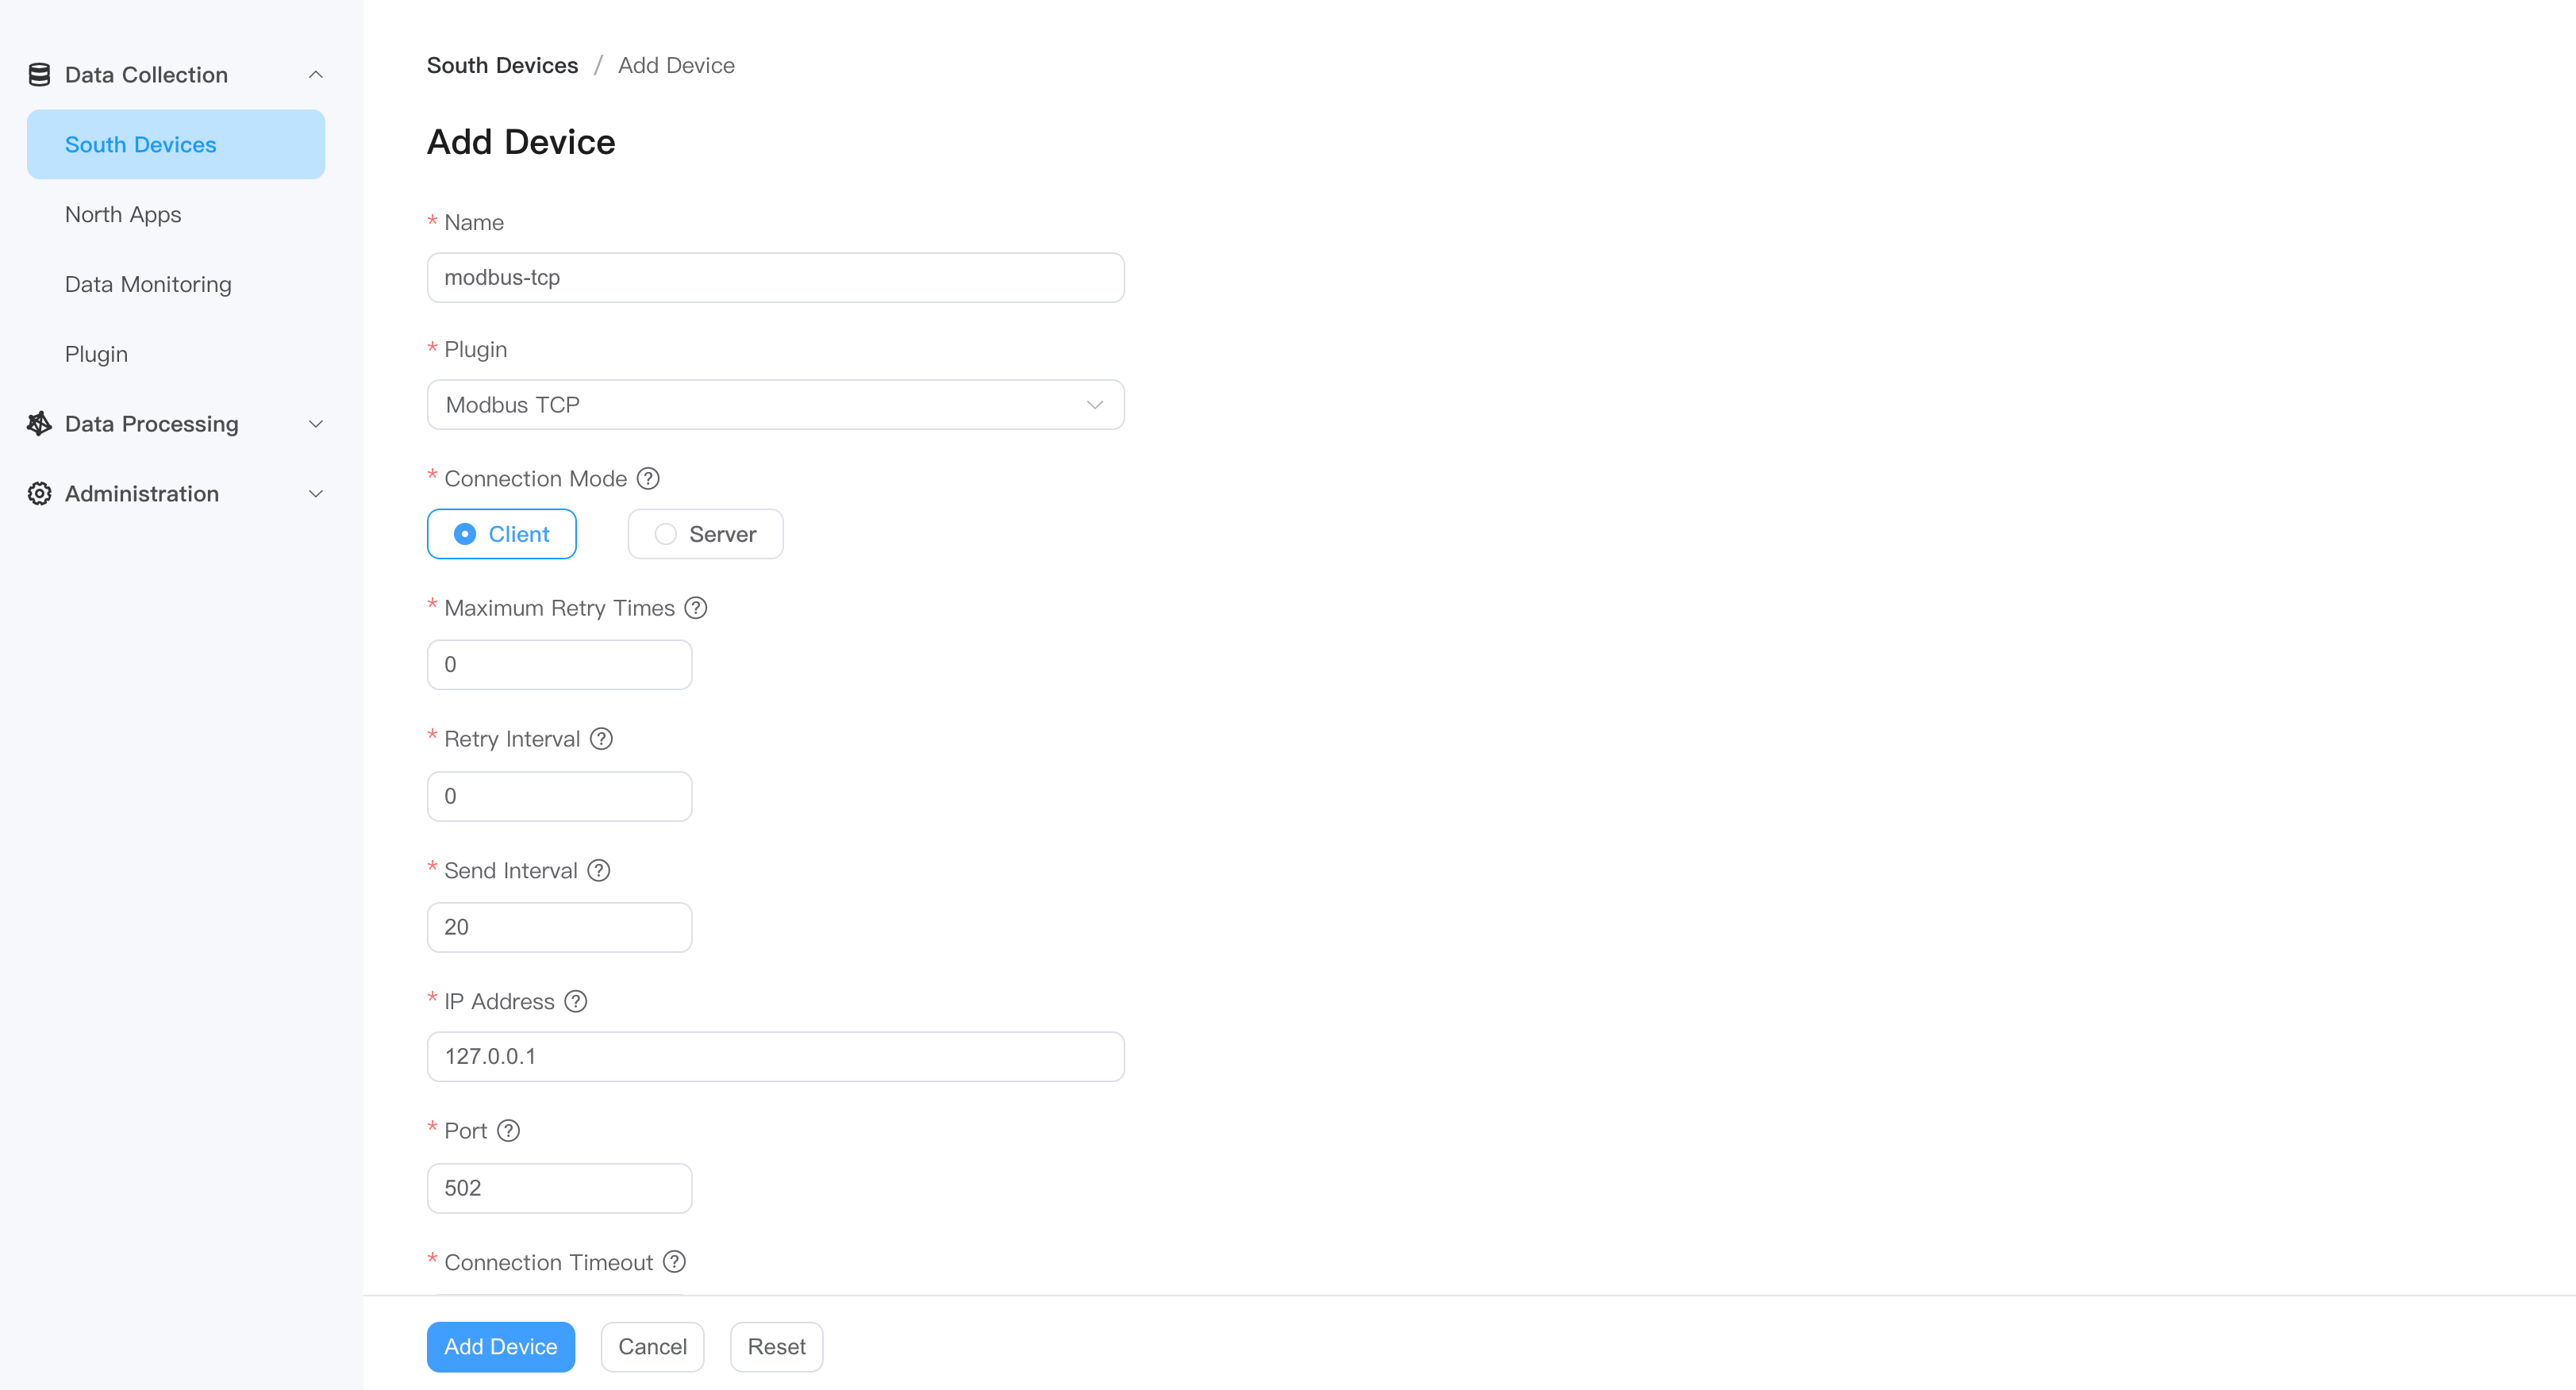
Configure the parameters EMQX Neuron needs to establish a connection with the device.
- Name: fill in the device name, such as Modbus TCP;
- Plugin: Select the Modbus TCP plugin from the drop-down box;
- IP address: Fill in the IP address of the access device. Example: fill in the IP address of the PC side of the Modbus simulator installed;
- Port: default port 502;
- Click
Add Deviceto complete the device configuration, and the device status enters the Running status;
After the driver creation is completed, the connection status of the driver will be disconnected. To update the connection status, EMQX Neuron needs to continue with the creation of data points configuration, which will trigger EMQX Neuron to send read requests to the device.

TIP
The configuration parameters required for each device are different. For detailed southbound device parameter description, please refer to Create Southbound Driver.
Create data point
Create Group is used for grouping data points. Different collection groups can be configured with different collection interval.
Click any blank space of modbus-tcp node to enter the group list management page.
Click Create Group and fill in the relevant parameters in the Create Group pop-up box, as shown in the figure below.
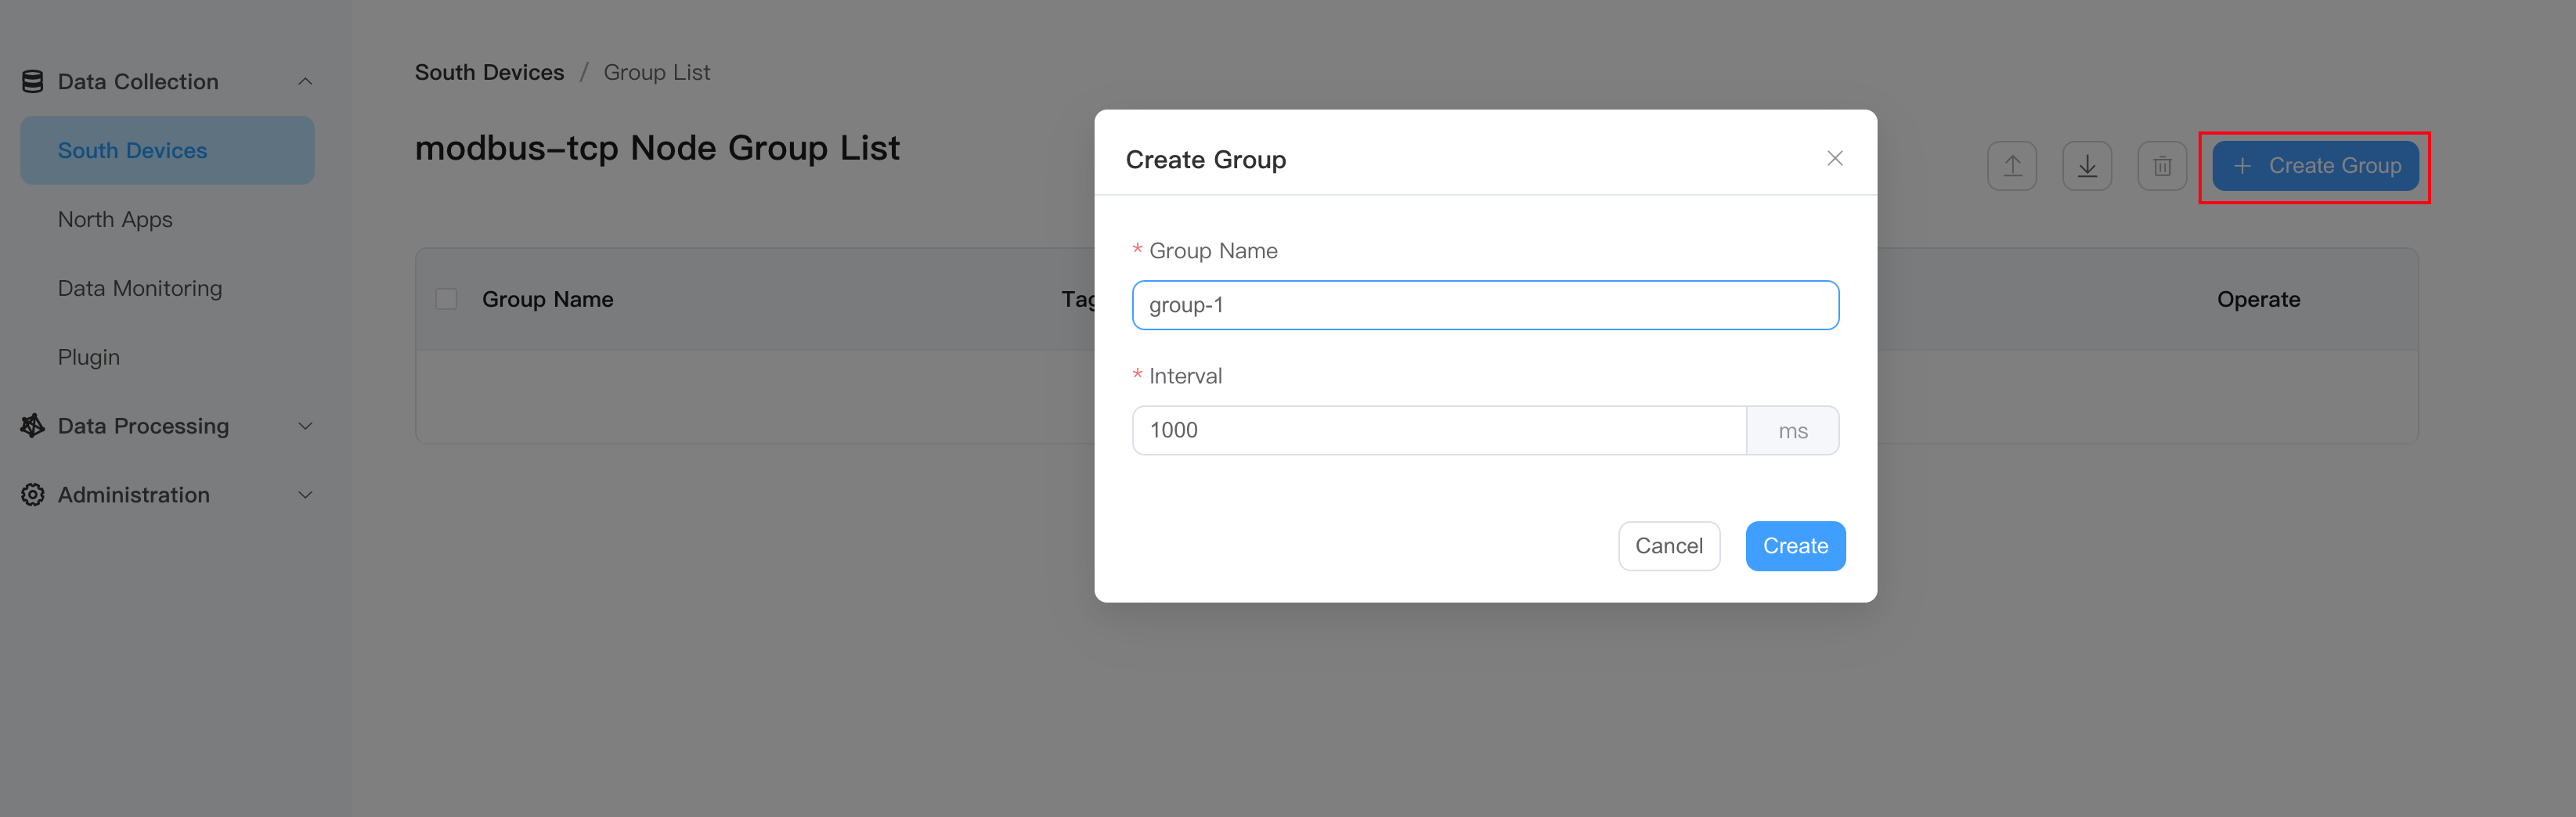
- Group name: fill in the group name, such as group-1;
- Interval: fill in the collection interval;
- Click
Createto complete the group creation.
Manually create data points for the group, click any blank space in the newly created group-1 group list to enter the point list page.
Click Add Tags, configure the data point attributes, type, address, etc., as shown in the figure below.
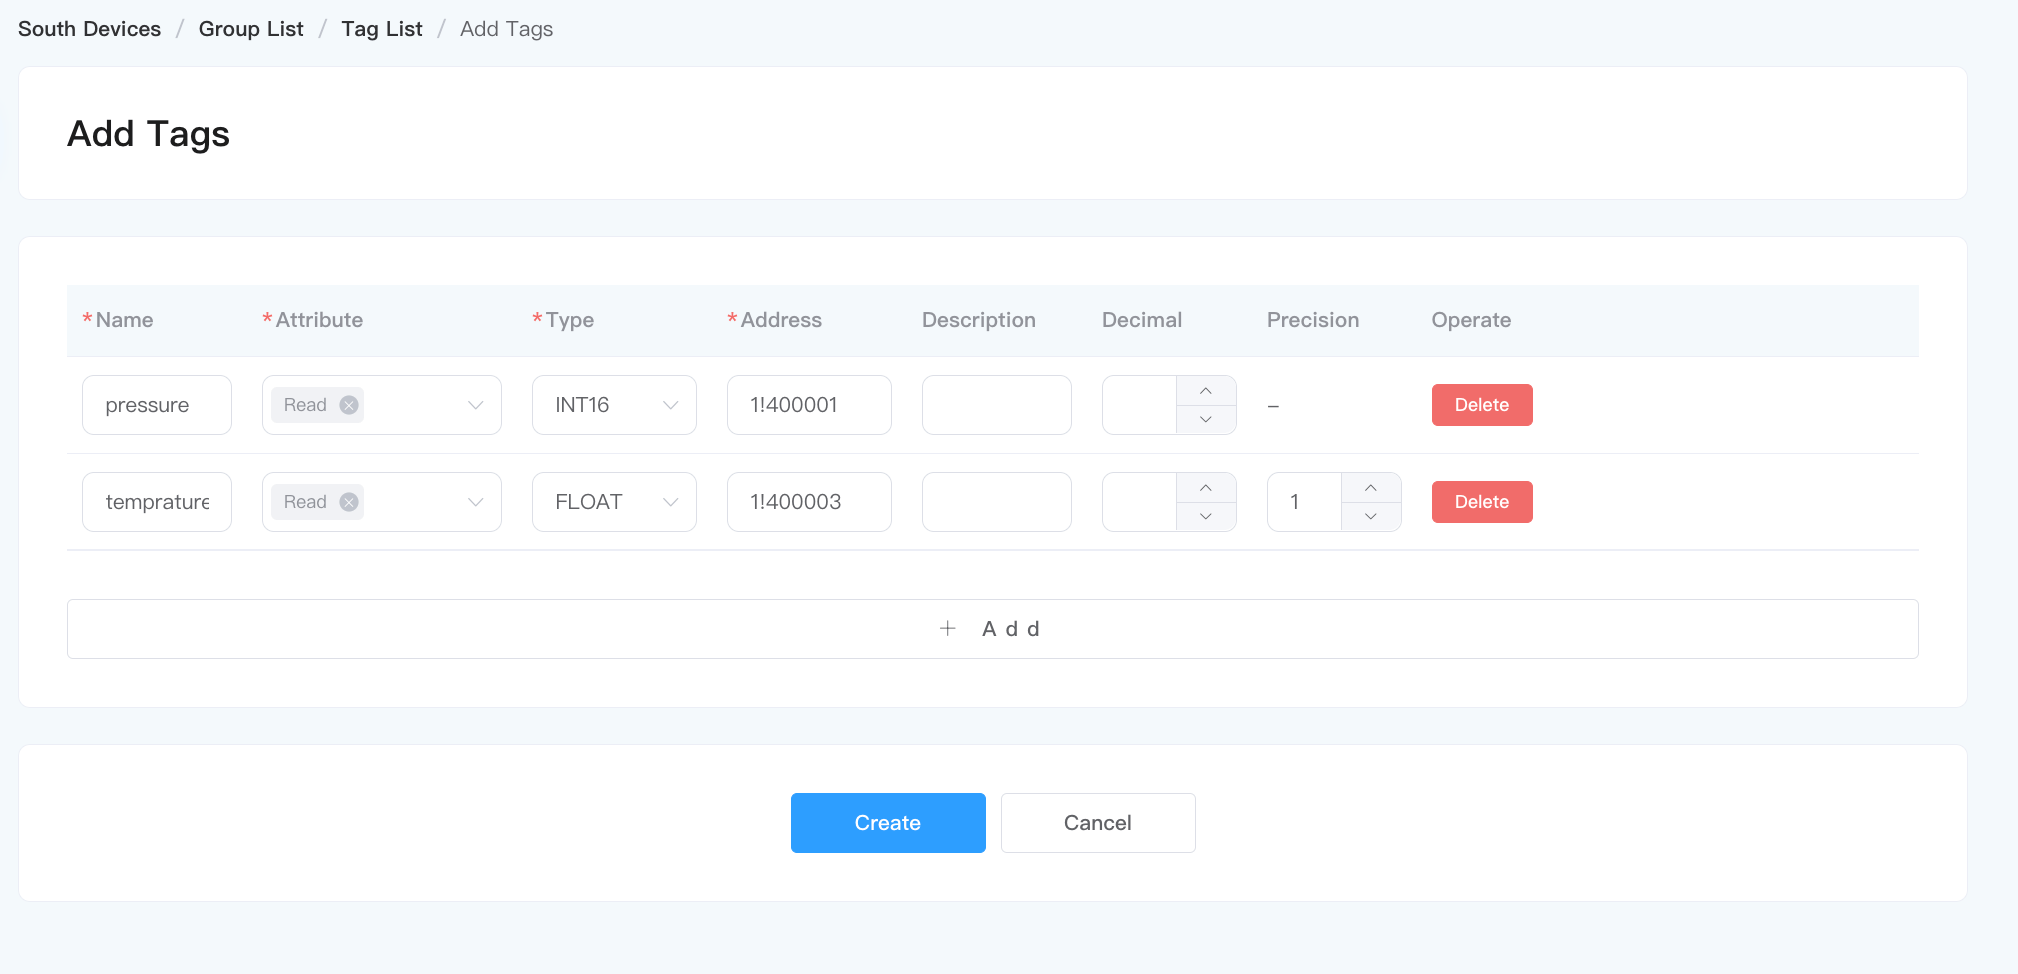
- Name: fill in the name of the equipment point, for example, pressure;
- Attributes: drop down to select point attributes, for example, Read;
- Type: drop down to select the data type, for example, int16;
- Address: fill in the driving point address, for example, 1!40001;
- Click the
Createbutton to complete the creation of Tag;
TIP
Point address resolution: 1 represents the point site number set in the Modbus simulator, 40001 represents the register address of the point.
For detailed instructions on how to use the driver address, please refer to Creating a southbound driver.
After creating the data points, EMQX Neuron automatically establishes communication with the device. The modbus-tcp node changes to the Running status and the Connected connection status.
If after waiting for a few seconds, the connection status is still Disconnected, please do the following to find out the reason:
- Please confirm that the IP address and port number are set correctly during device configuration, and the firewall is turned off.
- Execute the following command in the EMQX Neuron operating environment terminal to confirm whether the EMQX Neuron operating environment can access the corresponding IP and port:
$ telnet <IP of the PC running the Modbus simulator> 502View collected data
Select Data Monitoring under the Data Collection menu to enter the data monitoring page and view the values read from the device, as shown in the figure below.
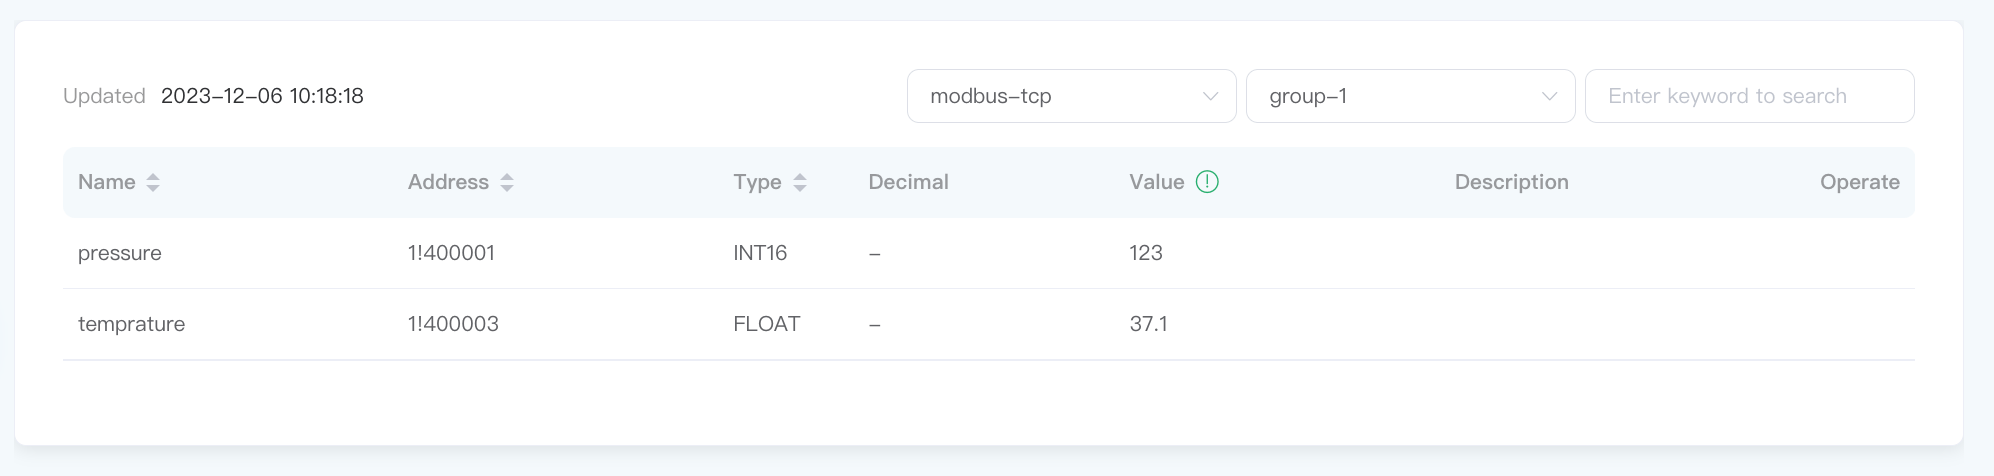
Data monitoring displays values in groups:
- Southbound device: drop-down box to select the southbound device you want to view, for example, select modbus-tcp created in the above step;
- Group name: Use the drop-down box to select the group you want to view under the selected southbound device. For example, select group-1 that has been created in the above step;
- Once the selection is completed, the page will display the value of data points under the group;
Northbound application configuration
Create northbound application node
Northbound application nodes are used for data interaction between EMQX Neuron and various northbound applications. Taking the MQTT plug-in as an example, a new MQTT node is added.
Select North Apps in Data Collection menu and click Add Application to add a new application, as shown in the figure below.
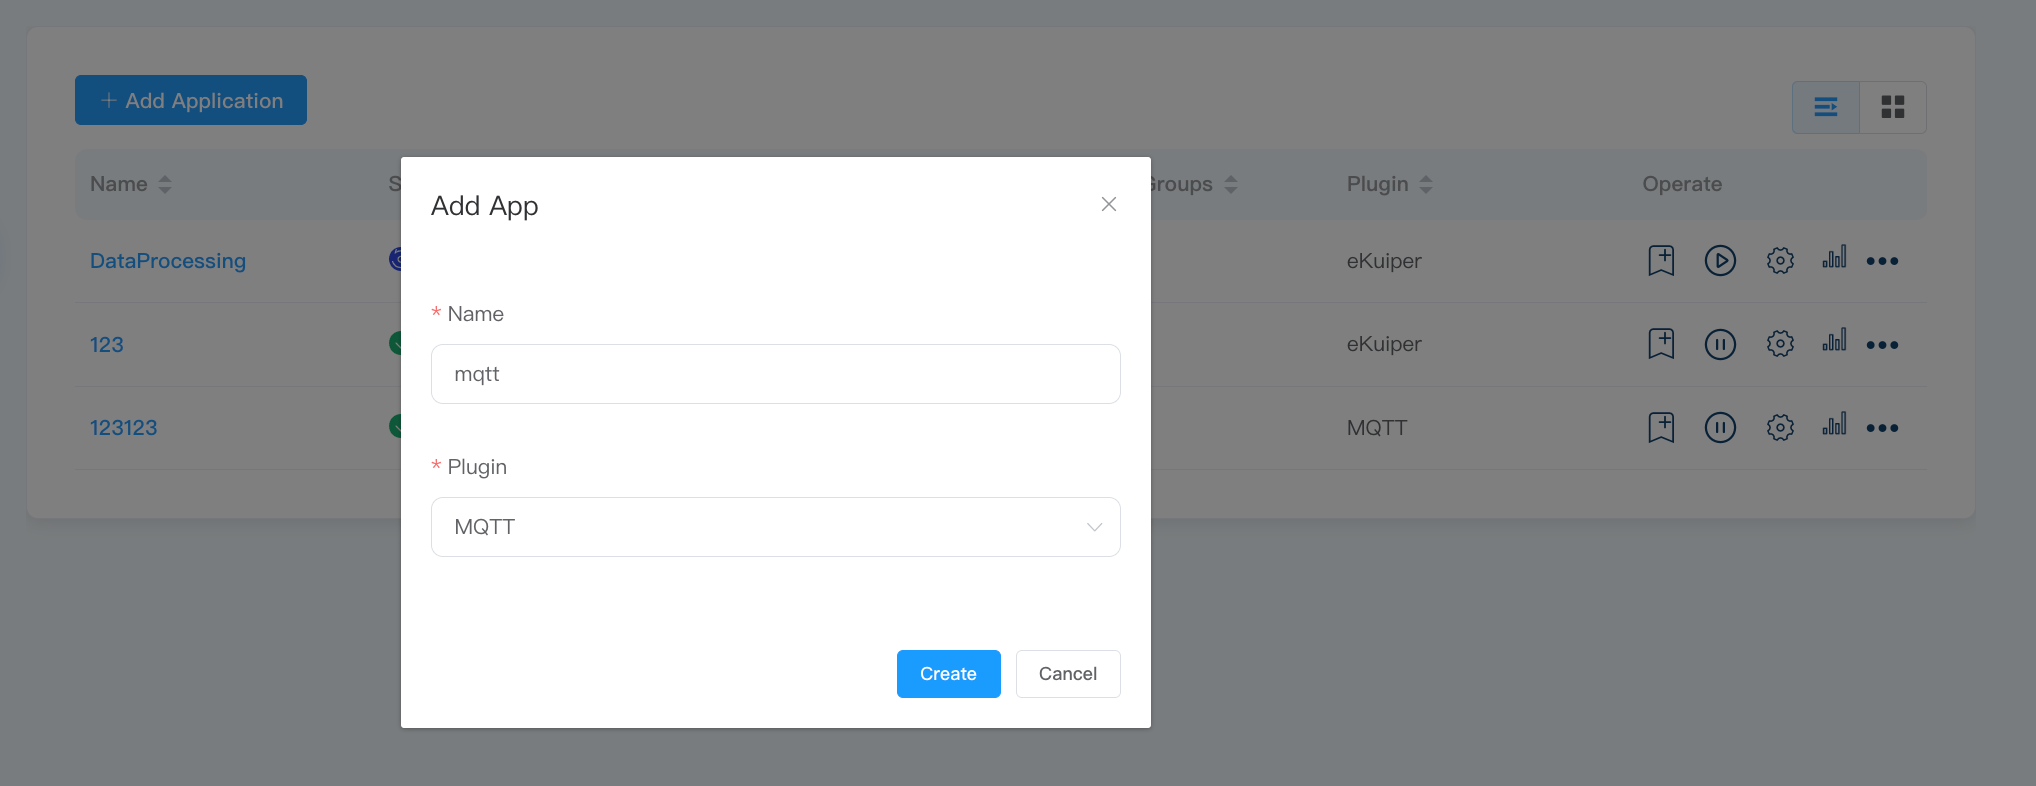
- Name: fill in the application name, for example, mqtt;
- Plug-in: Select the MQTT plug-in from the drop-down box;
- Click
Createto add a new application.
Configure northbound application nodes
Configure the parameters required for EMQX Neuron to establish a connection with the northbound application.
After the northbound node is successfully created, it will automatically jump to the Application Configuration page, as shown in the figure below.
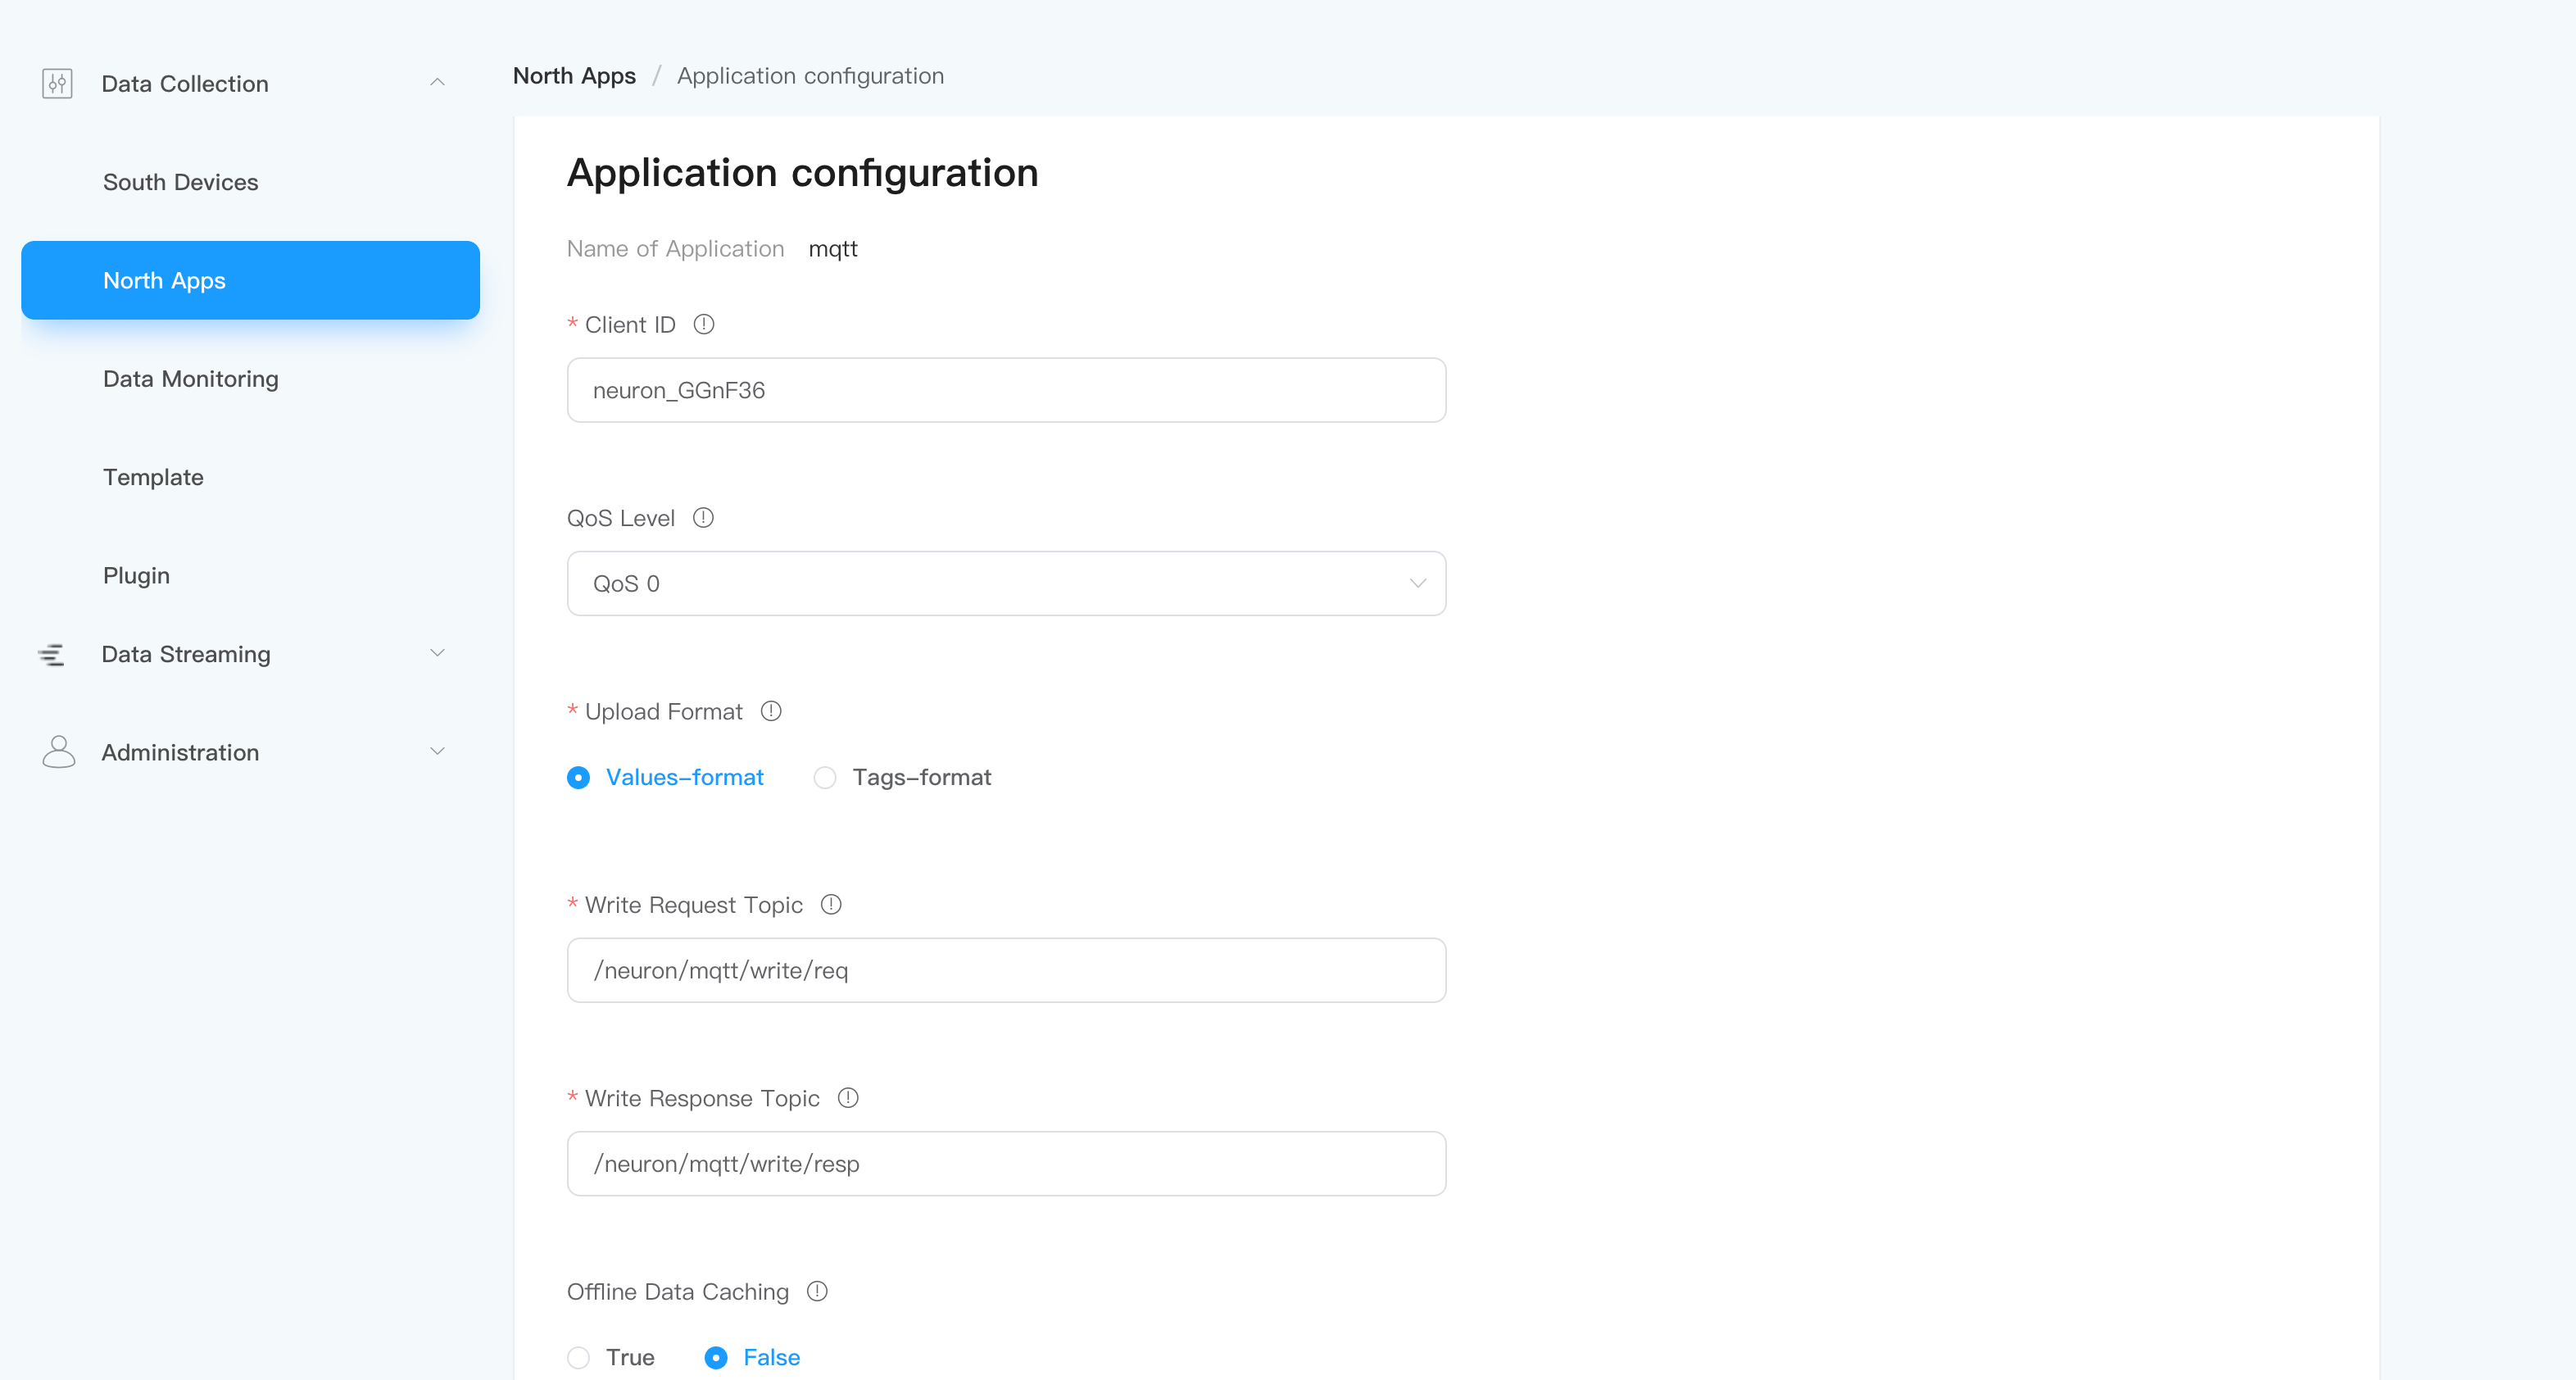
- Broker Host: Fill in the mqtt broker address. By default, the public EMQX Broker
broker.emqx.iois used; - Broker Port: fill in the mqtt broker port, the default is 1883;
- Click
Submitto complete the northbound application configuration, and the application card automatically enters the Running status.
Subscribe to southbound group
The collected data send to the North Apps in groups, and users need to select which groups of data to send.
Click Add Subscription button to add a new subscription, as shown in the figure below.
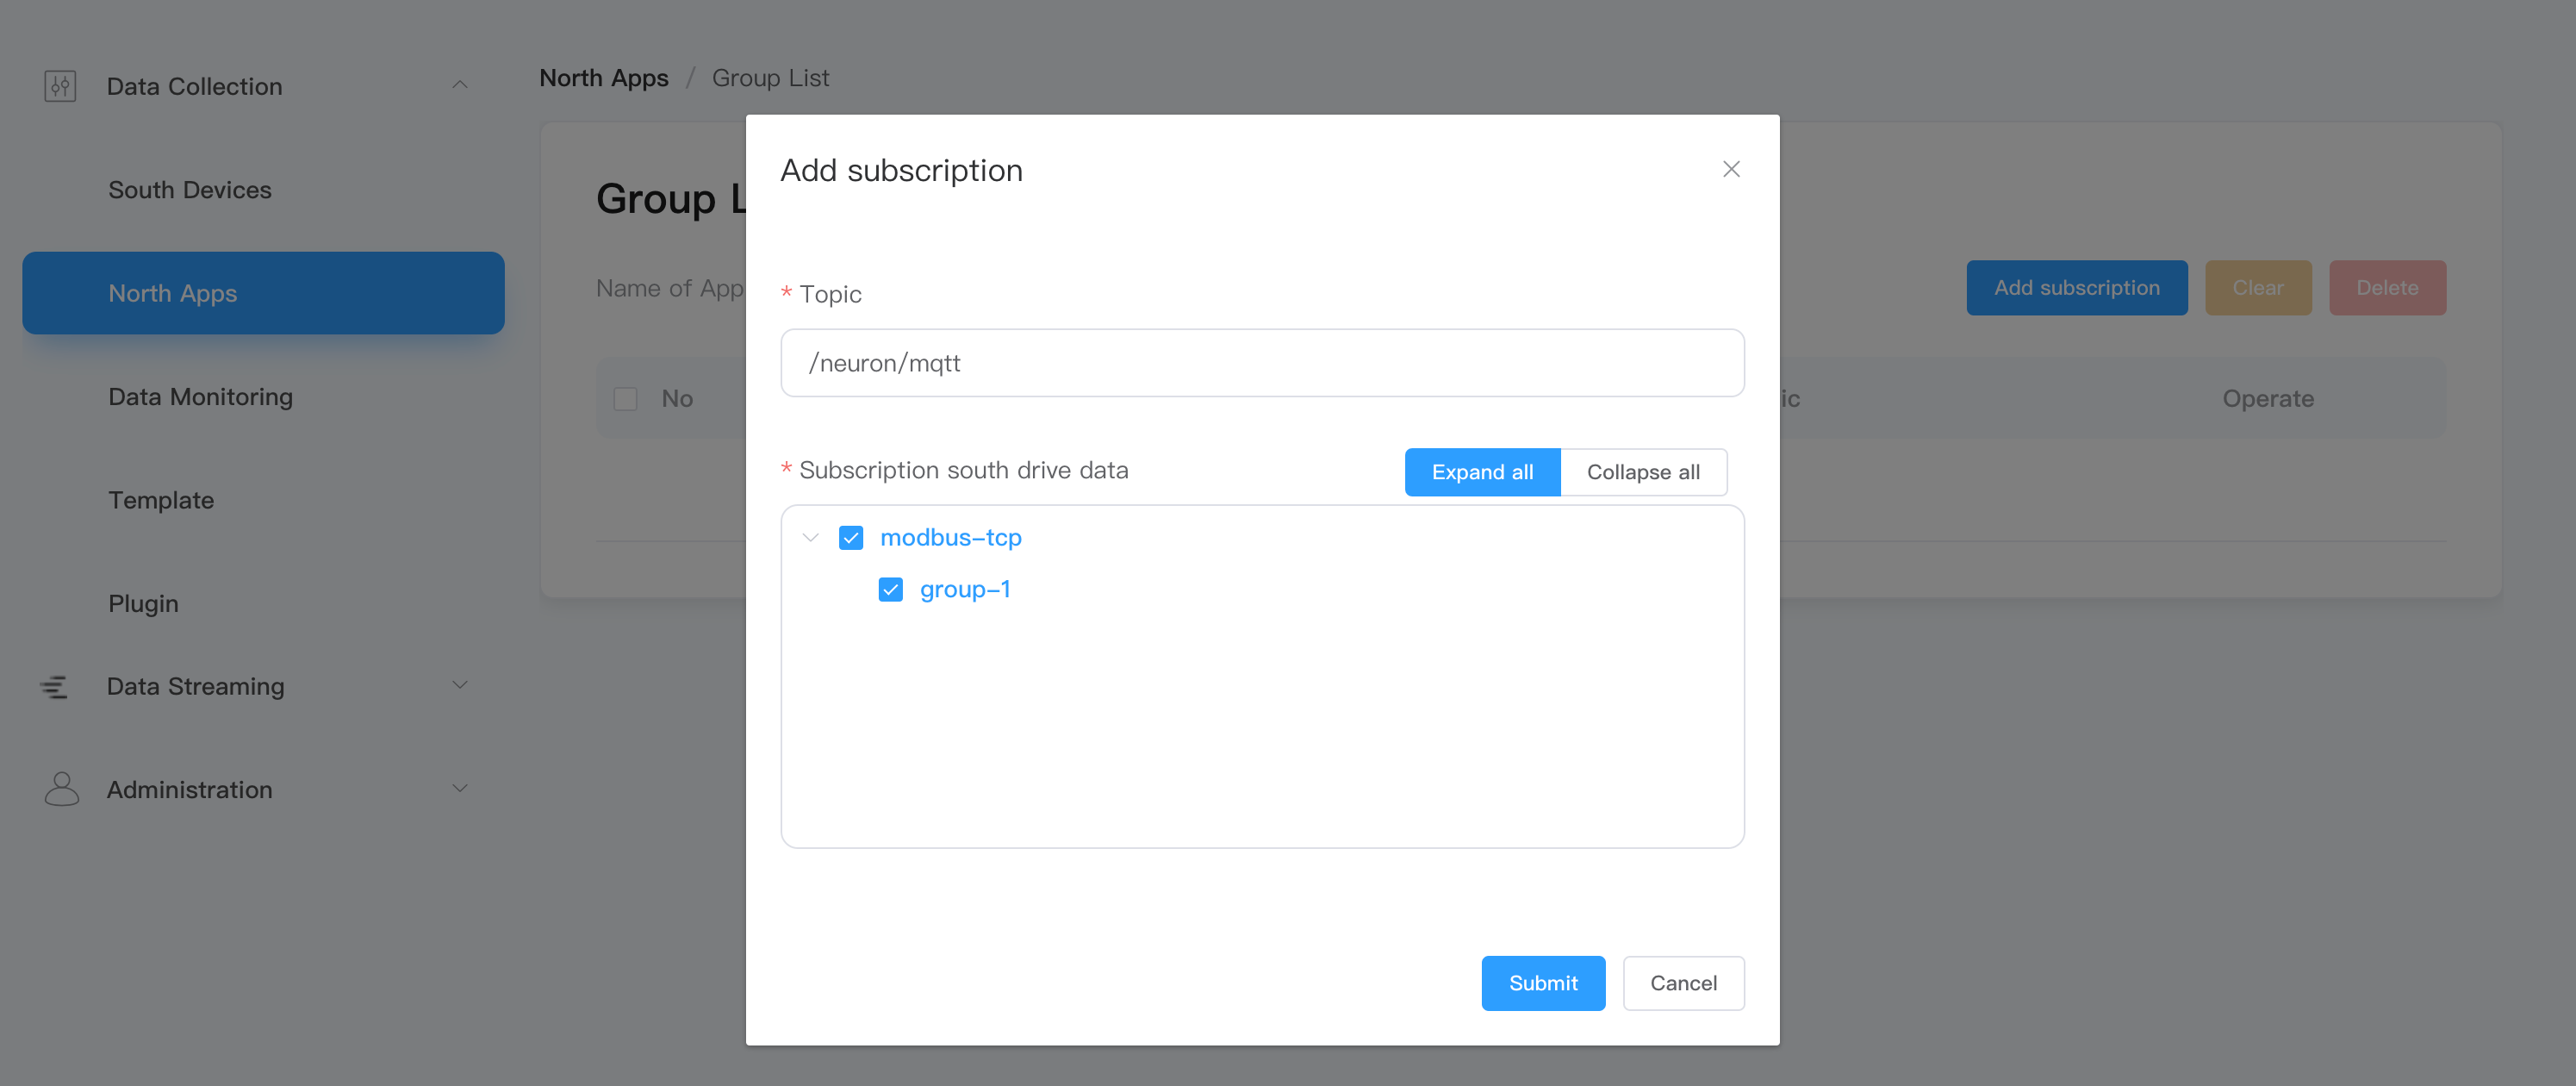
- Topic: The topic can be customized, and the example uses the default topic;
- Subscription southbound device data: independently select the group to be subscribed;
- Click
Submitto complete the subscription.
View data on MQTT client
Use the MQTT client to view the uploaded data. For example, use the MQTT client tool MQTTX to connect to the public EMQX broker to view the data uploaded by EMQX Neuron to the MQTT Broker, as follows As shown below.
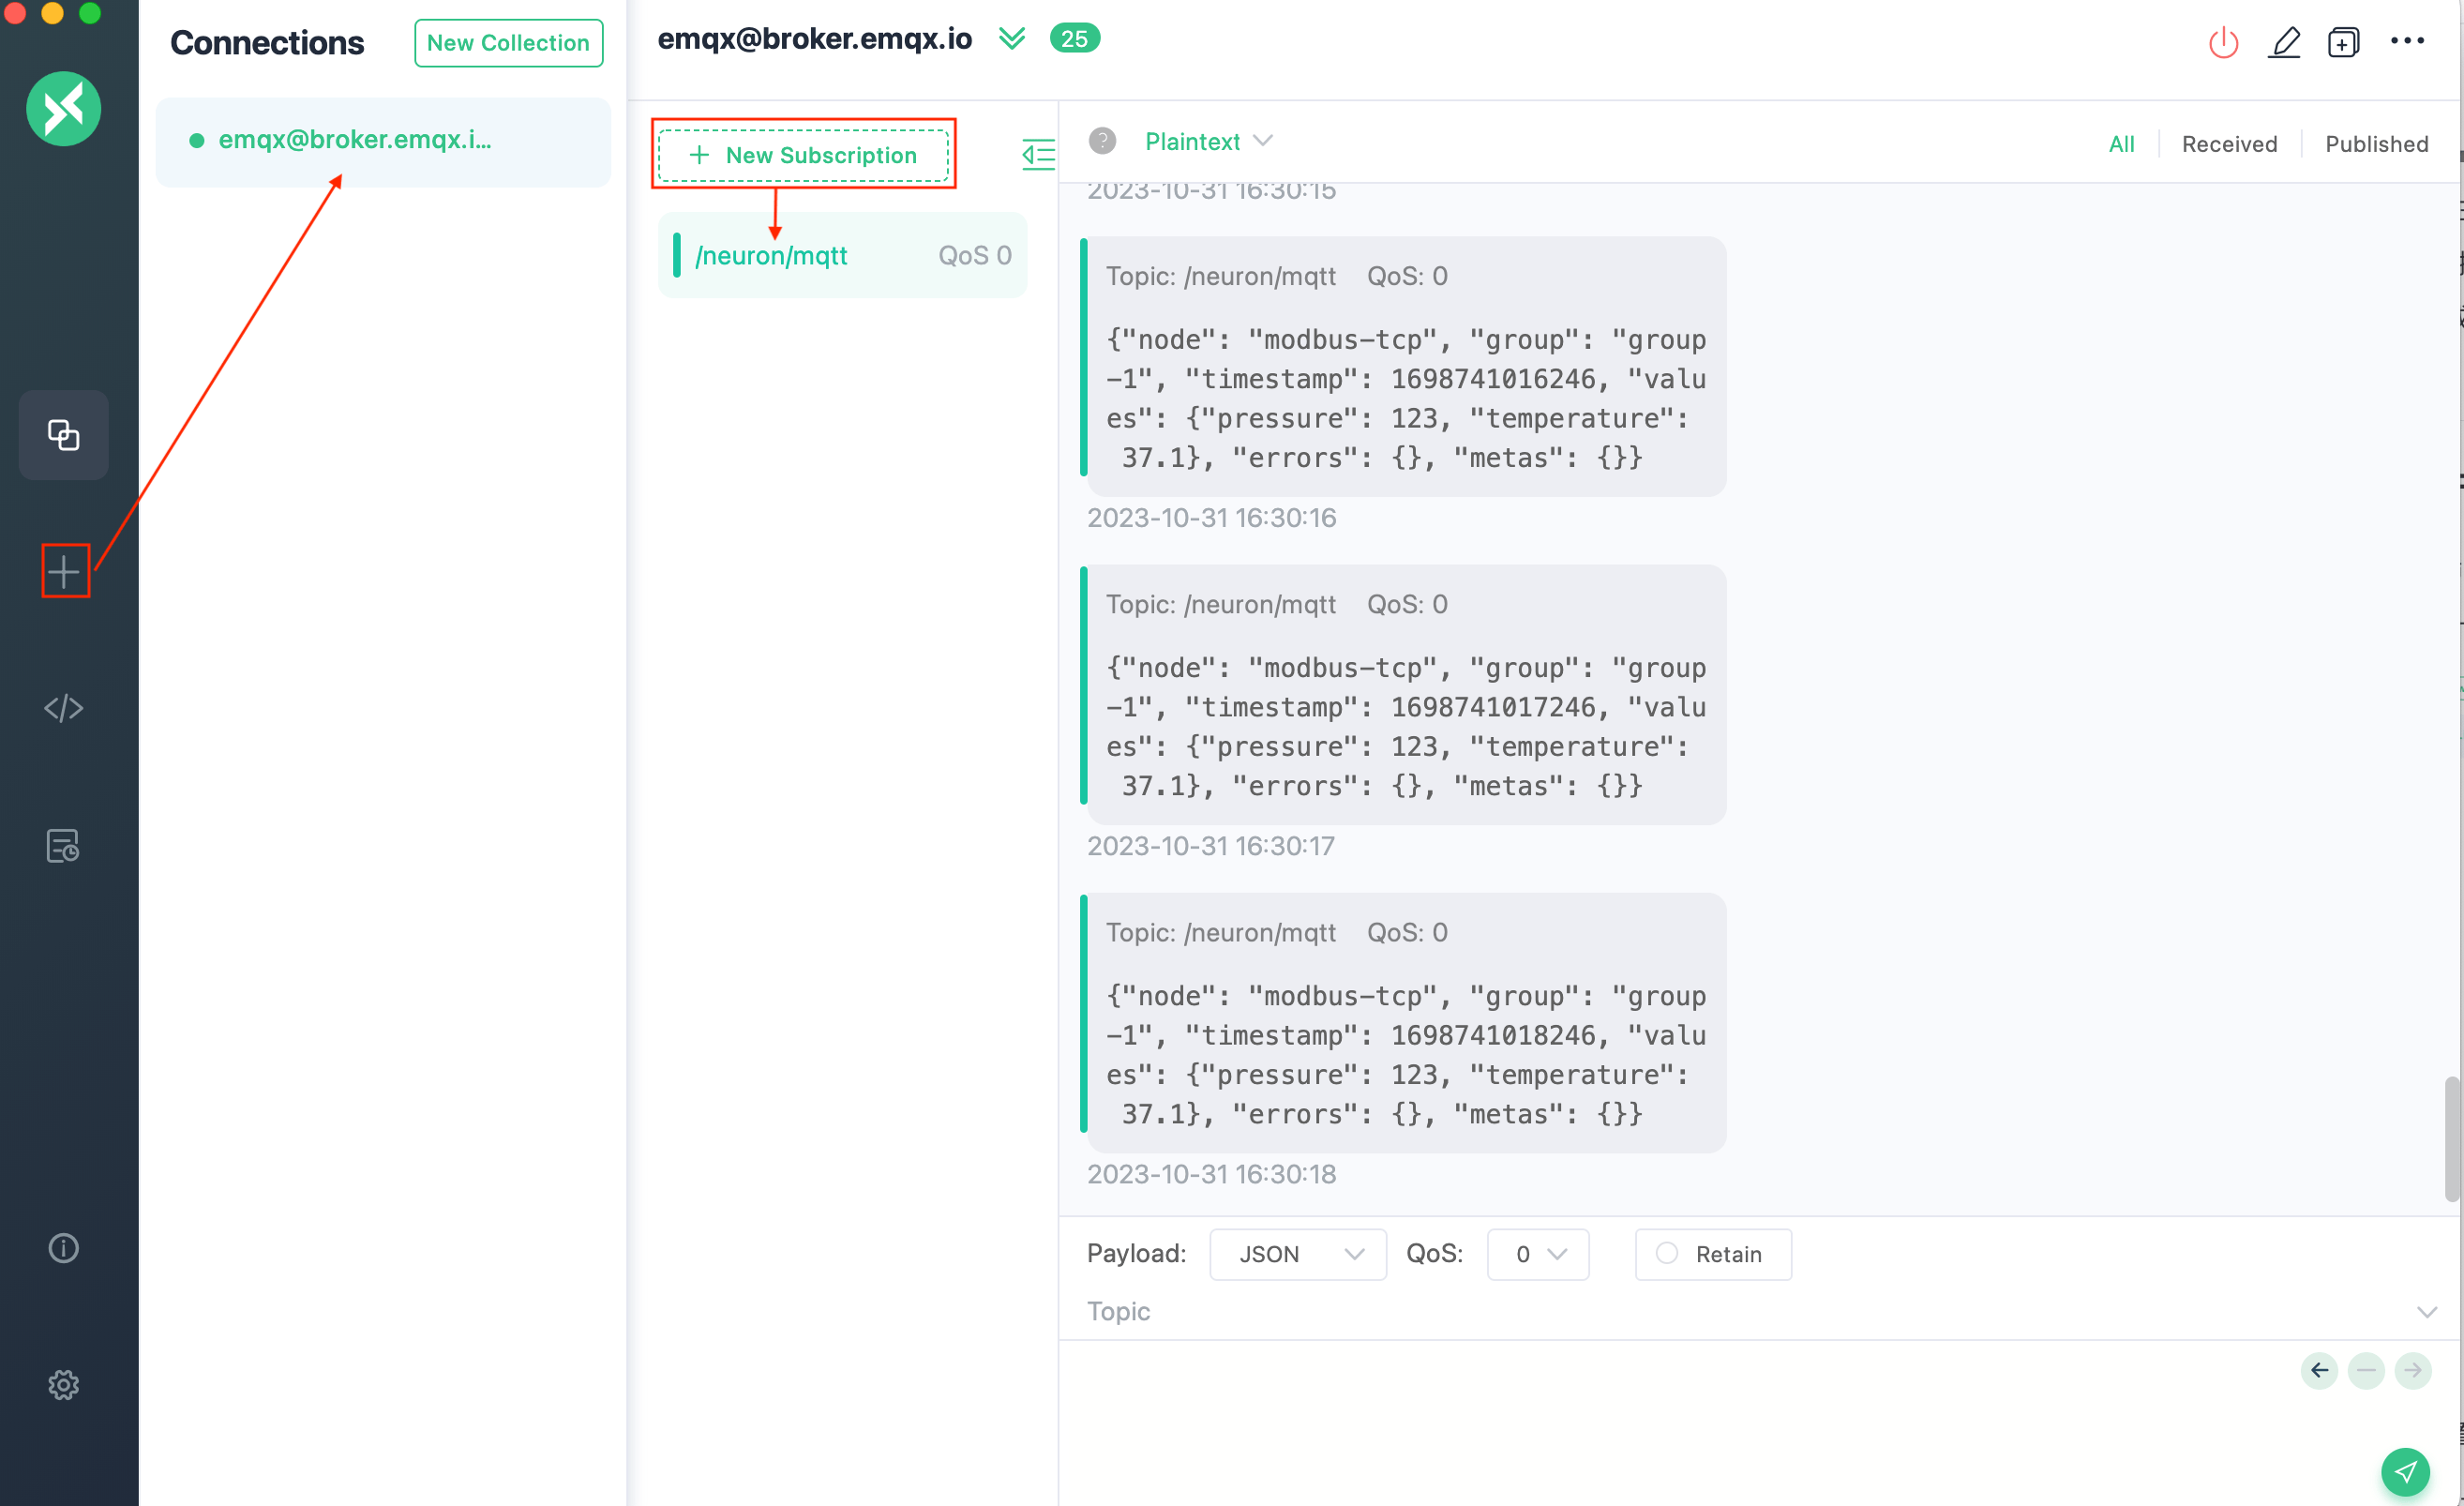
After the subscription is successful, you can see that MQTTX can always receive the data collected and reported by EMQX Neuron.
- Open MQTTX to add a new connection, correctly fill in the name, Host (broker.emqx.io) and Port (default 1883) to complete the connection;
- Add a new subscription, and the Topic must be consistent with the subscription topic of the EMQX Neuron northbound application.
Data processing
EMQX Neuron provides data processing functions, which can perform data extraction, transformation, filtering, sorting, grouping, aggregation, connection and other functions after data collection. Through powerful streaming computing and analysis capabilities, it can realize data standardization, analysis and monitoring, and Real-time alarm. Please refer to the Data Processing section for more details.
This example will introduce how to add one to the the value collected by EMQX Neuron and then send the result to the dynamic topic of MQTT broker in the cloud.
Northbound application DataProcessing node
On the Data Collection -> Northbound Application page, EMQX Neuron has been configured with DataProcessing node by default. Users only need to subscribe to the group of Southbound Driver through this application, and then the data points collected by Southbound driver will be sent to the neuronStream stream on the Data Processing -> Sources page.
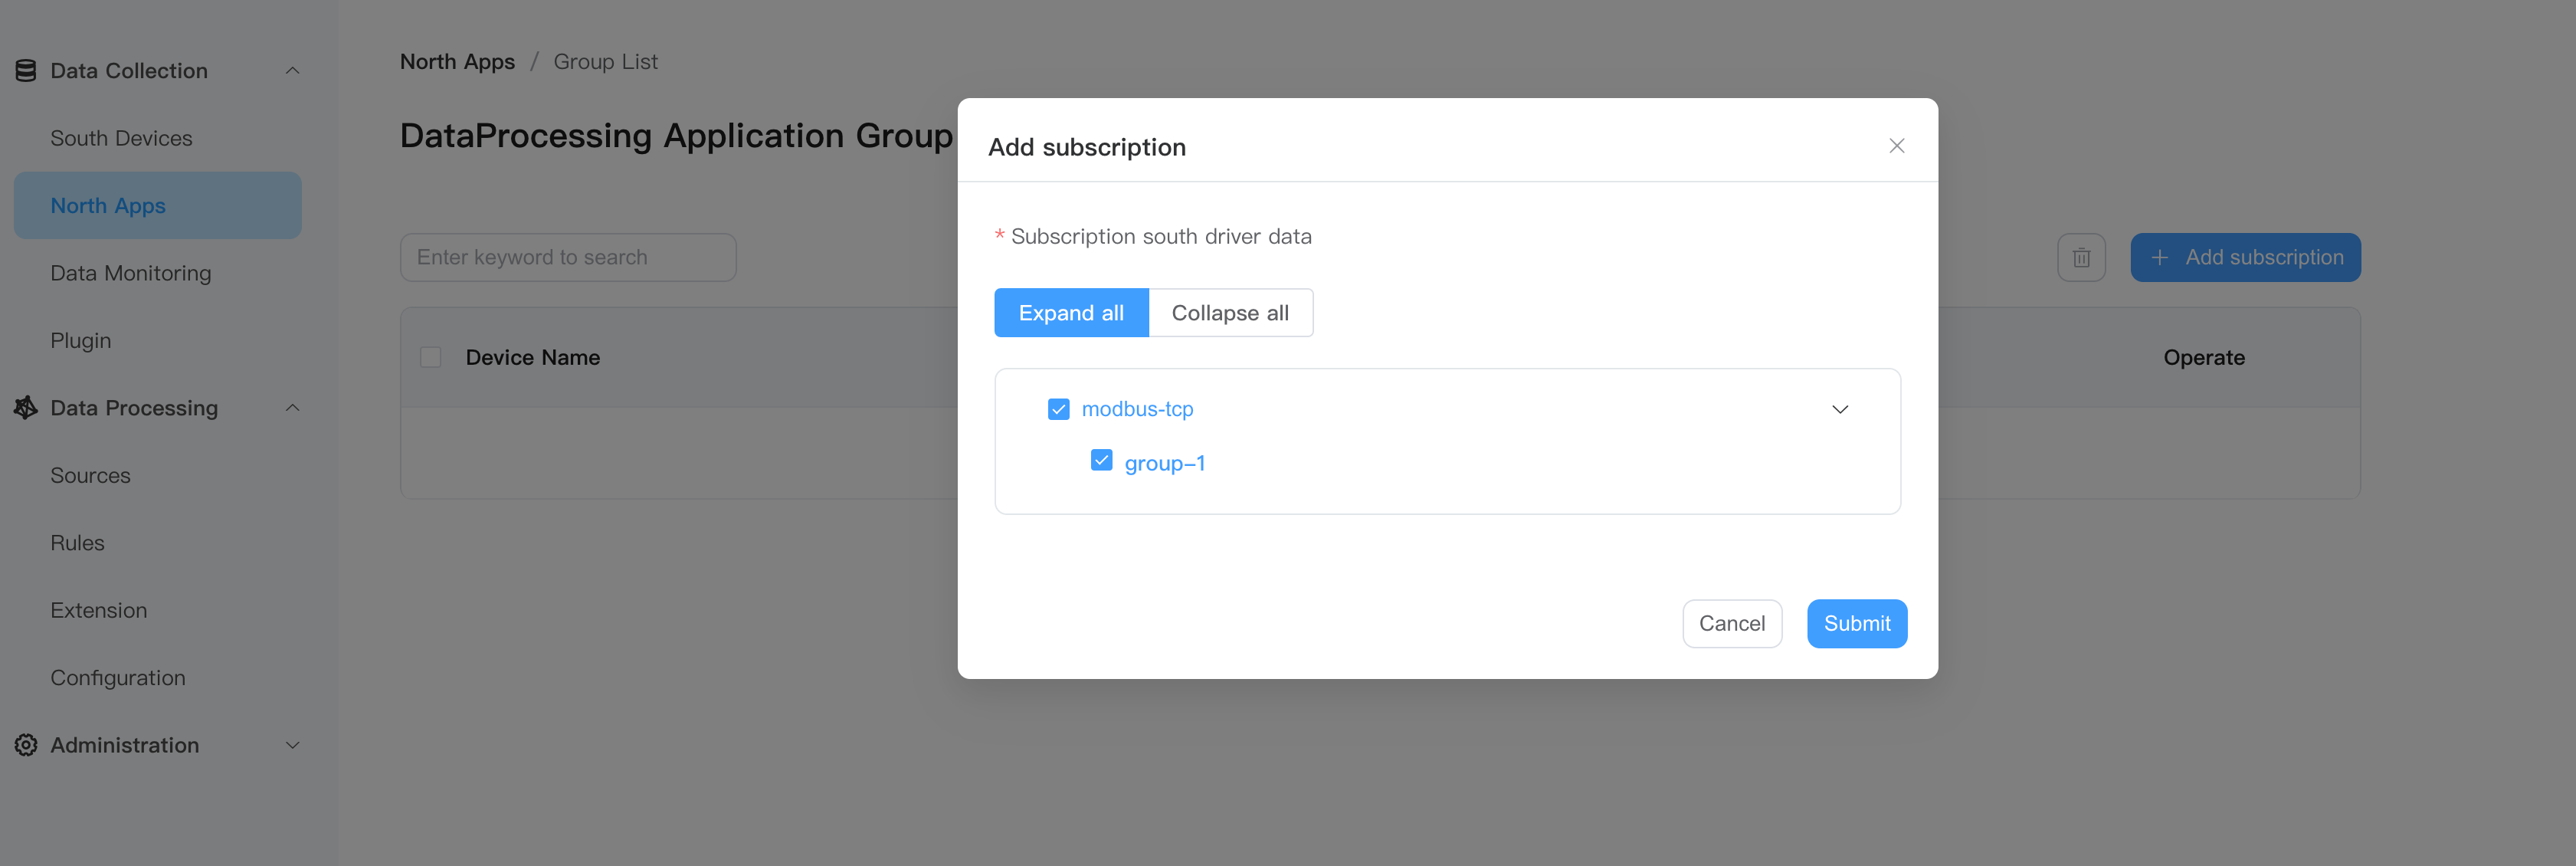
Click Add Subscription button to add a new subscription on DataProcessing App, as shown in the figure below. 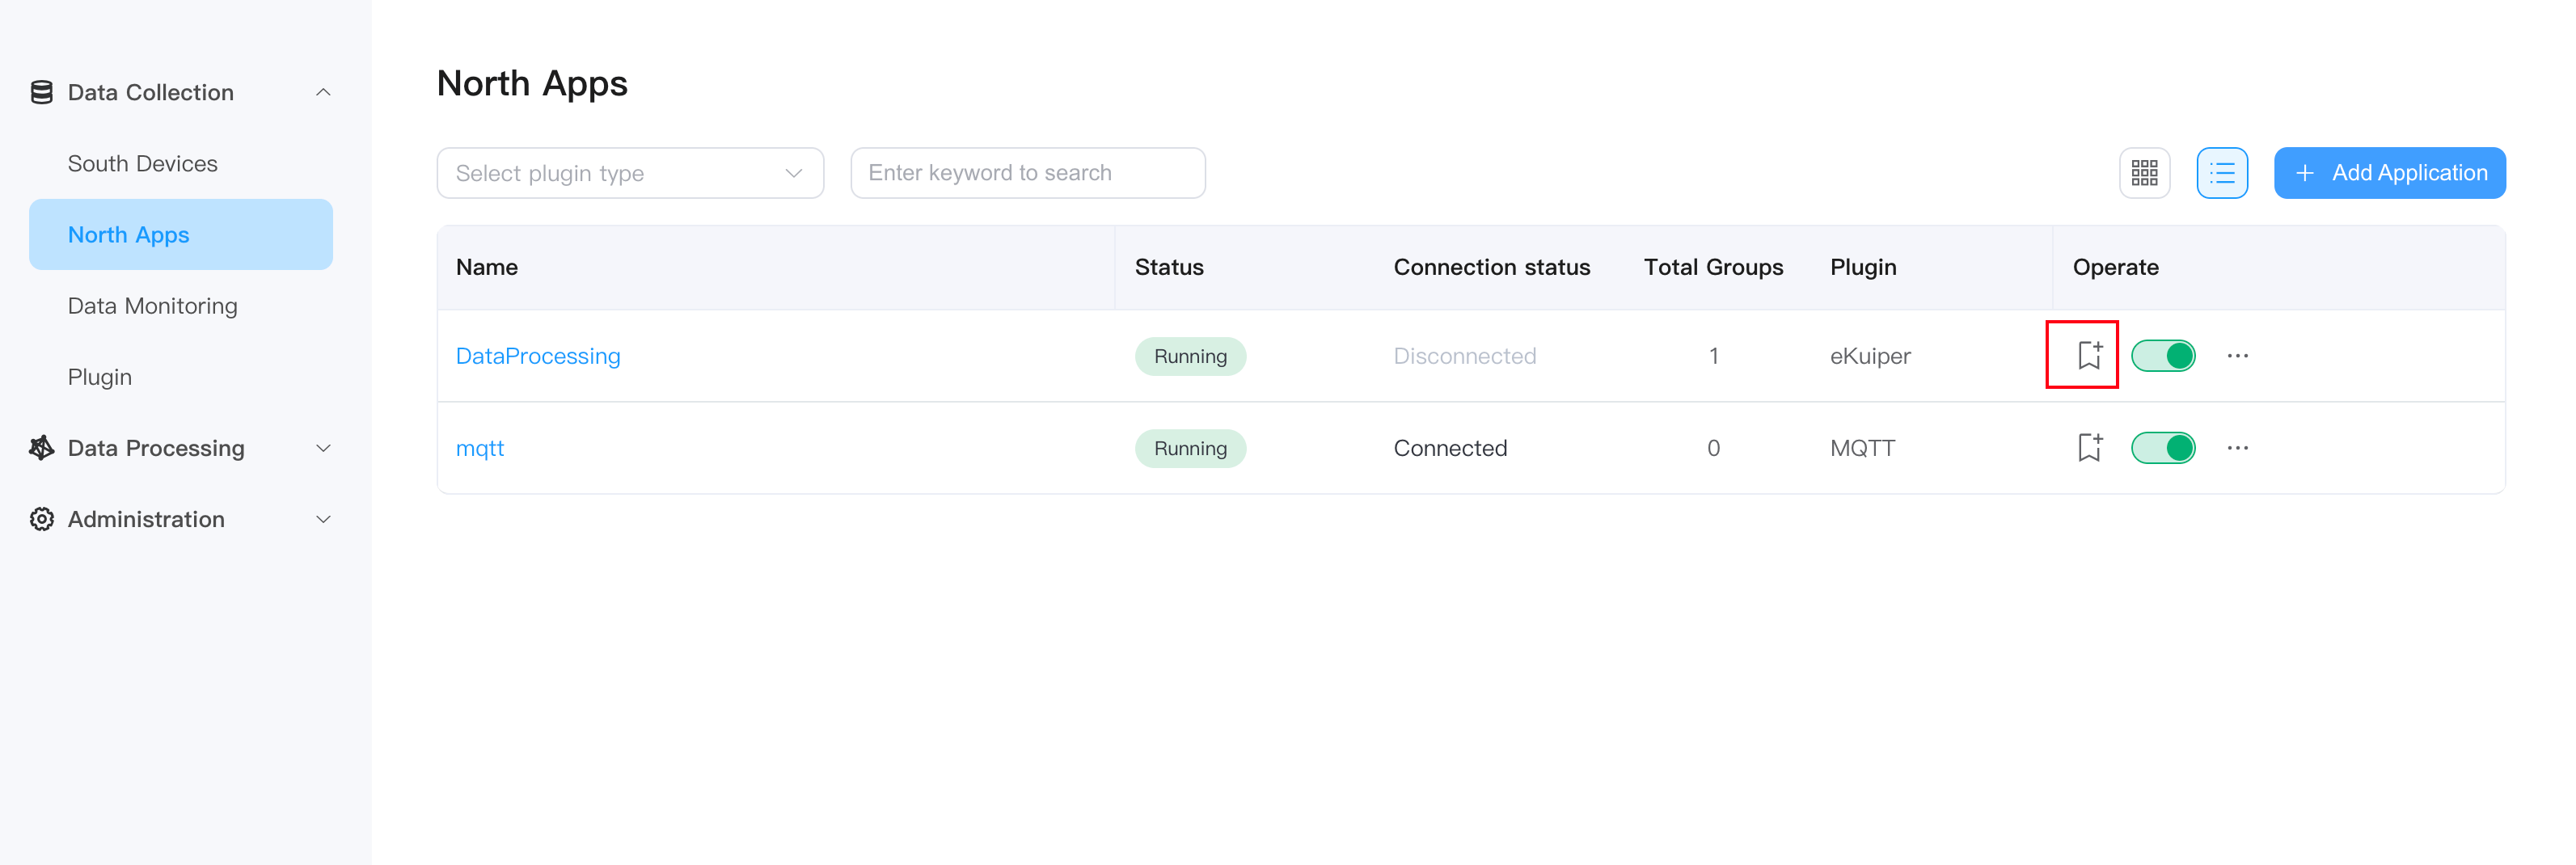
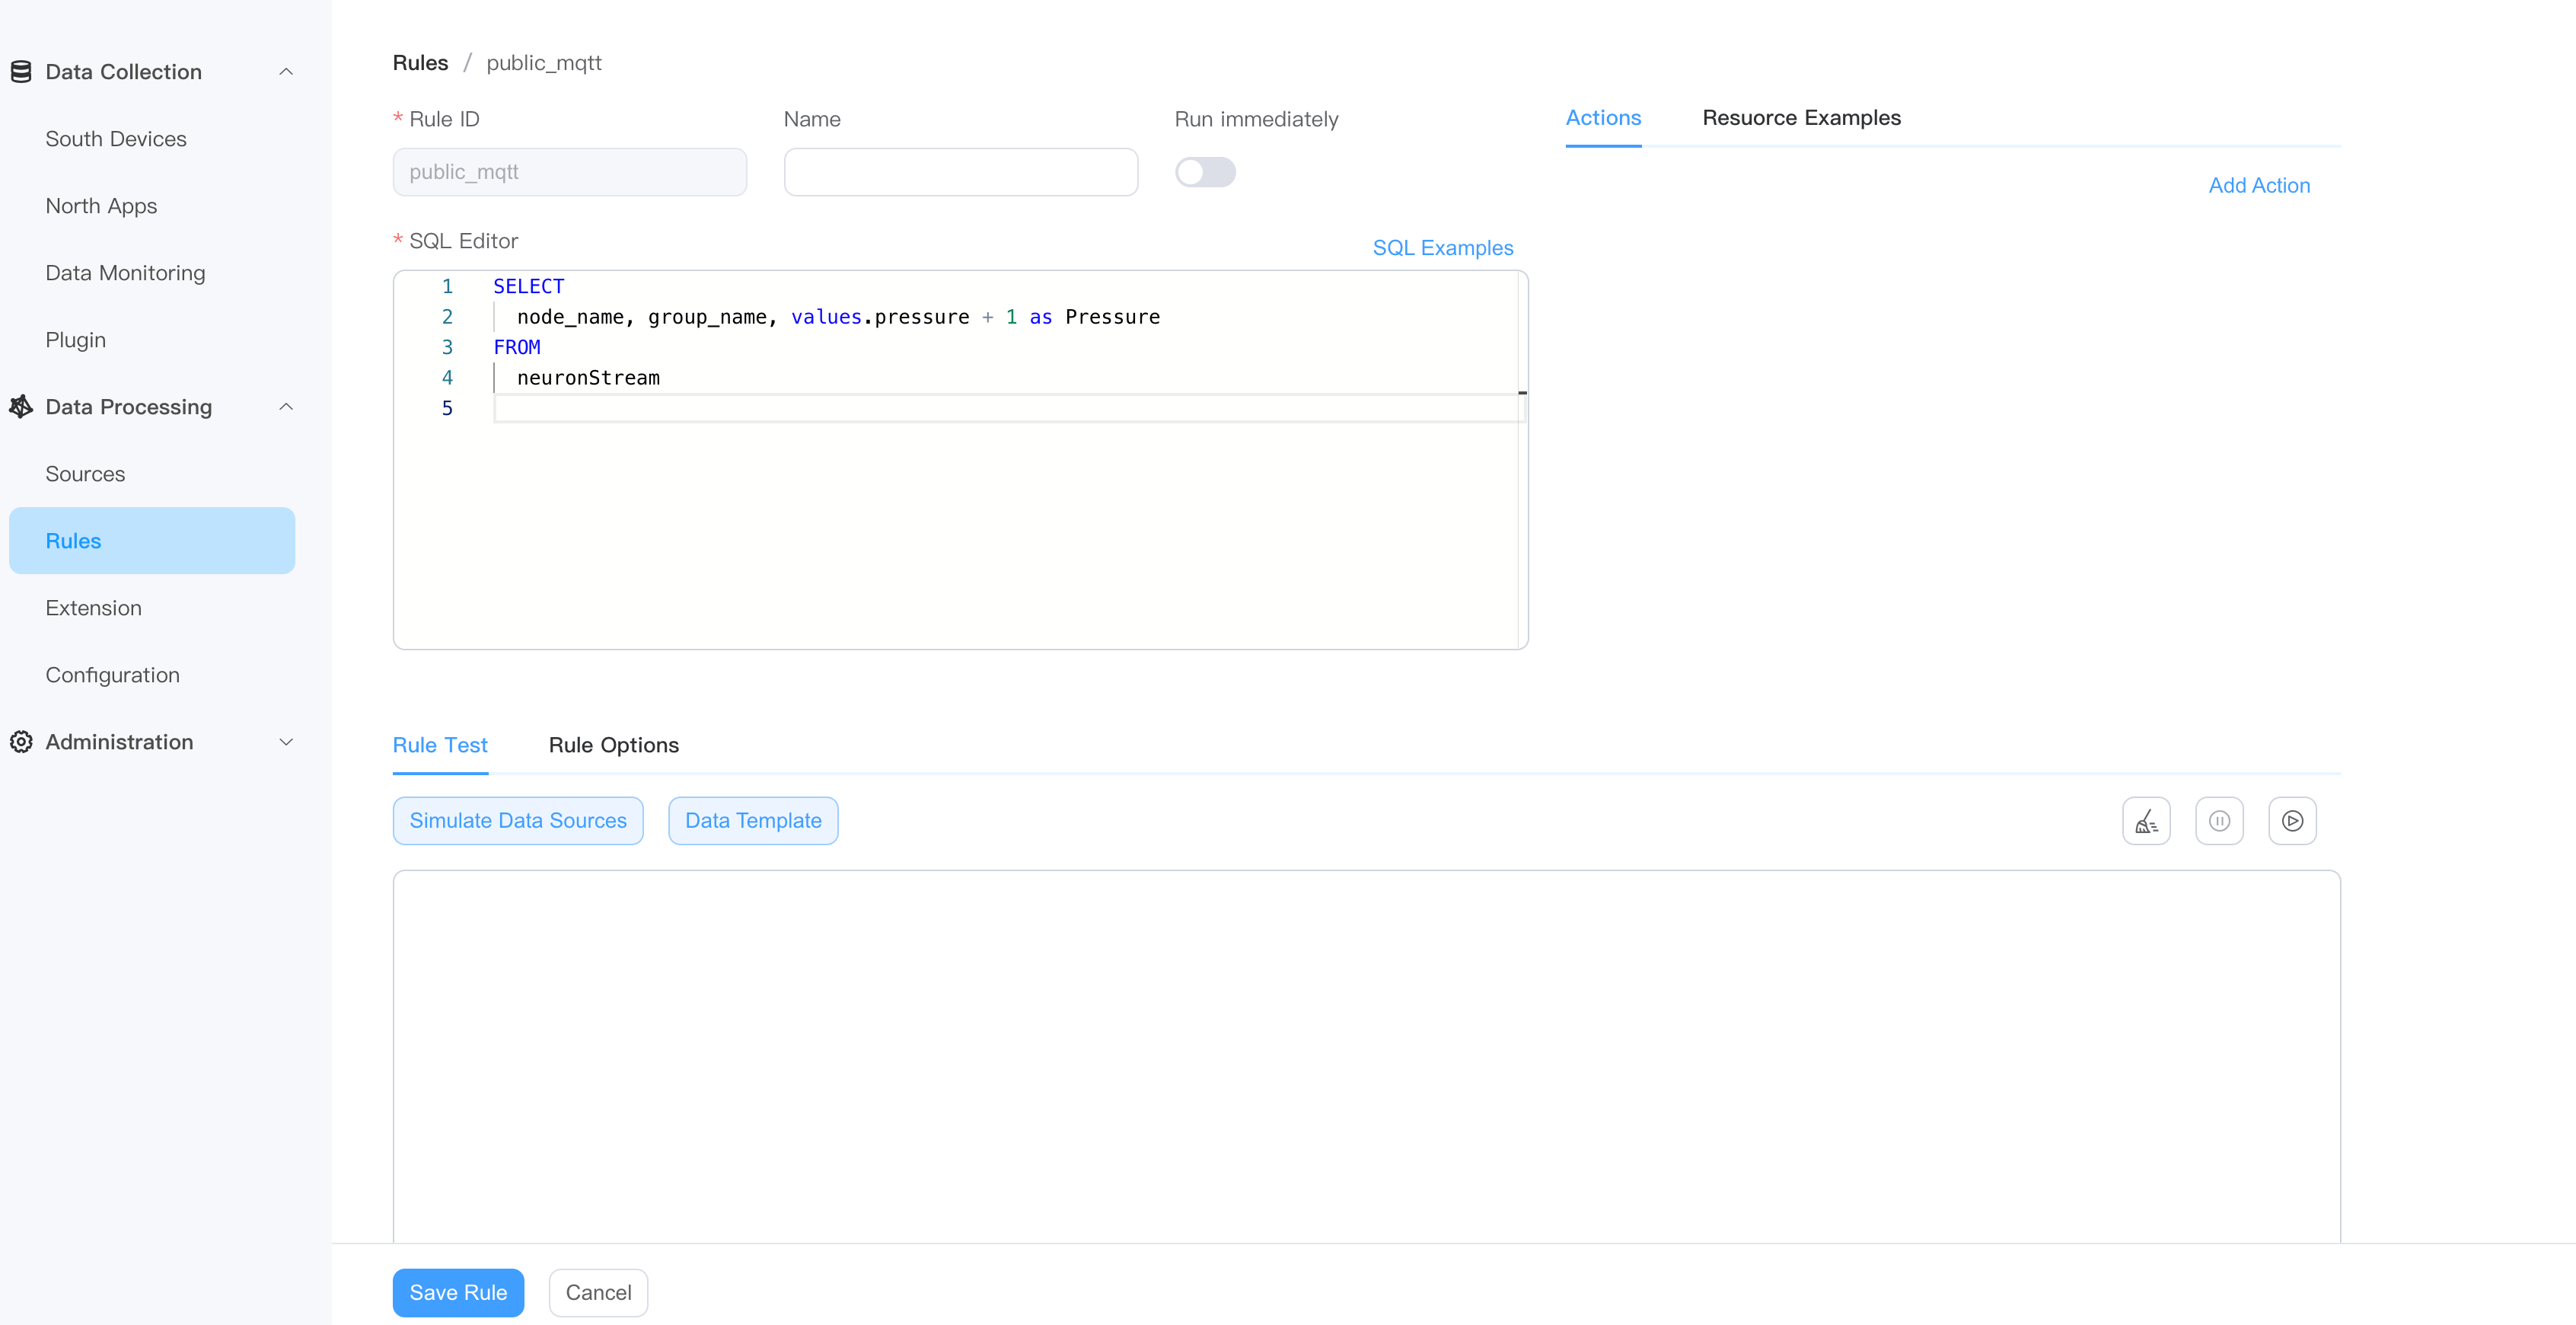
Create new rule
On the Data Processing -> Rules page, click Create Rule, as shown in the figure below.
Click Add Action, as shown in the figure below.
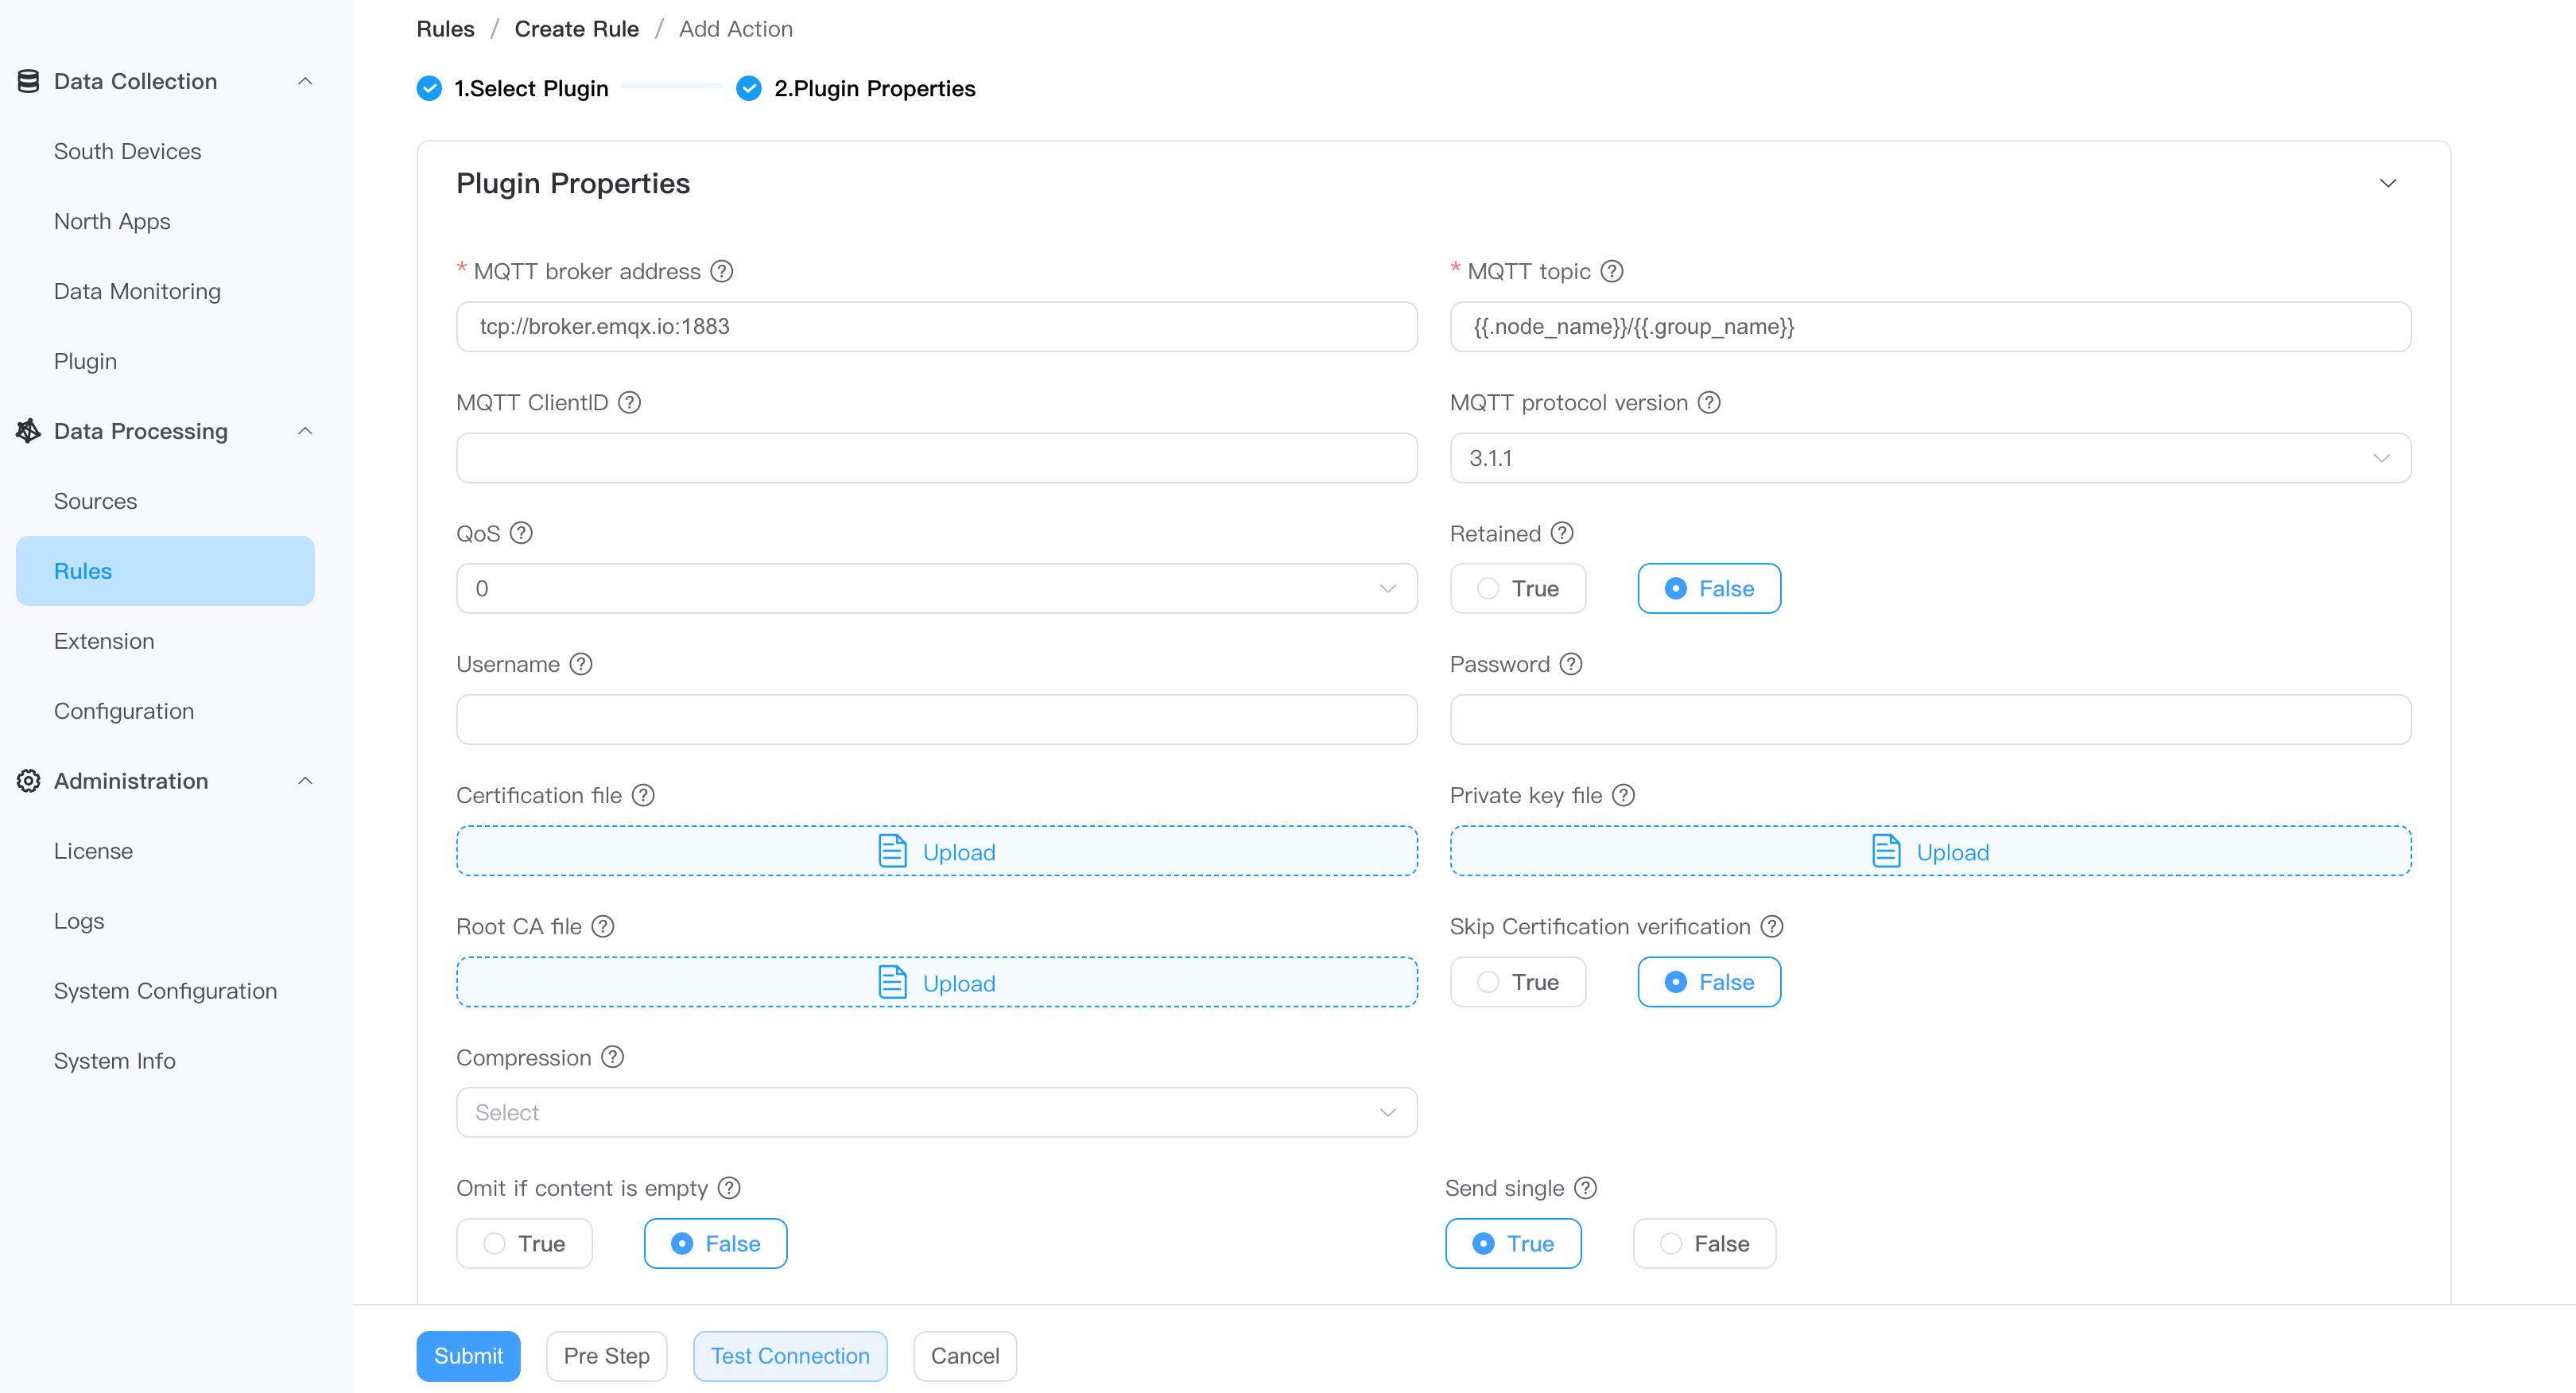
- Sink: Select MQTT plugin;
- MQTT broker address: Correctly fill in the MQTT broker address and port;
- MQTT topic: data reporting topic, the example uses the default topic;
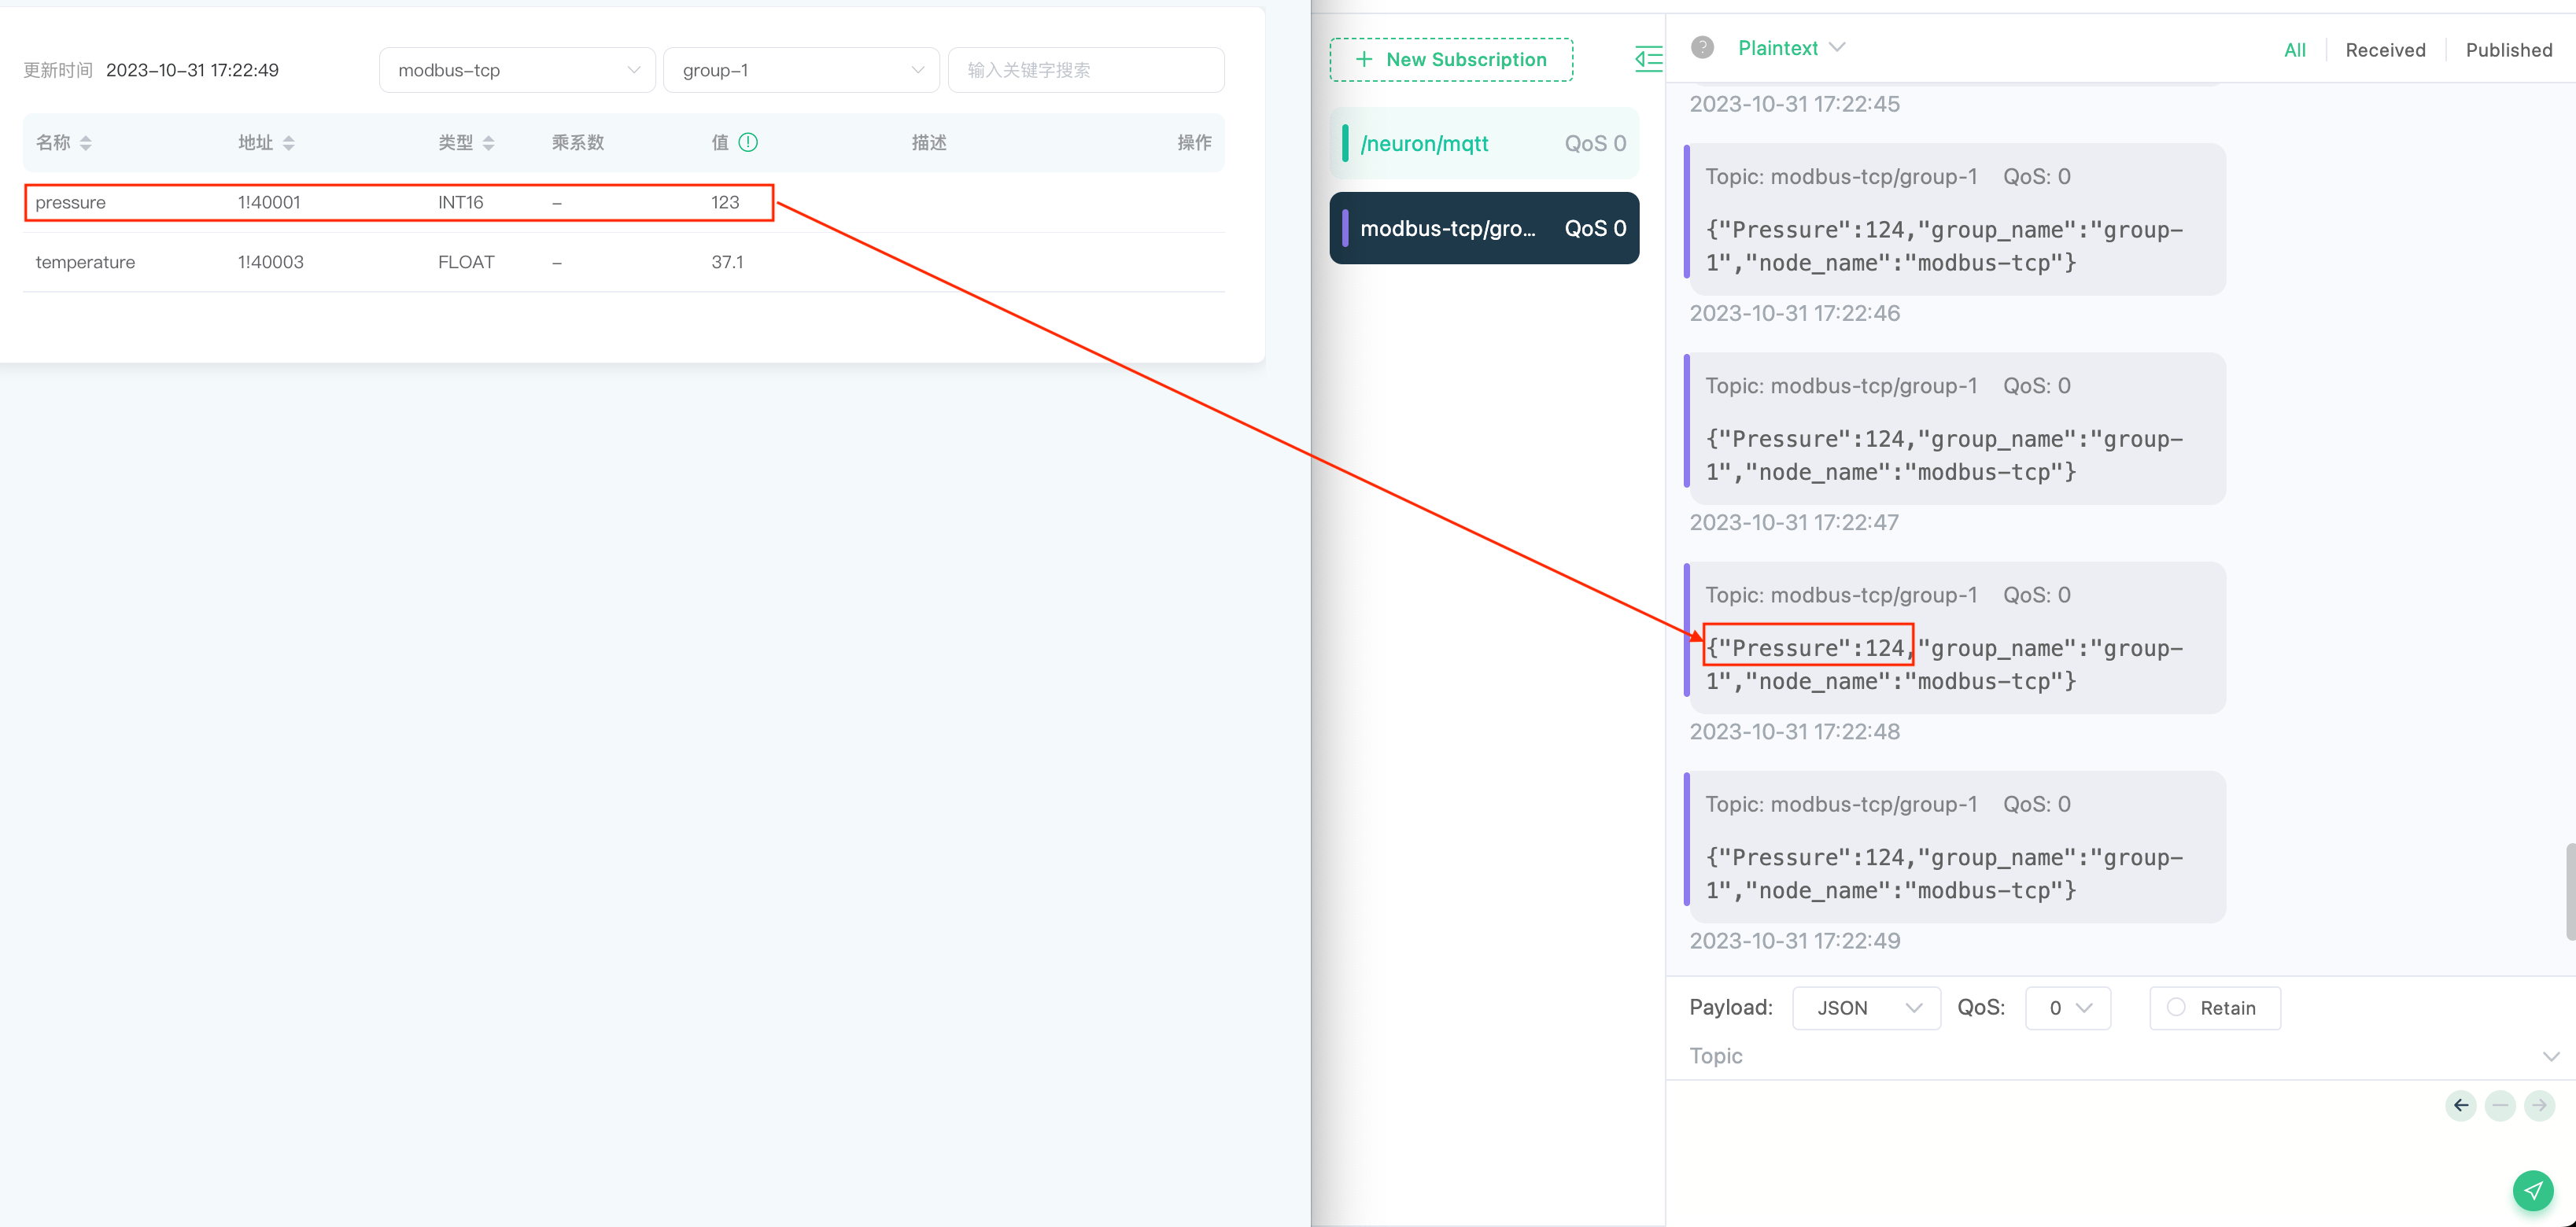
View stream processing results
In the example, the node_name subscribed by the data flow node is modbus-tcp, and the group_name is group-1, that is, the subscription topic is modbus-tcp/group-1.