Message Queue クイックスタート
このページでは、EMQX 6.0 の Message Queue 機能の使い方を説明します。MQTTX を使ってクライアントをシミュレートし、EMQX ダッシュボードからメッセージキューを作成・管理し、メッセージがどのように確実に保存・配信されるかを確認します。
目的
このクイックスタートでは、EMQX Message Queue が以下を実現できることを紹介します。
- サブスクライバーがオフラインでもメッセージを永続化する
- 設定可能なディスパッチ戦略をサポートする
- メッセージ圧縮のための Last-Value Semantics を有効にする
前提条件
開始する前に、以下を準備してください。
- EMQX 6.0 以上が稼働していること(Message Queue 機能が有効)
- MQTTX(または MQTT 5.0 対応のクライアント)
- EMQX ダッシュボードへのアクセス(デフォルト:
http://localhost:18083)
Message Queue 基本機能のテスト
このセクションでは、EMQX Message Queue がメッセージをどのように永続化し配信するかを示します。MQTTX でクライアントをシミュレートし、サブスクライバーがオフラインでもメッセージが保持・配信される様子を確認します。
ステップ 1: メッセージキューの作成
左メニューの Message Queue に移動します。
画面右上の Create ボタンをクリックします。
Create Message Queue ダイアログで以下の設定を行います。
- Topic Filter:
demo/topic - Dispatch Strategy:
Random - Data Retention Period:
1日 - Last Value Semantics:
Disabled
- Topic Filter:
Create をクリックします。
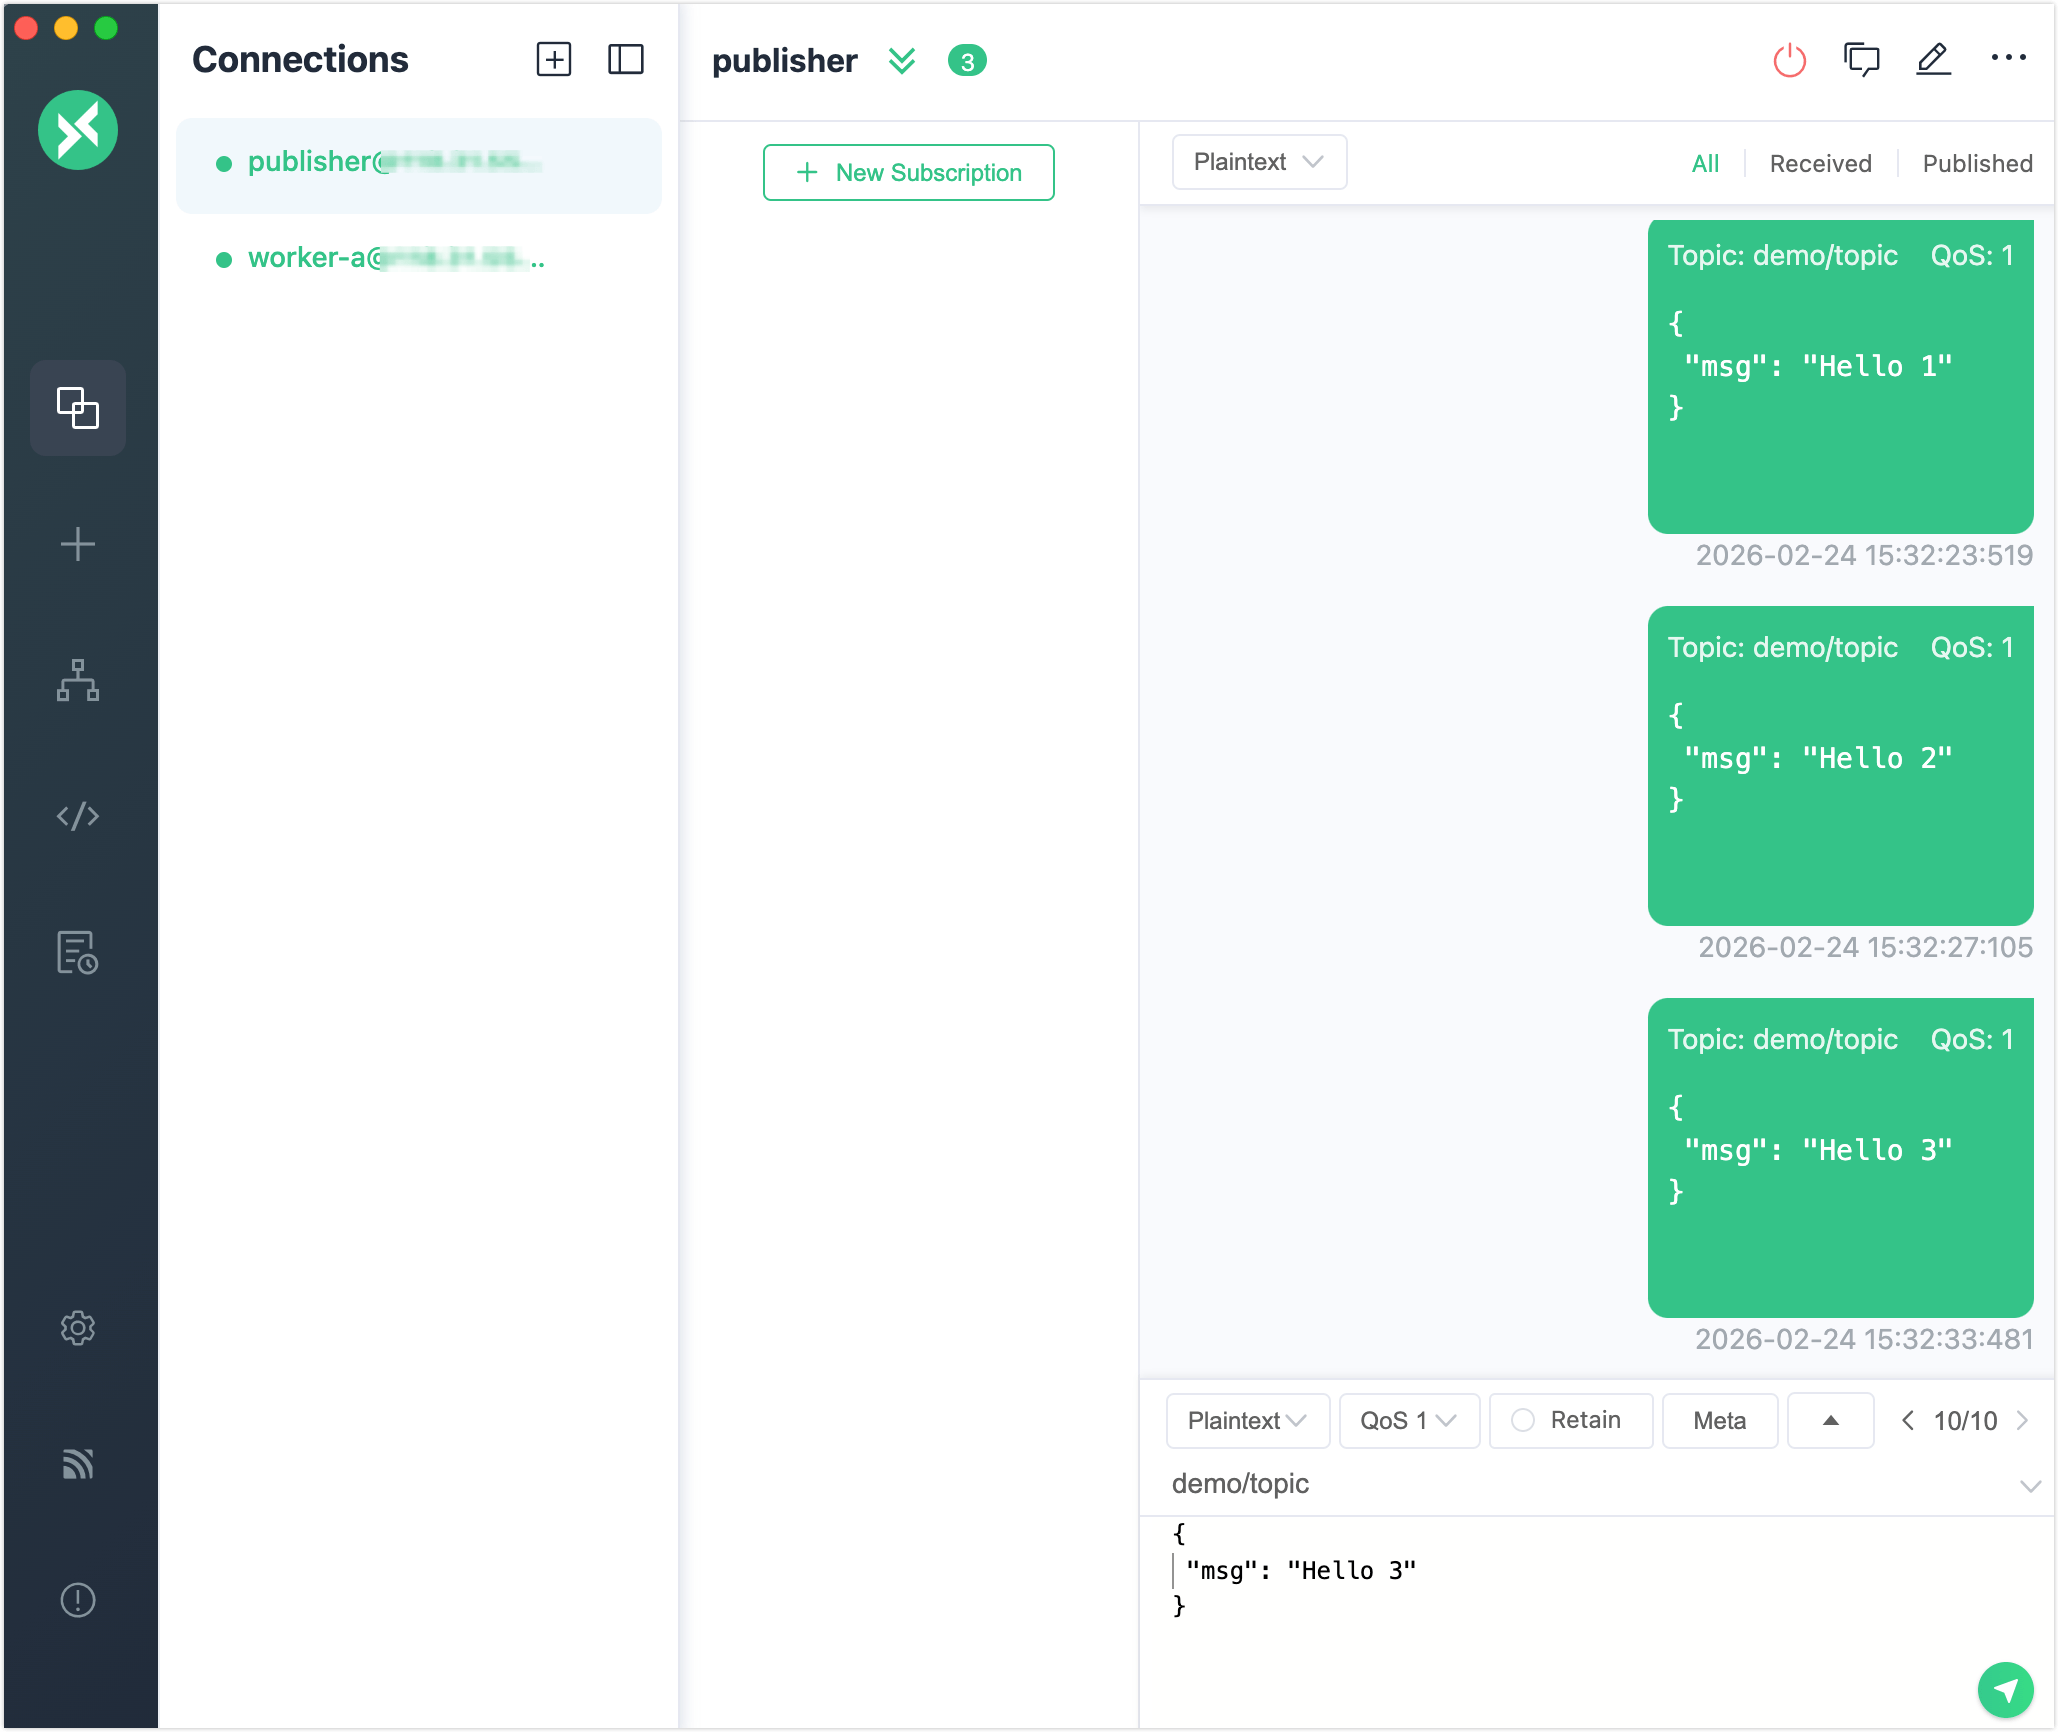
ステップ 2: メッセージのパブリッシュ
MQTTX を使って パブリッシャー としてクライアントをシミュレートします。
- MQTTX を開き、クライアントを作成します(例:
publisher)。 - EMQX に接続します(
mqtt://localhost:1883)。 - トピック
demo/topicに QoS 1 でメッセージをパブリッシュします。
例:
Topic: demo/topic
QoS: 1
Payload: {"msg": "Hello 1"}
{"msg": "Hello 2"} など、ペイロードを変えて複数回繰り返します。
この時点ではサブスクライバーがいません。メッセージは EMQX によってキューに保存され永続化されます。
ステップ 3: サブスクライブしてメッセージを消費
MQTTX を使って サブスクライバー としてクライアントをシミュレートします。
2つ目のクライアントを開きます(例:
worker-a)。EMQX に接続します。
キュートピックにサブスクライブします。
jsonTopic: $queue/my_queue/demo/topic QoS: 1
これで、キューに保存されていたすべてのメッセージを受信できます。
複数サブスクライバーとディスパッチ戦略のシミュレーション
このセクションでは、同じメッセージキューに複数のサブスクライバーが接続した場合の動作をシミュレートし、異なるディスパッチ戦略がメッセージ配信にどのように影響するかを確認します。
publisherクライアントで、元のトピック($q/プレフィックスなし)に複数のメッセージをパブリッシュします。bashfor i in {1..10}; do mqttx pub -t demo/topic -m "message-$i" -q 1 doneもう1つ MQTTX クライアントを作成します(例:
worker-b)。EMQX に接続し、同じキュートピックにサブスクライブします。
jsonTopic: $queue/my_queue/demo/topic QoS: 1
これで、worker-a と worker-b の両方が同じキューからメッセージを消費します。
- 両方のサブスクライバーでメッセージの流れを観察します。
ディスパッチ戦略が配信に与える影響
キューの Dispatch Strategy によってメッセージ配信の挙動が変わります。
| Dispatch Strategy | 挙動 | 利用ケース |
|---|---|---|
Least Inflight Subscriber | 未アック(未確認)メッセージが少ないサブスクライバーを優先 | 不均一な消費者間の負荷分散 |
Round Robin | サブスクライバーに順番に交互にメッセージを配信 | 速度に関係なく公平に配信したい場合 |
Random (デフォルト) | ランダムに選ばれたサブスクライバーにメッセージを送信 | 予測不能な動作やデモシナリオ |
worker-a と worker-b のメッセージ配信状況を観察して、これらの挙動を確認できます。
ディスパッチ戦略の変更
戦略は動的に変更可能です。
- ダッシュボードの Message Queue に移動します。
- 対象のキューの横にある Edit をクリックします。
- 新しい Dispatch Strategy を選択し、保存します。
ただし、サブスクライバーがオンラインで接続中の場合は新しい戦略は適用されません。クライアントを切断し、再接続する必要があります。
切り替え後に再度メッセージをパブリッシュし、サブスクライバー間の配信パターンの違いを確認してください。
Last-Value Semantics のテスト
このセクションでは、Last-Value Semantics を有効にする方法を示します。これは、キーごとに最新のメッセージのみをキューに保持し、デバイス設定の更新などに適した機能です。
ステップ 1: 既存キューの削除
- EMQX ダッシュボードの Message Queue に移動します。
- トピックフィルターが
demo/topicのキューを探します。 - Actions 列の Delete をクリックします。
- 確認ダイアログで削除を確定します。
これで以前のキューと保存されていたメッセージが削除されます。
ステップ 2: Last-Value Semantics を有効にしたキューの作成
- Message Queue ページで Create をクリックします。
- Create Message Queue ダイアログで以下を設定します。
- Topic Filter:
device/config - Dispatch Strategy:
Random(または任意) - Data Retention Period:
1日 - Last Value Semantics: 有効にする(トグルオン)
- Queue Key Expression:
message.from(またはキーとして使う任意のフィールド名)
- Topic Filter:
- Create をクリックします。
「Queue Key Expression」は、EMQX がメッセージからキーを抽出し、Last-Value Queue での重複排除に使う方法を定義します。このフィールドは Variform expressions による設定をサポートしています。
このクイックスタートでは message.from を使い、メッセージのパブリッシャーのクライアントIDをキーとして抽出しています。
Queue Key Expression の高度な使い方やカスタムキー、メッセージ構造の例については、Queue Key Expression を参照してください。
ステップ 3: メッセージのパブリッシュ
- MQTTX を開き、クライアントを選択または作成します(例:
publisher)。 - EMQX に接続します(
mqtt://localhost:1883)。 device/configにメッセージをパブリッシュします。
例:
| フィールド | 値 |
|---|---|
| Topic | device/config |
| QoS | 1 |
| Payload | {"ssid": "wifi1"} |
- 同じクライアント(同じクライアントID)で内容を更新したメッセージをパブリッシュします。
Payload: {"ssid": "wifi2"}Queue Key Expression が message.from に設定されているため、EMQX は各メッセージからクライアントIDを自動的に抽出し、それをキューキーとして使用します。同じクライアントからのメッセージは、未消費の前のメッセージを上書きします。
ステップ 4: キューへのサブスクライブ
- 2つ目の MQTTX クライアントを作成します(例:
subscriber)および EMQX に接続します。 - キュートピックにサブスクライブします。
Topic: $q/device/config
QoS: 1期待される動作:
最新のメッセージのみが配信されます。この場合、{"ssid": "wifi2"} のみが受信されます。