How to Connect Any PLC to MQTT in 10 Minutes
Connecting PLC data to MQTT is the first step in modern industrial digitalization. As a lightweight messaging protocol, MQTT has become the de facto standard for Industrial IoT—it handles unstable network environments well, supports real-time data streaming, and is natively supported by almost all cloud platforms, data analytics tools, and MES systems.
However, in real factory environments, connecting PLC data to MQTT is far more complex than imagined. PLCs from different manufacturers use different communication protocols (Modbus, OPC UA, Siemens S7, Ethernet/IP...), and traditional solutions require writing driver code for each protocol, resulting in high deployment and maintenance costs.
This article demonstrates how to connect any PLC to MQTT in 10 minutes using EMQX Neuron, without writing any code.
Why is PLC to MQTT So Difficult?
Protocol Fragmentation
Equipment in factory workshops comes from different eras and manufacturers:
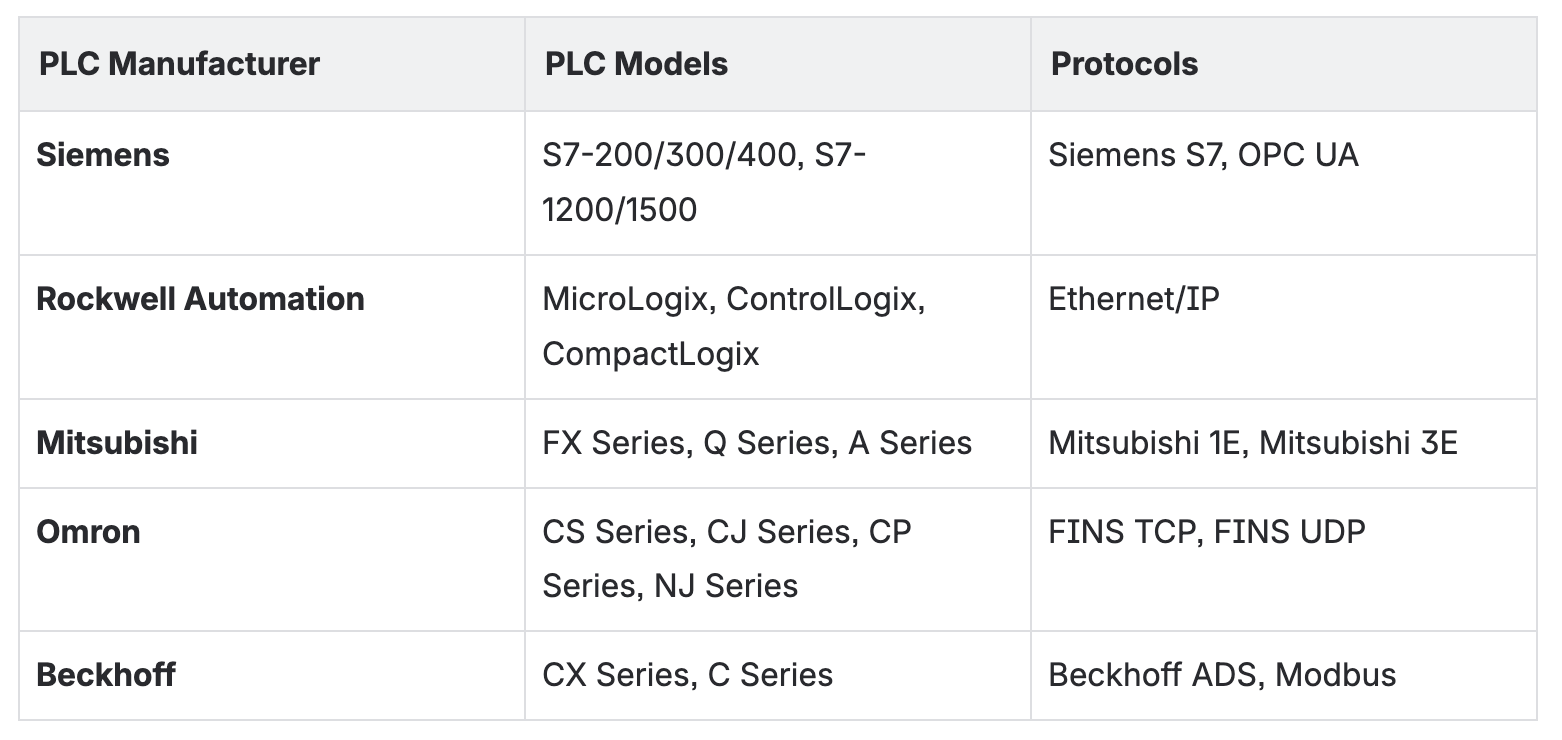
Each protocol has its own data format, addressing method, and communication mechanism. Traditional solutions require developing and maintaining independent drivers for each protocol.
Inconsistent Data Formats
Even after successfully collecting data, different PLCs have vastly different data formats:
Register addresses:
40001(Modbus) vsDB1.DBD0(Siemens) vsN7:0(Allen-Bradley)Data types:
INT16,FLOAT,BOOL,STRING...Byte order: Big-endian vs Little-endian
These data need to be standardized before being sent to MQTT.
Deployment and Maintenance Costs
Traditional access solutions often rely on dedicated hardware gateways, which not only have high initial procurement costs but also incur a series of hidden expenses: deployment and debugging of hardware gateways require professional engineers to operate on-site, which is time-consuming and labor-intensive; driver adaptation for different PLC protocols, firmware upgrades, and troubleshooting all require additional technical service fees.
EMQX Neuron: Industrial Edge Gateway Software
EMQX Neuron is an industrial edge gateway software designed specifically for industrial scenarios. It integrates protocol conversion, data processing, and MQTT publishing into a lightweight software solution.
Core Advantages
100+ Industrial Protocols Out of the Box
Modbus TCP/RTU, OPC UA, Siemens S7, Ethernet/IP, BACnet, IEC 60870-5-104, DNP3...
Complete protocol list: Data Collection Plugin List
Flexible & Lightweight Deployment
Docker container: One-click deployment, cross-platform operation (runs with
256MBmemory)Kubernetes: Cloud-native deployment
Bare-metal installation: Supports Ubuntu, CentOS, Debian
Edge hardware: Raspberry Pi, Industrial PC, ARM gateways
Zero-Code Configuration
Visual configuration via Web interface
Complete PLC to MQTT pipeline in 10 minutes
Powerful Edge Computing Capabilities
SQL stream processing:
160+built-in functions, supports filtering, transformation, aggregationAI algorithm integration: Supports Python, ONNX, external HTTP services
Real-time alerts: Millisecond-level response, supports complex rules
Enterprise-Grade Features
High performance: Single node supports
100,000+data pointsSecurity: TLS/SSL encryption, user permission management
Observability: Complete logs, metrics, and monitoring
10-Minute Hands-On: Modbus PLC to MQTT
Let's demonstrate the entire process through a complete hands-on case.
Architecture Overview

Prerequisites
PLC or simulator: This example uses a Modbus TCP simulator (PeakHMI Slave Simulators)
EMQX Neuron: Quick deployment via Docker
MQTT Broker: Use public broker
broker.emqx.ioMQTT client: Use MQTTX to verify data
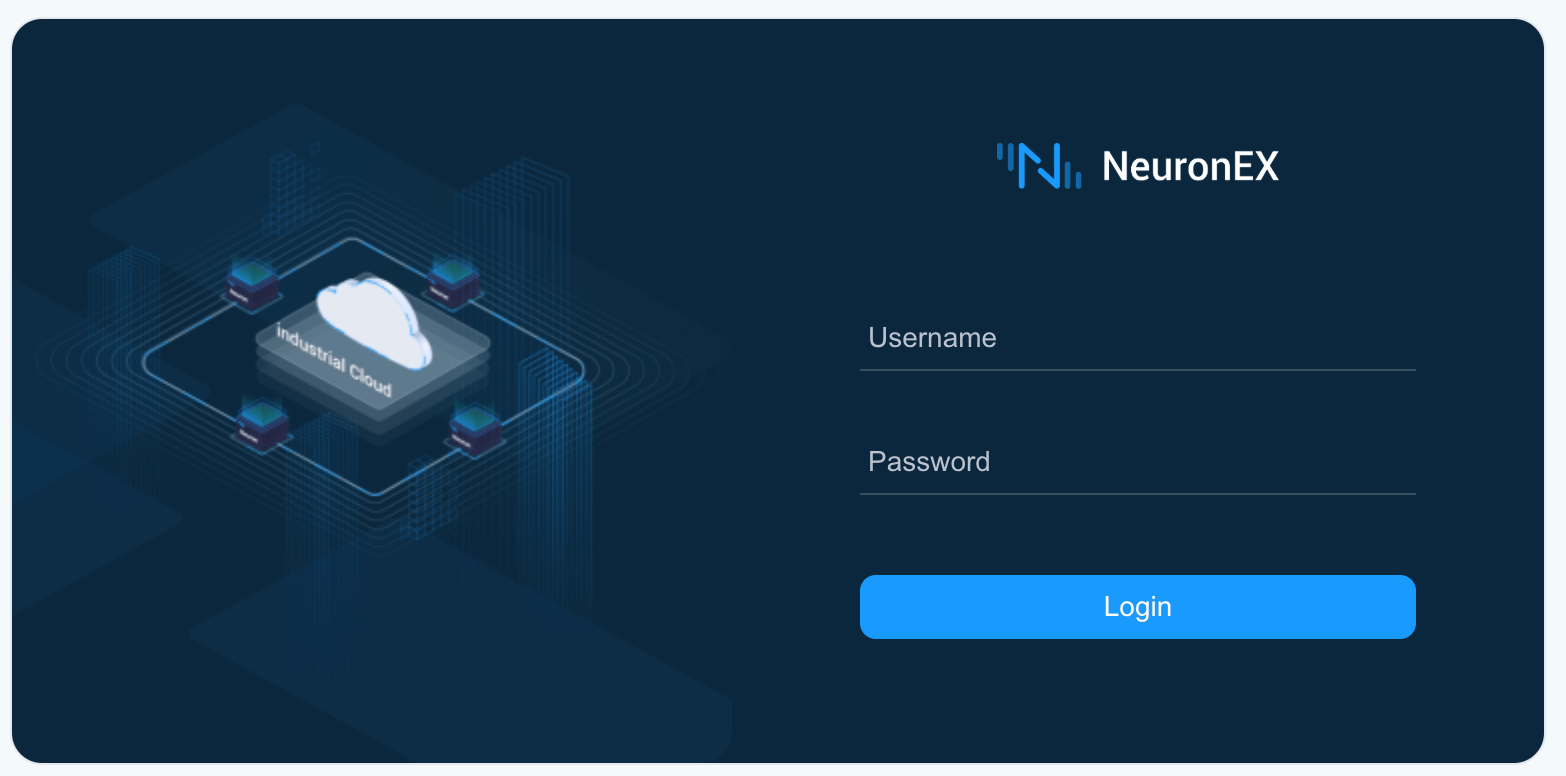
Step 1: Start EMQX Neuron
docker pull emqx/neuronex:latest
docker run -d --name neuronex -p 8085:8085 --log-opt max-size=100m --privileged=true emqx/neuronex:latest
Access http://localhost:8085 and log in with default credentials: Username: admin, Password: 0000
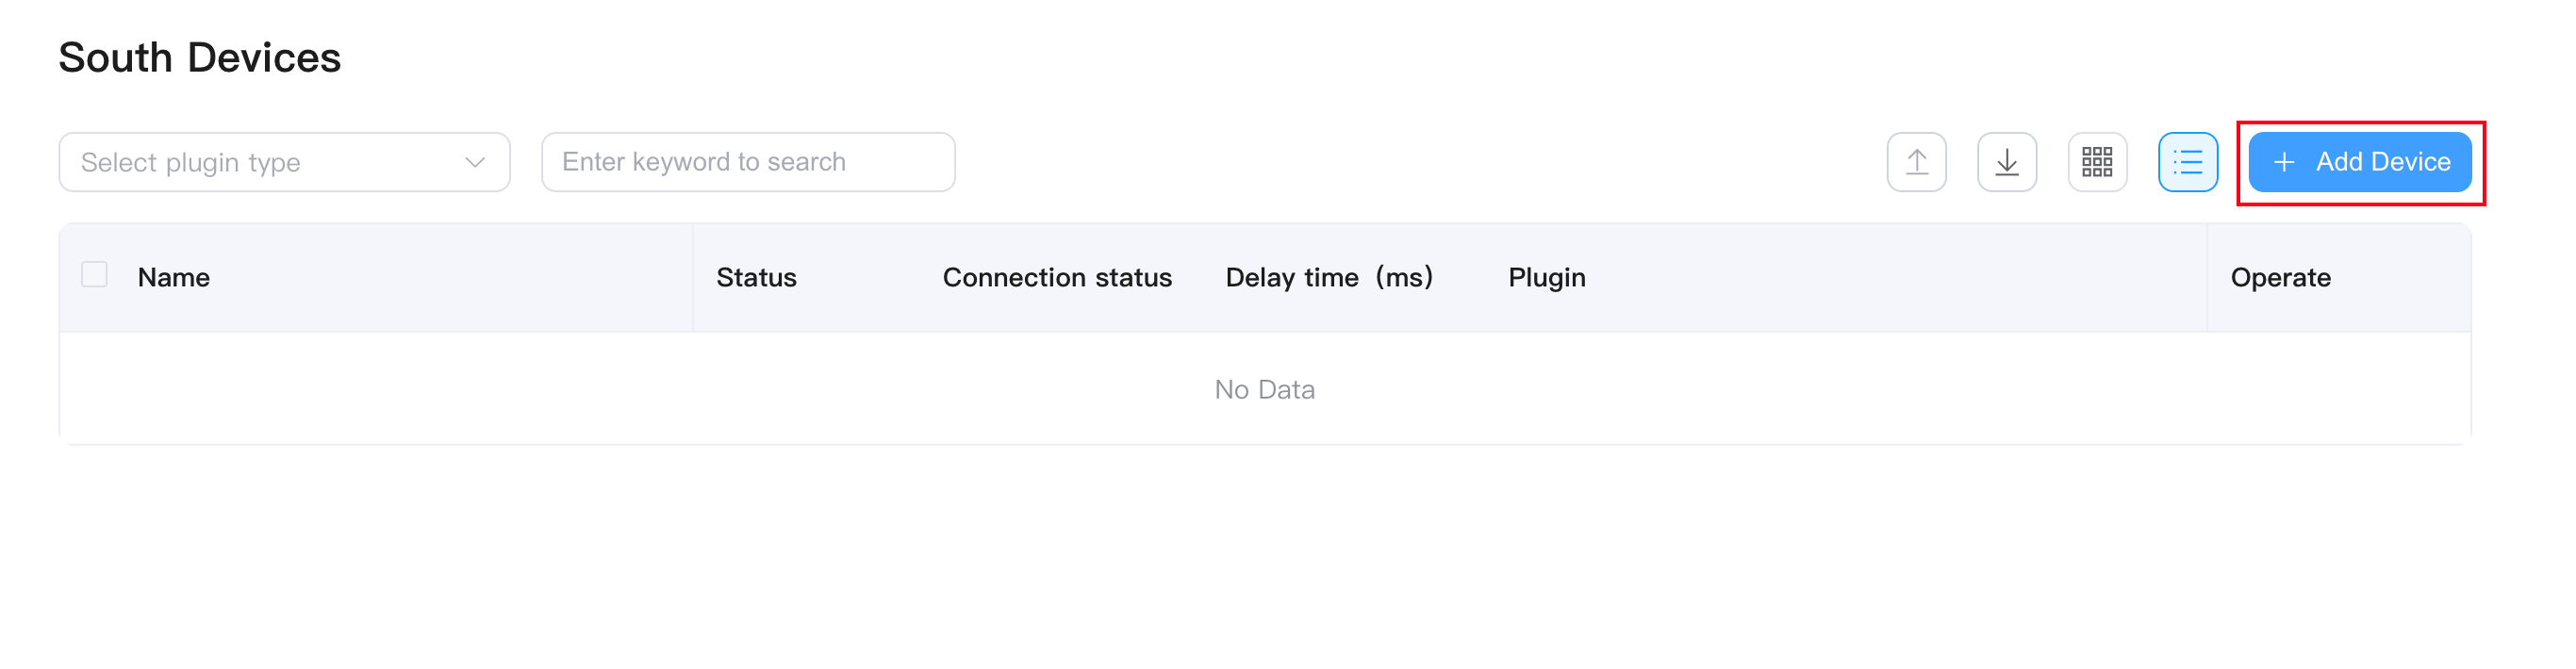
Step 2: Add Southbound Device (Data Source)
Southbound devices are connections between NeuronEX and PLCs.
Go to "Data Collection" → "Southbound Devices"
Click "Add Device"
Configure device parameters:
Name:
modbus-tcp-1Plugin: Select "Modbus TCP"
IP Address: Enter the simulator's IP (e.g.,
192.168.1.100)Port:
502(Modbus TCP default port)Keep other parameters as default
Click "Add Device"
Step 3: Create Collection Group and Tags
Collection groups are used to group data points, and each group can have an independent collection frequency.
3.1 Create Collection Group
Click on the
modbus-tcp-1device card you just createdClick "Create Group"
Configure group parameters:
Group Name:
group-1Collection Interval:
1000(milliseconds, i.e., collect once per second)
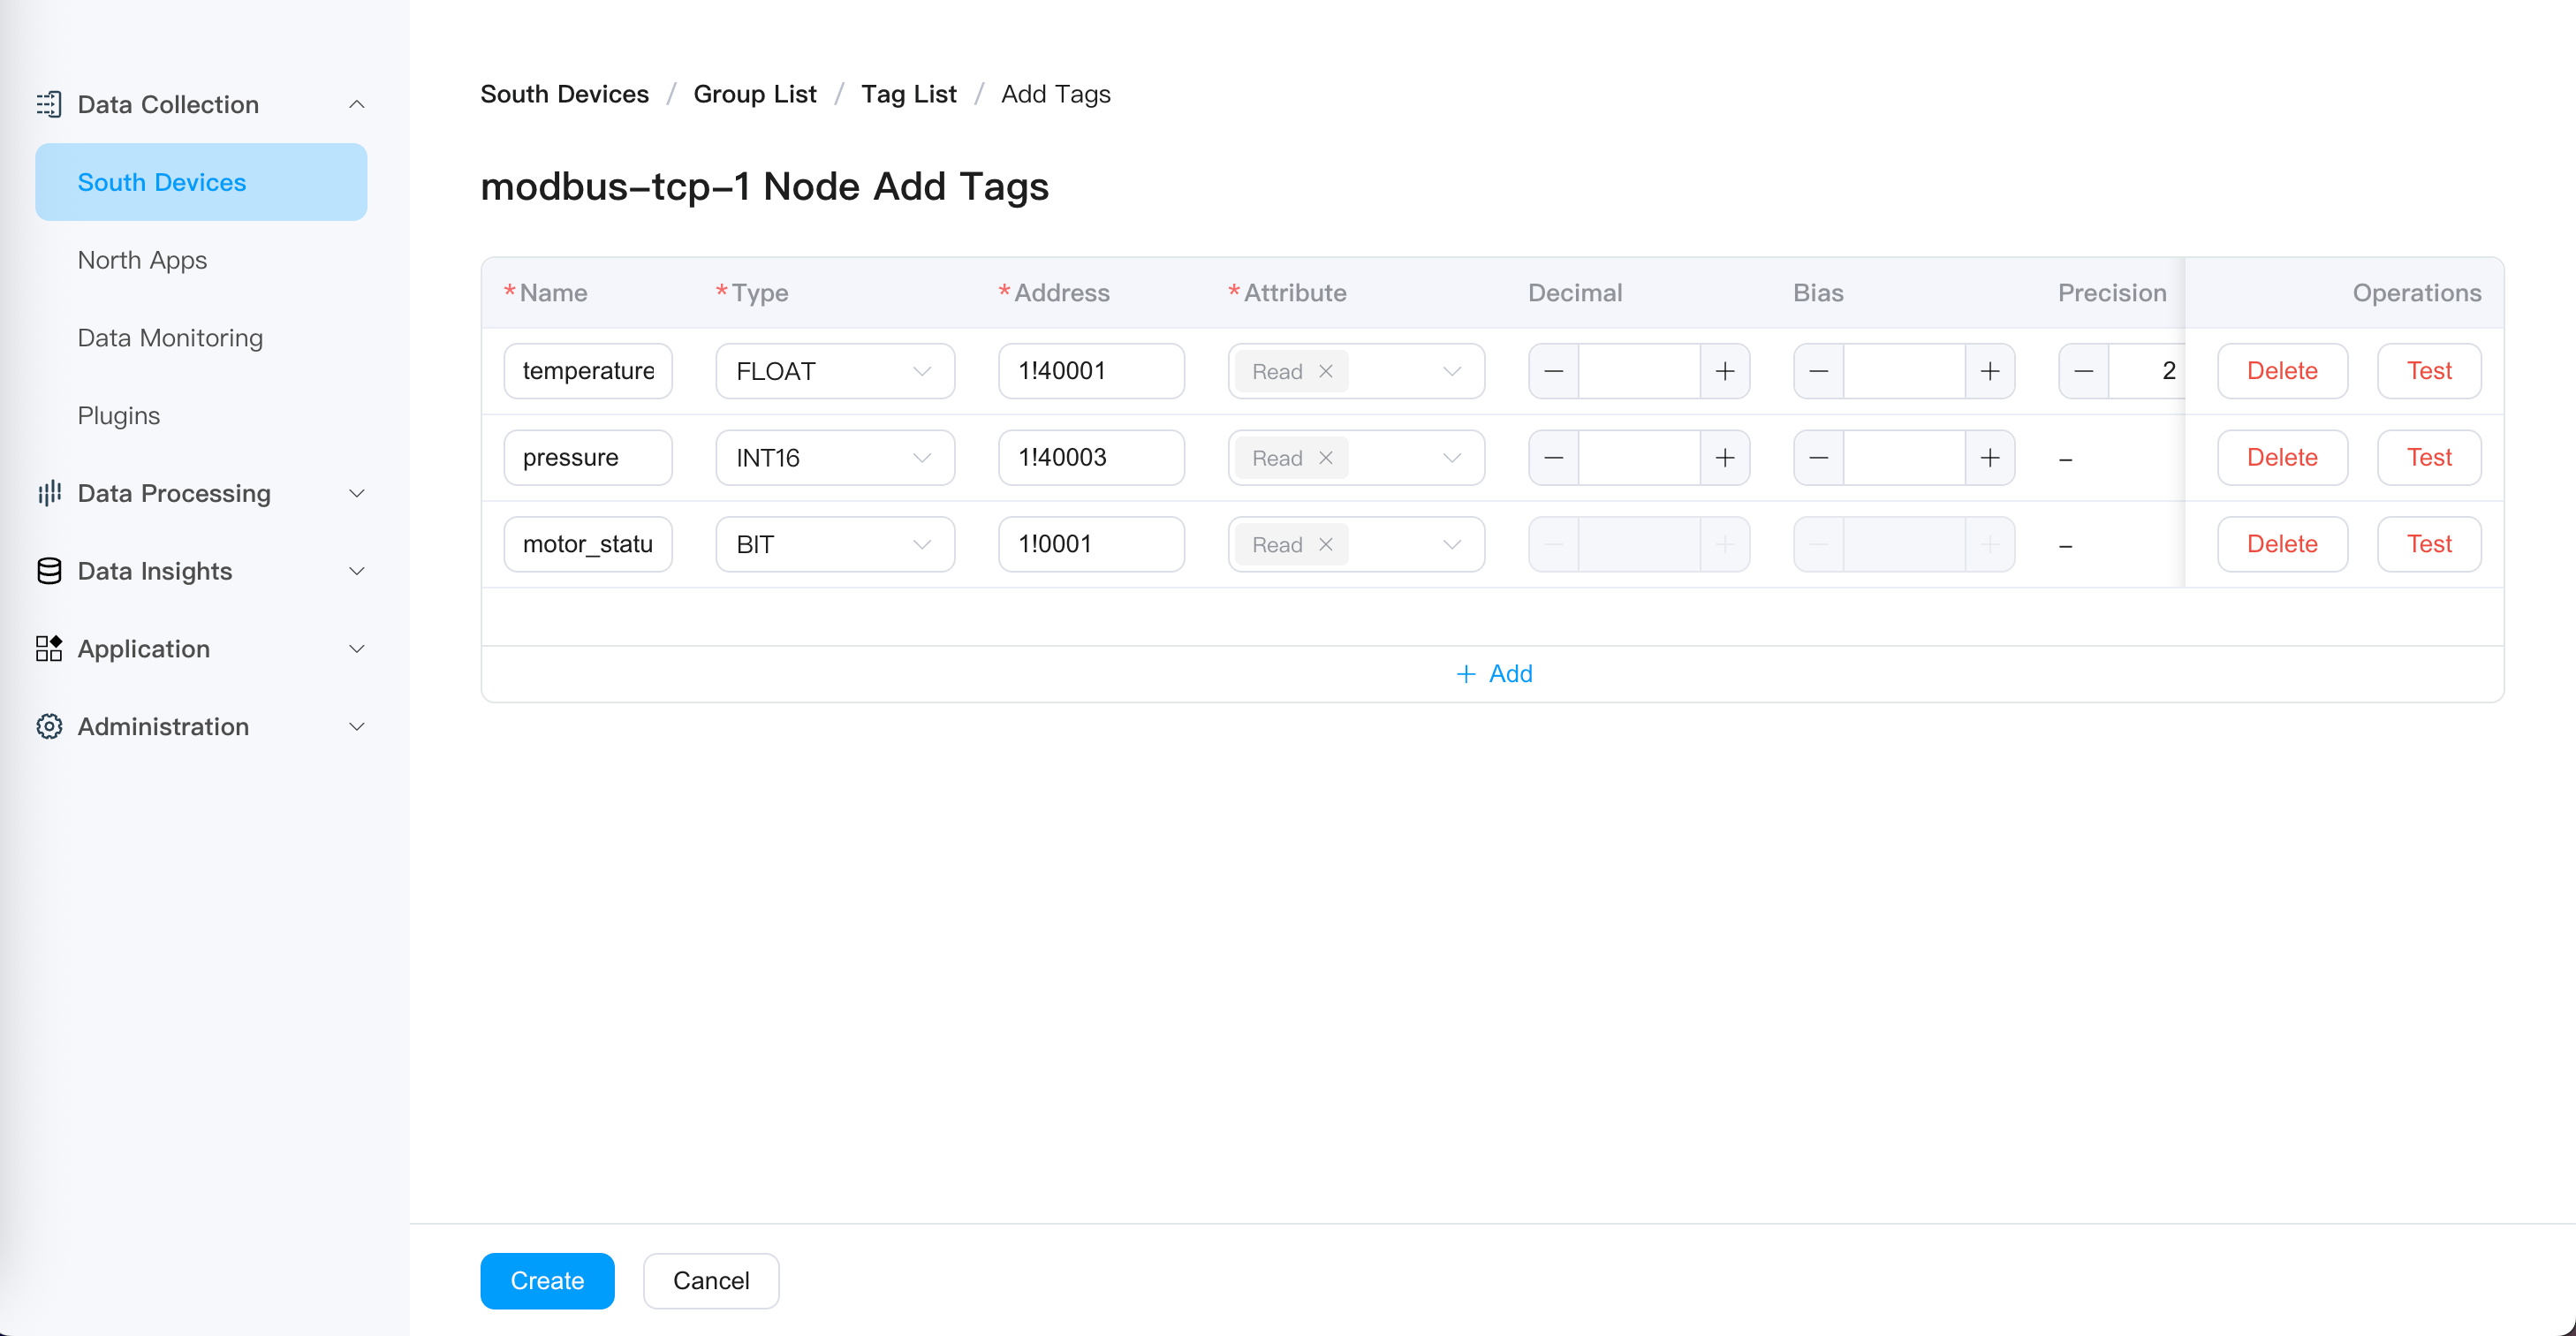
3.2 Add Data Tags
Click "Tag List" for the
group-1groupClick "Add Tag"
Configure tag parameters:
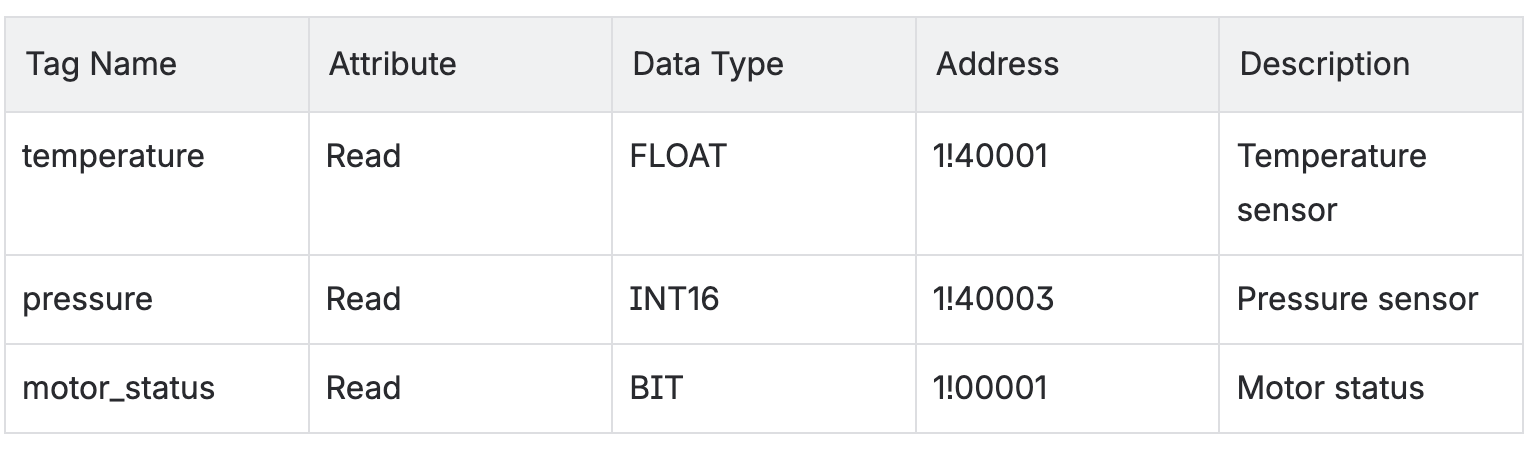
Address format explanation:
1!40001, where1is the station number and40001is the holding register address1!00001:1, where1is the station number and00001is the coil address
- Click "Create"
After completing tag creation, the device status will automatically change to "Connected".
Step 4: Verify Data Collection
Go to "Data Collection" → "Data Monitoring"
Select southbound device:
modbus-tcp-1Select group:
group-1View real-time data
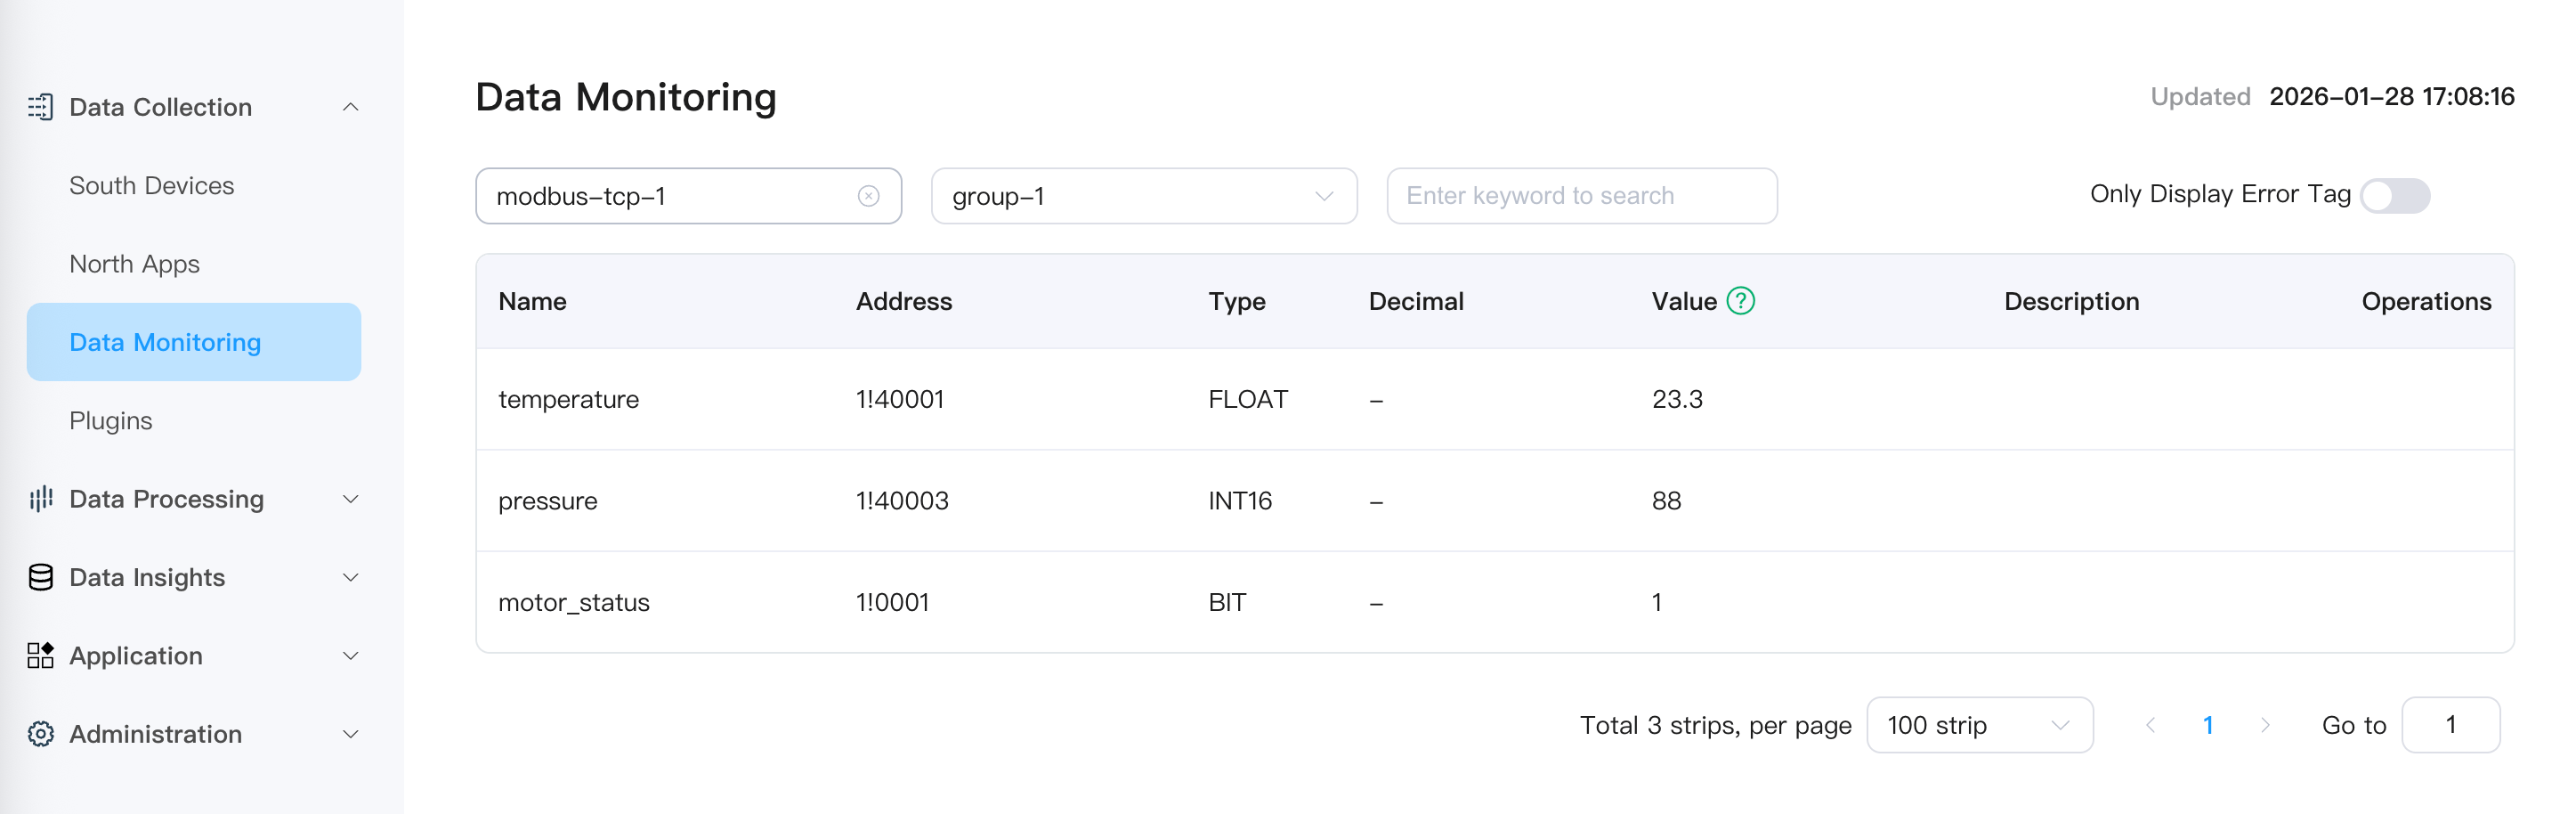
You will see the real-time values of each tag.
Step 5: Configure Northbound Application (MQTT Publishing)
Northbound applications are used to send collected data to external systems.
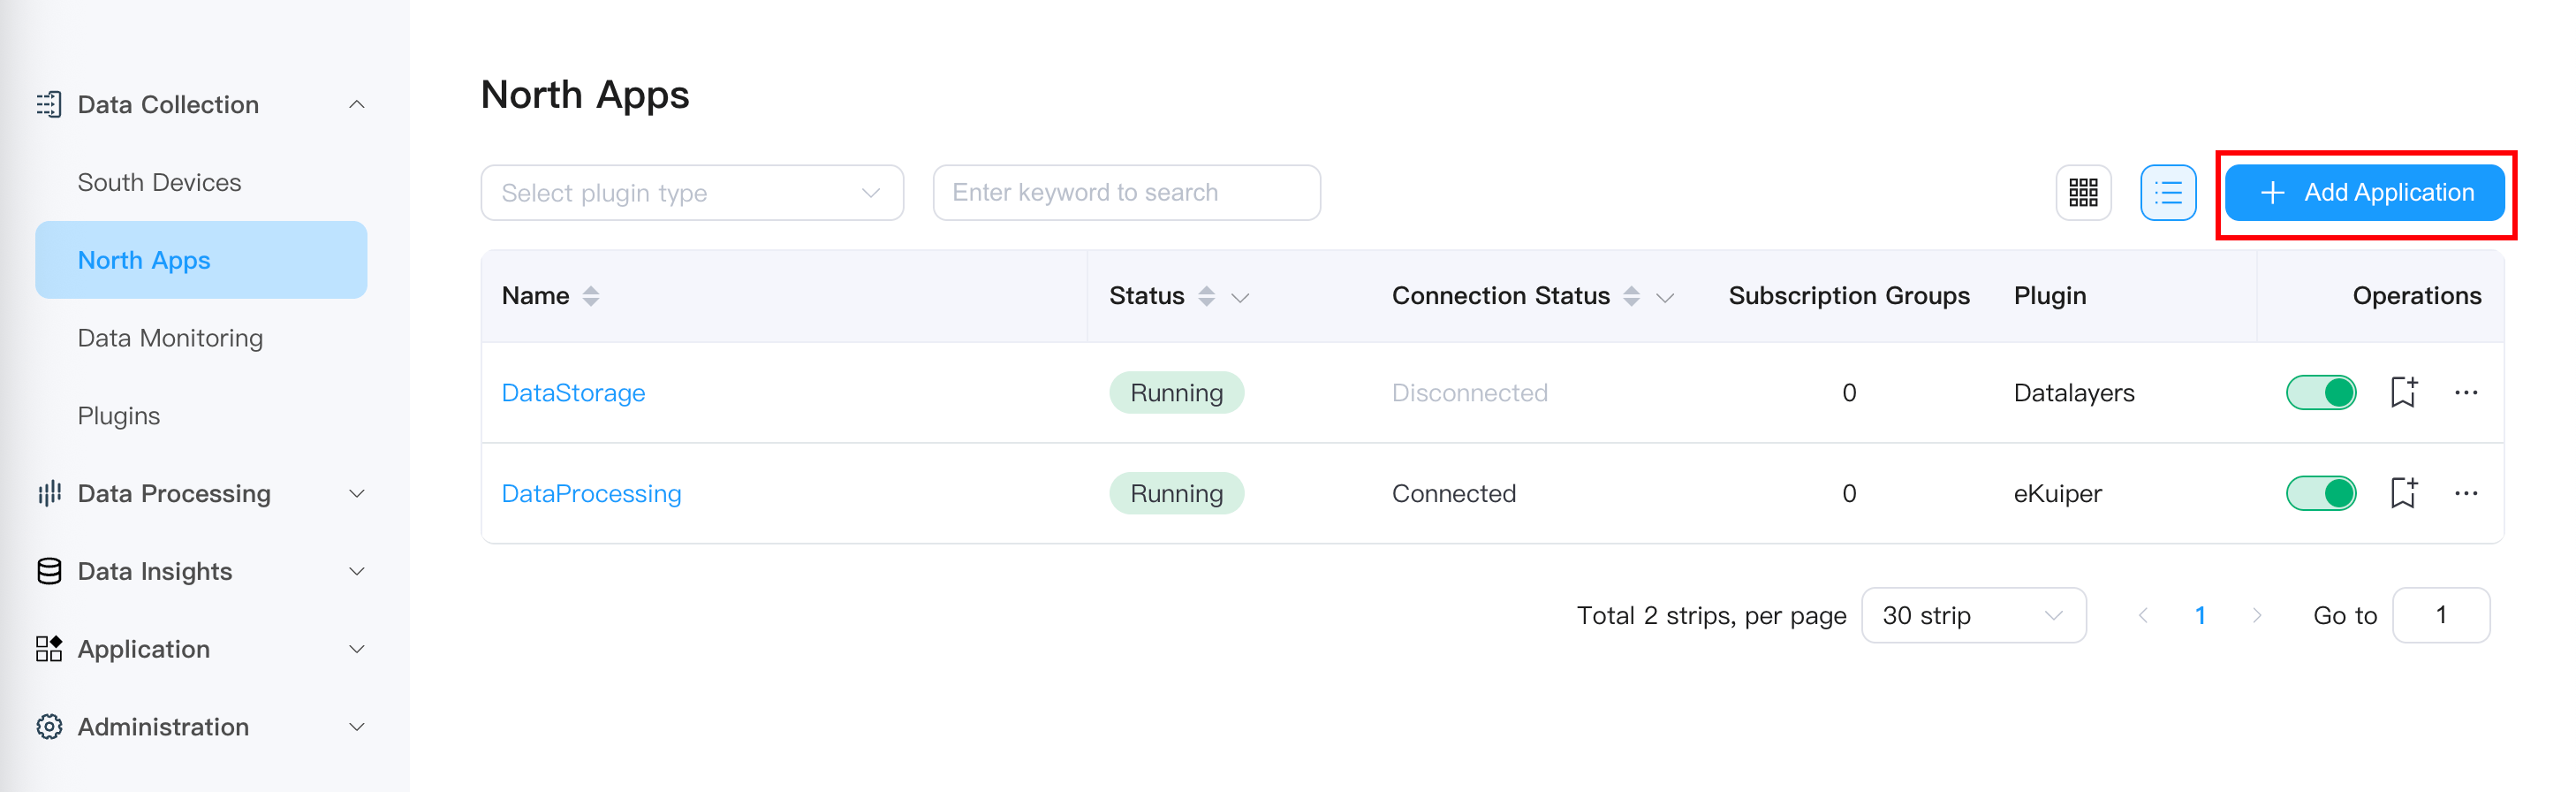
5.1 Create MQTT Application
Go to "Data Collection" → "Northbound Applications"
Click "Add Application"
Configure application parameters:
Name:
mqtt-brokerPlugin: Select "MQTT"
5.2 Configure MQTT Connection
Fill in the application configuration page:
Server Address:
broker.emqx.io(public MQTT Broker)Server Port:
1883Client ID:
neuron-client-001(optional)Username/Password: Leave blank (public broker requires no authentication)
Click "Submit", and the application status will change to "Running".
5.3 Subscribe to Southbound Data Group
Click "Add Subscription" for the
mqtt-brokerapplicationConfigure subscription parameters:
Topic:
factory/line1/modbus-tcp-1/data(custom topic)Subscribe to Southbound Driver Data: Select
modbus-tcp-1→group-1
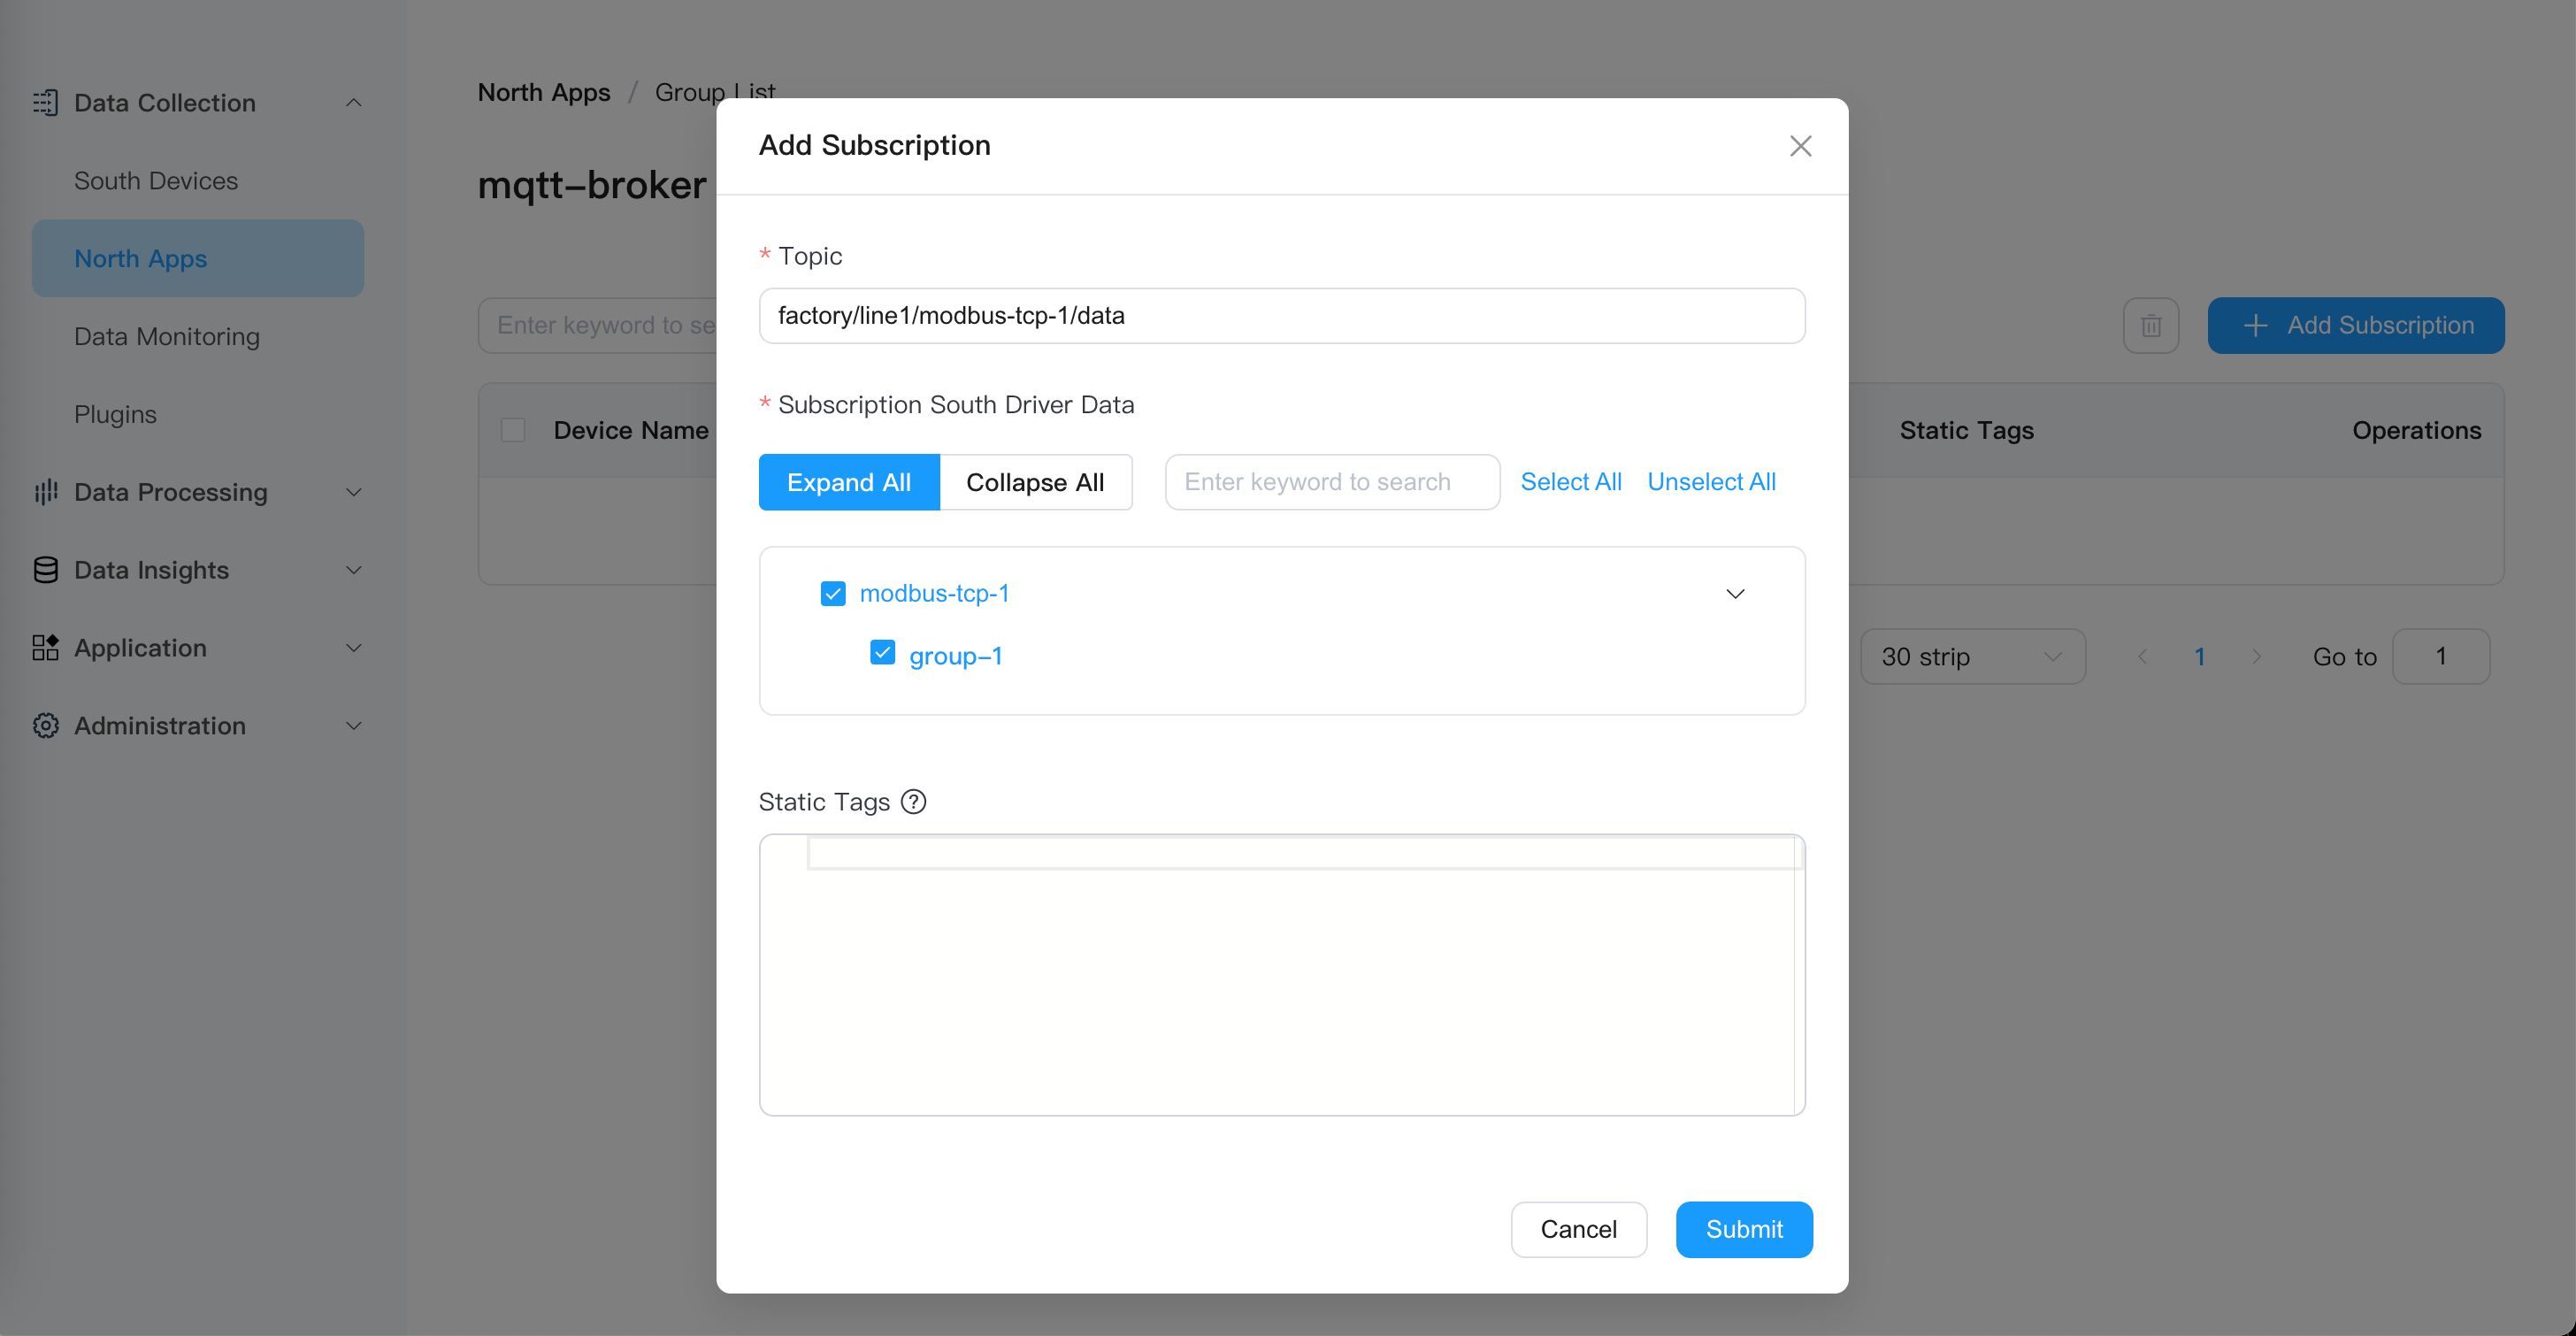
- Click "Submit"
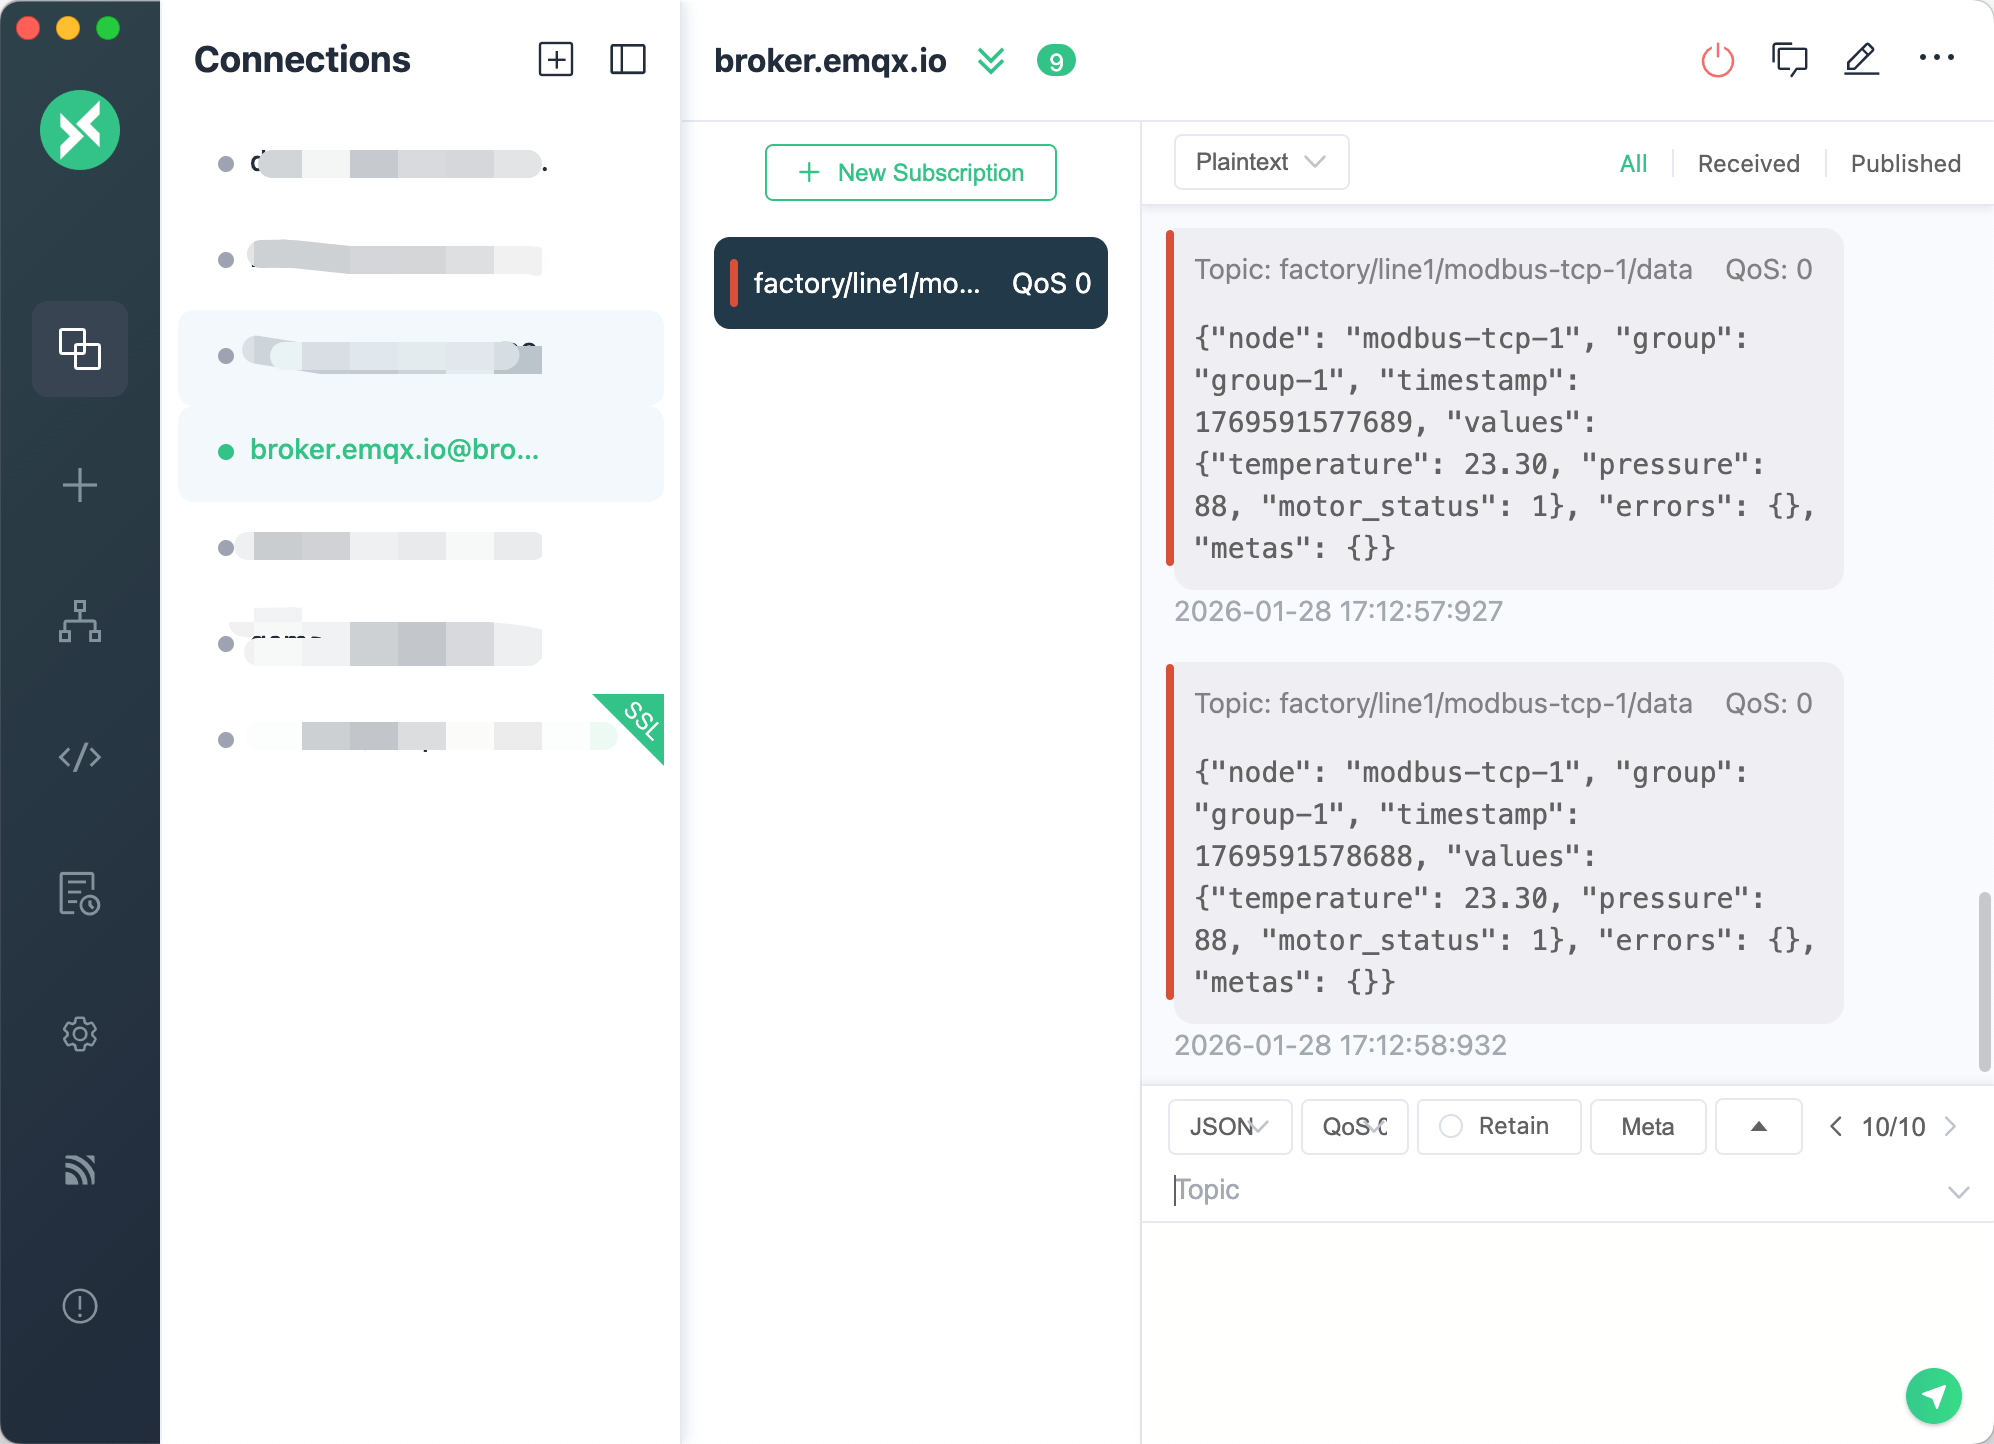
Step 6: Verify MQTT Data
Use the MQTTX client to verify that data is successfully published to the MQTT Broker.
Open MQTTX and create a new connection:
Name:
TestConnectionHost:
broker.emqx.ioPort:
1883
Add subscription:
- Topic:
factory/line1/modbus-tcp-1/data
- Topic:
View received data:
{
  "timestamp": 1706745600000,
  "node_name": "modbus-tcp-1",
  "group_name": "group-1",
  "values": {
    "temperature": 23.3,
    "pressure": 88,
    "motor_status": 1
  }
}
Congratulations! You have completed the complete data pipeline from Modbus PLC to MQTT in 10 minutes.
Advanced: Support for More PLC Protocols
The example above uses a Modbus simulator for data collection. EMQX Neuron supports 100+ industrial protocols. For a complete tutorial on collecting data from Siemens S7-1200 PLC using EMQX Neuron and sending it to MQTT, please refer to: Connecting Siemens S7-1200 PLC to MQTT in 10 Minutes
Advanced: Edge Data Processing
EMQX Neuron can not only collect and forward data but also perform real-time data processing at the edge.
Use Cases
Data filtering: Only upload data exceeding thresholds (e.g., temperature >
80°C)Data transformation: Unit conversion (
PSI→Bar), value calculation (+1,×0.9)Data aggregation: Calculate average, maximum, minimum values
Alert triggering: Real-time anomaly detection and alert sending
Quick Example: Temperature Over-Limit Alert
Scenario: When temperature exceeds 80°C, send an alert to a separate MQTT topic.
Subscribe data to the data processing module
In "Data Collection" → "Northbound Applications", find the default DataProcessing application and add a subscription: the
group-1collection group of themodbus-tcp-1driver.Data will automatically flow into the
neuronStreamdata stream of the data processing module.Create processing rule
Go to "Data Processing" → "Rules", click "New Rule":
SELECT
  timestamp,
  node_name,
  values.temperature as temp
FROM neuronStream
WHERE values.temperature > 80
Configure action (Sink)
Click "Add" in the "Actions" module, select "MQTT":
Server Address:
broker.emqx.io:1883Topic:
factory/alerts/high-temperatureData Template:
{
  "alert_type": "high_temperature",
  "device": "{{.node_name}}",
  "temperature": {{.temp}},
  "timestamp": {{int64 .timestamp}}
}
Verify alert
Subscribe to
factory/alerts/high-temperaturein MQTTX. When the temperature exceeds80°C, you will receive an alert message.
Summary
Connecting PLCs to MQTT should not be a complex, expensive, and time-consuming project. EMQX Neuron simplifies the entire process in the following ways:
✅ 100+ protocols out of the box: No need to write drivers for each PLC
✅ Zero-code configuration: Visual Web interface operations, complete configuration in 10 minutes
✅ Lightweight deployment: Docker container, 200MB+ image, 256MB memory
✅ Edge computing capabilities: SQL stream processing + AI algorithm integration
Start your industrial digitalization journey today and let data flow.