Rules
EMQX provides a powerful and efficient built-in data processing feature, the Rule Engine. By leveraging SQL-like syntax, users can effortlessly extract, transform, and enrich data from various sources. Once processed, data can be distributed or integrated to external systems through actions triggered by rules, including built-in actions and Sink/Sources. You can also republish processed data to MQTT clients or devices.
Rule Engine is a core component of EMQX's data integration capabilities. It provides a flexible business integration solution with the use of data integration, simplifying the business development process, improving user usability, and reducing the coupling between business systems and EMQX. For more detailed information, see Rule Engine.
To create and manage the rules, you can access the Rules page by clicking Integration -> Rules from the left menu.
Create Rules
To create a Rule, click Create on the upper right corner of the Rules page. You can also create a Rule quickly by clicking Create Rule from the Action column of an existing connector on the Connector page.
SQL Editor
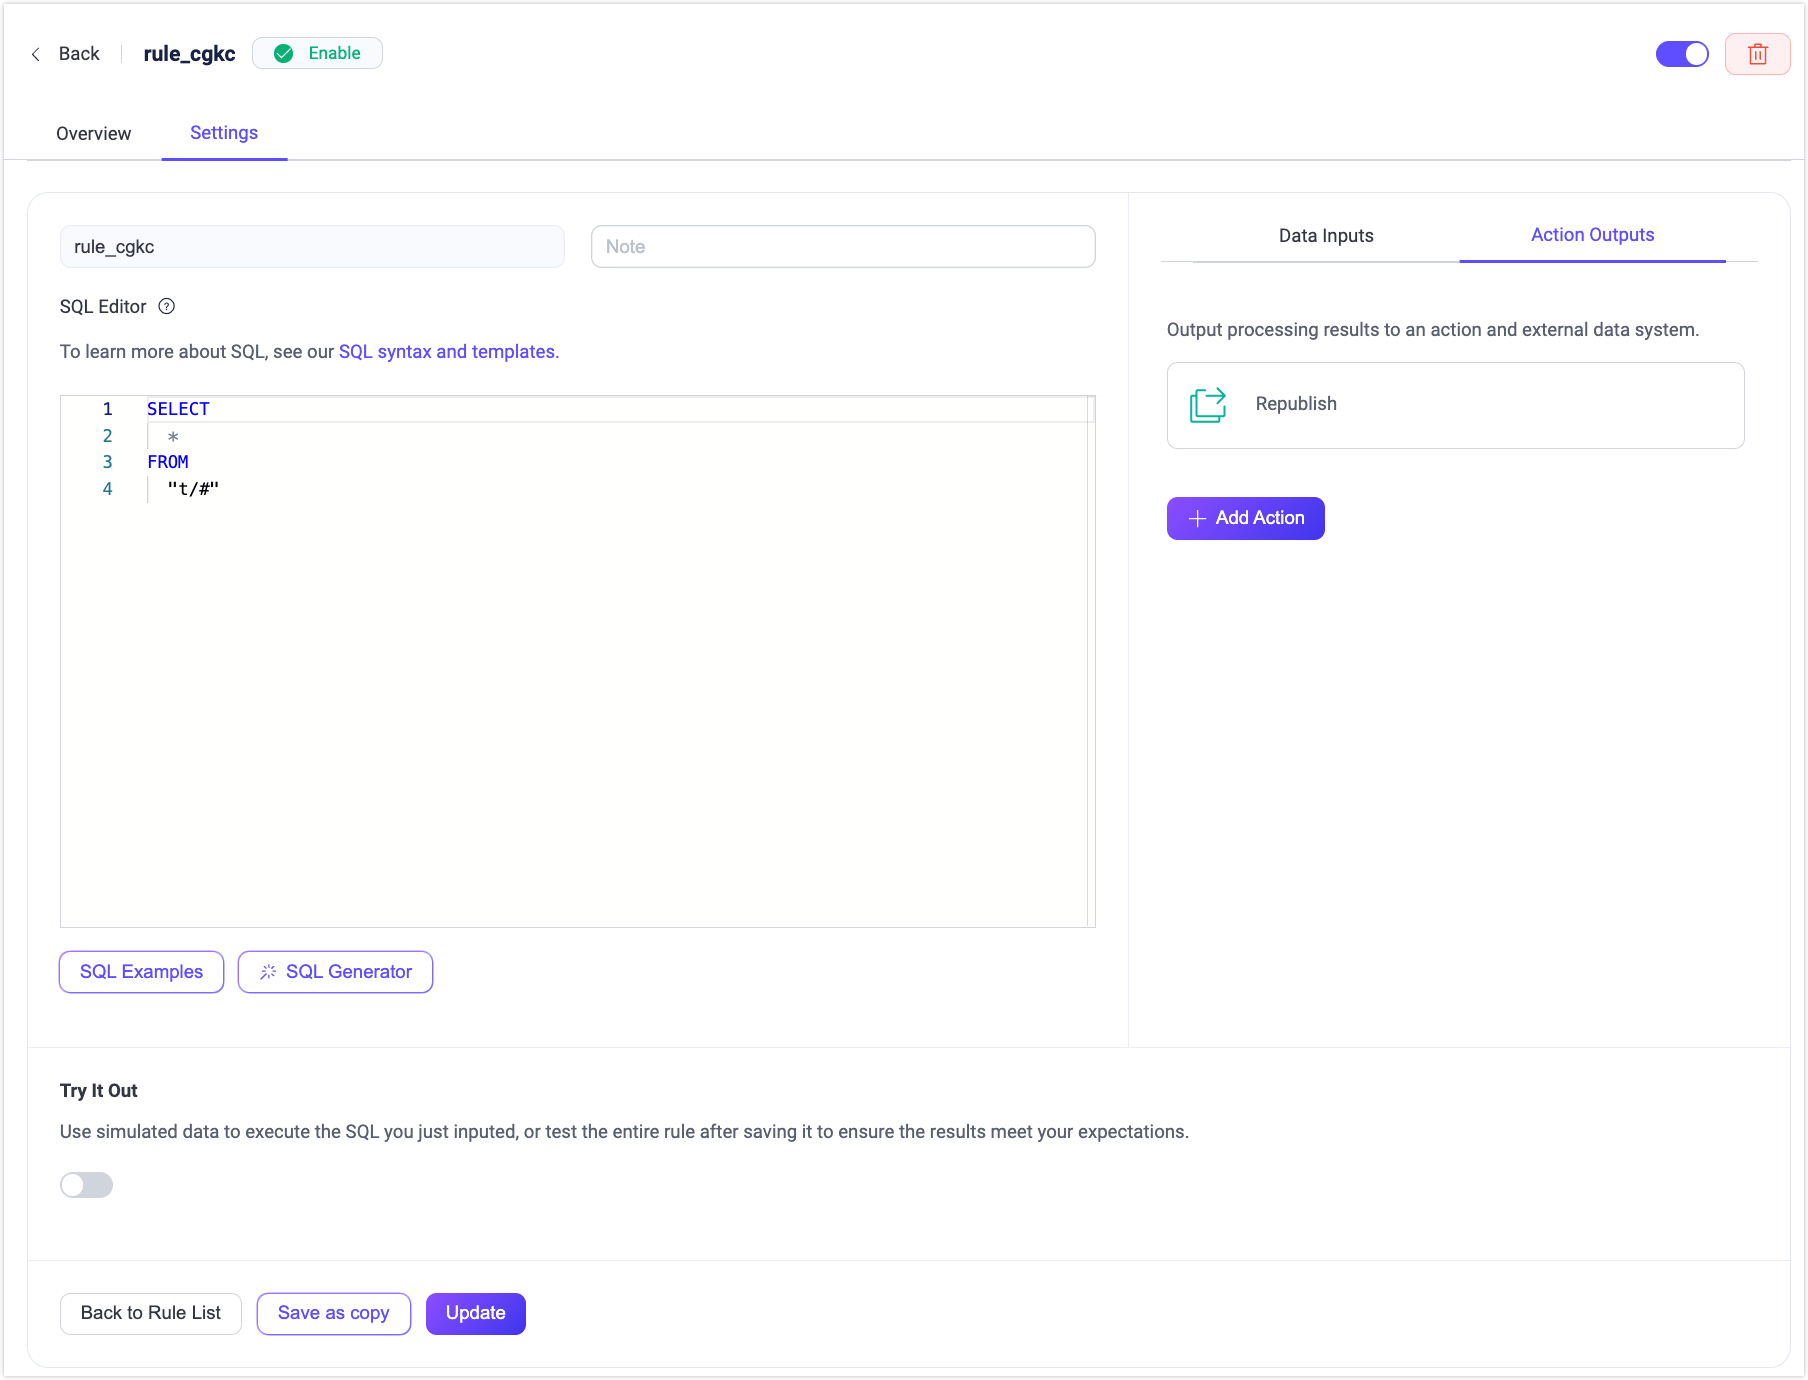
The Create Rule page features an SQL editor where you can define rule logic using SQL statements. These statements enable real-time data manipulation, including querying, filtering, transforming, and enriching data exchanged between clients or systems.
To identify and organize rules, you'll provide a Rule ID and optional Note. A unique Rule ID is automatically generated, but you can also specify your own. The Note field allows for brief descriptions to clarify the rule's purpose.
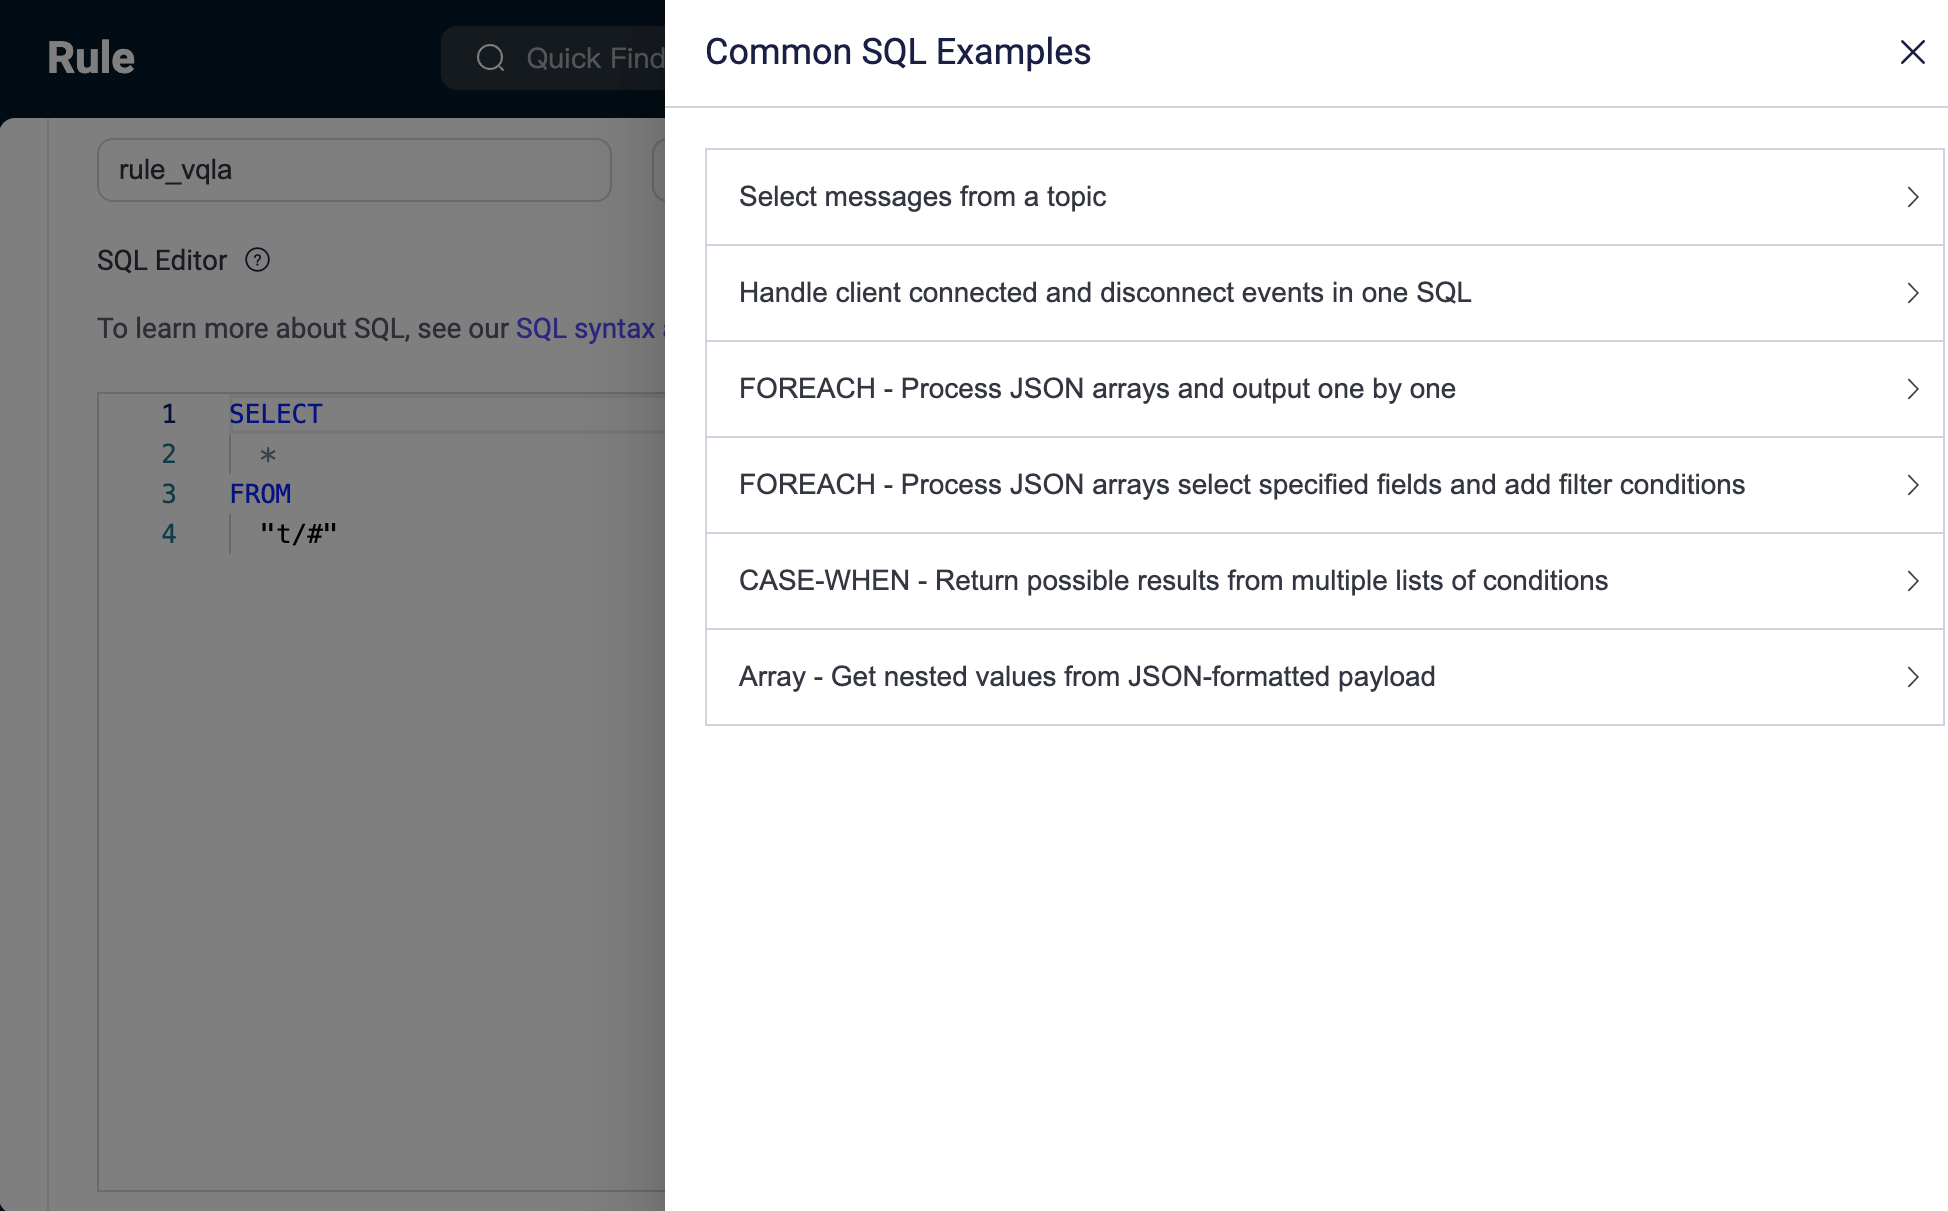
By clicking the SQL Examples below the SQL Editor, you can see some common SQL examples on the right side. You can quickly create rule by referring to one of the following SQL examples:
The default SQL statement is SELECT * FROM "t/#", which means that when the client publishes a message to the topic t/#, the Rule Engine will take out all the data under the current event.
The SELECT keyword can get all the fields in the message, for example, if you want to get the current message's Payload, it can be modified to SELECT payload from "t/#". The data can be processed and transformed using built-in functions.
The FROM keyword is followed by one or more data sources. To see possible event topics, the Try It Out area below the SQL Editor can view all the optional data source events. Using the WHERE keyword, you can add conditional filtering. For more detailed SQL syntax usage, see SQL syntax and examples.
Try It Out
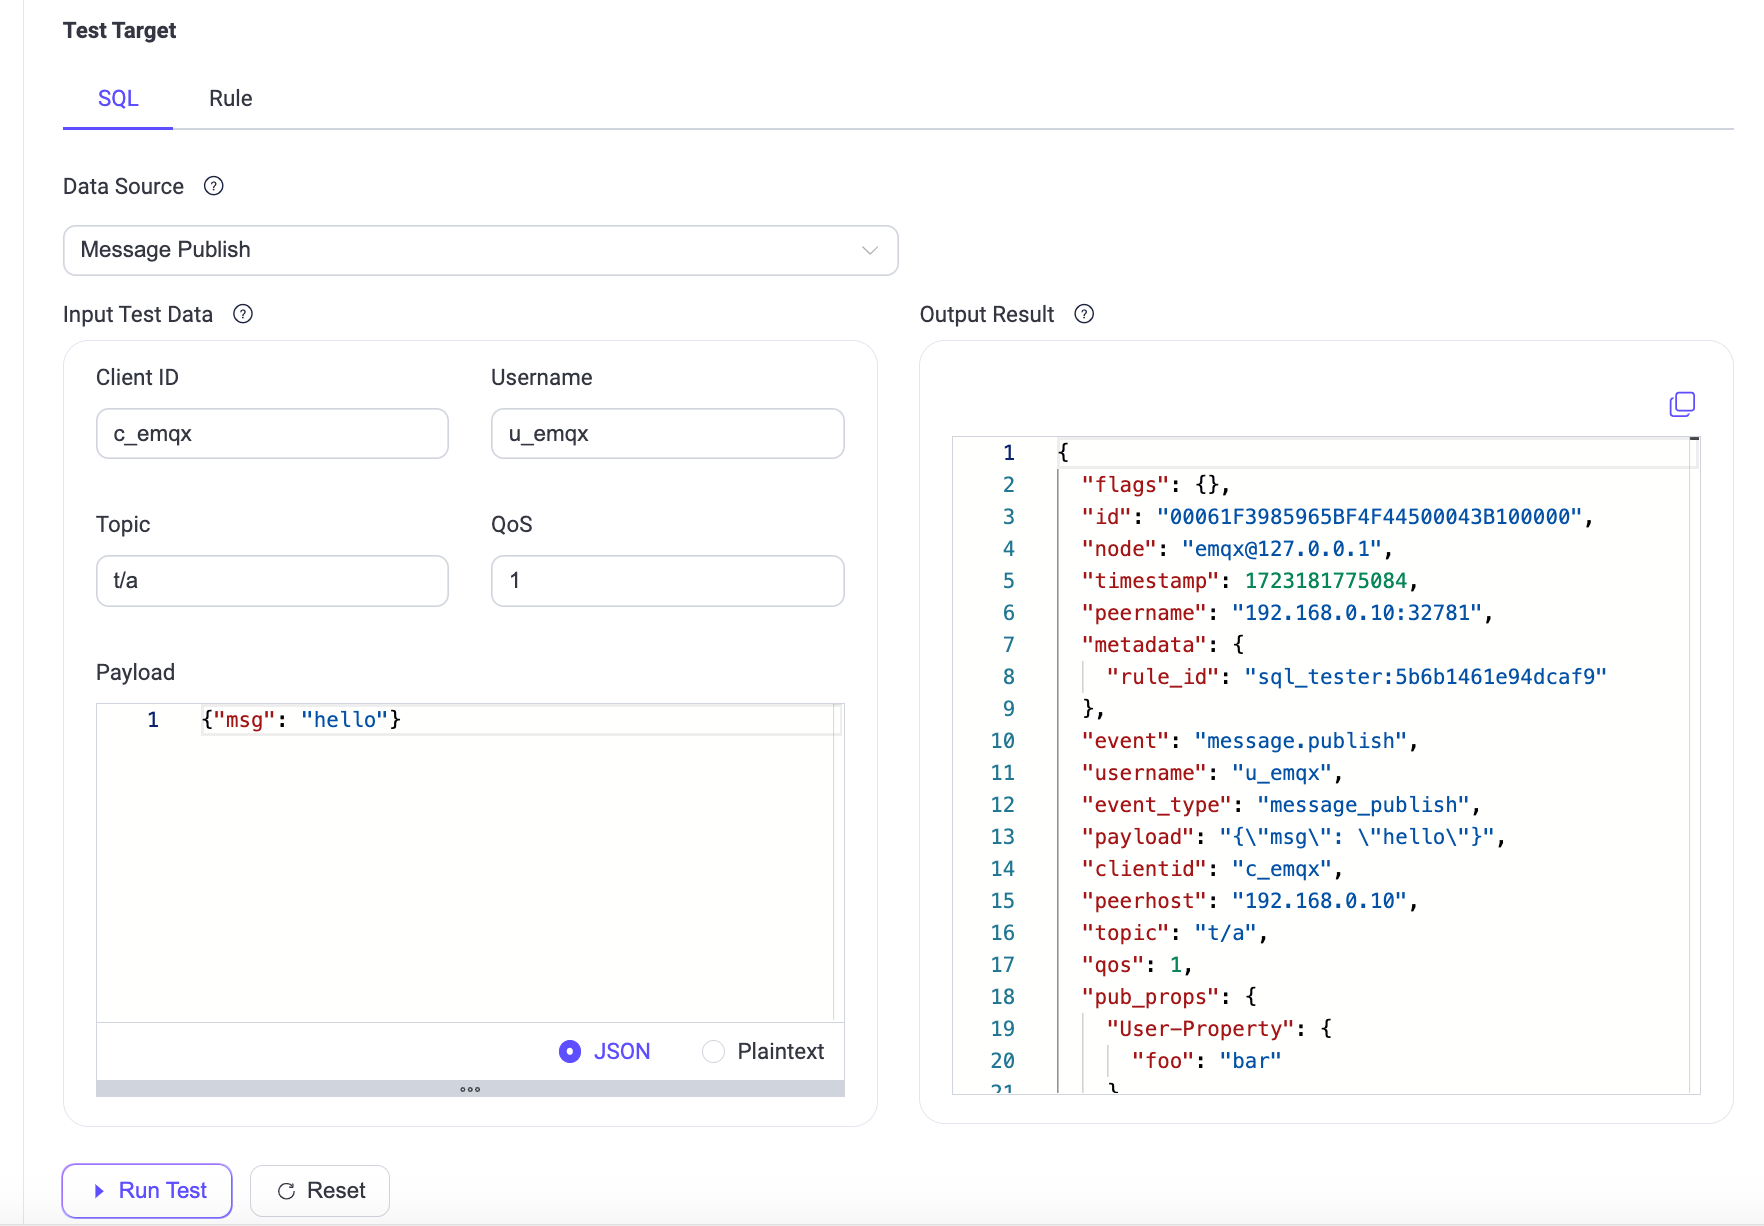
When the SQL statement is completed, you can click the Try It Out toggle switch at the bottom of the page to run the Rule test in this area.
For the SQL test, you can select the event or data source from the Data Source drop-down box and enter the simulated test data, and click Run Test to see the execution output data in the Output Result on the right.
You can test the output data of the rule through the SQL test every time you change the SQL statement to ensure the correctness of the rule.
TIP
If the 412 error code prompt appears when executing SQL, it may be due to the mismatch with the test data, and when the data source does not match the SQL statement, the corresponding event or data source will be prompted to be selected. Updated data source events will automatically update the test data to the corresponding data.
The simulated data source is the same as the real scenario, including some MQTT events. For the message part, you can select different message events to simulate data, including:
- Message publish (mqtt topic)
- Message delivered ($events/message/delivered)
- Message acked ($events/message/acked)
- Message dropped ($events/message/dropped)
For other events, you can select different client and session events to simulate data, including:
- Client connected ($events/client/connected)
- Client disconnected ($events/client/disconnected)
- Client connack ($events/client/connack)
- Client check authorization complete ($events/auth/check_authz_complete)
- Client check authentication complete ($events/auth/check_authn_complete)
- Subscribed ($events/session/subscribed)
- Unsubscribed ($events/session/unsubscribed)
The corresponding data source needs to be consistent with the SQL statement in the editor. When you need to use some message events to get data, you need to fill in the corresponding event topic (the content in the brackets) into the SQL statement after the FROM keyword, and rules support the use of multiple events. For more details about data source and event explanations, see SQL Data Source and Fields.
You can also test the rule in the testing area. For detailed testing steps, you can see Test Rule for details.
Action Outputs
After completing the editing of the SQL statement and the rule debugging, you can get output data that meets your requirements. At this time, you can select the action that needs to be executed after the rule is triggered in the Action Outputs tab on the right side of the page. Click the Add Action button, and you can select the type of the actions, including 2 built-in actions and various Sink/Source to continue to process the output data of the rule. For more detailed information about creating actions, see Add Action.
View Rules
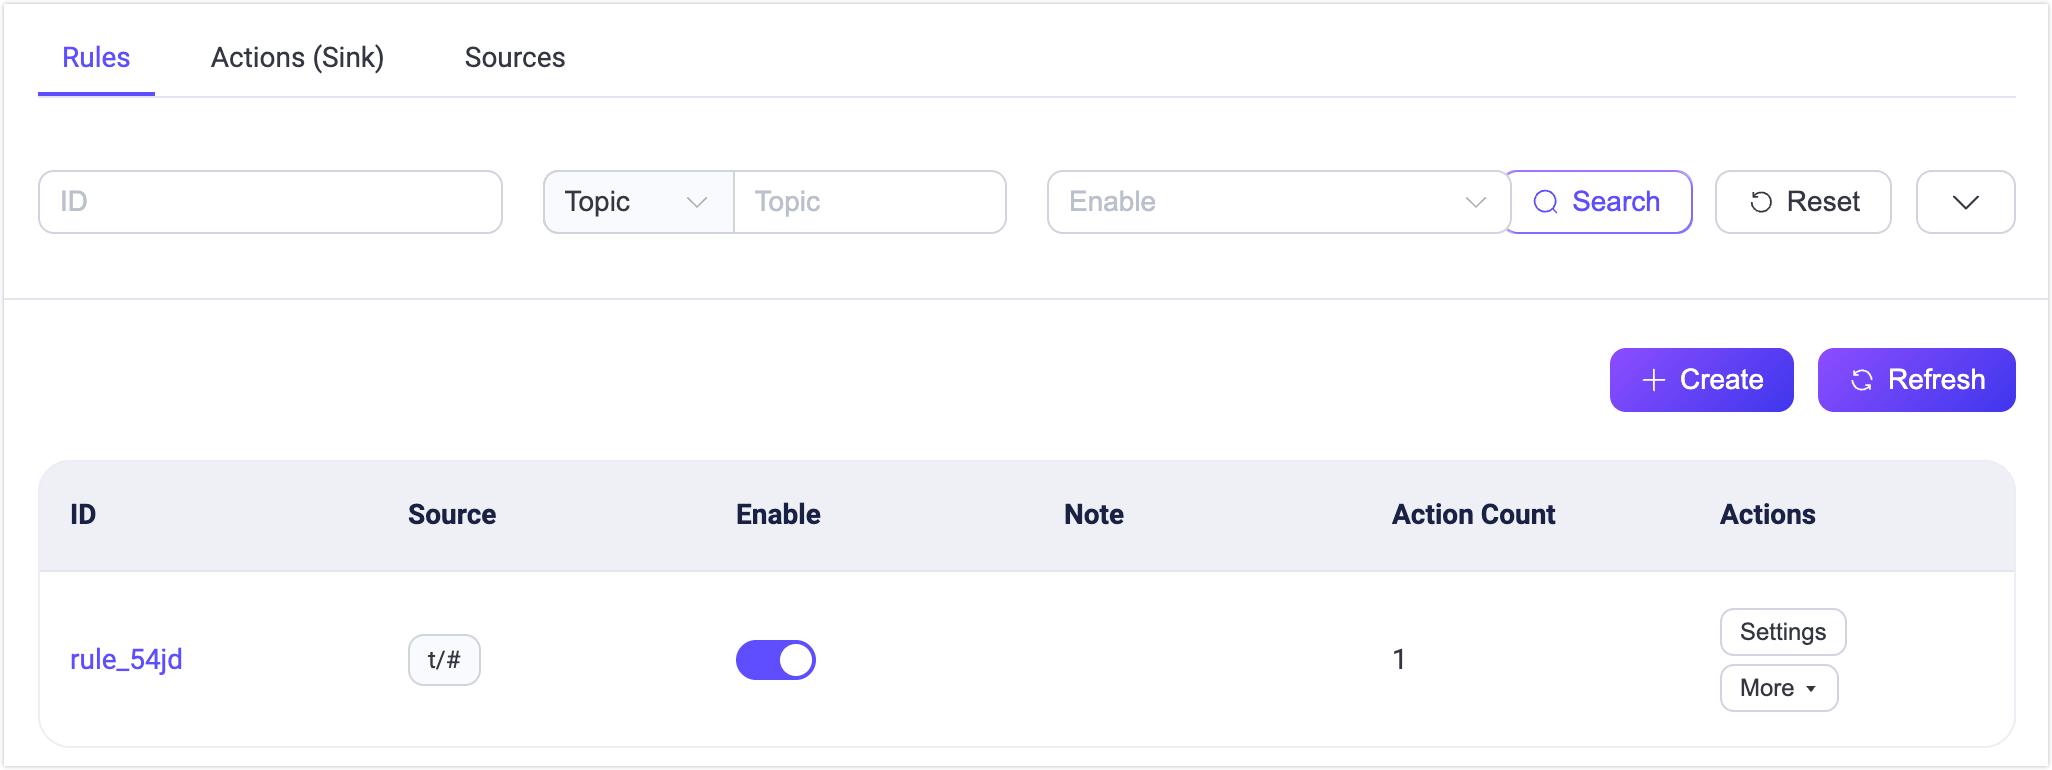
When a rule is created, you can view the basic information of the rule in the rule list, including the rule ID, the source of the rule access data (such as events, topics, and data bridges), the rule notes, enabled status, and creation time. The rules can be set, deleted, enabled, disabled, and other operations. You can also duplicate a rule and modify it in the action bar to improve the reuse of rules.
The top of the list contains a search bar, we can use rule ID, topic, enabled status, and note to query rules with multiple conditions, which helps users quickly find rules that meet the conditions and view and set them. Note: Rule ID and note support fuzzy query, topic supports wildcard search.
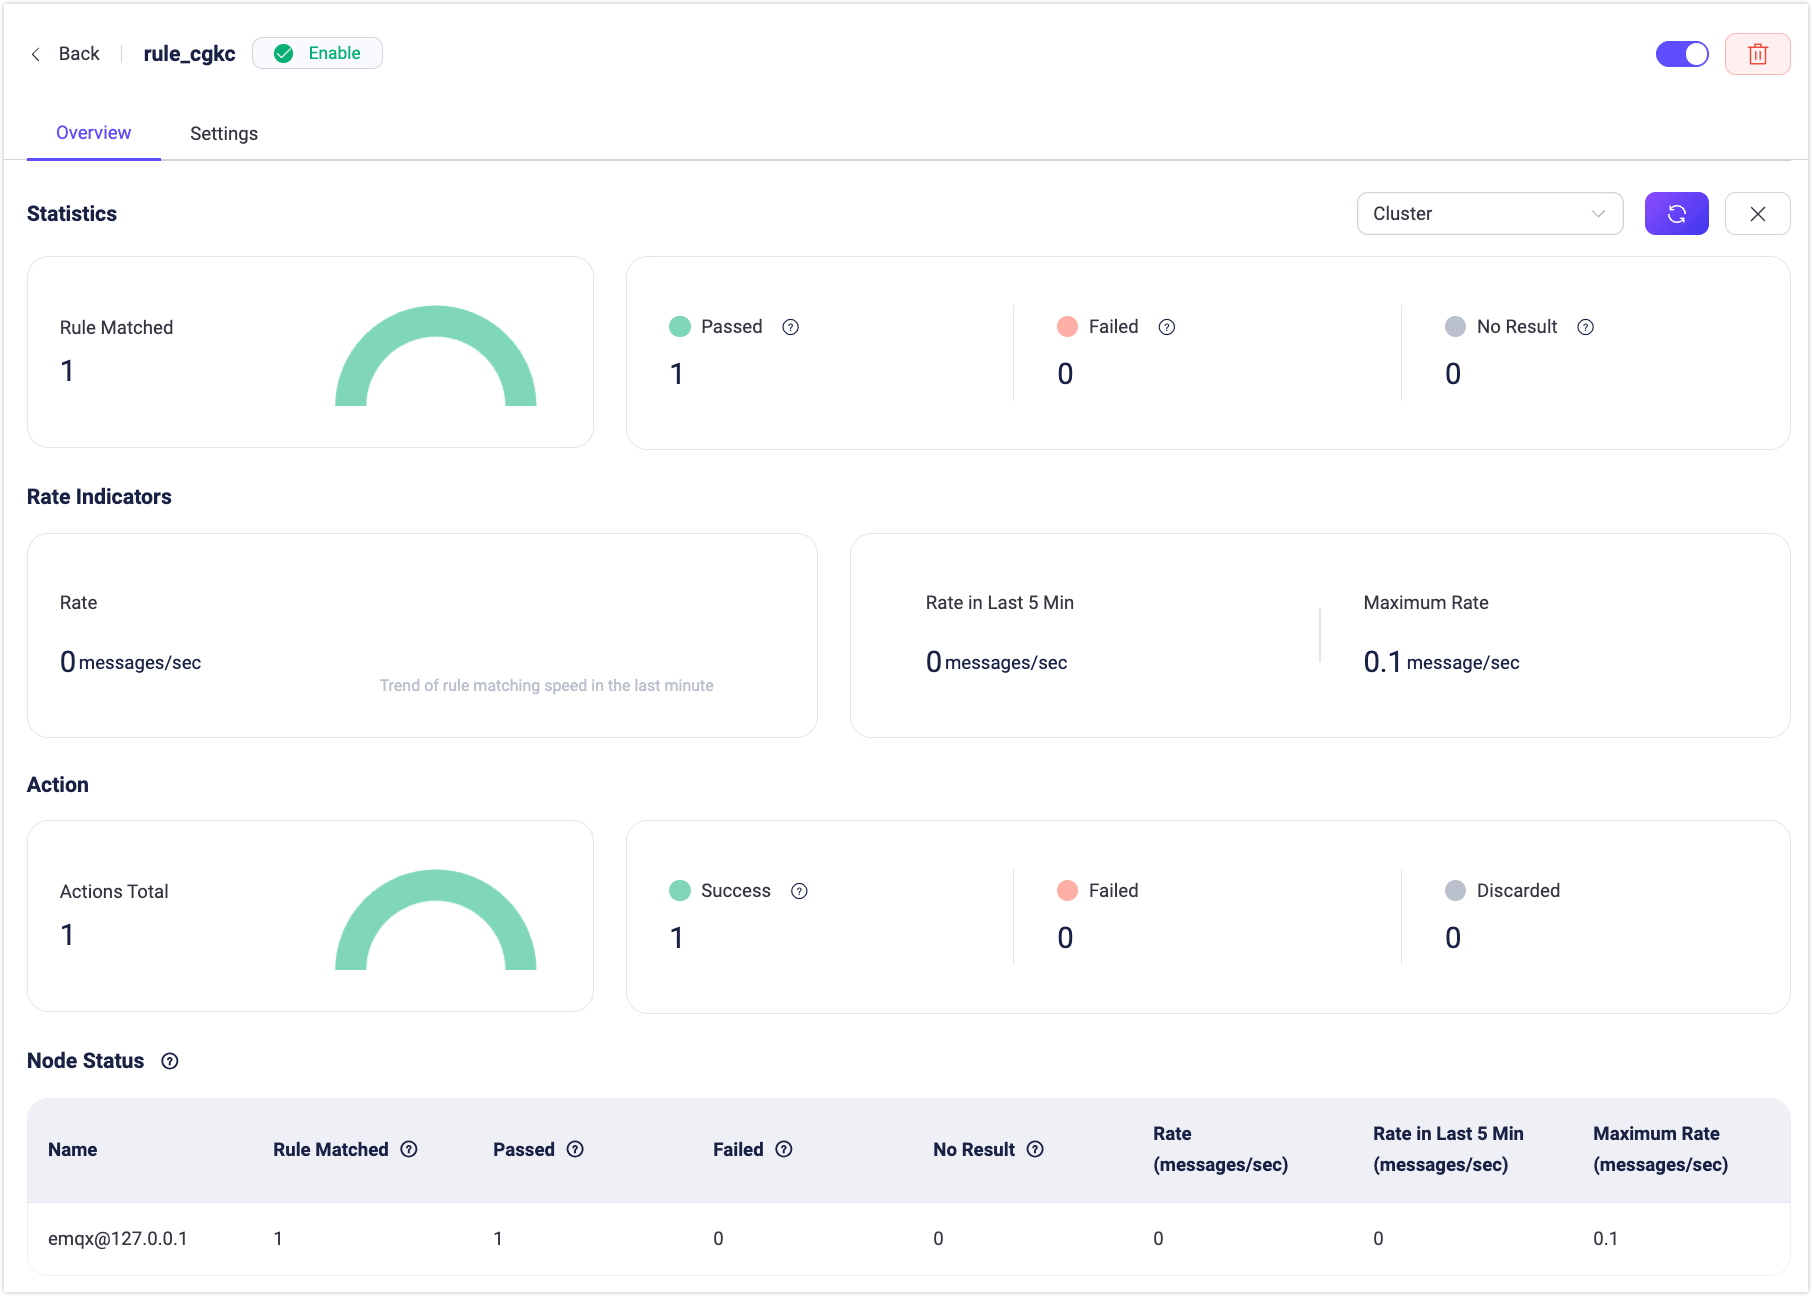
Rule Execution Statistics
On the rule list page, click the rule ID to quickly enter the rule overview page. The rule overview page contains the basic data statistics of the rule, including the execution statistics of the rule and the execution statistics of the action under the current rule. For example, the number of matched, passed, and failed, the execution rate of the rule, successful and failed executions of the action, etc. Click the Refresh button in the upper-right corner to view the real-time running data statistics of the current rule.
Settings
By clicking the Settings tab or the Settings button in the Action column in the rule list, you can enter the Settings page. It contains the basic information of the rule, which is the same as the rule creation page. On this page, you can modify and debug the rule. For example, you need to modify the execution action under the current rule, modify the rule notes, and re-edit the SQL statement.