Manage Plugins
This page covers the plugin lifecycle in EMQX and explains how to install, configure, start, stop, uninstall, and upgrade plugins using the Dashboard, CLI, or REST API.
Plugin Lifecycle
An EMQX plugin goes through three main lifecycle states:
- Installed: The plugin's code and configuration are loaded, but the application is not yet started.
- Started: The plugin is running and actively interacting with EMQX.
- Uninstalled: The plugin is completely removed from the system.
Installation Process
The installation process is as follows:
- The plugin package (the tarball created by the
make relcommand) is uploaded via the Dashboard, API, or CLI. For detailed installation steps, see Install and Manage Plugins. - The plugin package is transferred to each node of the EMQX cluster.
- On each node:
- The tarball is saved in the
pluginssubdirectory in the EMQX root directory (this may be overridden by theplugins.install_diroption):$EMQX_ROOT/plugins/my_emqx_plugin-1.0.0.tar.gz. - It is unpacked into the same directory:
$EMQX_ROOT/plugins/my_emqx_plugin-1.0.0/. - The initial configuration (
config.hoconfrom the main plugin's app) is copied into the$EMQX_DATA_DIR/plugins/my_emqx_plugin/config.hoconfile. - The Avro schema is loaded (if present) for validation.
- The plugin code is loaded into the node, but the application is not started.
- The plugin is registered as
disabledin the EMQX config (plugins.states).
- The tarball is saved in the
TIP
For plugins, only the plugin state (true or false for the enable flag) is stored in the EMQX config. Full plugin configurations reside in the $EMQX_DATA_DIR/plugins/my_emqx_plugin/config.hocon file on the nodes.
Configuration
After installation, plugin configuration can be updated through the Dashboard or API:
- The new configuration is validated against the Avro schema (if present).
- Updates are distributed to all cluster nodes.
- The plugin's
on_config_changed/2callback function is called. If the plugin accepts the new configuration, it is persisted in the$EMQX_DATA_DIR/plugins/my_emqx_plugin/config.hoconfile.
TIP
on_config_changed/2 callback function is called even if the application is not started.
TIP
on_config_changed/2 callback function is called on each node of the EMQX cluster. Avoid implementing configuration validation that depends on local system state (e.g., checking network availability), as this can lead to inconsistent results across nodes. Use on_health_check/1 for runtime checks instead and report an unhealthy status if some resource is not available.
Config File Locations
There are two relevant config file locations:
Bundled default file inside the installed plugin package:
- Docker:
/opt/emqx/plugins/my_emqx_plugin-1.0.0/my_emqx_plugin-1.0.0/priv/config.hocon - deb/rpm:
/usr/lib/emqx/plugins/my_emqx_plugin-1.0.0/my_emqx_plugin-1.0.0/priv/config.hocon
- Docker:
Persisted plugin config file managed by EMQX after config is saved via Dashboard or API:
- Docker:
/opt/emqx/data/plugins/my_emqx_plugin/config.hocon - deb/rpm:
/var/lib/emqx/plugins/my_emqx_plugin/config.hocon
- Docker:
The priv/config.hocon file is the packaged default template. The data/plugins/.../config.hocon file is the persisted plugin config location used after EMQX saves plugin config changes.
Starting
The plugin is started manually via the Dashboard, API, or CLI. Upon starting:
- The plugin's application is started.
- The plugin is registered as
enabledin the EMQX config (plugins.states).
When the plugin is started and its information is requested, the on_health_check/1 callback function is called to retrieve the plugin's status.
Stopping
When the plugin is stopped:
- The plugin's applications are stopped.
- The plugin is registered as
disabledin the EMQX config (plugins.states).
Although the plugin’s application is stopped, its code remains loaded on the node, as a stopped plugin can still be configured.
Uninstallation Process
The uninstallation process is as follows:
- The plugin is stopped (if it is running).
- The plugin's code is unloaded from the node.
- Its package files are removed from the nodes (the config file is preserved).
- The plugin is unregistered in the EMQX config (
plugins.states).
You can uninstall a plugin package via the Dashboard or CLI. For details, see Install and Manage Plugins.
Cluster Join Behavior
When an EMQX node joins the cluster, it may not have the actual plugins installed and configured since the plugins and their configs reside in the local file systems of the nodes.
The new node does the following:
- When a node joins the cluster, it obtains the global EMQX config (as a part of the cluster join process).
- From the EMQX config, it knows plugin statuses (which plugins are installed and which are enabled).
- The new node requests the plugins and their actual configs from other nodes.
- The new node installs plugins and starts the enabled ones.
Install and Manage Plugins
EMQX supports plugin package installation, uninstallation, and management via the Dashboard, CLI, and API.
Install Packages via Dashboard
Suppose your plugin is already built and the tarball my_emqx_plugin-1.0.0.tar.gz is available. To install a compiled plugin package directly via the Dashboard, follow the steps below:
Important Security Update
For security reasons, EMQX now requires explicit authorization before plugin installation via the Dashboard.
Installation permission must be granted before initiating the process.
The allowed state is temporary and is automatically revoked after installation completes.
If running in a clustered environment, permission must be granted on all nodes before installation.
Run the following command in the CLI to explicitly allow the plugin installation:
bashemqx ctl plugins allow $NAME-$VSN{NAME}: The name of your plugin (e.g.,my_emqx_plugin).{VSN}: The version of the plugin (e.g.,1.0.0).
Once this command is executed, you can proceed with the installation through the Dashboard.
Navigate to Management -> Plugins in the EMQX Dashboard.
Click the + Install plugin button to open the Install plugin page.
Select or drag the plugin package to upload it to the Dashboard.

Click the Install button to complete the installation. You will see the list of plugins with the new plugin installed.
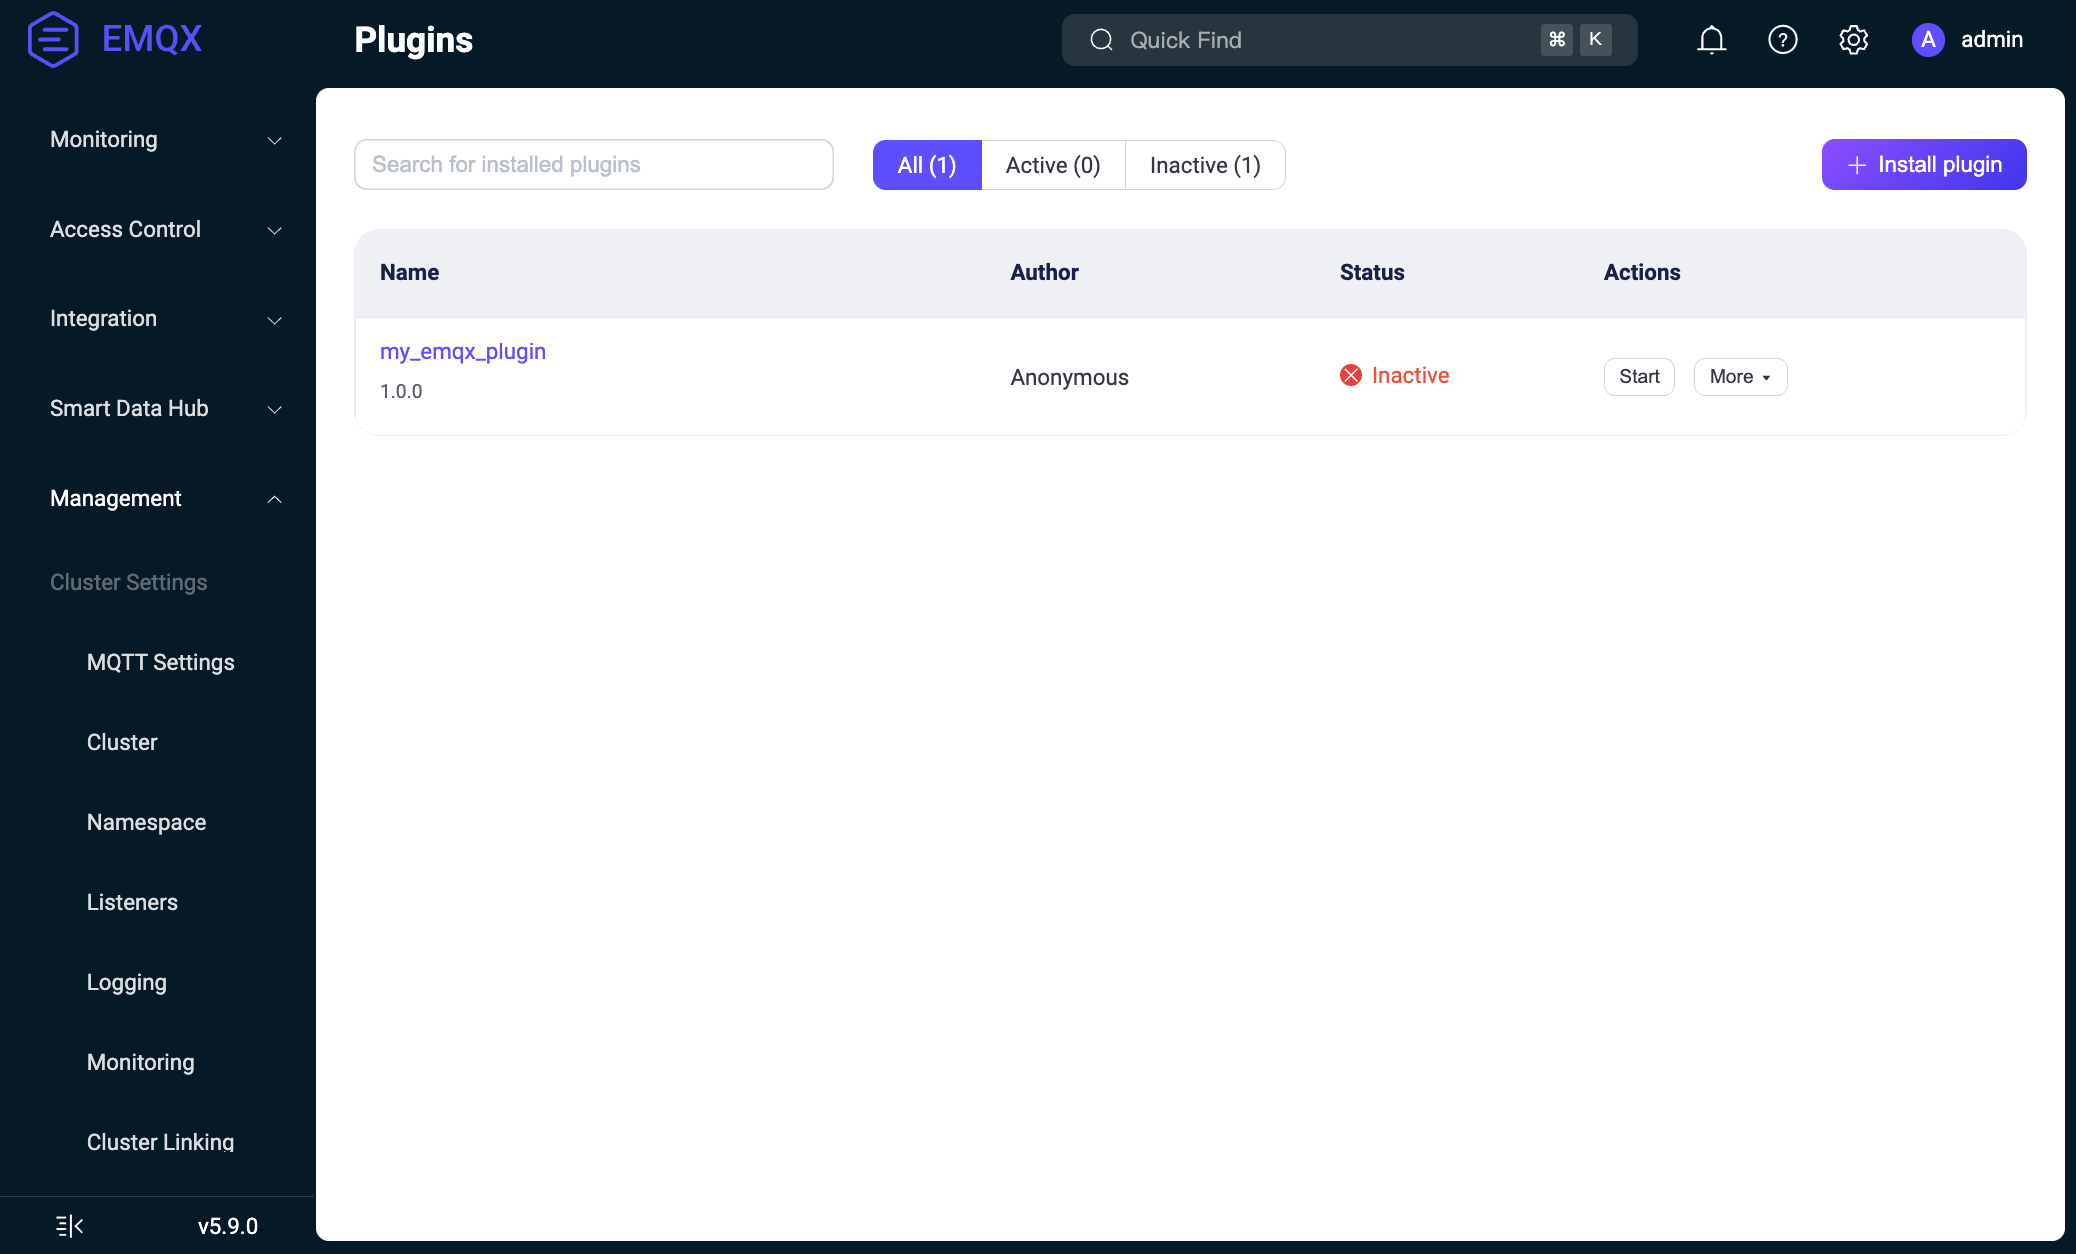
Now you can start/stop the plugin and configure it.To uninstall a plugin package via Dashboard, click the Uninstall button under the More menu in the Actions column on the plugin list page.
To revoke permission for a previously allowed plugin, either:
- Uninstall the plugin (if already installed).
- Or explicitly disallow it using the following command:
emqx ctl plugins disallow $NAME-$VSNInstall Packages via CLI
Suppose your plugin is already built and the tarball my_emqx_plugin-1.0.0.tar.gz is available. To install a compiled plugin package directly via the CLI, follow the steps below:
On an EMQX node, copy the tarball to the EMQX plugins directory:
$ cp my_emqx_plugin-1.0.0.tar.gz $EMQX_HOME/pluginsInstall the plugin:
$ emqx ctl plugins install my_emqx_plugin-1.0.0Check plugin list:
$ emqx ctl plugins listStart/stop the plugin:
$ emqx ctl plugins start my_emqx_plugin-1.0.0
$ emqx ctl plugins stop my_emqx_plugin-1.0.0
Uninstall the plugin:
$ emqx ctl plugins uninstall my_emqx_plugin-1.0.0
Install Packages via API
Suppose your plugin is already built and the tarball my_emqx_plugin-1.0.0.tar.gz is available. To install a plugin using the API, follow these steps:
Allow the installation. To enable the installation of the plugin, run the following command:
emqx ctl plugins allow my_emqx_plugin-1.0.0Install the plugin. Use
curlto install the plugin by sending a POST request to the API:$ curl -u $KEY:$SECRET -X POST http://$EMQX_HOST:18083/api/v5/plugins/install -H "Content-Type: multipart/form-data" -F "plugin=@my_emqx_plugin-1.0.0.tar.gz"Check the plugin list. To verify if the plugin has been installed successfully, run:
$ curl -u $KEY:$SECRET http://$EMQX_HOST:18083/api/v5/plugins | jqStart/stop the plugin. To start or stop the plugin, use the following commands:
$ curl -s -u $KEY:$SECRET -X PUT "http://$EMQX_HOST:18083/api/v5/plugins/my_emqx_plugin-1.0.0/start"
$ curl -s -u $KEY:$SECRET -X PUT "http://$EMQX_HOST:18083/api/v5/plugins/my_emqx_plugin-1.0.0/stop"
Pre-Install Plugins before EMQX Starts
If you want a plugin to be available immediately when EMQX starts, for example, when building a custom Docker image, you can pre-install the plugin by extracting the package and configuring EMQX in advance.
The following steps use a Dockerfile as an example, but the same approach applies to any deployment method (deb/rpm, bare metal, etc.):
Copy and extract the plugin tarball into the plugins directory:
dockerfileCOPY --chown=emqx:emqx my_emqx_plugin-1.0.0.tar.gz /opt/emqx/plugins/my_emqx_plugin-1.0.0.tar.gz RUN cd /opt/emqx/plugins && \ mkdir -p my_emqx_plugin-1.0.0 && \ tar zxf my_emqx_plugin-1.0.0.tar.gz -C my_emqx_plugin-1.0.0Register the plugin in EMQX configuration so it is started automatically on boot. Append the following to the EMQX base config file:
dockerfileRUN cat <<EOF >> /opt/emqx/etc/base.hocon plugins { states = [ { name_vsn = "my_emqx_plugin-1.0.0" enable = true } ] } EOFSet
enable = trueto start the plugin automatically, orenable = falseto install it without starting.
Upgrade Plugins
EMQX does not allow multiple versions of the same plugin to be installed simultaneously.
To install a new version of the plugin:
- The old version must first be uninstalled.
- The new version is then installed.
The plugin configuration is preserved across installations.