Schema Registry Example - Avro
This page demonstrates how the schema registry and rule engine support message encoding and decoding in Avro format.
Decoding Scenario
A device publishes a binary message encoded using Avro, which needs to be matched by the rule engine and then republished to the topic associated with the name field. The format of the topic is avro_user/${name}.
For example, you need to republish a message with the name field equal to Shawn to the topic avro_user/Shawn.
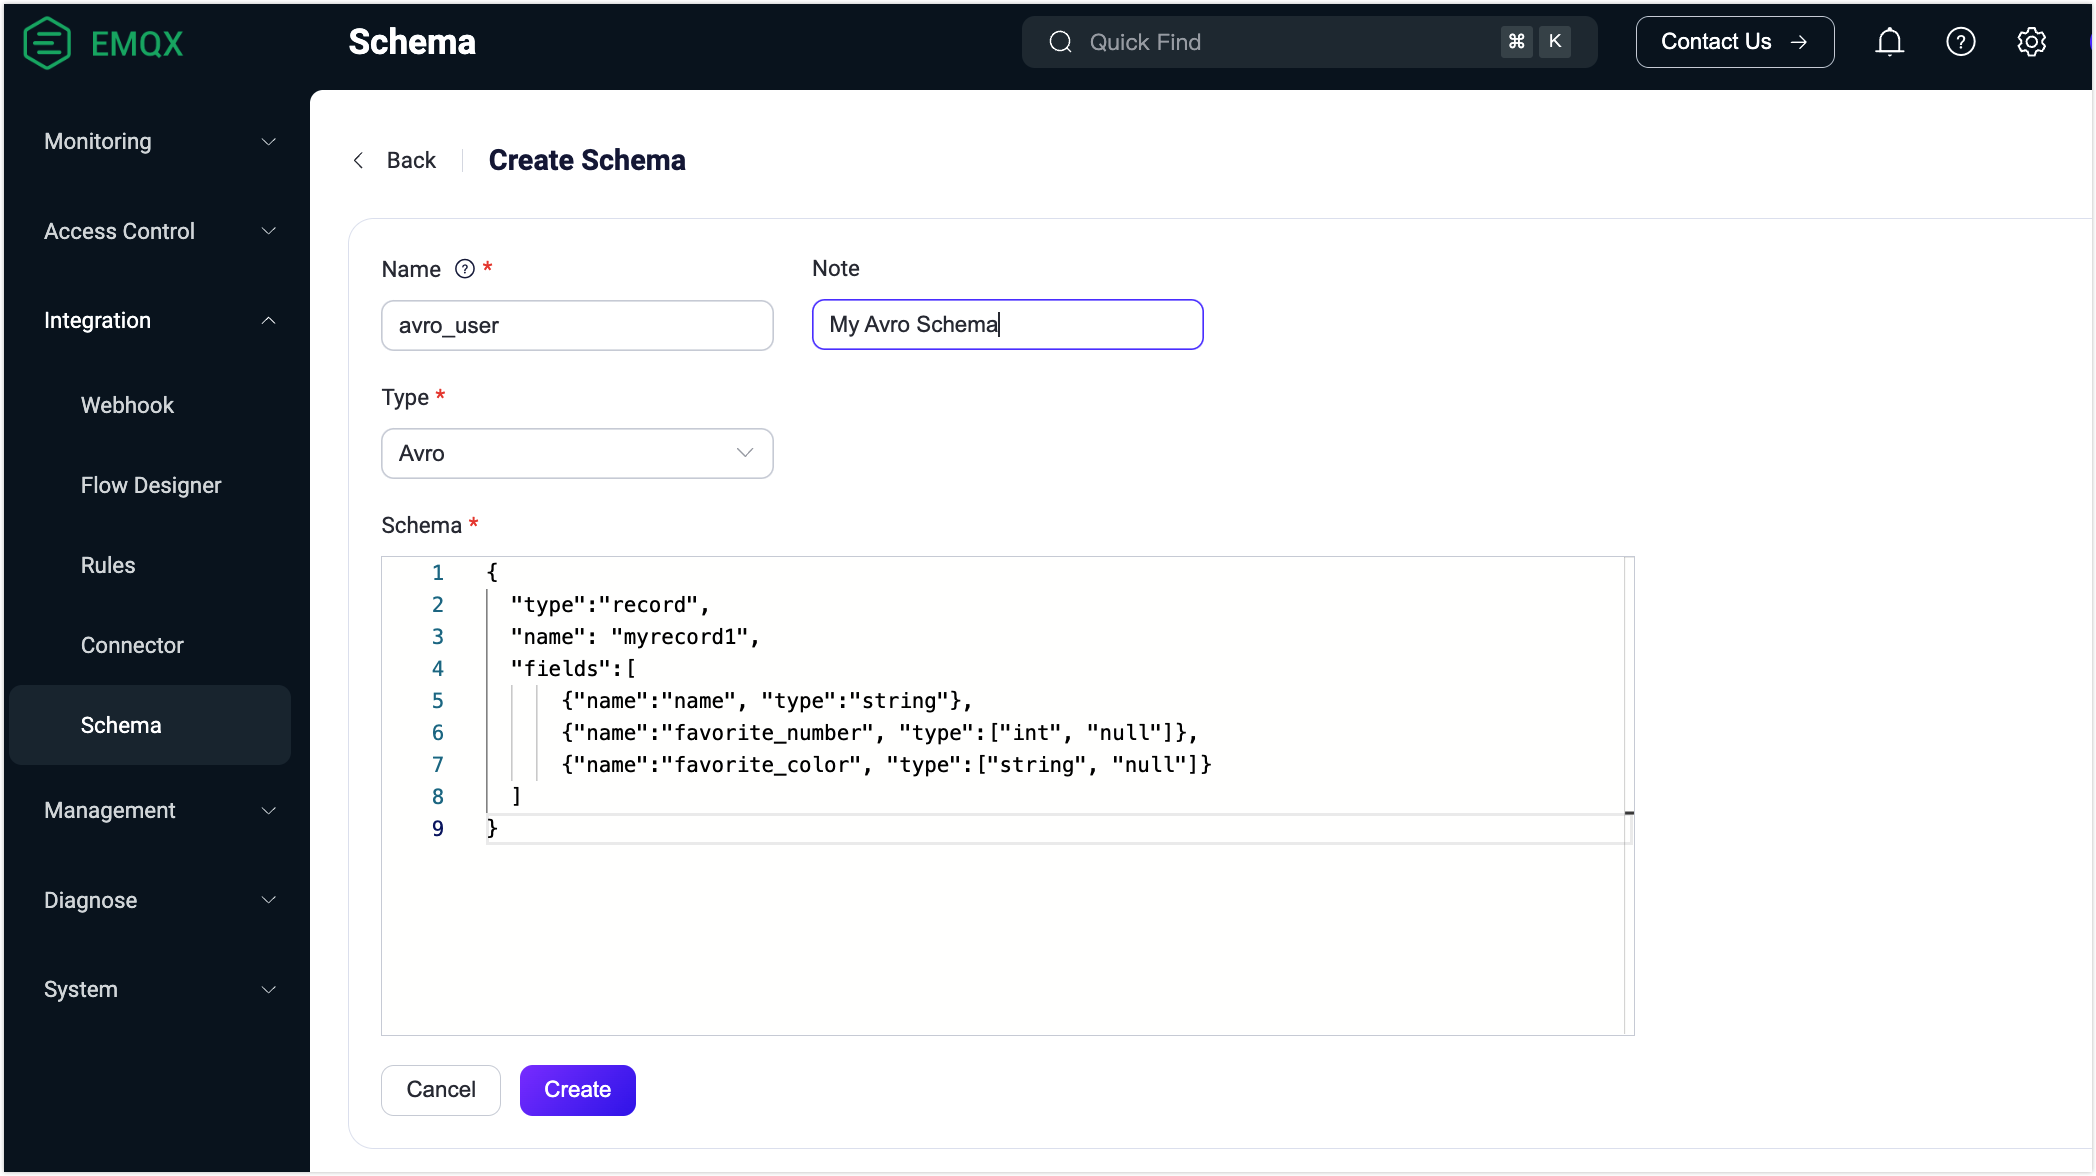
Create Schema
To enable the rule engine to correctly decode or encode Avro messages, you must first register a schema that defines the structure of the Avro message using the Schema Registry.
Go to the Dashboard, select Smart Data Hub -> Schema Registry from the left navigation menu.
Under the Internal Schema tab, click Create.
Create an Avro schema using the following parameters:
Name:
avro_user. This name will be used in encoding and decoding functions.Type:
Avro.Schema:
json{ "type":"record", "name": "myrecord1", "fields":[ {"name":"name", "type":"string"}, {"name":"favorite_number", "type":["int", "null"]}, {"name":"favorite_color", "type":["string", "null"]} ] }
Click Create.
Create Rule
In the Dashboard, select Integration -> Rules from the navigation menu.
On the Rules page, click Create at the top right corner.
Use the schema you have just created to write the rule SQL statement:
sqlSELECT schema_decode('avro_user', payload) as avro_user, payload FROM "t/#" WHERE avro_user.name = 'Shawn'The key point here is
schema_decode('avro_user', payload):- The
schema_decodefunction decodes the contents of the payload field according to the Schemaavro_user; as avro_userstores the decoded value in the variableavro_user.
- The
Click Add Action. Select
Republishfrom the drop-down list of the Action field.In the Topic field, type
avro_user/${avro_user.name}as the destination topic.In the Payload field, type message content template:
${avro_user}.
This action sends the decoded message to the topic avro_user/${avro_user.name} in JSON format. ${avro_user.name} is a variable placeholder that will be replaced at runtime with the value of the name field from the decoded message.
Prepare Device-Side Code
Once the rule is created, you can simulate the data for testing.
The following code uses the Python language to fill a user message, encode it as binary data, then send it to the t/1 topic. See full code for details.
def publish_msg(client):
    datum_w = avro.io.DatumWriter(SCHEMA)
    buf = io.BytesIO()
    encoder = avro.io.BinaryEncoder(buf)
    datum_w.write({"name": "Shawn", "favorite_number": 666, "favorite_color": "red"}, encoder)
    message = buf.getvalue()
    topic = "t/1"
    print("publish to topic: t/1, payload:", message)
    client.publish(topic, payload=message, qos=0, retain=False)
Check Rule Execution Results
- In the Dashboard, select Diagnose -> WebSocket Client.
- Fill in the connection information for the current EMQX instance.
- If you run EMQX locally, you can use the default value.
- If you have changed EMQX's default configuration. For example, the configuration change on authentication can require you to type in a username and password.
Click Connect to connect to the EMQX instance as an MQTT client.
In the Subscription area, type
avro_user/#in the Topic field and click Subscribe.Install the Python dependencies and execute the device-side code:
shell$ pip3 install avro paho-mqtt $ python3 avro_mqtt.py Connected with result code 0 publish to topic: t/1, payload: b'\nShawn\x00\xb4\n\x00\x06red'Check that a message with the topic
avro_user/Shawnis received on the Websocket side:json{"favorite_color":"red","favorite_number":666,"name":"Shawn"}
Encoding Scenario
A device subscribes to a topic avro_out expecting a binary message encoded using Avro. The rule engine is used to encode such message and publish it to the associated topic.
Create Schema
Use the same schema as described in the Decoding Scenario.
Create Rule
In the Dashboard, select Integration -> Rules from the navigation menu.
On the Rules page, click Create at the top right corner.
Use the schema you have just created to write the rule SQL statement:
sqlSELECT schema_encode('avro_user', json_decode(payload)) as avro_user FROM "avro_in"The key point here is
schema_encode('avro_user', json_decode(payload)):- The
schema_encodefunction encodes the contents of the payload field according to the Schemaavro_user; as avro_userstores the encoded value in the variableavro_user;json_decode(payload)is needed becausepayloadis generally a JSON-encoded binary, andschema_encoderequires a Map as its input.
- The
Click Add Action. Select
Republishfrom the drop-down list of the Action field.In the Topic field, type
avro_outas the destination topic.In the Payload field, type message content template:
${avro_user}.
This action sends the Avro-encoded message to the topic avro_out. ${avro_user} is a variable placeholder that will be replaced at runtime with the value of the result of schema_encode (a binary value).
Prepare Device-Side Code
Once the rules have been created, you can simulate the data for testing.
The following code uses the Python language to fill a User message, encode it as binary data, then send it to the avro_in topic. See full code for details.
def on_message(client, userdata, msg):
    datum_r = avro.io.DatumReader(SCHEMA)
    buf = io.BytesIO(msg.payload)
    decoder = avro.io.BinaryDecoder(buf)
    decoded_payload = datum_r.read(decoder)
    print(msg.topic+" "+str(decoded_payload))
Check Rule Execution Results
- In the Dashboard, select Diagnose -> WebSocket Client.
- Fill in the connection information for the current EMQX instance.
- If you run EMQX locally, you can use the default value.
- If you have changed EMQX's default configuration. For example, the configuration change on authentication can require you to type in a username and password.
Click Connect to connect to the EMQX instance as an MQTT client.
In the Publish area, type
avro_inin the Topic field and type the following message in the Payload field:json{"favorite_color":"red","favorite_number":666,"name":"Shawn"}Click Publish.
Install the Python dependencies and execute the device-side code:
shell$ pip3 install avro paho-mqtt $ python3 avro_mqtt_sub.py Connected with result code 0 msg payload b'\nShawn\x00\xb4\n\x00\x06red' avro_out {'name': 'Shawn', 'favorite_number': 666, 'favorite_color': 'red'}