Get Started with EMQX
EMQX is the world’s most scalable and reliable MQTT messaging platform that can help you to connect, move, and process your business data reliably in real-time. With this all-in-one MQTT platform, you can easily build your Internet of Things (IoT) applications with significant business impacts.
This chapter gives you a tour of how to download and install EMQX and how to test the connecting and messaging services with our built-in WebSocket tool.
TIP
Besides the deployment methods introduced in this quickstart guide, you are also welcome to try our EMQX Cloud, a fully managed MQTT service for IoT. You only need to register for an account before you can start your MQTT services and connect your IoT devices to any cloud with zero need for infrastructure maintenance.
Install EMQX
EMQX can be run with Docker, installed with EMQX Kubernetes Operator, or installed on a computer or virtual machine (VM) via a download package. If you choose to install EMQX with a download package, the following operating systems are currently supported:
- RedHat
- CentOS
- RockyLinux
- AmazonLinux
- Ubuntu
- Debian
- macOS
- Linux
For other platforms not listed above, you can contact EMQ for support.
Install EMQX Using Docker
Container deployment is the quickest way to start exploring EMQX. This quick start guide shows you how to install and run EMQX through Docker.
To download and start the latest version of EMQX, enter the command below.
Ensure Docker is installed and running before you execute this command.
bashdocker run -d --name emqx -p 1883:1883 -p 8083:8083 -p 8084:8084 -p 8883:8883 -p 18083:18083 emqx/emqx-enterprise:latestStart your web browser and enter
http://localhost:18083/(localhostcan be substituted with your IP address) in the address bar to access the EMQX Dashboard, from where you can connect to your clients or check the running status.Default user name and password:
adminpublic
Install EMQX Using Installation Package
You can also install EMQX using installation packages on a computer or VM and easily adjust the configurations or run performance tuning. The instructions below use macOS 15 (Sequoia) and arm64 architecture (Apple Silicon) as an example to illustrate the installation steps.
TIP
Considering all the runtime dependencies, it is recommended to use installation packages for testing and hot upgrades, and NOT recommended in a production environment.
Go to the macOS tab of the official download site.
Select the latest version
6.2.2and selectmacOS 15 arm64 / zipfrom Package Type.Click the link below to download and install the package. You can also refer to the command instructions on the page.
To run EMQX, enter:
bash./emqx/bin/emqx foregroundThis will start EMQX in an interactive shell. Closing the shell will stop EMQX. Alternatively (but not recommended), you can also start EMQX in the background with the following command:
bash./emqx/bin/emqx startStart your web browser and enter
http://localhost:18083/(localhostcan be substituted with your IP address) in the address bar to access the EMQX Dashboard, from where you can connect to your clients or check the running status.The default user name and password are
admin&public. You will be prompted to change the default password once logged in.To stop EMQX, enter:
bash./emqx/bin/emqx stop
To uninstall EMQX after your testing, simply delete the EMQX folder.
Use MQTTX to Verify Connection
Now that you have successfully started EMQX, you can continue to test the connection and message services with MQTTX.
MQTTX is an elegant cross-platform MQTT 5.0 desktop client, running on macOS, Linux, and Windows. Users can quickly create connections and save multiple clients through a chat-style user interface of MQTTX. Users can also test the MQTT/MQTTS connection, the subscription, and the publication of MQTT messages.
This section introduces how to verify the connection with MQTTX Web, the browser-based MQTT 5.0 WebSocket client tool, with zero need to download or install any application.
Prerequisites
The broker address and the port information should be prepared before testing the connection:
- EMQX address: The IP address of your server, in general.
- Port: Click Management -> Listeners from the left navigation menu in the Dashboard to get the port number.
Create a Connection
Click MQTTX Web to visit the browser-based MQTTX.
Configure and establish an MQTT connection. Click the + New Connection button to open the connection configuration page.
Name: Enter a connection name, for example,
MQTTX_Test.Host:
Select the protocol from the drop-down list. For example, choose
ws://when using the WebSocket protocol.MQTTX Web supports WebSocket connections only. To test SSL/TLS connections, download the MQTTX desktop client.
Enter the EMQX address, for example,
127.0.0.1.
Port: Enter the port number. For example,
8083is commonly used for WebSocket connections.
Leave the remaining fields at their default values, or adjust them according to your requirements. For a detailed explanation of each option, see MQTT User Manual – Connect.
Click the Connect button at the top right corner of the page.
Verify message publishing and receiving. Click the Send icon in the lower-right corner of the message area. Successfully sent messages will appear in the chat window above.
Publish and Subscribe to Topics
After the connection is successfully established, you can continue to subscribe to different topics and publish messages.
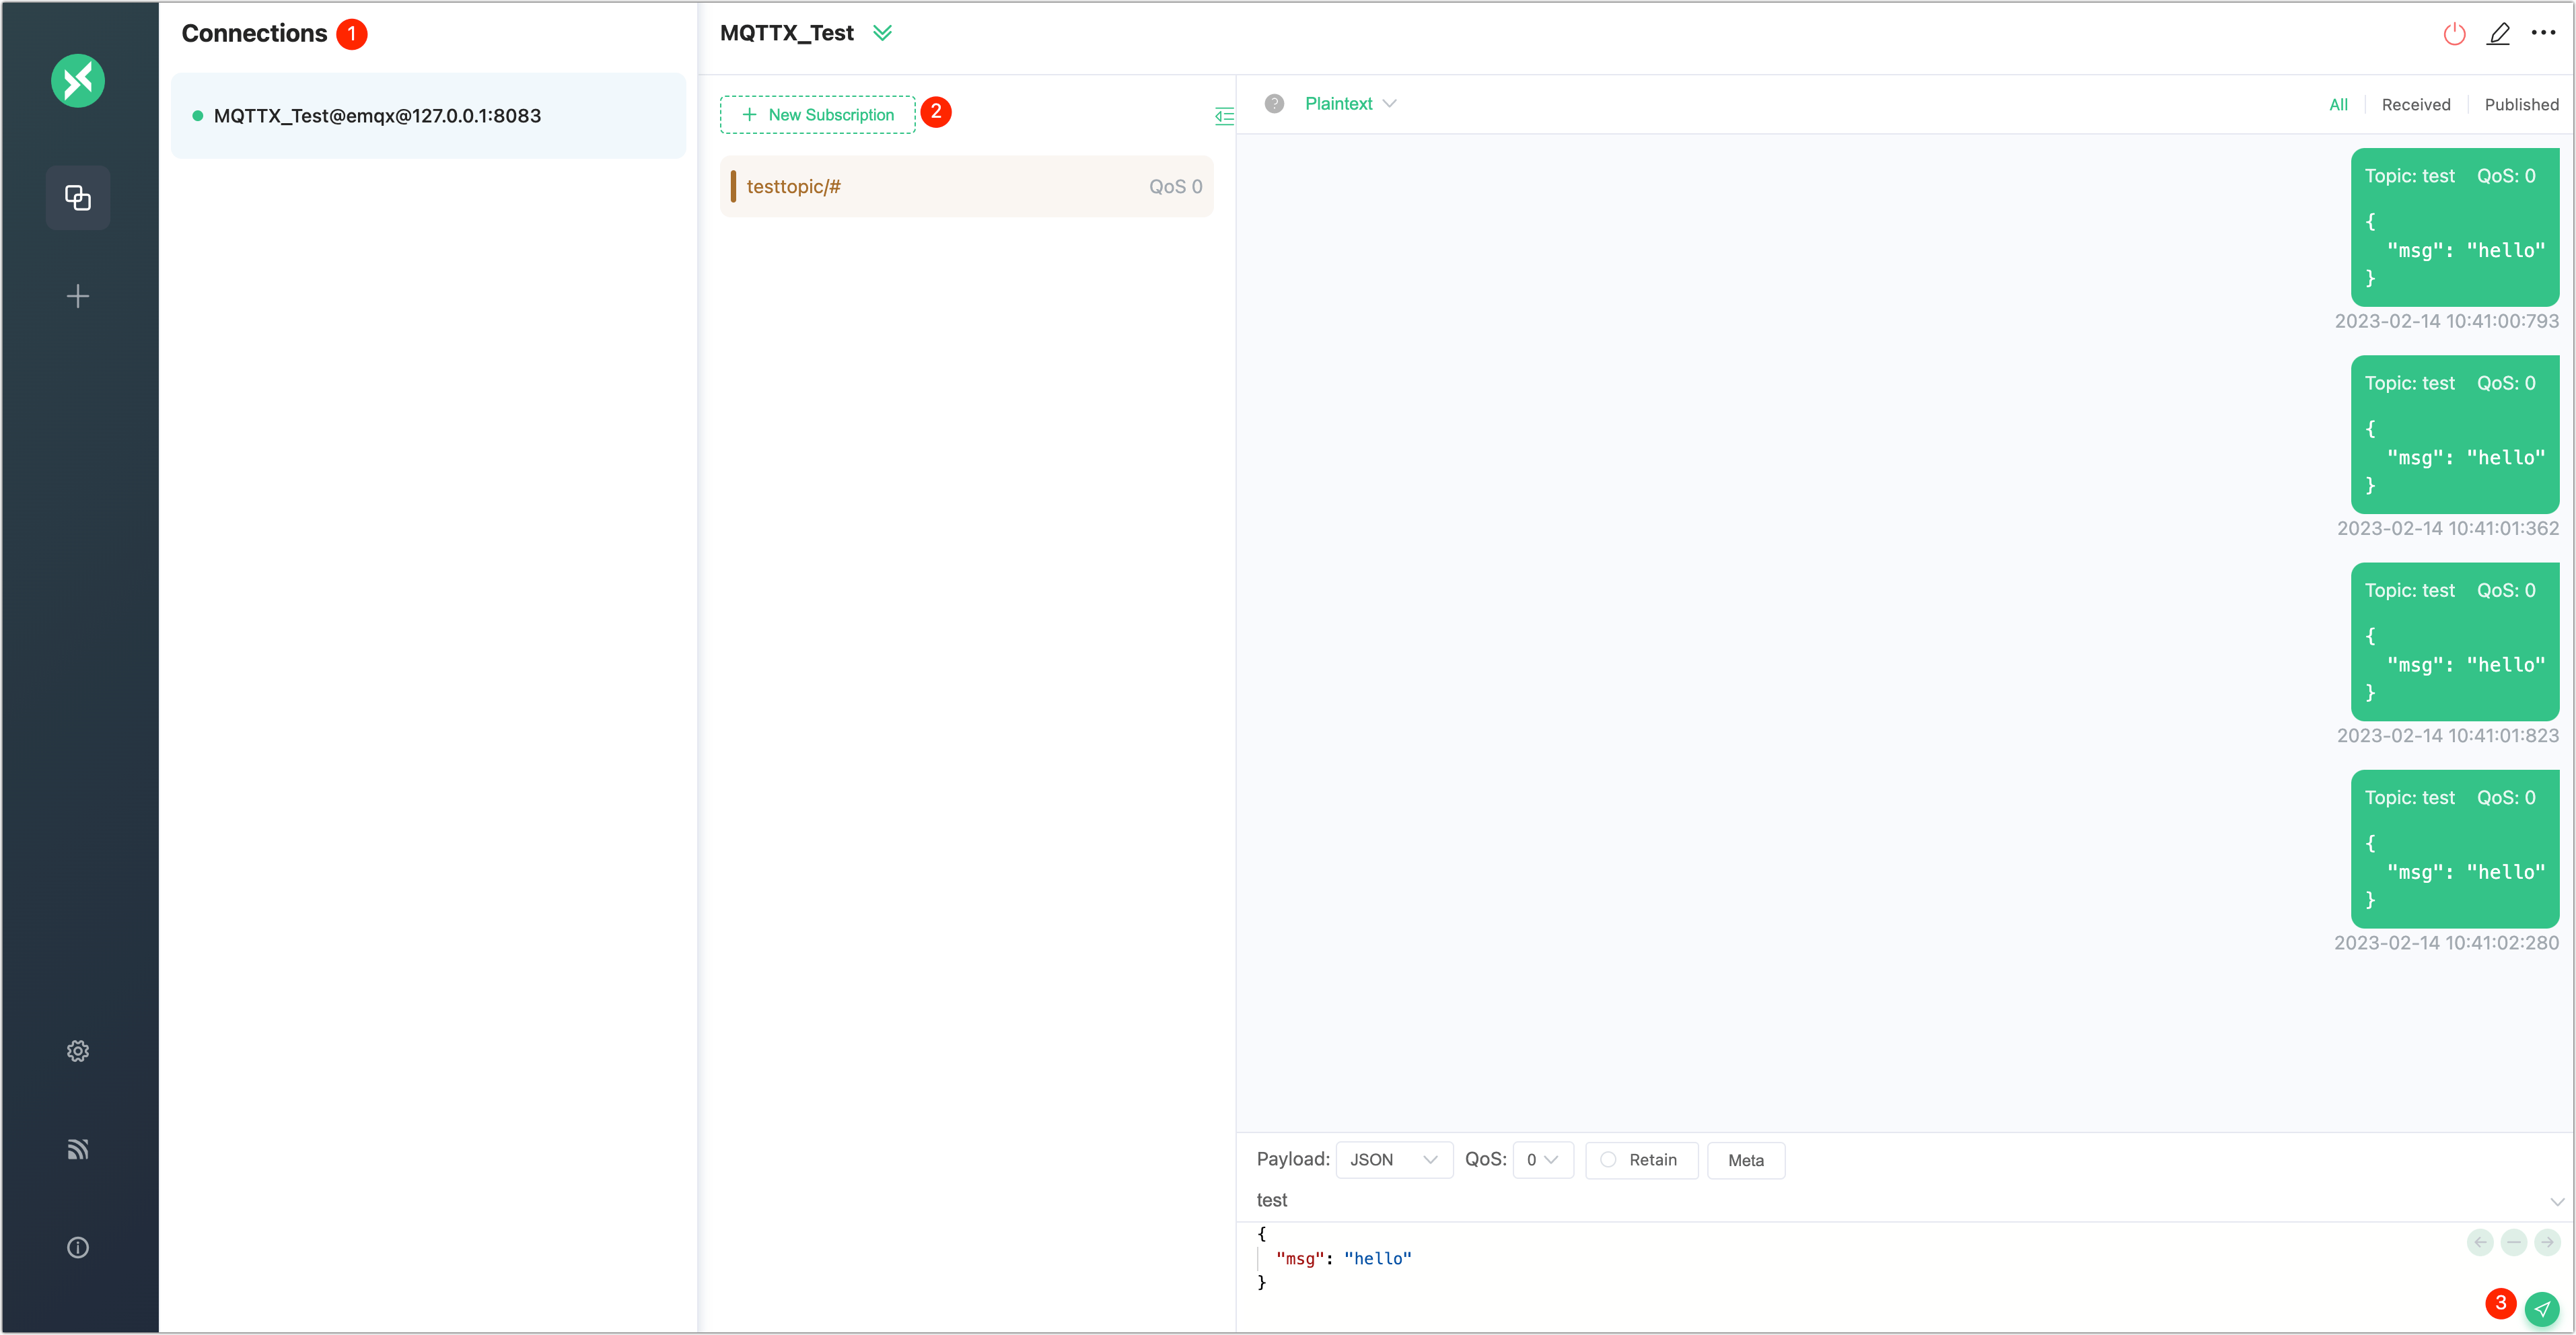
Click + New Subscription. MQTTX Web has already filled in some fields, according to the setting, you will subscribe to topic
testtopic/#with QoS level of 0. You can repeat this step to subscribe to different topics, and MQTTX Web will differentiate topics with colors.In the right corner of the chat area at the bottom, click the send icon to test the message publishing/receiving. The messages successfully sent will appear in the chat window.
If you want to continue the testing, such as one-way/two-way SSL authentication, and simulate test data with customized scripts, you can continue to explore with MQTTX.
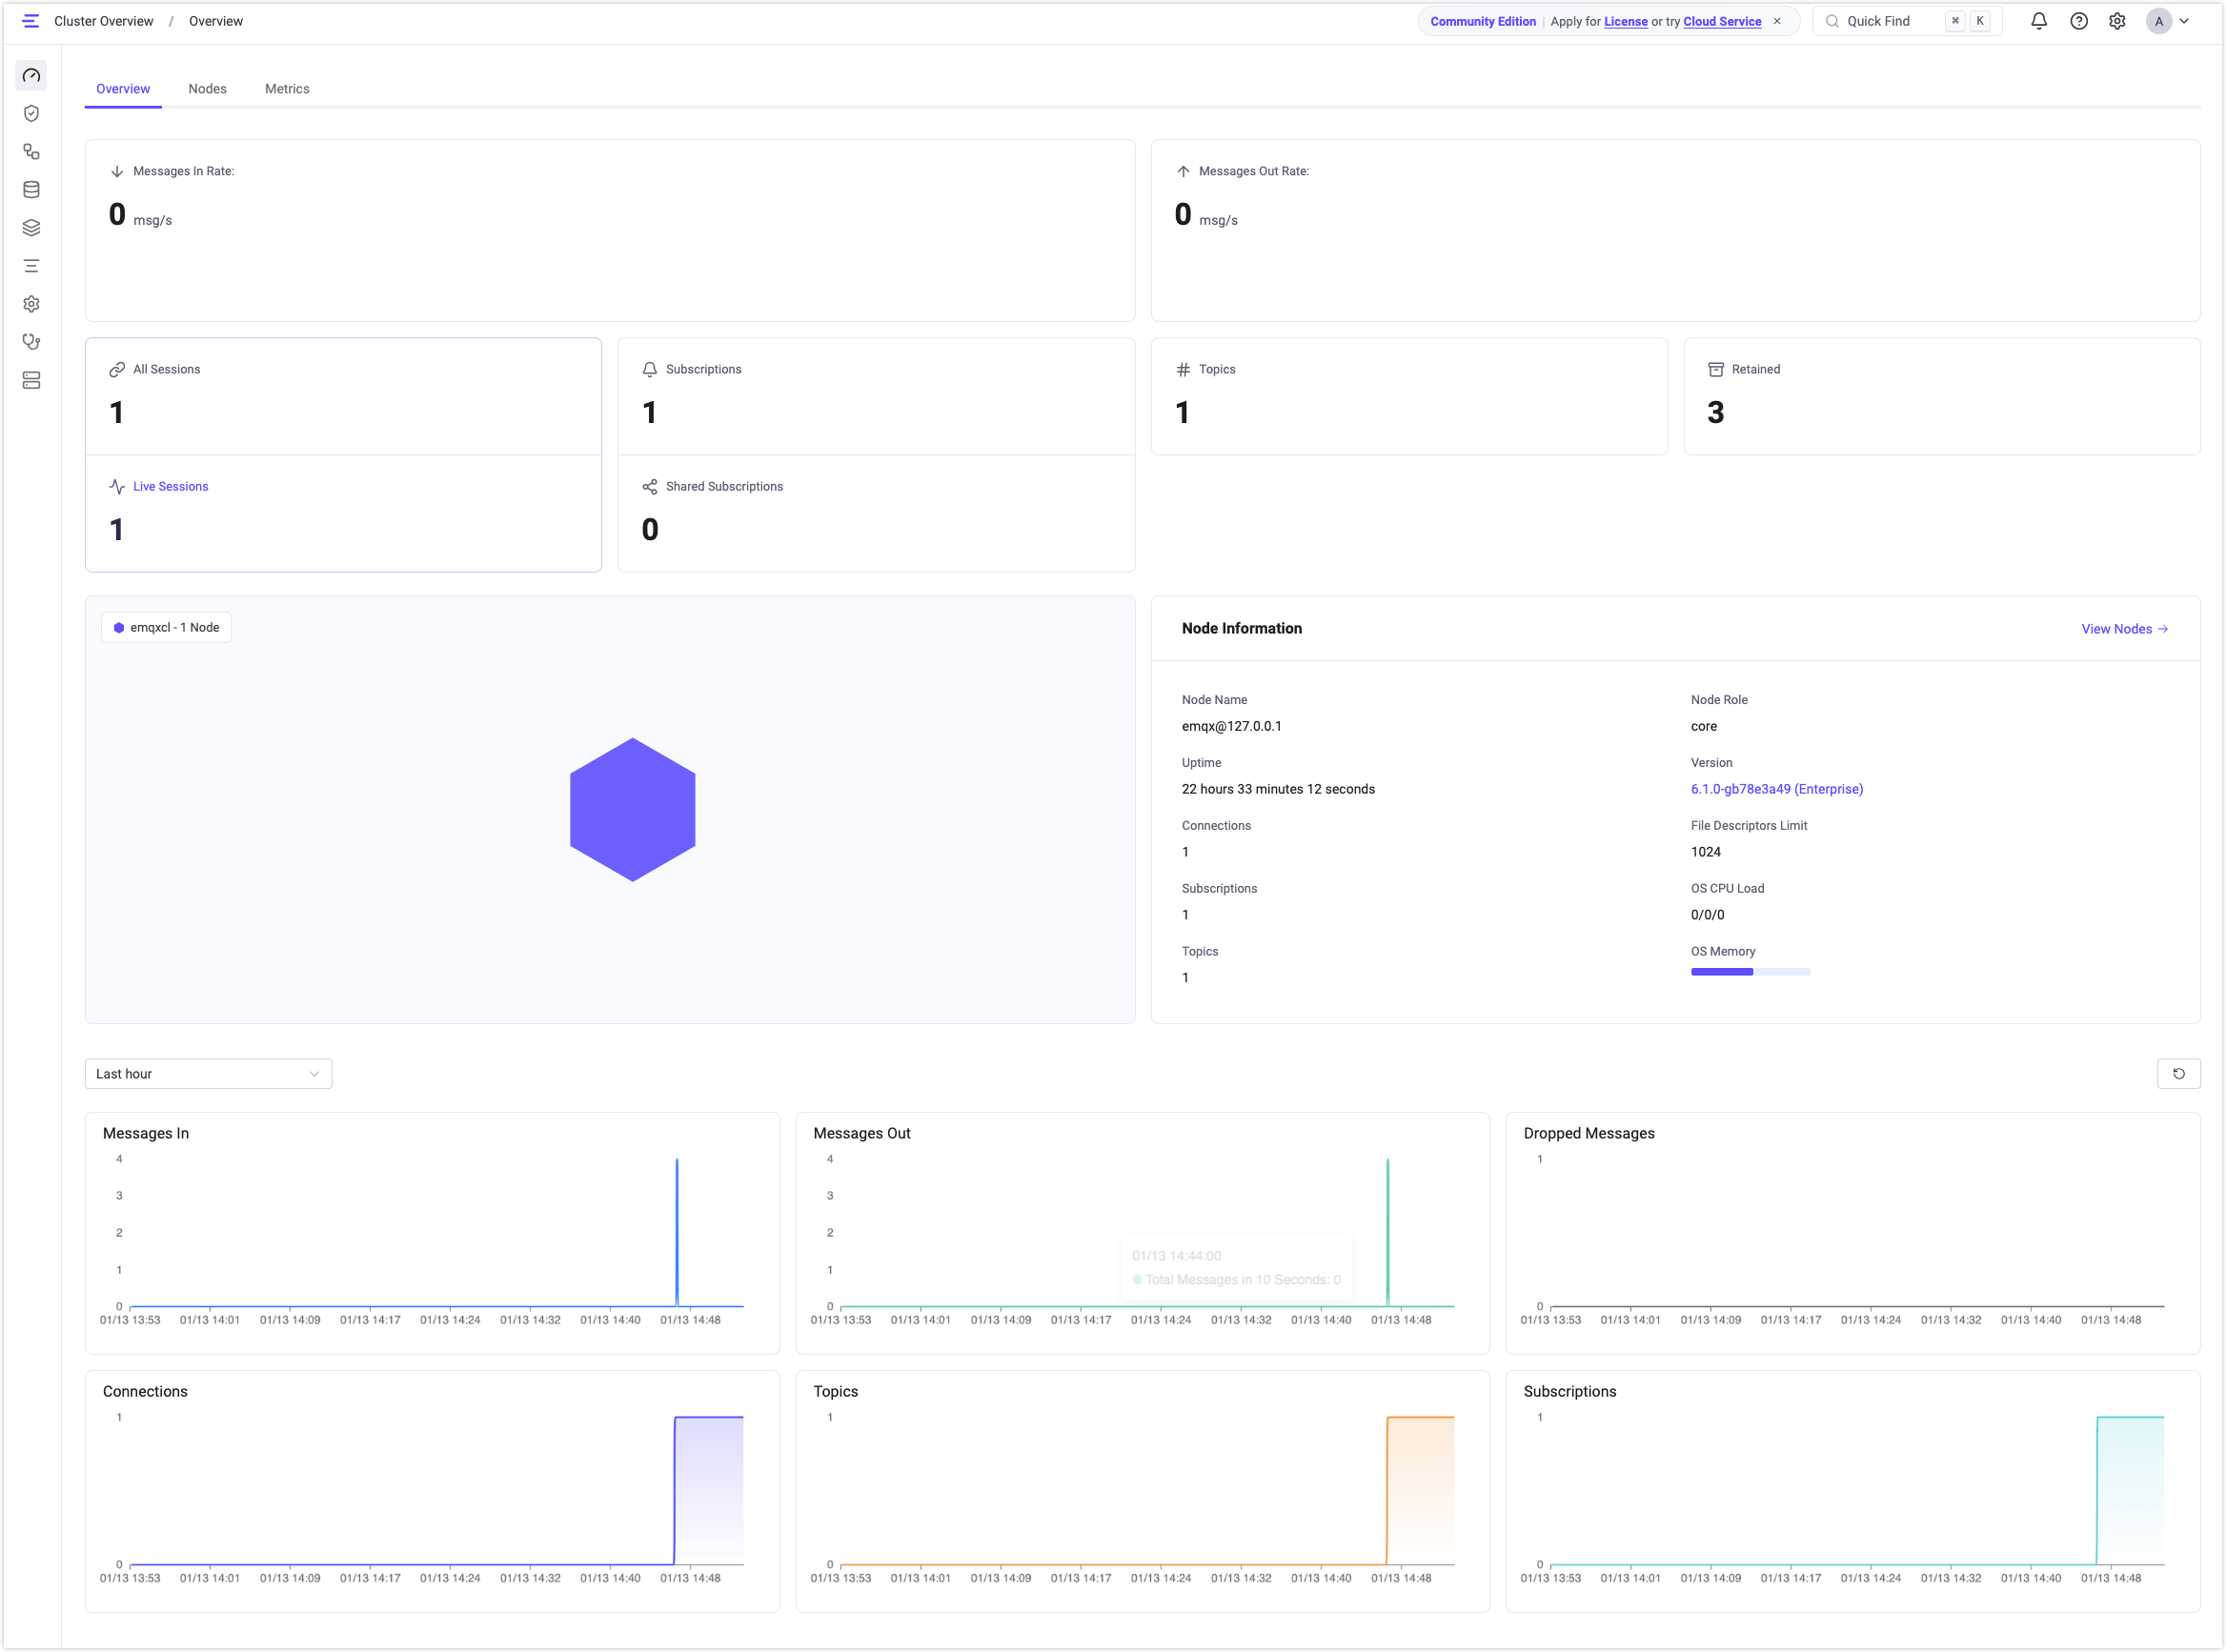
View Metrics on Dashboard
On the Cluster Overview page in the EMQX Dashboard, you can check metrics such as Connections, Topics, Subscriptions, Incoming Messages, Outgoing messages, and Dropped Messages.
Next Steps
So far, you have completed the installation, startup, and access test of EMQX, you can continue to try out more advanced capabilities of EMQX, such as authentication and authorization and integration with Rule Engine.
Frequently Asked Questions
You can visit the EMQ Q&A Community to participate in discussions, ask and answer questions about the usage of EMQX and other EMQ-related products, and exchange experiences with other EMQX users in IoT-related technologies. Additionally, feel free to contact us at any time for professional technical support.