Connect to Deployment using Electron via MQTT.js SDK
This article mainly introduces how to use MQTT in Electron projects, complete a simple MQTT desktop client, and implement the connection, subscription, unsubscribe, messaging, and other functions between the client and MQTT broker.
Prerequisites
Before connecting your Electron application to the EMQX Cloud, ensure you have completed the following prerequisites:
- Deploy MQTT Broker
- Create an Electron application
Deploy MQTT Broker
To connect your application to the EMQX Cloud, you need to create and configure a deployment.
Serverless Deployment
Create a Serverless deployment in the EMQX Cloud Console.
Once the deployment is created and running, go to the deployment Overview page to find the MQTT connection information, including:
Broker address
Port number (only TLS ports are supported in Serverless)
Serverless deployments require TLS connections. Make sure to download the CA certificate from the Overview page and use port
8883for TLS.Configure the default authentication (username/password) under Access Control -> Client Authentication in the deployment.
For more details, refer to the Serverless Port Guide.
Dedicated Flex or BYOC Deployment
- You can create a Dedicated Flex or BYOC deployment in the EMQX Cloud Console.
- After creation, go to the deployment Overview page to retrieve MQTT connection information, including:
- Broker address
- TCP and TLS port numbers for MQTT and WebSocket (Both TCP and TLS connections are supported).
- Configure the default authentication (username/password) under Access Control -> Client Authentication in the deployment.
For detailed port configurations, see the Dedicated & BYOC Port Guide.
Create an Electron Application
Electron is an open-source software framework developed and maintained by GitHub. It allows for the development of desktop GUI applications using web technologies: it combines the Chromium rendering engine and the Node.js runtime. Electron is the main GUI framework behind several notable open-source projects including Atom, GitHub Desktop, Light Table, Visual Studio Code, and WordPress Desktop.^1
A basic Electron includes three files: package.json (metadata) main.js (code) and index.html (graphical user interface). The frame is provided by the Electron executable file (electron.exe on Windows, electron.app on macOS, electron on Linux). Developers are free to add flags, customize icons, rename or edit Electron executable files.
There are many ways to build a new project, but here is a brief list of a few:
To create manually, do the following in the self-built project directory
shellcd your-project npm init npm i -D electron@latestAlso, refer to the following documentation for the steps to build the project.
Rapid development with the official template projects
electron-quick-start.Address: https://github.com/electron/electron-quick-start
shell# Clone this repository git clone https://github.com/electron/electron-quick-start # Go into the repository cd electron-quick-start # Install dependencies npm install # Run the app npm startRapid development builds with the template project
electron-react-bolierplate, which can be developed usingReact.js.Address: https://github.com/electron-react-boilerplate/electron-react-boilerplate
shellgit clone --depth 1 --single-branch https://github.com/electron-react-boilerplate/electron-react-boilerplate.git your-project-name cd your-project-name yarnThe rapid development build of the project via
electron-vuewill be coupled with project initialization using thevue-clitool, which can be developed usingVue.js.Address: https://github.com/SimulatedGREG/electron-vue
shell# Install vue-cli and scaffold boilerplate npm install -g vue-cli vue init simulatedgreg/electron-vue my-project # Install dependencies and run your app cd my-project yarn # or npm install yarn run dev # or npm run dev
In this article, the official electron quick start project template will be used to initialize the project in order to quickly build the example project.
Installation dependencies
Installation through the command line
npm install mqtt --saveAfter the dependencies are installed, if you want to open the console for debugging, you need to modify the code in main.js and uncomment win.webContents.openDevTools().
// Open the DevTools.
mainWindow.webContents.openDevTools()
In this case, the locally installed MQTT.js module cannot be loaded directly into renderer.js without using the front-end builder to package the front-end page. In addition to using the build tool method, there are two other ways to solve this:
nodeIntegrationcan be set to true inwebPreferences. When this property is present,webviewwill have Node integration in it, and node APIs likerequireandprocesscan be used to access low-level system resources. Node integration is disabled by default.javascriptconst mainWindow = new BrowserWindow({ width: 800, height: 600, webPreferences: { nodeIntegration: true, preload: path.join(__dirname, 'preload.js'), }, })The MQTT.js module can be imported in preload.js. When there is no node integration, this script still can access all Node APIs. However, when this script execution completes, global objects injected via Node will be removed.
The MQTT.js module can be imported in main process and connected. In Electron, processes communicate by passing messages through developer-defined "channels" with the
ipcMainandipcRenderermodules. These channels are arbitrary (you can name them anything you want) and bidirectional (you can use the same channel name for both modules). For usage examples, check out the IPC tutorial.
Connection
To illustrate more intuitive, the key connection code for the example will be written in the renderer.js file. With the consideration of security, the installed MQTT module will be loaded via the required method of the Node.js API, in the preload.js file (using method 2 above). Also, this method injecting it in the global window object.
Note: Context isolation (contextIsolation) has been enabled by default since Electron 12, Although preload scripts share a
windowglobal with the renderer they're attached to, you cannot directly attach any variables from the preload script towindowbecause of thecontextIsolationdefault.
Therefore, we need to set contextIsolation: false in webPreferences to close:
const mainWindow = new BrowserWindow({
    width: 800,
    height: 600,
    webPreferences: {
      preload: path.join(__dirname, 'preload.js'),
      contextIsolation: false; // Version 12.0.0 above are enabled by default
    }
  })
So that the loaded module can be accessed directly in renderer.js:
- Import MQTT module
// preload.js
const mqtt = require('mqtt')
window.mqtt = mqtt
Connect over TCP port
Set the client ID, username, and password using the following code, and the client ID should be unique.
const clientId = 'emqx_vue3_' + Math.random().toString(16).substring(2, 8)
const username = 'emqx_test'
const password = 'emqx_test'
Establish a connection between the client and MQTT Broker using the following code.
const client = mqtt.connect('mqtt://broker.emqx.io:1883', {
  clientId,
  username,
  password,
  // ...other options
})
Connect over TCP Secure port
If TLS/SSL encryption is enabled, the connection parameter options are consistent with establishing a connection through the TCP port. You only need to pay attention to changing the protocol to mqtts and matching the correct port number.
Establish a connection between the client and MQTT Broker using the following code.
const client = mqtt.connect('mqtts://broker.emqx.io:8883', {
  clientId,
  username,
  password,
  // ...other options
})
Connect over WebSocket port
MQTT WebSocket uniformly uses /path as the connection path, which needs to be specified when connecting, while EMQX Broker uses /mqtt as the path.
Therefore, when using WebSocket connection, in addition to modifying the port number and switching the protocol to ws, you also need to add the /mqtt path.
Establish a connection between the client and MQTT Broker using the following code.
const client = mqtt.connect('ws://broker.emqx.io:8083/mqtt', {
  clientId,
  username,
  password,
  // ...other options
})
Connect over WebSocket Secure port
If TLS/SSL encryption is enabled, the connection parameter option is consistent with establishing a connection through the WebSocket port. You only need to pay attention to changing the protocol to 'wss' and matching the correct port number
Establish a connection between the client and MQTT Broker using the following code.
const client = mqtt.connect('wss://broker.emqx.io:8084/mqtt', {
  clientId,
  username,
  password,
  // ...other options
})
Subscription and Publishing
Subscribe to Topics
Set the topic to be subscribed to and its corresponding QoS level(Optional) and call the MQTT. js subscribe method for subscription operations.
function onSub() {
  if (client.connected) {
    const { topic, qos } = subscriber
    client.subscribe(
      topic.value,
      { qos: parseInt(qos.value, 10) },
      (error, res) => {
        if (error) {
          console.error('Subscribe error: ', error)
        } else {
          console.log('Subscribed: ', res)
        }
      }
    )
  }
}
Unsubscribe to Topics
When canceling a subscription, it is necessary to pass on topics that no longer require subscription and corresponding QoS (optional).
https://github.com/mqttjs/MQTT.js#mqttclientunsubscribetopictopic-array-options-callback
function onUnsub() {
  if (client.connected) {
    const { topic } = subscriber
    client.unsubscribe(topic.value, (error) => {
      if (error) {
        console.error('Unsubscribe error: ', error)
      } else {
        console.log('Unsubscribed: ', topic.value)
      }
    })
  }
}
Publish messages
When publishing a message, it is necessary to inform MQTT Broker of the corresponding topic and message content.
https://github.com/mqttjs/MQTT.js#mqttclientpublishtopic-message-options-callback
function onSend() {
  if (client.connected) {
    const { topic, qos, payload } = publisher
    client.publish(topic.value, payload.value, {
      qos: parseInt(qos.value, 10),
      retain: false,
    })
  }
}
Receive messages
// In the onConnect function
client.on('message', (topic, message) => {
  const msg = document.createElement('div')
  msg.setAttribute('class', 'message-body')
  msg.innerText = `${message.toString()}\nOn topic: ${topic}`
  document.getElementById('article').appendChild(msg)
})
Disconnect from MQTT Broker
Active disconnection by the client
https://github.com/mqttjs/MQTT.js#mqttclientendforce-options-callback
function onDisconnect() {
if (client.connected) {
client.end()
client.on('close', () => {
connectBtn.innerText = 'Connect'
console.log(options.clientId + ' disconnected')
})
}
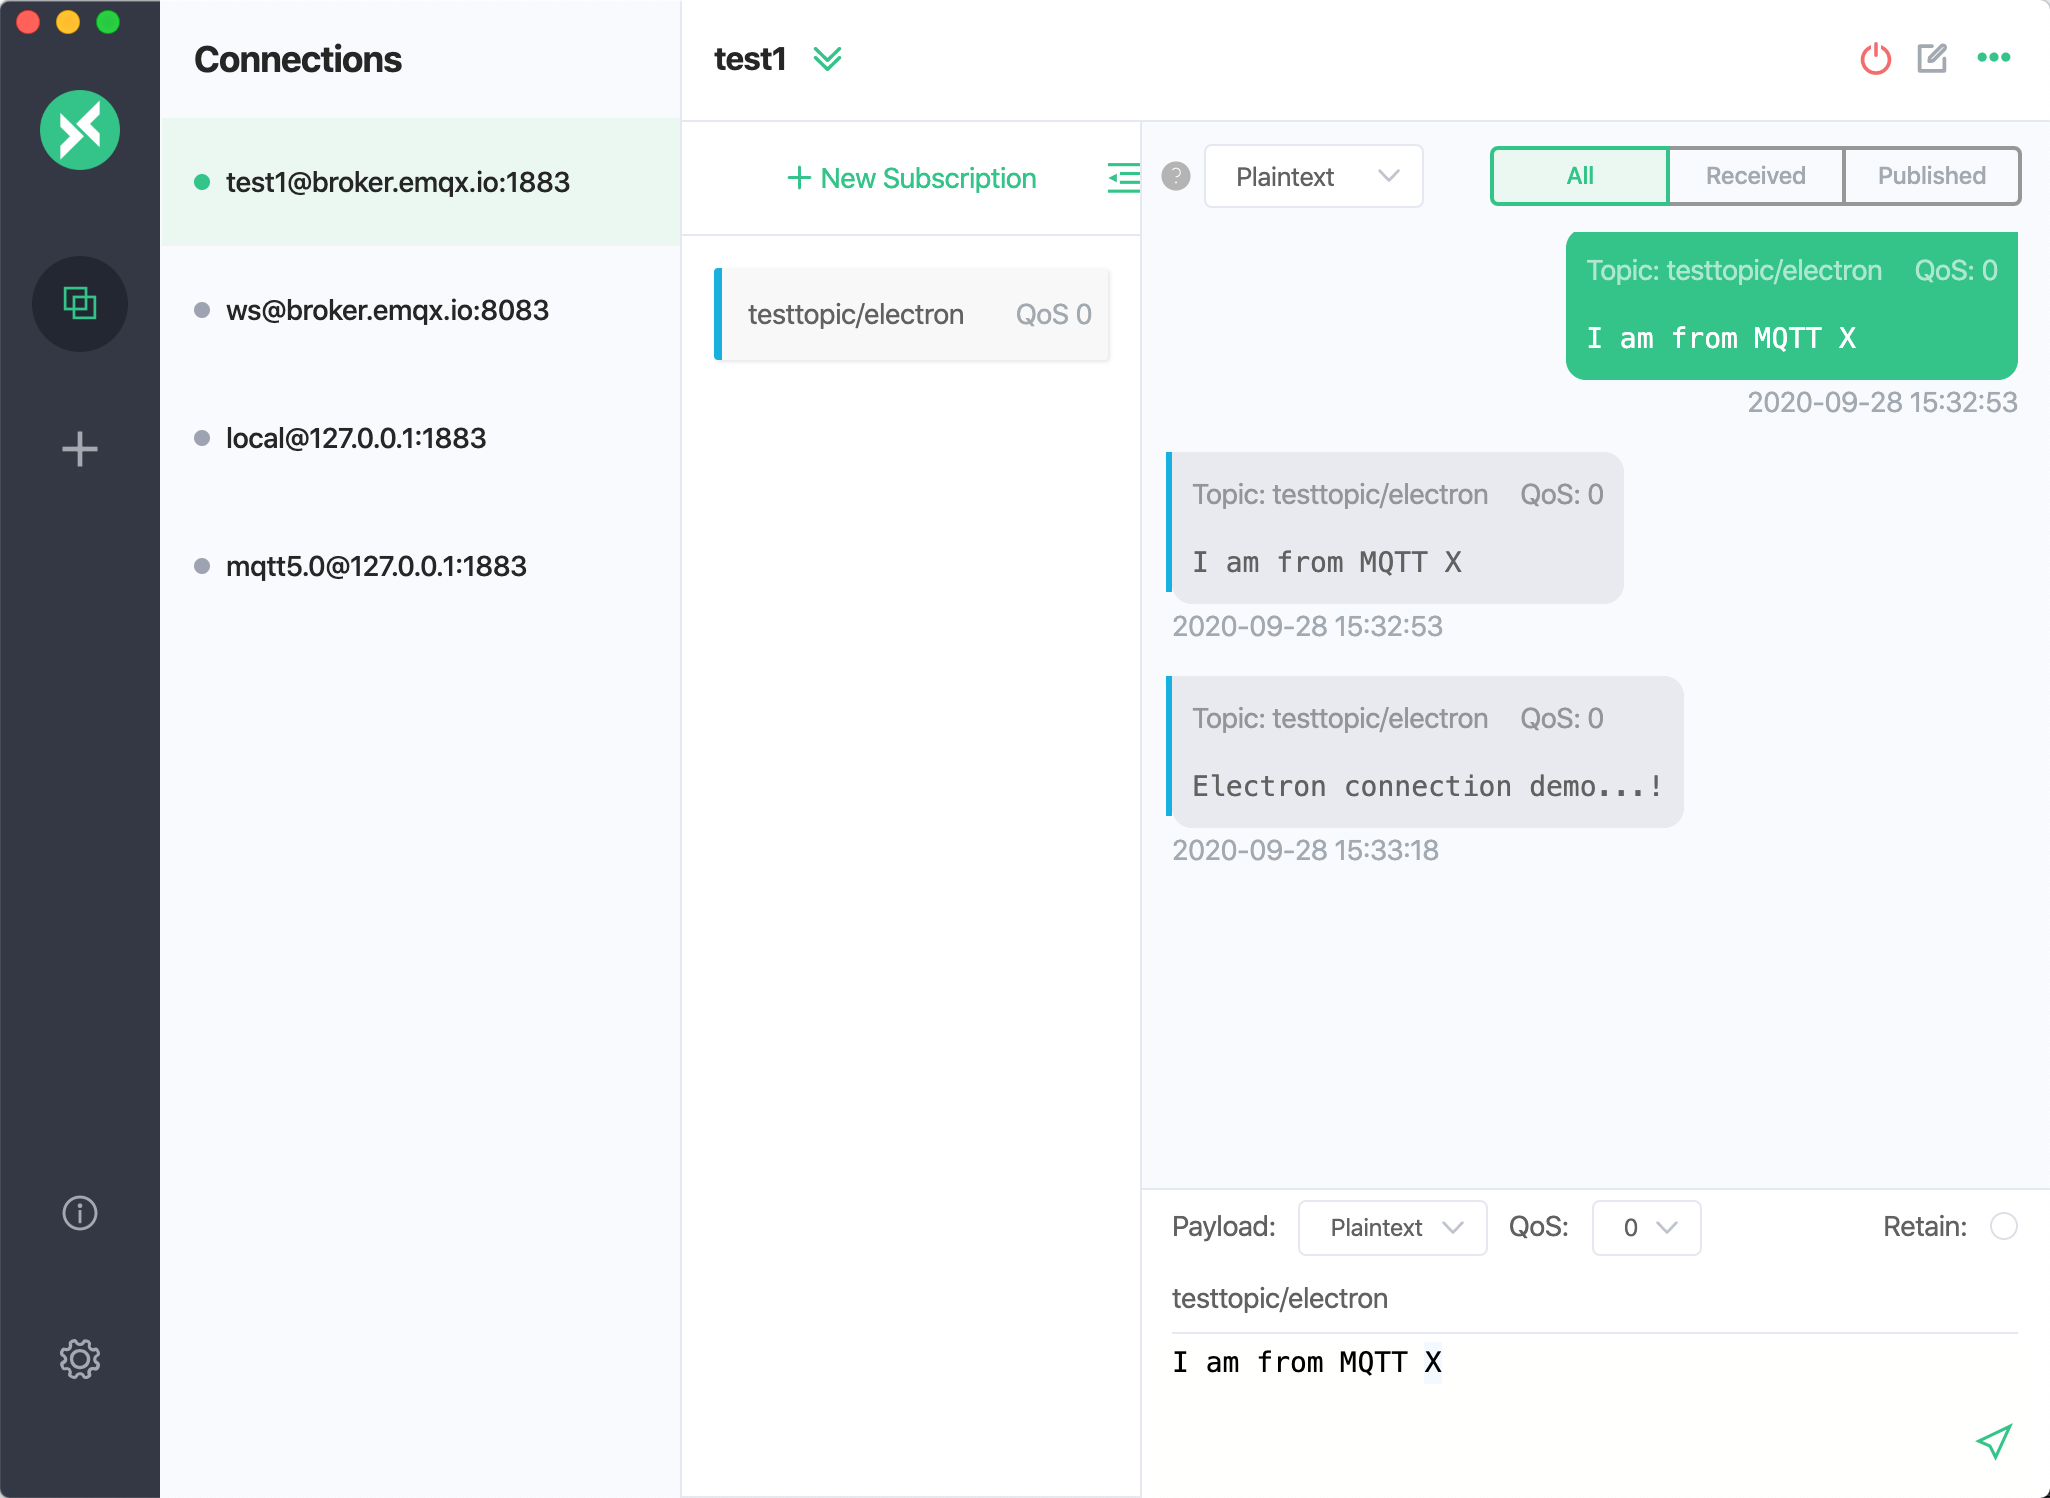
}Test the Connection
At this point, we test the sending and receiving of messages with a MQTT 5.0 client tool - MQTTX, also written in Electron.
When using MQTTX to send a message to the client, you can see that the message is received properly:

Send a message to MQTTX using the client you wrote yourself, and now you can see that MQTTX is also receiving the message properly:
More
So far, we have completed that use Electron to create a simple MQTT desktop client, and simulate the connection, messaging, unsubscribe and disconnect scenarios between the client and MQTT broker. You can download the complete sample source code on the MQTT Client Electron page, and also welcome to explore more demo examples in other languages on the MQTT Client Example page.