Connect via Paho Python
This document describes how to use the paho-mqtt client library in Python projects to connect to the MQTT server, subscribe, unsubscribe, send and receive messages.
paho-mqtt is currently using more MQTT client library in Python. It provides support for MQTT V5.0, V3.1, and V3.1.1 for client classes on Python 2.7.9+ or 3.6+. It also provides some helper functions to make publishing one off messages to an MQTT server very straightforward.
Prerequisites
Before connecting your Python application to the EMQX Cloud using the Paho Python client, ensure you have completed the following prerequisites:
- Deploy MQTT Broker
- Check Python version
Deploy MQTT Broker
To connect your application to the EMQX Cloud, you need to create and configure a deployment.
Serverless Deployment
Create a Serverless deployment in the EMQX Cloud Console.
Once the deployment is created and running, go to the deployment Overview page to find the MQTT connection information, including:
Broker address
Port number (only TLS ports are supported in Serverless)
Serverless deployments require TLS connections. Make sure to download the CA certificate from the Overview page and use port
8883for TLS.Configure the default authentication (username/password) under Access Control -> Client Authentication in the deployment.
For more details, refer to the Serverless Port Guide.
Dedicated Flex or BYOC Deployment
- You can create a Dedicated Flex or BYOC deployment in the EMQX Cloud Console.
- After creation, go to the deployment Overview page to retrieve MQTT connection information, including:
- Broker address
- TCP and TLS port numbers for MQTT and WebSocket (Both TCP and TLS connections are supported).
- Configure the default authentication (username/password) under Access Control -> Client Authentication in the deployment.
For detailed port configurations, see the Dedicated & BYOC Port Guide.
Check Python Version
This project uses Python 3.8 to develop and test. Confirm the Python version by the following command.
➜  ~ python3 --version
Python 3.8.6
Install MQTT client
- Pip is a package-management system written in Python used to install and manage software packages. Use the following command to install paho-mqtt.
pip install paho-mqtt- Import the Paho MQTT client
from paho.mqtt import client as mqtt_clientConnect over TCP Port
Please find the relevant address and port information in the Deployment Overview of the Console. Please note that if it is the basic edition, the port is not 1883, please confirm the port.
- Set the host, port and topic of MQTT Broker connection. At the same time, we call the Python function 'random.randint' to randomly generate the MQTT client id.
broker = 'broker.emqx.io'
port = 1883
topic = 'python/mqtt'
client_id = f'python-mqtt-{random.randint(0, 1000)}'
username = 'emqx'
password = '**********'- Write the connect callback function 'on_connect'. This function will be called after connecting the client, and we can determine whether the client is connected successfully according to 'rc' in this function.
def connect_mqtt():
    def on_connect(client, userdata, flags, rc):
        if rc == 0:
            print("Connected to MQTT Broker!")
        else:
            print("Failed to connect, return code %d\n", rc)
    # Set Connecting Client ID
    client = mqtt_client.Client(client_id)
    client.username_pw_set(username, password)
    client.on_connect = on_connect
    client.connect(broker, port)
    return client
Connect over SSL/TLS Port
Please find the relevant address and port information in the Deployment Overview of the Console. Please note that if it is the basic edition, the port is not 8883, please confirm the port.
This section introduces how to connect to a deployment with SSL/TLS one-way authentication. If you need to use two-way authentication, you can refer to here.
- Set the host, port and topic of MQTT Broker connection. At the same time, we call the Python function 'random.randint' to randomly generate the MQTT client id.
broker = 'broker.emqx.io'
port = 8883
topic = 'python/mqtt'
client_id = f'python-mqtt-{random.randint(0, 1000)}'
username = 'emqx'
password = '**********'- Setting the CA certificate. If you are using Serverless deployment, you can download CA certificate file in the Deployment Overview of the Console. If you are using Dedicated Flex deployment, please refer to Configure TLS/SSL for certificate configuration.
- Write the connect callback function 'on_connect'. This function will be called after connecting the client, and we can determine whether the client is connected successfully according to 'rc' in this function.
def connect_mqtt():
    def on_connect(client, userdata, flags, rc):
        if rc == 0:
            print("Connected to MQTT Broker!")
        else:
            print("Failed to connect, return code %d\n", rc)
    # Set Connecting Client ID
    client = mqtt_client.Client(client_id)
    # Set CA certificate
    client.tls_set(ca_certs='./server-ca.crt')
    client.username_pw_set(username, password)
    client.on_connect = on_connect
    client.connect(broker, port)
    return client
Publish and Subscribe
This section introduces how to subscribe to topics and publish messages after you successfully connect to the MQTT broker.
Subscribe to Topics
- Set the topic for subscription and the QoS Level of the topic.
- Write the message callback function 'on_message'. This function will be called after the client received messages from the MQTT Broker. In this function, we will print out the name of subscribed topics and the received messages.
def subscribe(client: mqtt_client):
    def on_message(client, userdata, msg):
        print(f"Received `{msg.payload.decode()}` from `{msg.topic}` topic")

    client.subscribe(topic, qos=0)
    client.on_message = on_message
Unsubscribe to Topics
Use the following codes to unsubscribe to topics. You need to define the topic for unsubscription and the QoS level.
def unsubscribe(client: mqtt_client):
    client.on_message = None
    client.unsubscribe(topic)
Publish Messages
- Inform MQTT Broker about the topic and payload when publishing messages.
- First, we define a while loop. In this loop, and we will set the MQTT client 'publish' function to send messages to the topic 'python/mqtt' every second.
def publish(client):
    msg_count = 0
    while True:
        time.sleep(1)
        msg = f"messages: {msg_count}"
        result = client.publish(topic, msg)
        # result: [0, 1]
        status = result[0]
        if status == 0:
           print(f"Send `{msg}` to topic `{topic}`")
        else:
           print(f"Failed to send message to topic {topic}")
        msg_count += 1
Receive Messages
The following code specifies that the client listens for message events and executes a callback function after receiving a message, printing the received message and its topic to the console.
def on_message(client, userdata, msg):
        print(f"Received `{msg.payload.decode()}` from `{msg.topic}` topic")

client.on_message = on_message
Disconnect from MQTT Broker
If the client wants to disconnect actively, use the following code:
def disconnect(client: mqtt_client):
    client.loop_stop()
    client.disconnect()
The above section only lists some key codes. For the complete code of the project, please refer to here. You can download and experience it.
The full code
The code of publishing messages
# python 3.8

import random
import time

from paho.mqtt import client as mqtt_client


broker = 'broker.emqx.io'
port = 1883
topic = "python/mqtt"
# generate client ID with pub prefix randomly
client_id = f'python-mqtt-{random.randint(0, 1000)}'
username = 'emqx'
password = '**********'


def connect_mqtt():
    def on_connect(client, userdata, flags, rc):
        if rc == 0:
            print("Connected to MQTT Broker!")
        else:
            print("Failed to connect, return code %d\n", rc)

    client = mqtt_client.Client(client_id)
    # client.tls_set(ca_certs='./server-ca.crt')
    client.username_pw_set(username, password)
    client.on_connect = on_connect
    client.connect(broker, port)
    return client


def publish(client):
    msg_count = 0
    while True:
        time.sleep(1)
        msg = f"messages: {msg_count}"
        result = client.publish(topic, msg)
        # result: [0, 1]
        status = result[0]
        if status == 0:
            print(f"Send `{msg}` to topic `{topic}`")
        else:
            print(f"Failed to send message to topic {topic}")
        msg_count += 1


def run():
    client = connect_mqtt()
    client.loop_start()
    publish(client)


if __name__ == '__main__':
    run()
The code of subscribing
# python3.8

import random

from paho.mqtt import client as mqtt_client


broker = 'broker.emqx.io'
port = 1883
topic = "python/mqtt"
# generate client ID with pub prefix randomly
client_id = f'python-mqtt-{random.randint(0, 100)}'
username = 'emqx'
password = '**********'


def connect_mqtt() -> mqtt_client:
    def on_connect(client, userdata, flags, rc):
        if rc == 0:
            print("Connected to MQTT Broker!")
        else:
            print("Failed to connect, return code %d\n", rc)

    client = mqtt_client.Client(client_id)
    # client.tls_set(ca_certs='./server-ca.crt')
    client.username_pw_set(username, password)
    client.on_connect = on_connect
    client.connect(broker, port)
    return client


def subscribe(client: mqtt_client):
    def on_message(client, userdata, msg):
        print(f"Received `{msg.payload.decode()}` from `{msg.topic}` topic")

    client.subscribe(topic)
    client.on_message = on_message


def run():
    client = connect_mqtt()
    subscribe(client)
    client.loop_forever()


if __name__ == '__main__':
    run()
Test
Publish messages
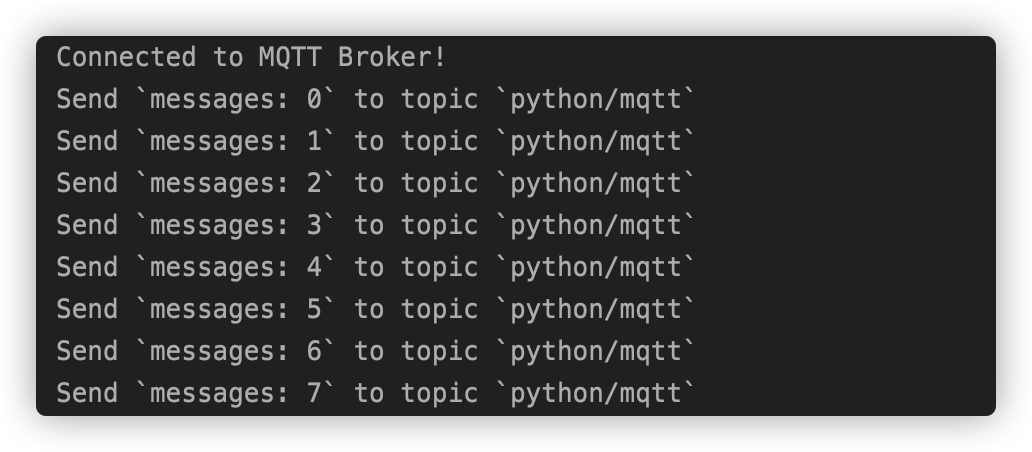
Run the code of publishing messages, we will see that the client connects and publishes messages successfully.

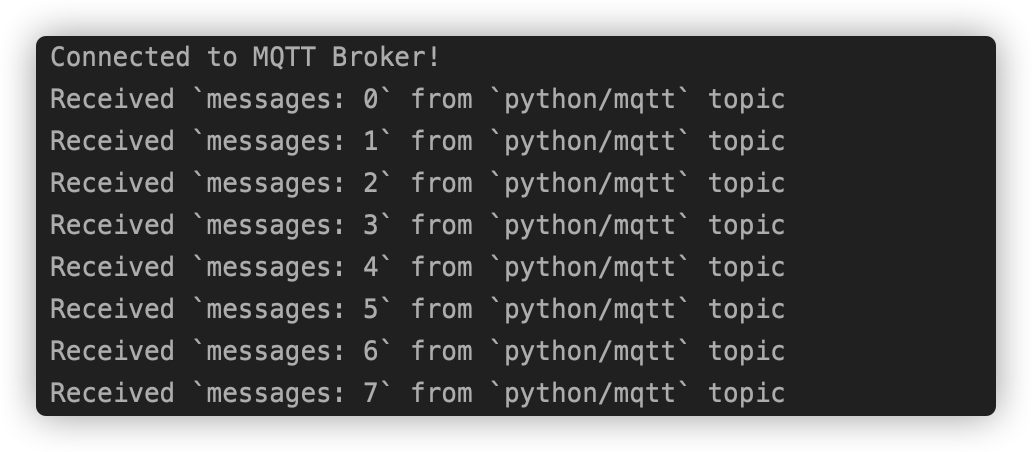
Subscribe

More
All of the above shows that how to use the paho-mqtt client library to connect to the EMQX Cloud. You can download the source code to the example in here. You can find more other languages in GitHub.