Get Started with EMQX Broker
This guide walks you through your first experience using EMQX Broker, including signing up, creating projects, and deploying your first MQTT broker.
EMQX Broker Free Trial
You can explore and try EMQX Broker products through our Serverless free quota or the Dedicated Flex plan's 14-day free trial.
Serverless Plan (Free Tier)
- 1 million session minutes per month
- 1 GB of traffic per month
- 1 million rule actions per month
Dedicated Flex Plan (14-Day Free Trial)
- 1000 sessions
- 100 GB free traffic
- Data integration, monitoring management, and other proprietary features
- Supports MQTT and WebSockets protocol connections.
Trial Limitations and Behavior
If no clients connect for 5 consecutive days, the deployment is paused. You can manually restart it from the console.
After the trial period:
- If you have credits, the deployment continues with hourly billing.
- If no credits are available, the deployment is retained for 3 days, then automatically deleted.
Create and Log into an EMQX Cloud Account
Sign Up
- Enter the required information, such as name, email, password, and mobile number. According to regulatory requirements, registration requires mobile verification for real-name authentication.
- Click Start free trial, and EMQX Cloud will automatically send a confirmation email to the email address you provided.
- Confirm your account via the email verification link.
Sign In
Enter your email and password, then click Sign In to be redirected to the EMQX Cloud console.
Password Recovery
If you forget your password, you can click Forgot your password? on the login page, and reset it via email.
First-Time Login: Create Your First Project
When you log in for the first time, the Overview page will be empty, and you’ll be prompted to create a project.
Create a Project
Projects help you organize EMQX deployments across teams, departments, or use cases.
- On the Overview page, click + New Project.
- Enter the Project Name and Note.
- Click Confirm.
Your new project will appear in the Projects section on the Overview page.
Learn more: Project Management
Create a Deployment
After creating a project, you can deploy an EMQX broker.
On the Overview page, click the project card to enter the project you have created.
Click + New Deployment to go to the New Deployment page.
Select the Serverless plan. Leave the default settings or configure them as needed.
For detailed descriptions of deployment settings, refer to Create a Serverless Deployment.
Review your deployment information in the Summary section. Check the box I have read and accept the EMQX Serverless Usage Terms, then click Deploy.
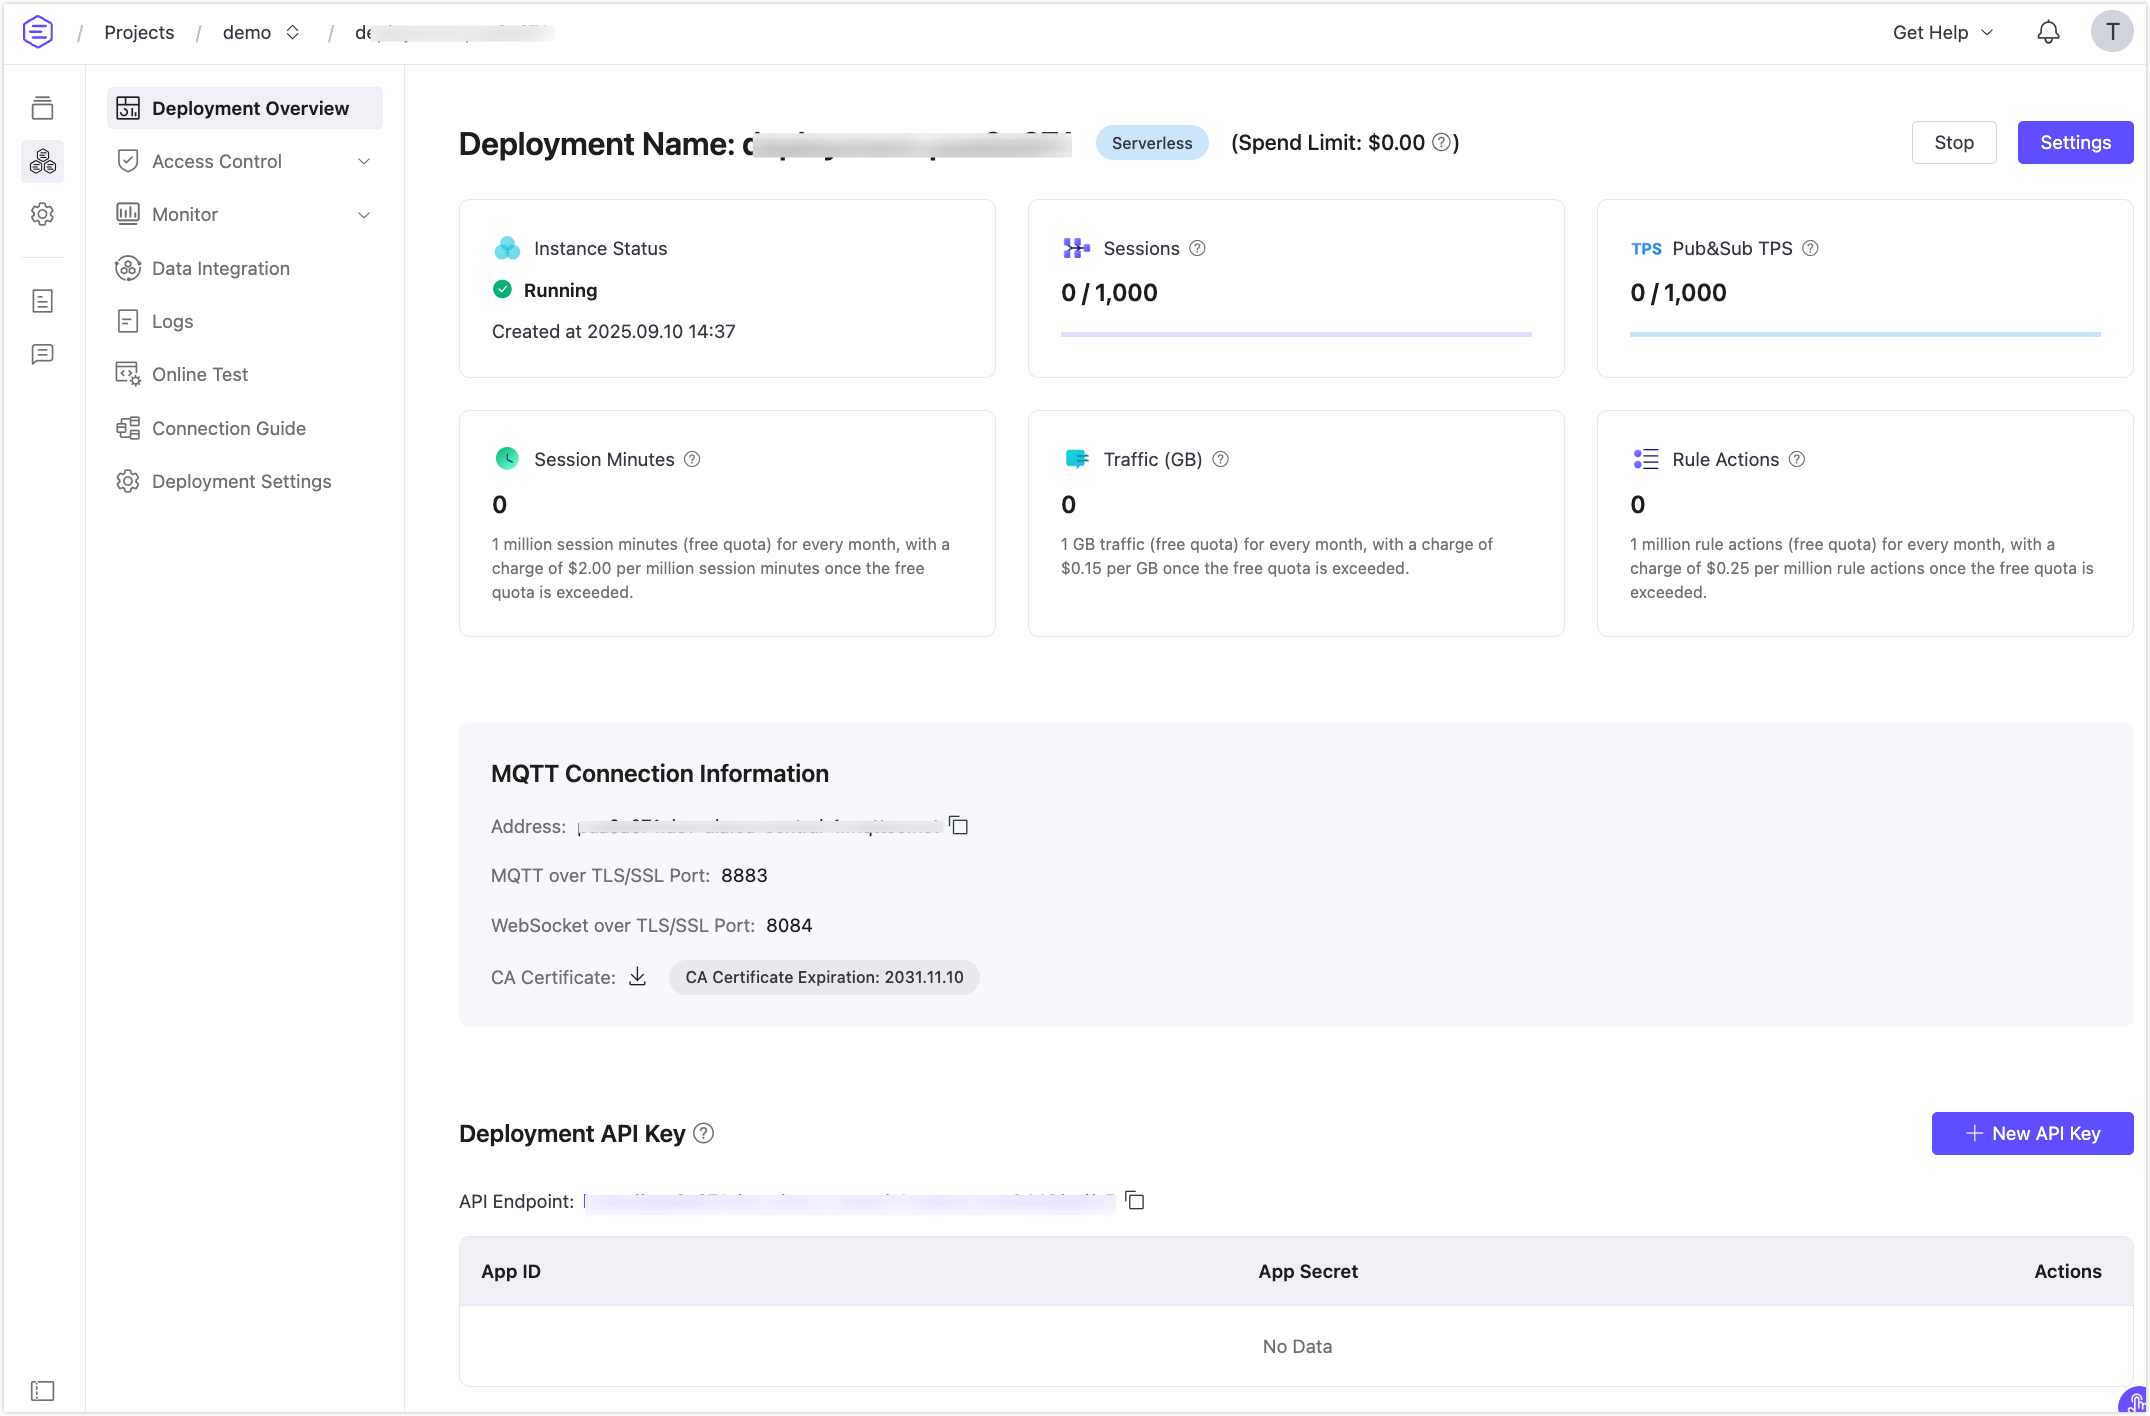
The deployment will begin. The deployment's progress can be tracked on the Overview page. Once the status updates to Running, your deployment is successfully established and is now operational.
View Deployment Information
After creation, your deployment will appear under EMQX Brokers on the Overview page. Each card shows:
- Deployment name
- Region
- Session limit
- EMQX version
- Status
Click the deployment card to access the Deployment Overview page. From the left menu, you can configure settings, view metrics, manage clients, and more.
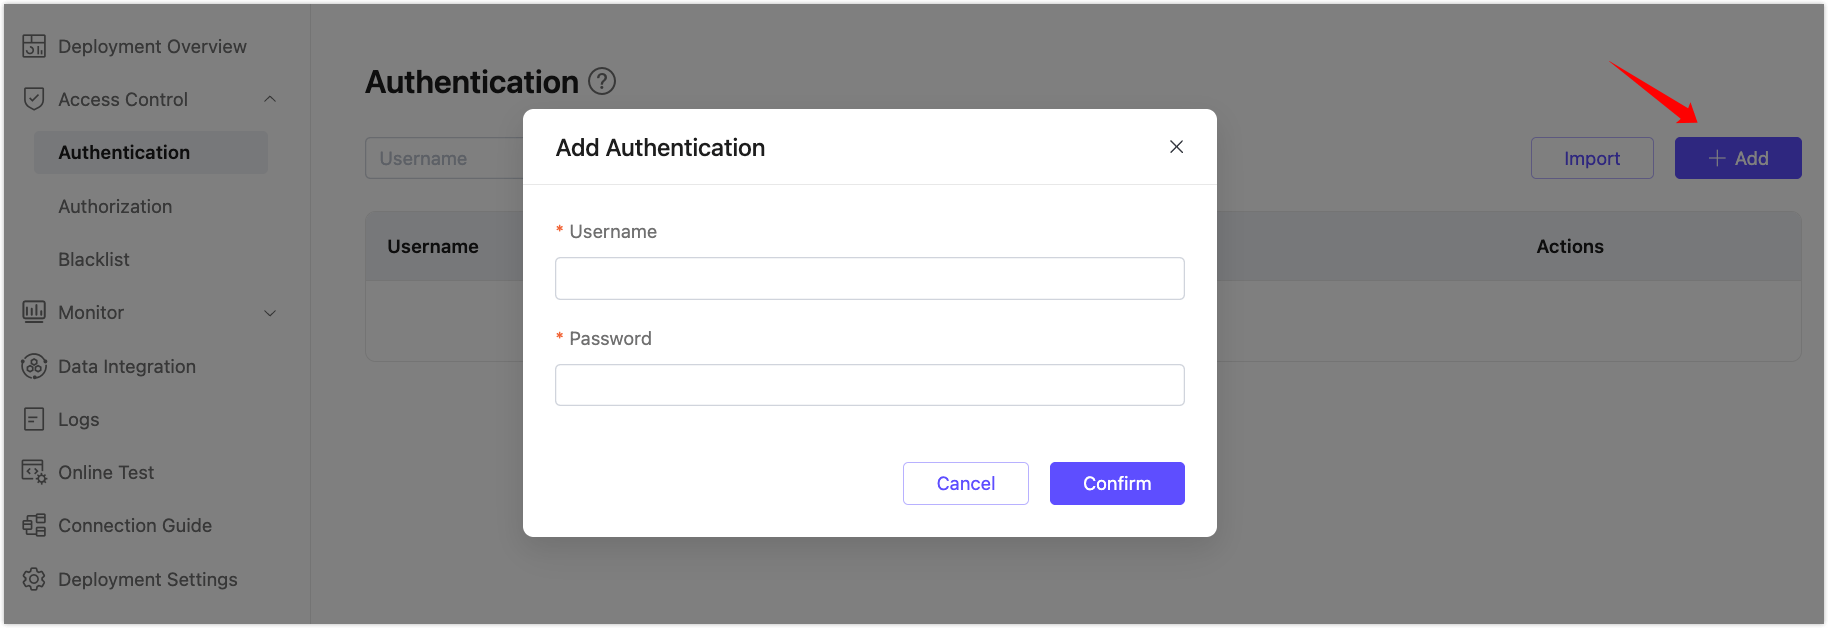
Configure Authentication
To secure your deployment, set up authentication before connecting clients.
Open your deployment and go to Access Control > Authentication.
Click Add, then enter a Username and Password.
Click Confirm.
TIP
Keep these credentials safe. They are required for connecting clients.
Learn more: Default Authentication Guide
Use MQTTX to Verify Connection
EMQX recommends using MQTTX to test connectivity. You can also use SDKs or other tools. Before connecting, make sure:
- You have the deployment host (MQTT endpoint)
- You’ve created authentication credentials
To test the connection:
- Download and open MQTTX.
- Create a new connection using your deployment info.
- Click Connect to verify success.
Full guide: Use MQTTX to Test Connection