Configure SSO with Azure AD Authorization
If you manage your enterprise accounts using Azure Active Directory (Microsoft Enterprise ID, referred to as Azure AD), you can choose Azure AD as the authorization server for EMQX Cloud and enable Single Sign-On (SSO). Additionally, you need to configure OpenID Connect (OIDC) settings in Azure AD. This page provides examples of OIDC configurations in both EMQX and Azure AD to help you understand the end-to-end configuration process for connecting an Enterprise Identity Provider (IdP) with EMQX Cloud to enable SSO.
Prerequisites
- An EMQX Cloud Root account.
- An Azure AD tenant, and an administrator user within the Azure AD tenant.
- You need to perform Azure AD operations using an administrator user (with global admin privileges). For guidance on creating users and authorizing users in Azure AD, refer to Azure AD documentation.
Step 1: Enable SSO in EMQX Cloud
- Log in to Cloud Console using your EMQX Cloud Root account.
- Click Settings from the left menu, and select the Single Sign-On tab.
- Click Enable SSO to enter the SSO configuration flow.
- Select Azure AD as the OIDC Identity Provider and click Next.
- You can now view the Redirect URL on the page; this address will be used in the subsequent configuration.

Step 2: Register a New Application in Azure AD
Log in to Azure Portal using your administrator user account.
Click the icon in the upper-left corner to navigate to the Azure Active Directory product page.
Click App registrations in the left menu.
On the main page, select New registration. Fill in or select the following information:
Enter the name of the application you want to register, for example,
emqx-cloud-sso.Select the Azure tenant that will use this application.
In the Redirect URI (optional) dropdown, select
Weband enter the redirect URI from Step 1.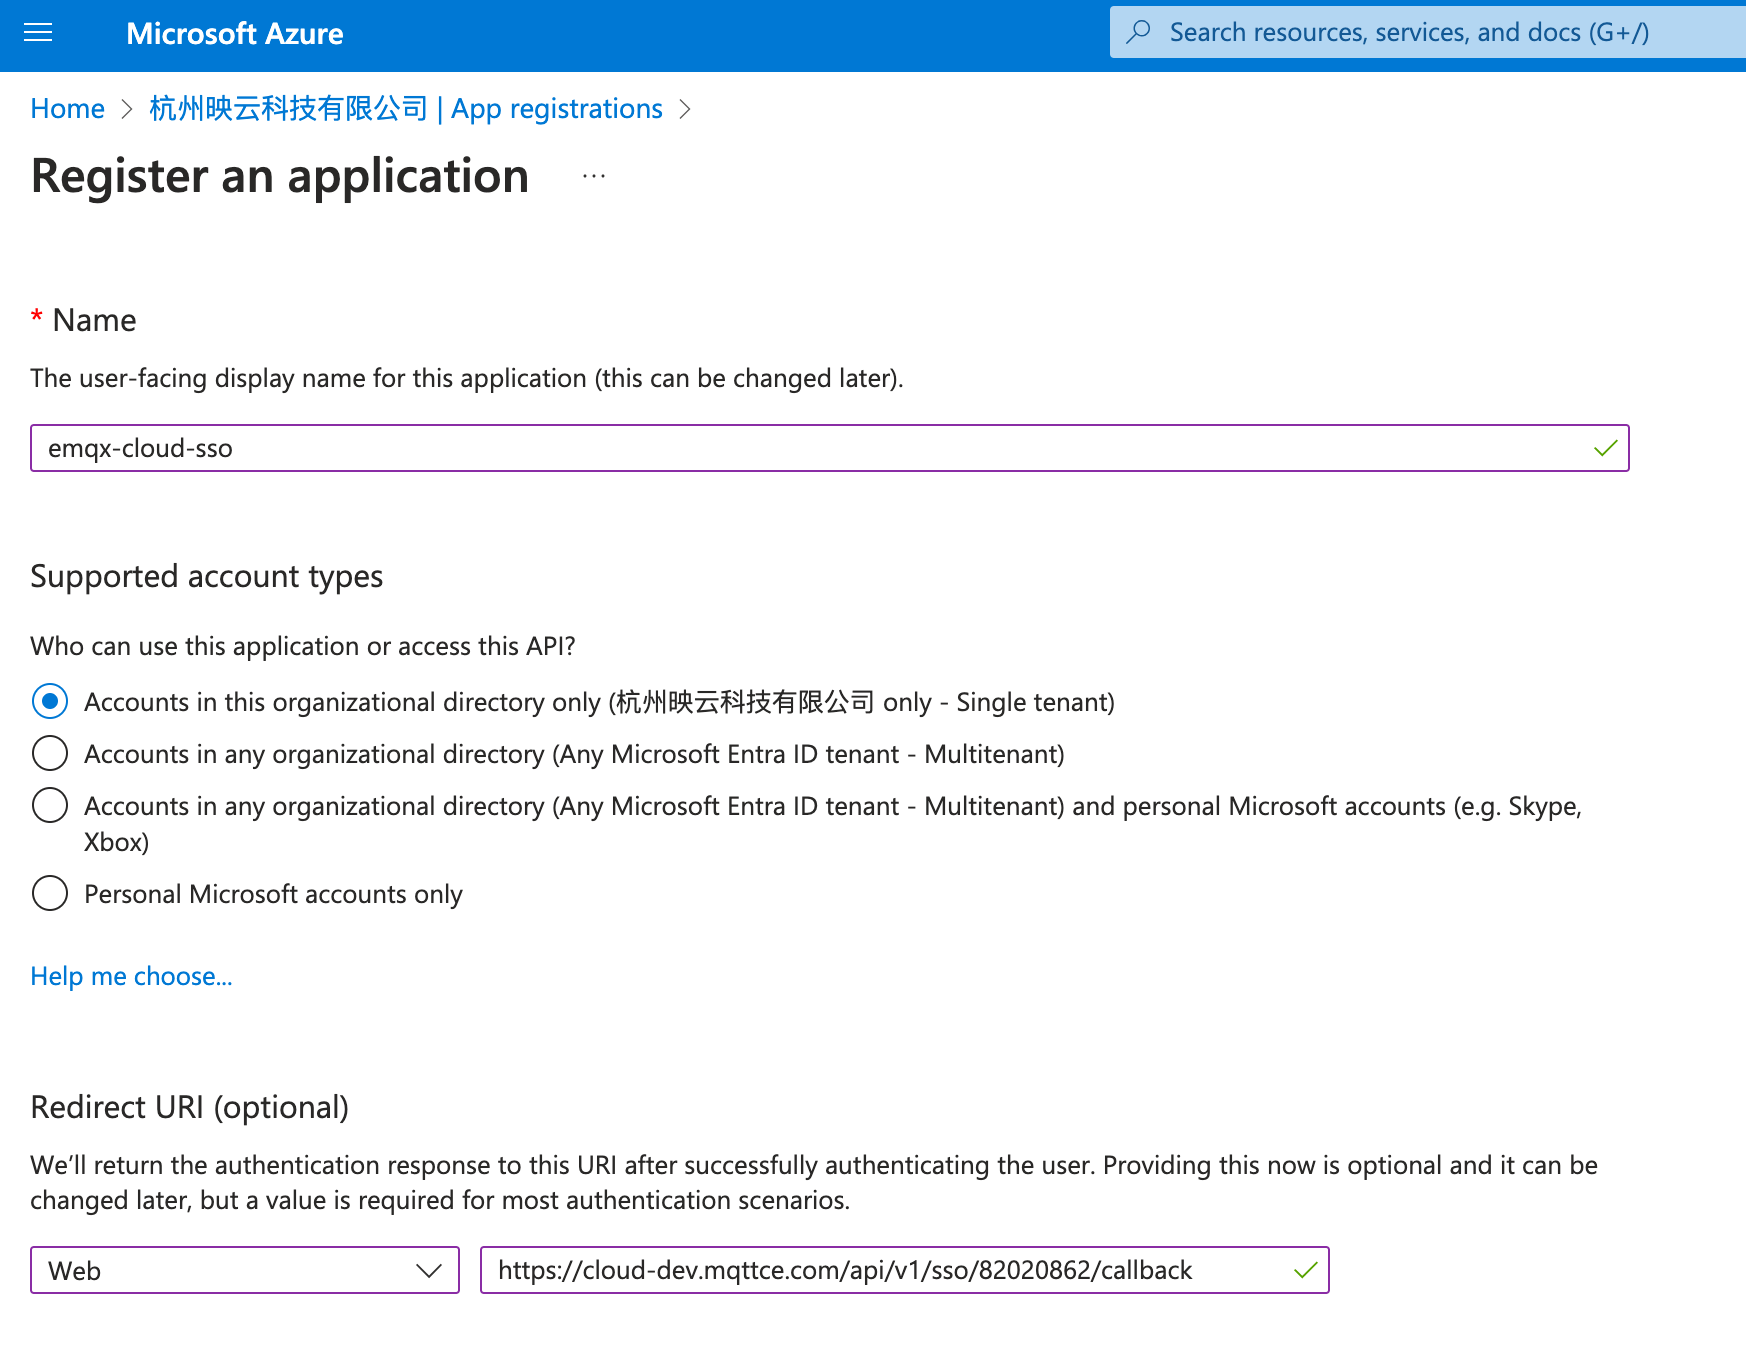
After filling out the information, click Register to access the Overview page for the newly registered application
emqx-cloud-sso.
Step 3: Configure SSO Information in EMQX Cloud
Go to the Configure SSO page in EMQX Cloud and follow these steps:
On the Configure SSO page in EMQX Cloud, configure the following information:
Tenant ID: Enter the Directory (tenant) ID from the
emqx-cloud-ssoapplication Overview page in Azure Portal.Client ID: Enter the Application (client) ID from the
emqx-cloud-ssoapplication Overview page Azure Portal.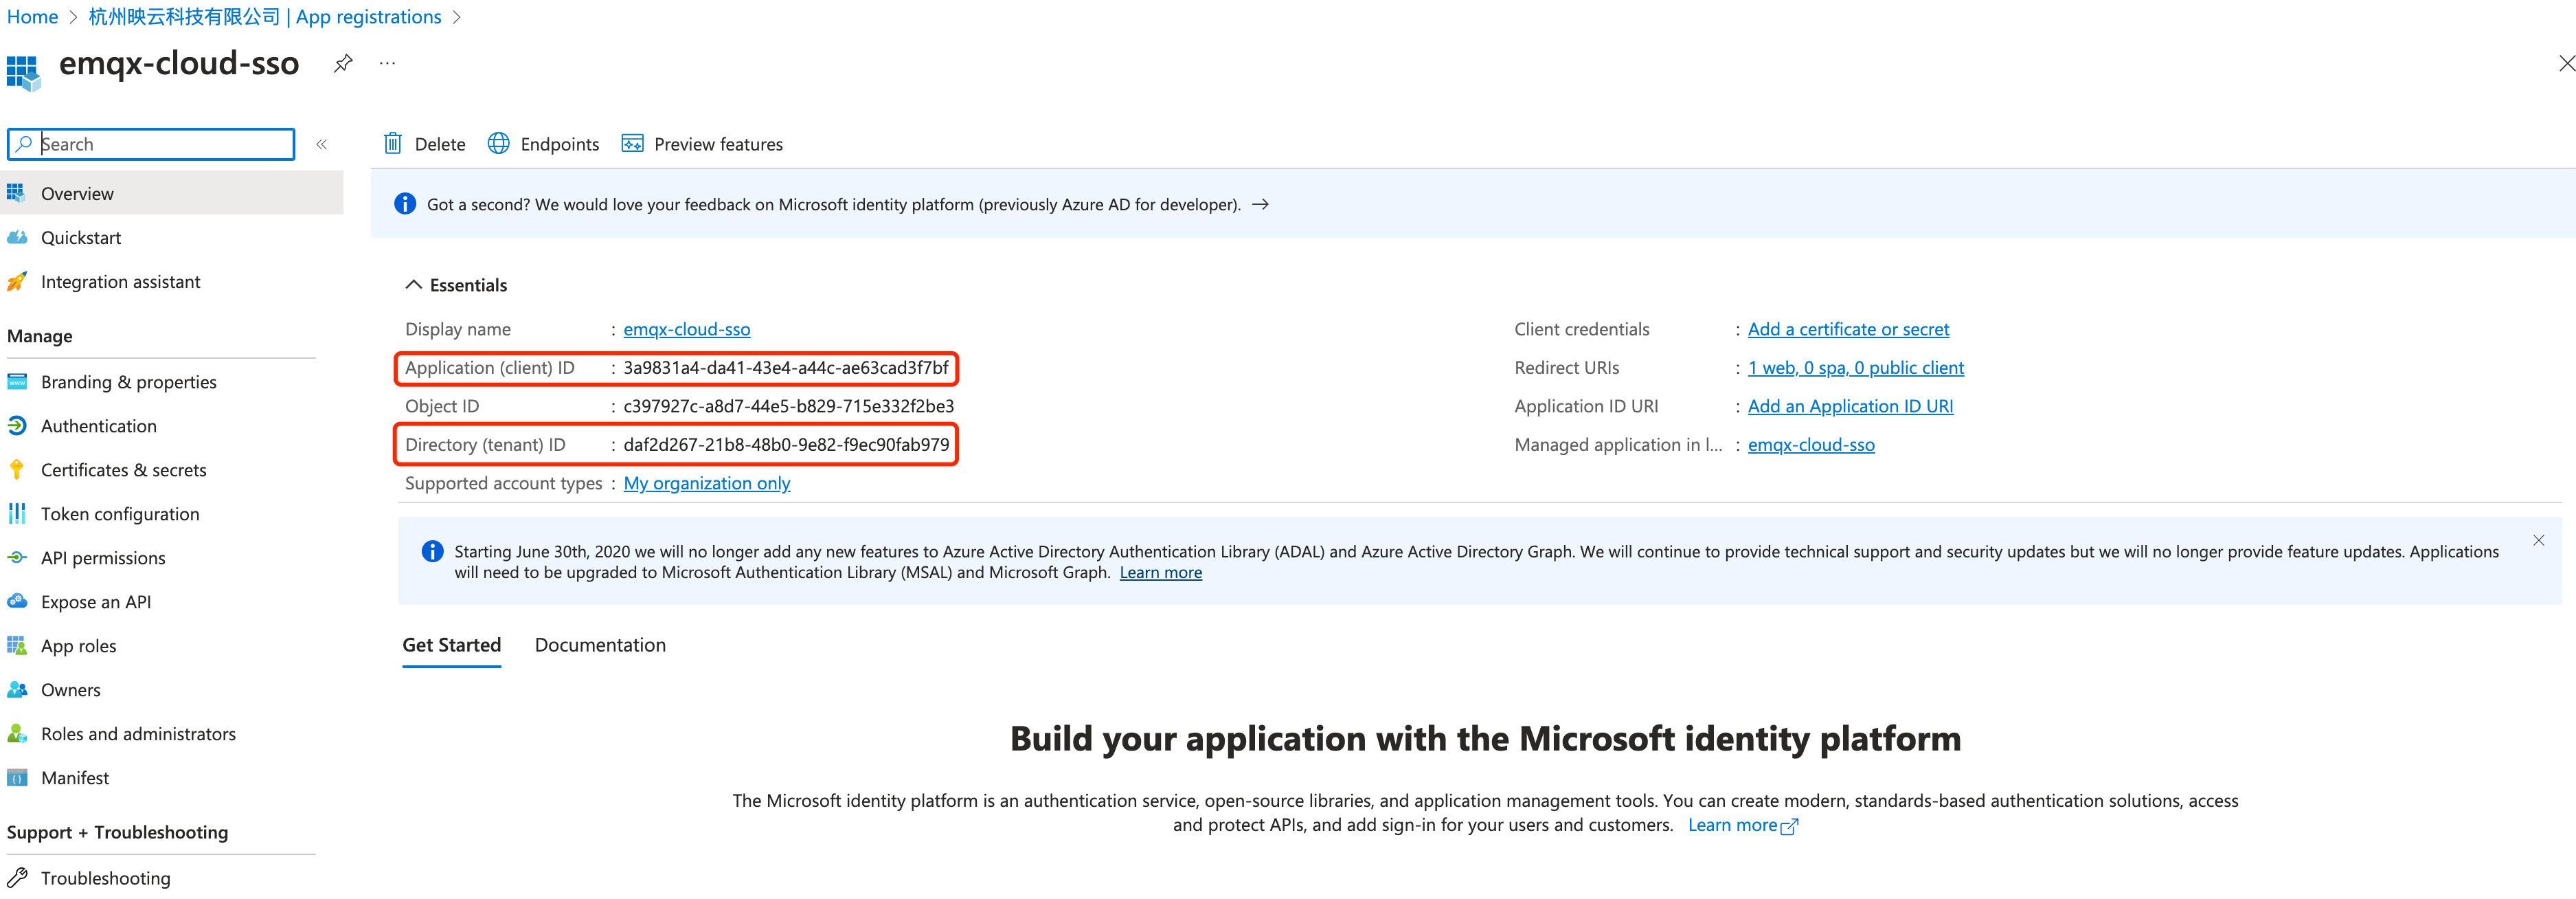
Select Certificates & secrets from the left navigation menu in Microsoft Azure.
Select Client secrets on the main page and click + New client secret. Fill in the description and expiration date to generate a Client secret. Copy the Value.
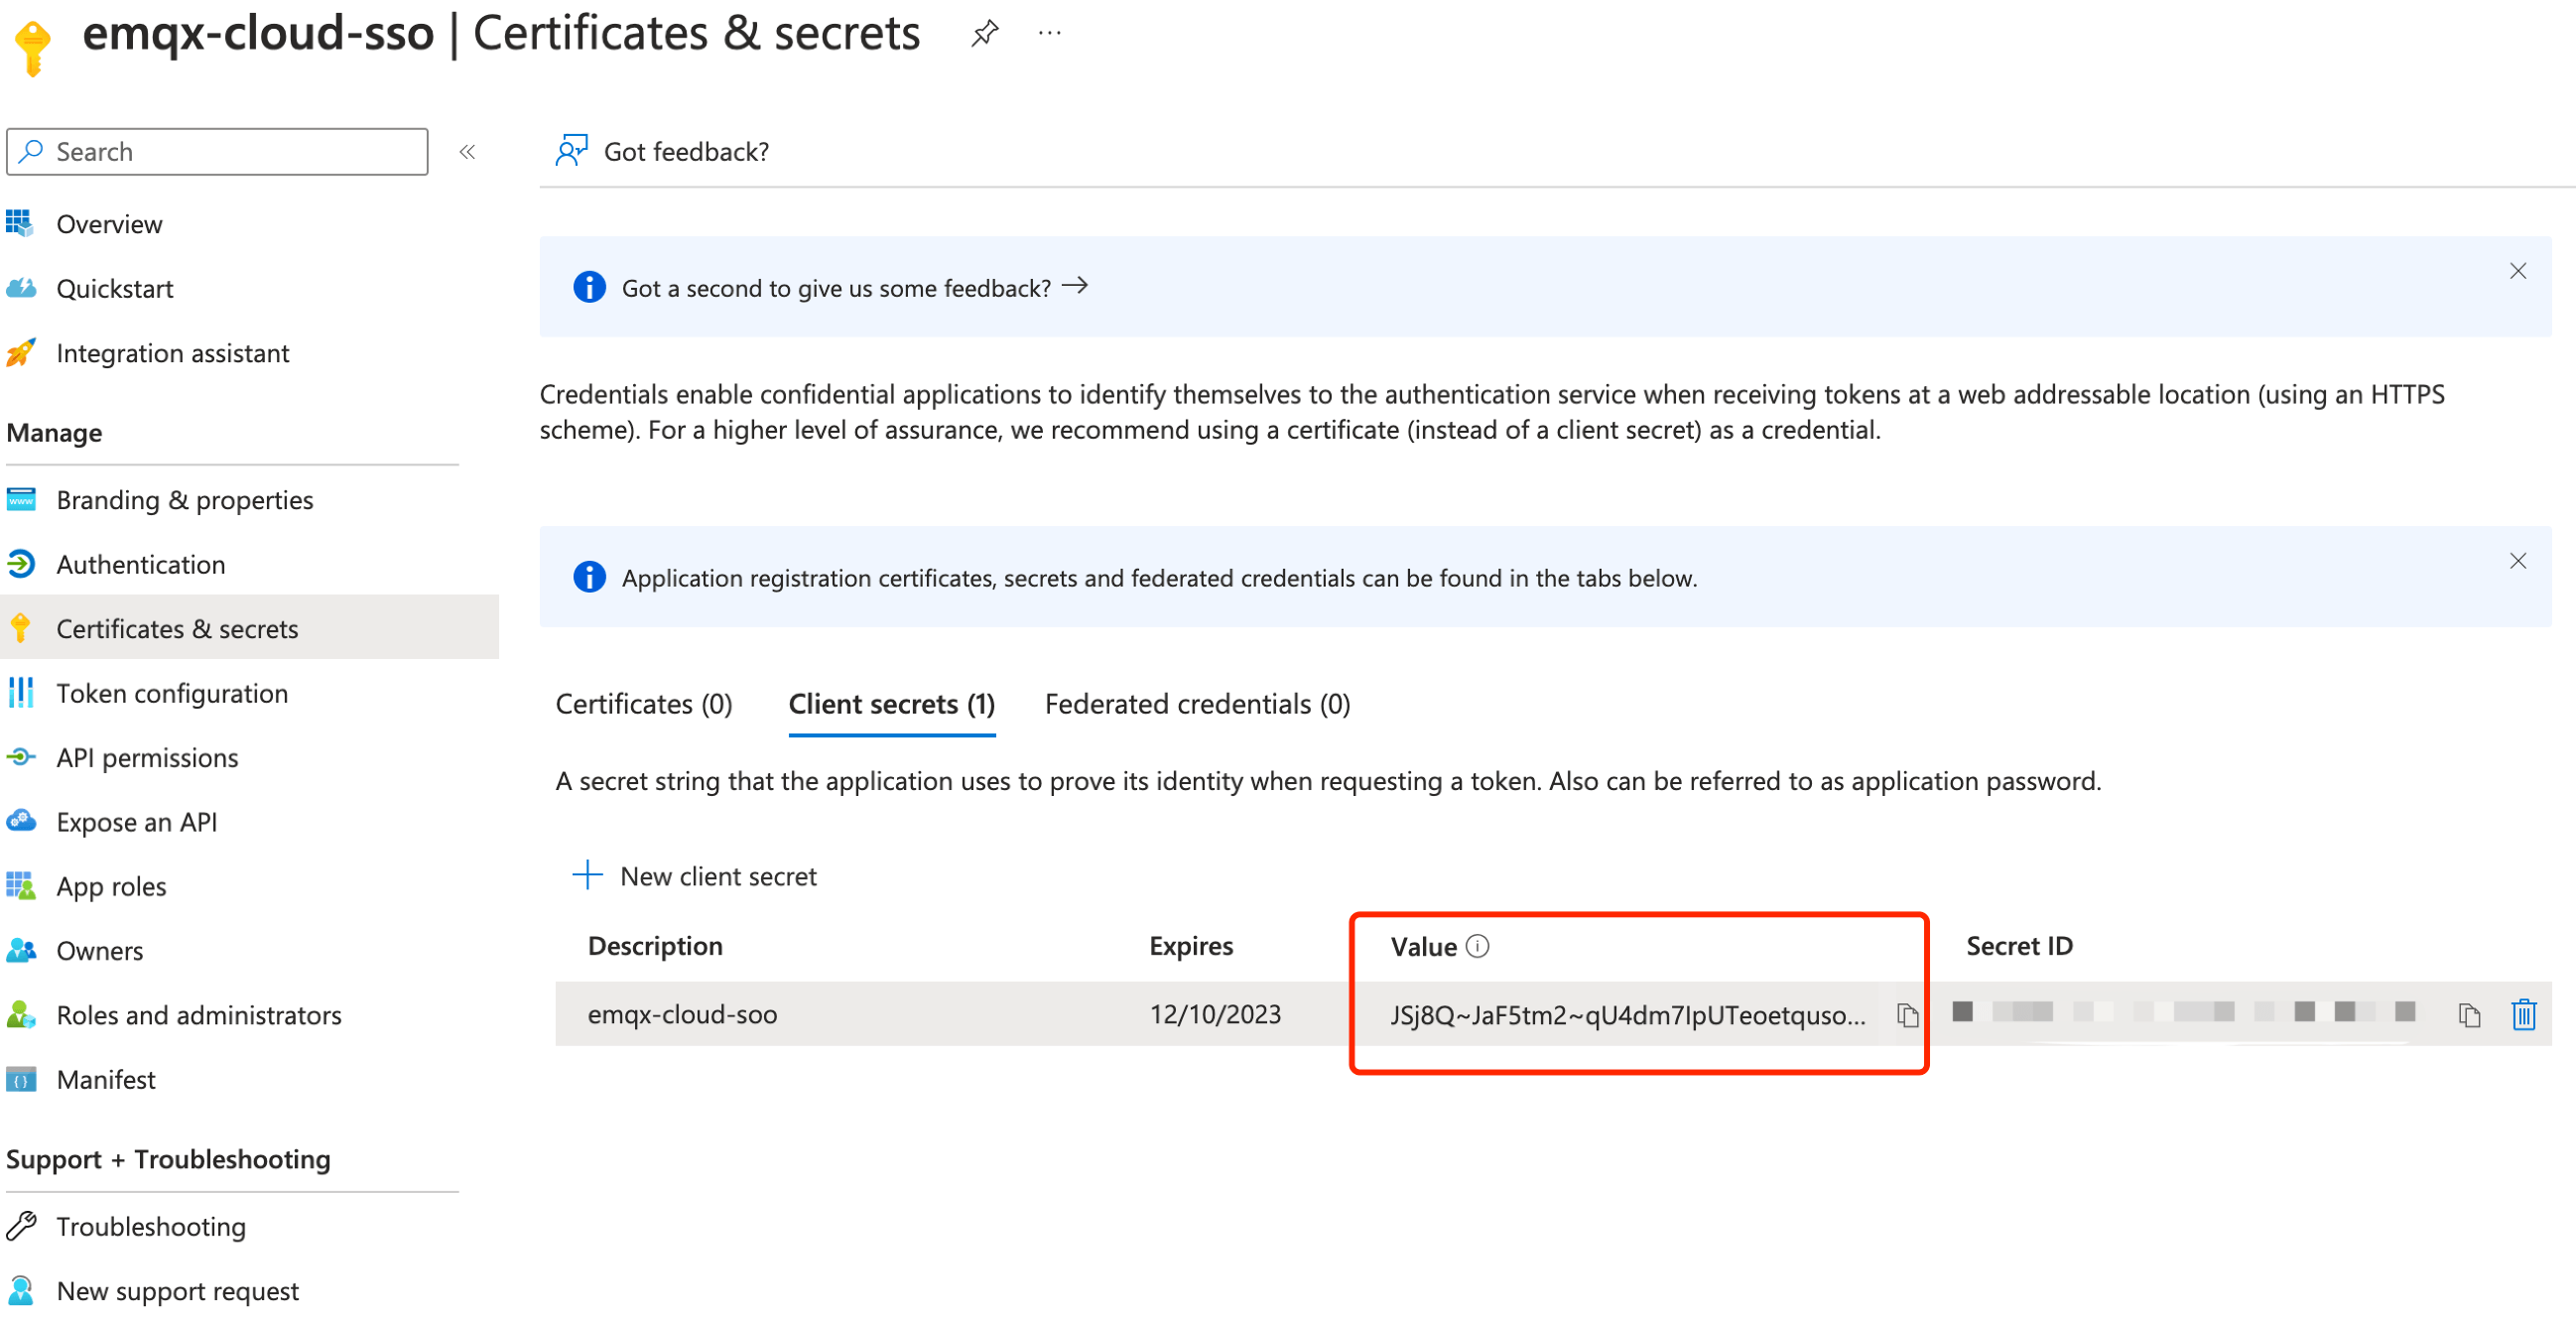
Paste the Value into the Client Secret field on the EMQX Cloud Config SSO page.
Click Confirm to complete the configuration.
If configured successfully, you will reach a page confirming that SSO has been successfully enabled, and you will get the SSO login URL.
Step 4: Create Users and Authorize the Application in Azure AD
On the
emqx-cloud-ssoapplication Overview page in Azure Portal, click Go to Enterprise applications in the lower-right corner.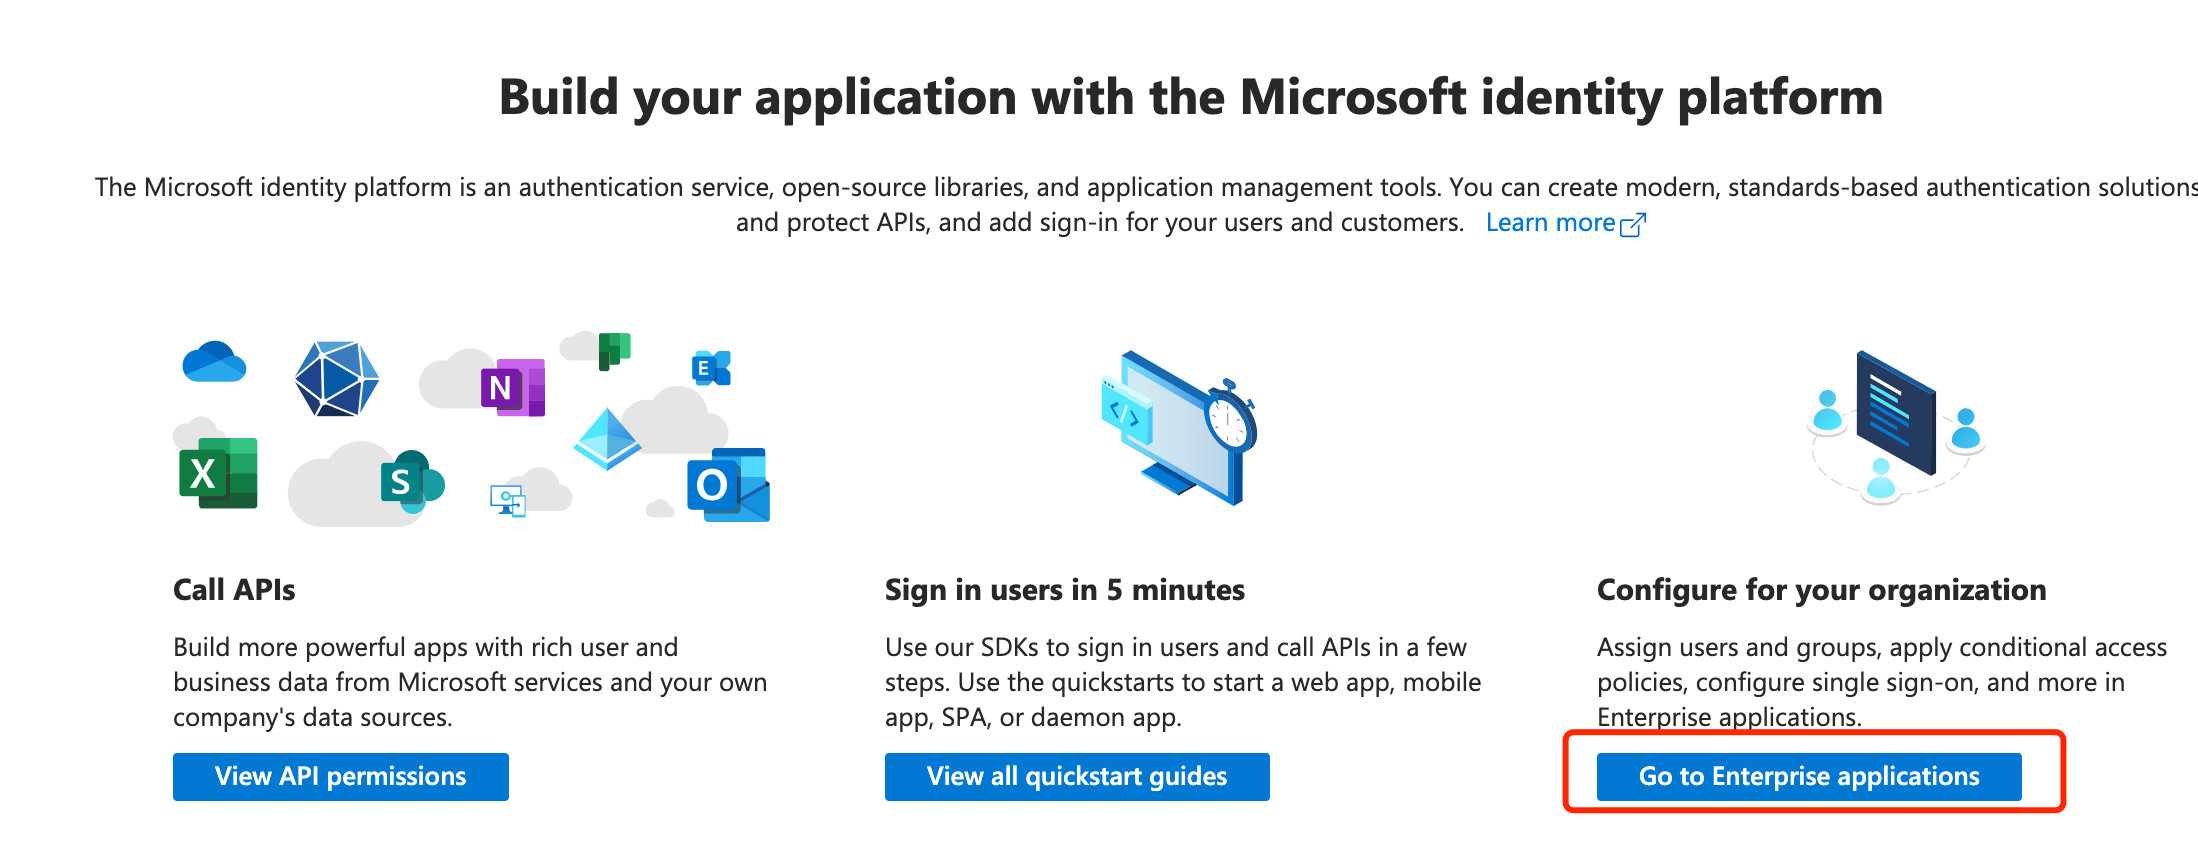
In the left navigation menu, click Users and groups.
On the main page, select + Add user/group, and select the users you want to authorize, such as Jack@emqx.io. You can also authorize user groups.
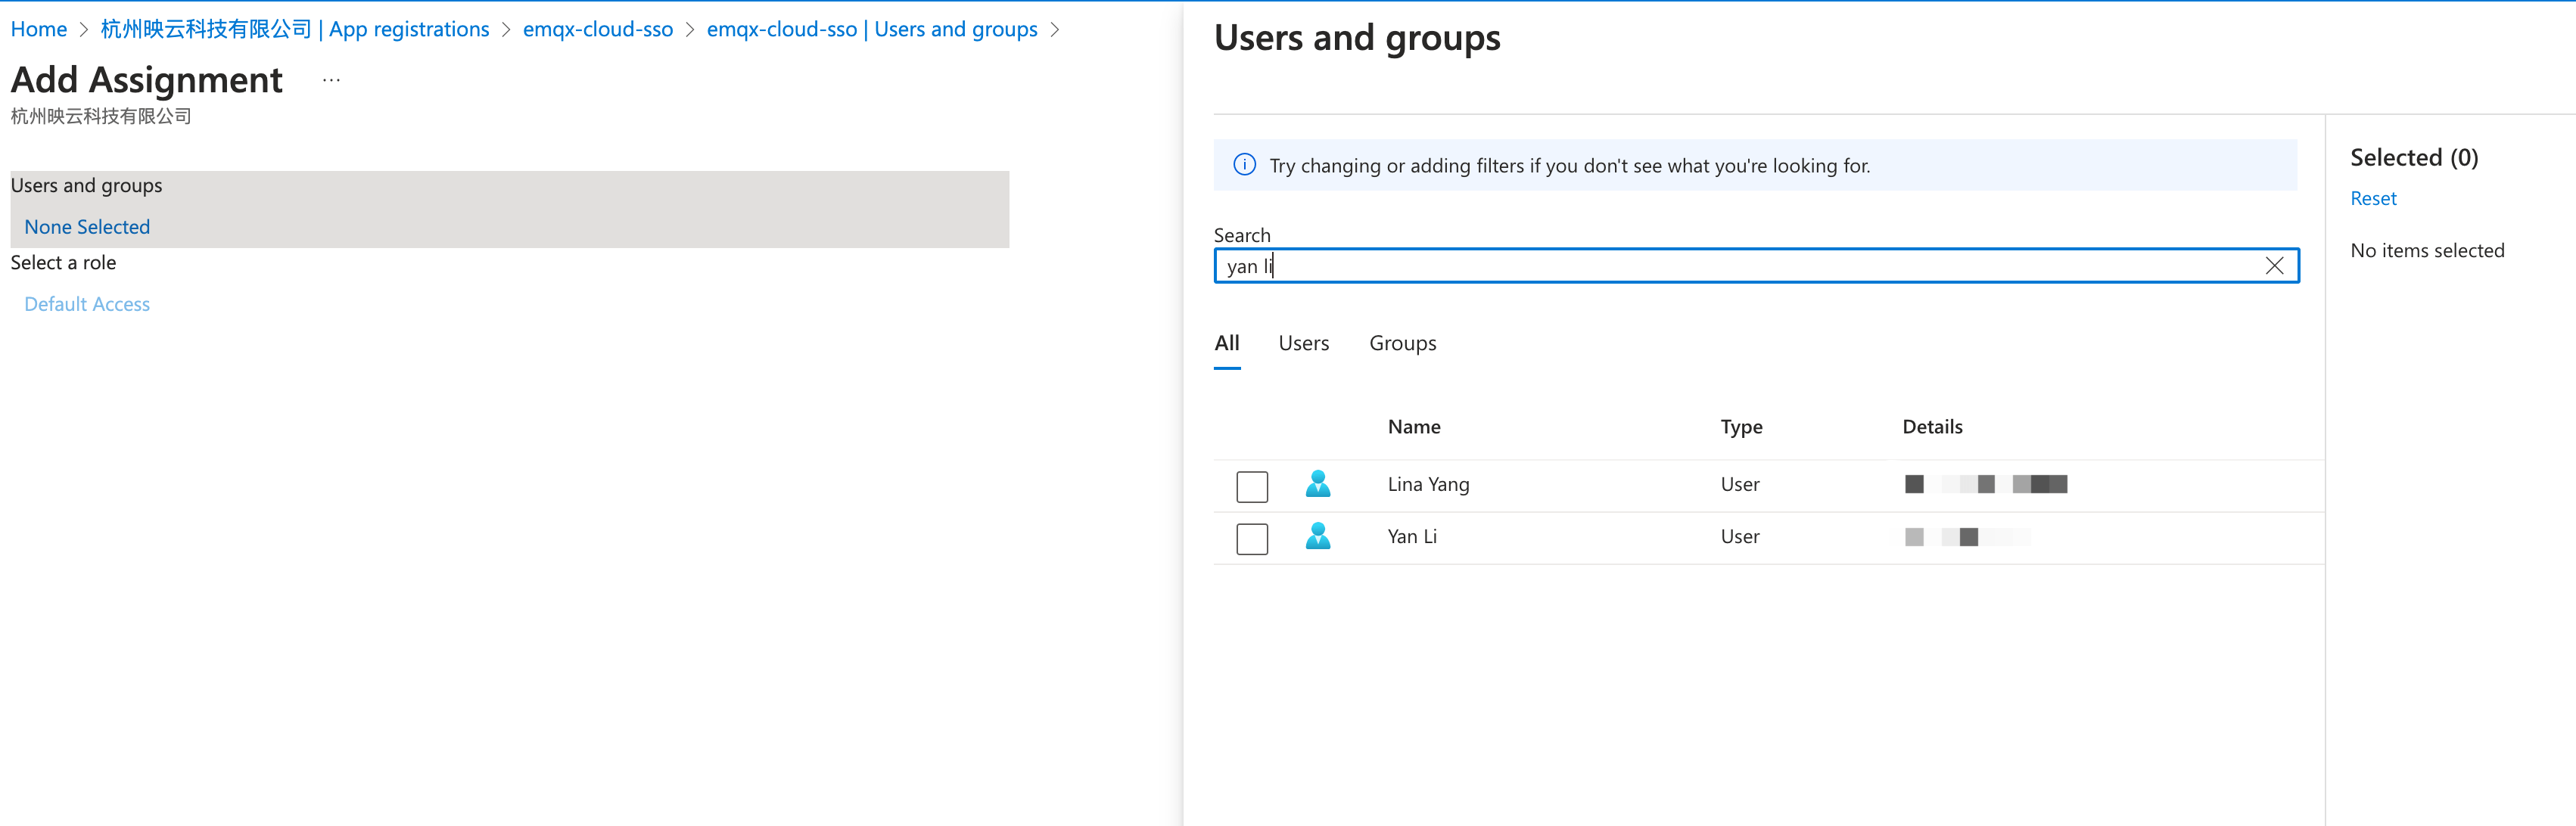
- After selecting users, click Assign to complete user authorization.
Step 5: Create a Member account in EMQX Cloud
In the Platform Console, click Team from the left menu.
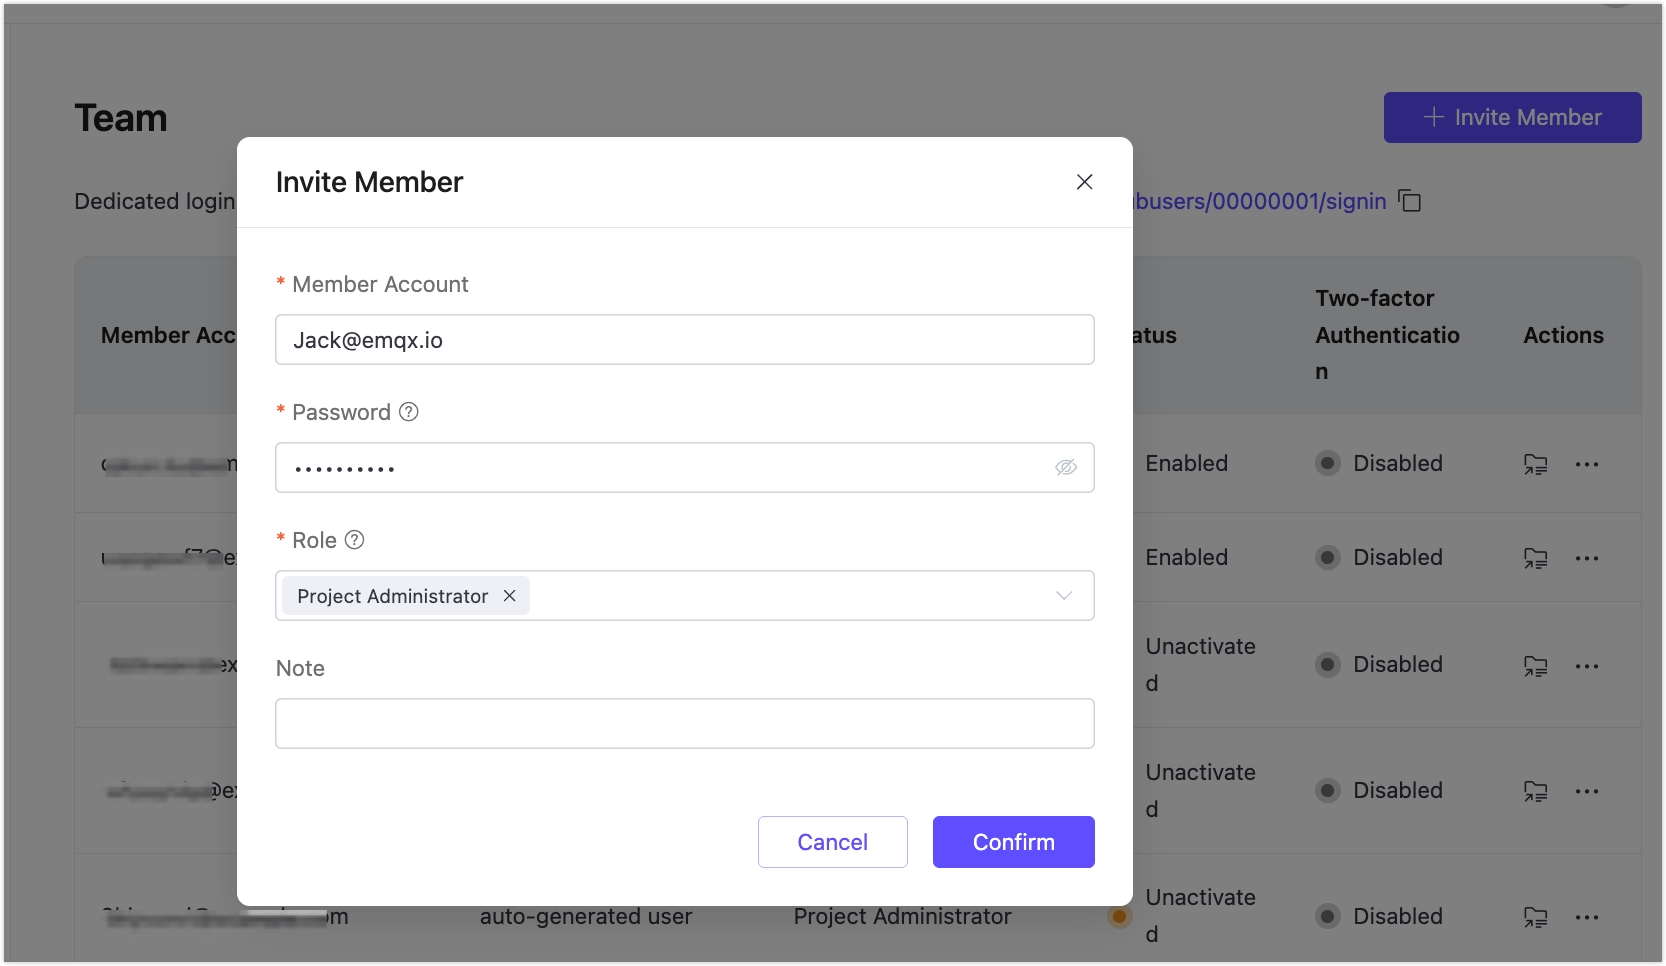
Click + Invite Member in the upper right corner.
In the Invite Member pop-up, enter the same email account that was authorized in Azure AD: Jack@emqx.io. Assign a role to this account. Refer to Roles and Permissions for setting different roles.
Open the dedicated URL for team members shown on the Teams page. Click Log in through an identity provider, and the browser will redirect to the Microsoft login page.
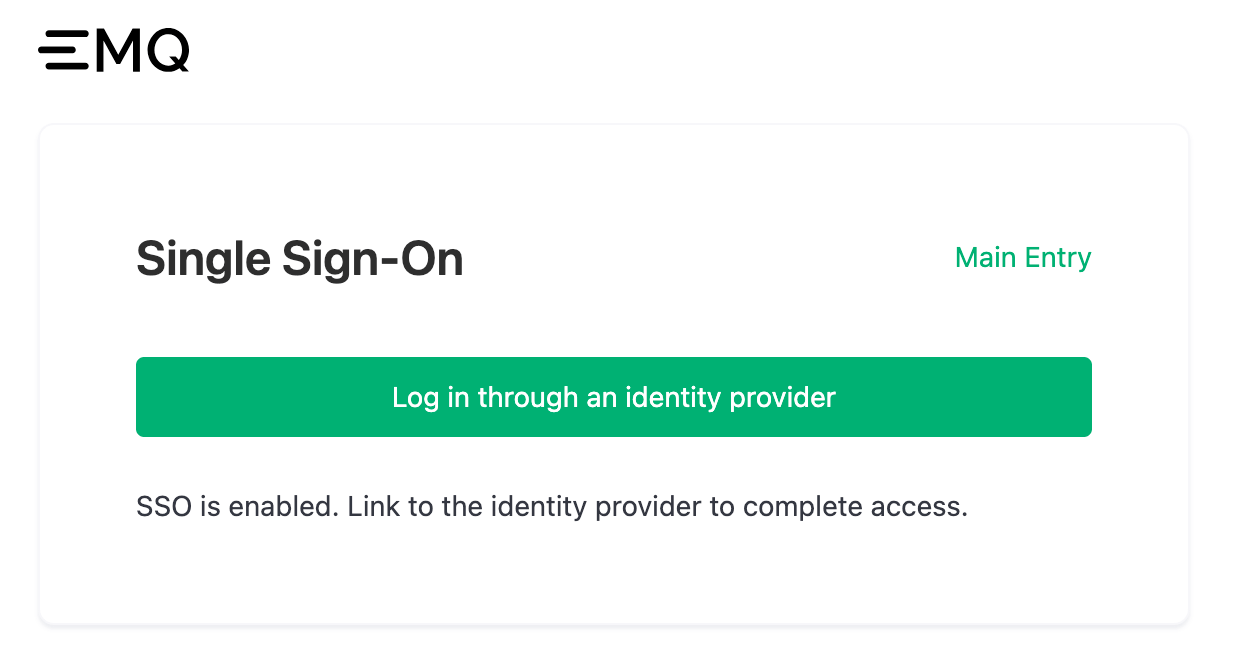
Complete the login process on the Microsoft login page, and the browser will automatically return to EMQX Cloud to complete the SSO login.