Create a Serverless Deployment
EMQX Serverless Plan offers a cost-effective and efficient way for developers or small businesses to test and develop IoT applications. This plan is based on secure and scalable clusters and can be easily deployed in just a few simple steps.
One of the biggest advantages of using Serverless deployment is that it is billed based on actual usage. For more detailed information on the billing system, see the Pricing section in Pricing and Billing.
Create a Deployment
Log in to the EMQX Cloud console.
If this is your first time using the platform, you need to start by creating a project. For detailed steps, see Create a Project. If you’ve already created a project, you can skip this step.
You can either click New Deployment on the Overview page of the Console to start the creation process directly, or click the project card where you want to create the deployment, and then click New Deployment on the project page to proceed.
In the Choose Plan step, select Serverless.
Specify the monthly Spend Limit for your Serverless deployment. This limit helps manage usage and prevent incurring charges beyond the complimentary quota. The spend limit can also be modified after the deployment is created.
- The default spend limit is set to
0, meaning only the free quota will be used. - If set greater than 0, usage beyond the free quota may incur charges. In this case:
- The View Payment Method button appears in the Summary section.
- Two options are available to define the behavior when the spend limit is reached:
- Suspend the deployment: The deployment will be automatically suspended once the spend limit is reached.
- Remind me and keep billing: You will be notified, and the deployment will continue running with billing enabled.
- The default spend limit is set to
In the Deployment Name & Project section:
- Enter a Deployment Name.
- Enter a Project Name, or it is automatically pre-filled based on the project you're currently in. You can switch to a different project by clicking the project name at the top of the page. Note that the project cannot be changed after the deployment is created.
Review the deployment information in the Summary section:
- If Spend Limit > 0, click View Payment Method to view your payment info.
- If you have a promo code, click Redeem Coupon to enter the code. Once successfully redeemed, the corresponding coupon will be added to your account and automatically applied to eligible charges.
Check the box I have read and accept the EMQX Serverless Usage Terms, then click Deploy.
Your deployment will begin provisioning. You can monitor its progress directly from the EMQX Brokers page. Once the status becomes Running, your deployment is ready for use.
View Deployment Information
Once your deployment is created, it will appear in the EMQX Brokers section on the Overview page.
Click the deployment card to access the Deployment Overview page. On this page, you can:
- View real-time status
- Copy connection information
- Access all deployment features via the left-hand menu
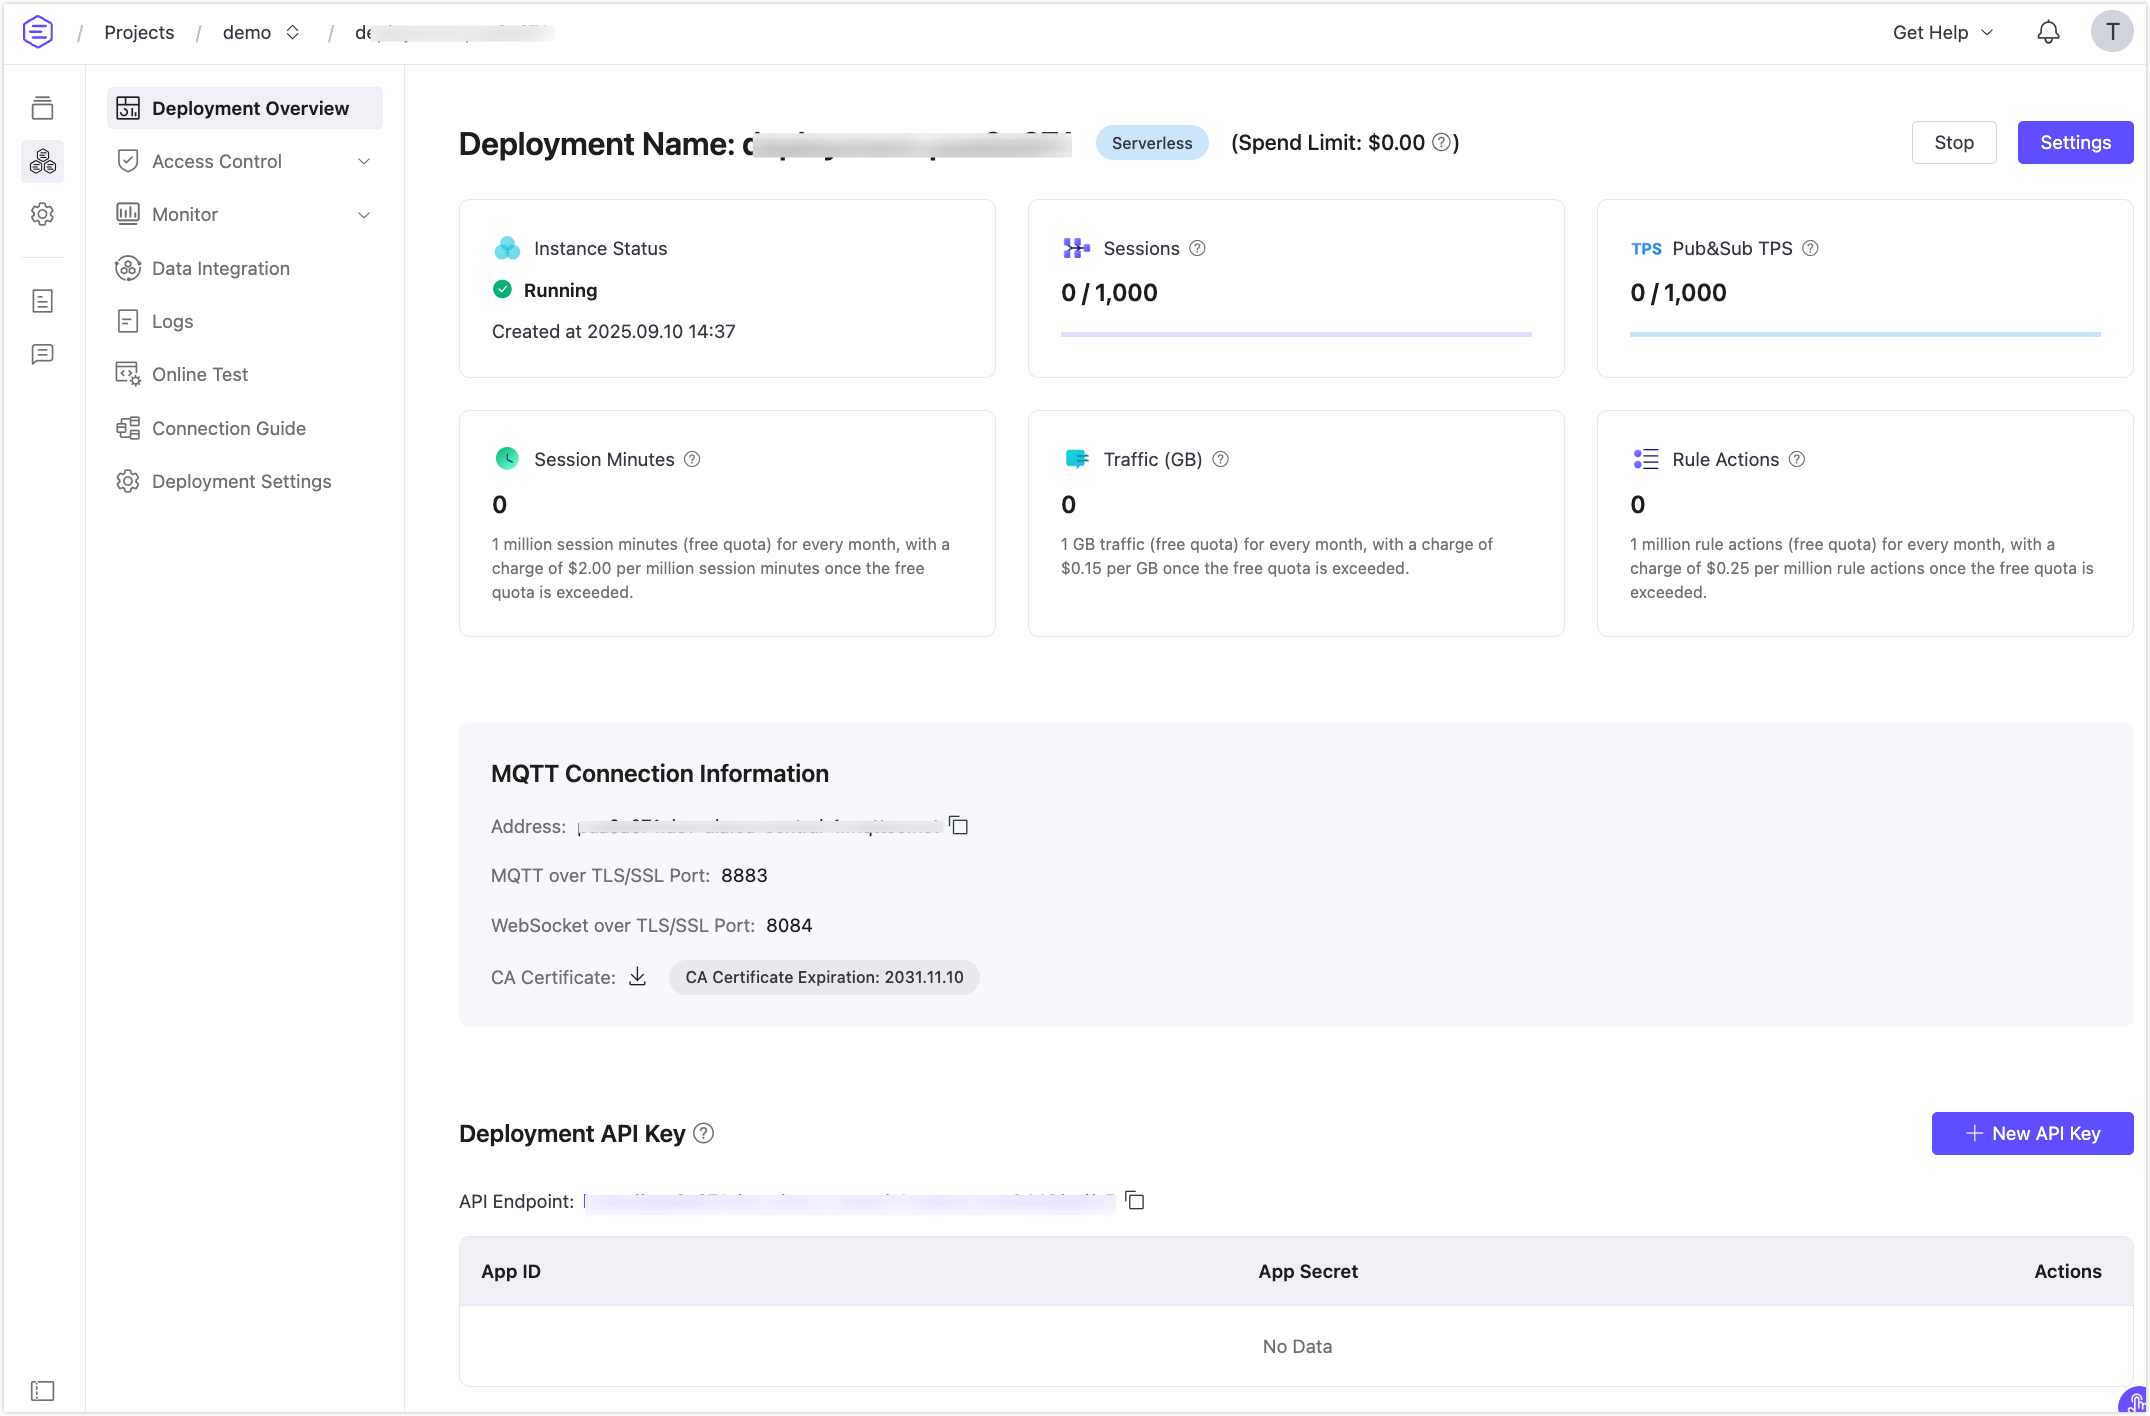
Basic Information
- Instance Status: Running status and duration of operation.
- Sessions: Current number of connections and maximum connection limits.
- Pub&Sub TPS: Current messages sent and received per second, as well as the TPS limit.
- Session Minutes: Total number of session minutes used this month. The count of this value has a delay of 1 hour.
- Traffic: Usage information for the deployed traffic, including monthly usage and free quota.
- Rule Actions: The number of rule actions executed this month. The count of this value has a delay of 1 hour.
- Spend Limit: The maximum spending limit set for the deployment in the current month. For more information, see the Spend Limit settings.
Connection Information
Address: The address for the client/terminal device to connect to EMQX Cloud.
Ports:
8883(mqtts) and8084(wss) are enabled by default. Check out the connection guide to learn more.CA Certificate: If the client needs to verify the server's CA, click to download this certificate.
Connect to Serverless Deployment Using MQTTX
EMQX Cloud recommends using MQTTX to test the connection to the deployment, but you can also use your preferred SDK or other tools for connection. Before connecting to the deployment using MQTTX, you first need to obtain the deployment connection address (Host) and port (Port) and user authentication information.
Get the connection information. Click Overview on the left navigation menu to find the deployment connection address and port.
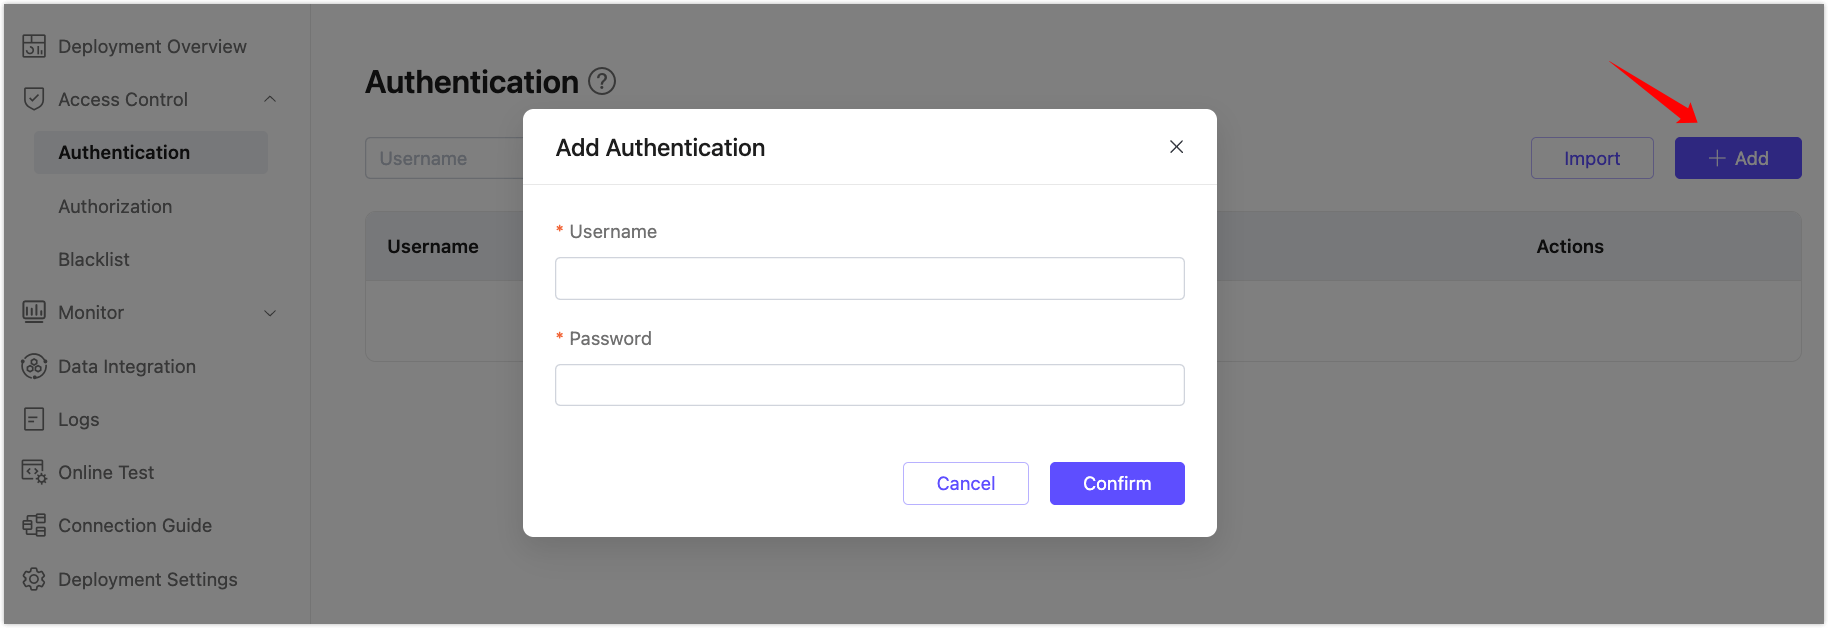
Add client authentication information. Click on Access Control -> Authentication in the left menu, click the Add button, enter the username and password for the client or device, and then click Confirm.
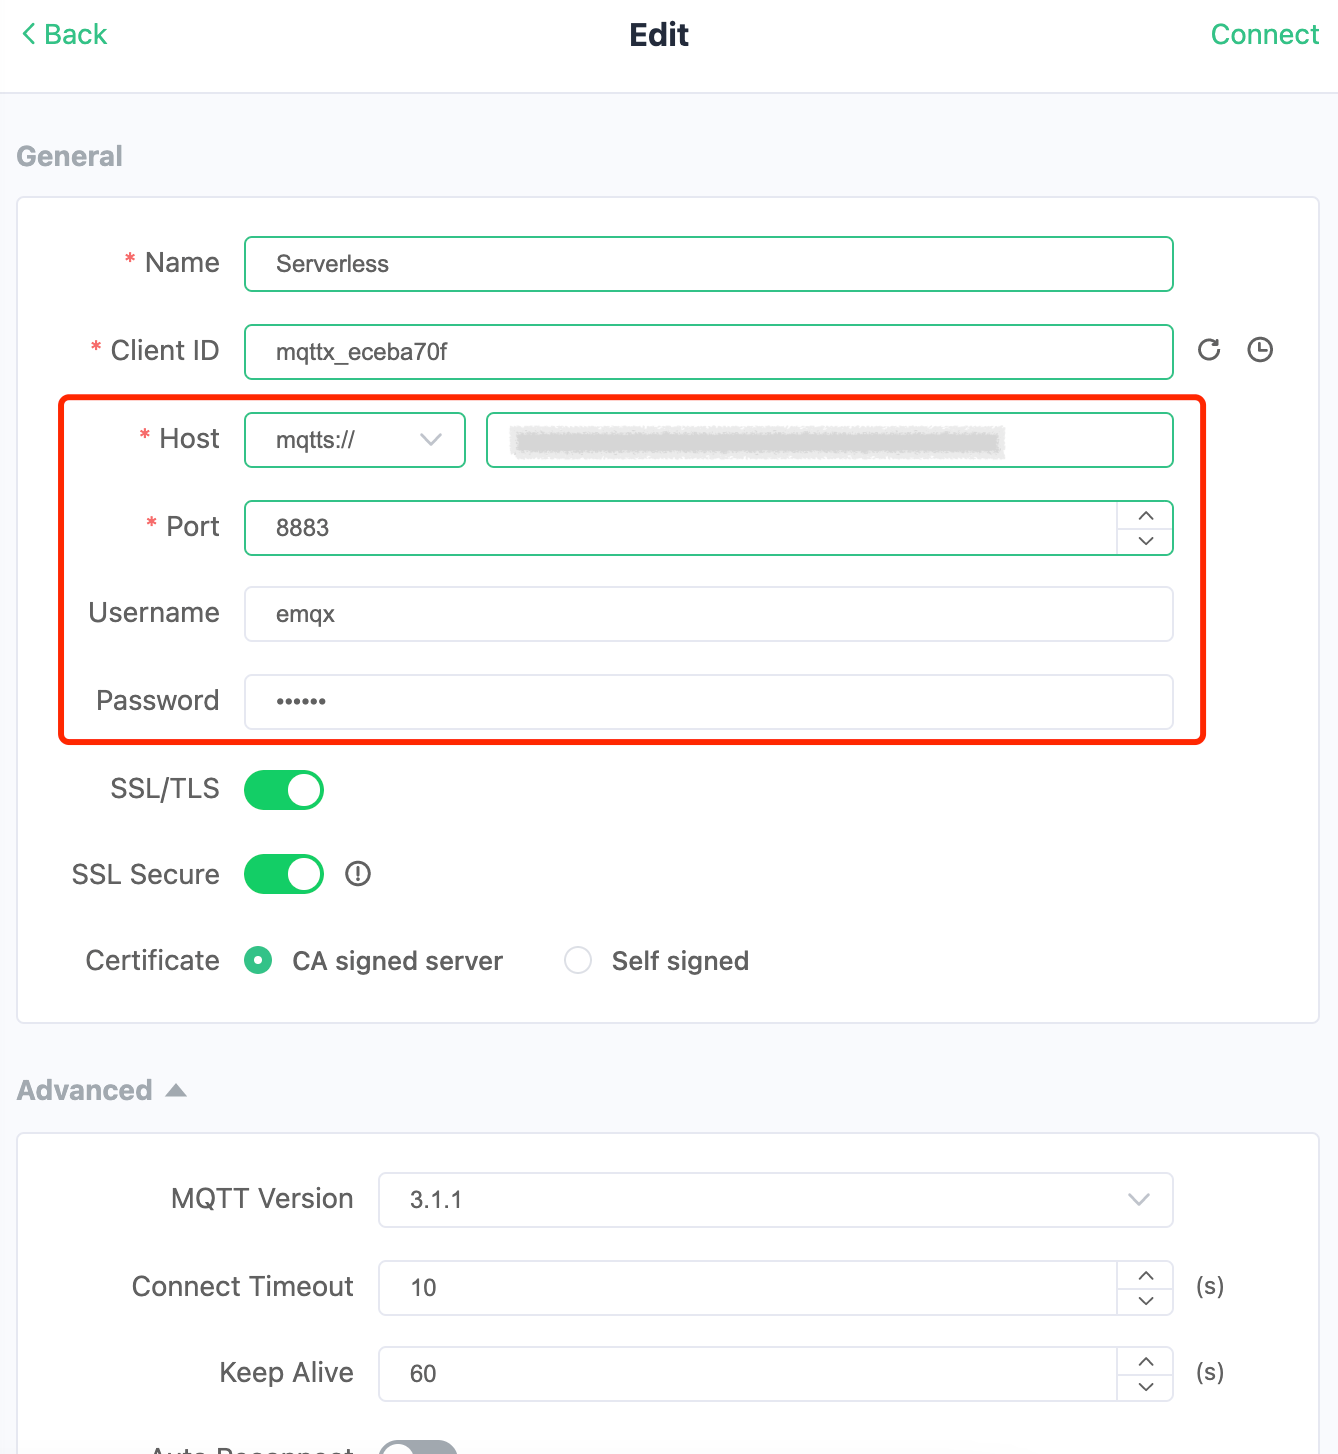
Set up the connection information in MQTTX and connect to the deployment.
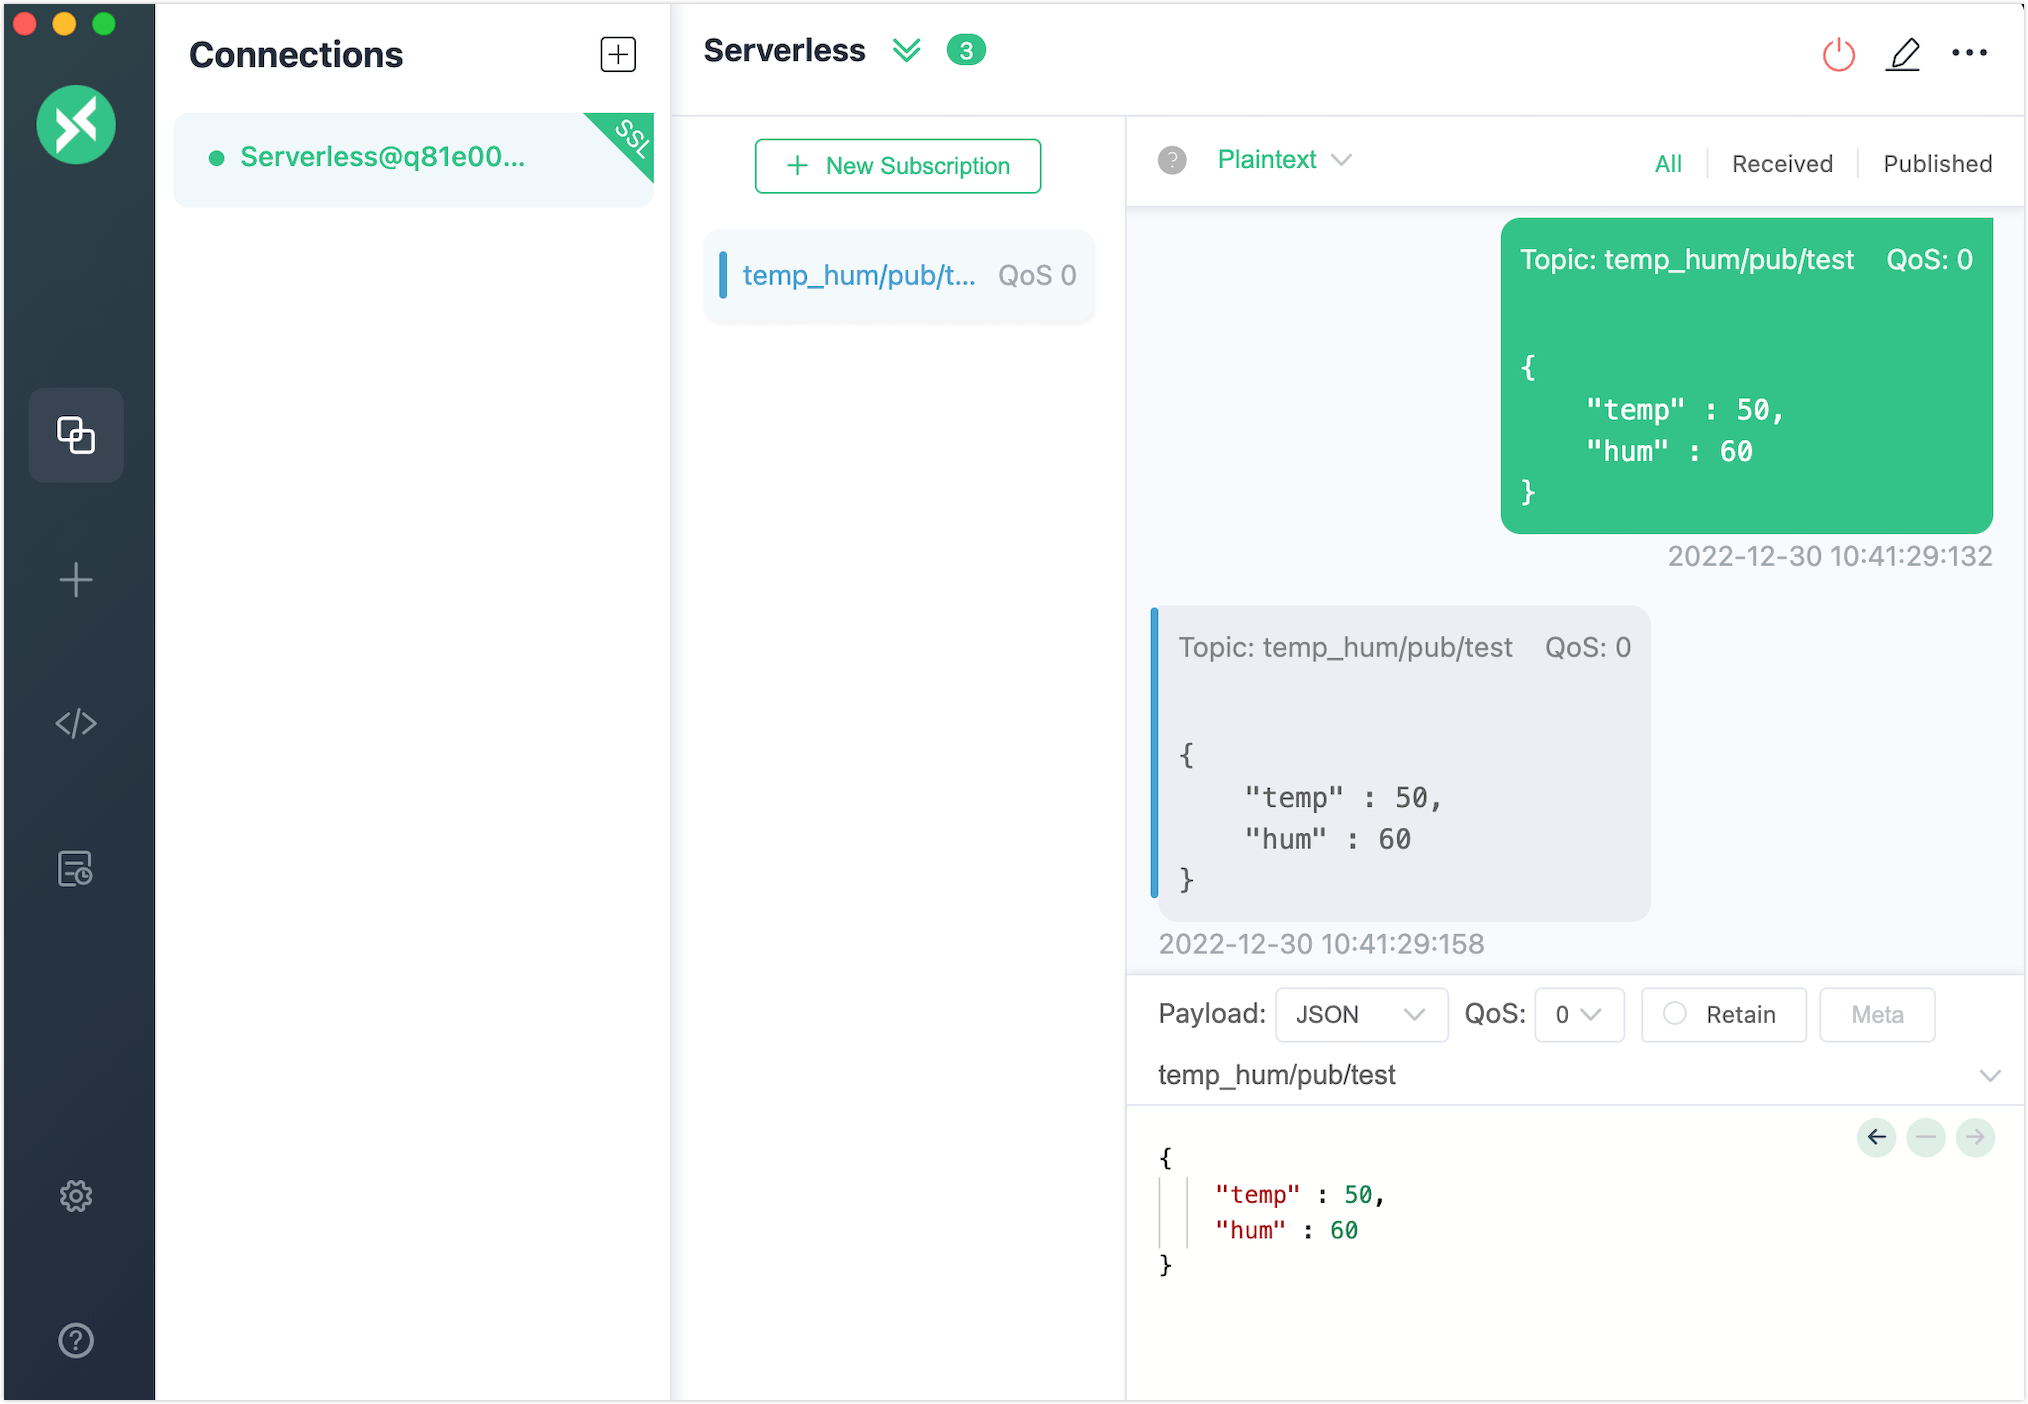
After a successful connection, you can publish and subscribe to messages.
Deployment Stopping and Deletion
Stopped by the system: If there are no active client connections to the deployment for 30 consecutive days, the deployment will be stopped by the system. If you wish to continue using it, please manually enable it in the console.
Deleted by the system: If the deployment is not activated within 30 days after being stopped, it can be deleted.