Default Authorization
Default authorization is based on a built-in database, offering users a low-cost, plug-and-play authorization method. This document provides a detailed guide on configuring client ID, username, and quota limits and using whitelists and placeholders for more advanced permission control.
Add Authorization Information
Note
The maximum number of entries for built-in authorization is twice the number of deployment connections, with an upper limit of 100,000. If this limit is exceeded, please use an external ACL.
Authorization can be controlled at three levels:
- Client ID: Authorization validation for a specific client ID.
- Username: Authorization validation for a specific username.
- All Users: Authorization validation based on topics for all users.
Select + Add on the Client Authorization page to add new authorization information based on the current category.
Add Client ID Authorization
Under the Client ID tab, create authorization rules for specific client IDs.
- Client ID: The client to which this authorization rule is applied.
- Topic: Configure the topic corresponding to this rule.
- Action: Configure the operation corresponding to this rule. Options:
Publish,Subscribe,Publish and Subscribe. - Permission: Whether to allow the current client to perform the requested operation; Options:
Allow,Deny.
Add Username Authorization
Under the Username tab, create authorization rules for specific usernames.
- Username: The username applicable to this rule.
- Topic: Configure the topic corresponding to this rule.
- Action: Configure the operation corresponding to this rule. Options:
Publish,Subscribe,Publish and Subscribe. - Permission: Whether to allow the current user to perform the requested operation; Options:
Allow,Deny.
Add Topic Authorization
Under the All Users tab, create authorization rules for specific topics.
- Topic: Configure the topic corresponding to this rule.
- Action: Configure the operation corresponding to this rule. Options:
Publish,Subscribe,Publish and Subscribe. - Permission: Whether to allow the current topic to perform the requested operation; Options:
Allow,Deny.
Use Placeholders
When using placeholders in a topic, you can dynamically replace the current client information in the topic-matching rules. The supported placeholders are:
${clientid}${username}
If you want to restrict all users to only subscribe to or publish specific topics, you can set it like this:
- Username
${username}, Topicxx/${username}/report - Client ID
${clientid}, Topicxx/${clientid}/report

Placeholders can only be used to replace an entire field in a topic, e.g., a/b/${username}/c/d, but cannot be used to replace a part of a field, e.g., a/b${username}c/d.
Security Recommendation
When using ${clientid} or ${username} in topic authorization rules, avoid using MQTT wildcard characters as client IDs or usernames.
Because + and # are MQTT wildcard characters, they may affect topic matching behavior when used in placeholder-based authorization rules. For example, the rule device/${clientid}/# is resolved to device/+/# when the client ID is +, resulting in a broader topic matching scope than intended.
To reduce this risk, we recommend adding the following values to the Blacklist as both client IDs and usernames:
+#+/#
For environments with stricter access control requirements, consider enforcing naming conventions that prohibit MQTT wildcard characters in client IDs and usernames.
Import Authorization Information
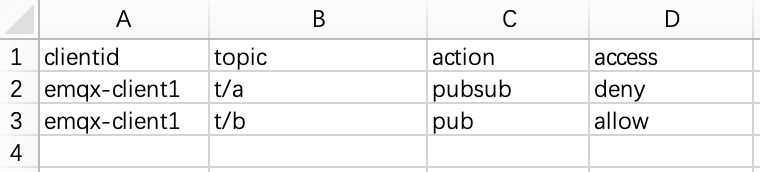
You can use the provided CSV template to import authorization information in batches (not supported for "All Users"). The fields for import are as follows:
clientid: Client IDusername: Usernametopic: Authorized topicaction: Action (sub/pub/pubsub)access: Whether to allow (allow/deny)
You can follow the instructions below to import authorization information in batch:
Click the Import button.
Download the template. An example template file (client ID template as an example) is shown below:
Fill in the authorization information and upload the file.
Click Import.
View Authorization Information
After you add the authorization information, you can view it on the Authorization page. The details of authorization entries can be viewed through three dimensions: Client ID, Username, and All Users (topic).
Edit Authorization Information
Click the edit icon next to the authorization information to modify the current authorization information.
Delete Authorization Information
Click the delete icon next to the authorization information to delete it.
Authorization Mode
EMQX supports two authorization strategies: blacklist mode and whitelist mode.
| Mode | Behavior |
|---|---|
| Blacklist mode (default) | Any publish or subscribe operation that is not explicitly denied will be allowed. |
| Whitelist mode | All publish and subscribe operations are denied by default; only operations explicitly permitted by rules are allowed. |
Authorization rules are evaluated in the following order: Username / Client ID rules first, then All Users rules. The system applies the first matching rule it finds. If no rule matches, the outcome depends on the active mode: allowed in blacklist mode, denied in whitelist mode.
TIP
- Within "All Users" authorization, if multiple rules exist, they are evaluated in the order they were created (earlier rules take priority). Place more specific allow rules (e.g., emqx/#) before a general deny rule (e.g., deny
#) to avoid unintentionally blocking legitimate access. - The combination of Client ID / Username and Topic is unique. For multiple records with the same Client ID / Username and Topic, only the most recent record is effective.
- If you have added extended authorization data sources, ensure that "Default Authorization" is placed last in the authorization order on the extended authorization page.
::: caution Note
For security reasons, the bare wildcard # is not permitted in client subscription topic filters. For example, # is not a valid client subscription topic, whereas t/# is allowed. This restriction applies to client subscribe operations only and does not affect authorization rule topic patterns, where # can still be used (for example, to enable whitelist mode, also add a rule under "Default Authorization" to deny all users from publishing and subscribing to #, as a deny-all fallback rule).
:::
Switch Authorization Mode (Recommended)
Version Note
The one-click authorization mode switch is available for EMQX Dedicated and Dedicated Flex deployments running EMQX version 5.10 or later. This feature is not supported on Serverless deployments.
On supported deployments, you can switch authorization modes directly from the console without configuring topic rules:
- Go to the Client Authorization page.
- Click the Blacklist Mode button in the top-right corner of the page, then select Whitelist Mode to switch.
After switching to whitelist mode, all publish and subscribe operations are denied by default. You must configure Allow rules for clients to access specific topics.
Configure Whitelist Mode via Rules
For deployments that do not support the authorization mode switch (EMQX version earlier than v5.10 or Serverless deployments), you can achieve whitelist behavior by adding a deny-all rule:
Under the All Users tab on the Client Authorization page, add an authorization entry. Enter # in the Topic field, select Publish & Subscribe for Action, select Deny for Permission, and click Confirm.
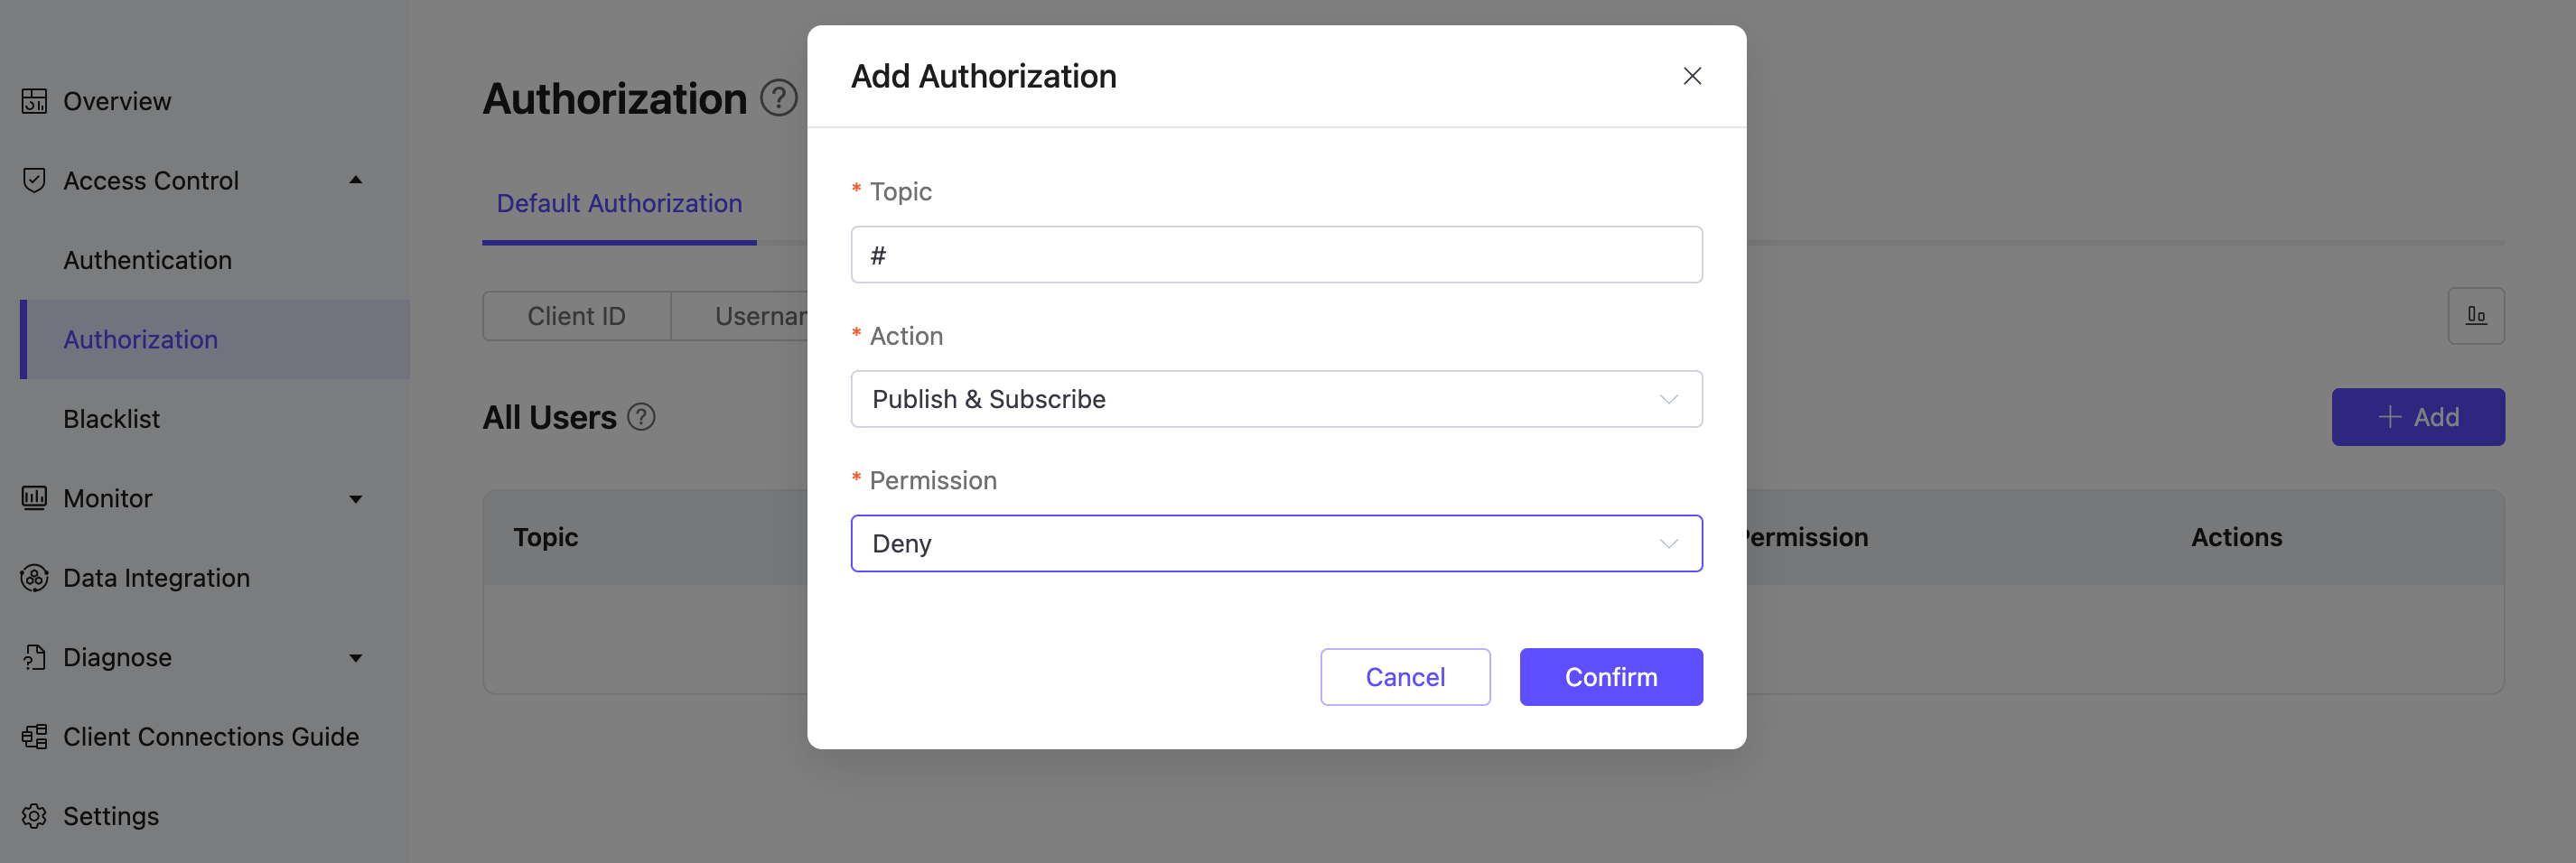
This rule acts as a final fallback deny rule. Any topic operation not explicitly allowed by other rules will be denied, effectively enabling whitelist behavior.
Best Practice
If your deployment supports it, it is recommended to use the console's authorization mode switch to enable whitelist mode instead of manually adding a “deny #” rule, as this reduces configuration complexity.
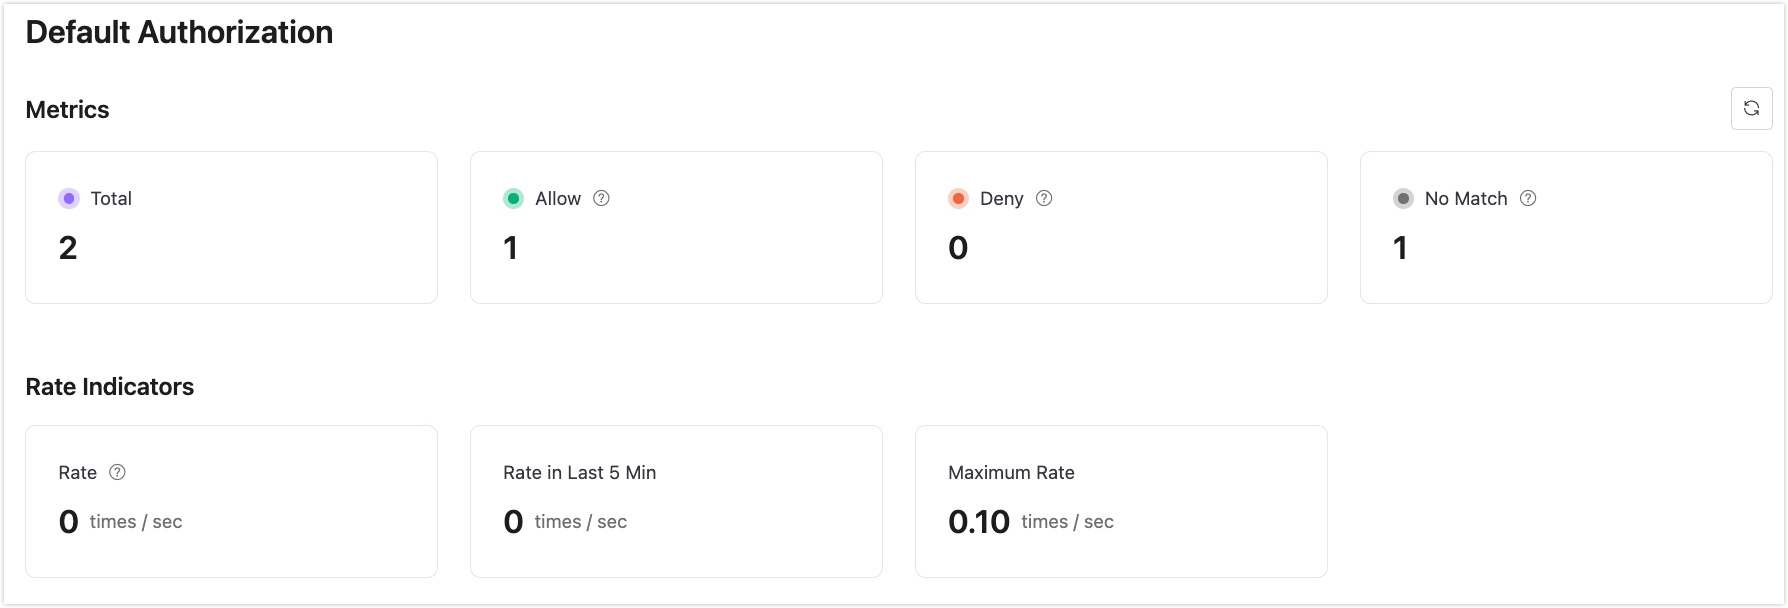
View Authorization Statistics
Click the Authorization Statistics icon at the upper right corner to view the metrics and rate indicators of authorization.