Configure and Manage Authorization in EMQX Cloud v5 Deployments
In EMQX Cloud v5, client authorization is used to control the publish and subscribe permissions of MQTT clients. This document provides a detailed guide on configuring client ID, username, and quota limits and using whitelists, placeholders, and extended authorization for more advanced permission control.
Add Authorization Information
Note
- The maximum number of entries for built-in authorization is twice the number of deployment connections, with an upper limit of 100,000. If this limit is exceeded, please use an external ACL.
Authorization can be controlled at three levels:
- Client ID: Authorization validation for a specific client ID.
- Username: Authorization validation for a specific username.
- All Users: Authorization validation based on topics for all users.
When adding authorization information, fill in the client ID or username, topic, choose an action (sub/pub/pubsub), then select whether to allow, and finally click the Add button to complete the operation.
Import Authorization Information in Batches
You can use the provided CSV template to import authorization information in batches (not supported for "All Users"). The fields for import are as follows:
clientid: Client IDusername: Usernametopic: Authorized topicaction: Action (sub/pub/pubsub)access: Whether to allow (allow/deny)
Use Placeholders
Placeholders can only be used to replace an entire field in a topic, such as
a/b/${username}/c/d, and cannot replace part of a field, such asa/b${username}c/d.
When using placeholders in a topic, you can dynamically replace the current client information in the topic matching rules. The supported placeholders are:
${clientid}${username}
If you want to restrict all users to only subscribe to or publish specific topics, you can set it like this:
- Username
${username}, Topicxx/${username}/report - Client ID
${clientid}, Topicxx/${clientid}/report

Enable Whitelists
Note
- By default, authorization uses a blacklist mode (i.e., all subscriptions and publish are allowed by default).
- The authorization matching order is: Username / Client ID authorization -> All Users authorization.
- The combination of Client ID/Username and Topic is unique. For multiple records with the same Client ID/Username + Topic, only the most recent record is valid.
- If you have added extended authorization data sources, ensure that "Default Authorization" is placed last in the Authorization order on the extended authorization page to enable whitelist mode.
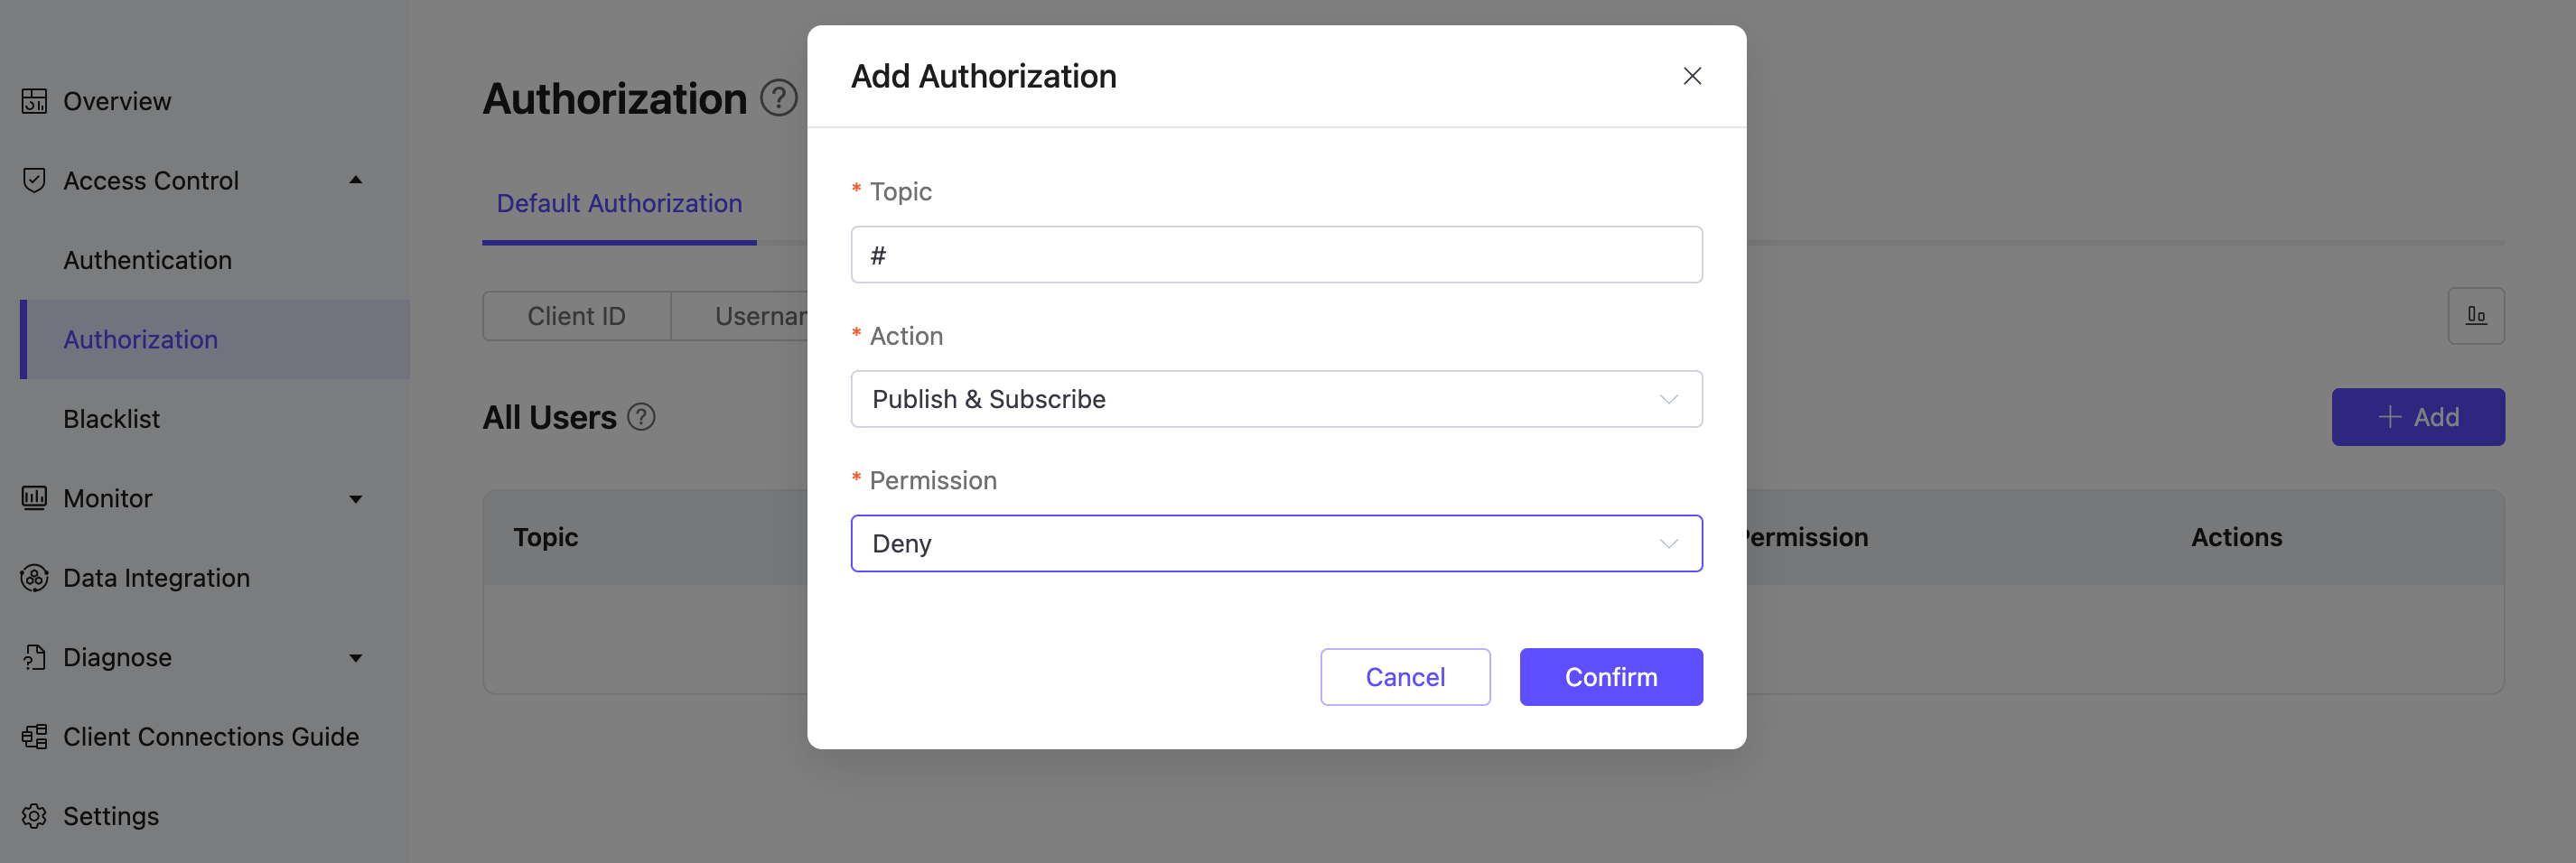
To enable whitelist mode (i.e., all subscriptions and publish are denied by default) in EMQX Cloud, go to the Access Control -> Authorization in the left menu of the deployment.
On the All Users tab, add an authorization entry by clicking the Add button. Enter # in the Topic field, select Action as Publish & Subscribe, and then set Permission to Deny. Click Confirm to enable whitelist mode.
Use External Authorization for Advanced Permission Control
Note
- The Serverless version does not support external authentication and authorization; other versions do.
- Although a maximum of two extended authorizations is supported, it is recommended not to use multiple extended authorizations simultaneously for performance reasons.
By enabling extended authorization, you can use custom services for authentication and authorization. The currently supported external data sources include Redis, MySQL, PostgreSQL, and authentication via HTTP services.
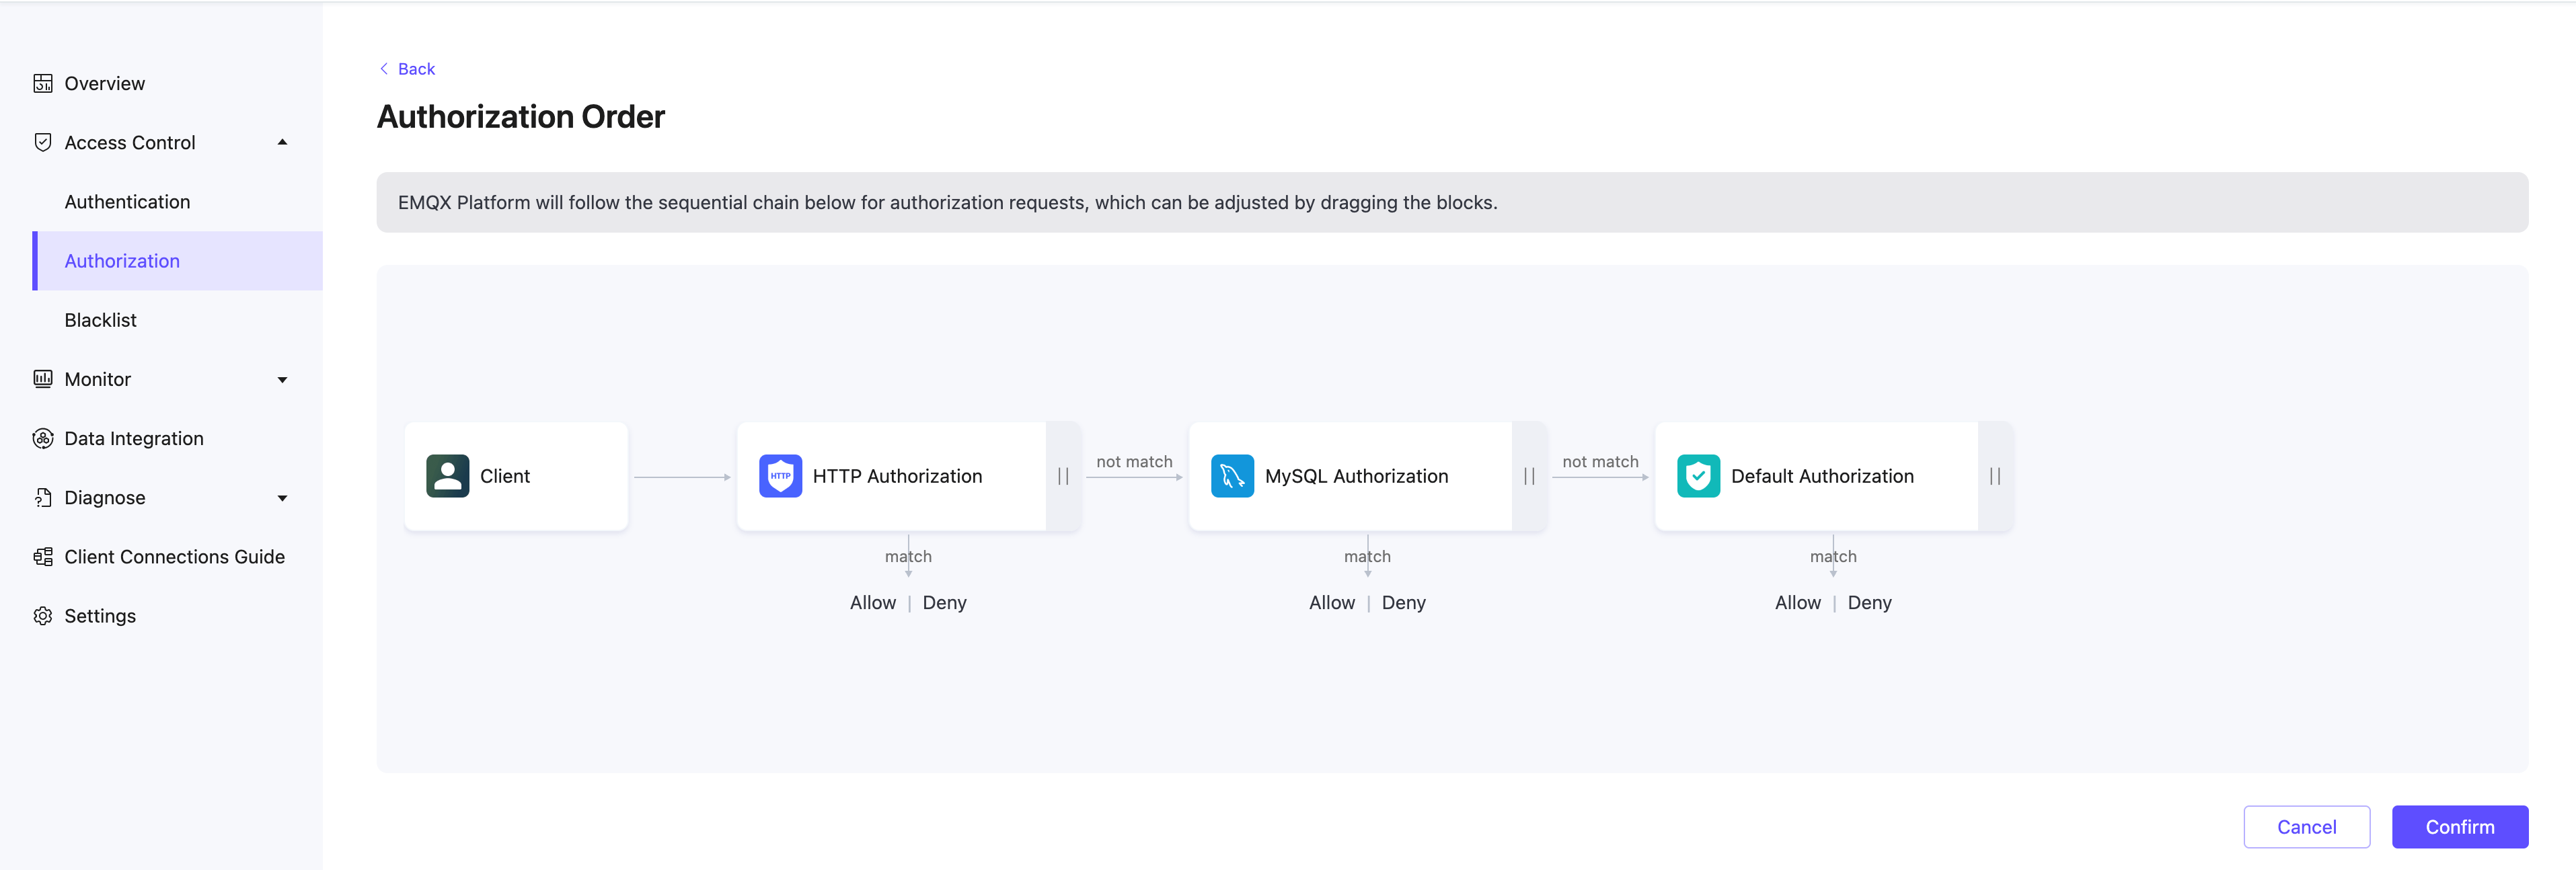
Authorization Order
After adding extended authorization data sources, you can sort the authorization data sources, supporting a custom authorization chain: drag and arrange the authorization data source icons to configure the authorization order.
In the extended authorization page, click Authorization order to enter the order page. The deployment will perform authorization checks in the order from left to right. By default, the most recently added authorization is placed first, and the default authorization is placed last.
- Actions are matched with permissions, allowing or denying client operations based on permissions
- If actions do not match with permissions, the check is passed to the next authorization checker Custom authorization chain: Authorization data source icons can be dragged and arranged left and right to sequence the authorization order.