Create an EMQX Tables Deployment
This guide walks you through the process of creating an EMQX Tables deployment, a fully managed time-series database powered by GreptimeDB. You can use EMQX Tables to store, query, and analyze your MQTT data within the EMQX Cloud.
Where to Start
You can create an EMQX Tables deployment from two locations in the EMQX Console:
- On the Overview page, under the EMQX Tables section, click + New Deployment.
- Within a Project, go to the Explore EMQX Tables section and click + New Deployment.
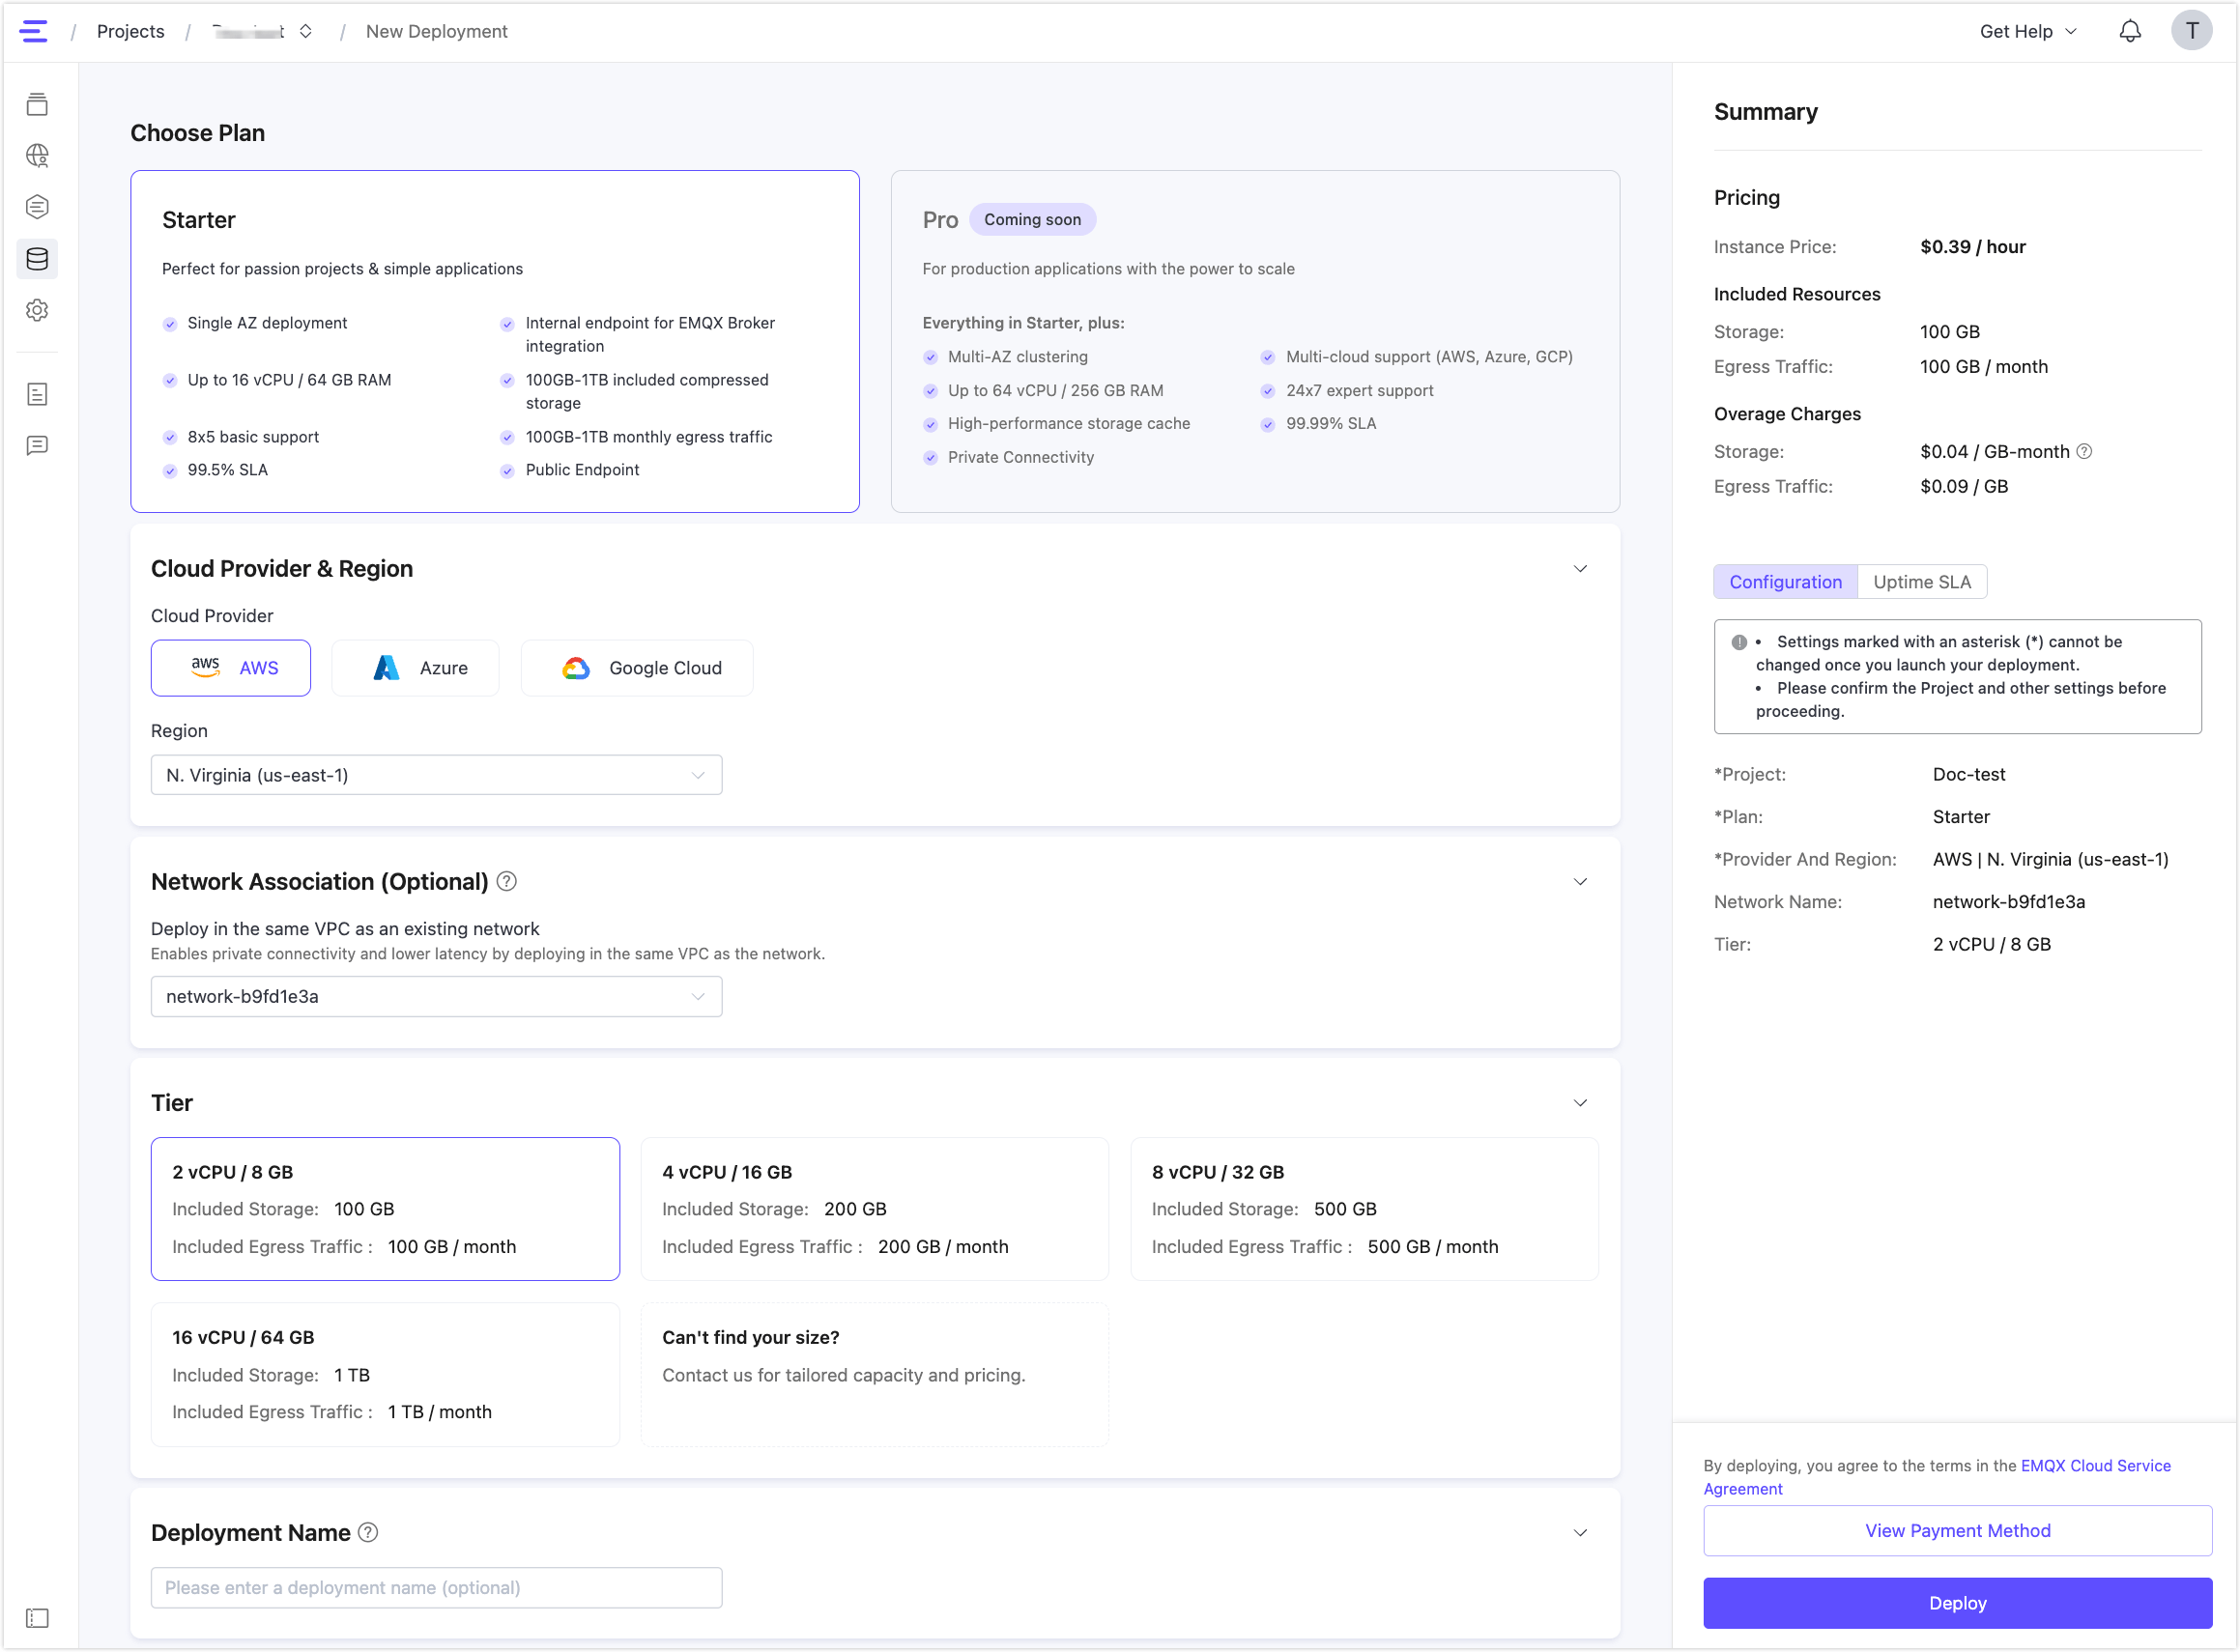
Step 1: Choose a Plan
On the New Deployment page, choose from the available plans for your EMQX Tables deployment:
- Starter Plan: Suitable for small-scale or trial deployments. Supports single-AZ, limited resource tiers, public/internal endpoints, and select regions on AWS, Azure, and Google Cloud.
- Pro Plan (Coming Soon): Designed for production scenarios, with multi-AZ support, private networking, and extended resource capacity.
For a detailed comparison, see EMQX Tables Product Plans.
Step 2: Select Cloud Provider and Region
Choose your preferred Cloud Provider & Region for deployment.
AWS, Azure, and Google Cloud are supported. For the full list of available regions, see Cloud Providers and Regions.
Choosing the right region can help reduce latency for your devices and may be important for compliance with data residency requirements.
Step 3: Network Association (Optional)
If there is an existing EMQX Broker deployment in the same cloud platform and region, you can associate the Tables deployment with that network. Select the network from the Network Association dropdown to enable private connectivity between the Broker and Tables. For more details, see Project-Level Network Management.
Each network can be shared by at most one EMQX Broker deployment and one EMQX Tables deployment at the same time.
If you leave this field blank, the Tables deployment will be created with its own separate network. You can view all project networks from the Network Management section in the project's left menu.
Step 4: Select Tier
Choose the Tier (resource configuration) for your deployment. The tier determines the available compute, memory, storage, and monthly egress traffic.
Available options for the Starter plan include:
| Tier | Storage | Egress Traffic/month | Use Case |
|---|---|---|---|
| 2 vCPU / 8 GB | 100 GB | 100 GB | Development / Testing |
| 4 vCPU / 16 GB | 200 GB | 200 GB | Small-scale workloads |
| 8 vCPU / 32 GB | 500 GB | 500 GB | Medium-scale workloads |
| 16 vCPU / 64 GB | 1 TB | 1 TB | Higher ingest rate workloads |
Additional usage pricing:
- Storage over quota: $0.04/GB (compressed)
- Egress traffic over quota: $0.09/GB
If you need more capacity, contact support for custom sizing options.
Step 5: Set a Deployment Name (Optional)
Enter a name for the deployment. If left blank, a name is automatically generated.
Step 6: Review and Deploy
The Summary panel on the right shows your current configuration, including the selected plan, region, tier, and the project under which the deployment will be created.
The project defaults to the last project you accessed. You can switch to a different project at any time before deploying by clicking the project name at the top of the page.
Note
The project cannot be changed after the deployment is created.
Once you have reviewed the configuration, click Deploy. The provisioning process may take a few minutes.
View Deployment Information
Once the deployment is ready, you can:
- View deployment status.
- View Connection Info, including public host, internal host, default database name, and network ports.
- Monitor resource usage, including CPU, memory, storage, and egress traffic.
- Use the built-in Quick Start section to:
- Integrate with an EMQX Broker
- Connect with client tools
- Visualize data using third-party tools like Grafana
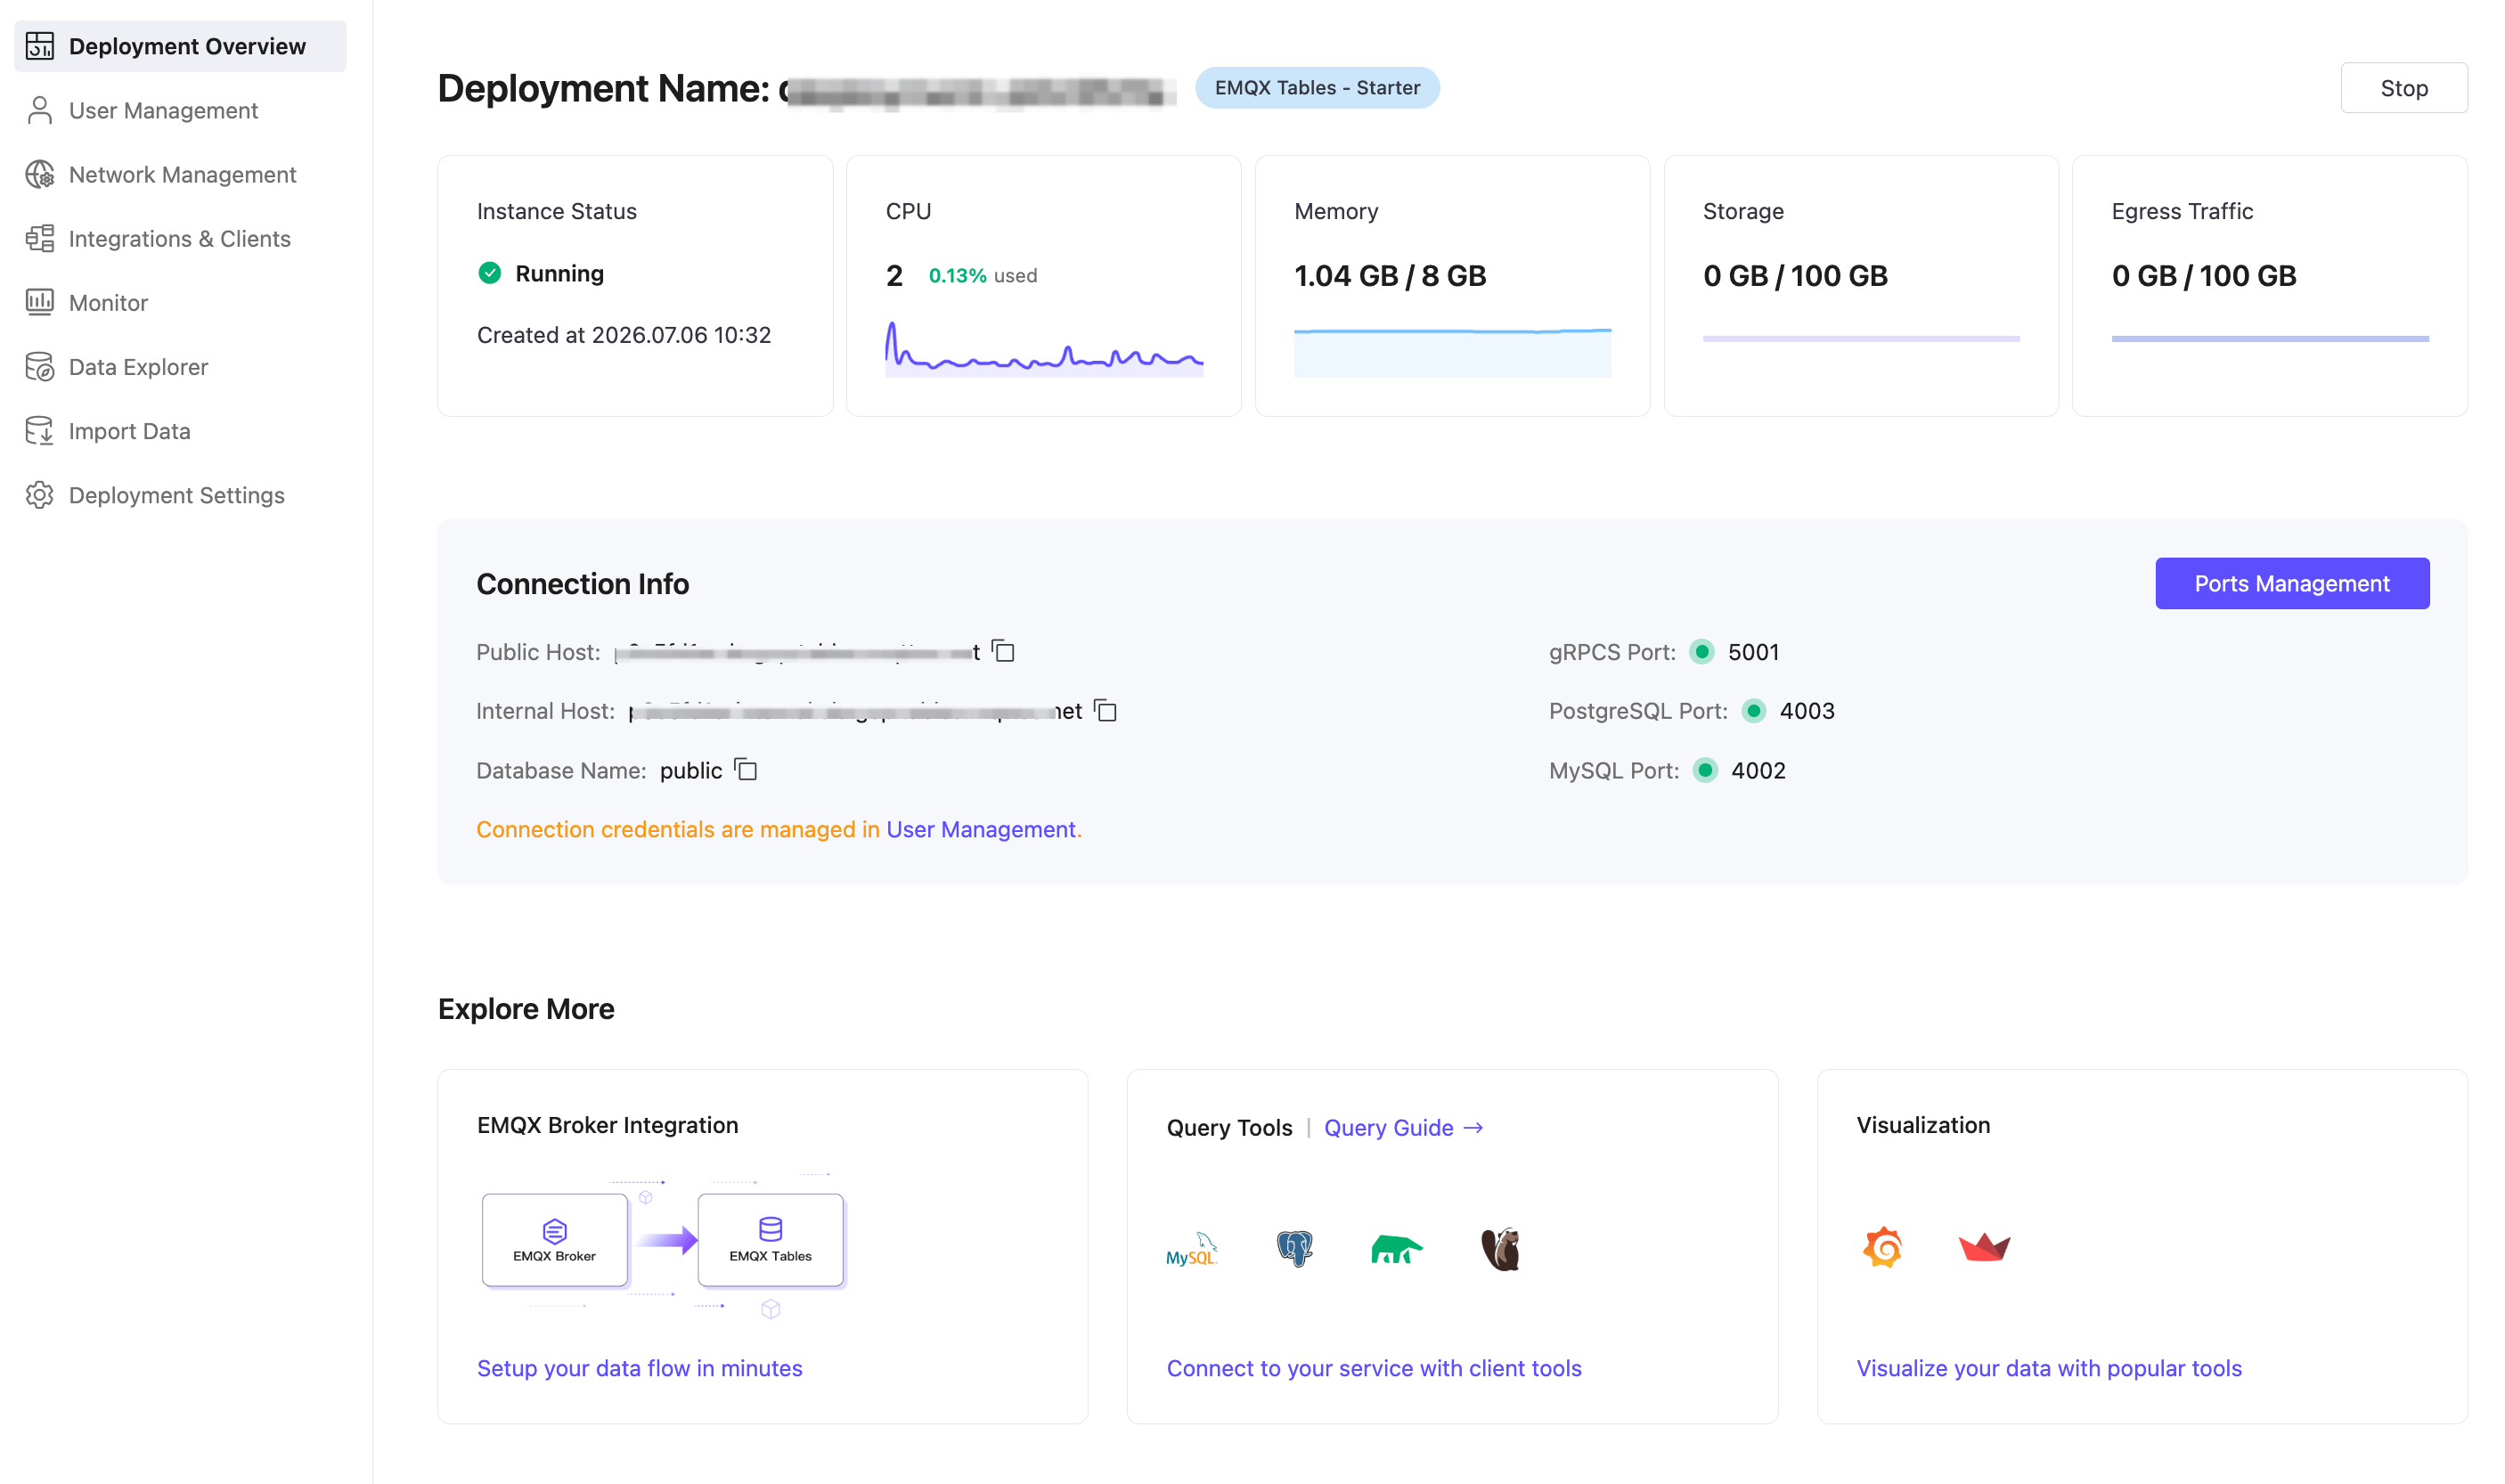
Newer EMQX Tables deployments do not show a default username or password on the Deployment Overview page. The Connection Info section shows a reminder that connection credentials are managed in User Management. To connect EMQX Broker or external clients, create a user in User Management. For details, see User Management.
The Connection Info section also provides a Ports Management button to enable or disable ports individually. For details, see Ports Management.