GCP PrivateLink
Note
This feature is available only with the EMQX Dedicated and Dedicated Flex edition.
This page provides detailed instructions on enabling the PrivateLink feature on the EMQX Broker when deployed on the Google Cloud Platform (GCP). By enabling PrivateLink, your EMQX Broker deployment can access managed services privately within your Virtual Private Cloud (VPC) network without exposing traffic to the public internet. This enhances both security and performance by keeping communication internal to GCP's private network.
In this setup, your EMQX Broker deployment’s VPC acts as the service user, establishing a connection to the service provider’s VPC, where your GCP resources reside.
Prerequisite
Before you begin, ensure that the necessary resources and permissions are in place:
- EMQX Broker resources have already been created.
- You have sufficient permissions in your GCP account to:
- Create Internal Load Balancers.
- Configure Private Service Connect (PSC) endpoints.
- Manage VPC networks.
Establish PrivateLink between GCP and EMQX Broker
This section guides you through the process of configuring GCP networking and enabling PrivateLink in the EMQX Broker.
Create an Internal Load Balancer
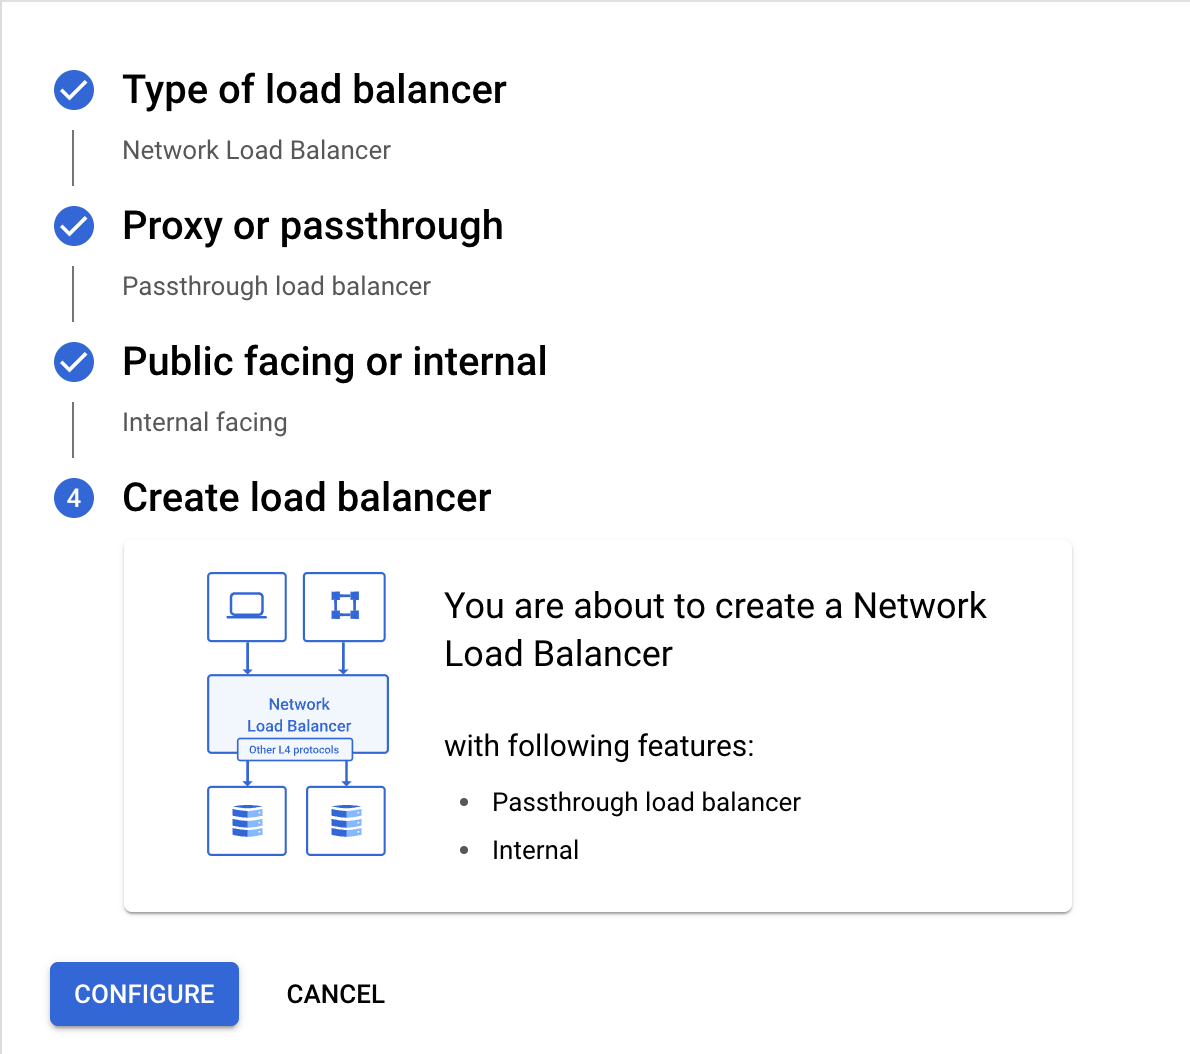
Go to the Load balancing page in the GCP Console, and click + CREATE LOAD BALANCER to configure the features for the load balancer.
- For Public facing or internal option, select
Internal. - Configure other options according to your needs.
When you finish, click Configure to proceed to the Create internal passthrough Network Load Balancer page.
- For Public facing or internal option, select
On the Create internal passthrough Network Load Balancer page, configure the following options:
Load Balancer name: Provide a descriptive name as required.
Region: Select the same region as your EMQX deployment.
Network: Select the VPC network to be peered with EMQX.
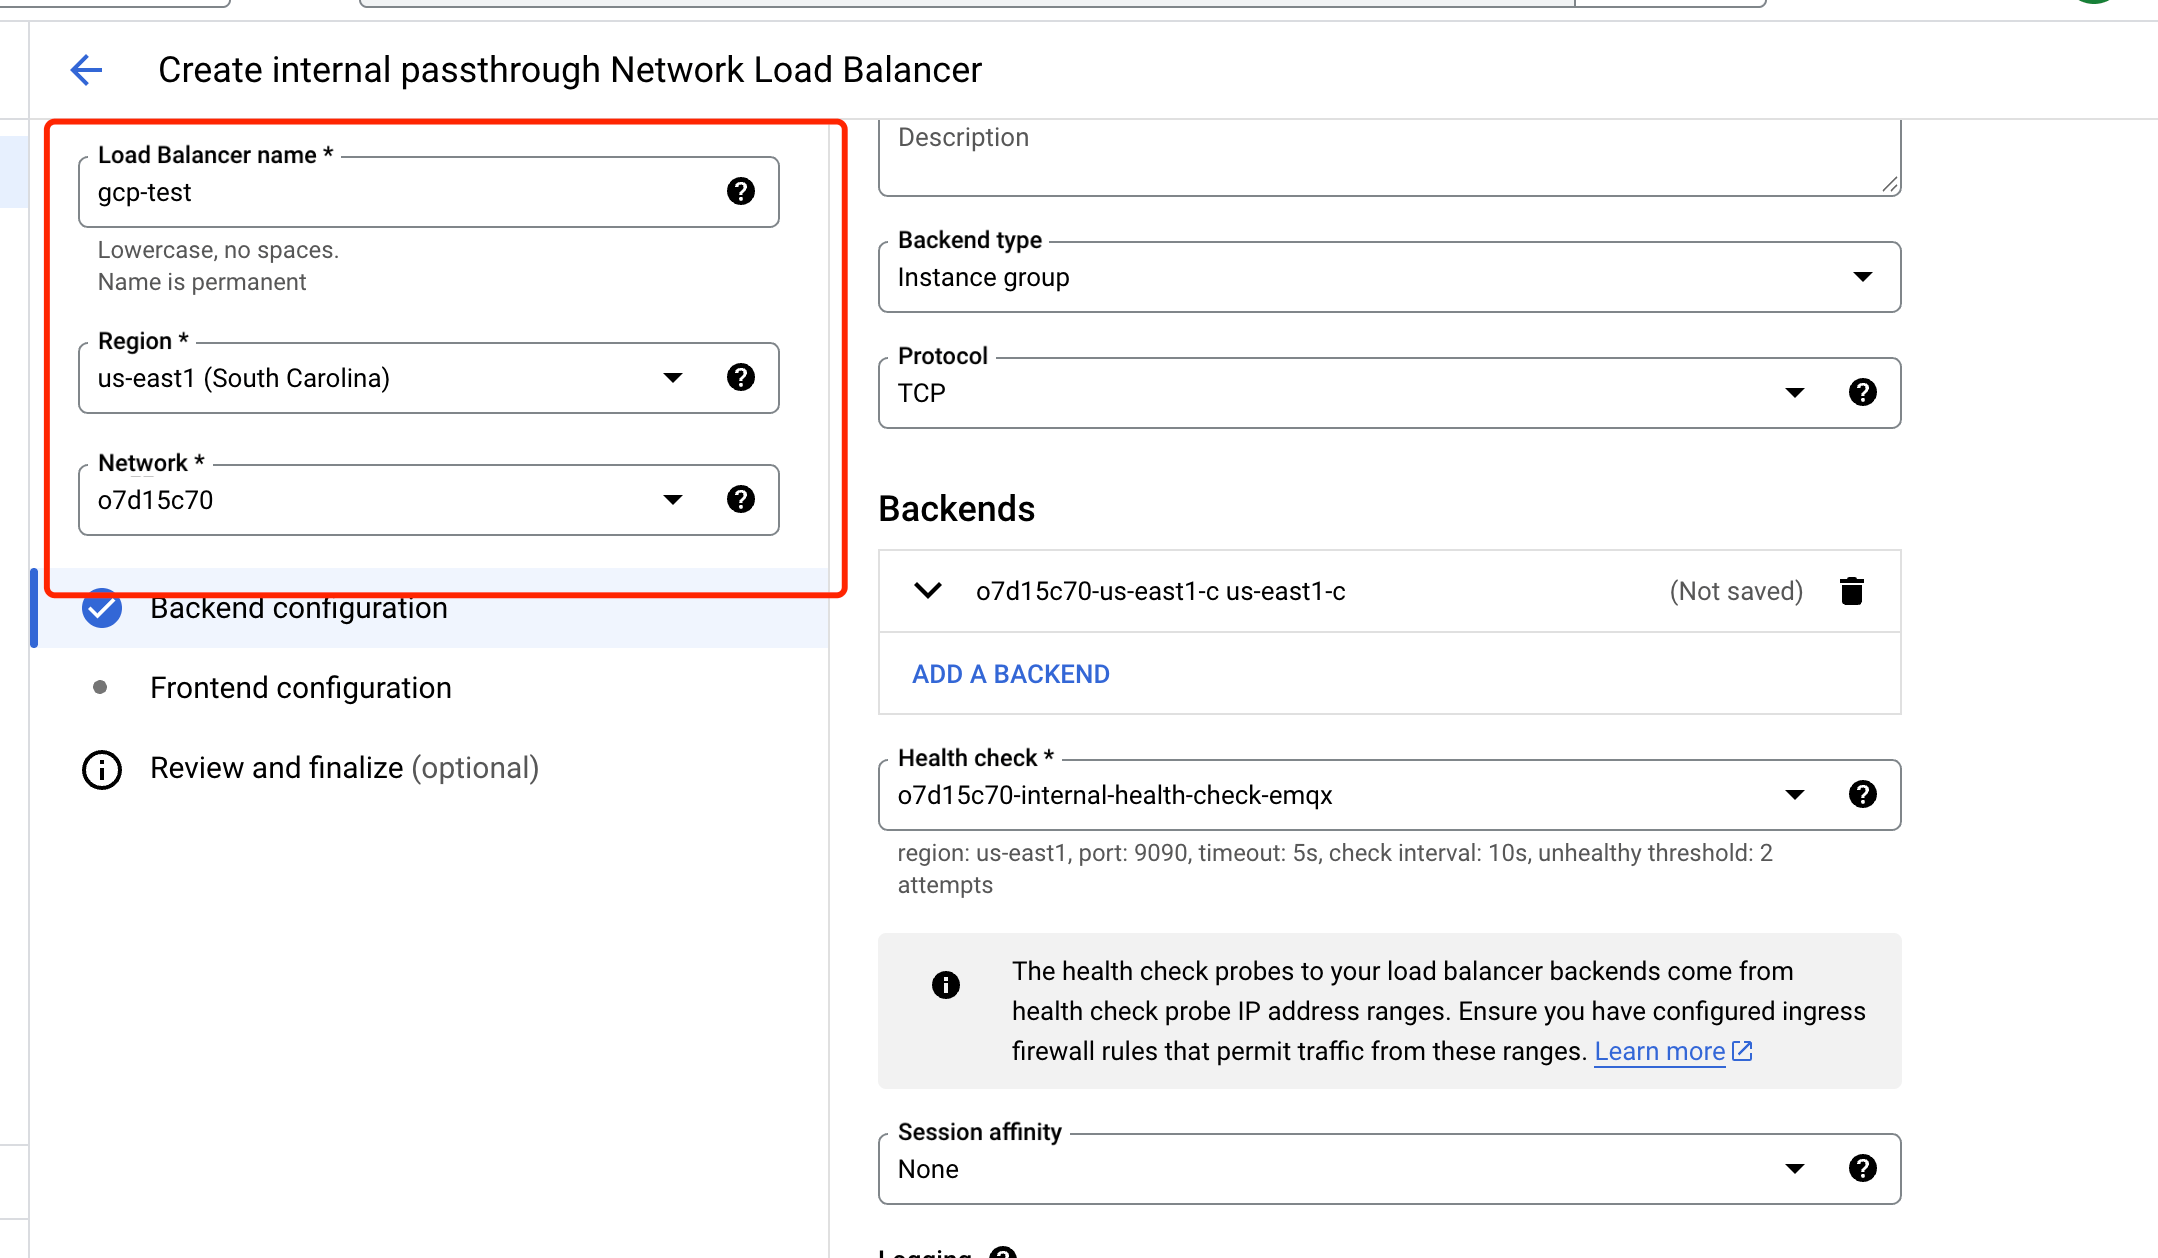
Backend configuration:
Select the Instance group according to your business needs.
Configure the correct Health check.
Frontend configuration: Configure the Port number to
1883, which is used by the EMQX resource services.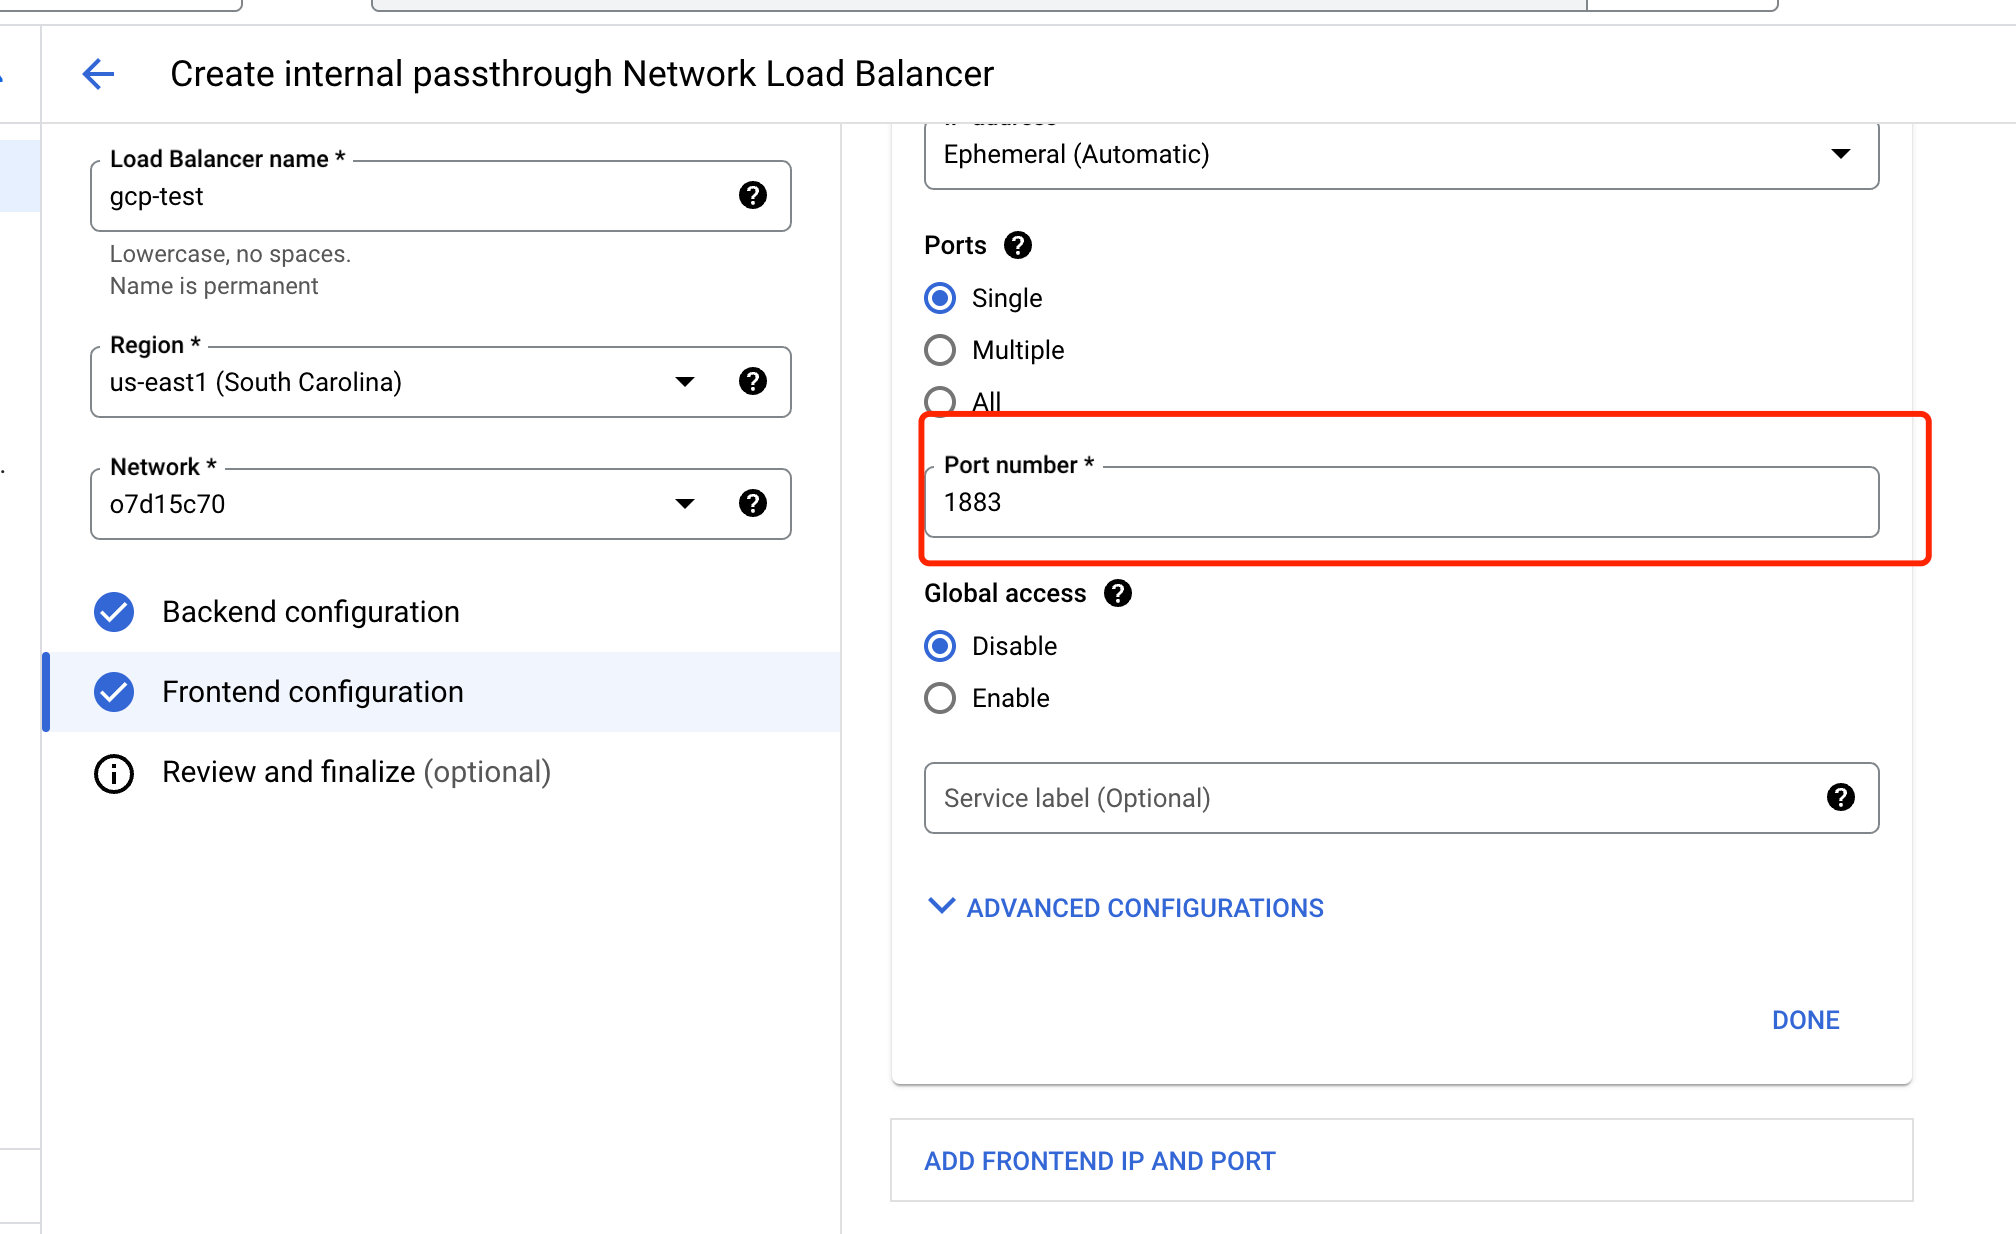
Click CREATE to finish the load balancer setup.
Create a Published Service Using Private Service Connect
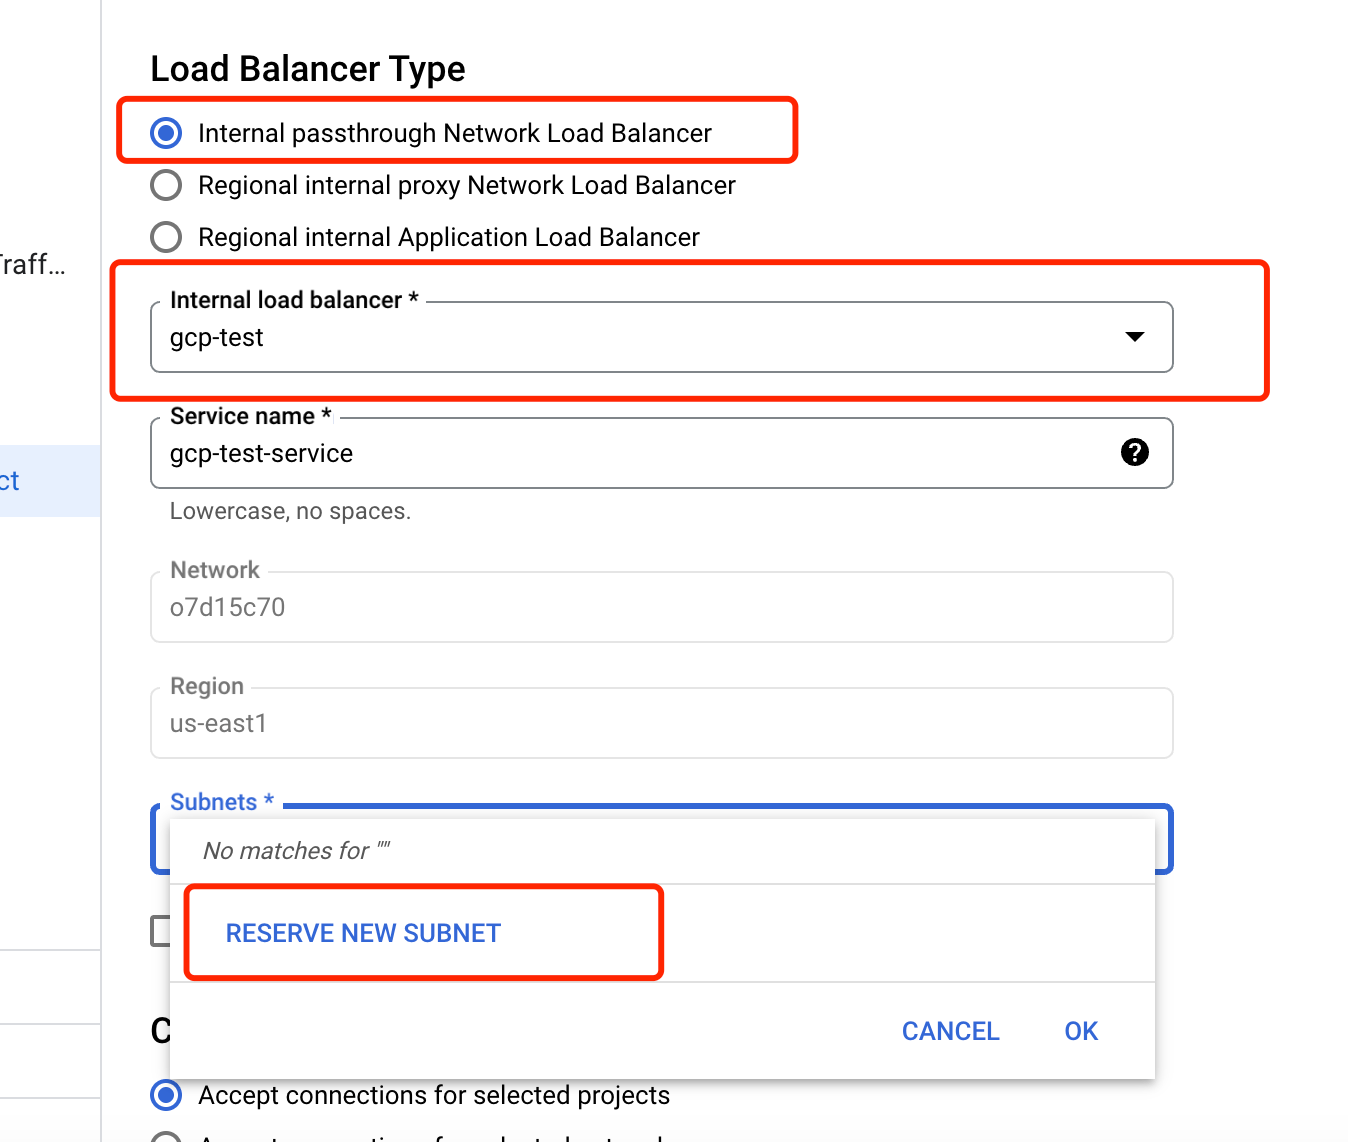
Go to Private Service Connect .
Click + ADD SERVICE to create a new published service. Configure the following:
- Internal load balancer: Select the load balancer you just created.
- Service name: Provide a name for your published service as required.
- Subnets: Create a new subnet.
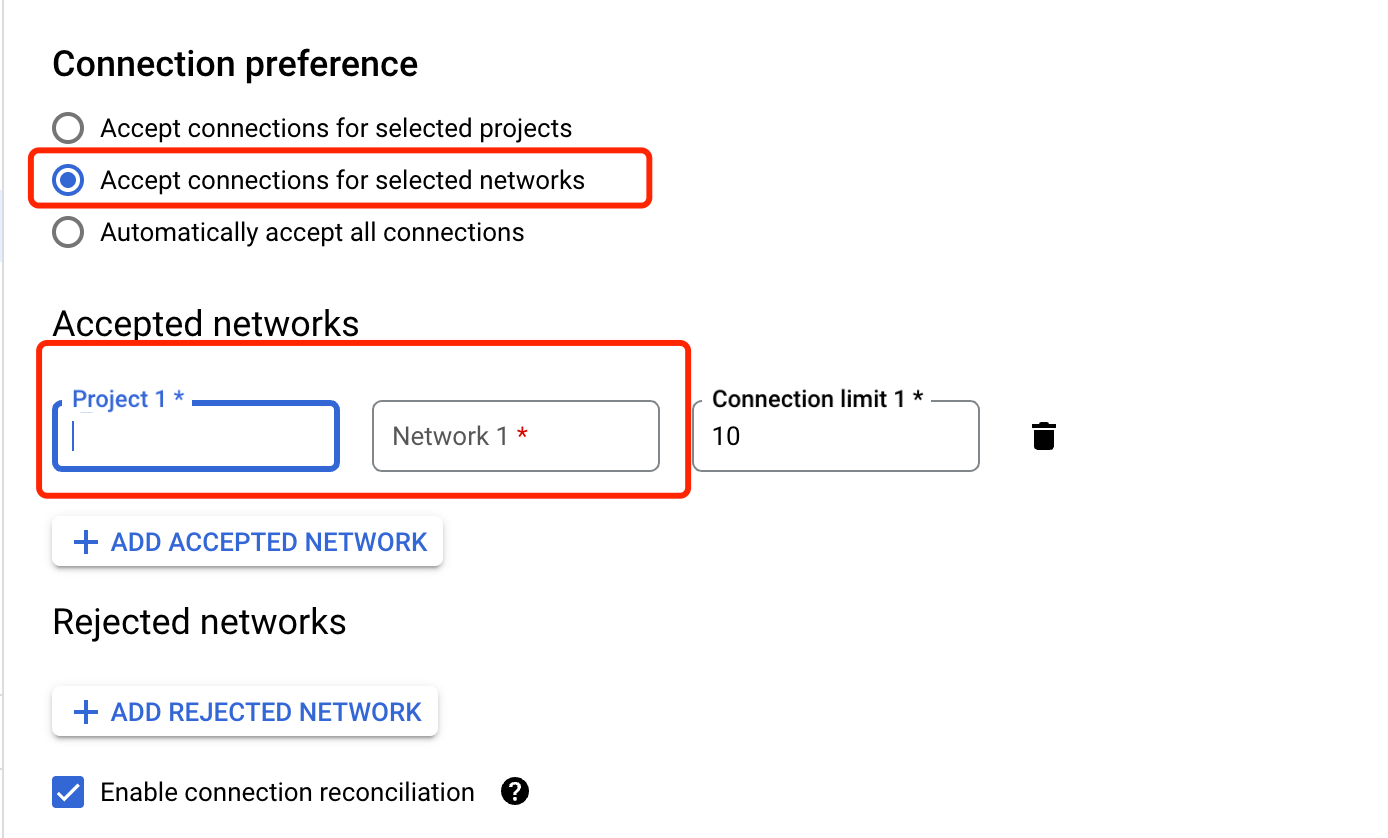
In Connection preference, select
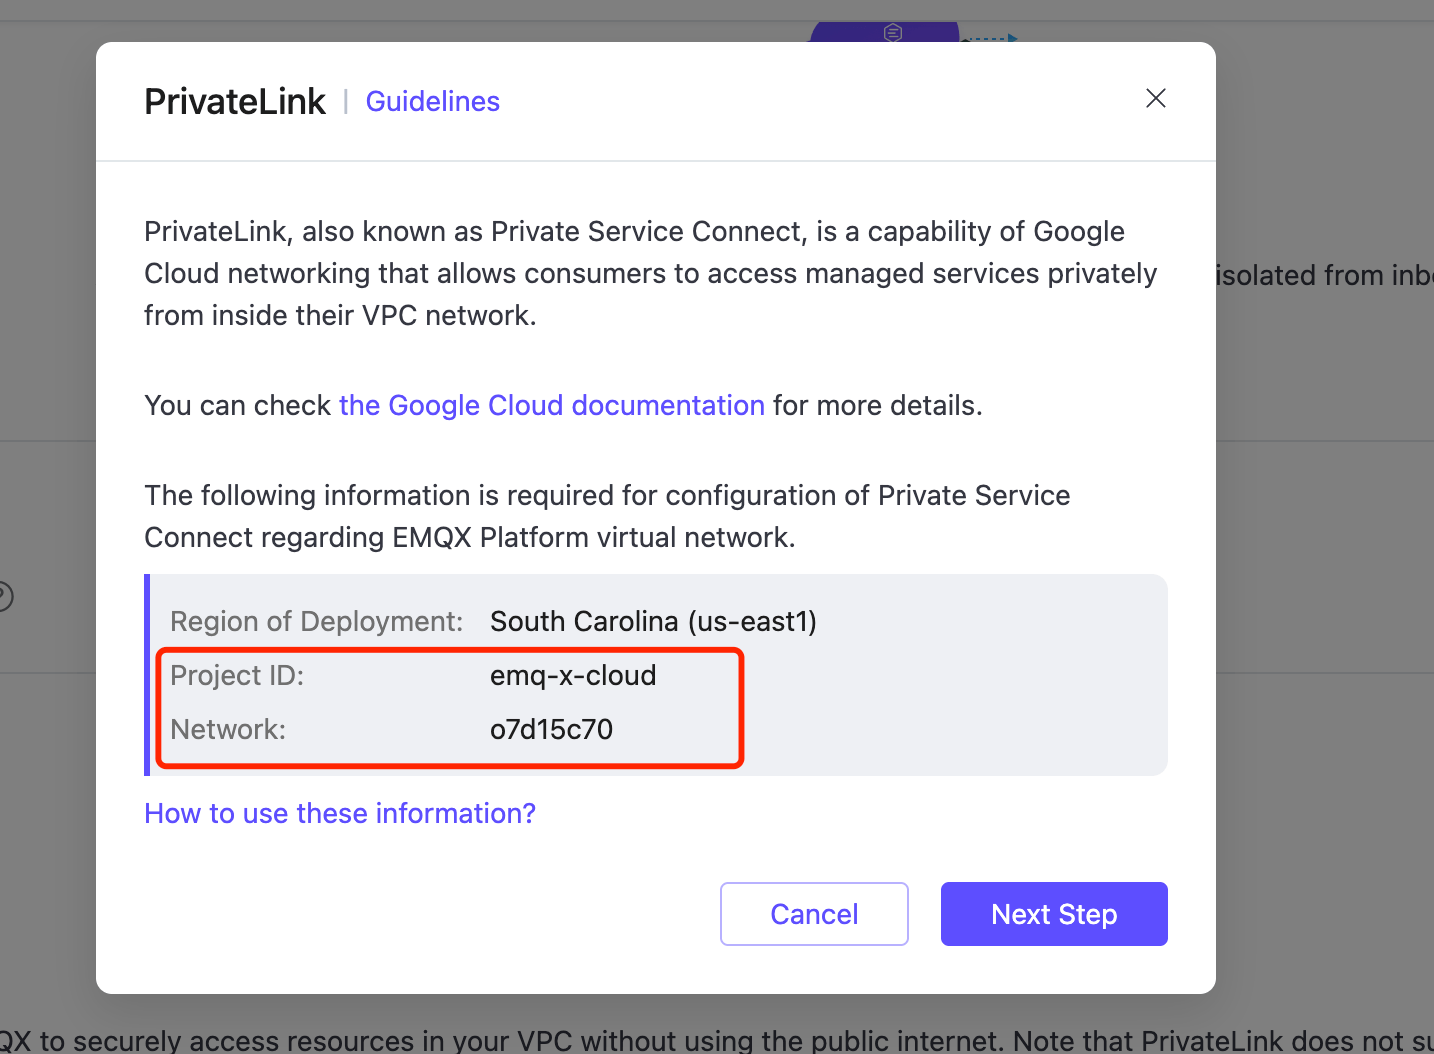
Accept connections for selected networks.In Accepted networks, enter the Project ID and Network displayed in the PrivateLink Guidelines dialog in your EMQX deployment. You can open the dialog by navigating to Network Management -> + PrivateLink in your deployment.
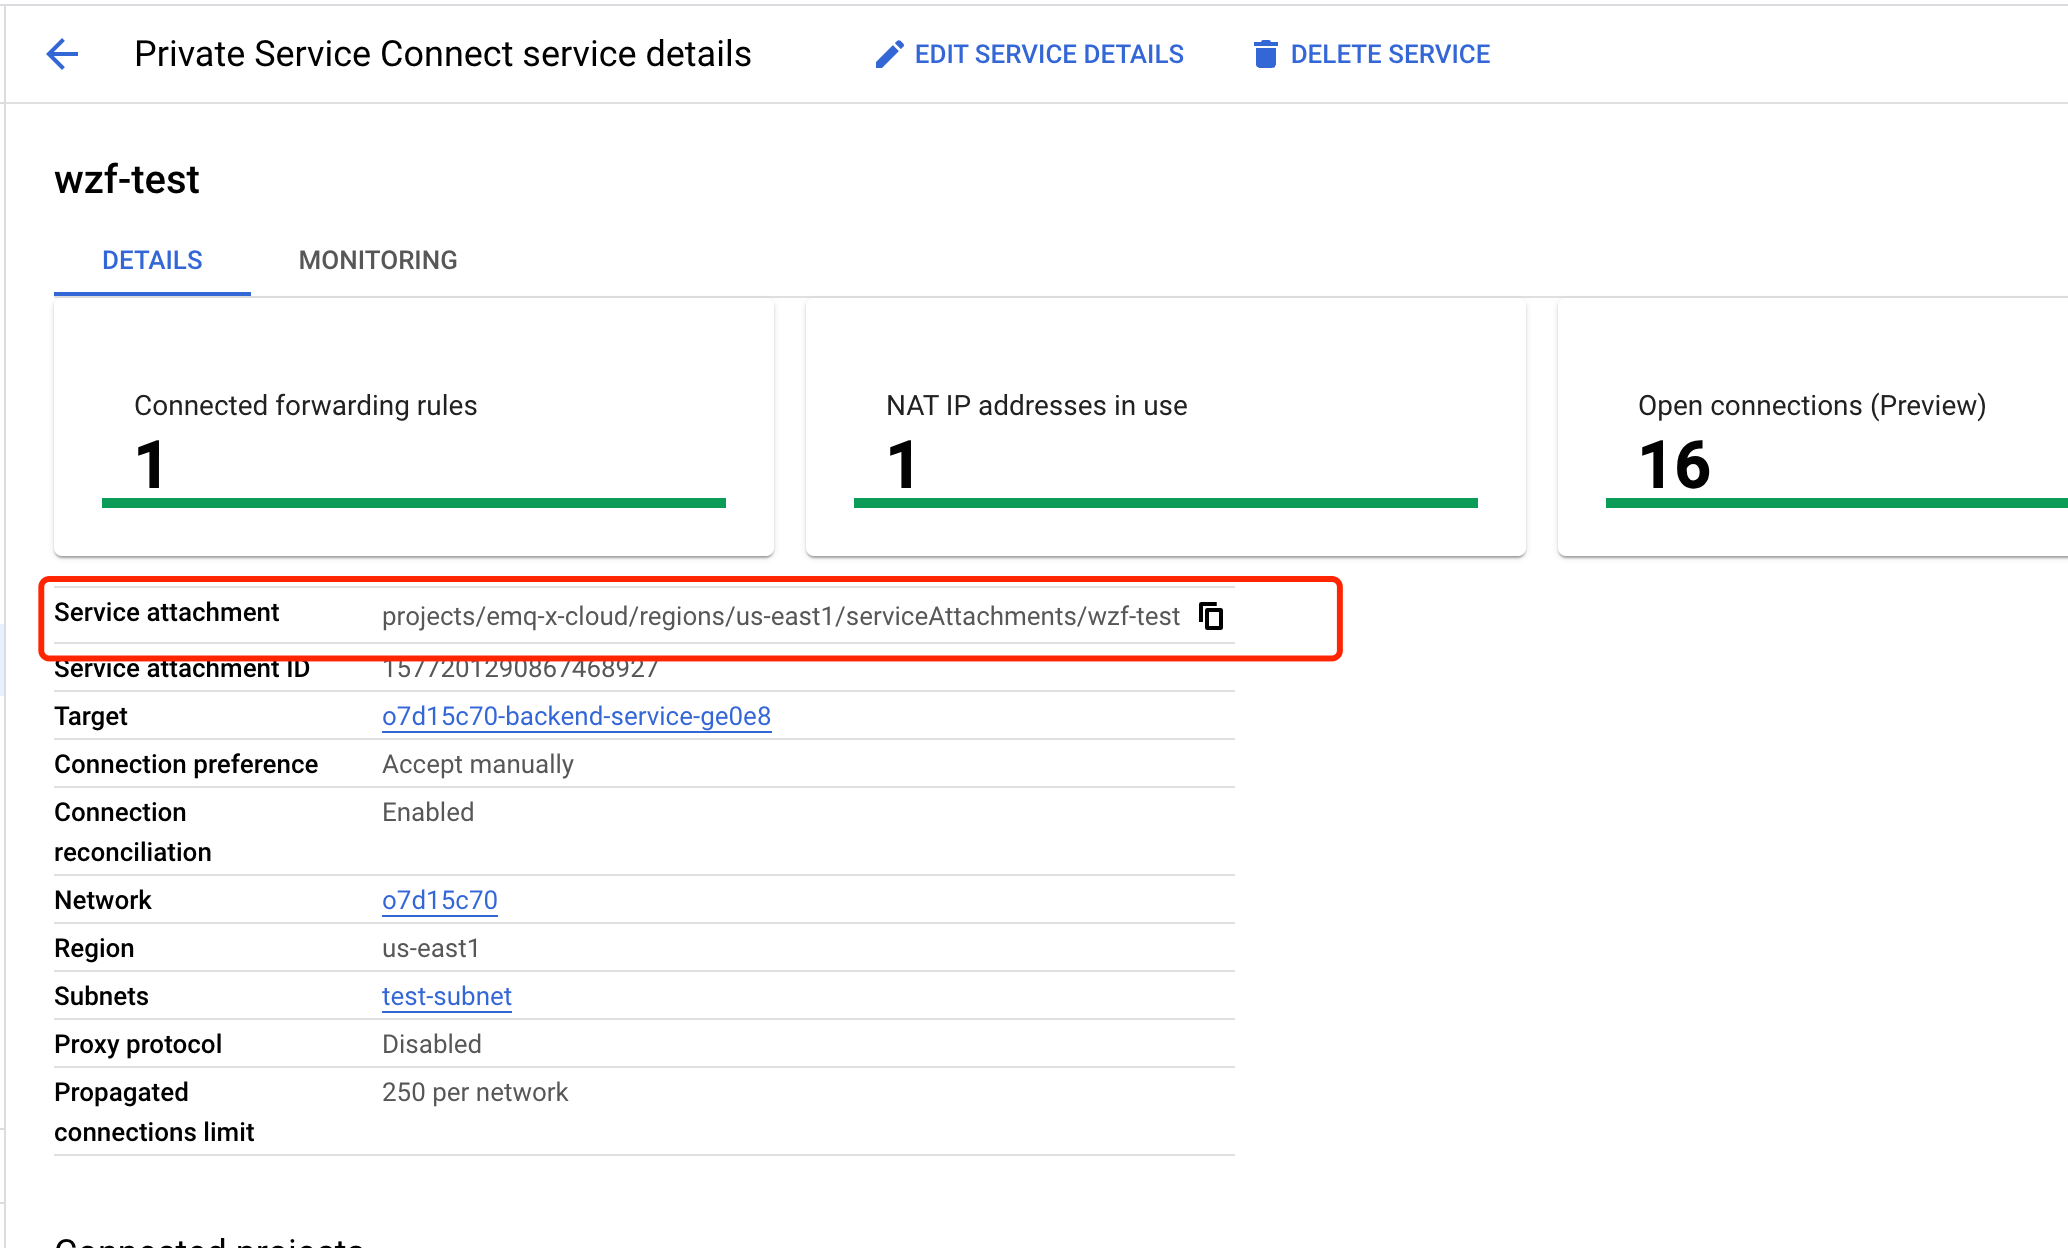
Click ADD SERVICE. Once completed, your service will appear in the Published Services list.
Click the name of the service to enter the details page, copy the value in Service attachment.
Enable PrivateLink in EMQX Broker
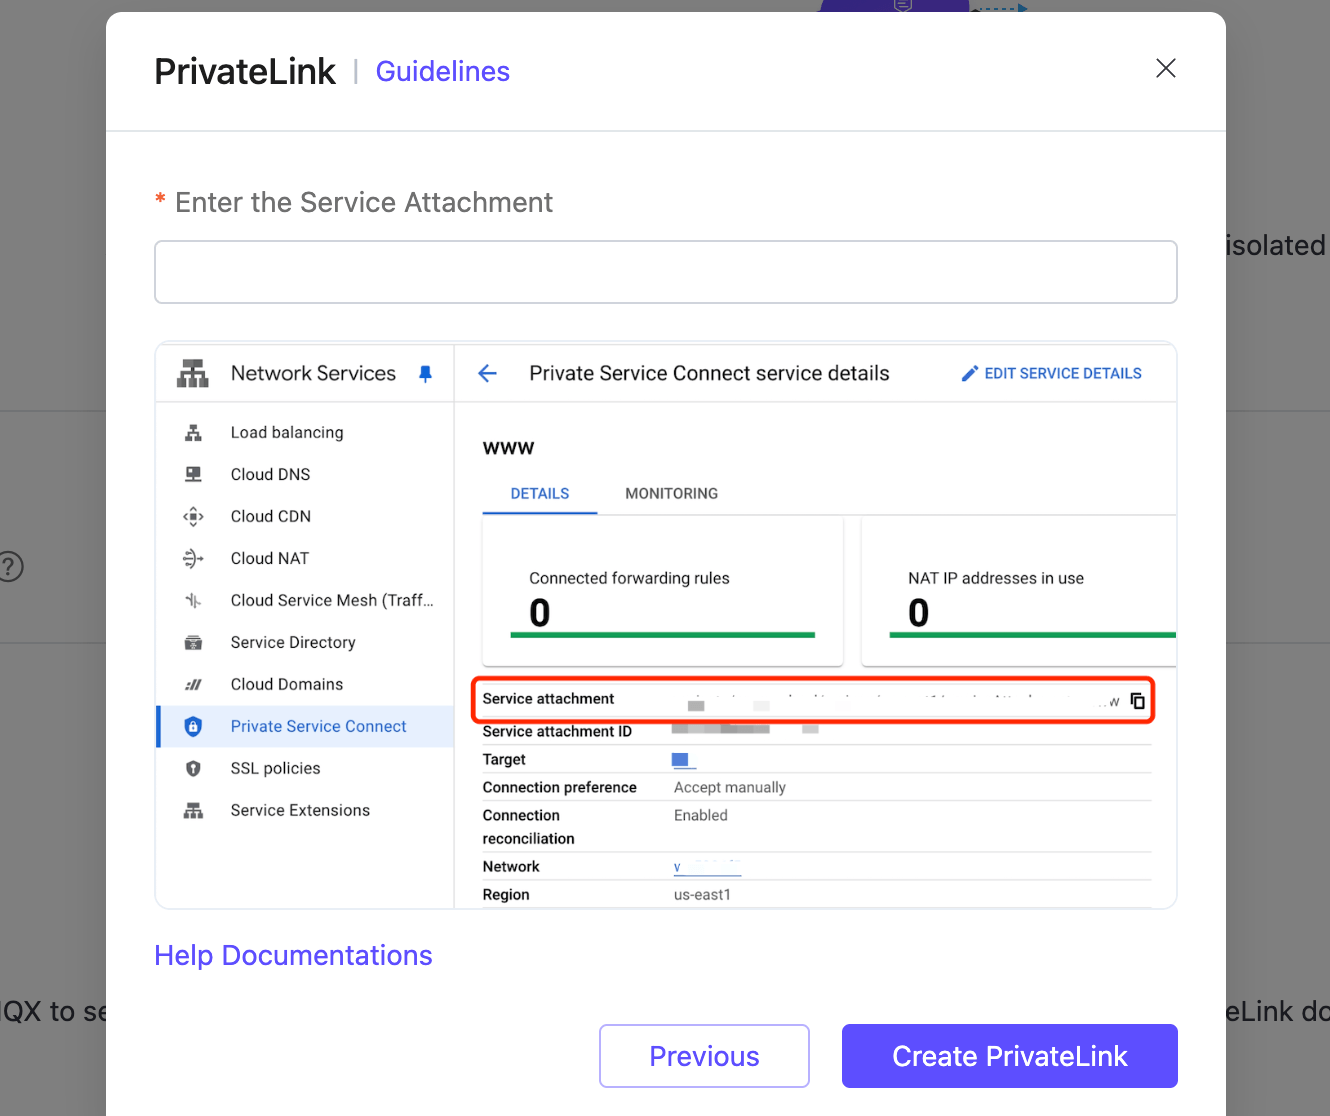
In your EMQX Broker deployment, open the PrivateLink Guidelines dialog again.
Paste the Service Attachment value into the input field. Click Create PrivateLink.
Wait for a while and check the status of the PrivateLink in the deployment details. Once the status changes to
running, the PrivateLink connection is successfully established.
After setup, your EMQX deployment can access GCP-hosted services privately using the generated PrivateLink address and port 1883.