Get Started with EMQX Fleets
This guide walks you through a complete end-to-end workflow: defining a device model, registering a device, synchronizing state using Device Shadow, and sending a real-time command. By the end, you will have a working Fleets deployment and a clear understanding of the core concepts.
Prerequisites
- An EMQX Cloud account with an active project.
- An EMQX Fleets deployment in the Running state. EMQX Fleets is currently available as a Private Beta. See Create an EMQX Fleets Deployment to request access.
- An EMQX Broker deployment in the Running state, in the same project as your Fleets deployment. EMQX Fleets routes all device communication through the associated Broker.
- An EMQX Tables deployment in the Running state, in the same project as your Fleets deployment. EMQX Fleets stores time-series data, such as telemetry events and shadow history, in the associated Tables.
- A device or application that can connect to EMQX Broker via MQTT.
Overview
You will complete the following steps:
- Create a Thing Type to define the device schema.
- Register a Thing (a device instance).
- Connect your device to EMQX Broker.
- Update the desired shadow state from the console.
- Send a real-time command and check the result.
The example device used throughout this guide is a smart thermostat that reports temperature and accepts a setTemperature command.
Step 1: Create a Thing Type
A Thing Type defines the schema for a category of devices, including the properties they report and the commands they accept. For full details, see Thing Types.
- Open your Fleets deployment in the EMQX Cloud Console.
- In the left menu, go to Device Management > Thing Types.
- Click + New Type.
- Enter a name:
com.example.thermostat - (Optional) Enter a description:
Thermostat device type for quick start - Click Confirm.
The new Thing Type appears in the list. A default Thing Group named com.example.thermostat (default) is automatically created.
Next, add a command definition so that setTemperature is available when you send a command in Step 5:
- Click the
com.example.thermostatentry to open it, then click Edit Type. - In the Commands section, click + Add.
- In the Add Command dialog, fill in:
- Name:
setTemperature - Type:
sync - Input: click + Add and add a parameter named
valuewith typefloat.
- Name:
- Click Confirm to close the dialog, then click Save.
Step 2: Register a Thing
A Thing is an individual device identity registered in Fleets. For full details, see Things.
- In the left menu, go to Device Management > Things.
- Click + Register Thing.
- Fill in the fields:
- Name:
thermostat-001 - MQTT Client ID:
thermostat-001 - Thing Type:
com.example.thermostat
- Name:
- Click Confirm.
The device is now registered with an offline status. It will show as online once the device connects using the MQTT Client ID configured above.
Step 3: Connect Your Device
Connect your device to the EMQX Broker in the same project as your Fleets deployment. If you do not have a physical device, you can use a client tool to simulate one.
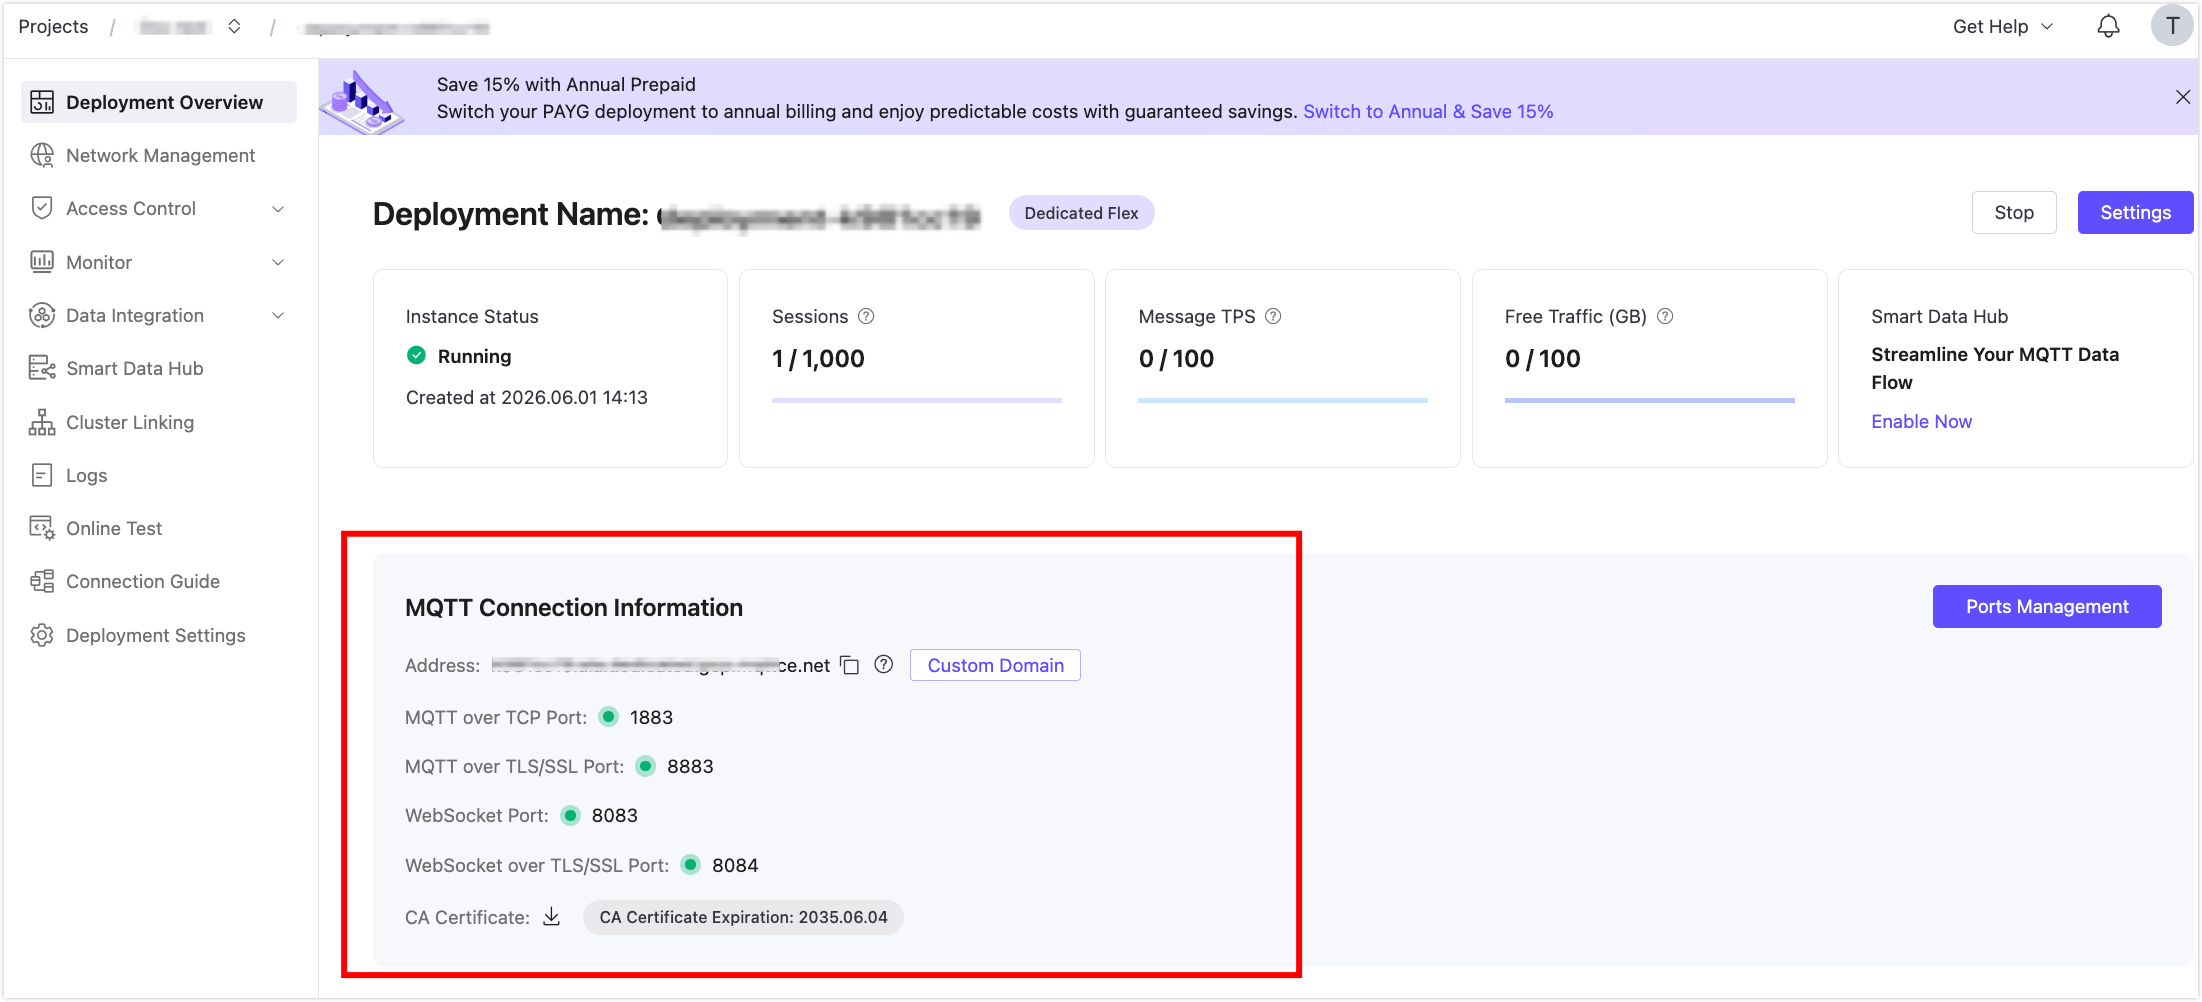
Go to the Overview page of your EMQX Broker deployment and find the connection details in the Connection Information section (host, port, and credentials).
Connect your device using the following parameters:
- Client ID: must match the value set when registering the Thing (
thermostat-001in this guide) - Host / Port: from the Broker MQTT Connection Information
- Username / Password: configured in the Broker's Access Control -> Authentication settings
- Client ID: must match the value set when registering the Thing (
After connecting, subscribe to the following topics:
Shadow delta topic, so the device can receive desired state changes:
text$emqx/things/thermostat-001/shadow/update/deltaCommand request topic, so the device can receive real-time commands:
text$emqx/commands/things/thermostat-001/executions/+/request
Once connected and subscribed, the device status in the Things list changes to online.
For details on required topic subscriptions and message formats, see MQTT Integration.
Step 4: Update the Desired Shadow State
Device Shadow lets you declare the state you want the device to reach, without needing the device to be online at the time of the update. For full details, see Device Shadow.
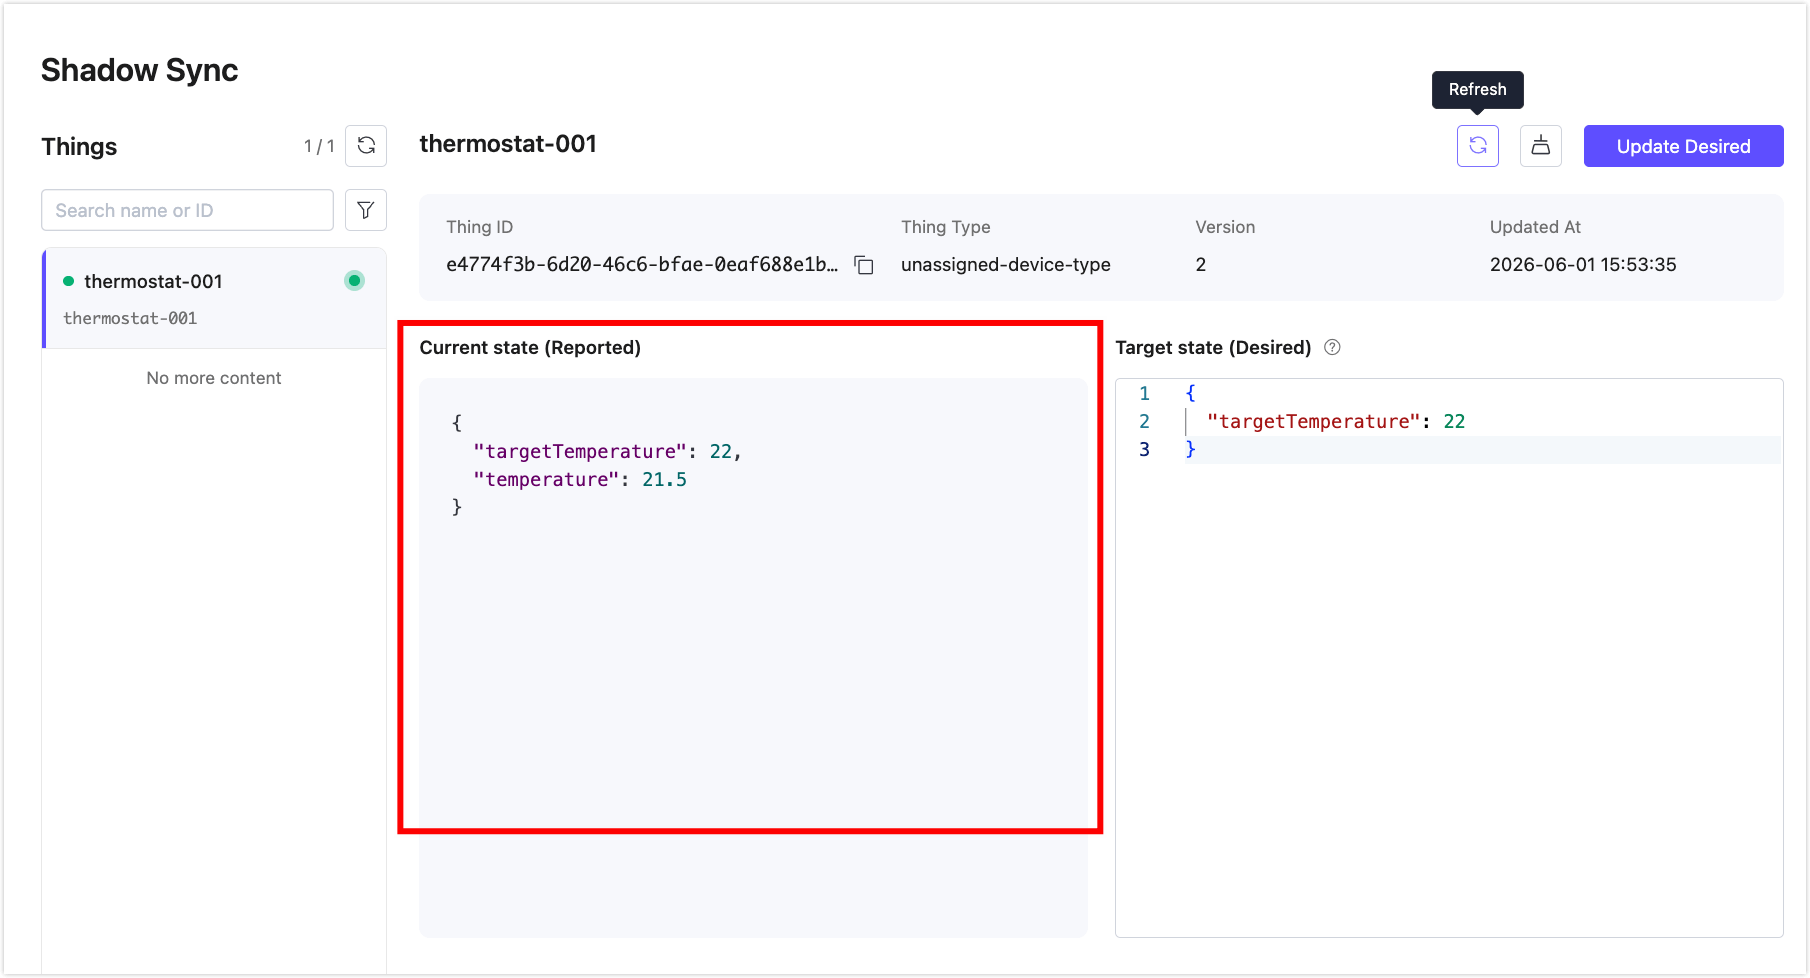
In the left menu, go to Shadow Sync.
Select
thermostat-001from the Things list.In the Target state (Desired) panel, enter:
json{ "targetTemperature": 22 }Click Update Desired.

Fleets computes the delta between the current reported state and the new desired state, and publishes it to the device on:
$emqx/things/thermostat-001/shadow/update/deltaThe device receives an incoming message on the delta topic:
{
  "version": 1,
  "timestamp": 1780298203,
  "state": {
    "targetTemperature": 22
  },
  "metadata": {
    "targetTemperature": {
      "timestamp": 1780298203
    }
  }
}
The device reads the delta, applies the change, and publishes the new reported state back. Use your MQTT client to publish the following:
- Topic:
$emqx/things/thermostat-001/shadow/update - Payload:json
{"state": {"reported": {"targetTemperature": 22, "temperature": 21.5}}}
After publishing, go back to Shadow Sync in your Fleets deployment and refresh the page to see the Current state (Reported) updated.
Step 5: Send a Real-Time Command
Commands are request-response interactions sent directly to a connected device. For full details, see Commands & Jobs.
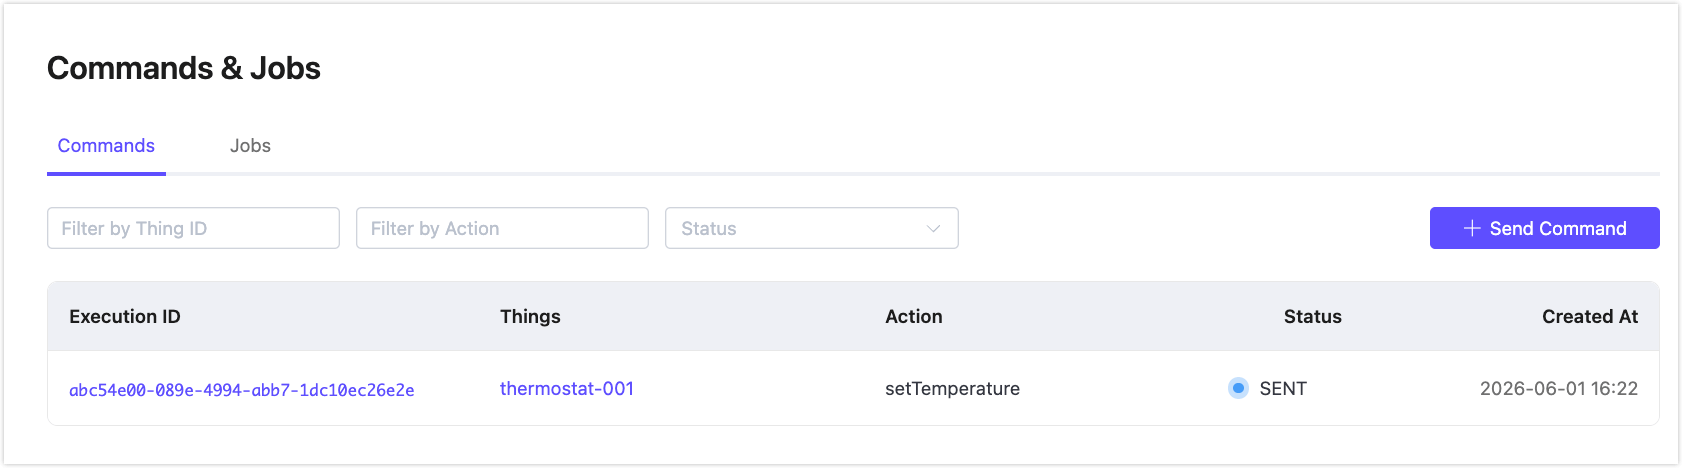
- In the left menu, go to Commands & Jobs.
- Click + Send Command.
- Fill in the fields:
- Thing:
thermostat-001 - Action:
setTemperature - Parameters: set value to
24
- Thing:
- Click Send Command.
Fleets publishes the command to the device on:
$emqx/commands/things/thermostat-001/executions/{executionId}/requestThe device receives the request and is expected to execute the action, then publish a response to:
$emqx/commands/things/thermostat-001/executions/{executionId}/responseIn this guide, you are simulating the device with an MQTT client, so no response is sent automatically. The execution status remains SENT until a response is published. In a real device integration, your device code publishes the response and the status updates to SUCCEEDED or FAILED.
To verify the command was dispatched, go to Commands & Jobs > Commands tab and check that an execution record appears for thermostat-001. Click the execution ID to view its details.
What's Next
You now have a working Fleets deployment with a registered device, a shadow state, and a dispatched command. From here you can:
- Manage Thing Types to model your real devices
- Organize devices into groups and use tags for dynamic membership
- Query your device fleet using the Device Query interface
- Integrate a real device using MQTT or HTTPS
- Create a Job to dispatch a batch operation to multiple devices