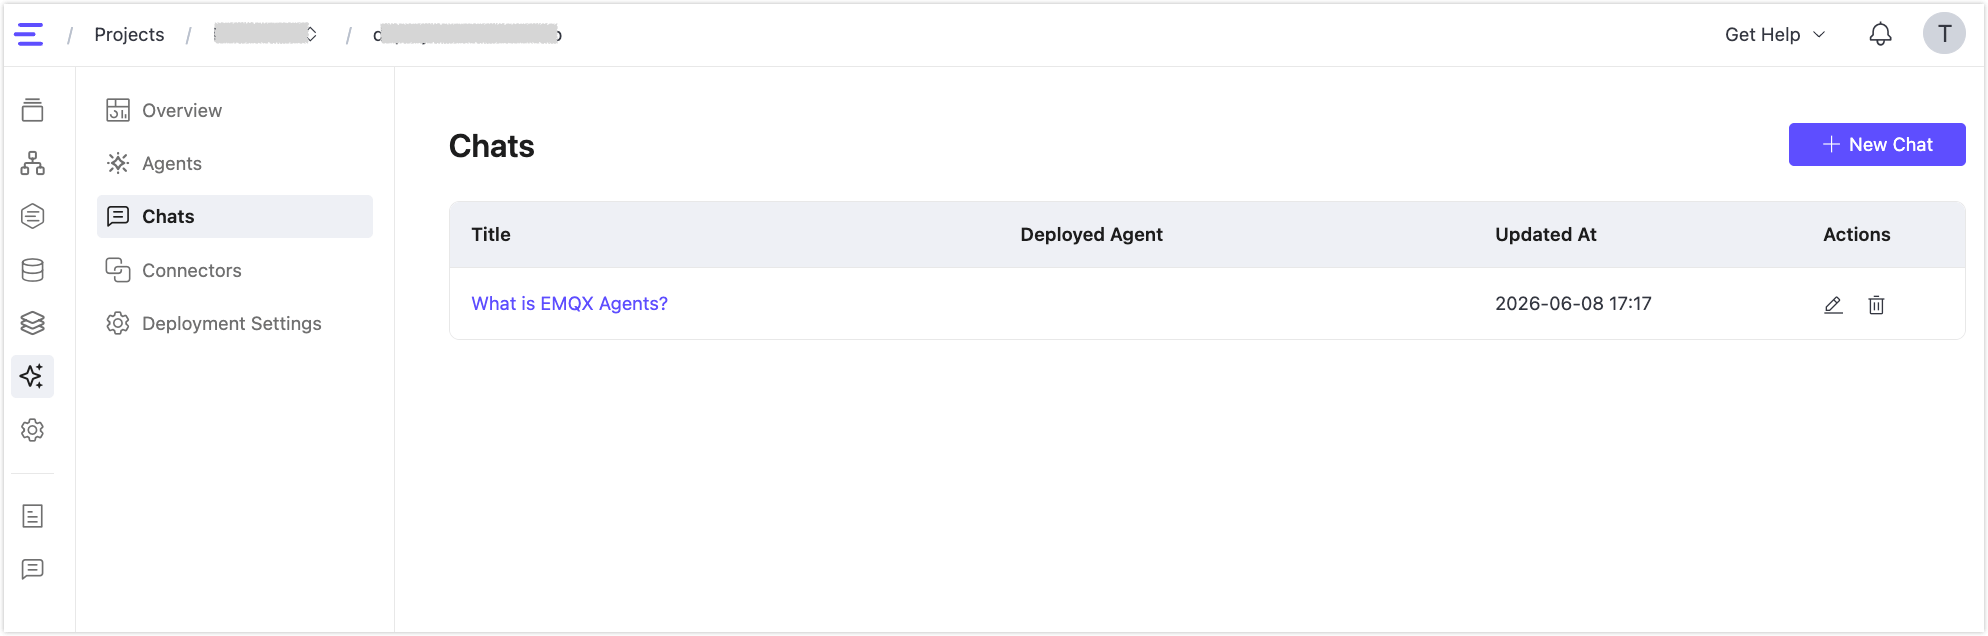
Chats
A chat is a conversation with the built-in LLM where you describe what you want an agent to do. The LLM interprets your request, generates the agent's instructions and skills, and assembles a complete agent definition ready to deploy.
Chats serve two purposes:
- One-off tasks: Ask the LLM to query recent device data, summarize an incident, or analyze a set of MQTT events without creating a persistent agent.
- Agent authoring: Describe an automation goal, iterate on the behavior through follow-up messages, and deploy the result as a long-running agent.
View Chats
Click Chats in the left menu to open the Chats page. The list shows all chats in this deployment with the following columns:
| Column | Description |
|---|---|
| Title | The chat title, auto-generated from the first message. Click to open the chat. |
| Deployed Agent | The agent deployed from this chat, if any. |
| Updated At | When the chat was last active. |
| Actions | Rename or delete the chat. |
Start a New Chat
- Click Chats in the left menu.
- Click + New Chat.
- Optionally select connectors to make available for this session (see Select Connectors).
- Type your request in the input field and press send.
The input field placeholder shows example prompts to help you get started, such as:
- Query recent power draw from EMQX Tables and summarize line-3 motor usage
- Detect stalled robot arm telemetry from MQTT topics and page the on-call team
These are suggestions only. Describe your own use case in plain language.
Select Connectors
Before or during a chat, you can select which connectors the LLM has access to. The LLM uses the selected connectors when generating an agent definition, for example to configure the MQTT trigger topic, the target of a mqtt.publish action, or tools exposed by an MCP connector such as Gmail or Slack.
To select connectors:
- Click the connector icon in the lower-left corner of the input area. A Connectors panel appears listing your configured connectors.
- Check the authorized connectors you want to make available for this session. MCP connectors in Unauthorized, Expired, or Error status may appear in the list but cannot be selected.
- To add a new connector, click + in the upper-right corner of the panel. This opens the Add Connector form without leaving the chat.
If no connectors are selected, the LLM can still respond to general questions but cannot generate an agent definition that references a specific broker, Tables instance, Fleets deployment, or MCP service.
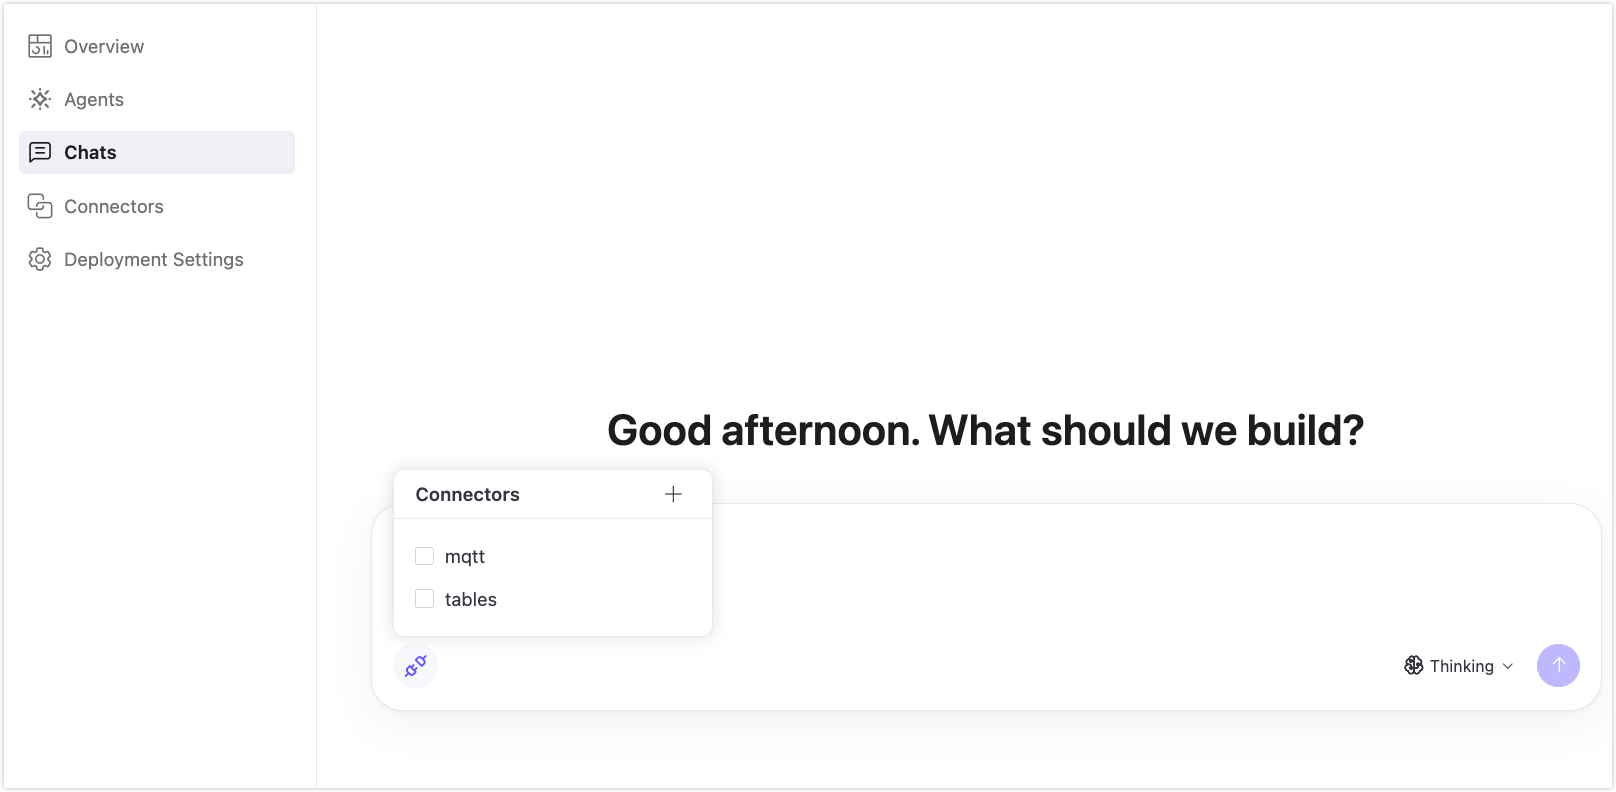
Thinking Mode
The input area has a thinking mode selector in the lower-right corner. Three modes are available:
| Mode | Description |
|---|---|
| Instant | The LLM responds faster with less reasoning. Suitable for simple questions or one-off tasks. |
| Thinking | The LLM applies more reasoning before responding. Suitable for complex agent definitions with multiple tools or skills. |
| Pro | The LLM applies the most reasoning before responding. Suitable for advanced, multi-step agent design or troubleshooting tasks. |
Select the mode that fits your request before sending.
Refine the Agent Definition
After the LLM responds, you can continue the conversation to refine the agent:
- Ask the LLM to adjust the trigger topic, change the threshold, or add a new tool.
- Request a different skill implementation or a more conservative alerting condition.
- Ask the LLM to explain what it generated before you deploy.
Each follow-up message updates the agent definition in the workspace. The LLM retains context across all messages in the same chat.
Deploy an Agent from a Chat
When the LLM has generated an agent definition, a Deploy Agent button appears at the bottom of the chat.
- Review the generated definition. You can ask follow-up questions or request changes before deploying.
- Click Deploy Agent. A dialog appears with a pre-filled Agent Name and Description generated from the chat.
- Optionally edit the name or description, then click Deploy Agent in the dialog.
- The agent detail page opens. The agent may take a few minutes to reach Running status.

TIP
Deploying an agent from a chat does not close or archive the chat. You can return to the same chat later to update the agent's behavior and redeploy.
Redeploy from a Chat
To update a deployed agent, return to the originating chat and continue the conversation:
- Open the chat from the Chats list.
- Describe the changes you want to make.
- Click Deploy Agent again when the LLM has updated the definition.
Redeploying replaces the running agent with the new definition. The previous run history is preserved.
Rename a Chat
- On the Chats list page, click the edit icon in the Actions column.
- Enter a new title and confirm.
Delete a Chat
- On the Chats list page, click the delete icon in the Actions column.
- Confirm the deletion.
Deleting a chat does not affect any agents that were deployed from it. The agent continues running independently.