Create an EMQX Fleets Deployment
EMQX Fleets is currently available as a Public Beta. You can open the Fleets creation page from the Console without submitting a support ticket.
During Public Beta, Fleets instance charges and Fleets egress traffic charges are not billed. If you have not created a Fleets trial deployment before, the lowest tier includes one 14-day free trial. Higher tiers and subsequent deployments are created as non-trial deployments. Creating a non-trial deployment requires a payment method, but no Fleets instance or egress traffic fees are charged during Public Beta.
Prerequisites
Before creating an EMQX Fleets deployment, make sure the target project already has the following deployments in the same cloud provider and region:
- A running EMQX Broker deployment with Internal Endpoint enabled. For details, see Internal Endpoint.
- A running EMQX Tables deployment.
EMQX Fleets must be attached to the same EMQX Cloud network as the Broker and Tables deployments it uses. The Broker and Tables deployments must already be running before their shared network can be selected under Network Association during Fleets deployment creation. The selected network must not already contain another Fleets deployment.
Step 1: Choose a Plan
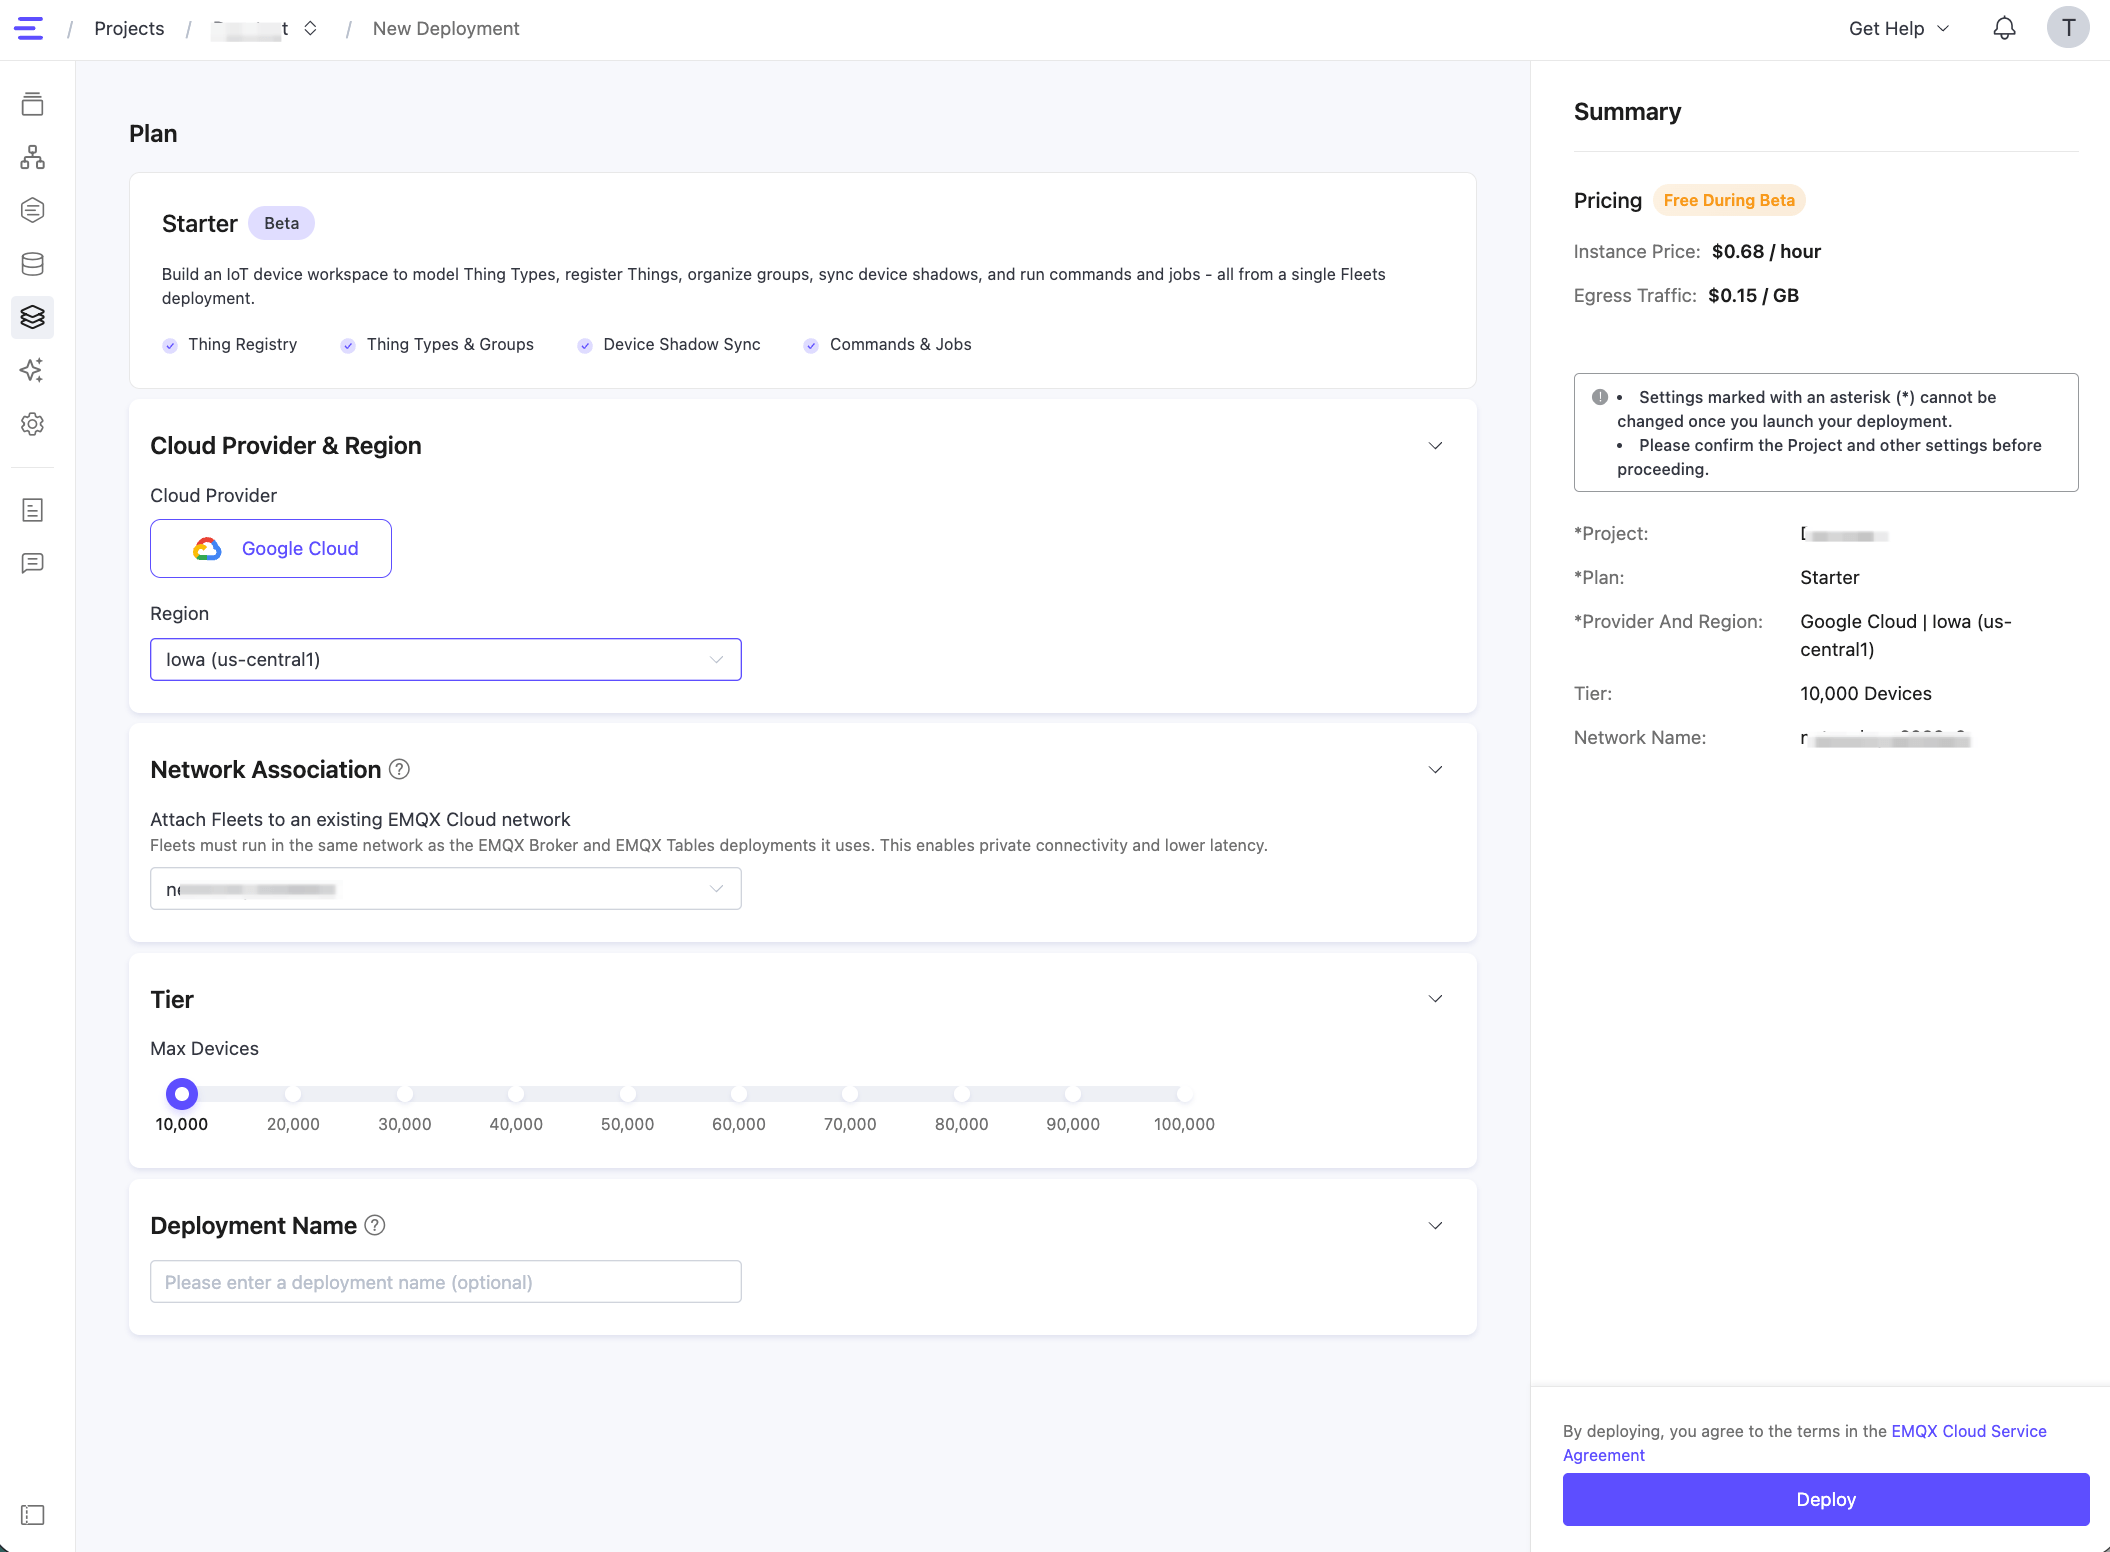
Go to the New Deployment page and select the EMQX Fleets plan.
The Starter plan is the only available option during the Public Beta period. It is selected by default and includes:
- Thing Registry
- Thing Types & Groups
- Device Shadow Sync
- Commands & Jobs
Step 2: Select Cloud Provider and Region
Choose the Cloud Provider and Region where the Fleets deployment will run.
EMQX Fleets is currently available only on Google Cloud in the following regions:
- Iowa (us-central1)
- Oregon (us-west1)
Select the same region as the EMQX Broker and EMQX Tables deployments that Fleets will use. This allows the shared network to appear in the Network Association dropdown in the next step.
Step 3: Configure Network Association
Under Network Association, select the existing EMQX Cloud network that contains the Broker and Tables deployments.
This attaches Fleets to the same network as its dependent services, enabling private connectivity and lower latency. A network can contain only one deployment of each service type: EMQX Broker, EMQX Tables, EMQX Fleets, or EMQX Agents.
Important Notice
If no eligible network is available in the selected region, the Console shows the required network conditions. Follow the on-screen guidance to create or start the required Broker and Tables deployments, enable Internal Endpoint on the Broker, and then deploy Fleets into that network.
Step 4: Select a Tier
Under Tier, select the maximum number of devices that the Fleets deployment can manage. Available tiers range from 10,000 to 100,000 devices in increments of 10,000.
The selected tier cannot be changed after the deployment is created. Choose a tier that can accommodate your expected device fleet.
If you have Fleets trial eligibility, the 10,000 Devices tier shows the 14-day free trial. The trial can be created only at this lowest tier. If you select any higher tier, or if you have already used your Fleets trial, the deployment is created as a non-trial deployment. Non-trial deployments can use any available tier and require a payment method to complete creation.
A deleted Fleets trial deployment counts as your used trial. Failed creation attempts do not consume the trial.
Selecting a different tier updates the reference Instance Price in the Summary panel. During Public Beta, the reference prices are not charged. For the prices associated with each tier, see EMQX Fleets Pricing.
Step 5: Set a Deployment Name (Optional)
Enter a deployment name. If left blank, a name is automatically generated.
The deployment name can be changed after creation from the Deployment Settings page.
Step 6: Review and Deploy
The Summary panel on the right shows the project, plan, cloud provider, region, selected network, and tier. It also displays the pricing label and the following reference prices:
- Instance Price: The hourly price for the selected device tier.
- Egress Traffic: The traffic price per GB.
If you create the lowest-tier trial, the pricing label shows the 14-day free trial. Non-trial deployments are displayed as Free during Public Beta. Settings marked with an asterisk (*) and the selected tier cannot be changed after the deployment is created.
Click Deploy to start provisioning. Once the deployment is ready, it appears under EMQX Fleets with a Running status.